


When you’re using WooCommerce for your online store, adding products to the store is super fun and easy. Even if you have no experience in uploading products before to a WooCommerce website, still you can do it in no time by following some easy steps.
If you’re looking for those steps, you’re in the right place. In this blog, we will be focusing on:
- Types of products that WooCommerce supports by default
- How to add products like physical (simple), virtual, and downloadable products to a WooCommerce website
- How to upload bulk products to a WooCommerce site
After completing the WooCommerce setup procedure, you’re ready to begin adding products to WooCommerce and selling to customers.
So, without any further delay, let’s check how to add products to WooCommerce stores!
Types of Products You Can Add to Your WooCommerce Store

By default, WooCommerce supports 6 types of products. There are the –
- Simple Product
- Grouped Product
- External/Affiliate Product
- Variable Product
- Virtual Product
- Downloadable Product
WooCommerce also supports other extensions that add more product types to your store.
With WooCommerce free version, you will be able to add these 6 types of products to your store. Now let’s explore more about these WooCommerce product types.
Also Read: What is WooCommerce? Why Is It Worth Your Attention?
1. Simple Product
A simple product is the most common and easily-understandable product type in WooCommerce. A simple product is a unique, stand-alone, physical product that you may have to ship to the customer. For instance, books, wallets, watches, etc.
2. Grouped Product
Grouped products consist of two or more simple products. It is a sort of collection of items that are mutually related and that you can sell or purchase together. The identity of the grouped product is created by a number of child products that have unique features of their own.
Your customers can purchase any of the child products from the grouped product individually as well, e.g., a set of six glasses.
3. External/Affiliate Product
These products are not available for purchase directly from your website but instead, you list them with descriptions on your product pages, along with a link for the direct seller. Your customers who wish to purchase such products will be redirected to the URL that you specify in the product settings.
4. Variable Product
Variable product type lets you add variations to the same product to create a complex, variable product. Each variation of the product has its own price, SKU, available stock, etc. A typical example of a variable product is a shoe or bag with multiple sizes, colors, and possibly slightly different design variations.
5. Virtual Product
A virtual product is simply defined as a product that is not a physical entity. For this reason, there is no need to ship such a product. Therefore defining and configuring a virtual product is a simple and straightforward process. This type is ideal for services. For example, you list a service as a product in your store.
6. Downloadable Product
Similar to virtual products, downloadable products also don’t require shipping. They are available as downloadable files with a specified path or URL. In most cases, there will be a limit on the number of downloads of such products. For example, music albums, movies, ebooks, courses, and so on.
How to Add Products to WooCommerce-Powered Websites
Now you know what product types WooCommerce supports. So, It’s time to check how to add products to WooCommerce websites.
This is going to be a very beginner-friendly tutorial. Just follow the below-described procedures and get your job done in no time.
- Step 01: Add New Product with Name and Description
- Step 02: Select a Product Type
- Step 03: Add Product Data
- Step 04: Add Product Image
- Step 05: Add Product Gallery
- Step 06: Set Category and Tag
- Step 07: Publish the Product
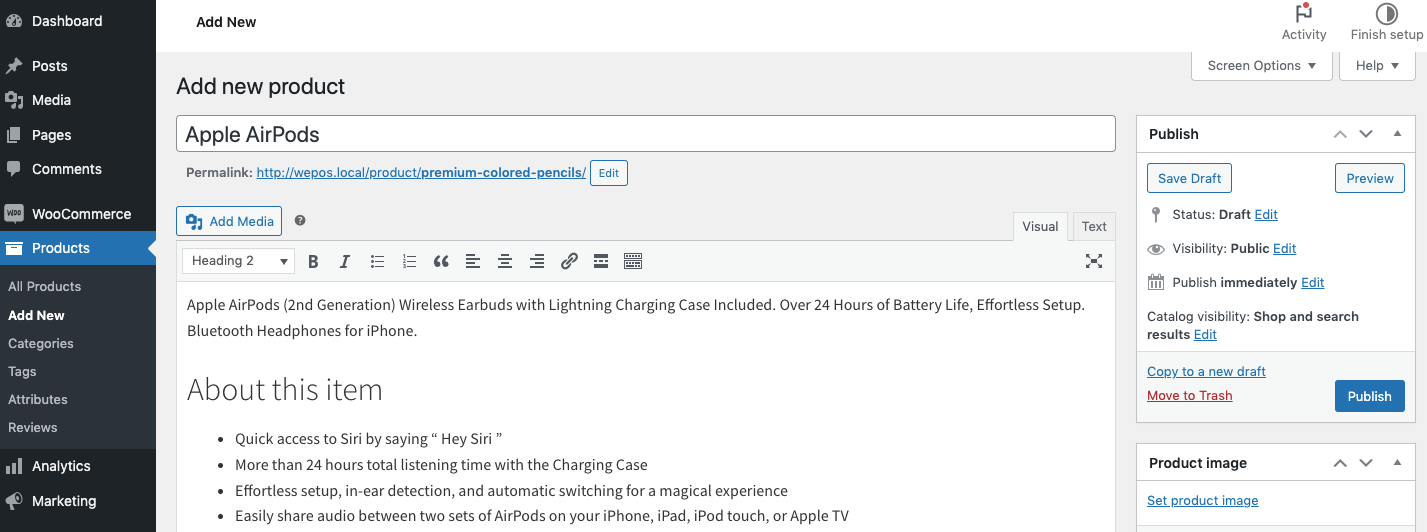
Step 01: Add New Product with Name and Description
To add new products to your WooCommerce store, navigate to your WordPress dashboard > Products > Add New.
There you’ll find options to add the product’s name and description. Give a name to your product in the title section. Then, write a short description of your product.
The description should include all the important details about your product. These could be its selling points, and key facts such as size, color, ingredients, etc.
You can stylize your text and font using bold and italic formats, adding bullet points, and alignments.
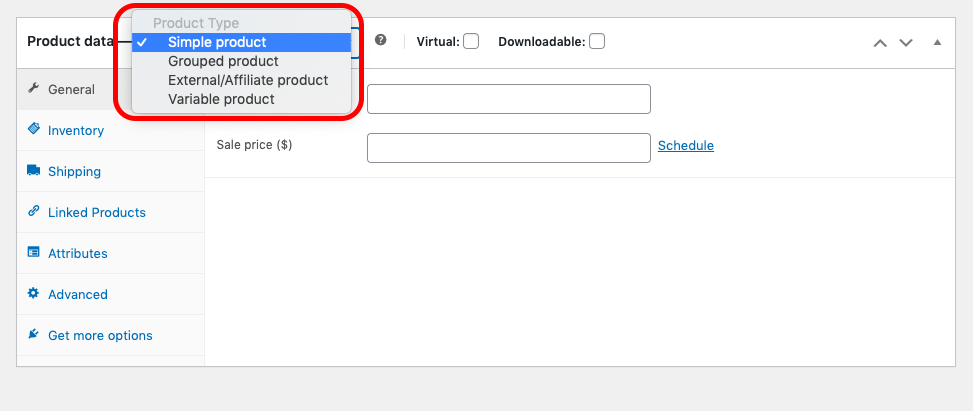
Step 02: Select a Product Type
After inserting the product name and description, scroll a bit down and there you’ll get the option to choose the product type. As we have mentioned earlier, by default, WooCommerce supports 6 types of products.
Click on “Product data” to choose a product type from the drop-down list.
Step 03: Add Product Data
After choosing the product type, it’s time to add product data. Depending on the type you’ve selected, the data fields will change accordingly.
Here is the list of the product data that you need to customize:
- General
- Inventory
- Shipping
- Linked Products
- Attributes
- Advanced
Note: If you don’t customize these settings, still you can add and publish products to your WooCommerce store. But without these customizations, your customers won’t get enough information about the products, and eventually, they will not purchase from you. On top of that, customizing these settings will also help you to get a better ranking in SERP.
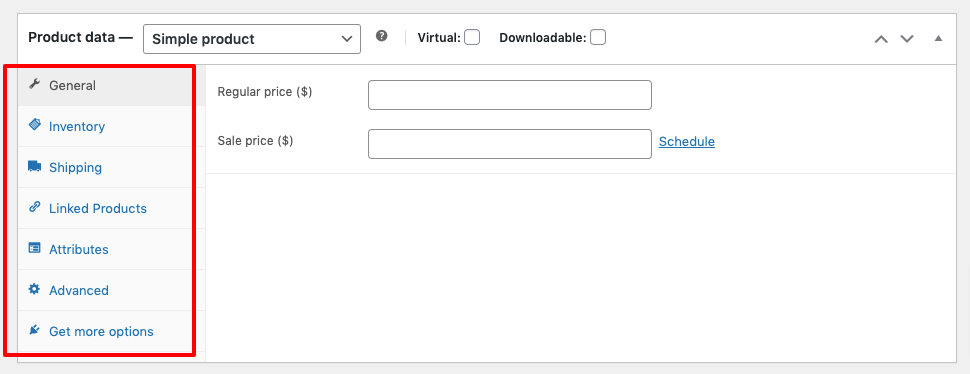
General
For a simple product, the General tab basically contains fields for the pricing details.
If your product is currently on sale, you’ll want to enter the regular price in the first field and then the sale price in the second. If your product is not on sale, you can leave the second field blank.
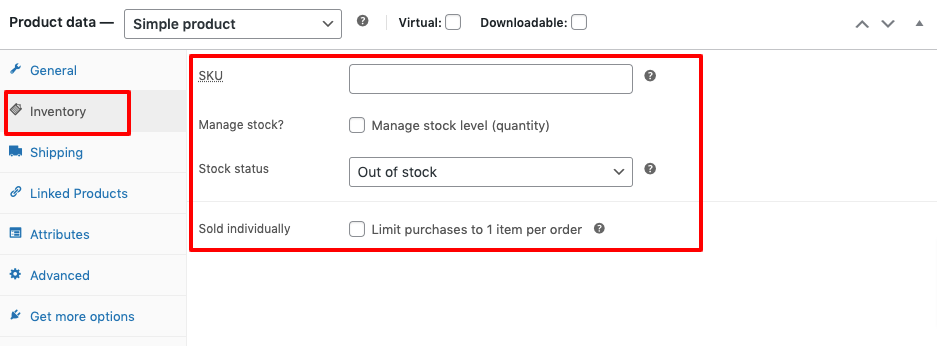
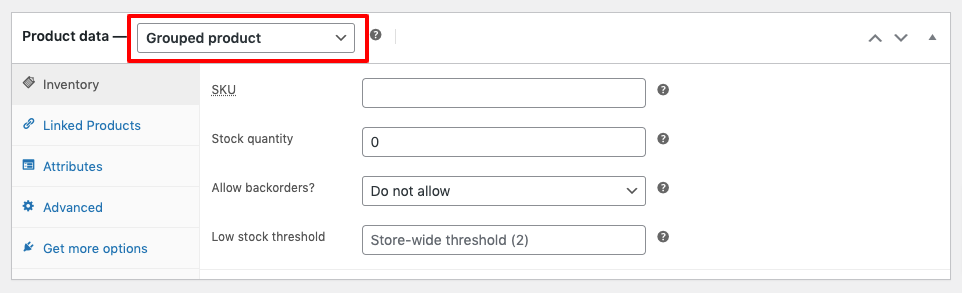
Inventory
If you’re looking to manage stock, the Inventory tab is where you need to look. Stock Keeping Unit (SKU) refers to the specific number of products available. The Stock Status field informs the buyer when the product is in or out of stock or lets them backorder it.
Also, you can enable stock management to update your stock automatically or decide to allow the product to be purchased in a single order.
The fields present here include:
- SKU: A product SKU (stock-keeping unit) is a unique identifier for each product you have in stock. It’s up to you whether or not to enter an SKU, but if you do have one, you can input it here.
- Stock Status: If your product is in stock, leave this set to In stock. If it’s not, you can change the status to Out of stock.
- Sold individually: Checking this box will mean that a customer can only buy one of these products at a time.
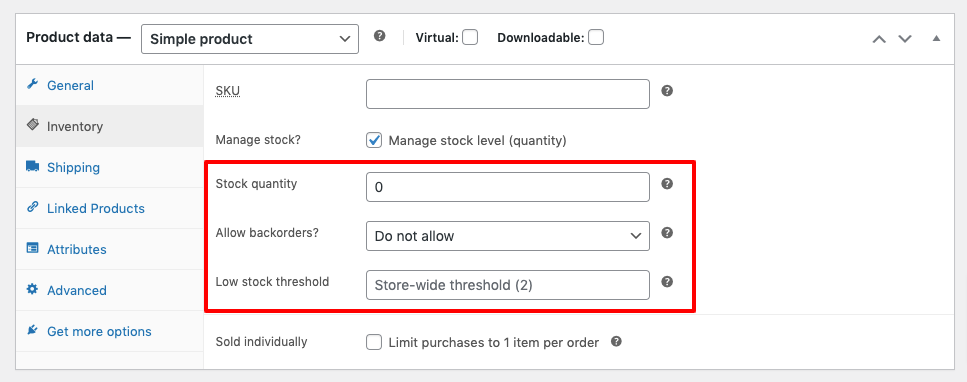
If you tick the “Manage stock?” option, new selections appear, including:
- Stock Quantity: This is where you input how many items of this product you have in stock. If your product doesn’t have variations, you’ll input the number here. If it does have variations, you’ll need to input the number for each variation.
- Allow backorders: A backorder is when a customer orders a product that’s out of stock. If you select the “Allow backorders” option, customers will still be able to purchase the product, and you can choose one of the following three options: Do not allow, Allow, but notify customer, and Allow.
- Low stock threshold: This is the point at which you will receive a low stock notification. You can choose the number that works for you.
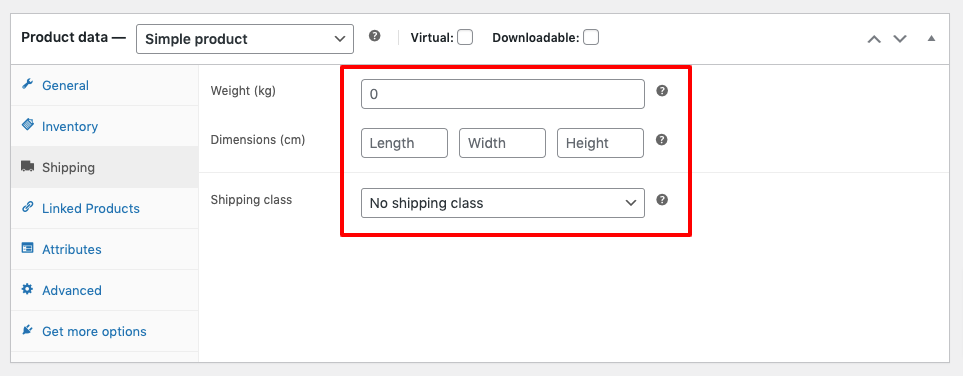
Shipping
The Shipping section is where you can input shipping data for your product. It offers just a handful of options by default:
- Weight: This is the product weight, which you’ll need to input in either pounds or kilograms.
- Dimensions: Here, you can input the product length, width, and height. You’ll need to input these numbers in centimeters.
- Shipping class: This allows you to assign a shipping class to your product.
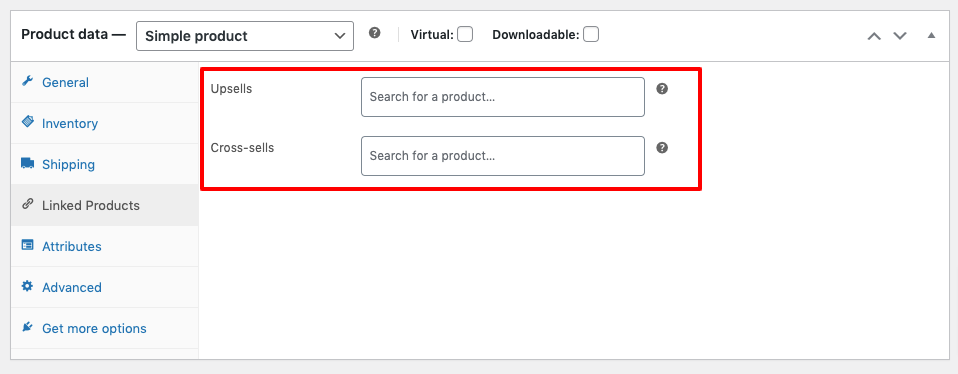
Linked Products
In the Linked Products tab, you can search for other products and add them as upsells and cross-sells. In simpler terms, upsells and cross-sells are often labeled as ‘Recommended deals’ and ‘Frequently bought together’ respectively.
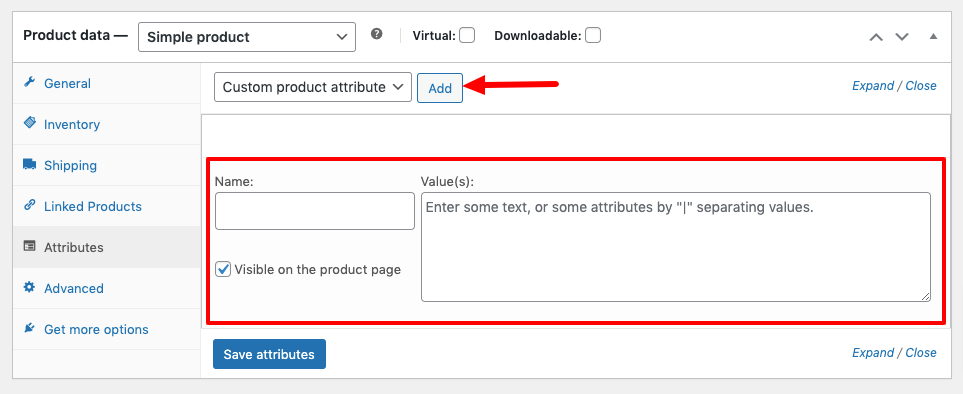
Attributes
The Attributes section is where you can add more info about the different versions of products you sell. Attributes are pieces of data that help describe a product, such as color, size, or material.
For example, if you sell a t-shirt, you should use the color attribute to offer different colors and the size attribute to offer different sizes.
Click on the Add button and you’ll get options to add different attributes for the products.
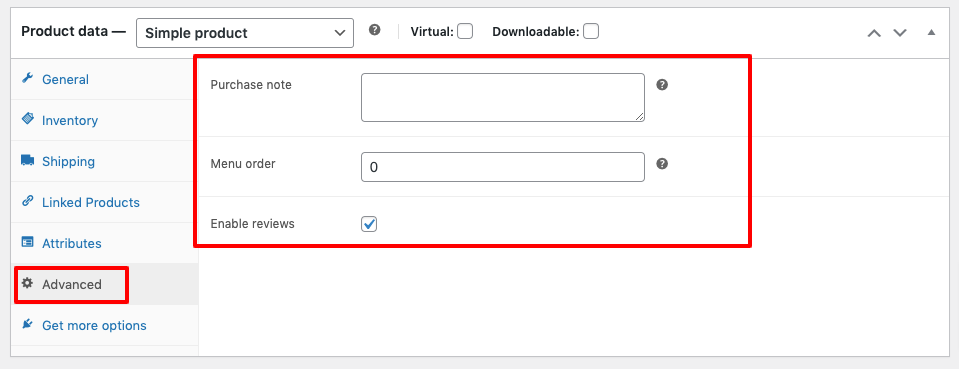
Advanced
Now click on the Advanced tab, there you’ll find the below options to add more about product details.
- Purchase note: A purchase note is a short message that’s sent to customers after they purchase a product. You can input your message here.
- Enable reviews: Checking this box will allow customers to leave reviews for the product.
- Menu order: This is the order in which the product will appear in relation to other products. For example, if you set the menu order to 1, it will be the first product listed.
This is how you can add a simple or physical product to your WooCommerce store.
But if it’s a virtual or downloadable product, how would deal with it?
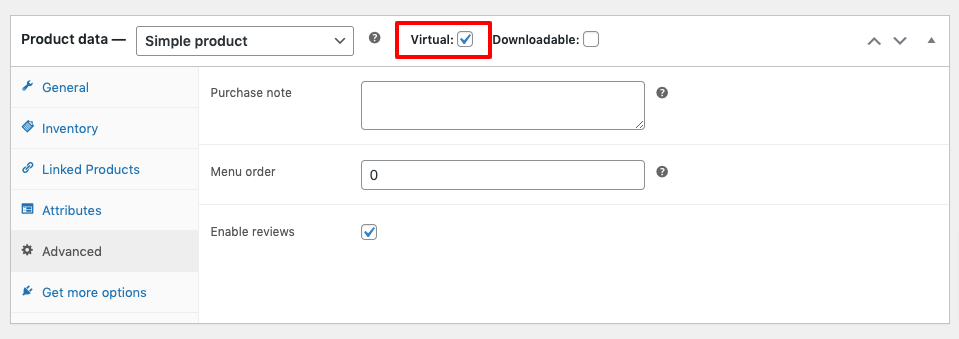
Virtual Product
Well, for a virtual product, you have to tick the Virtual box and follow the same procedures as adding a physical or simple product.
Also, as it’s a virtual product, there will be no option for shipping information.
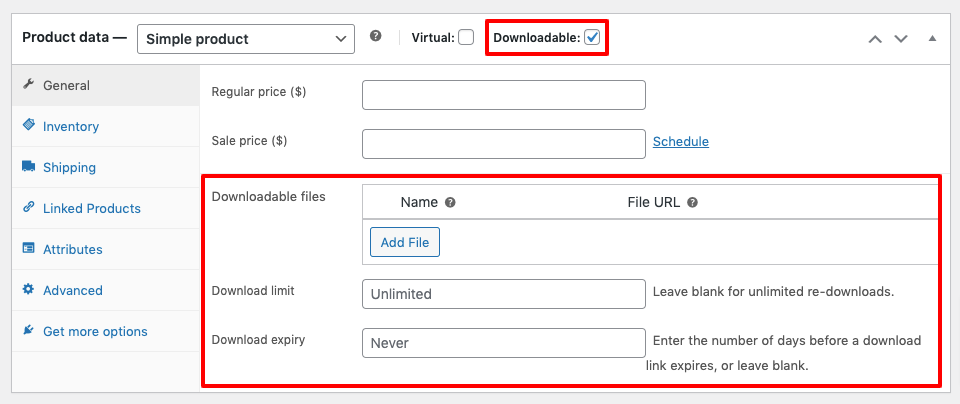
Downloadable Product
Downloadable products have all the same things as simple products/physical products except they also have a download link specified under General options.
Here again, you have to tick the Downloadable checkbox.
Then you’ll have these options to configure:
- Downloadable files: Click on the Add File option to set the downloadable file here.
- Download limit: Leave blank for unlimited re-downloads or set a range.
- Download Expiry: Enter the number of days before a download link expires, or leave blank.
That’s how you can add downloadable products to your WooCommerce website.
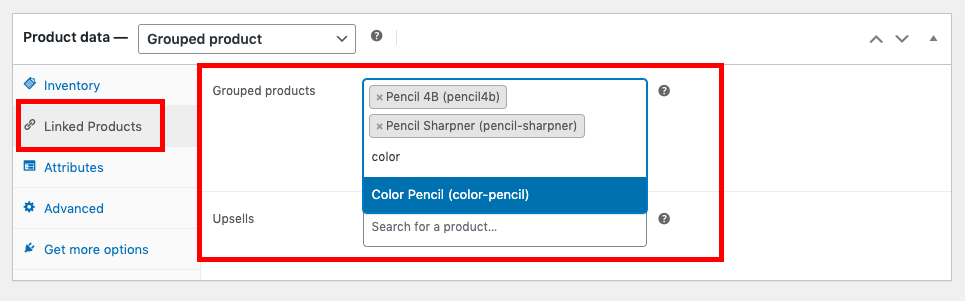
Grouped Product
Unlike the other product type we’ve discussed earlier, creating a grouped product doesn’t create a new unique entry. Instead, a grouped product is a collection of already existing simple products in your store.
To create a grouped product, select the Grouped product option in the Product data dropdown menu.
Since it’s a bunch of linked items, a grouped product doesn’t include a price or other basic options. The main task in configuring a WooCommerce grouped product is to add a number of child products that already exist in your store.
To do this, navigate to the Linked Products tab and search for the items you want to link in the Grouped products field.
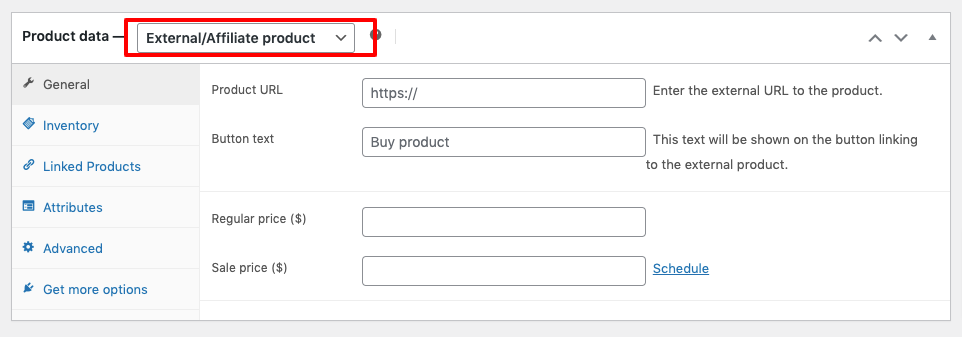
External/Affiliate Product
All you need to configure an external product is to add a product URL and a button text which will be displayed as a Call to Action (CTA.)
Once you’ve added the product URL and button text, the buyer will be redirected to an external site where they can complete their purchase.
Variable Product
Once you choose the Variable Product option from the Product data dropdown menu, you can navigate to the Variations tab to configure it. However, before you can add variations, you need to first create custom attributes.
To do this, navigate to the Attributes tab. Here, click the Add button adjacent to the Custom product attribute field.
Then, you can add the name and values of the variation. Once you’re done, ensure to check the Used for variations box and click Save attributes.
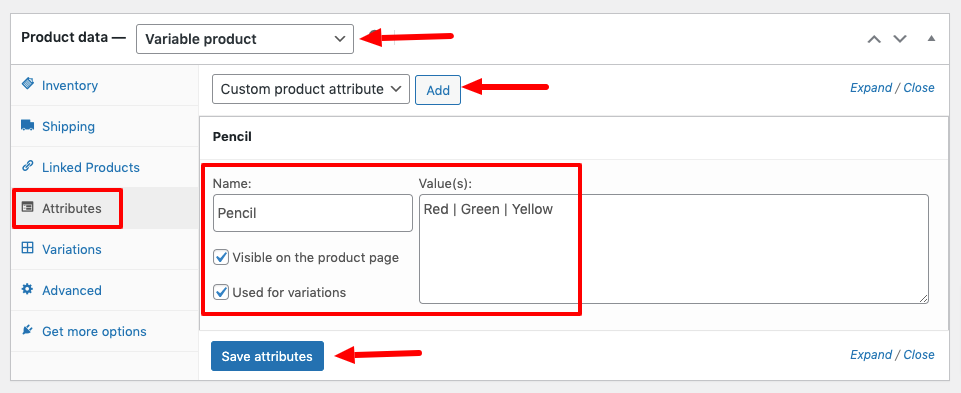
Now, when you navigate to the Variations tab, you can choose from any of the attribute values you set earlier.
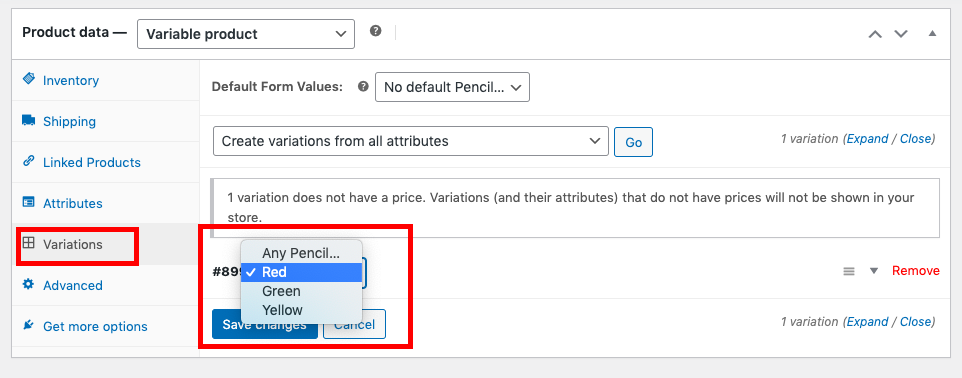
WooCommerce lets you set a default variation value in the Default Form Values field. In our case, this will be the default product size. Similarly, you can add other details such as price and stock status here.
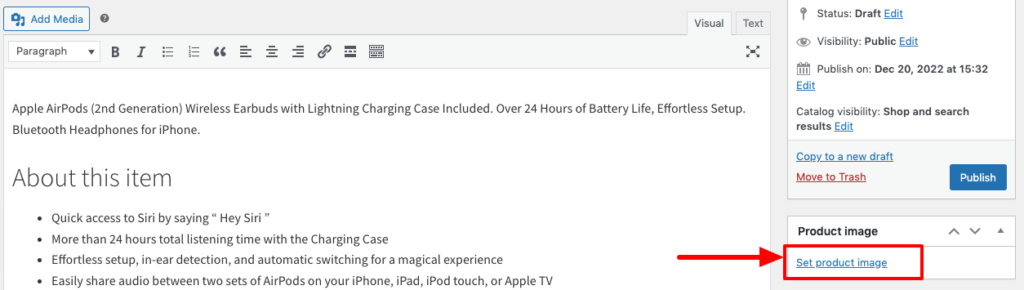
Step 04: Add Product Image
After configuring the product data, now upload a high-resolution product image to attract shoppers’ attention.
Click on the “Set product image” to upload an image for the product.
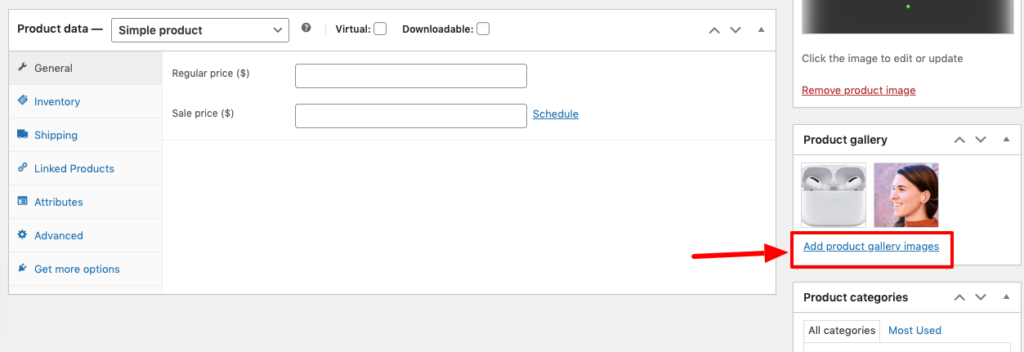
Step 05: Add Product Gallery
Online shoppers want to check different images for a single product. That is why WooCommerce lets you upload multiple images for a product. The name of this feature is Product gallery.
Find the Product gallery option on the right side of your interface and click on that to upload multiple photos for a single product to make it a gallery.
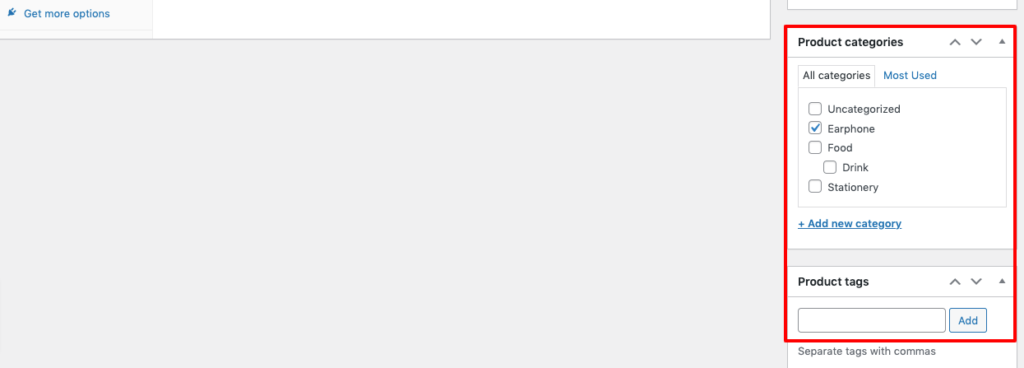
Step 06: Set Category and Tag
Now assign a category for this product. You will find the option right down the Product gallery.
Also, set some tags for the product. Tags are used to describe the product, and they help customers find similar products on your website.
As you type, WooCommerce will suggest existing tags to insert. If you don’t see a tag you want to use, you can create a new one by typing it in and then clicking on the Add button.
Step 07: Publish the Product
After completing all the editing parts, now it’s time to hit the Publish button to live the products for the world.
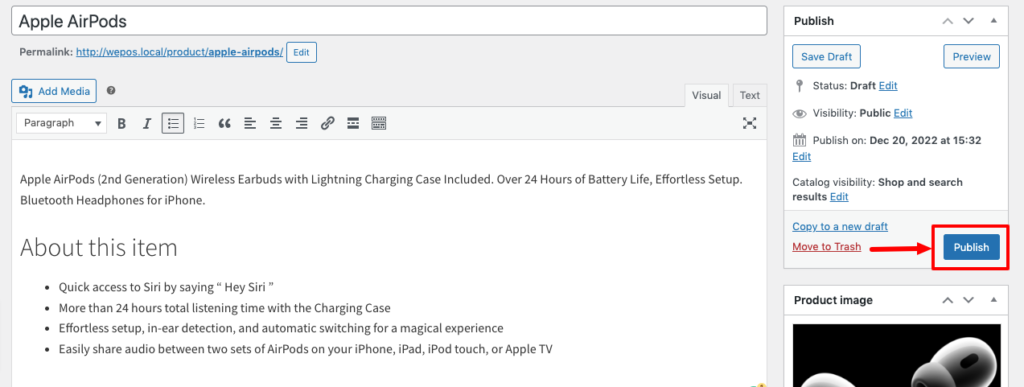
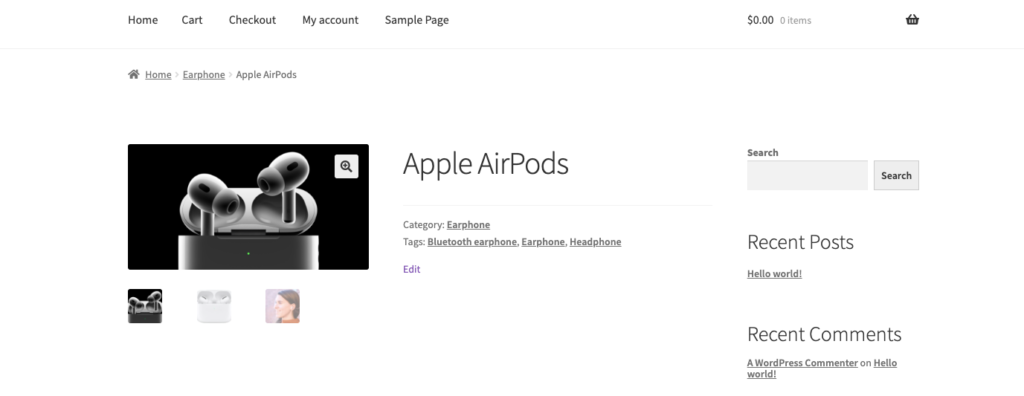
Congratulations! Your product has been published. Visit your WooCommerce store to check the product.
Also Read: Essential Plugins for Your WooCommerce Store: The Ultimate List
Bonus: How to Import Bulk Products to Your WooCommerce Website
If you want to avoid the hassle of manually adding products to your WooCommerce store, there is another way to do this. This is importing products using the CSV file.
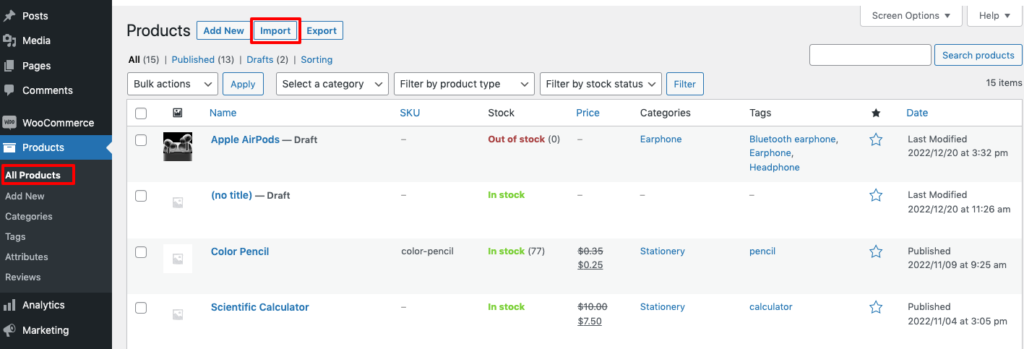
After preparing the CSV file, navigate to Products > All Products. Then, click on the Import button.
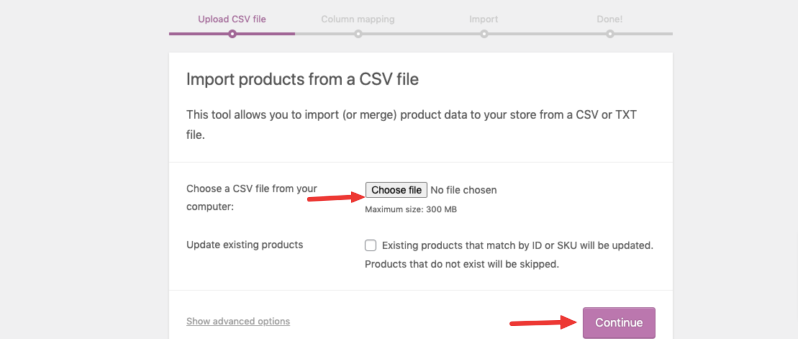
Now click on the Choose file option to upload the CSV file. Then click on the Continue button.
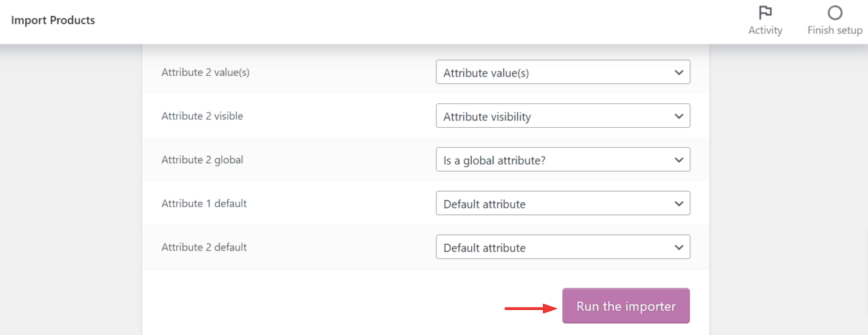
You will find yourself on a new page. Leave all the fields and boxes untouched as they are. Just scroll down to the bottom of the page. Click on the Run the importer button.
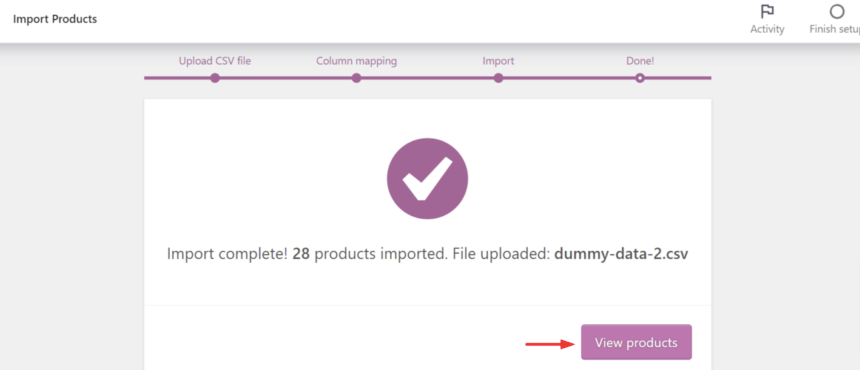
When the import is complete, you will see the following notification on your screen. Click on View Products.
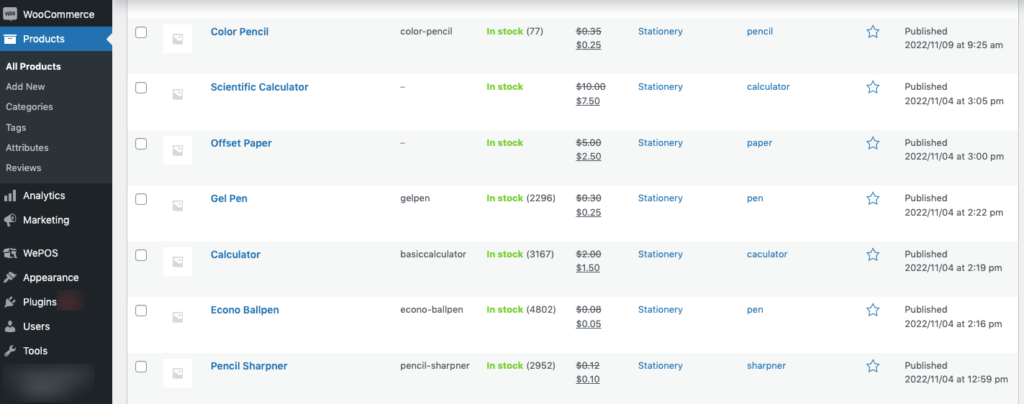
Here is the product list that we’ve uploaded now.
Ready to Upload Products to Your WooCommerce Store?
As we have said earlier, adding products to a WooCommerce store is easy. We have demonstrated here how to add products to WooCommerce websites following 7 easy steps.
So, get prepared with your computer, follow these 7 steps, and add as many products as you want to your online store, no matter if it’s a physical, virtual, or downloadable product. We’ve shown all the methods here.
If you face any problem while uploading products, don’t hesitate to post that issue with screenshots in the comment box below. We would love to help you out in no time.


Leave a Reply