

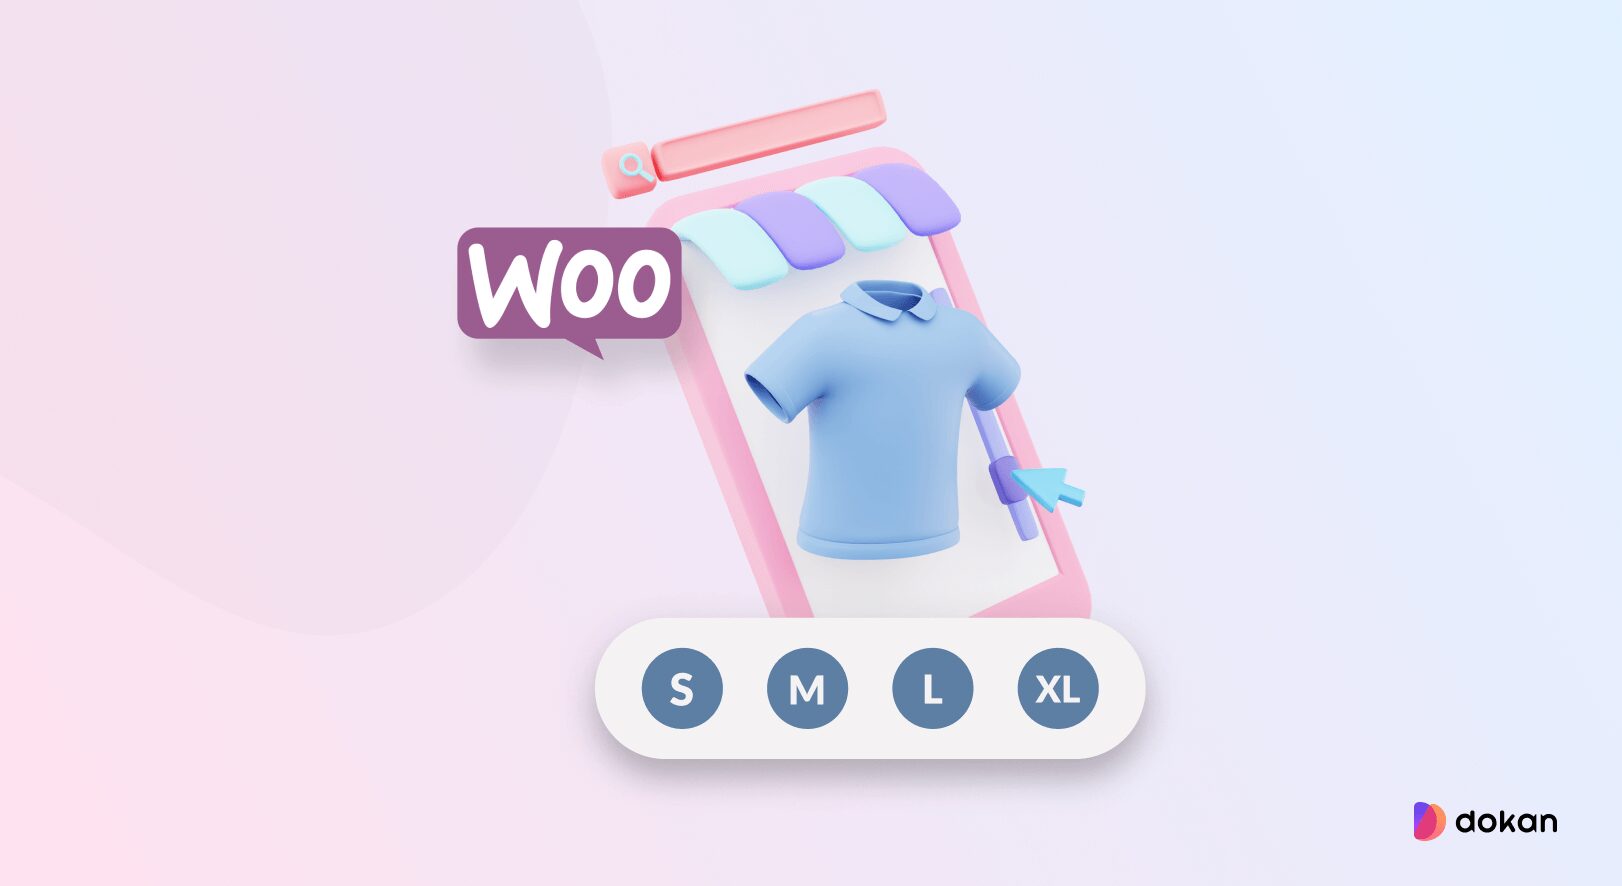
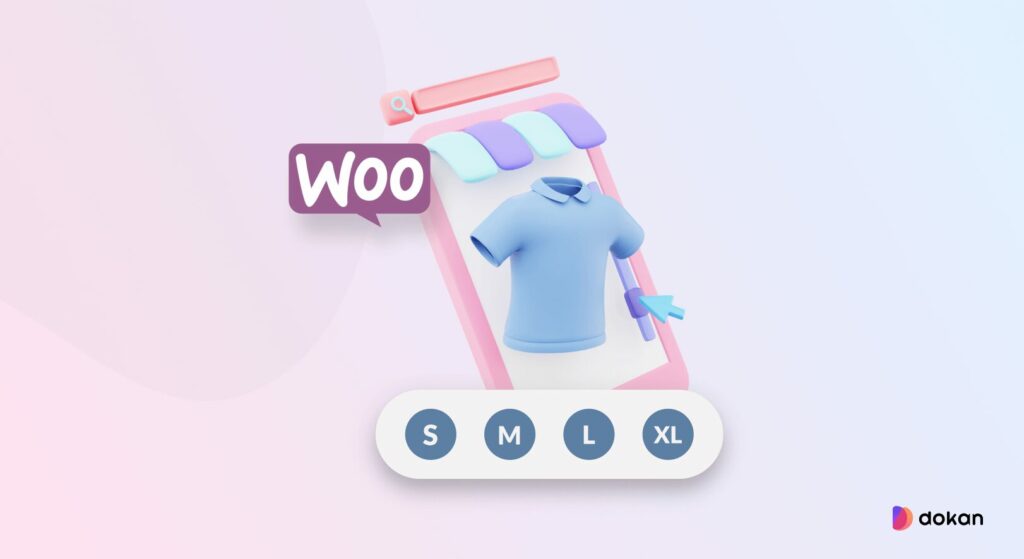
Are you planning to sell the same products in different sizes on your WooCommerce store? Let’s show you effective ways to include multiple sizes of products on your website.
WooCommerce allows you to add several sizes for a single product. Such as Small, Medium, Large, Extra Large, etc., and sizes for the same product.
Showing several choices for a single product means you can serve more customers. More customers mean more profit. Moreover, if customers get their desired products, they will keep coming back to your site.
So, make your eCommerce site ready to display different sizes for a single product. If you’re wondering how to add sizes to WooCommerce products, don’t worry. In this blog, we’ll show you the whole process step-by-step.
Let’s start the show!
How to Add Sizes to WooCommerce Products- 4 Steps to Follow
You just need to follow 4 steps to get your job done. But before showing these 4 steps, let’s discuss the Attributes and Variations of WooCommerce a bit. The knowledge about these two terms will help you to understand this tutorial better.
- Attributes: Product attributes are data that describe the product in detail. For example, if you are selling a dress, an attribute for it could be the size of that dress or its color.
- Variations: Variations instead, are the choices that the customer has when purchasing the product and they are based on the product attributes. While attributes can exist without variations, they must first be added before variations can be set up.
If you are not still convinced about attributes and variations, don’t be worried. After completing this tutorial, you will be clear on these terms.
Here are the steps you need to follow-
- Step 01: Add Attributes
- Step 02: Add Products and Product Types
- Step 03: Assign Attributes to Variable Products
- Step 04: Display the Product Variations
Note: To continue with this tutorial, make sure WooCommerce has already been installed on your website.
Step 01: Add Attributes
By adding attributes, you can apply them to your new or current products in the future.
To add attributes, go to your WordPress dashboard and navigate to Products -> Attributes.
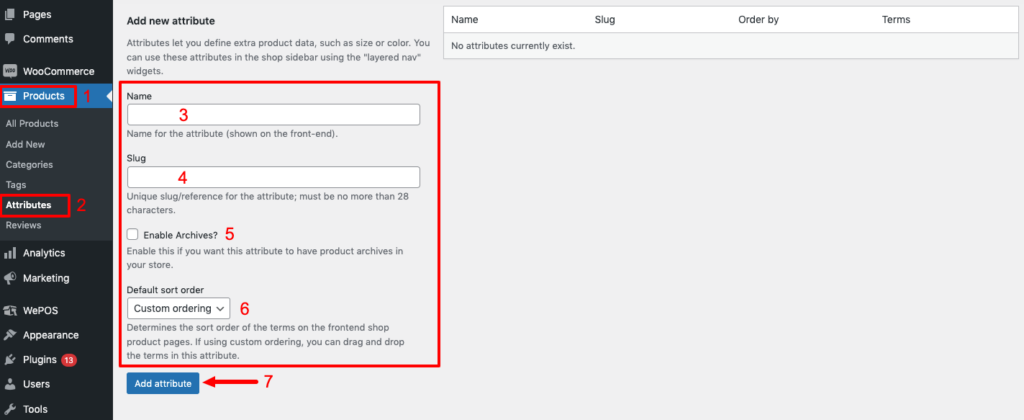
On the attributes page, you can set up all the necessary properties by entering the required details in the appropriate fields.
Listed below are the settings to create an attribute:
- Name: This is the title of the attribute that appears on the frontend of your site (for example, ‘Color’ or ‘Size’).
- Slug: The slug substitutes the attribute name in the Uniform Resource Locator if it is included (URL).
- Archives: You may enable archives for the attributes you’re working on. When this property is enabled, WooCommerce produces a page with all the products related to it.
- Default Sort Order: On the frontend, you have four options for how you want the terms in this attribute to be arranged. You can, for example, choose the Name option. This implies that if a ‘Size’ property has values like ‘Small,’ ‘Large,’ and ‘Medium,’ these words will be sorted alphabetically. Similarly, you may use Custom Order to move the words to the next page by dragging and dropping them.
Then, to save your selections, click Add attribute. After you’ve generated your first global attribute, go to Configure terms and fill in the required values.
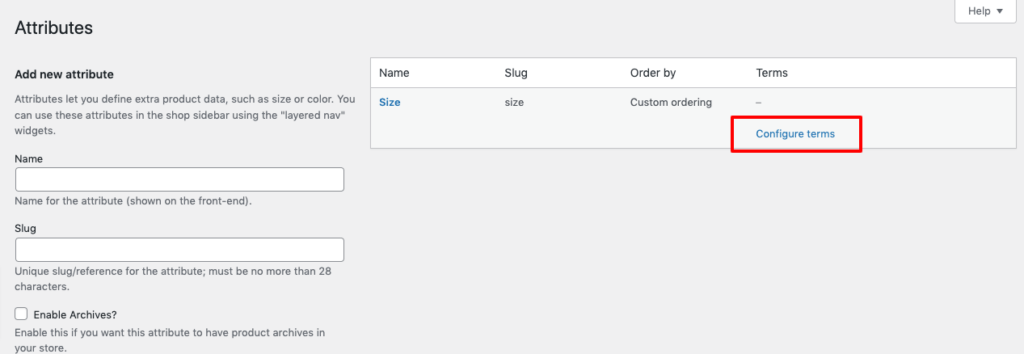
You can add new values to your attribute on the following page. Because the attribute name is ‘Size,’ we must fill the fields under the Add new Size section in our situation.
The Name and Slug sections are the same as those on the previous page. In addition, you may give the new attribute value a description.
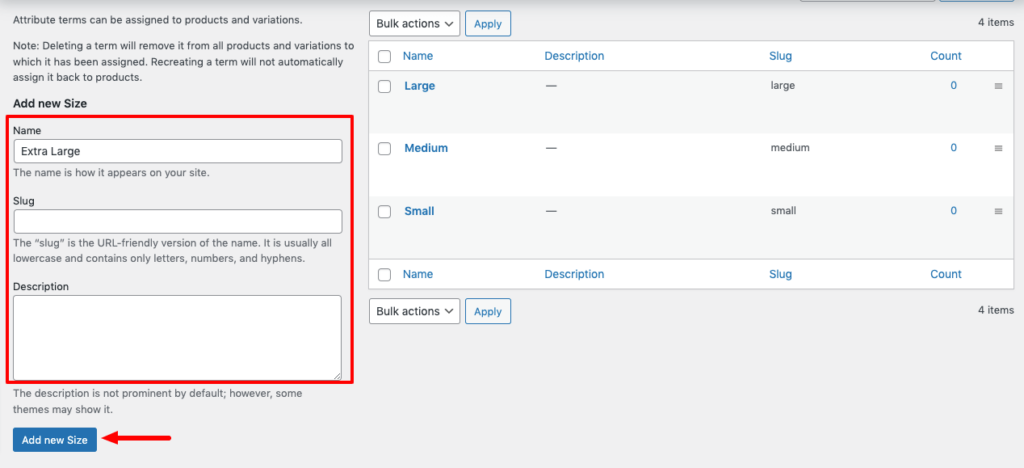
Here, we have created 4 new terms for Size attributes e.g., Small, Medium, Large, and Extra Large. After inserting the Name, Slug, and Description, click on the Add new Size to add new terms for the Size attribute.
Step 02: Add Products and Product Types
After creating the global attributes, it’s time to add the new product to which we’ll apply them. There are 6 different product types:
- Simple Product
- Grouped Product
- External/Affiliate Product
- Variable Product
- Virtual Product
- Downloadable Product
Variable products are the only product kinds on WooCommerce that allow you to add variants.
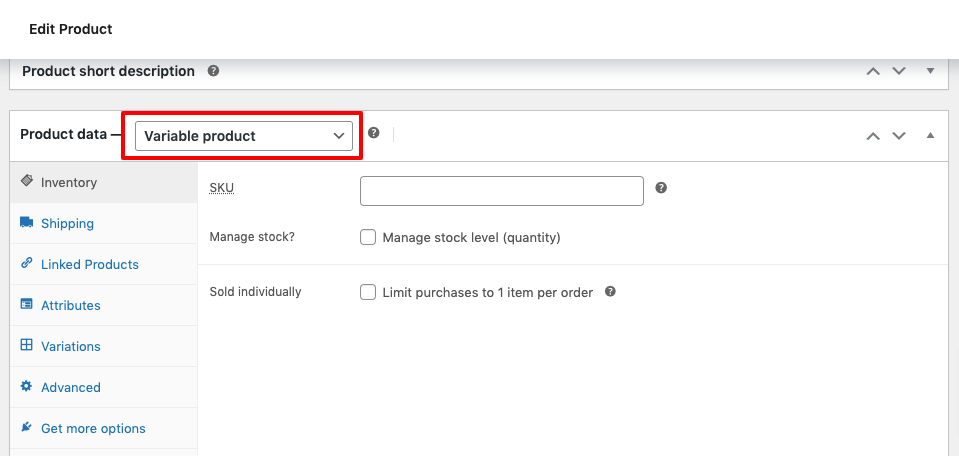
Click on the Products tab from your WordPress dashboard to create a new variable product or edit an existing one.

After entering the product settings page, there you’ll find options to assign the product type.
Select the Variable product option from the dropdown menu. The settings menu changes right away to assist you in configuring your variable product. You may configure the product using the different tabs on the left side of the settings.
Step 03: Assign Attributes to Variable Products
There are two ways to assign attributes to your variable products. You can create custom attributes or utilize global attributes (the ones we created in the first step).
If numerous products in your store have the same attributes, global attributes are ideal. Custom attributes, on the other hand, are more appropriate if they are unique to a certain product.
Global Attributes
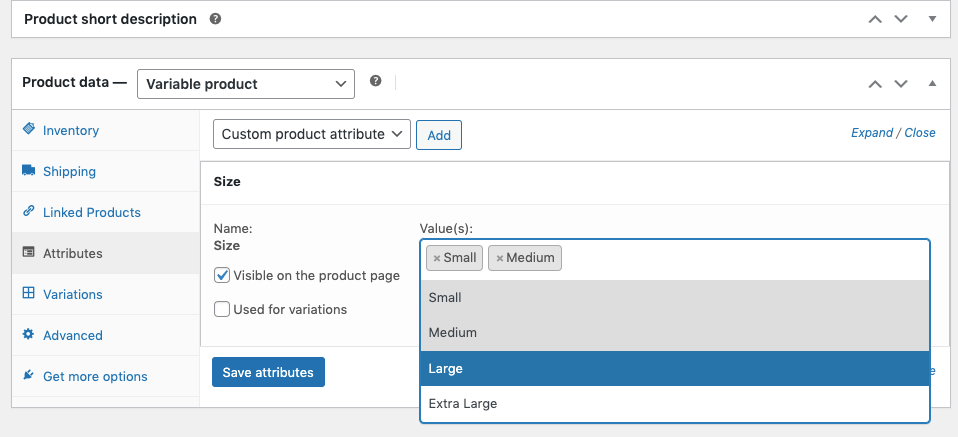
To assign global attributes to a variable product, navigate to the Attributes tab under the Product data section. Now choose the “Size” attribute from the drop-down option. Then click the “Add” button to add that attribute.
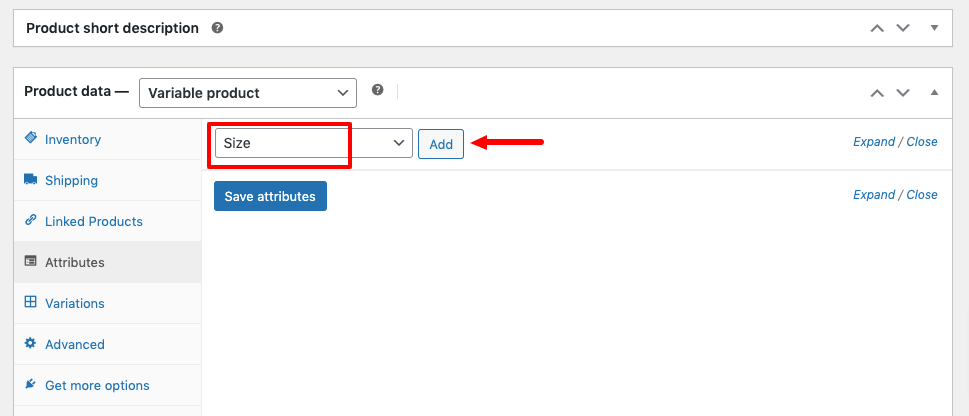
After clicking the Add button, you’ll get the chance to add the Size Values. You can add as many values as you wish here.
Don’t forget to check the boxes for Visible on the product page and Used for variations. Then, to save all of your modifications, click the Save attributes button.
Custom attributes
Alternatively, you may assign a specific product with custom attributes. Select the Custom product attribute option to do so. This approach also allows you to quickly and simply add attributes and their values. All you have to do now is fill in the Names and Values fields with the appropriate values.
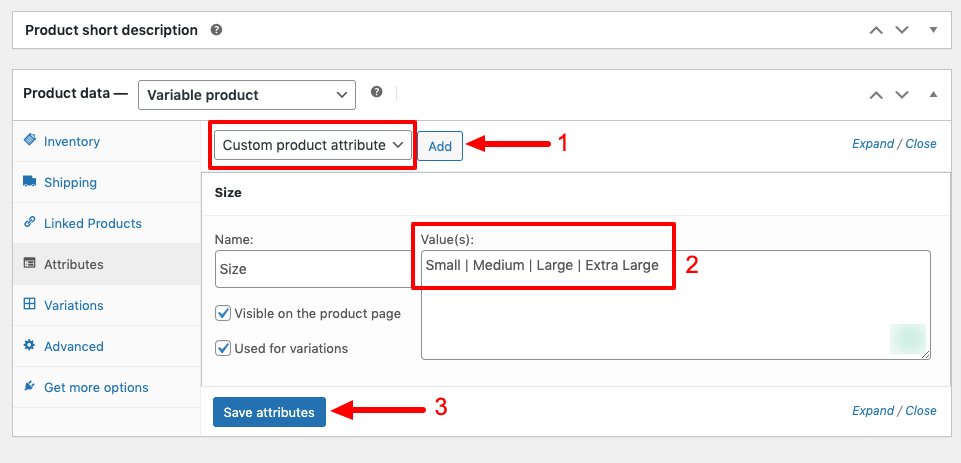
When adding multiple attribute values, use the “|” character to separate each phrase. Then tick the boxes for Visible on the product page and Used for variations. When you’re finished, click Save attributes, and you’re all set.
Step 04: Display the Product Variations
Navigate to the Variations tab to get started. Go to the Add variation dropdown option and select Create variations from all attributes. WooCommerce produces variants from all the attributes assigned to the products when you click Go.
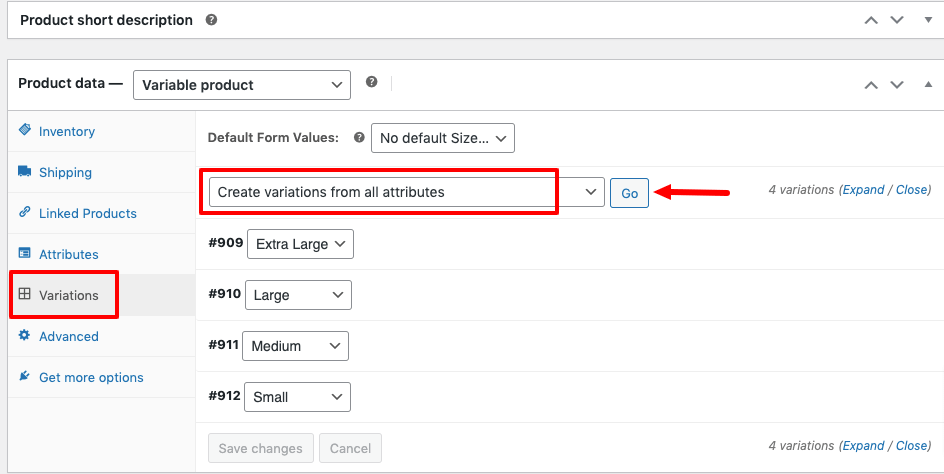
These product variants, however, do not yet include pricing or other crucial attributes. Hover over any variant field and click on the empty white spot to change it. This brings up a settings editor.
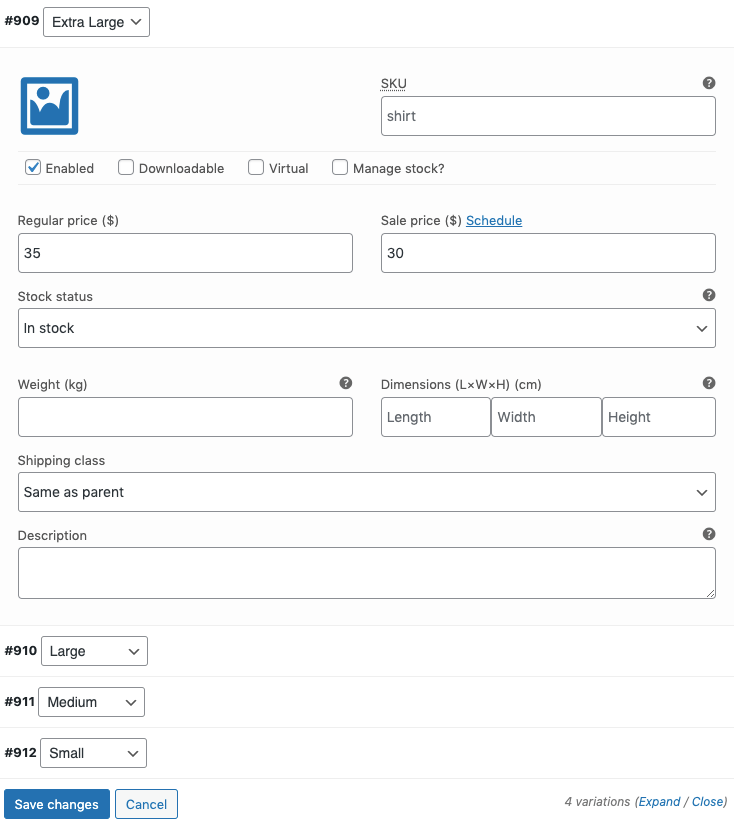
You may modify the variant in the same way that you would any other WooCommerce simple product.
There’s enough area to include a product image, a standard price, and a sale price, as well as weight and measurement values and the option to make it downloadable. Similarly, by checking or unchecking the Enabled box, you may turn on or off the variant.
You can simply configure various pricing or dimensions for multiple versions of the product because each variation has its own options menu.
Once you’re done customizing the products, click Preview on the top right-hand side of the page, to view changes.
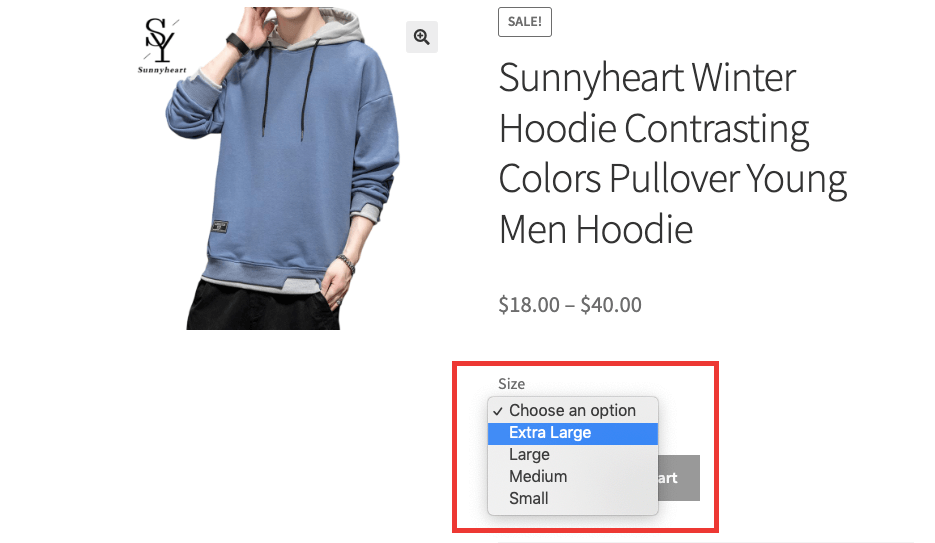
Congratulations! You’ve successfully added sizes to your WooCommerce products.
Bonus: Free Plugins to Add Product Size in WooCommerce
You can add sizes to WooCommerce products manually following the above-explained steps. Or, you can add product sizes to WooCommerce using a plugin.
Here we are going to mention top 3 WordPress plugins to add sizes to WooCommerce products-
- Variation Swatches for WooCommerce
- Additional Variation Images Gallery for WooCommerce
- Product Size Chart for WooCommerce
i) Variation Swatches for WooCommerce
Variation Swatches for WooCommerce is a great plugin, designed to help you make the product page for variable products more attractive. Using the plugin, you will be able to display product variations through color swatches, text swatches, or image swatches.
Apart from adding sizes to WooCommerce products, you will also get some necessary features like the followings using this plugin:
- Control swatches size on product pages
- Choose a swatches shape (round or square)
- Set tooltip with customized text, size, and background color
- Show cross sign (X) for out-of-stock products
- Enable and disable AJAX variation
ii) Additional Variation Images Gallery for WooCommerce
You will be able to add extra images to your product variations using the Additional Variation Images Gallery for WooCommerce plugin. When a customer chooses a variation, the gallery images specific to the will be displayed. This is not possible with the default WooCommerce configuration. Moreover, the plugin automatically hides the gallery images of the rest of the variations other than the selected one.
iii) Product Size Chart for WooCommerce
Product Size Chart for WooCommerce is another essential plugin to add sizes to WooCommerce products. This plugin helps you to customize and design the size chart of specific products or categories, you can choose the available templates of the size chart.
WooCommerce Size Chart will create conveniences for customers when shopping in your WooCommerce Store and boost your sales.
Show Different Product Sizes to Get More Conversions
WooCommerce by default lets you display multiple sizes for a single product. We have shown you how to do that in 4 steps. You can also get your job done by using a WooCommerce plugin. You can choose any of the above-mentioned plugins to add sizes to WooCommerce products.
That means now you know more than one way to configure your WooCommerce site for displaying several sizes of the same product. So what are you waiting for?
Start configuring your online store now and show different product sizes to serve more customers. That ultimately leads you to more conversions. If you face any problems while configuring your eCommerce site, feel free to let us know through the comment box below. We would like to help you out in no time.


Leave a Reply