Most people think you need money to make money. That’s not always true.
I’ve tried a bunch of ways to earn online without spending a single dollar upfront. Some were trash. Some were just hype. But a few actually worked, and one of the best ones I found is FlyCommerce Shop.
If you’re just starting out, broke, or just curious, this guide will show you how to earn money online free without falling into shady stuff. And no, you won’t need coding, fancy tools, or a marketing degree.
Ready? Let’s get into the real stuff.
Is It Really Possible to Earn Money Online Free with FlyCommerce?
Yes, you can earn money online for free, but not in the way most YouTube ads promise. I’ve tried all the usual stuff.
- Clicking ads? Wasted time.
- Online surveys? You earn cents, not dollars.
- Easy gigs that ask for an upfront fee? Just nope.
If you’re serious about making real income, you need to treat it like a real business. But that doesn’t mean you need to spend money to start. You just need the right platform and a smart way to use it.
FlyCommerce Shop is one of those tools. You can build a full online store without spending anything. No hosting, no setup fees, no design headache. That’s a solid starting point for anyone trying to earn money online for free, without getting scammed.
Let’s talk about what you can actually sell.
What Can You Sell to Earn Money Online for Free?

You don’t need a warehouse or a fat wallet to start selling. With the right setup, you can launch a store for free and still make real money.
Digital Products
Still, the easiest way to earn online without spending a cent.
You can sell:
- eBooks
- Printable planners
- Design templates
- Presets
- Audio files
- Checklists
If you’ve made it once, you can sell it again and again.
Print-on-Demand Products
You design, Printful does the rest. No inventory. No packing. No shipping.
You can sell print on demand products, like:
- T-shirts
- Hoodies
- Tote bags
- Posters
- Phone cases
Just connect Printful with Dokan and start uploading your designs. Zero upfront cost.
Why FlyCommerce Shop is Perfect for Beginners
Starting an online business sounds scary. Hosting, domains, plugins, payments – way too much when you’re just starting out.
That’s why FlyCommerce Shop is a lifesaver.
You don’t need to be a tech expert. You don’t need to spend money. You just sign up and start building your store right from your browser.
Here’s what makes it beginner-friendly:
- No Setup Cost: You can open a full-featured online store without paying anything. There’s a free plan that’s actually useful—not just a teaser.
- No Hosting or Maintenance: Forget cPanel, SSL, updates, or backups. FlyCommerce handles everything behind the scenes. You focus on your store. They take care of the boring stuff.
- Easy to Use: Drag-and-drop builder. Clean dashboard. No coding. No confusion. If you can click, you can build.
- Built-In Payments: You don’t need to set up complicated payment systems. FlyCommerce Shop lets you accept payments online with zero hassle.
- Perfect for Digital & Print-on-Demand Sellers: Sell digital downloads or use the Printful integration to sell physical products without storing anything.
For anyone starting out with zero budget and zero experience, FlyCommerce Shop is a solid first step.
How to Earn Money Online Free with FlyCommerce Shop (Step-by-Step)
Getting started with FlyCommerce Shop is simple. You don’t need technical skills or a big budget. Just follow these steps and your store will be up in no time.
- Sign Up for FlyCommerce
- Set Up Your Store
- Add Your Products
- Set Up Payment Info
- Share Your Store
- Make Your First Sale
Now, let’s get into the details!
I. Sign Up for FlyCommerce
To sign up for the FlyCommerce, you need to navigate to the FlyCommerce Shop website and choose a plan.
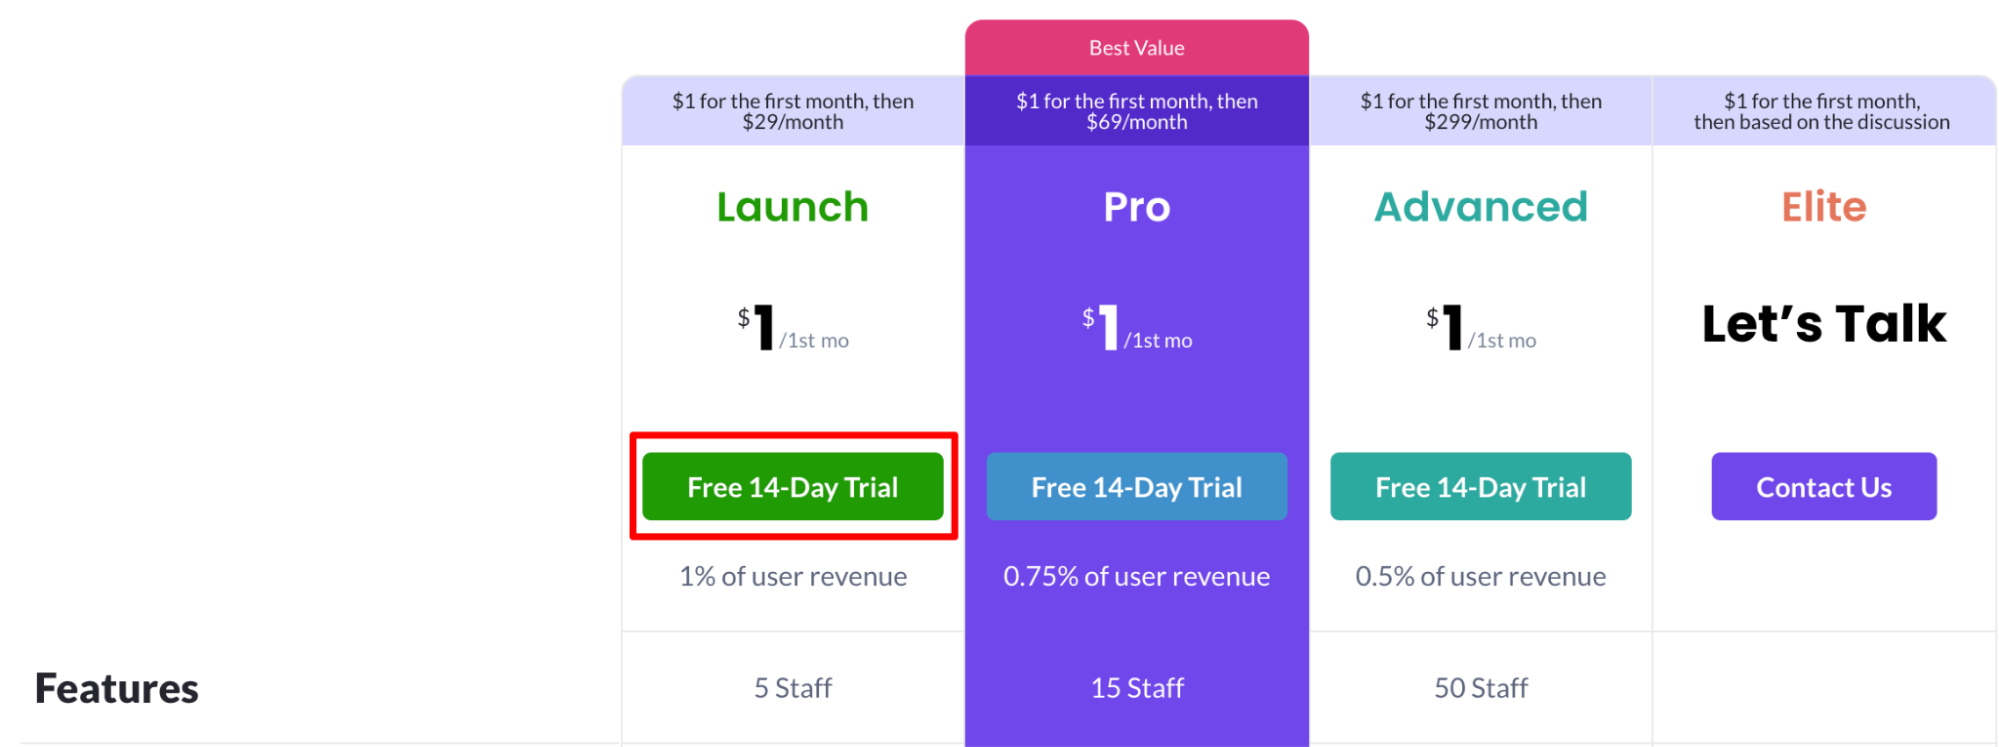
After choosing a plan, click on the ‘Free 14-Day Trial’ button. You will be redirected to a new interface.
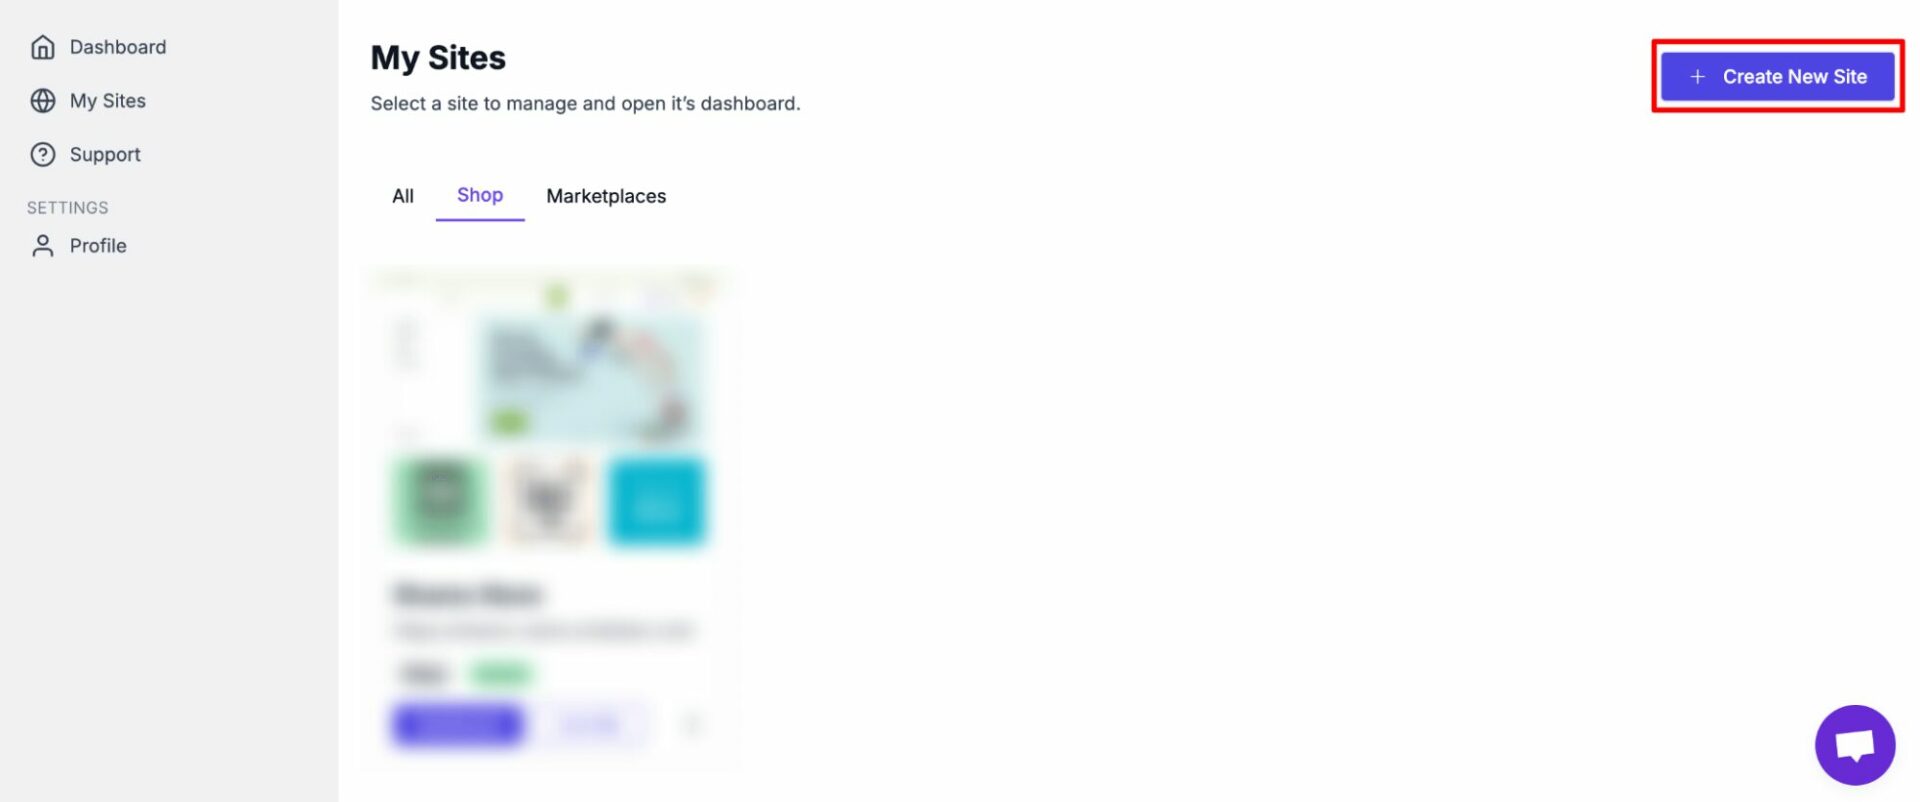
Now, click on the ‘+Create New Site’ option.
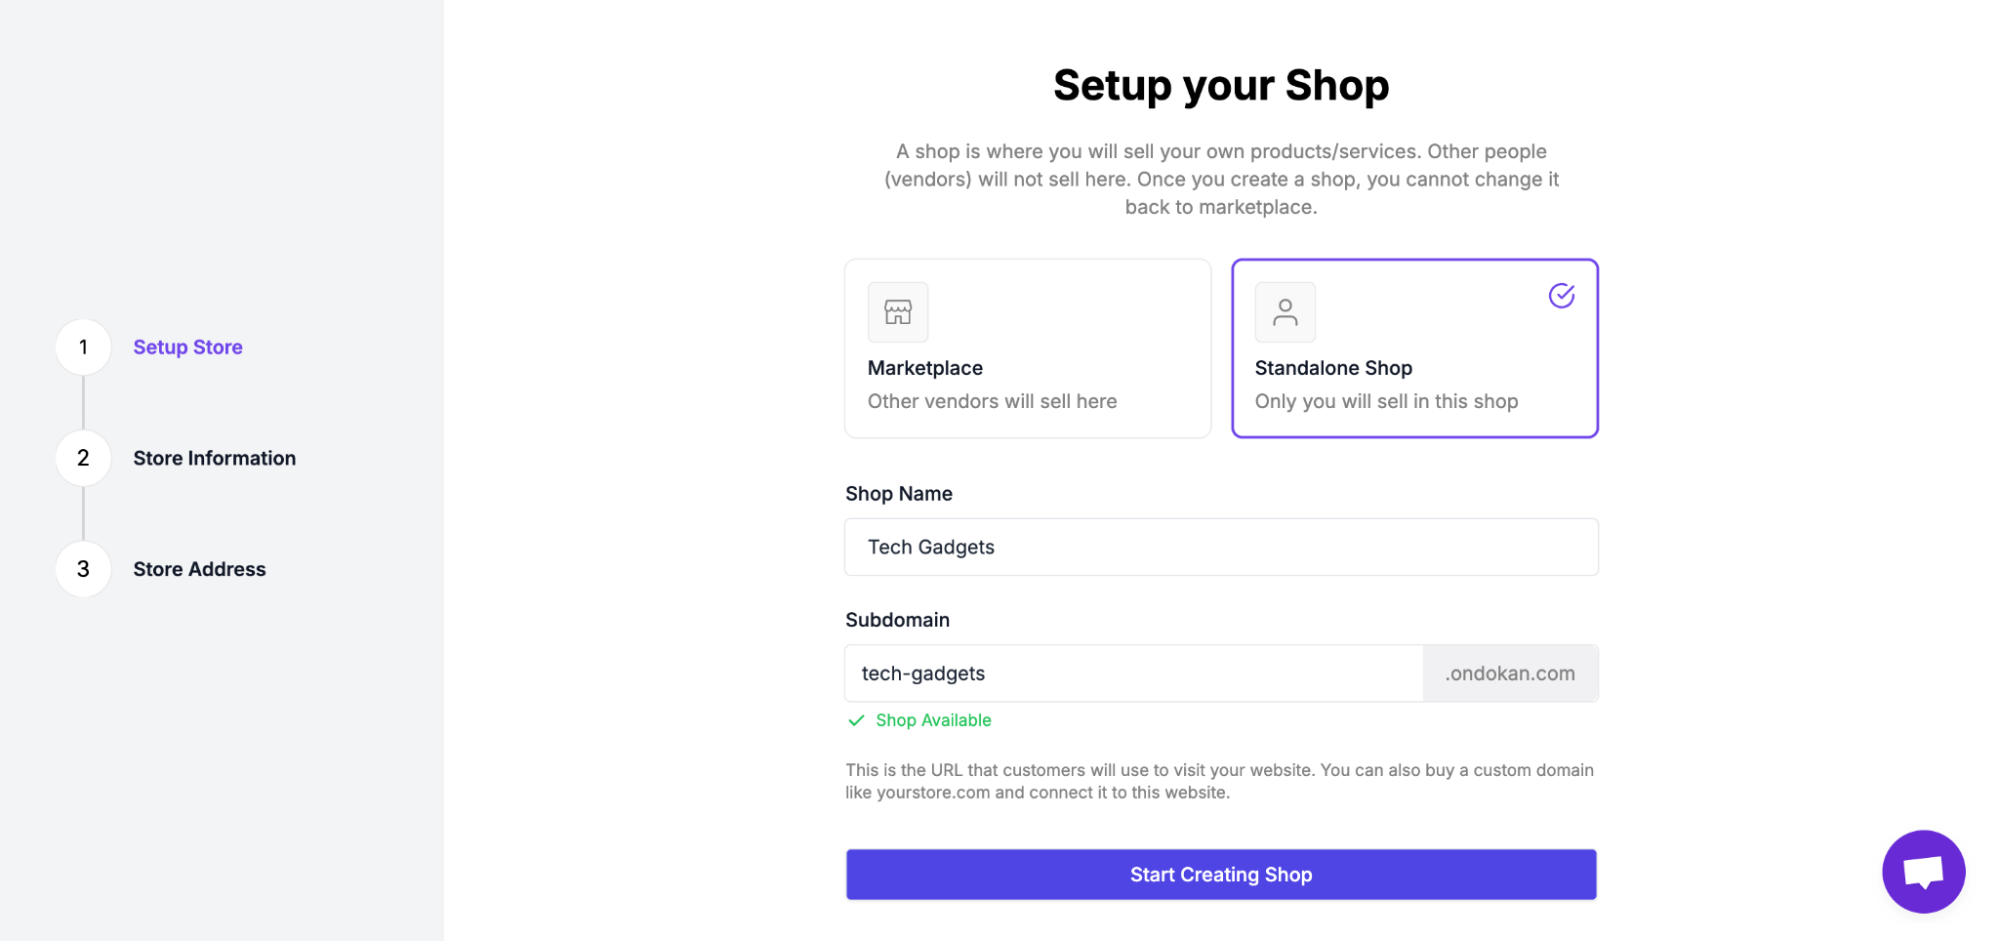
In this screen, click on the ‘Standalone Shop’ and insert your shop name. Then hit the ‘Start Creating Shop’ button.
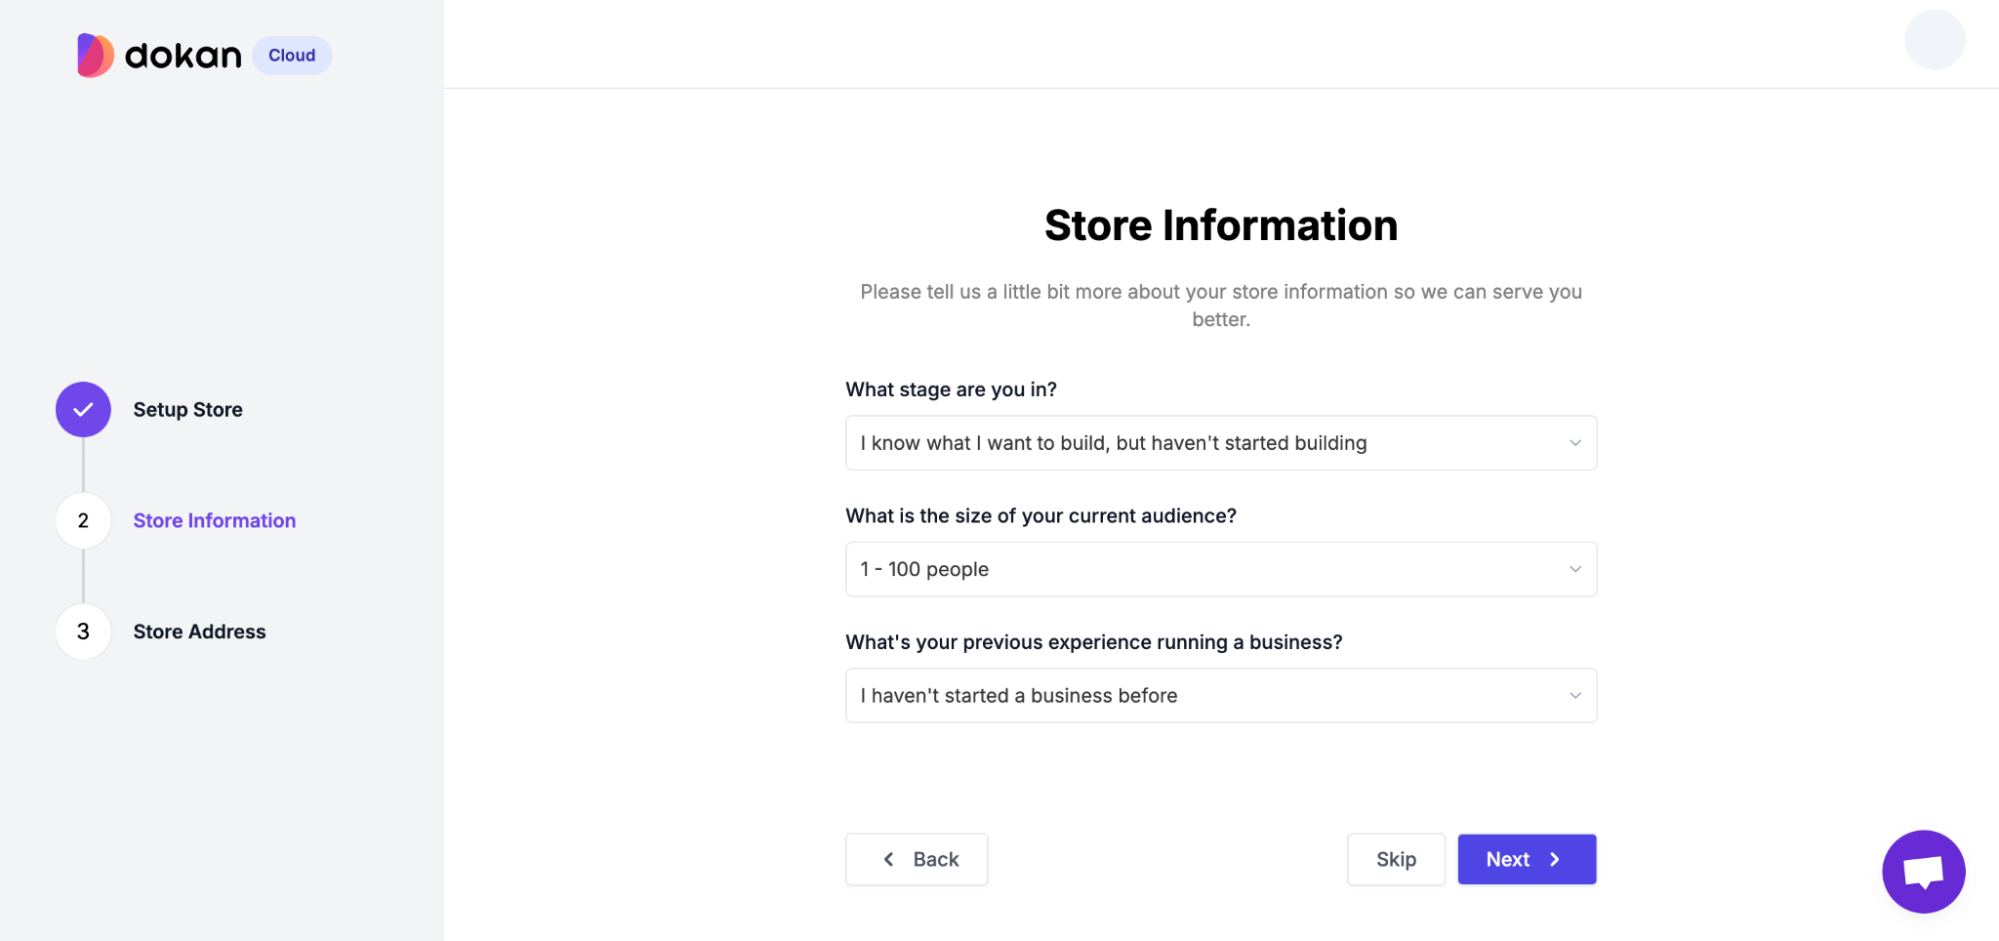
In the next screen, insert your store information. You can also skip this part by clicking on the ‘Skip’ button.
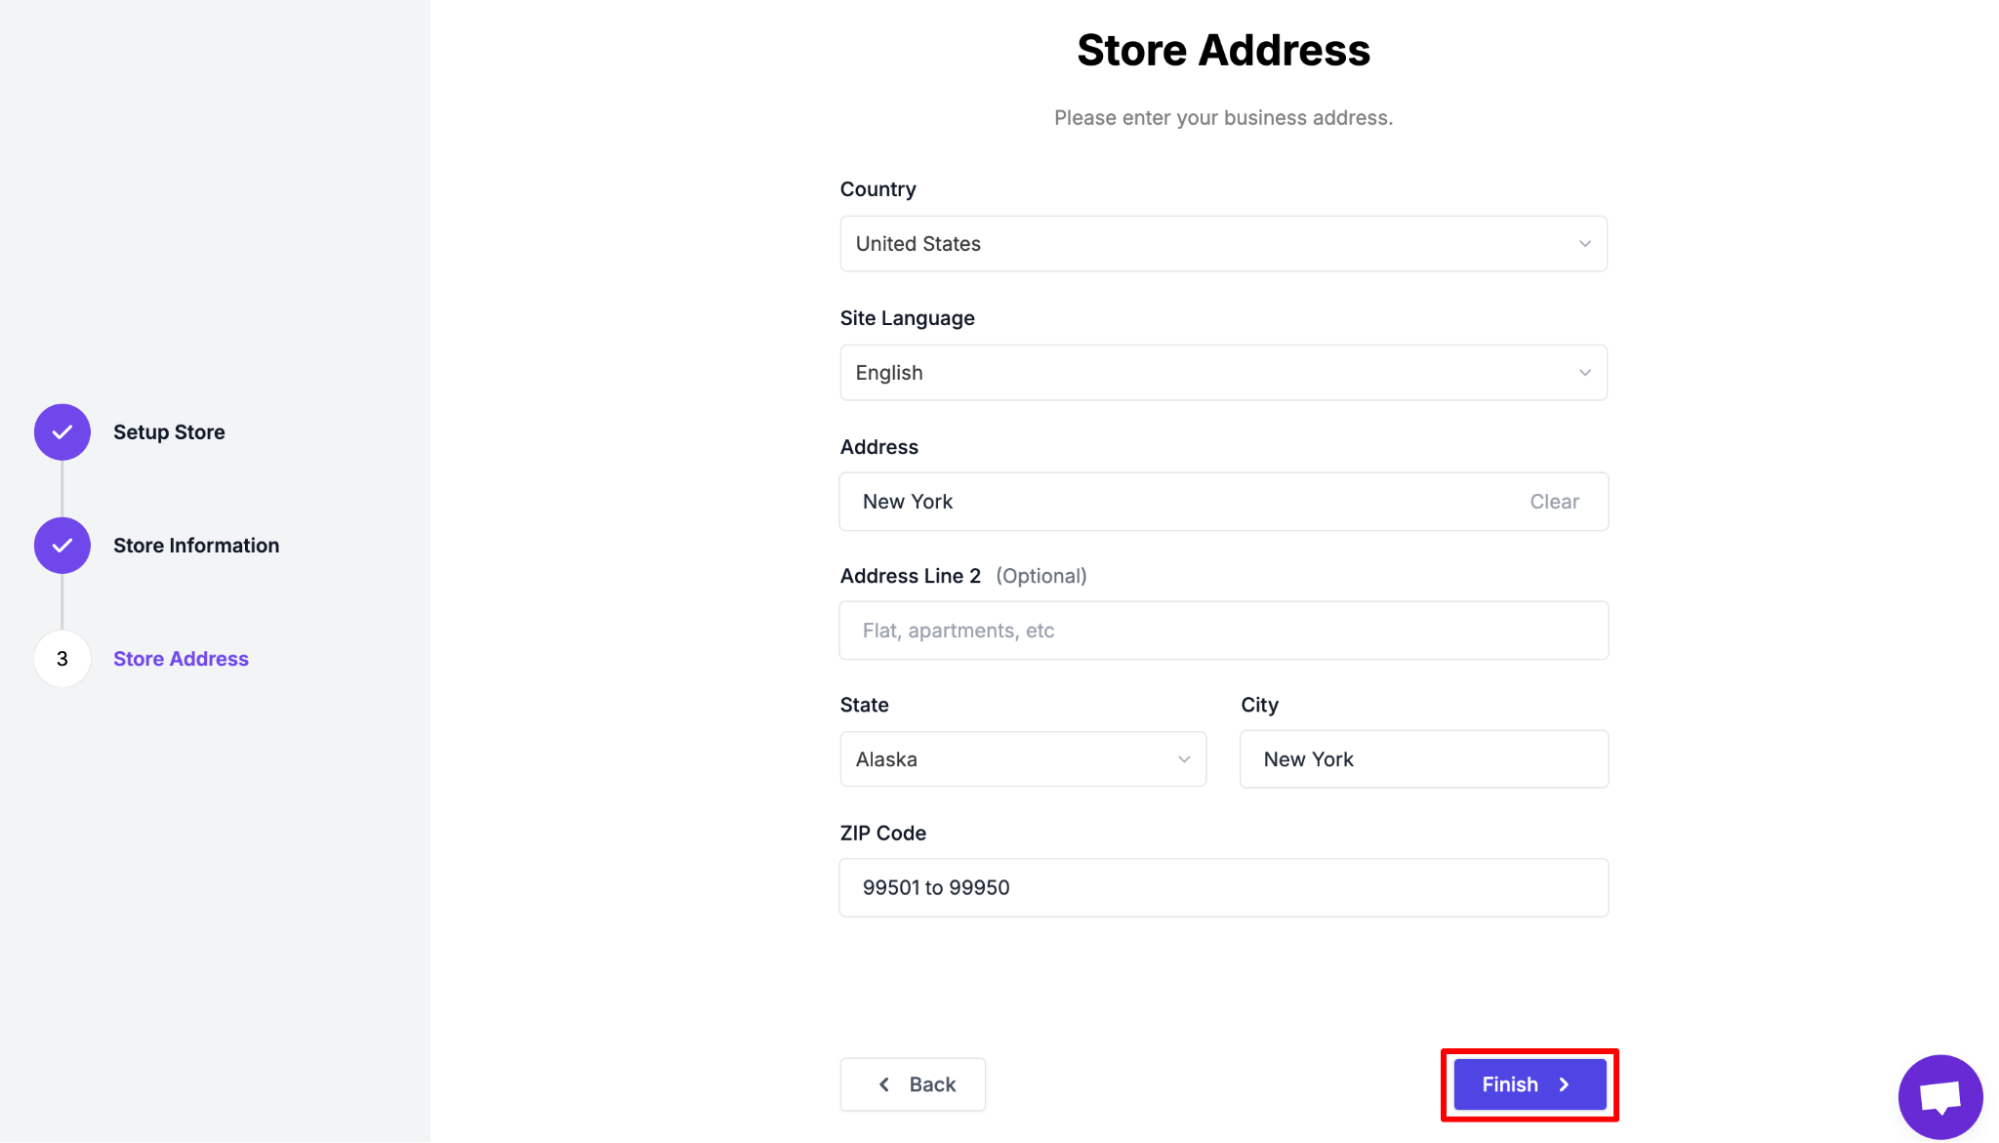
Now you need to insert your store address. When you are done, hit the ‘Finish’ button.
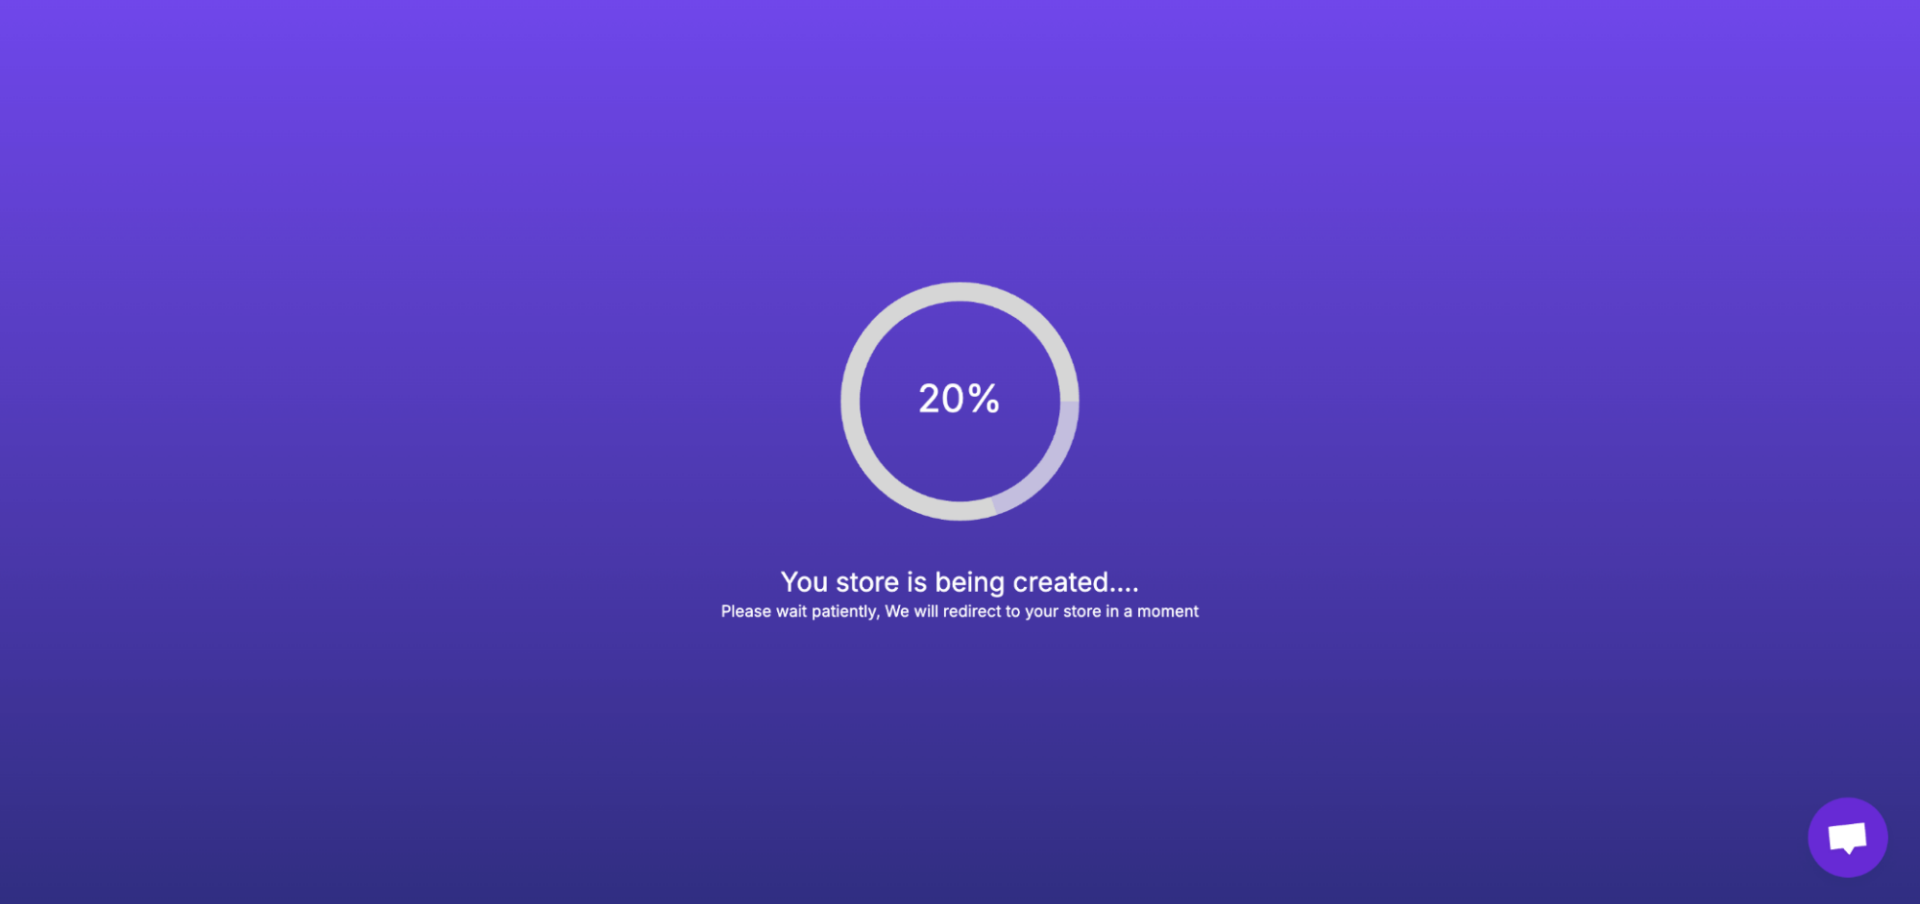
After clicking on the finish button, it’ll take a few seconds to generate your store.
II. Set Up Your Store
Your store’s design is the first thing people notice. A clean and professional look builds trust and keeps visitors browsing.
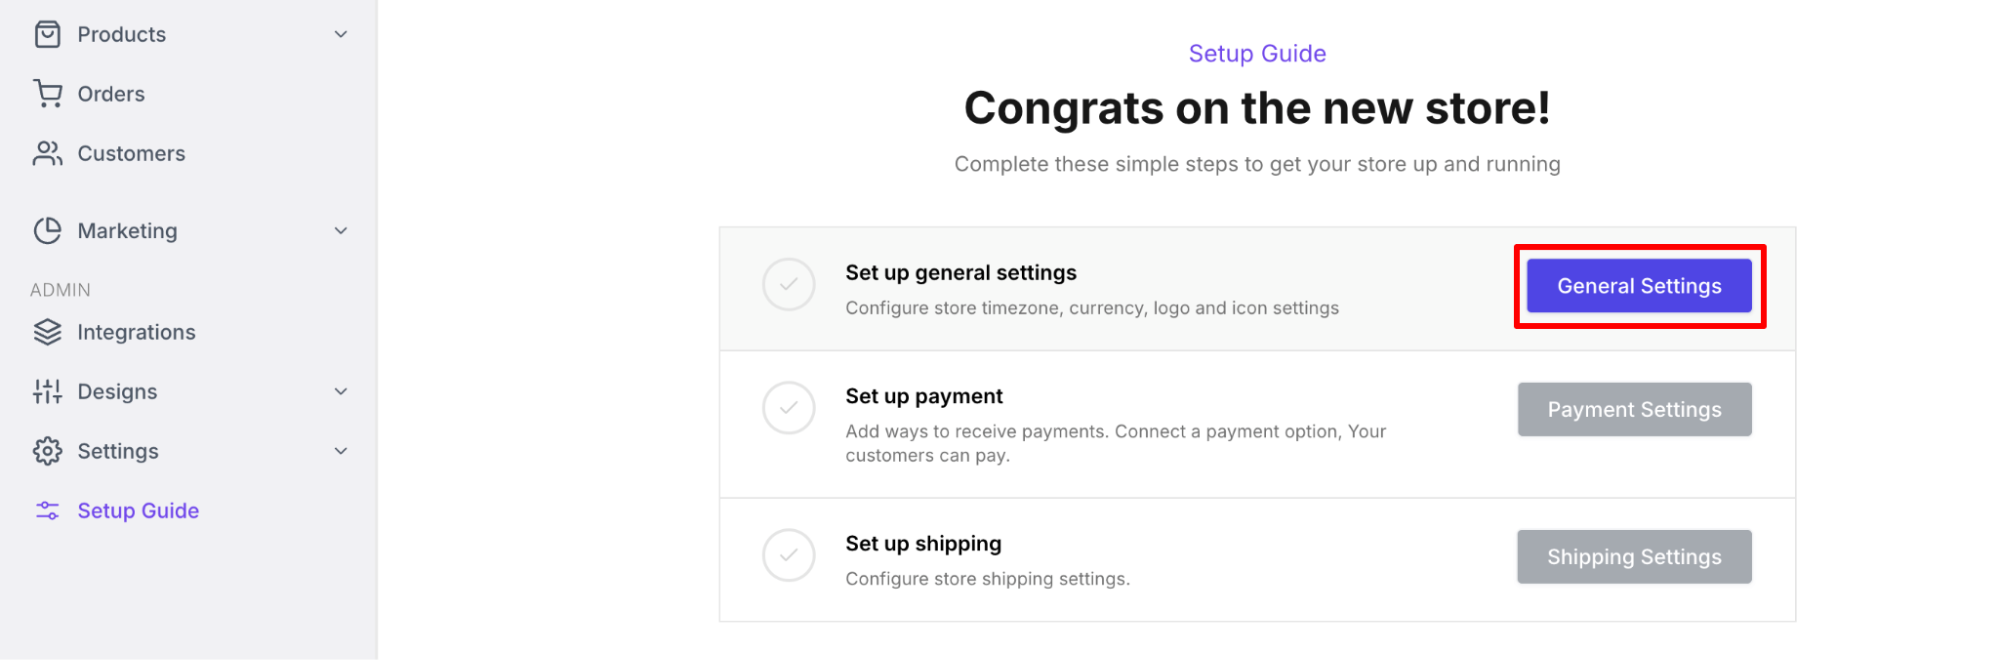
When you’re store is ready, you’ll be redirected to this interface. Now, click on the ‘General Settings’.
You’ll be redirected to this interface. You need to configure these options:
- Basic
- Business Details
- Domain
- Brand, and
- Code Snippet
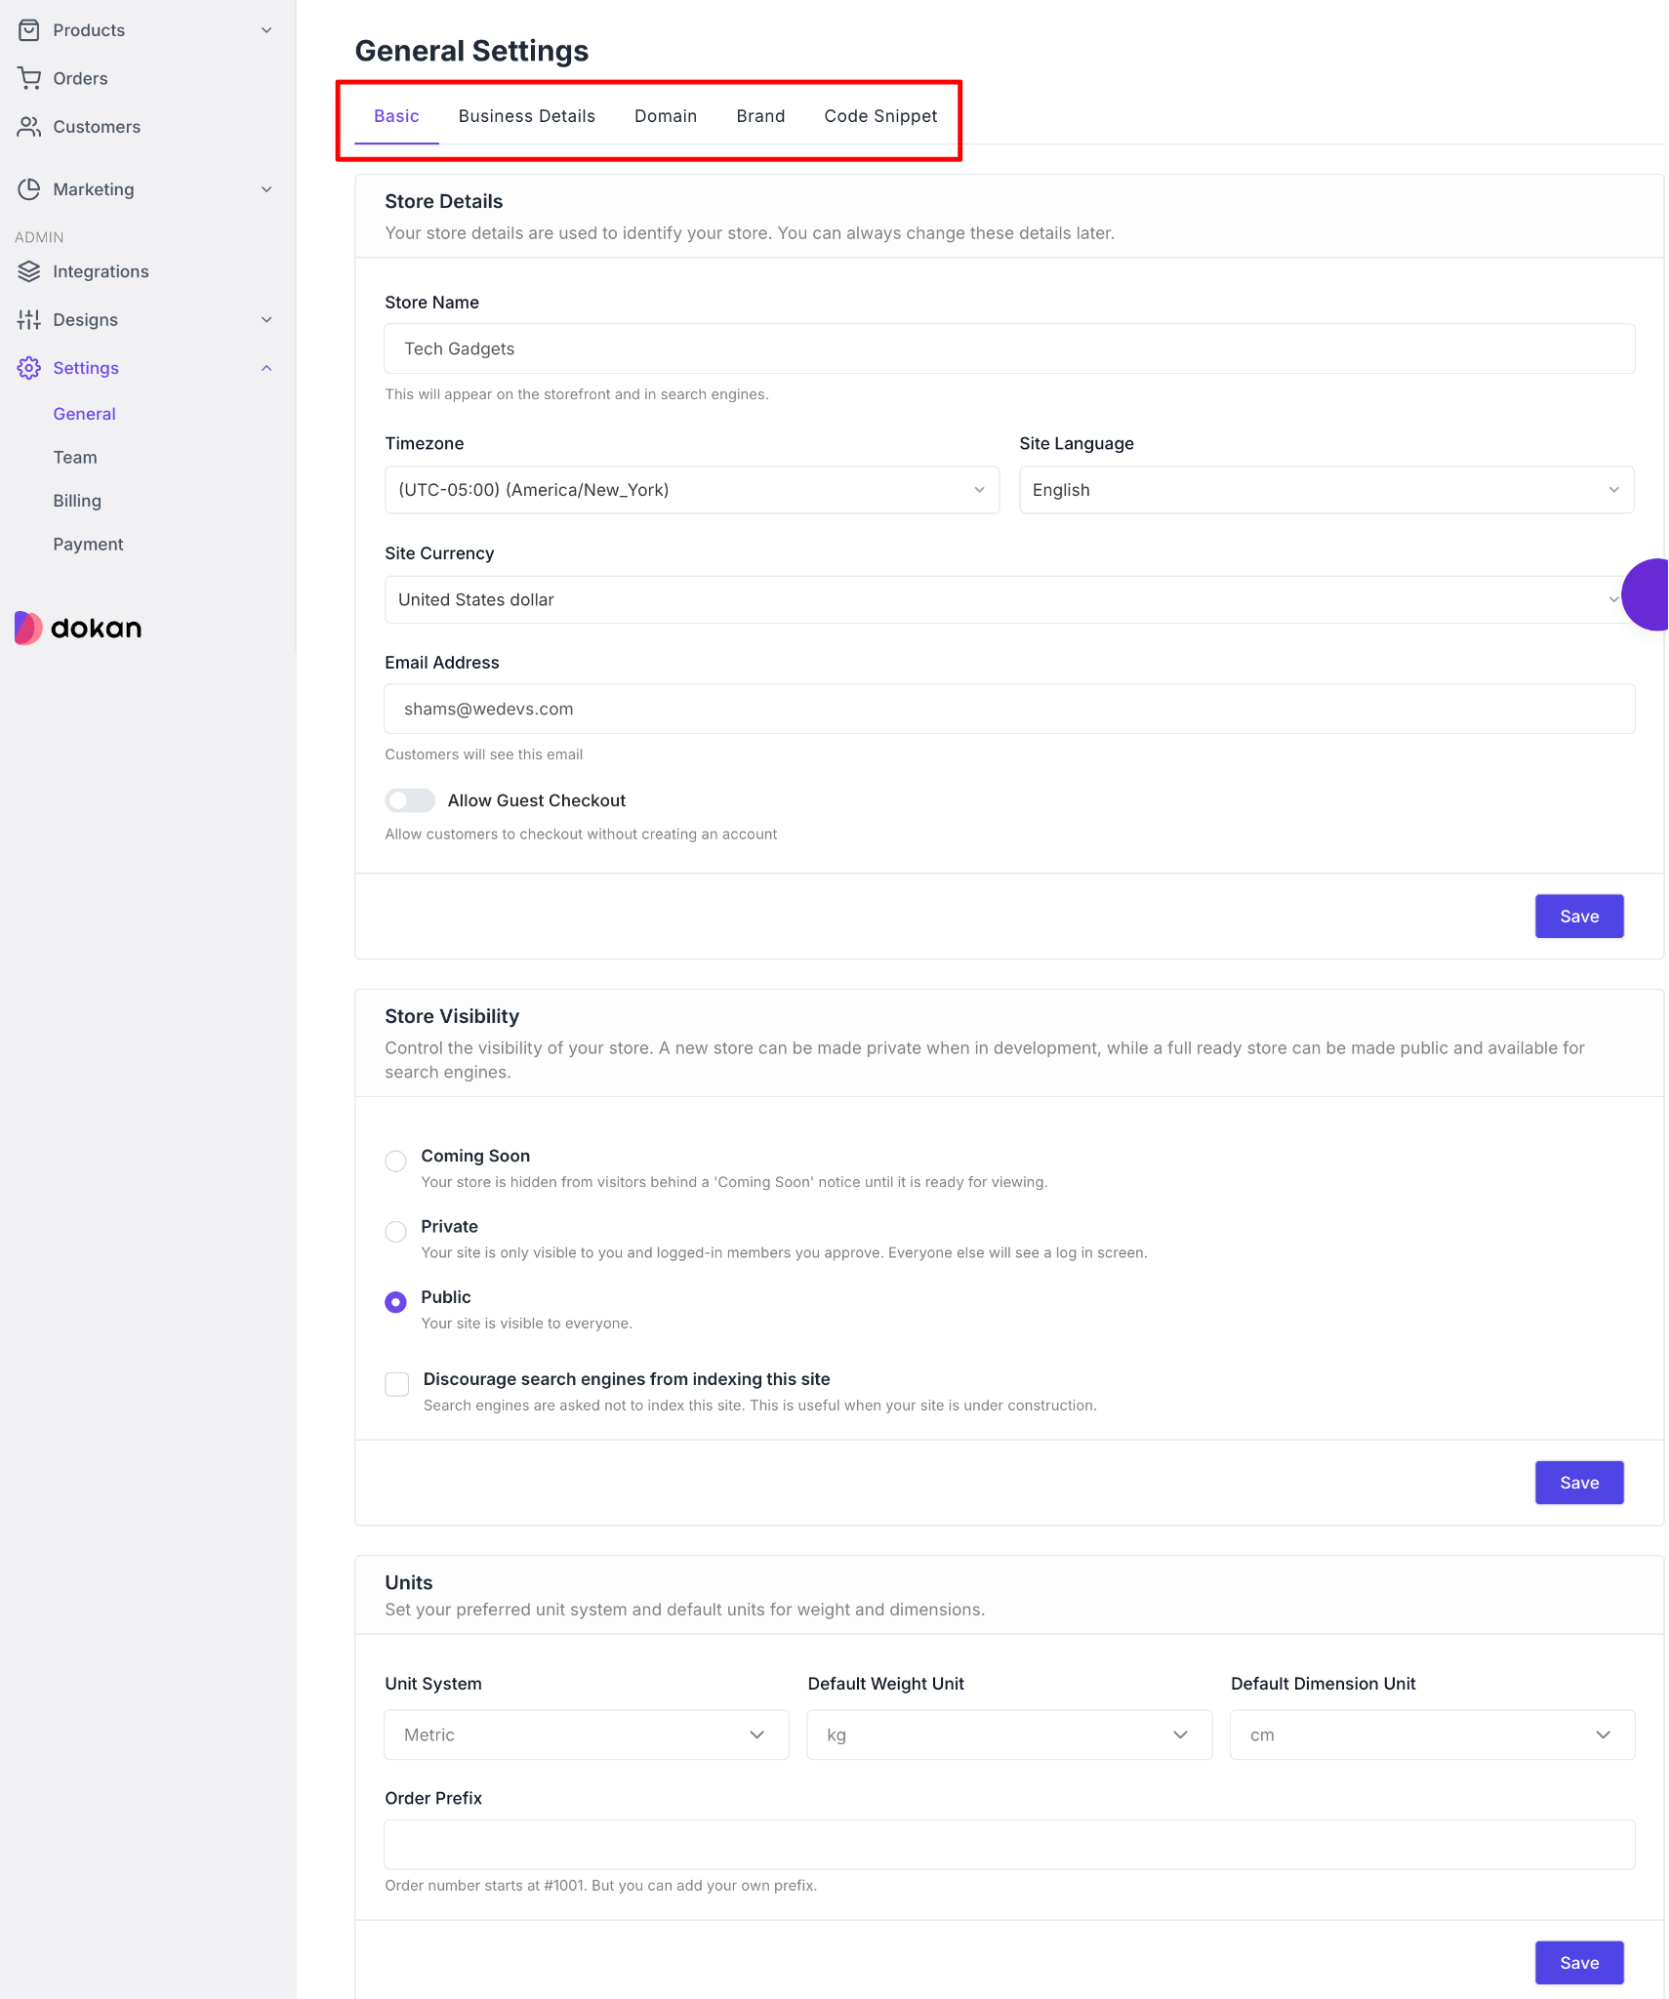
If you are facing any difficulties in configuring the basic settings, you can check the step-by-step documentation to complete this step easily.
III. Add Your Products
Navigate to the Products -> All Products, and click on the ‘+Add Product’ button. You will be redirected to a new interface.
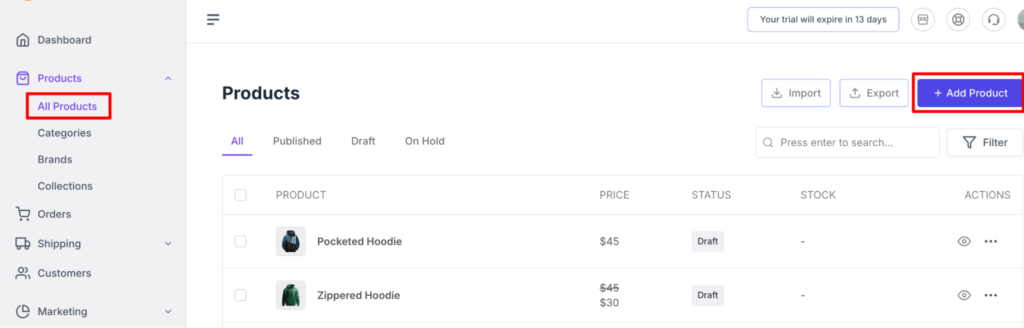
In this screen, you need to insert some information to successfully add any product to your eCommerce store.
Follow these instructions to add a product:
- Product Name: Add the product name in the text area. Make sure the product name reflects the product.
- Product Type: Choose the product type. You can choose,
- Standard Type: This is for creating a physical product.
- Digital Type: This is for creating a digital product.
- Description: In this text area, you need to write the product description. Make sure to write a detailed product description so that it helps you with product SEO.
- Category: Choose a product category. You can choose a category that you have created.
- Images: Upload your product image here. You can upload more than one image.
- Pricing: Add your product pricing here. You can set the Sale price as well.
- Tax Class: If you want, you can add taxes to your product. Enable the “Collect Tax on this product” option and choose the Tax Class. There are three types of tax classes-
- Reduced Rate
- Standard Rate
- Zero Rate
- Cost Per Item: Here, you can specify the cost price and see profit reports.
- Inventory: You can add the SKU, Barcode, Stock Quantity, and Low Stock Threshold from here. Also, you can allow or not allow backorders from here as well.
- Attributes: If your product has different colors or sizes, you can add attributes as well
- Variations: After creating the attributes, you can generate variations for those attributes as well.
- Status: Decide if you want to publish the product right away or keep it in draft status.
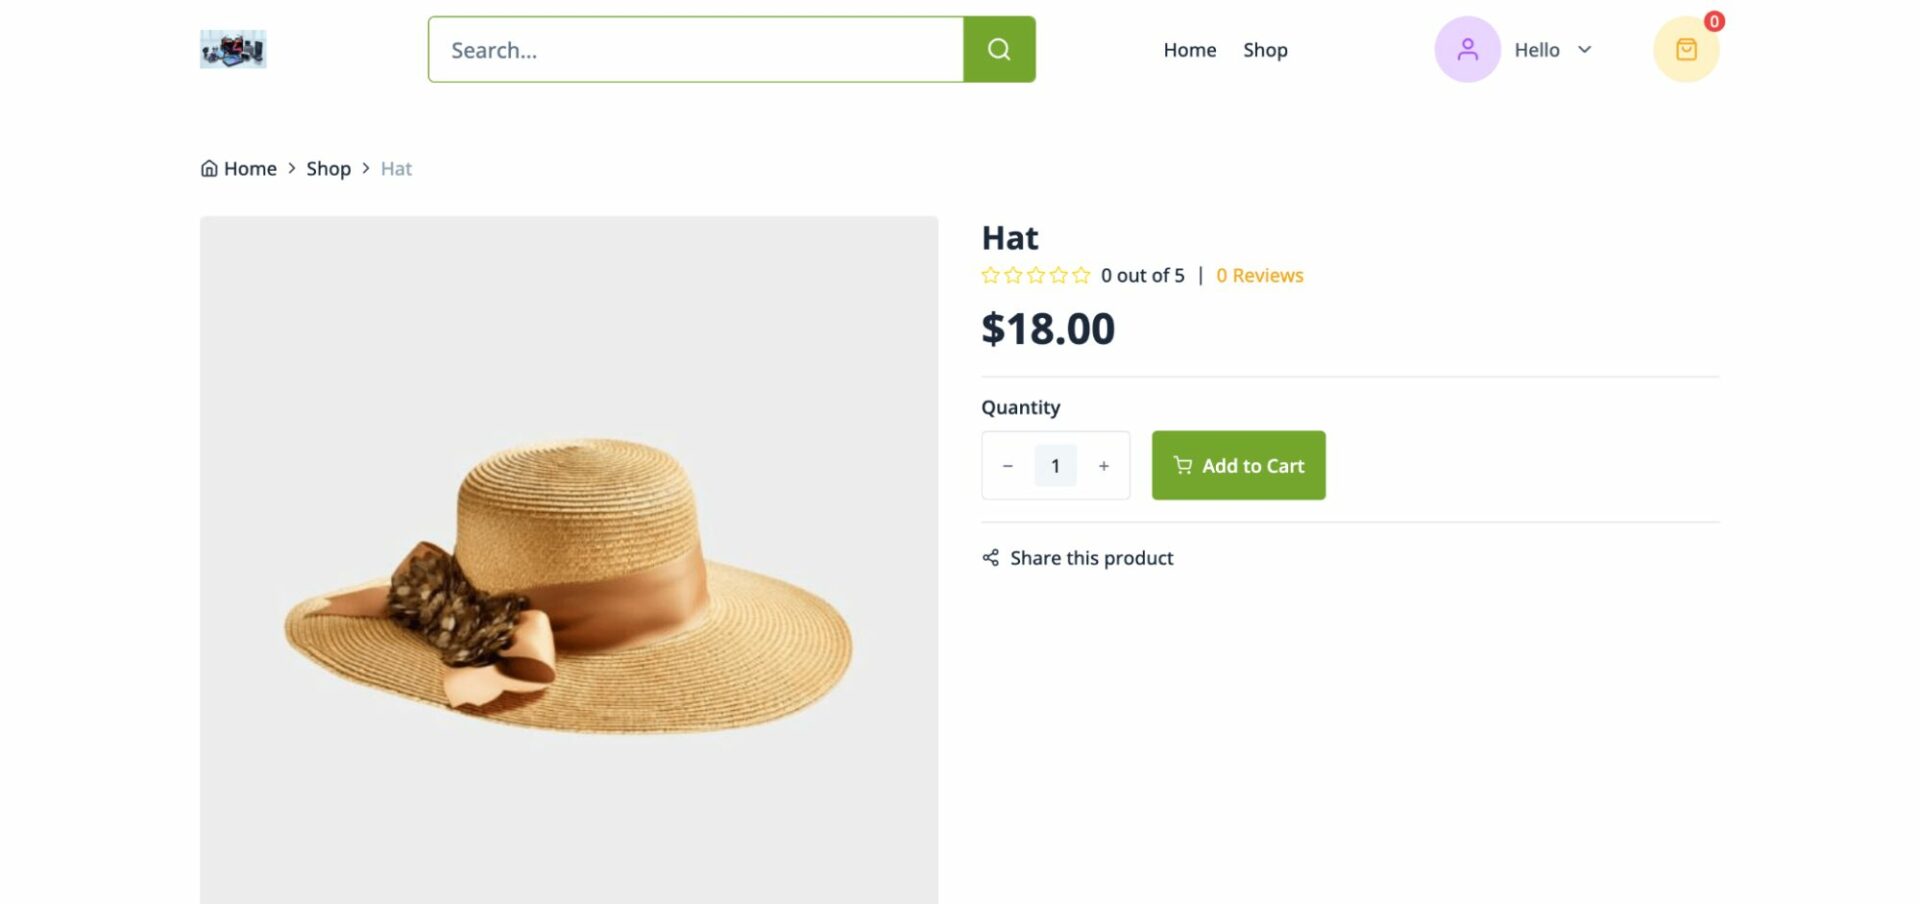
After publishing the product, you can check the preview of the product by clicking on the preview button. Or, you can visit your website to check the product.
Here is the preview of the product that we have just added:
IV. Set Up Payment Info
If you have successfully set up the general settings of your store, you’ll be able to configure the payment option. Click on the ‘Set up payment’ option.
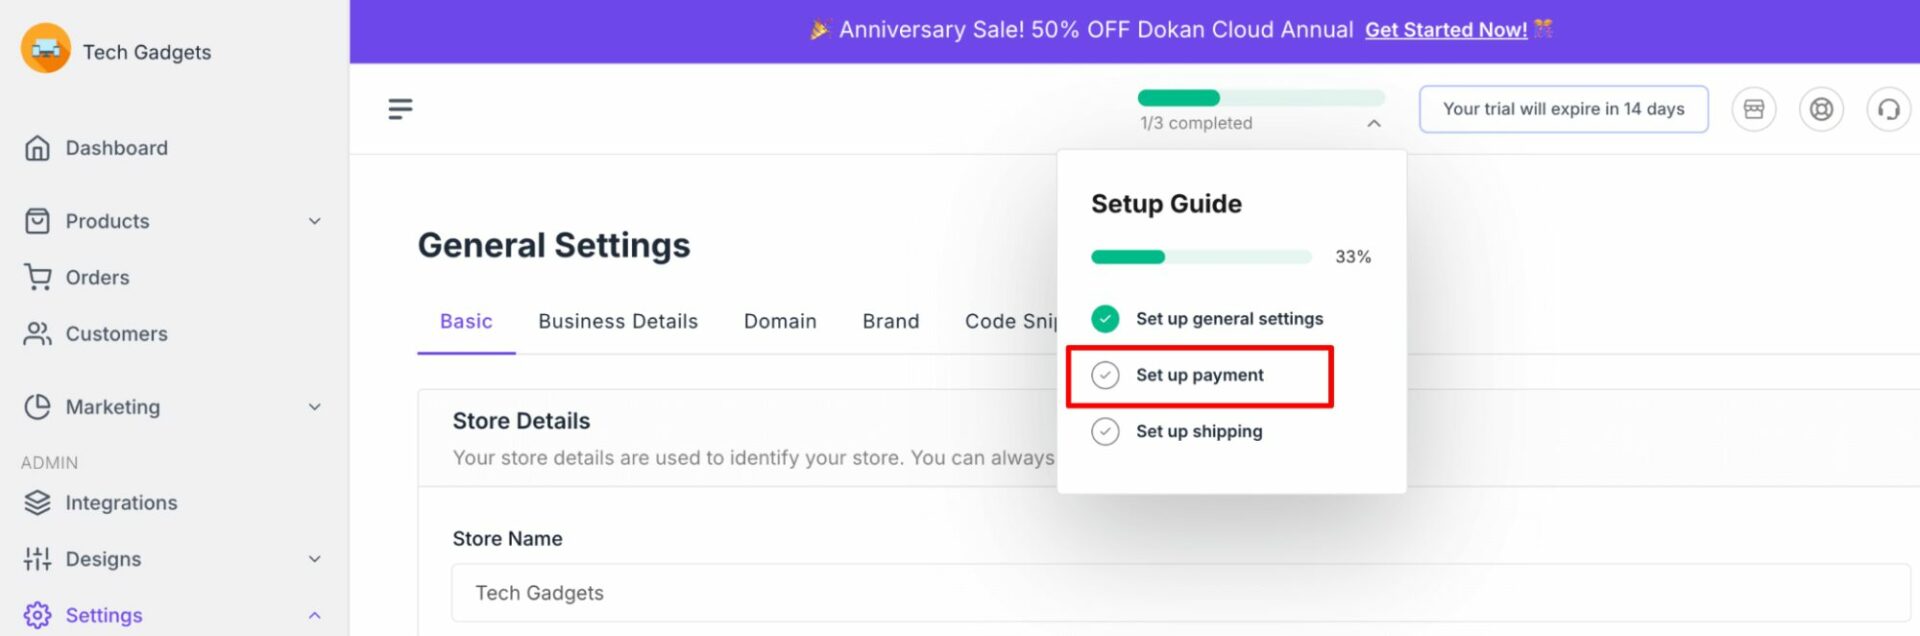
Then you will be redirected to a new interface where you can set up the payment settings.
Note: You will only see the payment methods supported according to your region.
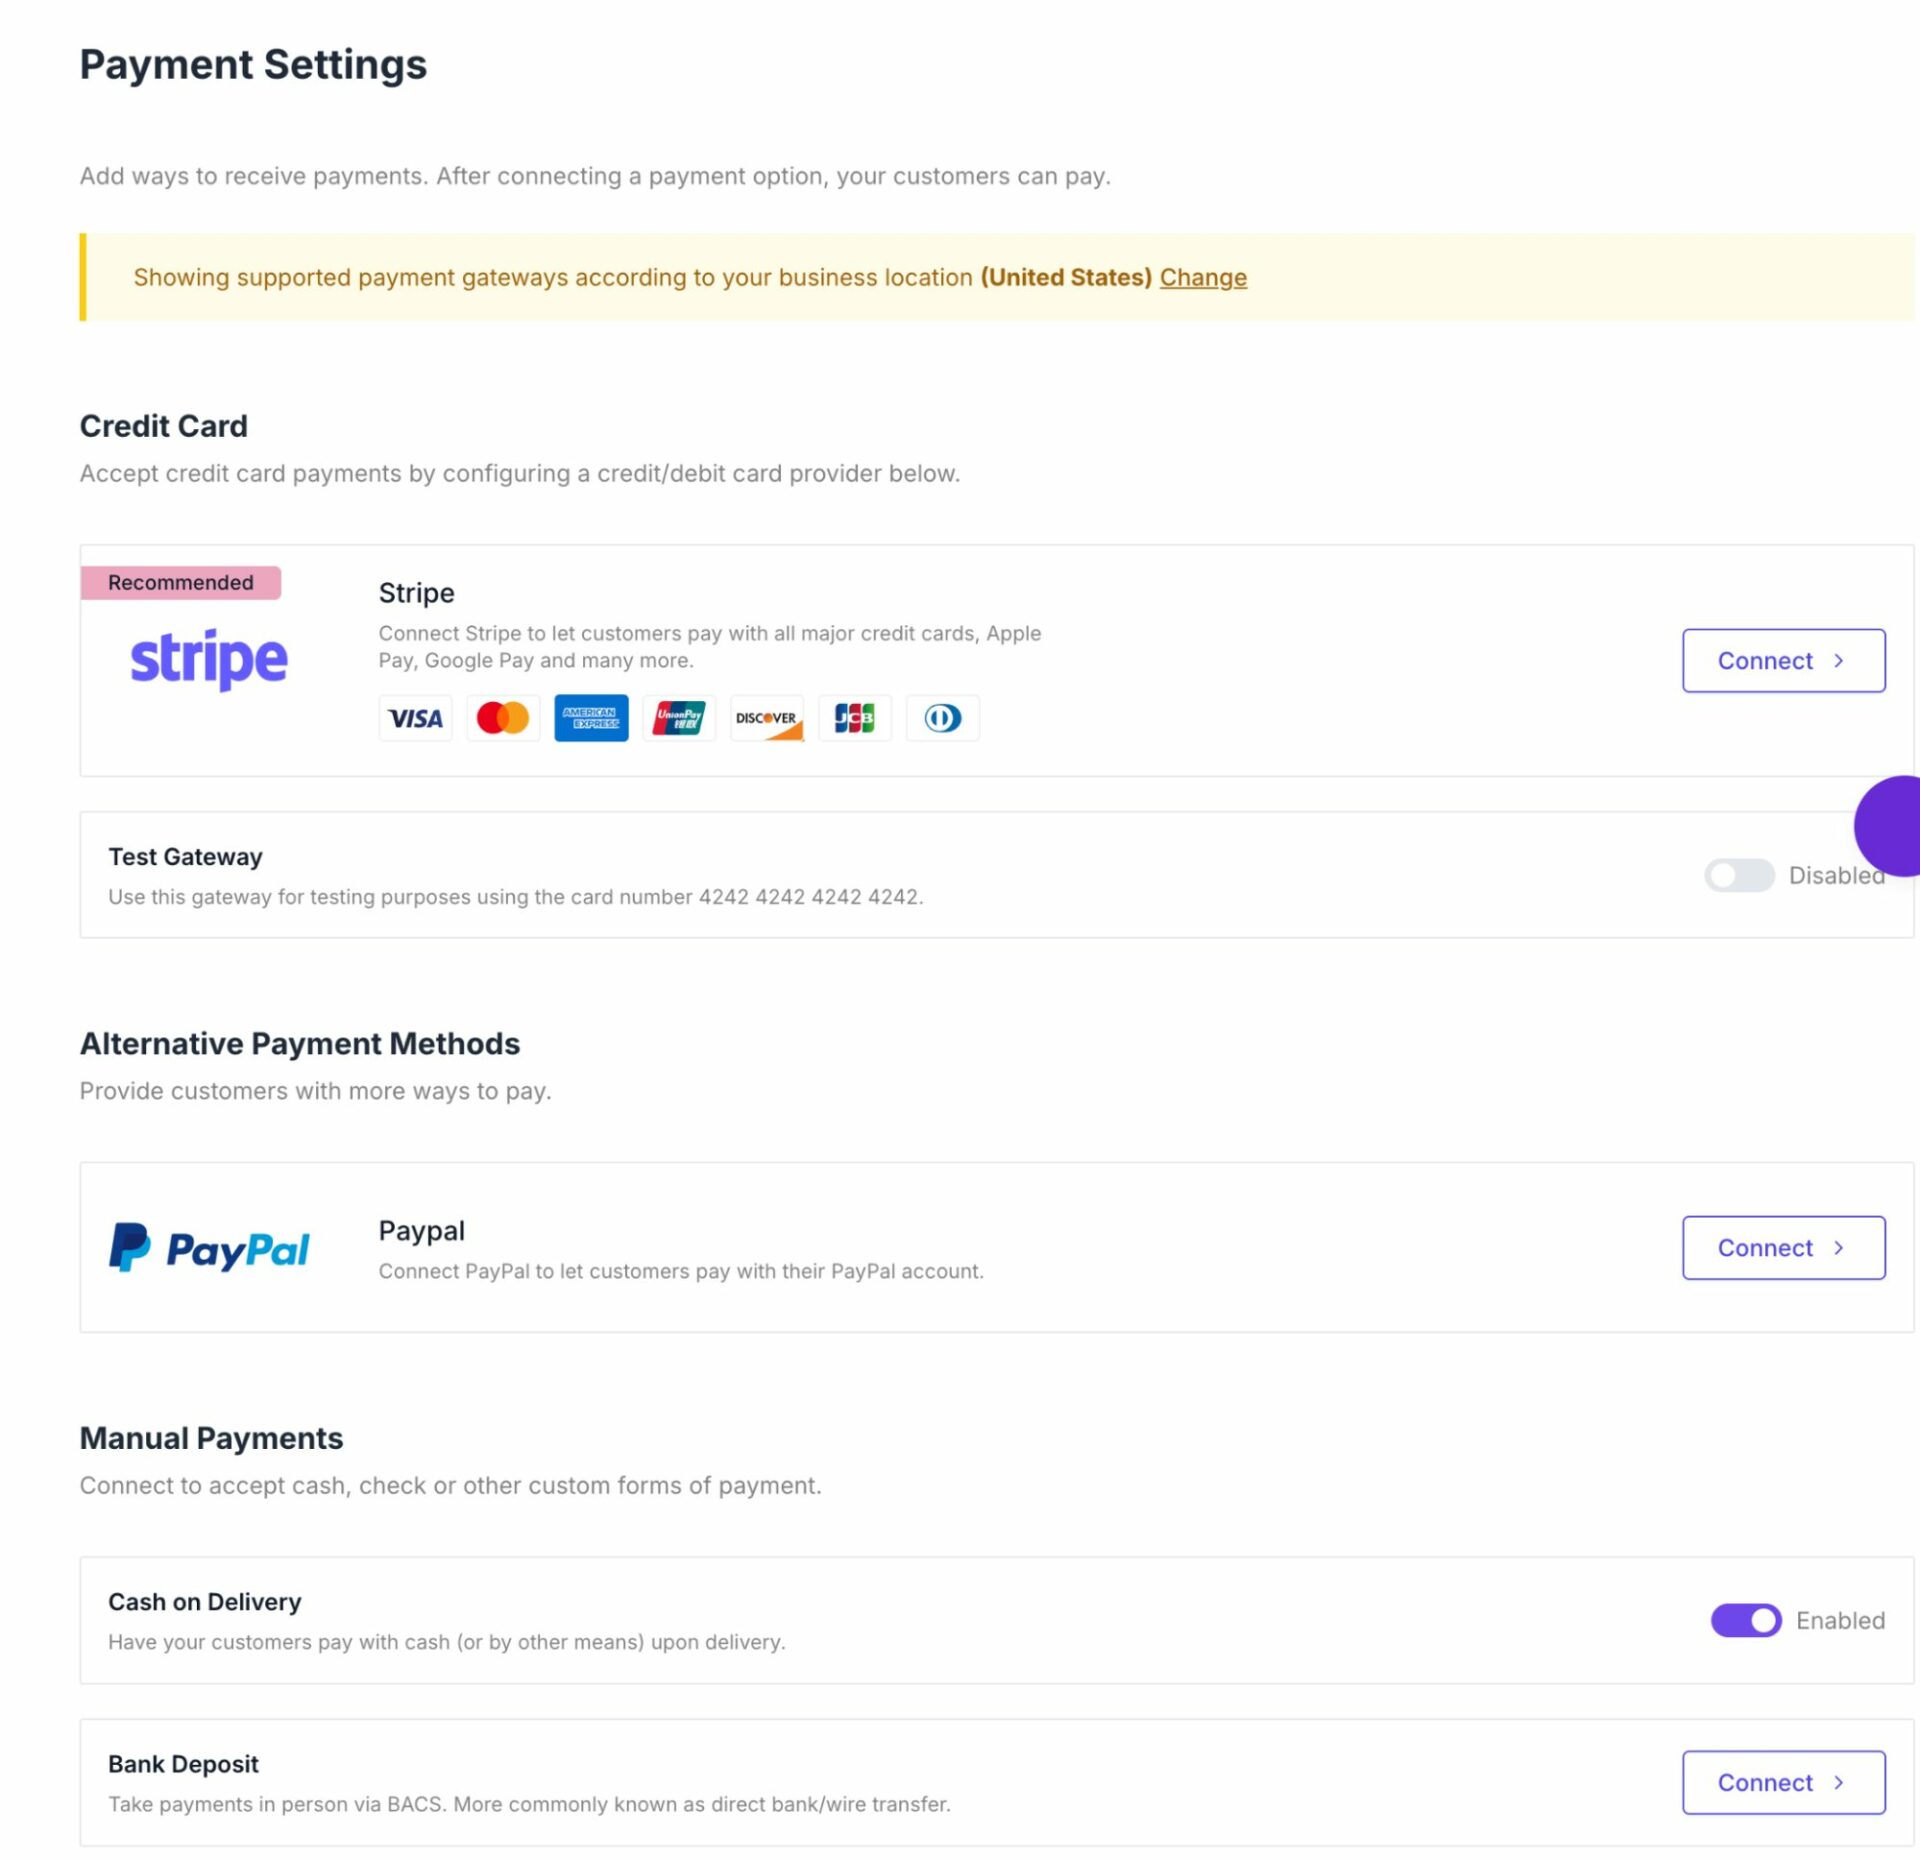
If you want to connect the PayPal payment gateway, click on the ‘Connect’ button besides the PayPal option.
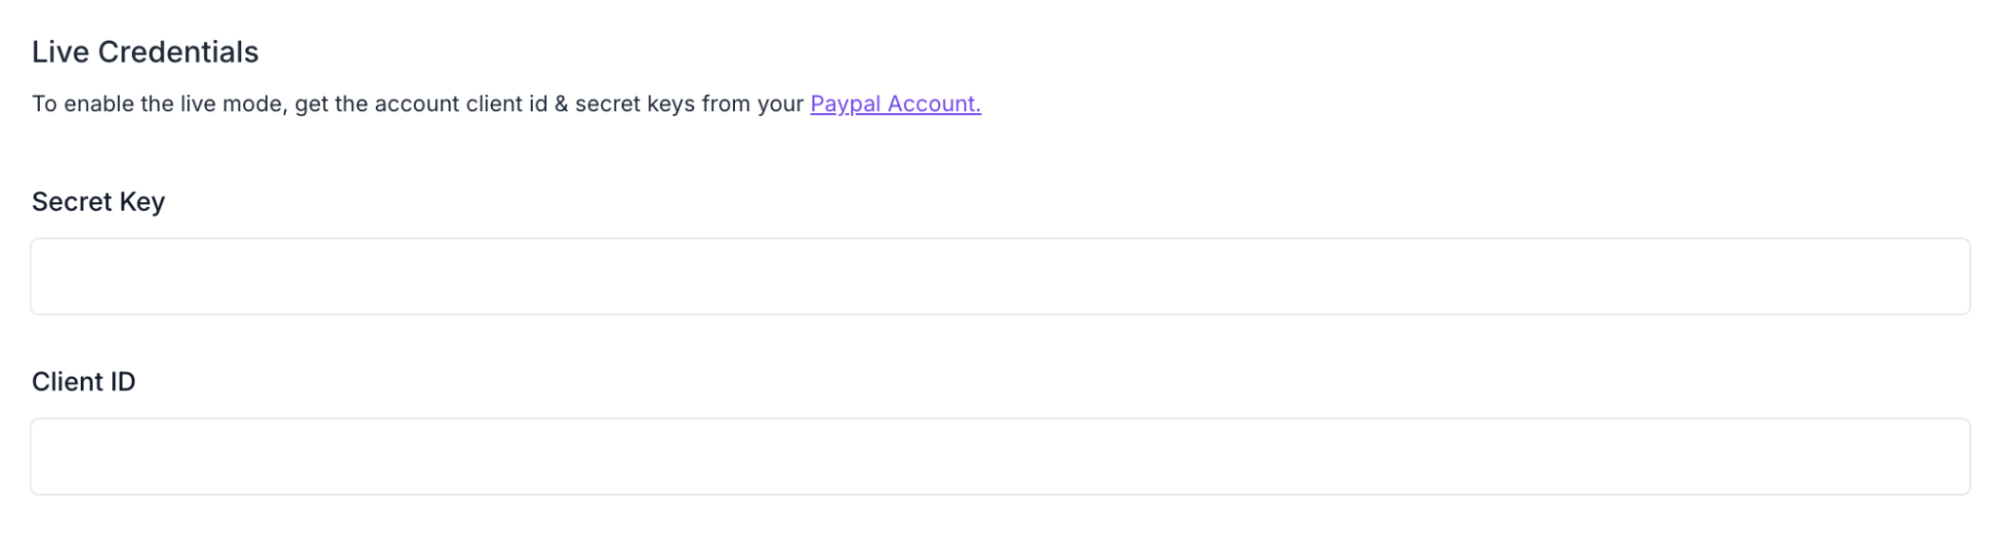
To get the PayPal secret key and Client ID, just log in to your PayPal account and copy the keys.
Read this documentation to get the secret key and client ID for PayPal.
After adding all the information, click on the Save Changes button to finish.
Now, customers can pay using the PayPal payment gateway.
Note: If you don’t want to connect the PayPal or Stripe payment gateway right now, you can simply enable the ‘Cash on Delivery’ option and proceed to the next step.
To configure the payment gateways of the FlyCommerce Shop platform, you can check this documentation to get your job done.
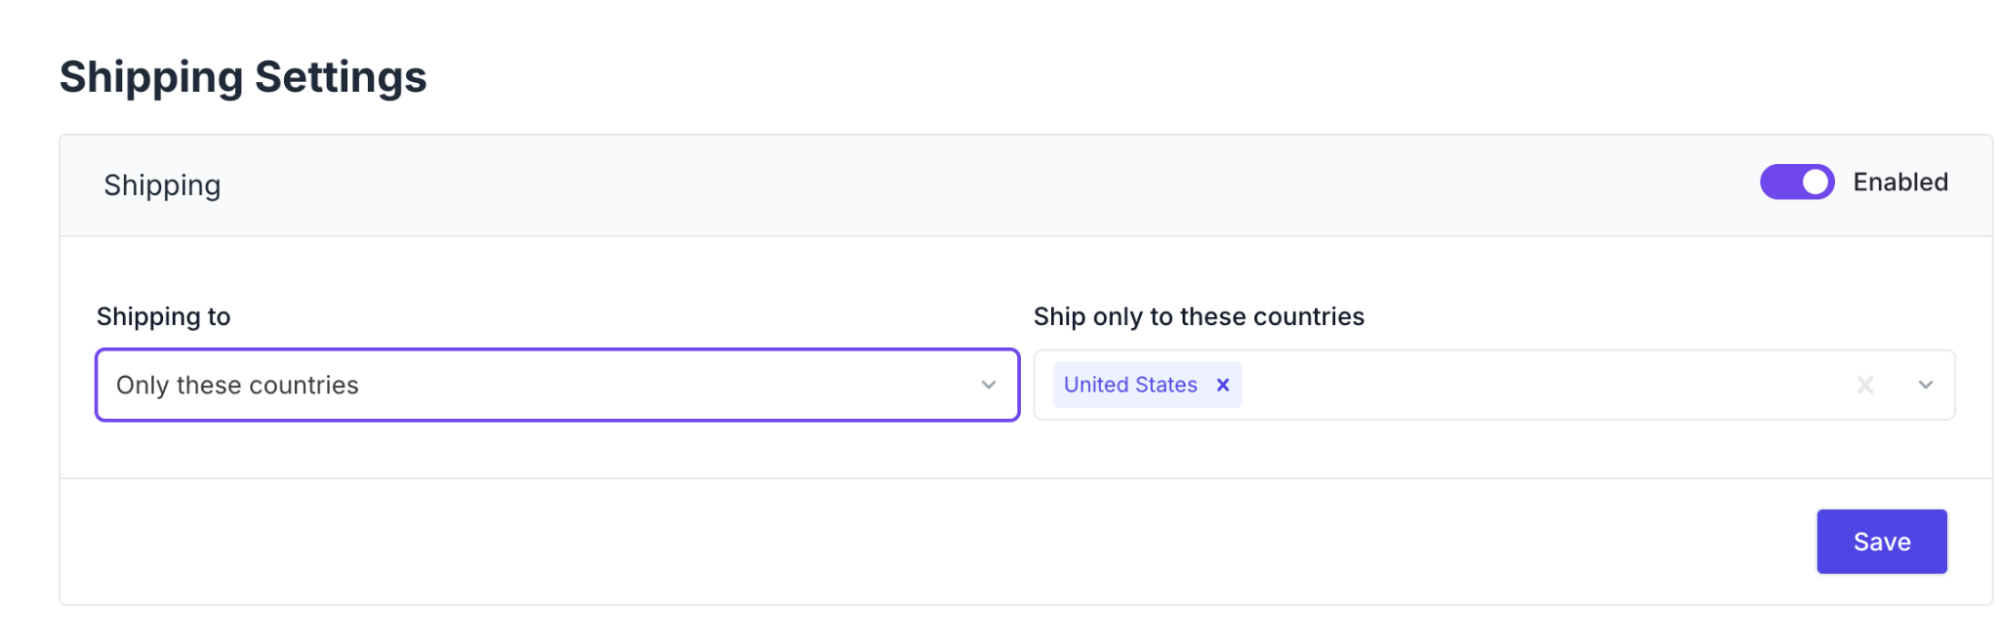
Now, you need to configure the shipping settings of your eCommerce store. You’ll get the shipping settings under the payment settings.
Navigate to the Shipping Settings, enable shipping by clicking on the toggle button, and then set the rules.
Set up which country you want to ship your products to. Finally, hit the Save button to save all the changes.
V. Share Your Store
Once your store is ready, don’t wait, start spreading the word.
Post your store link on Facebook, Instagram, X (Twitter), and WhatsApp. Add it to your bio. Share it in groups where your target audience hangs out. You can even create simple product posts using Canva.
No need to run ads at the beginning. Just focus on reaching people who know you or trust your content. The more eyeballs, the more chances of sales.
Consistency is key. Keep sharing. Keep showing up.
VI. Make Your First Sale
This is where things get real.
Once your store is live and shared, your job is to keep driving traffic. People need to see your products, so don’t stop promoting. The first few visitors might just scroll. Some will ask questions. A few will bookmark it.
And then, one day, someone clicks “Buy.”
You’ll get a notification. The product gets delivered, either instantly (for digital files) or through Printful (for physical items). You didn’t invest any money upfront, but now you’ve earned your first dollar online.
It’s a small win, but a big moment.
From there, you learn what people like. Maybe one design sells more than others. Maybe your audience prefers bundles over single items. This is your signal to double down.
The first sale is not just income, it’s momentum.
Conclusion
Making money online without spending anything might sound too good to be true, but it’s not. You just need the right tools and a clear path.
FlyCommerce Shop gives you that path. It removes all the usual barriers, no hosting costs, no setup fees, no complicated setup.
You can create a store, add your products, and start selling, all for free.
If you’re just getting started, this is one of the easiest and most reliable ways to test your ideas and build something real, without any risk.
It doesn’t have to be big. It just has to begin.
Want to know how to be trustworthy to your customers? Check this blog on how to build trust and do it professionally.
Now, if you want to share anything related to this blog, do it using the comment box. We would appreciate your efforts!
Subscribe to
Dokan blog
We send weekly newsletters, no spam for sure!


Leave a Reply