

If you are looking for the easiest ways to import and export WooCommerce products, you are in the right place. Today, we will show you how to import and export all your WooCommerce products in 10 minutes.
Importing and exporting WooCommerce products is easier than it sounds. WooCommerce comes with a feature that allows you to import and export any WooCommerce product easily by default.
In addition, several free and premium WordPress plugins can help you import and export your products in customized ways.
In this blog, we will show you both ways to import and export WooCommerce products. As a bonus, we will also show you how you can import and export your products for your marketplace.
So, without any further ado, let’s get started!
Why You Need to Import and Export WooCommerce Products
There are several reasons why you might need to import and export your WooCommerce products.
First, let’s check why you need to import WooCommerce products:
- Setting Up Your Store: When you’re first setting up your WooCommerce store, importing a list of products from a spreadsheet or another platform can save you a ton of time compared to manually adding each product.
- Updating Products in Bulk: Maybe you need to update prices, stock levels, or other product information for a large number of products. Importing a CSV file with the updates can be much faster than editing each product individually in your WooCommerce dashboard.
- Managing Multiple Stores: If you have multiple WooCommerce stores, you can export product data from one store and import it into another, keeping your inventory synchronized.

Now let us show you why you need to export WooCommerce products:
- Moving Your Store: If you’re migrating your WooCommerce store to a new website or server, you’ll need to export your product data and then import it to the new location.
- Data Backups: Exporting your product data regularly is a great way to create a backup in case something happens to your website. This way, you can easily restore your products if needed.
- Sharing Product Data: You might need to share your product data with suppliers, marketplaces, or other third-party services. Exporting your product data in a format they can understand makes this process much easier.
These are the main reasons to import and export WooCommerce products. Now let’s check how you can do that!
2 Easy Ways to Import and Export WooCommerce Products
We will show you two ways to import and export WooCommerce products. Here are the two ways:
- Import and Export WooCommerce Products Manually
- Import and Export WooCommerce Products Using a Plugin
First, we will show you how to import and export WooCommerce products manually which is using the WooCommerce default feature. Let’s get started!
Method 01: Import and Export WooCommerce Products Manually
WooCommerce comes with a default feature to let you import and export your products easily. Let’s check how it works!
Import WooCommerce Products
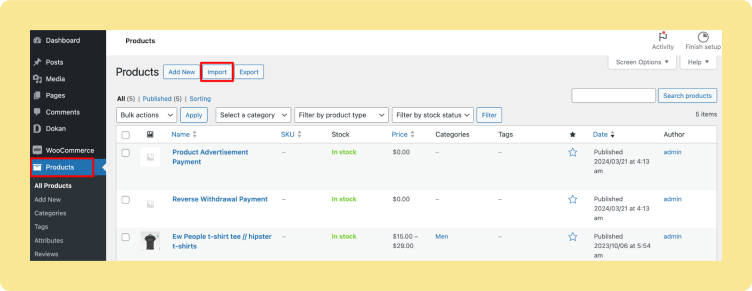
To import your WooCommerce products, go to your WordPress dashboard -> Products. There you’ll find the Import option. Click on that option.
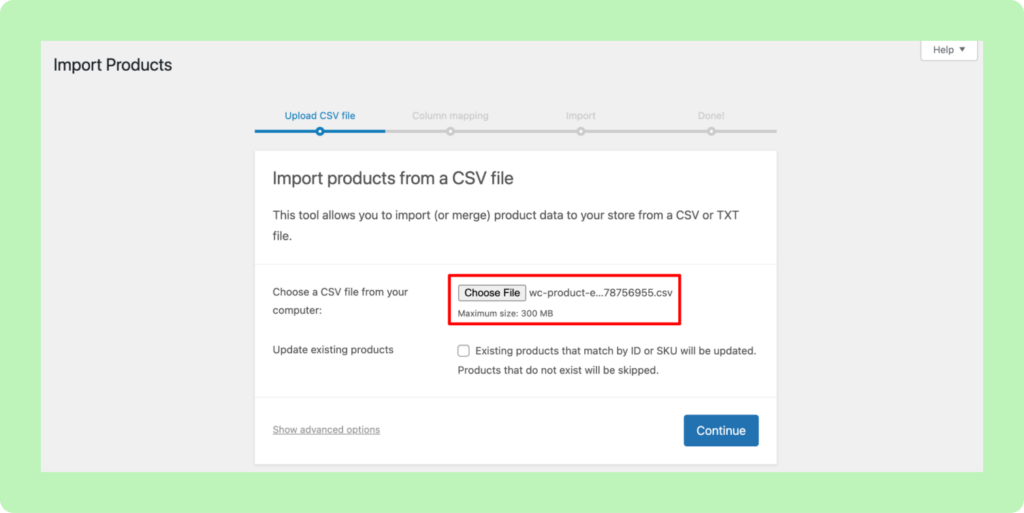
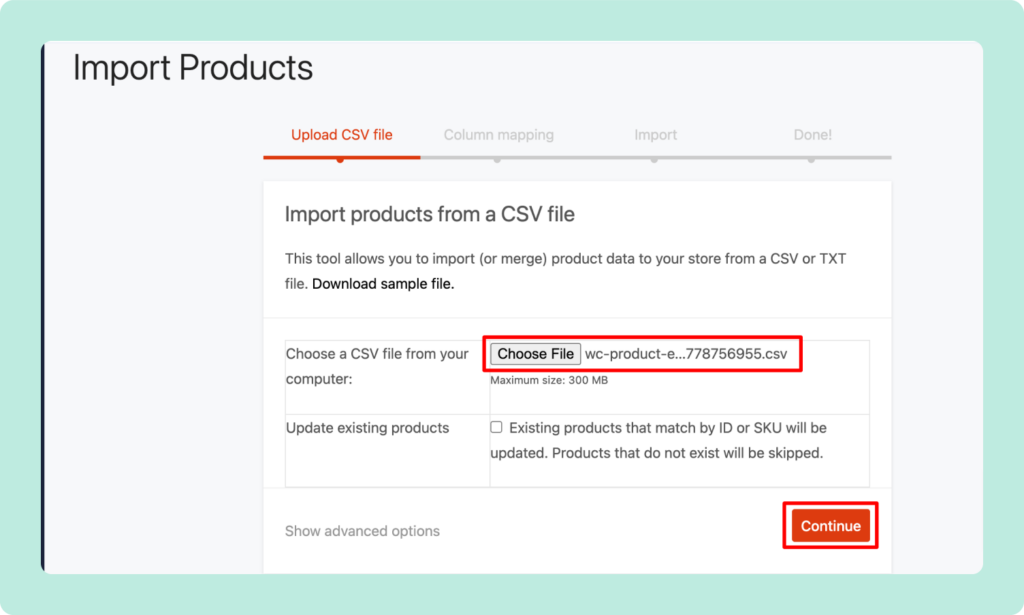
After clicking on the Import button, you will be redirected to a new interface. Here you need to click on the “Choose File” option to upload your WooCommerce product as a CSV file.
Now check the “Update existing products” if there are already similar products uploaded and now you want to update those products. Otherwise, you can skip this option.
Then click on the Continue button.
In the current screen, “Column mapping“, the WooCommerce system automatically maps the column name to its respective field. As shown in the image, ‘ID’ is automatically mapped to ‘ID’ under ‘Map to field’. Similarly, ‘Type’ to ‘Type’.
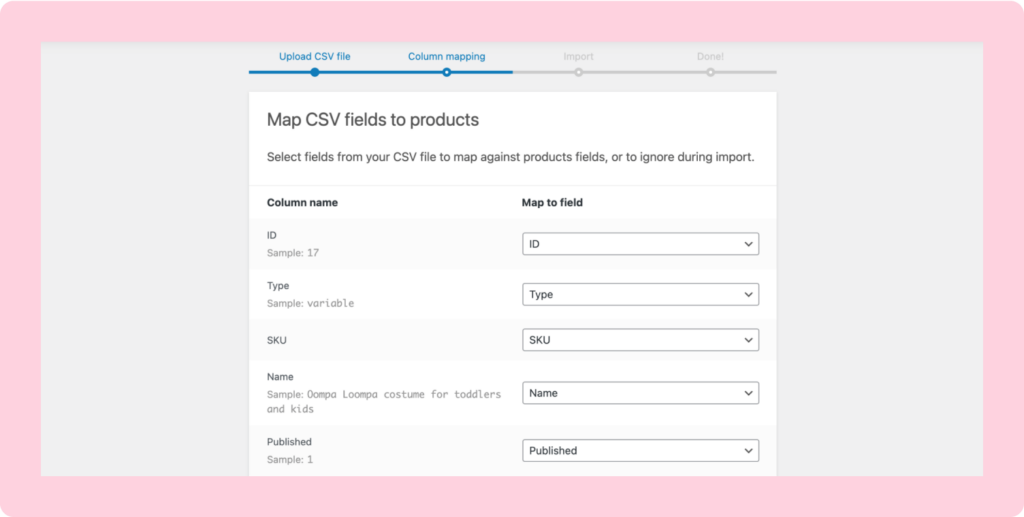
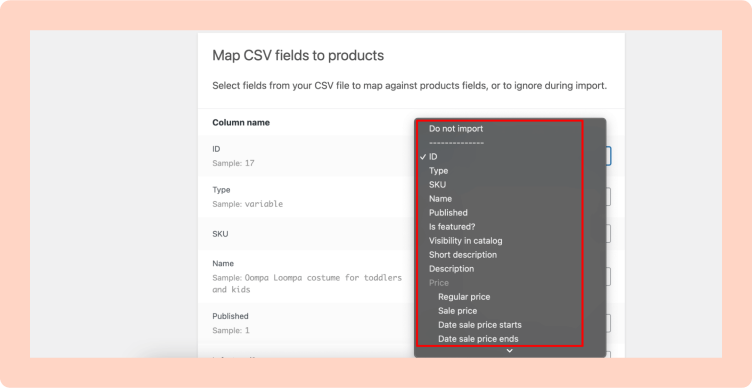
However, if the column name doesn’t match, you can open the drop-down menu and select the right name from the list.
Also, if there is a situation where you don’t want to import a particular field, under ‘Column name’, you could opt for the ‘Do not import’ option on the right-hand side.
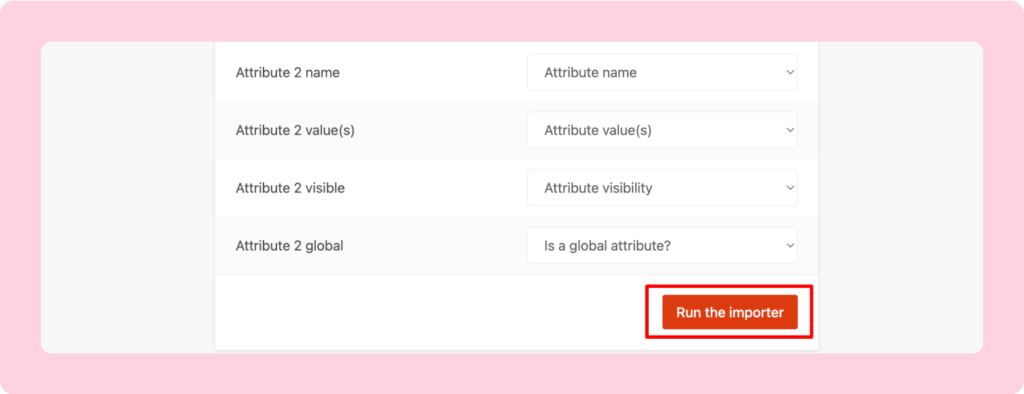
When you are done with this, scroll down a bit and click on the ‘Run the importer’ button. WooCommerce will now start importing data from CSV files.
When all your products are imported, you will get this success message.
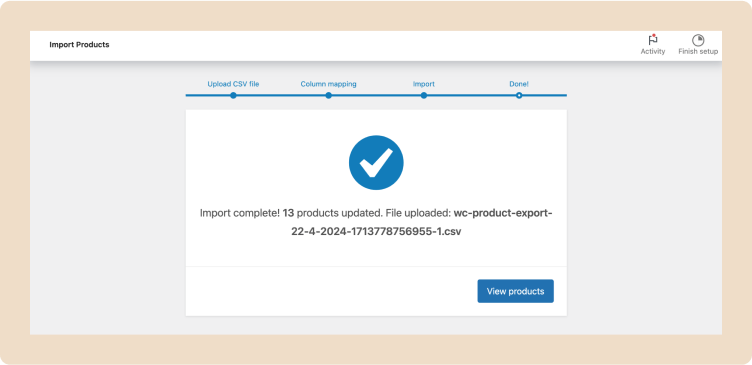
Now you can click on the “View products” or visit the Products tab to check your newly uploaded products.
That’s how you can import WooCommerce products by using the WooCommerce default settings.
Export WooCommerce Products
Now let’s check how to export WooCommerce products using the WooCommerce default settings.
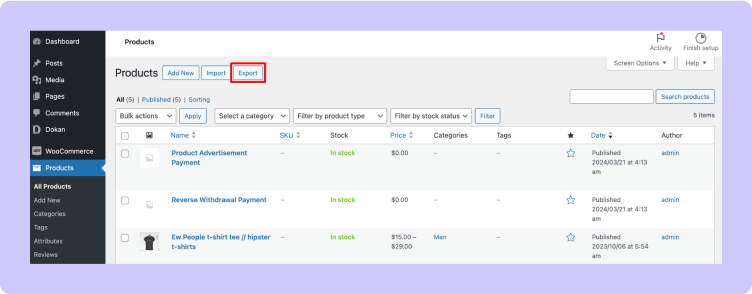
To do that go to your WordPress dashboard -> Products. There you will find the Export option. Click on that option.
In the next screen, you will find a list of the settings to configure to export your WooCommerce products.
Now you can choose the columns, product types, and product categories you’d like to export. By clicking on any field, you’ll get a drop-down, as shown below.
If you need to export all the fields, skip these options and simply click on the “Generate CSV” button. It will download you all the product data.
However, if you want to export selected data, you should choose which data you want to export.
Now click on the “Generate CSV” button to export your selected products.
That’s all! That’s how you can export WooCommerce products using the WooCommerce default feature.

Method 02: Import and Export WooCommerce Products Using a Plugin
There are several plugins that you can use to import and export your WooCommerce products. Among them, for this tutorial, we are going to use the “Order Export & Order Import for WooCommerce” plugin. It’s a free and popular plugin.
Now let’s check how you can import and export your WooCommerce products using a WordPress plugin:
First, you need to install and activate the Order Export & Order Import for the WooCommerce plugin. To do that, go to your WordPress dashboard -> Plugins -> Add New Plugin. Then search for the plugin and install it from the search result. Also, don’t forget to activate the plugin after installing it.

Then go to your WordPress dashboard -> WebToffee Import Export and install the Product module. Now you’re all set up to import and export your products.
Import WooCommerce Products Using a Plugin
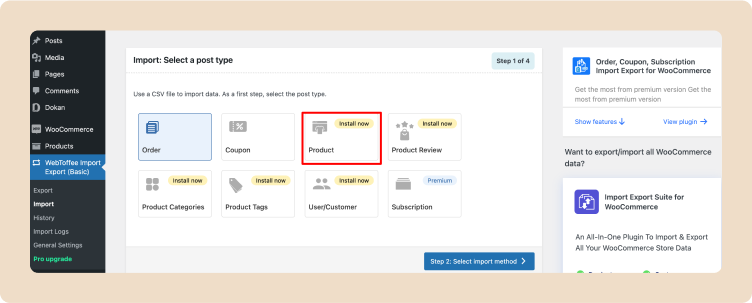
To import your WooCommerce products, navigate to the WebToffee plugin -> Import. Then click on the “Select import method“. You’ll be redirected to a new interface.
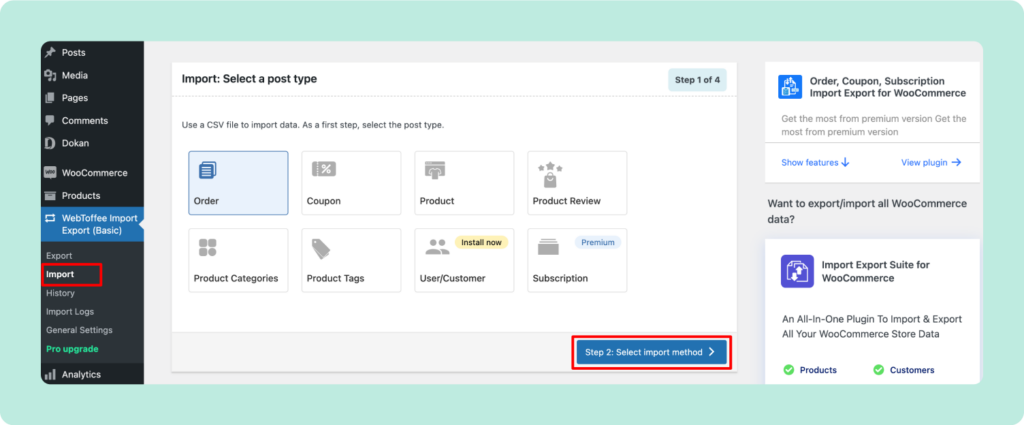
The plugin supports two methods for import.
- Quick import without any steps for mapping.
- Advanced import allows mapping and other advanced features.
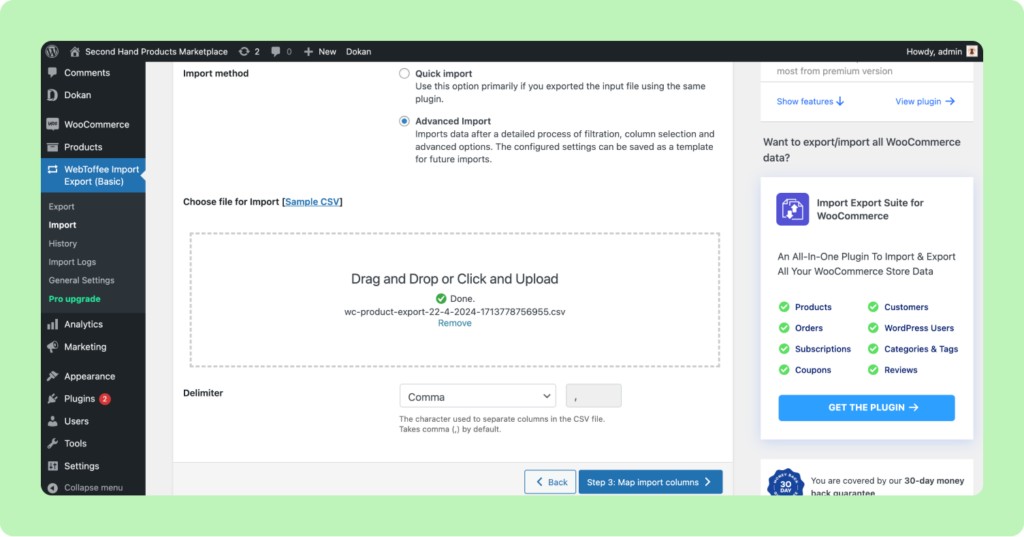
Checkmark Advanced Import and upload the CSV file you downloaded from your source store.
Once the file is uploaded, set the CSV delimiter and click Map Import Columns.
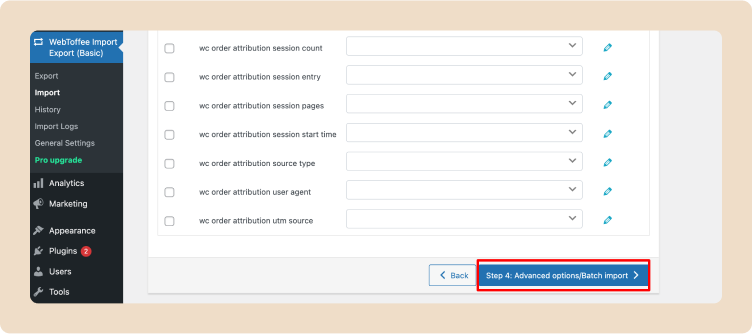
On the next screen, you’ll see a list of fields and the matching fields from your import file. If you see an empty field, you can choose a matching field for it in the next column.
If you are using product variations like sizes and colors, then make sure to click on the Attributes tab to match attribute fields.
However, if you are not using any products with variations or custom attributes, then you can use the default settings.
Click on the ‘Step 4: Advanced Options / Batch Import’ button to continue.
Configure the advanced options for import and configure batch import count. Set your preferences and click Import.
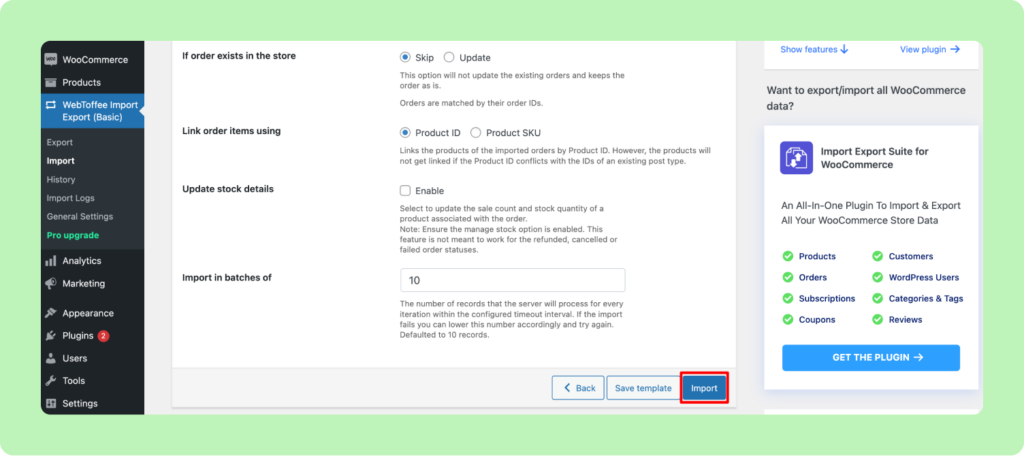
On successful mapping, you’ll see the following screen indicating your import has been completed successfully.

Export WooCommerce Products Using a Plugin
Go to WebToffee plugin -> Export and click on “Select an export method“.
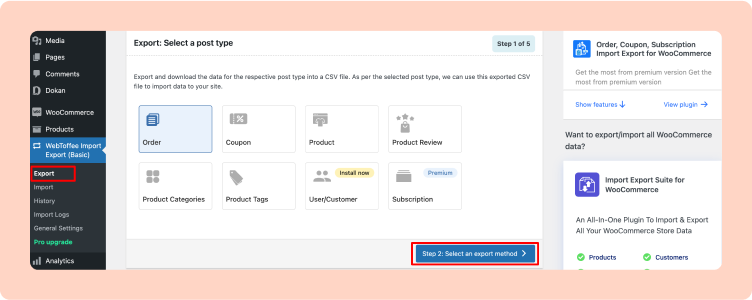
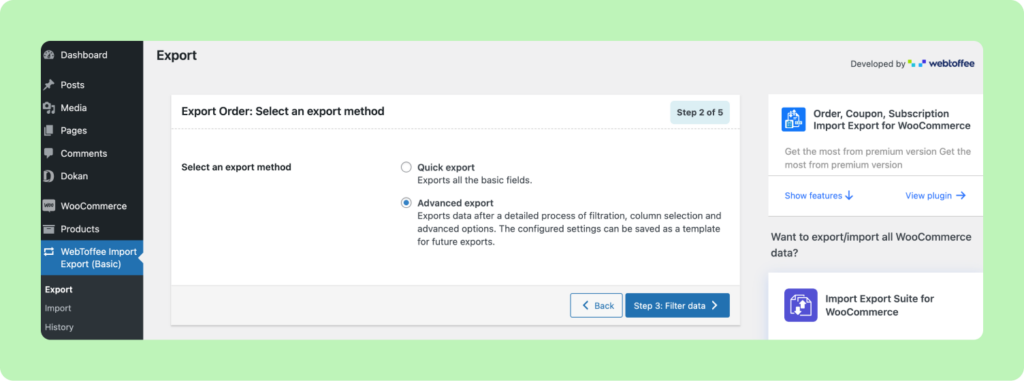
On the next screen, you need to select an export method. The default Quick Export method automatically selects all your products for export.
Optionally, you can also choose “Advanced Export“, which allows you to filter products by category, tag, and status.
You can also exclude individual products manually.
If you wish, you can filter the data and select which products you want to export. For example, the ‘Total number of products to export’ tells you the actual number of products you want to export.
The ‘Skip first n products’ is where you can specify the number of products to be skipped.
For example, enter 10 to skip the first 10 products from export. The Products category lets you filter by the specific names of the products you want to export, and the ‘Stock Status’ lets you choose based on the inventory status.
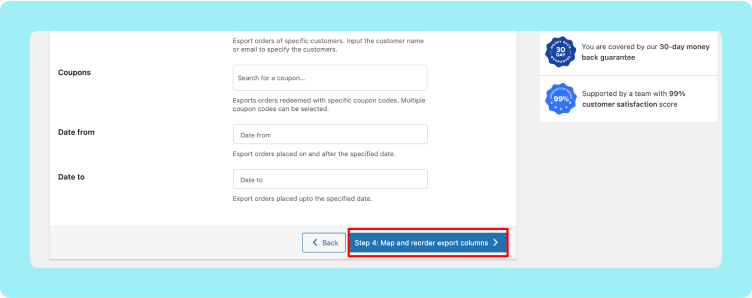
If you scroll down the page, you’ll have other options, such as:
- The products you wish to exclude
- Products in certain categories
- Products with specific tags
- And more
After completing all these configurations, click on the Map and reorder export columns button.
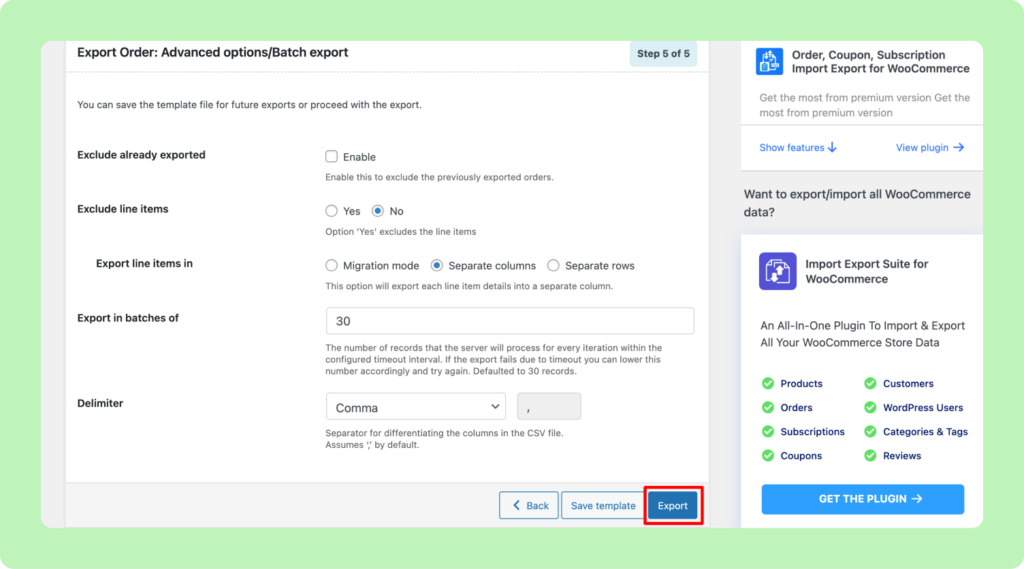
It will take you to a new interface. Here you need to do the mapping. We’re keeping it as it is. Then click on the Advanced options/Batch export button.
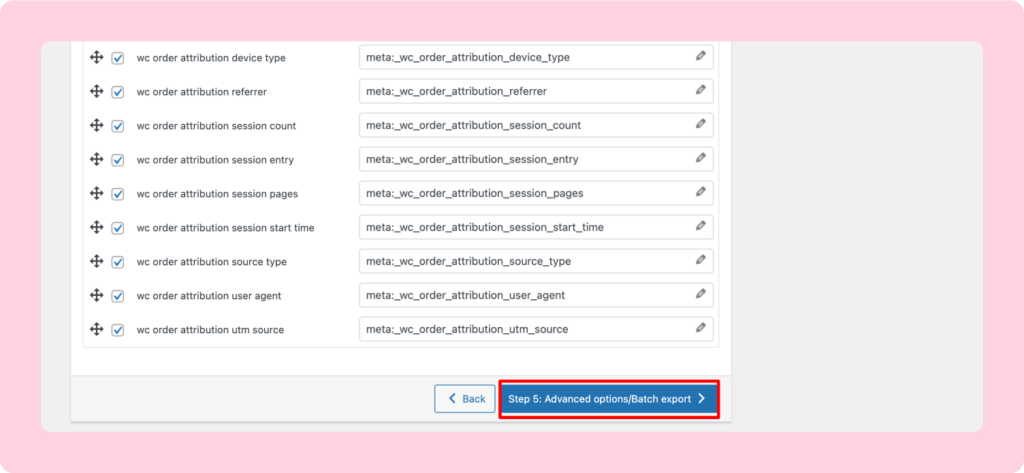
Now set the delimiter and the batch limit, and click Export.
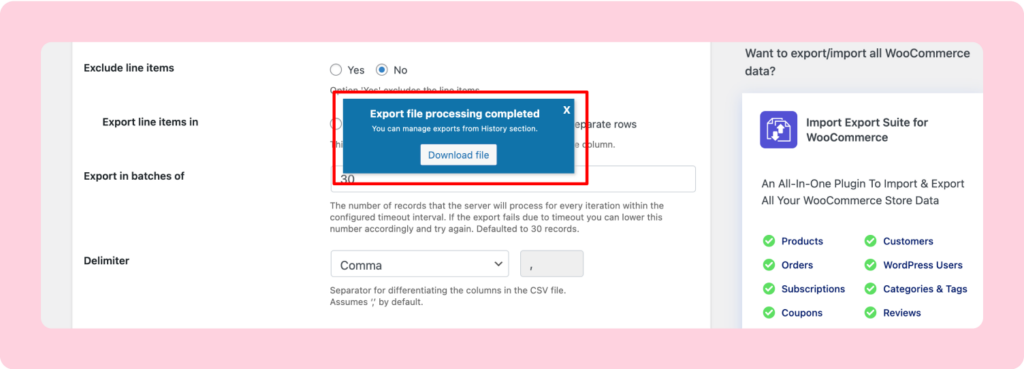
If everything goes right, you will get a success message like the following:
Bonus: How to Import and Export WooCommerce Products As a Dokan Plugin User
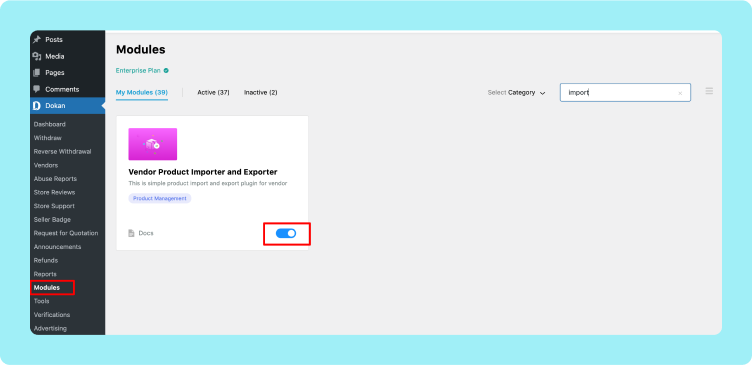
If you are a Dokan multivendor marketplace owner/admin and want to allow your vendors to easily export and import their products, you need to enable a Dokan module called – Vendor Product Importer and Exporter.
This is a premium module and it comes with the Dokan Business Package.
Now go to your WordPress dashboard -> Dokan -> Modules and enable the Vendor Product Importer and Exporter module.
Import WooCommerce Products As a Dokan Plugin User
If a vendor wants to import their WooCommerce products to a marketplace powered by Dokan Multivendor, they can do that without any complexity.
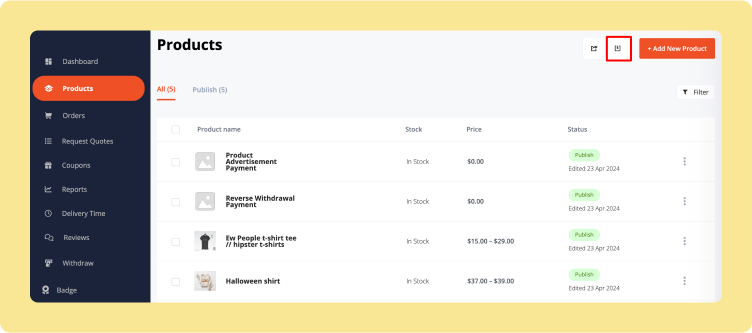
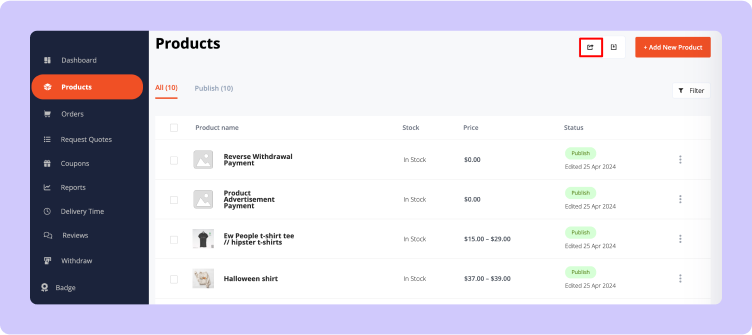
Vendors will have to visit their dashboard, click on the products menu, and hit the Import button at the top.
They will get a new importing wizard and it allows only CSV files. Now, select the CSV file containing all your products using the Choose File button. Then, click on Continue.
In the next step, you will need to map your column names with the field names. If you have imported from a WooCommerce store or another vendor store powered by Dokan, then you won’t have to do anything. It will automatically map fields. If not, then you have to choose manually.
After properly mapping all the fields, hit the Run Importer button. This will start the importing process.
When the process is completed, you will get a success message. Now, click on the view products button and you will find all your products imported into the store.
Please note that images of your product do not import this way. You have to manually upload them and keep their file names as they are.

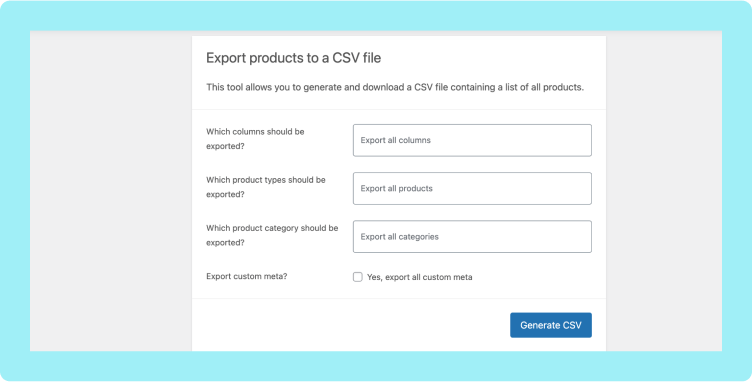
Export WooCommerce Products As a Dokan Plugin User
You as a vendor need to go to your vendor dashboard. Then you need to click on the export button to start exporting their products.
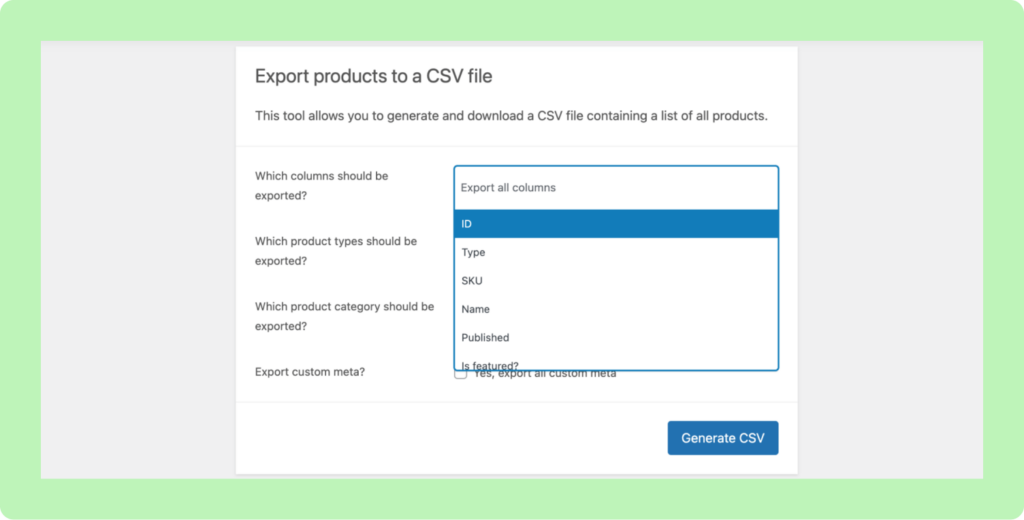
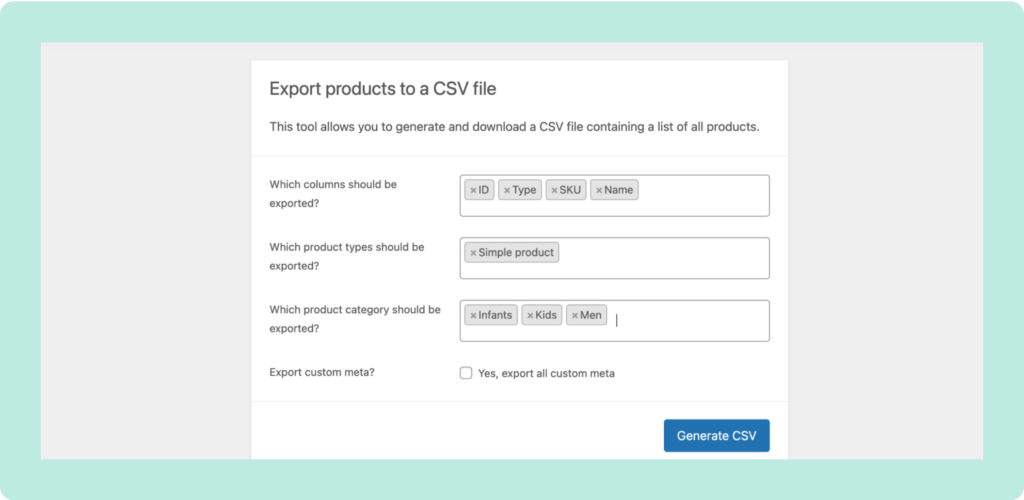
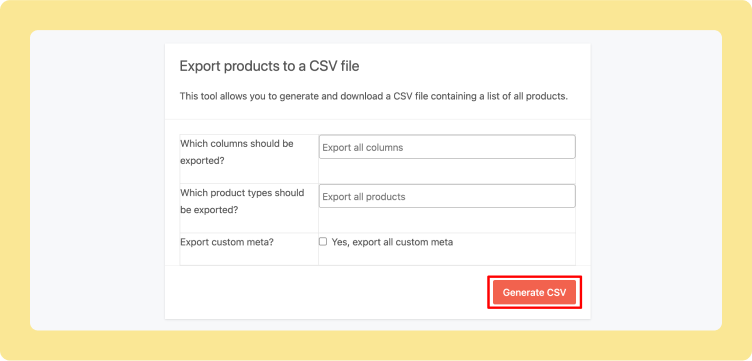
This tool will allow you to export your products in CSV format. You will have the option to select specific columns or all the columns for exporting. This is also applicable to products. If there are custom meta available for their products, you can export them too.
After selecting what to export, you have to click on the Generate CSV button. This will initiate the exporting process.
When the process is completed, you will get a CSV file. It will be downloaded automatically. The exporter does not export images, but it exports the image names. You will have to manually download the images and keep their names as they are.
That’s how you can export and import WooCommerce products as a Dokan Plugin user.

Import and Export WooCommerce Products – Ending Note
You are here which means now you know how to export and import WooCommerce products in both ways – using a plugin or using the WooCommerce default feature.
Did it seem complicated to you? No, right?
So, what are you waiting for? Start importing or exporting your eCommerce products by following this tutorial. Hopefully, you won’t face any difficulties.
However, if you face any complications, feel free to share them with us using the comment box below. We would love to help you out. Thank you!
Subscribe to
Dokan blog
We send weekly newsletters, no spam for sure!


Leave a Reply