
WooCommerce has made it easy for users to start an eCommerce store in a short period of time. The plugin is super flexible, cost-effective, and easy to handle. No wonder it has more than 5 million+ active installations to date. Also, figuring out how to set up WooCommerce in WordPress is easy if you are technically sound.
But, with all its features, payment processes, shipping settings, and more, configuring the whole plugin is somewhat daunting for beginners. After installing WooCommerce, they often get confused about what to do next. That’s when they hire individuals or developers to do the basic settings and end up spending more than required.
You will find about 1500+ available jobs on the freelance market like Upwork for WooCommerce site customization. Some of them are complex, but most of them are about basic WooCommerce settings.
Moreover, installing and configuring WooCommerce properly the first time around will save users a lot of time from troubleshooting down the road. Keeping them in mind, we have created this WooCommerce customization tutorial where we will go over the steps you need to take in order to launch your WooCommerce site after installing the plugin.
We will cover everything from setting up your site URL to adding important extensions along with some resources to grow your WooCommerce store. If you follow this guide you will become a WooCommerce expert yourself.
So without further ado, let’s get started.
WooCommerce Customization Tutorial: Things to Do After Installing The Plugin
Normally you will start by installing the WooCommerce plugin on your WordPress site. But this article is all about what to do after installing WooCommerce. So we are assuming you have already installed and activated the plugin on your site.
These are the steps you need to do after installing WooCommerce-
- Create and Assign the Necessary Pages
- Setup Your Store Title, Configure Site URL
- Configure Your Site’s Permalink Structure
- Setup Taxes
- Configure & Add Payment Methods
- Configure Shipping
- Setup Necessary Emails
- Upload Your Products
- Enable User Registration, Configure Account & Privacy Settings
- Create Coupons (Optional)
- Track Your Orders, Customers, Stock with Reports.
- Add Necessary Extensions
Let’s see them in detail.
Create and Assign the Necessary Pages
First and foremost, you need to make sure you have installed all the necessary pages for your WooCommerce site. Including,
- Cart page
- Checkout page
- My Account page
- Shop (product) page
- Privacy policy page
- Refund and Return policy page.
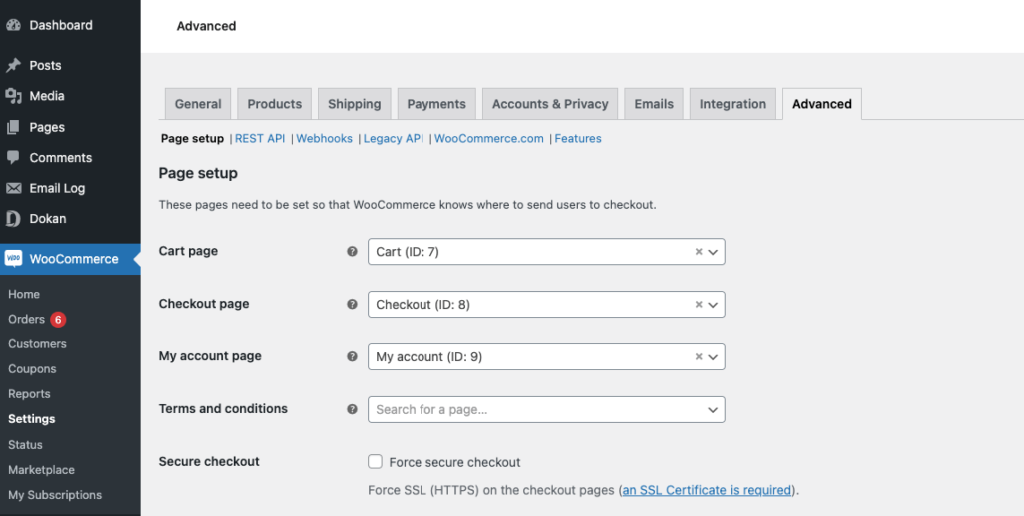
When you install WooCommerce, these pages are created automatically. You can use these default pages or you can customize them as well. In that case, if you make any other pages you have to assign them from the settings.
For that go to WooCommerce–> Settings–>Advanced. There click on the Page Setup option and assign your pages. Simply select your customized page from the drop-down menu and add that to the list.
Set Up Your Store Title & Configure Site URL
Your site title and tagline indicate to search engines what your website is all about. This is not a WooCommerce setting, it’s a WordPress setting.
As your eCommerce business is unique, your store title should reflect it. It’s easy to modify your site title and tagline on WordPress. All you need to do is navigate to WordPress Settings–> General. There set up your site/store title.
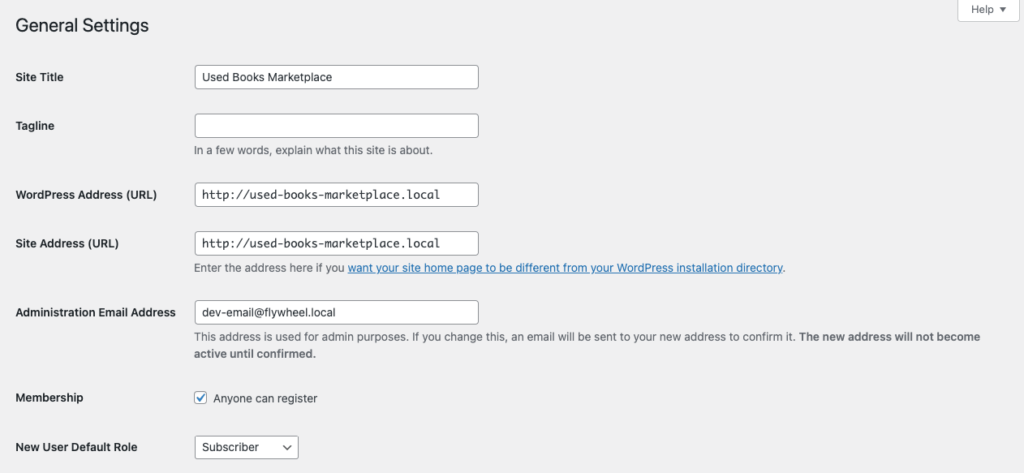
The “Site Title” is displayed to search engines and users as the name of your site. It also appears in various locations, such as the title bar of the browser as well as the admin bar of your WordPress Dashboard.
After that, you need to decide if you are going to use WWW or non-WWW for the site URL. There is not much difference between these variations. However, the best practice is to choose one initially and stick to it. If you change it from time to time, then it will create duplicate pages and make it harder for search engines to rank your pages. You will find the option again in Settings > General.
Configure Your Site’s Permalink Structure
Permalinks are representative of your website’s content. They tell search engines what your posts and pages are about and thus improve indexing and ranking. That is why their structure and format should be finalized from the get-go and they should be well thought out.
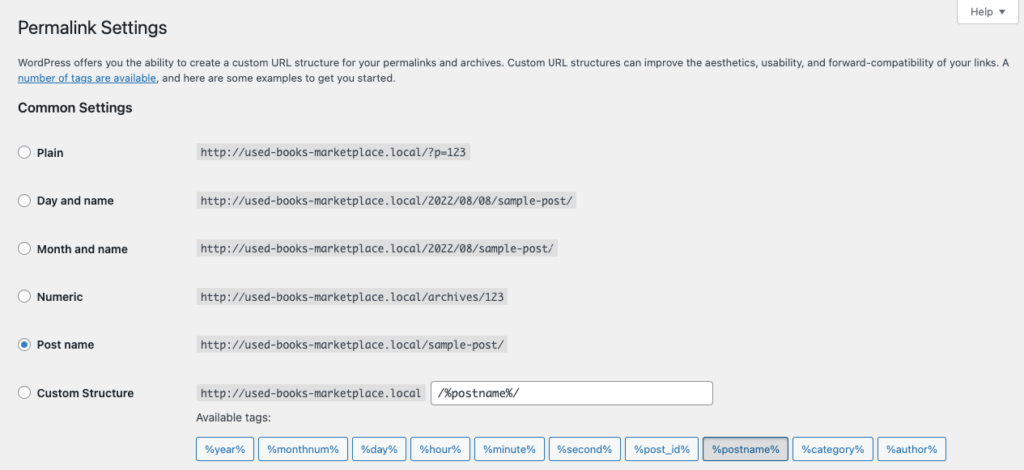
For your WooCommerce store, it is very important that you configure the permalink structure. By default, the WordPress permalink structure looks something like “yourdomain.com/?p=456”. But it is not ideal for Search Engine Optimization. An ideal permalink structure should like,
https://yoursite.com/shop/For that, you need to select the Post type from WordPress Settings–> Permalinks.
Setup Your Store’s Taxes
Next in this WooCommerce guide, you have to configure taxes. Go to WooCommerce–> Settings. There click on the Tax option. You can let WooCommerce know if the prices you enter for your products will include taxes or not.
In the latter case, you can have WooCommerce calculate tax rates for you, based on your store’s address, the customer’s shipping address, or the customer’s billing address.
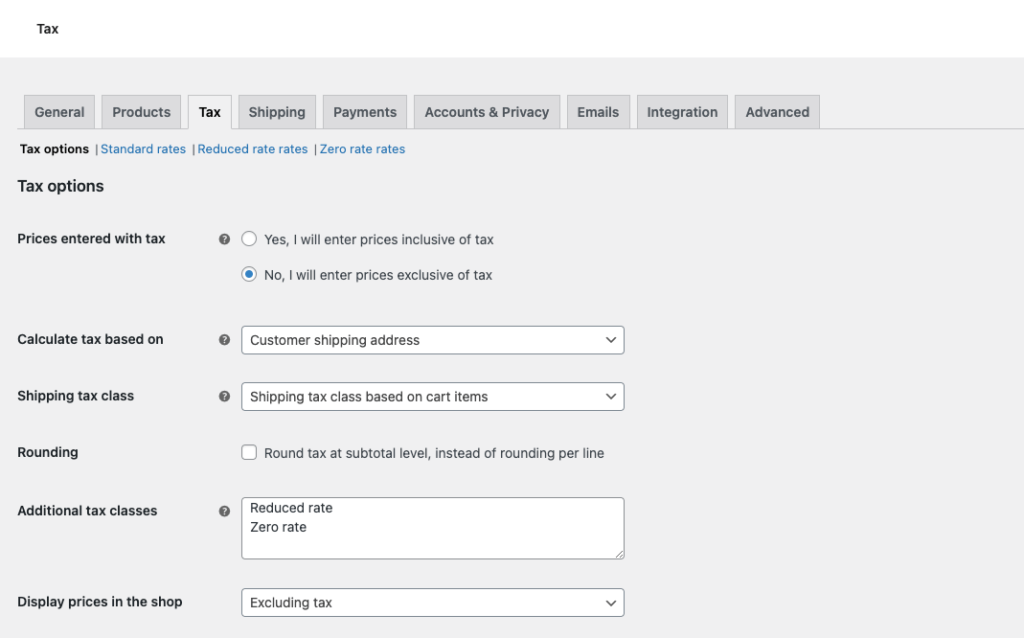
Also, you can determine how these taxes will be applied to the shipping costs. Lastly, customize the way prices and taxes are displayed on the front end and during the checkout process.
Configure & Add Payment Methods
When you were configuring the setup wizard, you would have found different payment methods. If you skipped the process, then you can add or exclude payment methods from the settings page.
Also, you will be able to customize the settings of adding different payment methods as well. You will find the payment options in WooCommerce Settings–> Payments.
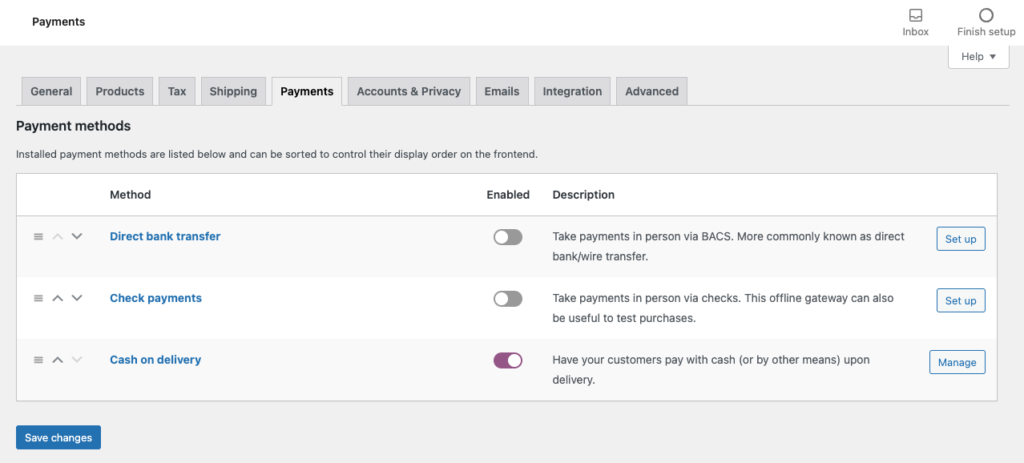
WooCommerce offers various payment gateways. Some of them are free and some of them are premium. You need to purchase extensions in order to use those premium payment gateways.
Configure Shipping
Now you need to set up your shipping zones. Go to WooCommerce Settings–> Shipping. There you can set shipping zones, and add shipping types as well. You can add flat-rate shipping, free shipping, and local pickup methods.

You can also customize how shipping is calculated, and choose what the default shipping destination will be. Restricting your store availability only to specific countries is also possible.
Set up Necessary Emails
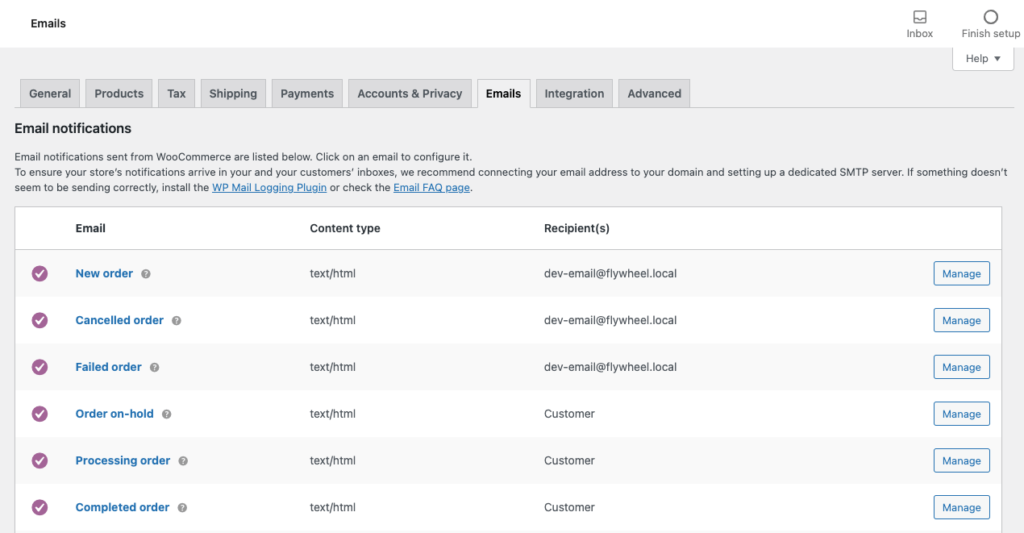
WooCommerce provides some default emails like New Order, Cancelled Order, Failed Order, and Order on hold. You can customize those emails to send emails as you want.
Go to WooCommerce Settings–> Emails. You will find all the email lists there. Click on the emails to customize them.
Upload & Publish Your Products
Next, you need to upload your products and publish them to start selling. To upload a product, go to your WordPress dashboard and navigate to Products–> Add New.
You need to add your product types (physical or digital), write product descriptions, and lastly add your product prices.
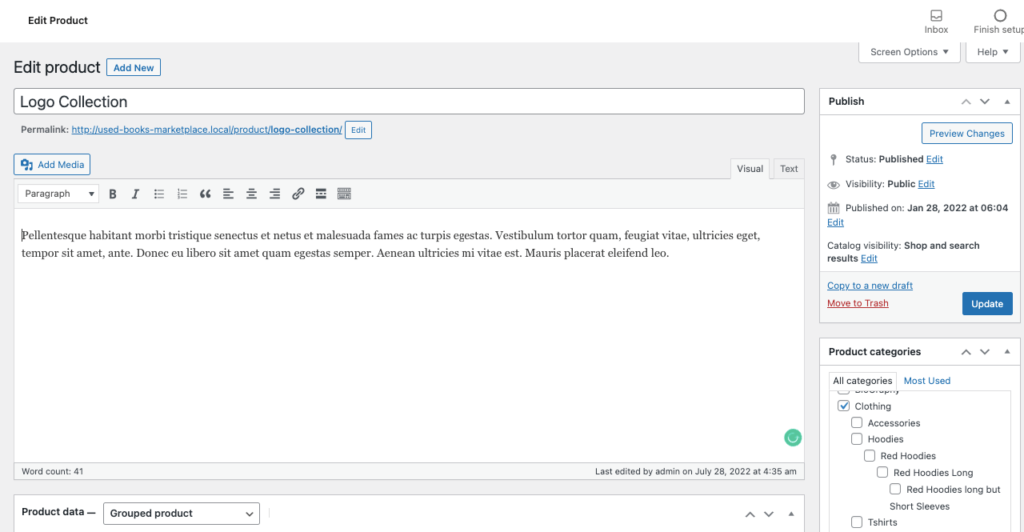
After that, you can publish your products and start selling from your WooCommerce store.
Enable User Registration & Configure Account and Privacy Settings
You can decide whether or not customers need to register during checkout if customers can place orders as guests. When you visit WooCommerce Settings–> Emails, under the Guest checkout and Account creation sections, you can determine these options.
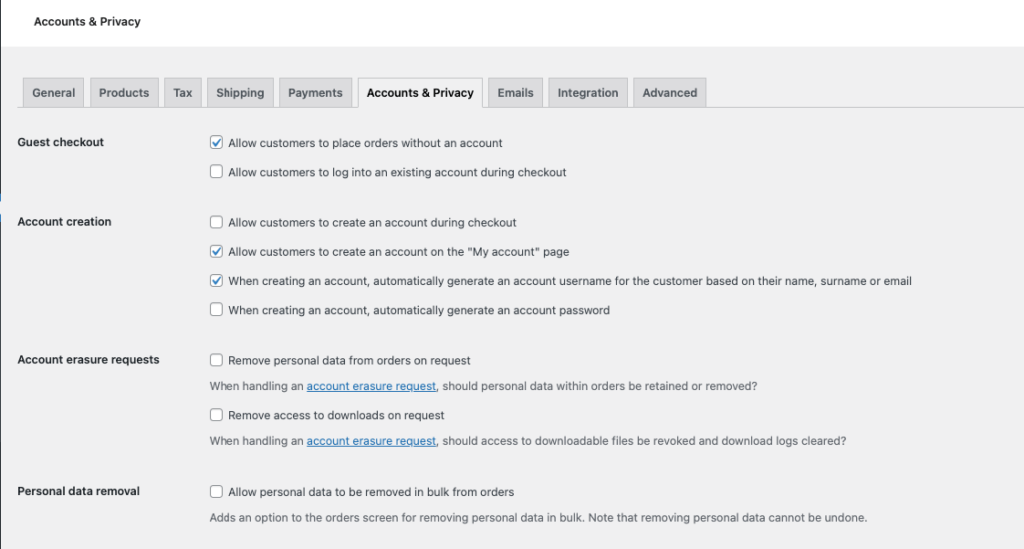
You can even provide them with automatically-generated usernames and passwords, in order to speed up the registration process.
Track Your Orders, Customers, and Stock with Reports
WooCommerce offers a powerful reports section. You can view charts and graphs of your sales, orders, and shipping costs over different time periods.
Each graph can be limited to the sales of a particular product, category, or coupon. In the Customers sub-tab, you can also view your customer acquisition over the same time periods.
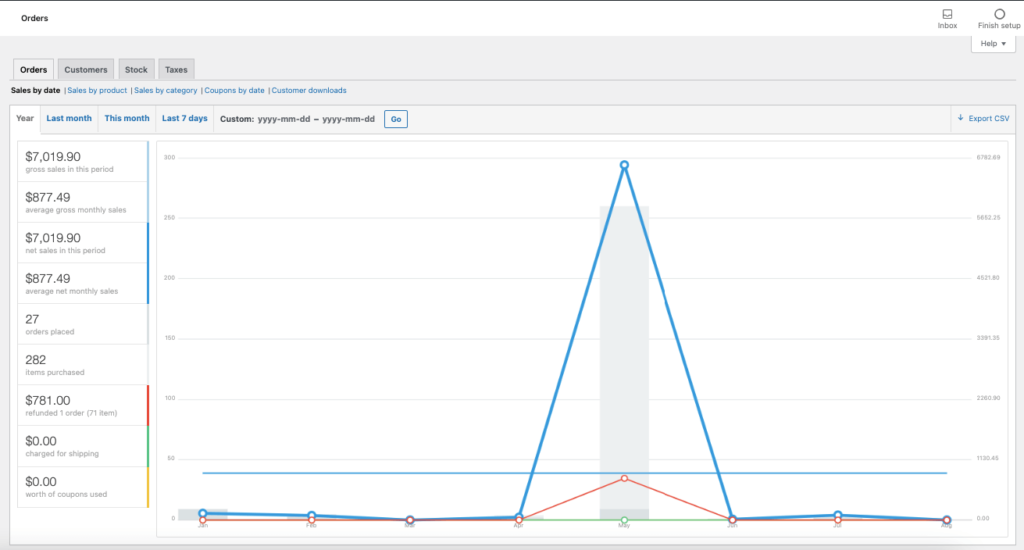
Last but not least, you’ll be able to review your low-in-stock, out-of-stock, and most-stocked products in the Stock sub-tab. All of this data can be exported as a CSV sheet if needed.
Create Coupons (Optional)
If you wish to offer discounts and coupons, then you can use this section to create them. In the Coupon tab, you can select Create your first coupon to access the editing screen. You can add a coupon code description, the type of coupon (percentage discount, fixed cart discount, or fixed product discount), its value, free shipping options, and its expiry date.
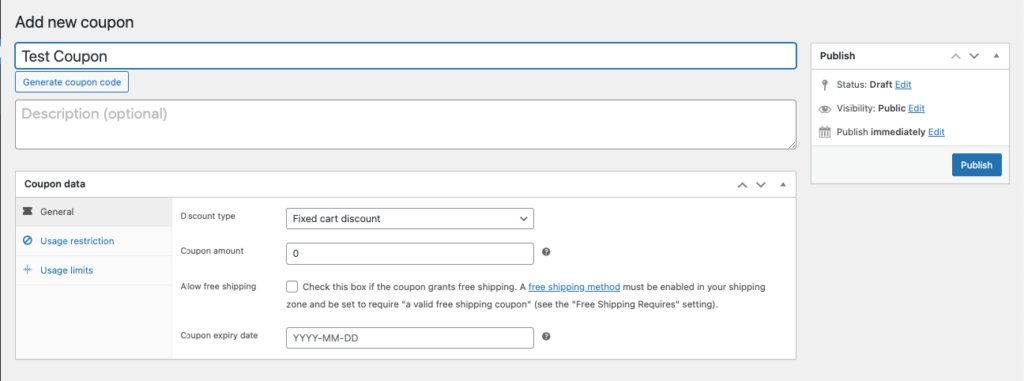
Under Usage Restrictions, you can set a minimum spend the customer has to make in order to validate the coupon. You can also check the box for Individual use only if you don’t want customers to use the coupon in conjunction with other offers. In the usage tab, enables you to determine how many times the coupon can be used, both overall and per customer.
Add Necessary Extensions
You are almost done with this WooCommerce customization tutorial. Now you need to add the top and necessary WooCommerce extensions in order to further enhance your WooCommerce store’s scalability. Here are the extensions you need,
- WooCommerce PDF Invoices & Packing Slips to automatically attach invoices to certain emails
- WooCommerce multilingual to translate all components of your WooCoomerce store
- WooCommerce menu cart to add shopping cart icons to your store
- Dokan to turn your single vendor store into a multivendor marketplace where sellers can sign to sell their products just like Amazon, eBay, etc
- Product Addons for WooCommerce to add variations to your products
- Yoast SEO to add Search Engine Optimization functionality to your WooCommerce store.
These are the extensions you will need after installing and configuring WooCommerce on your WordPress site.
Some Extra Steps You Need to Do After Installing WooCommerce:
- Update your timezone to avoid a scheduling conflict
- Remove the sample contents like “Hello World” to avoid duplication
- Configure the discussion settings to decide what you want to collect and show below your posts and pages
- Complete your user profile
- Set up a contact form so that customers can easily reach you. You will find a contact form plugin for free
- Remove all the unused plugins and themes
- Install SEO plugins. These plugins will help you with basic SEO settings for your WooCommerce store.
If you follow these steps to the letter, then hopefully you will become successful in launching your WooCommerce store. But what are the next steps after launching your WooCommerce store? That is exactly what we are going to discuss in the next section.
5+ Checklists On How to Grow Your WooCommerce Store
Now you know what to do after installing WooCommerce and you have launched your eCommerce store successfully. But your work is not over. You can’t just sit idly after launching your eCommerce store and think that everything will fall into place automatically. No!
You need to work constantly in order for your online store to grow and increase your product sales. You need to follow the below tips in order to increase your profit margin.
- Optimize Product Images, Create Videos
- Make Your Checkout Process Smooth
- Write a Concise Product Description
- Use Email Marketing
- Add Coupons and Discounts
- Provide a Great Refund Policy
- Focus on Analytics.
Let’s discuss them in detail.
Optimize Product Images, Create Videos if Necessary
The first tip to grow your WooCommerce store is you have to optimize your product images. It is a very important as optimized images also affect the performance of your website.
The main part of your eCommerce store is your products. Optimized product images help customers engage and motivate them to buy from your online shop. But in the case of optimization, you need to take care of two things. Your images have to have lowered images but maintain the quality. A minimum of 1000 pixels is considered the ideal size for WooCommerce product images.
Customers’ first interaction with your products has to be smooth, fast, and not annoying. In fact, a 0.1s improvement in page loading speed can improve your conversions by 8.4%. You can use tools like Smush image or Tinypng to get your job done.
Additionally, you can create videos for your product as well. It will not only let your audience understand your product better, but you will also get the chance to describe the different aspects of your products. And when users understand your product better, it will surely increase the chance of a conversion.
94% of marketers say that videos have helped improve the understanding of their product or service.
So, optimized product images along with a descriptive video can bring your WooCommerce store a lot of benefits.
Make Your Checkout Process Smooth
The checkout page is where customers have their last interaction with your store. And it is the most important part. Customers can either complete the purchase or abandon the cart. It is crucial that you get your checkout page right in order to get your conversion rate up.
Because a reduction in abandoned carts means an increase in sales and an improvement in your revenue. To make your checkout page optimized,
- Reduce the number of steps as much as possible and create a simple checkout system
- Offer different shipping options and be clear about the shipping charges
- Offer every possible billing option so that customers from different locations can purchase from your store
- Keep the checkout form simple and only ask for information that you really need.
Write a Concise Product Description
Ok, that could have been part of the first point where we could have just said to write a decent product description. But this is also an important part of your WooCommerce store growth.
You need to write a clear and concise product description. You need to get this right when you are learning how to setup WooCommerce in WordPress. You need to be very balanced when writing product descriptions. Don’t write something like this,
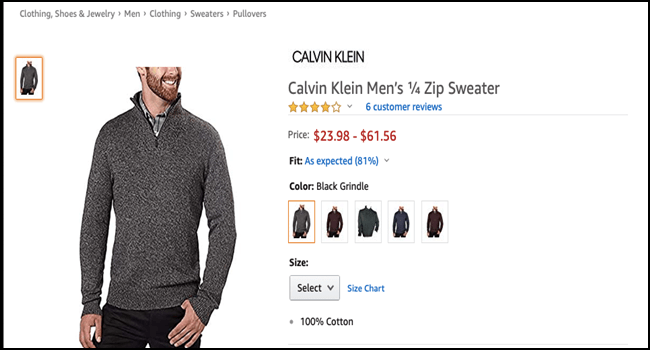
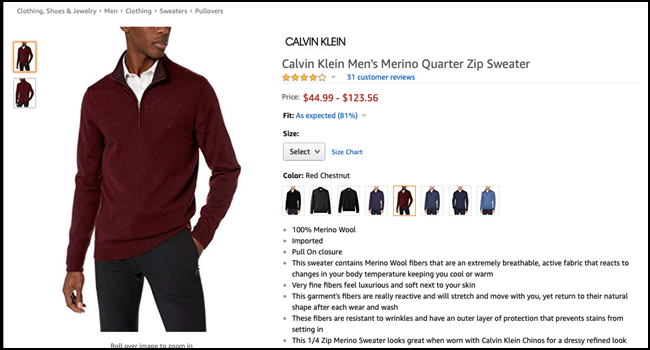
What is the product is all about? What materials have been used to make this product? Why would customers buy having no idea about its material, dimensions, and more? Also, it is not appropriate for eCommerce SEO as well. Customers won’t search for “Calvin Klein Men’s 1/4 Zip Sweater”, instead they can search for “men’s grey full-sleeves sweater” or something similar to that.
Here is a good example of a concise and perfect product description,
Leverage Email Marketing
Well, if you play your cards right and handle your emails correctly, then email marketing can become a winning strategy for eCommerce store owners. However, it is a necessity as well.
As an eCommerce store owner, you need to send welcome emails, transactional emails, cart recovery emails, reminders, and promotional emails. You can easily do that using the WooCommerce default email settings or using some of the popular WooCommerce extensions as well.
However, to maintain your emails, you can use a popular solution like weMail. It is one of the most effective email marketing solutions and will help you create email marketing campaigns for your WooCommerce store automatically. Also, this solution is far cheaper than other players in the market and it will approximately save you about $500.
Add Coupons and Discounts
This is also a great way to create awareness of your WooCommerce and increase sales. By offering coupons and discounts you can win over the customers who were on the fence as to whether to buy your products or not because of the price.
Discounts work well to get both existing and new customers to buy your products without abandoning carts. And as you can see from the WooCommerce configuring part, you can create custom coupons through WooCommerce. You can send those coupons through newsletters and increase the chances of sales.
Provide a Great Refund Policy
You have to be very clear about your refund policy. A great refund and return policy will help customers feel relief while making the purchase. Not only that but having a clear and concise refund policy will confirm the quality of your products and build trust between your customers.
It also ensures after-sales customer satisfaction. Because customers can purchase with the knowledge that even if they make any mistakes during the purchase they won’t face any problems. This will surely have a positive impact on your store and also provide a great customer experience.
Focus on Analytics
Last but not least, focus on your store analytics. We already said that you should attach Google Analytics to your WooCommerce store which will help you keep track of the activities of your store. If you follow the data, it will help you identify the possible trends in your audience’s behavior.
Google Analytics helps you dive deep into your store’s performance and audience behavior. There are several plugins that can help you get all the data on WordPress directly. This analytics dashboard on your WooCommerce platform provides you with the metrics you need to track your WooCommerce store growth.
So, these are the tips you need to follow in order to see your WooCommerce store grow and make you a handsome profit.
FAQ(s)
WooCommerce after installation not working?
First, try to find out if your WooCommerce installation is complete or not. If not, try deleting the plugin from /wp-content/plugins folder. Cross-check if there are duplicate folders like WooCommerce-old or WooCommerce1 etc under, and reconfirm if deleting them and trying to install WooCommerce from Dashboard > Plugins > Add new
How to change WooCommerce language after installation?
Go to Settings → General in your WordPress dashboard. Find the Site Language drop-down. Select the language that you want to use in your WooCommerce dashboard. Save your changes.
500 error after installing WooCommerce?
Go to your WordPress dashboard and navigate to Plugins–> Add New. Try to deactivate all the plugins one by one and see if the issue gets resolved or not.
GoDaddy error 500 after installing WooCommerce?
First, disable your .htaccess file. Then increase your memory limit. After that disable all your plugins. Lastly re-upload your WordPress core files. This should fix the problem.
Launch Your WooCommerce Store the Right Way!
Hopefully, after reading this WooCommerce customization tutorial, you know what to do after installing WooCommerce and launching your eCommerce store the right way. When you are thinking of starting an eCommerce store with WooCommerce, then you should utilize your time and follow all the steps properly.
There are a lot of steps to setting up an online store. The advantage of using WooCommerce is that the steps become much simpler. We hope this WooCommerce tutorial helped you set up your store and launch your eCommerce store.
Subscribe to
Dokan blog
We send weekly newsletters, no spam for sure!


Leave a Reply