
When I first thought about starting an online marketplace, I felt completely overwhelmed. But when I started using Dokan, the whole journey became much smoother. It’s the most popular multi-vendor marketplace plugin for WordPress. It gives you everything you need to turn your WooCommerce store into a thriving marketplace where multiple vendors can sell their products.
Still, when I got started with Dokan, I had a lot of questions. How do I install it? What steps should I follow to set up my store? How do my vendors sign up and start selling? These are common concerns for beginners who want to launch their marketplace quickly but don’t know the exact process.
That’s why I decided to create this clear onboarding guide. In this post, I’ll walk you through my complete Dokan onboarding journey. We’ll cover everything from installing the plugin to completing the setup. Let’s get started!
Things I Learnt in This Journey
Before I dive into the details, I want to give you a quick overview of what I learned while going through the step-by-step Dokan onboarding journey. Let’s explore the step-by-step process that I followed to set up my marketplace.
The Dokan Onboarding Journey: Explained Step-by-Step
Dokan is one of the largest and most feature-rich plugins in WordPress. When I first explored it, I realized why it’s possible to create huge multi-vendor marketplaces with it. So, at the beginning, you might feel a little overwhelmed. But no worries!
In this section, I will explain my step-by-step onboarding experience that you can also follow to make your journey easier. Keep reading it to the end.
Step 01: Installation Process of Dokan
Dokan is a WooCommerce-based multivendor marketplace plugin. I had to install the WooCommerce plugin in advance. So, below are the plugins I needed to get started with the Dokan plugin:
Let’s see the process of how to get started with them.
# Install WooCommerce
I navigated to Plugins > Add Plugin, typed WooCommerce into the search box, and installed and activated it once it appeared.

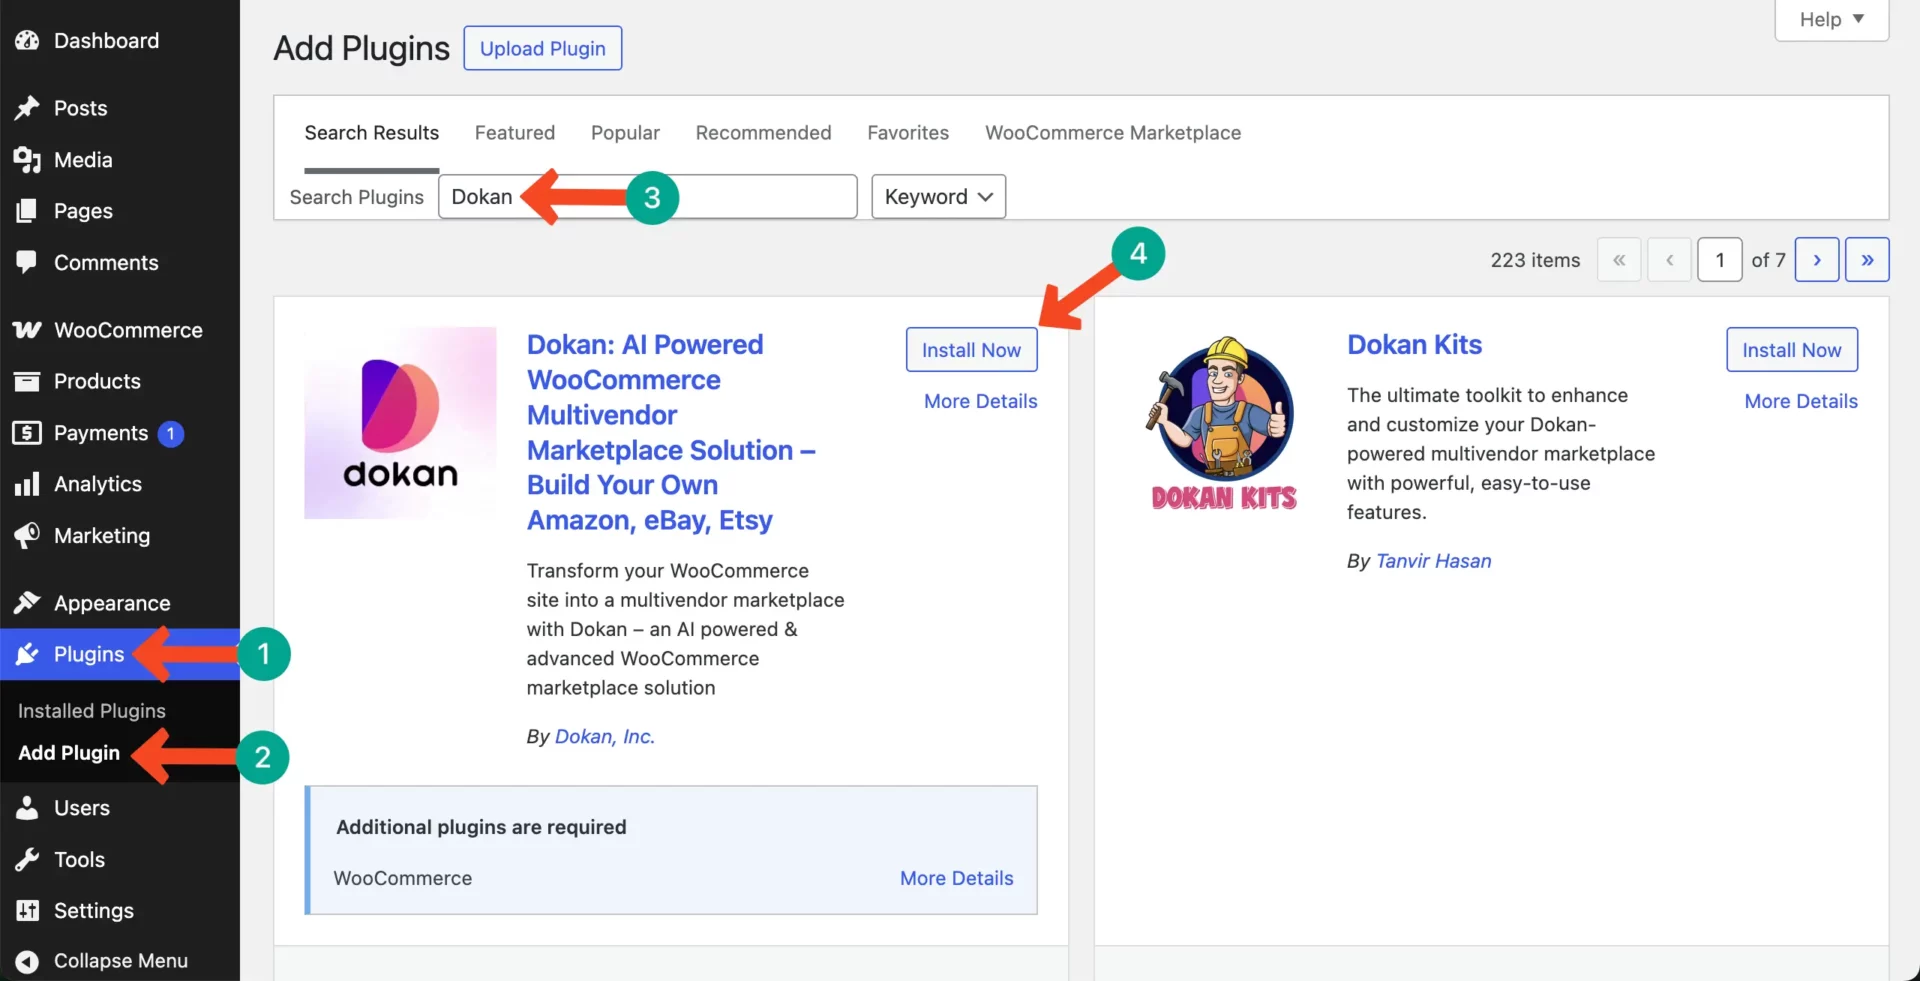
# Install Dokan Lite
In the same way, navigate again to Plugins > Add Plugin. Get the Dokan plugin by typing its name in the search box. Install and activate it.
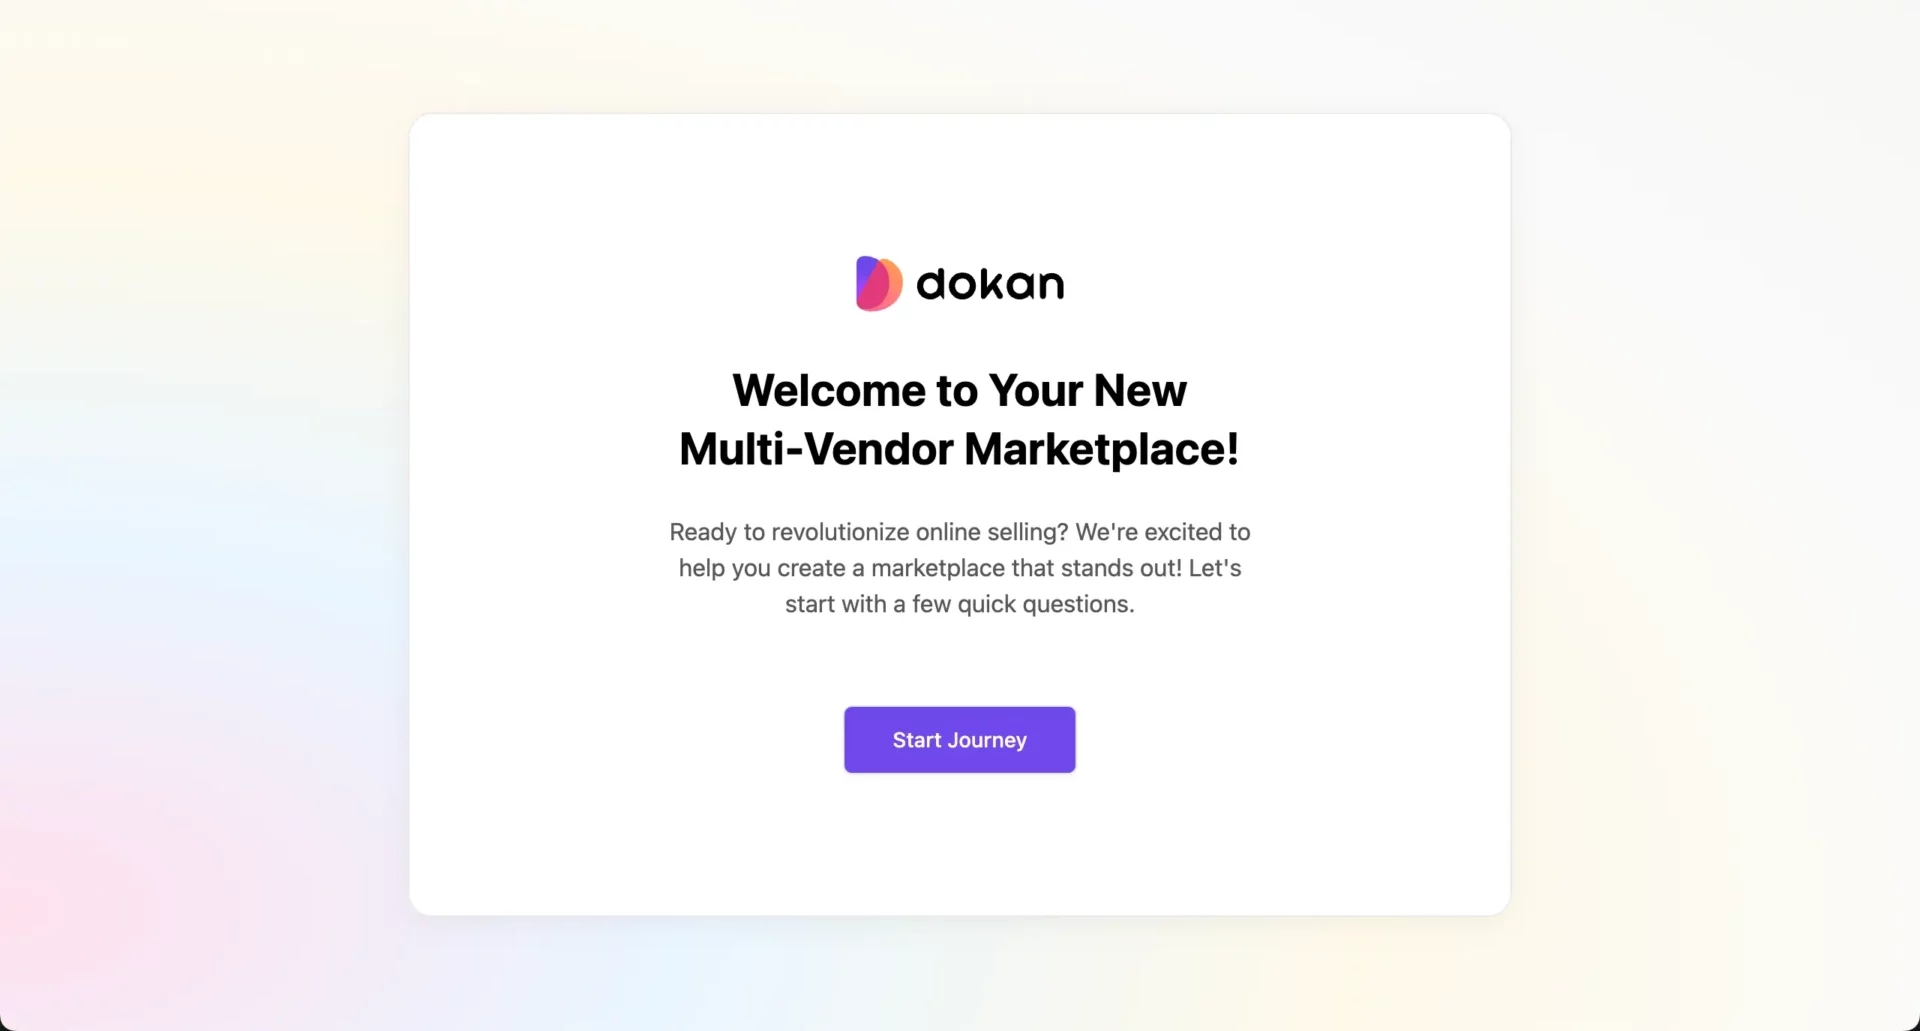
After installing the plugin, I was welcomed and asked to begin my journey with Dokan. I clicked the Start Journey button.
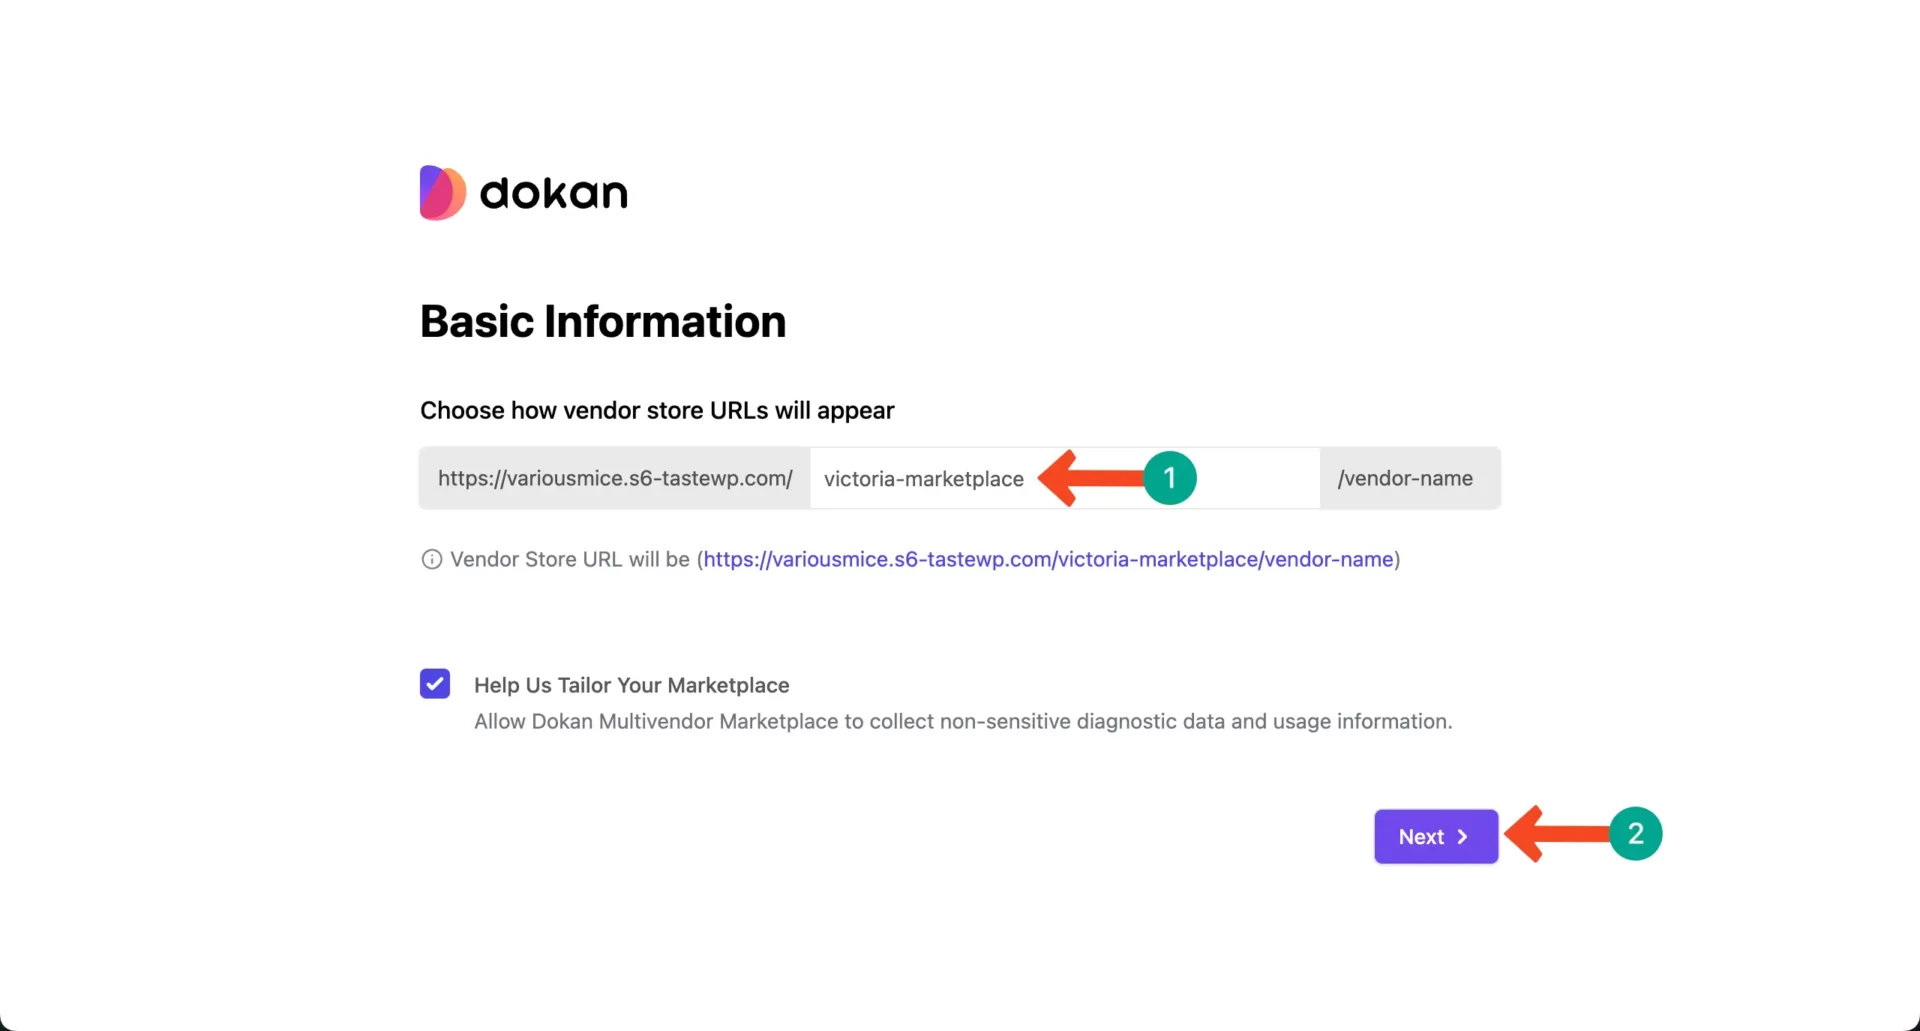
Write a slug for your marketplace and hit the Next button after that.
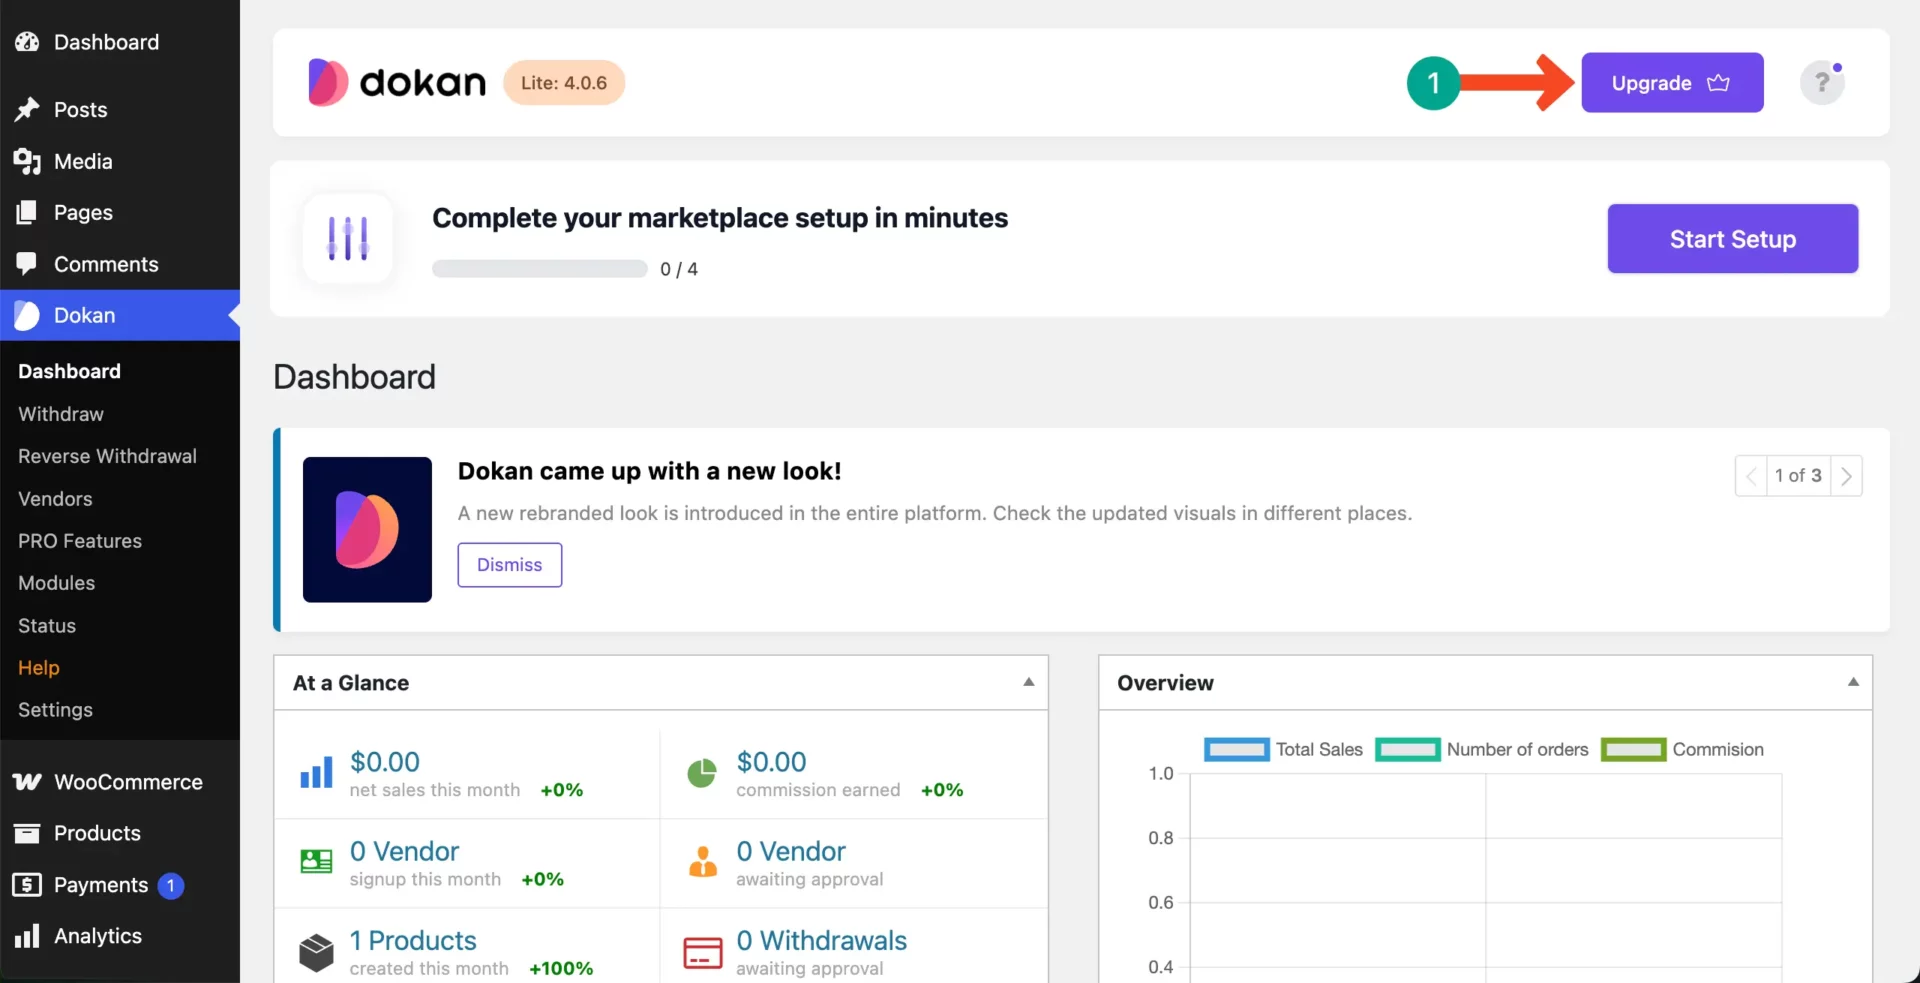
In the same way, completed the rest of the journey and came to the dashboard after that.
# Install Dokan Pro
With Dokan Lite, we can create only a basic marketplace, which is good only for practicing. But when it comes to doing business, making sales, and so many things that established marketplace platforms do, you must have the Dokan Pro plugin installed.
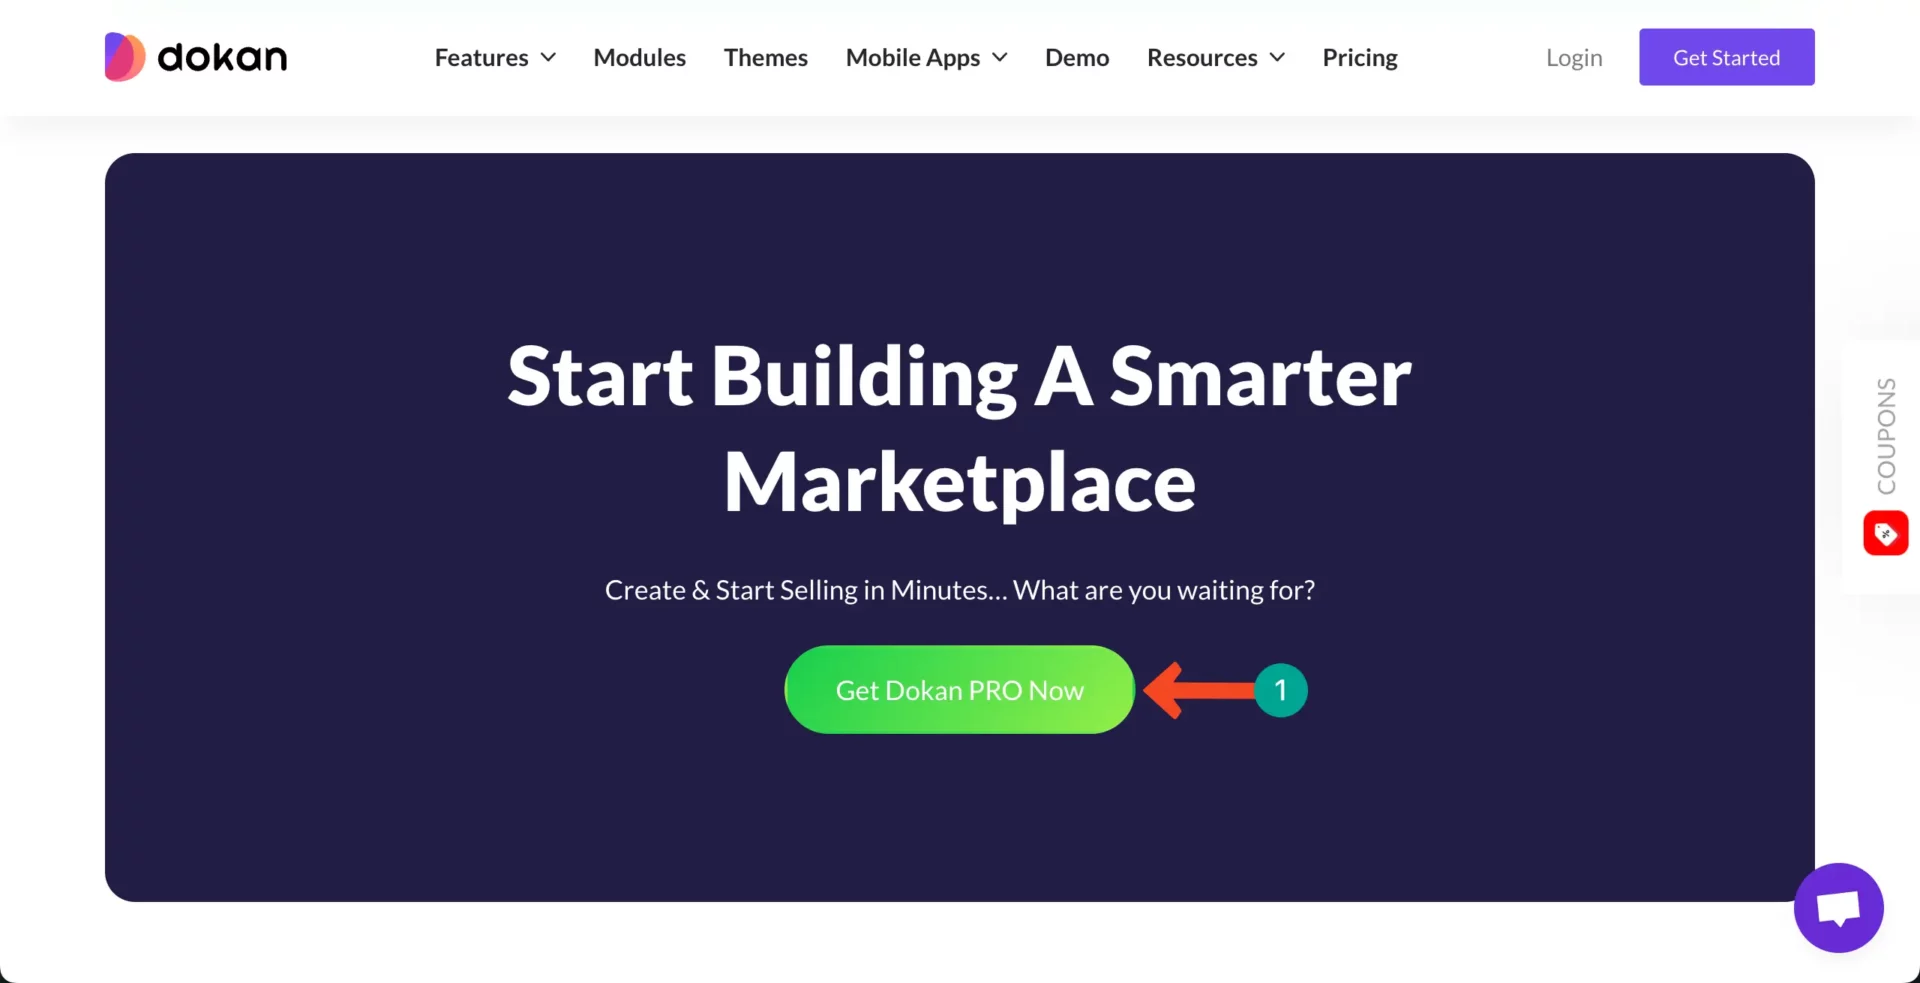
Once you come to the dashboard, you’ll see the Upgrade button in the top-right corner. Click the Upgrade button.
Once the Upgrade button is clicked, you will be taken to a new page where you’ll get the option to bye the Dokan Pro plugin.
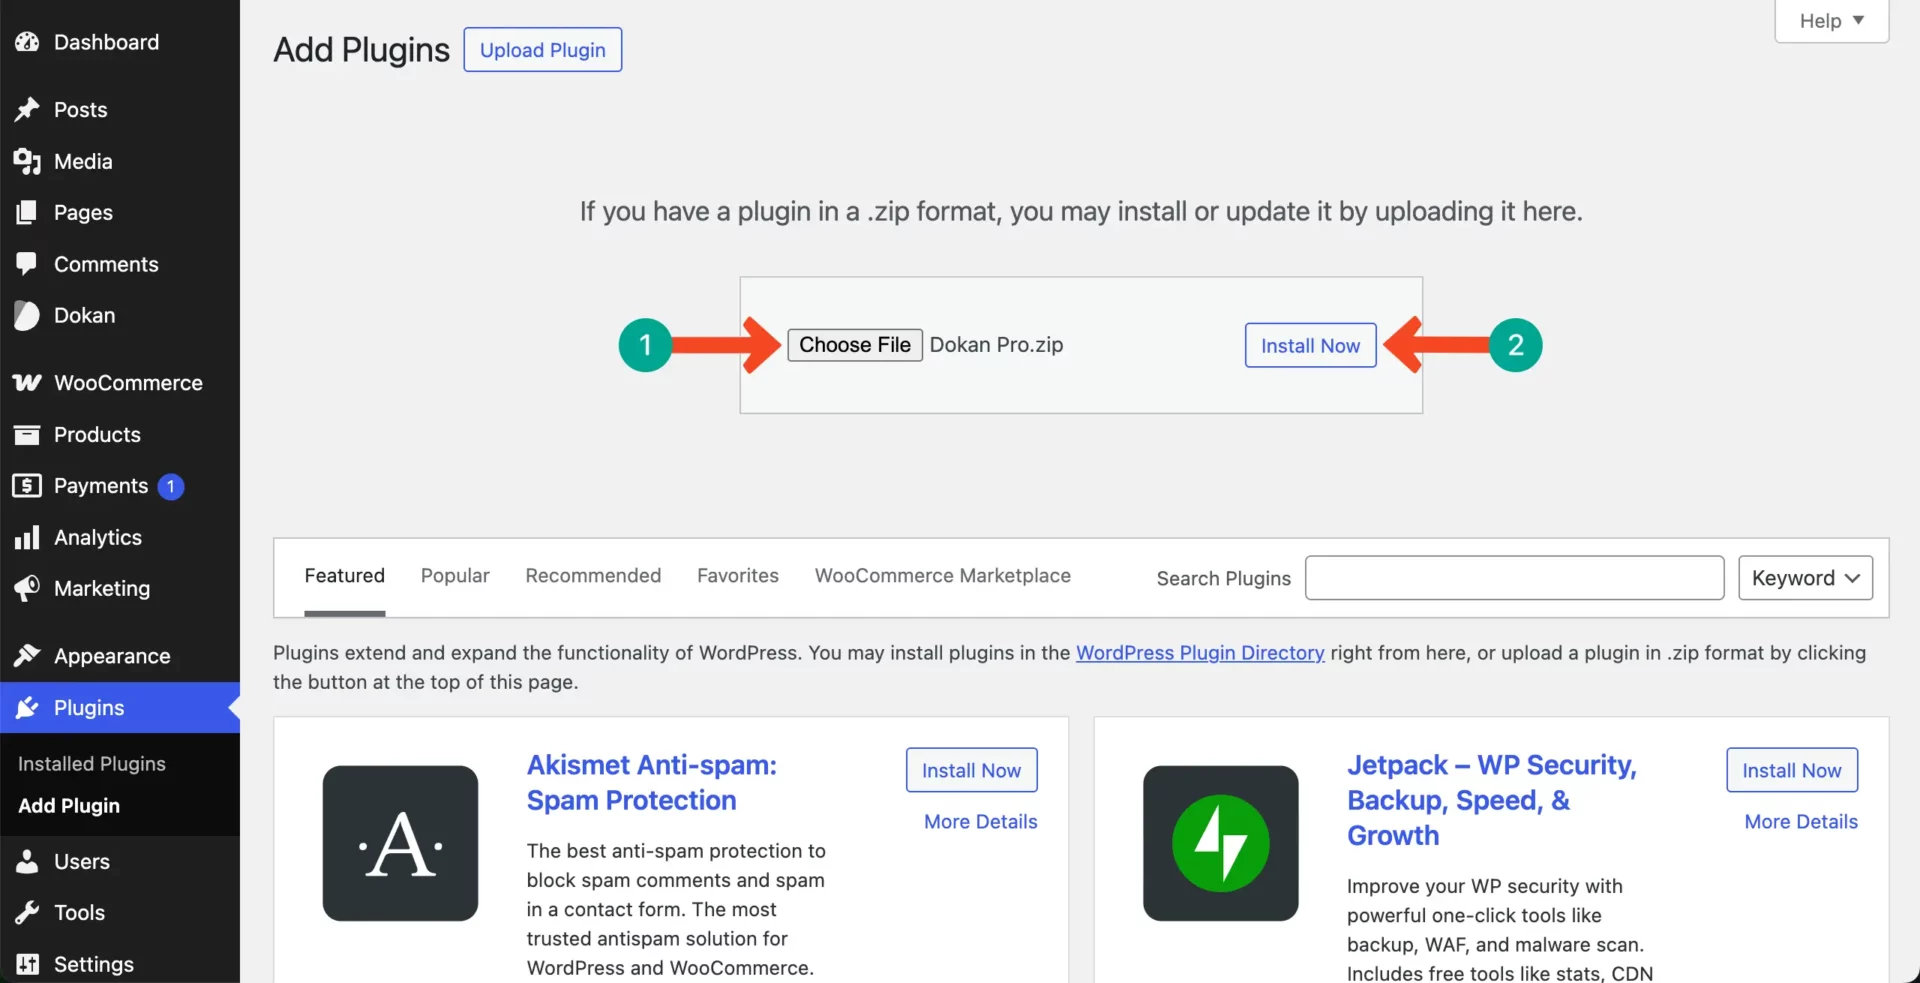
Once bought, the pro plugin will be sent to you by email with an activation code. Come to the plugin installation page again on your WordPress site.
Upload the Dokan Pro plugin and install it.
The ‘Activate Dokan Pro License‘ notification will appear on the plugin page after the tool is installed.
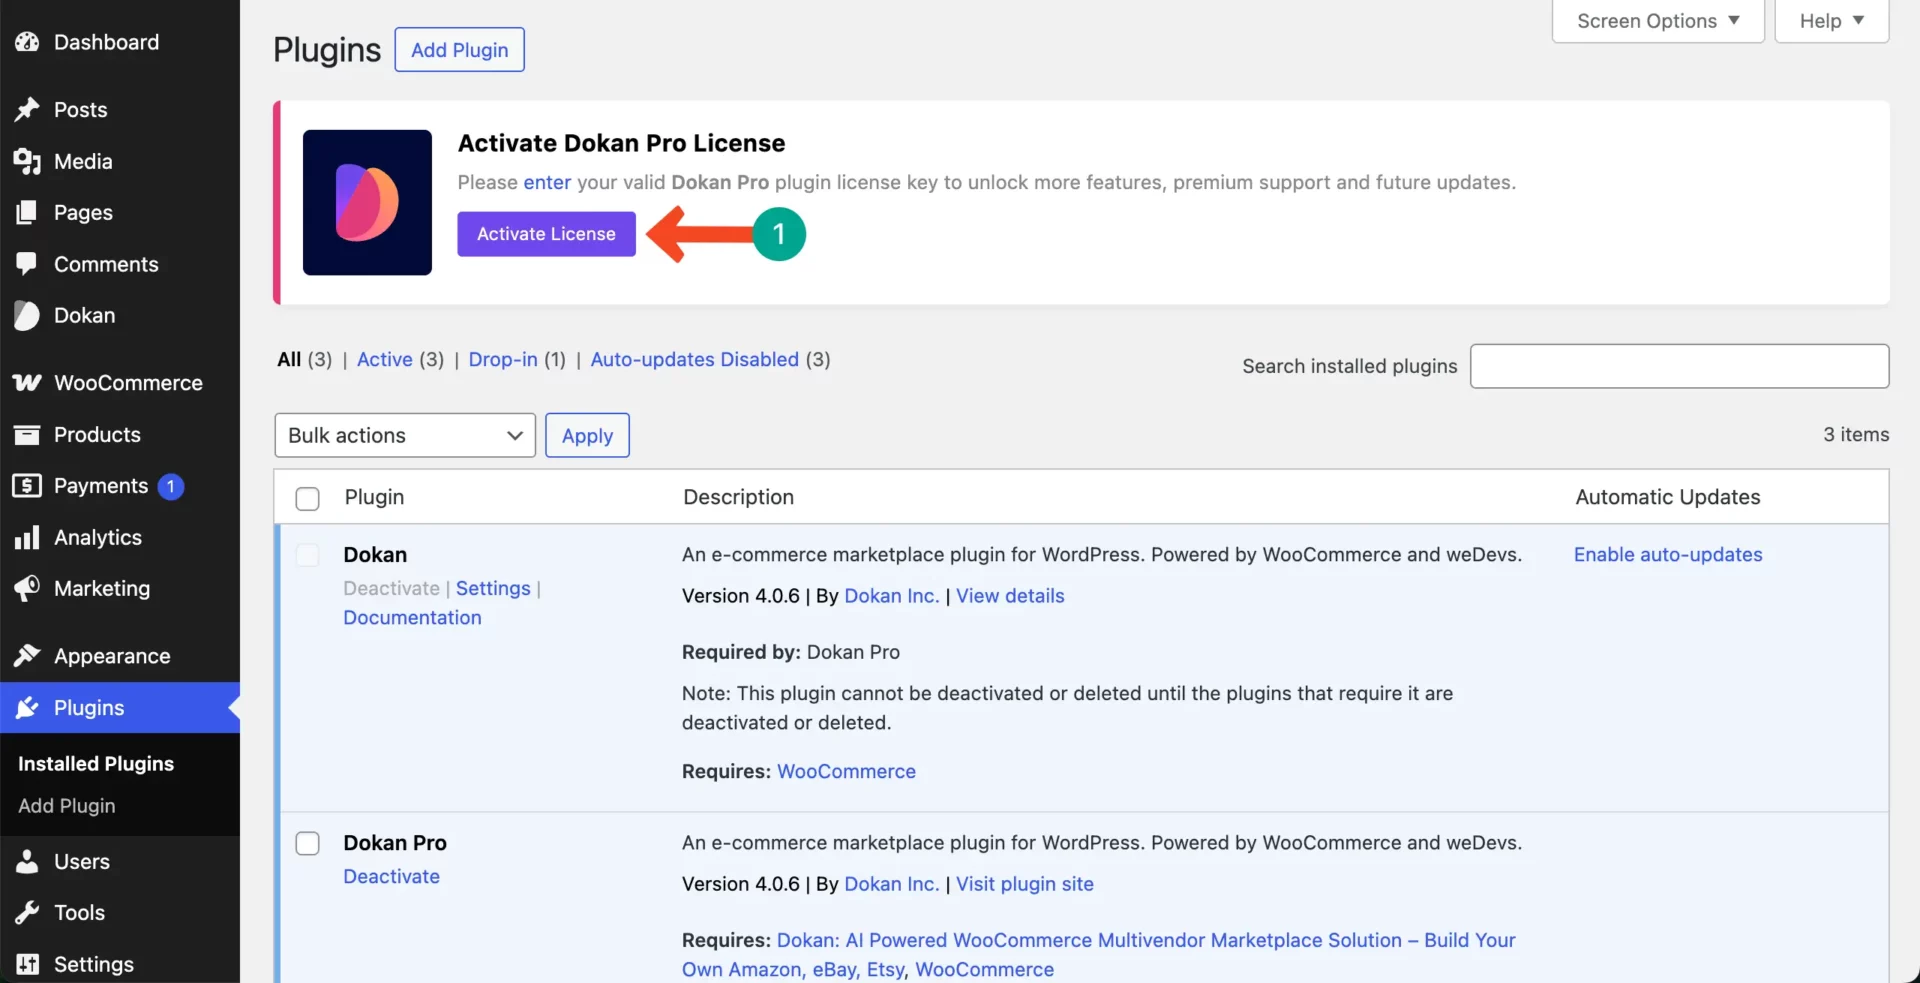
Thus, you can complete the installation process of the Dokan plugins.
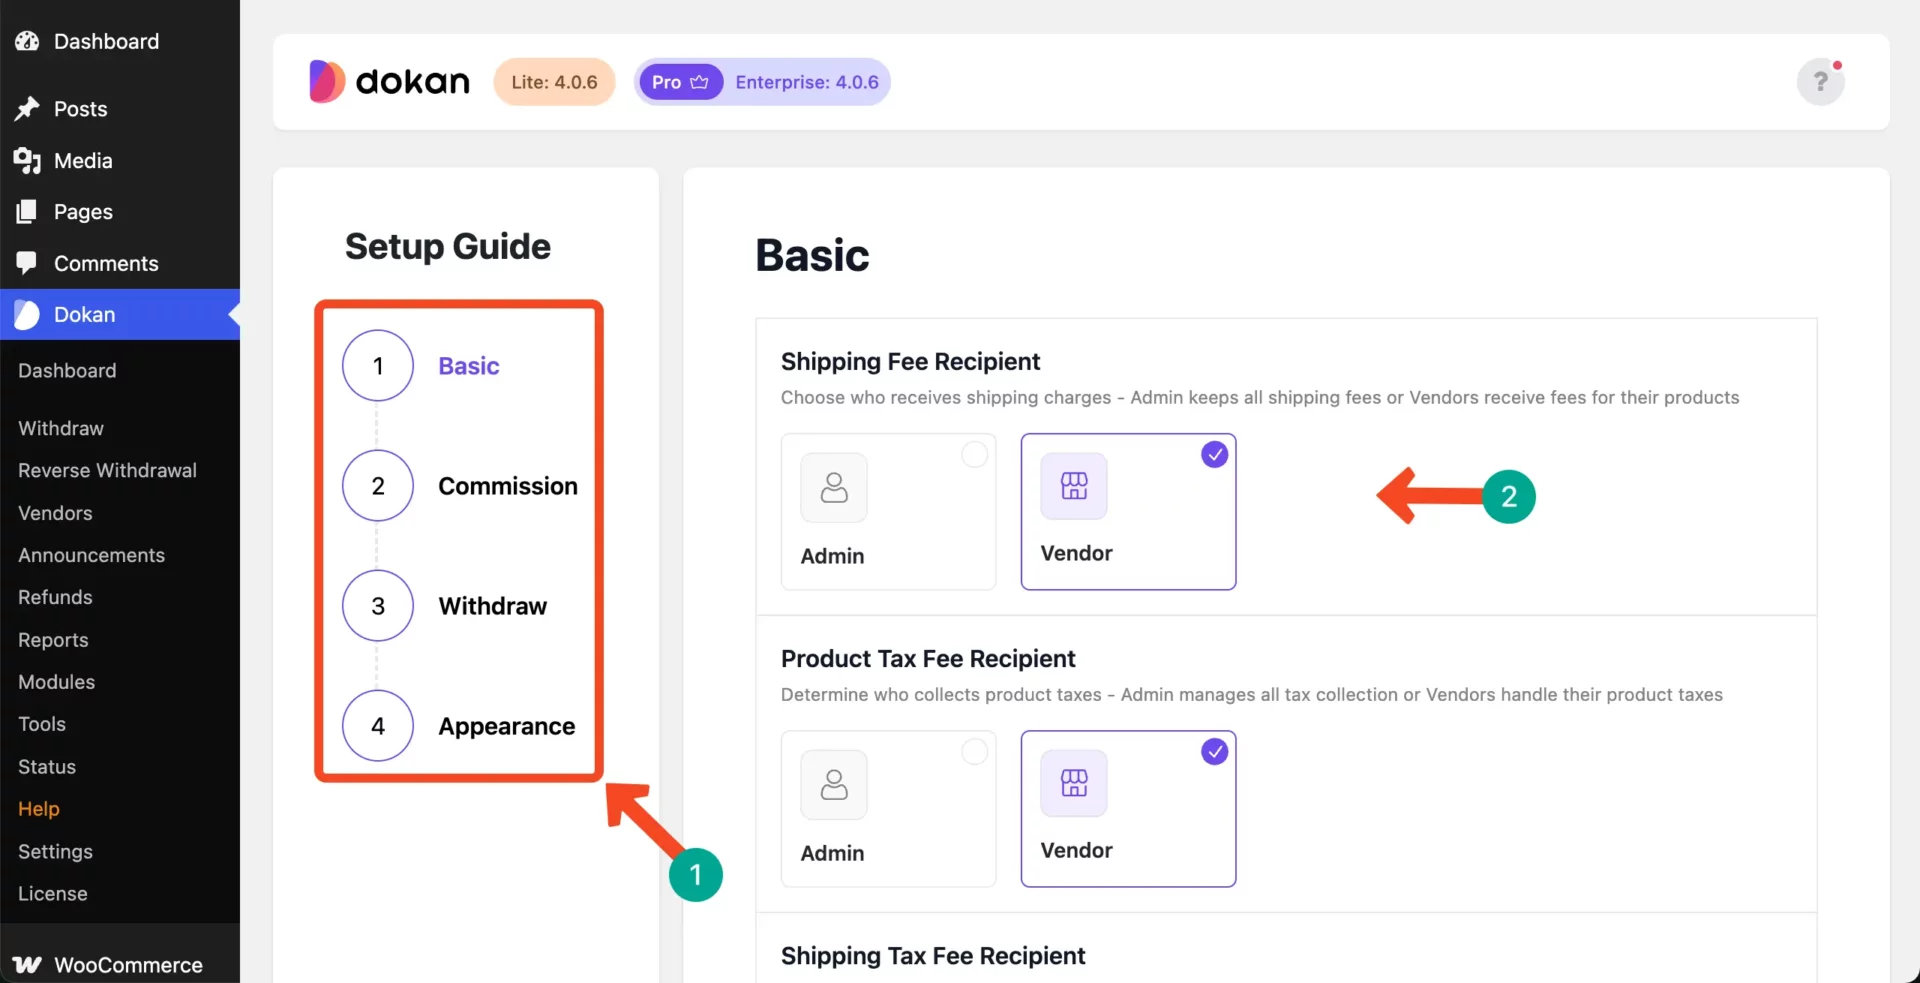
Once they are installed and activated, come to the dashboard again and click the Start Setup button.
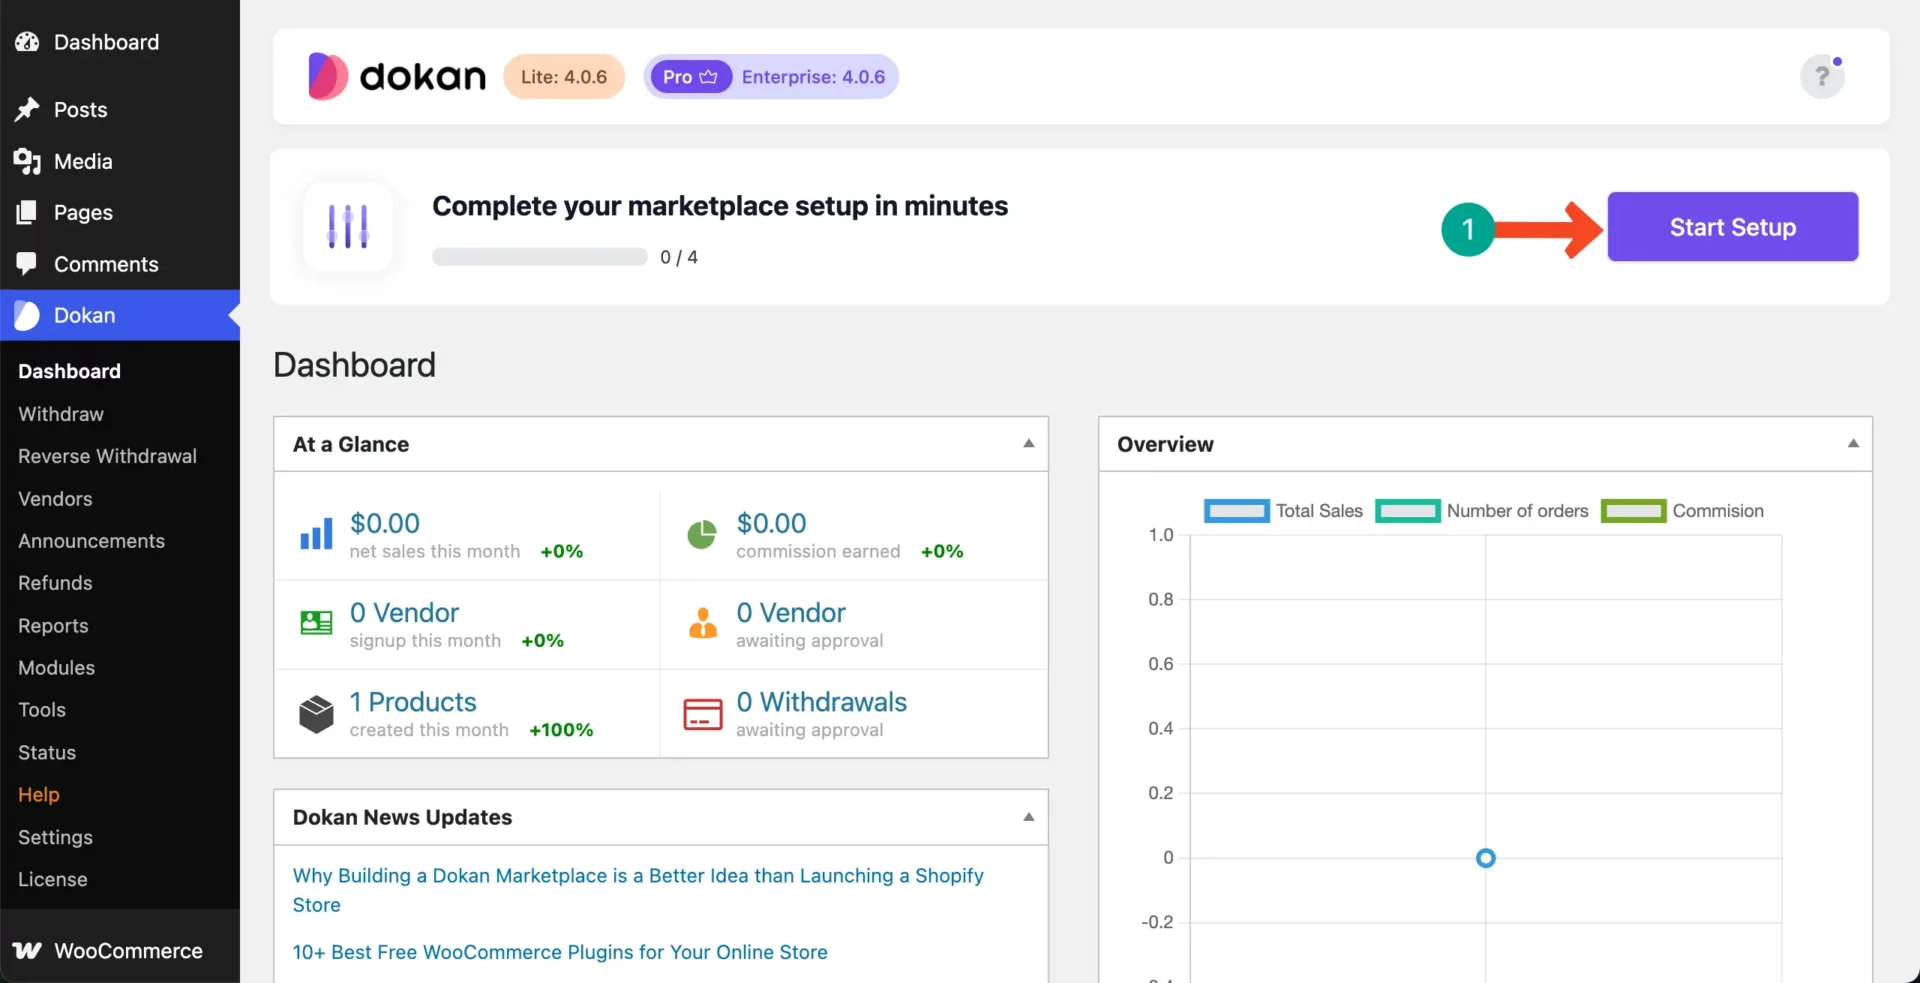
You’ll get four steps in the guide. Complete all these steps by setting the shipping free recipient, shipping tax, commission type, withdrawal system, and appearance.
Step 02: Theme Select and Design
A professional and user-friendly design is critical for attracting vendors and customers. Dokan integrates well with all WooCommerce-compatible themes.
A theme can help you design landing pages, headers, footers, and different content layouts that give your marketplace a complete and professional look.
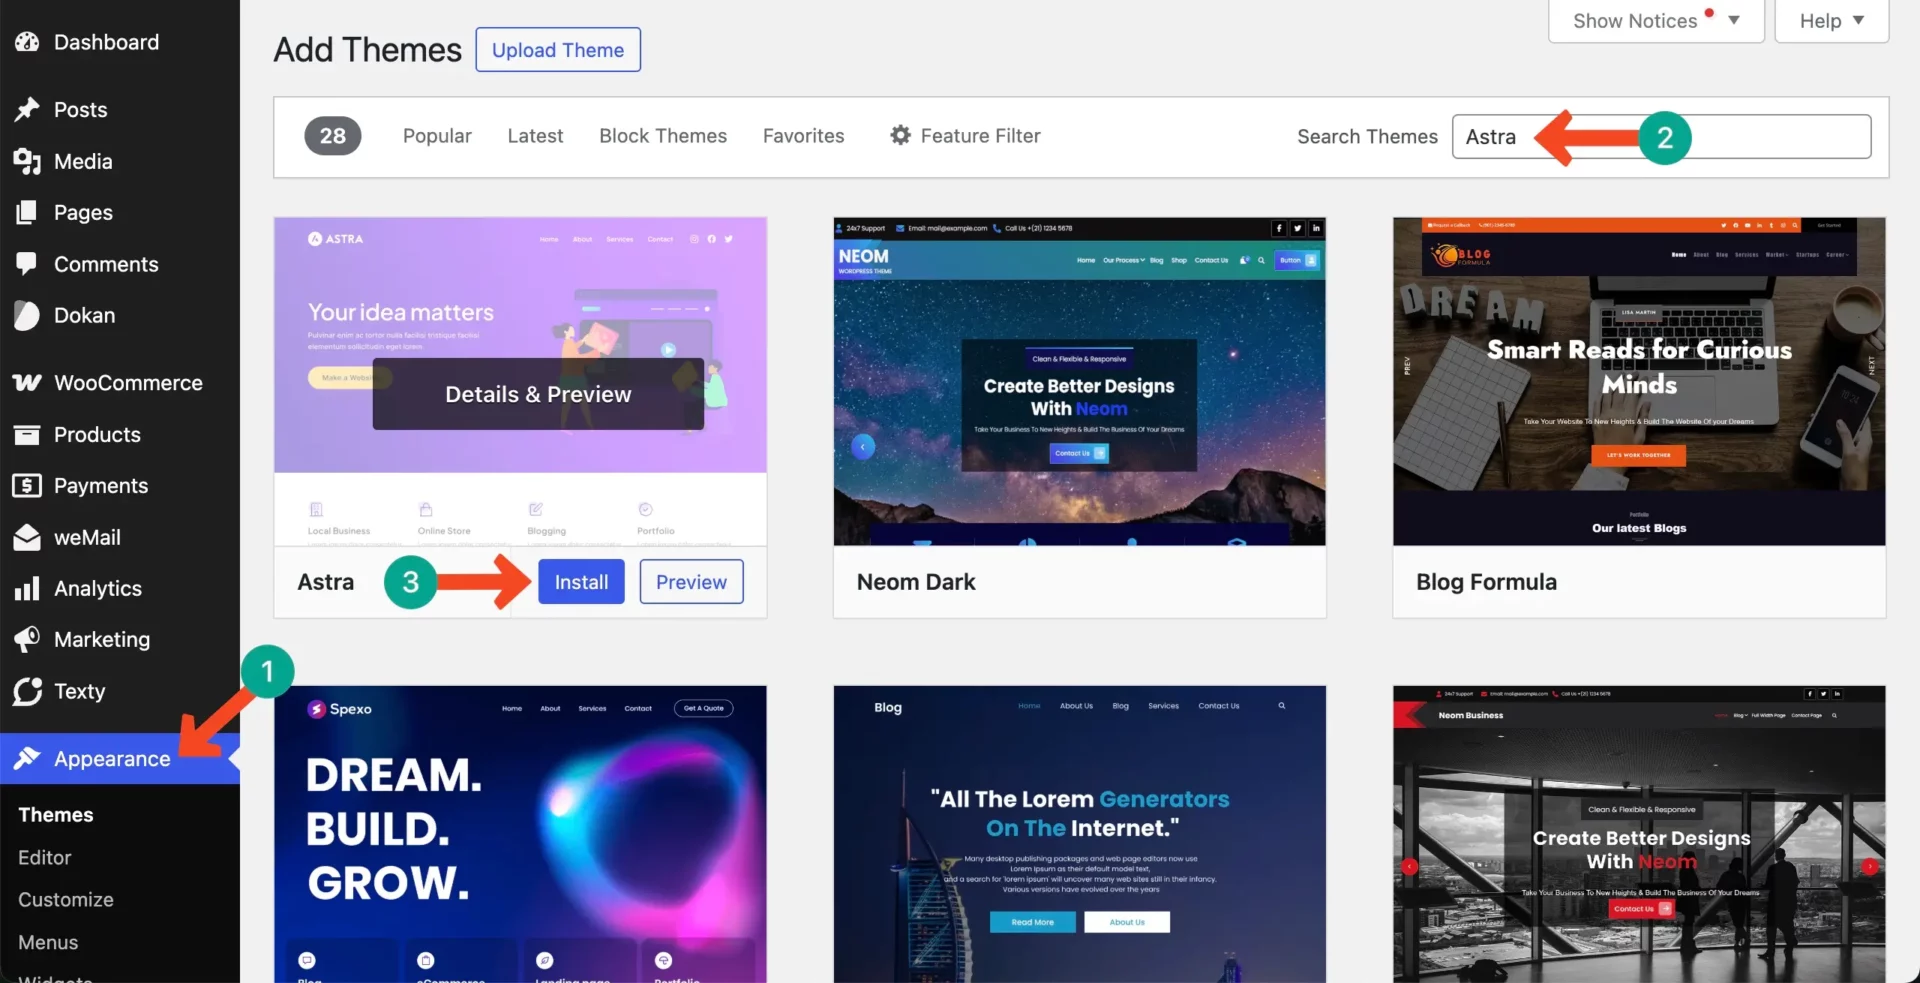
# Install a Theme
Go to Appearance > Theme. Find and install a theme. For the tutorial, we’re selecting the Astra theme.
# Customize the Theme
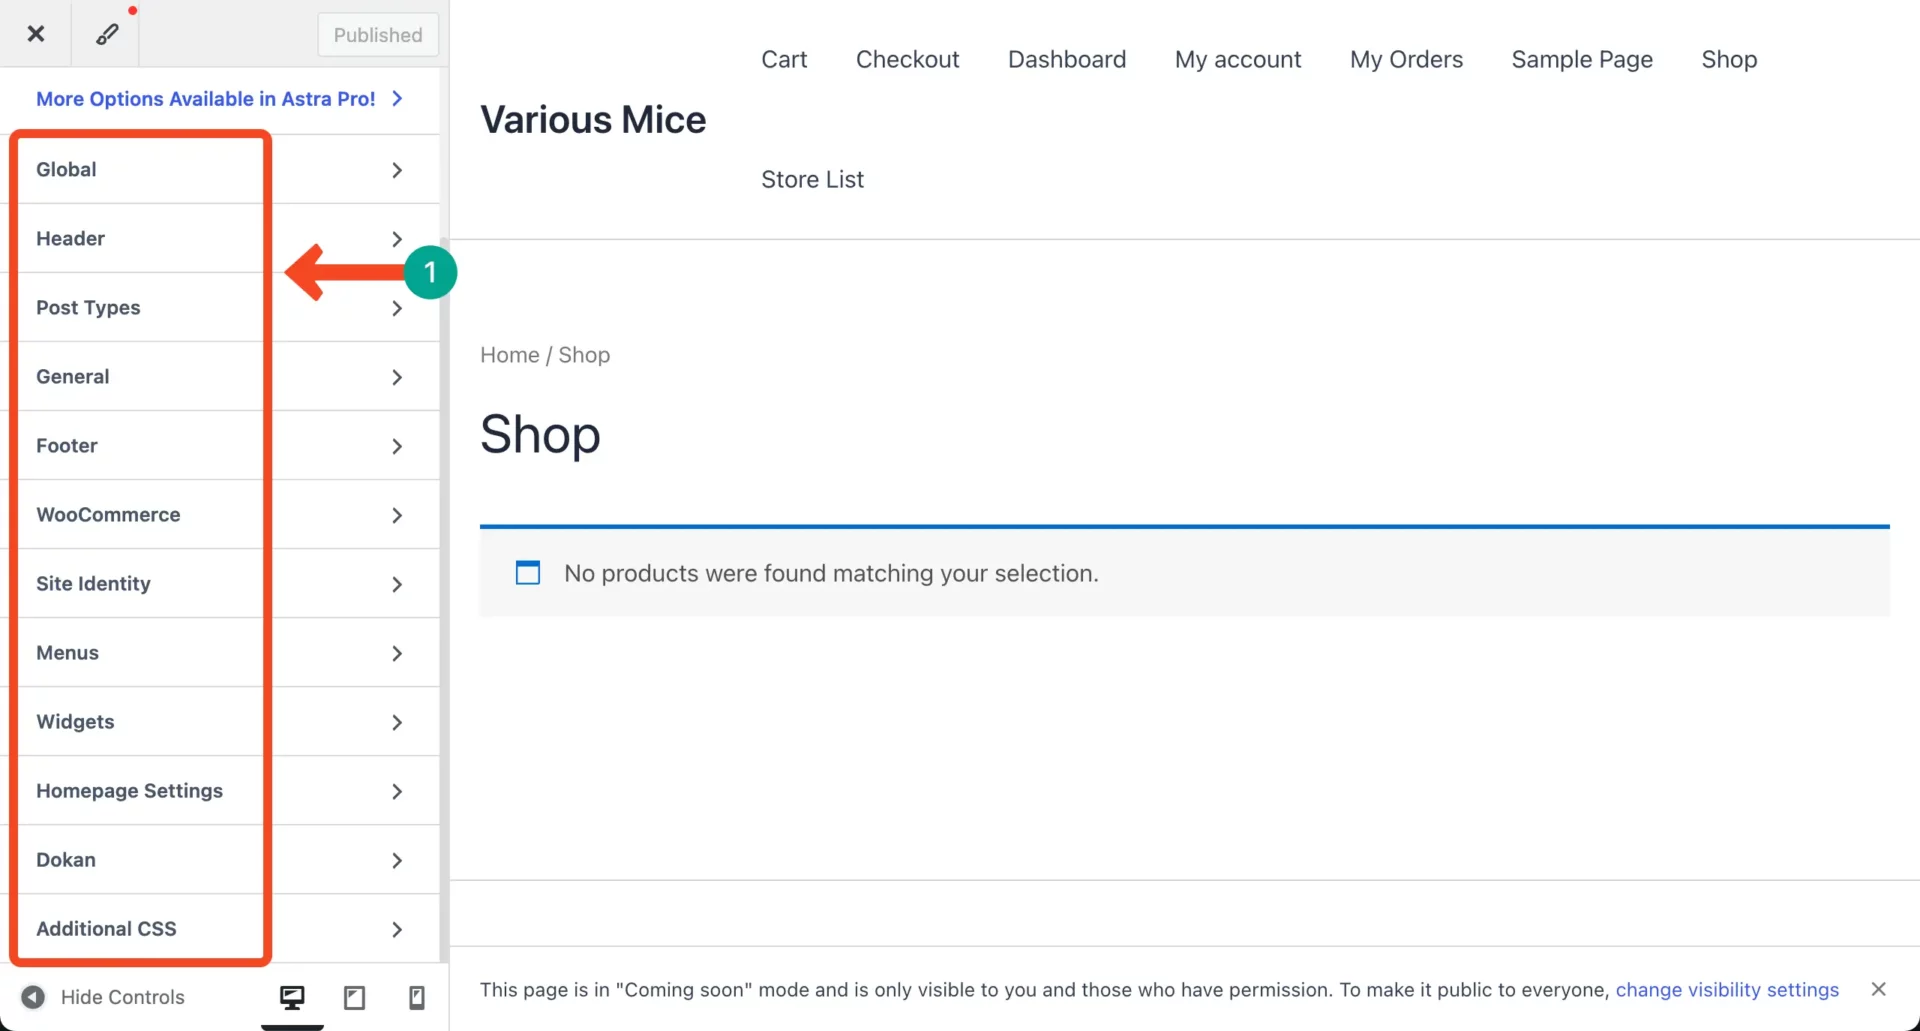
Now, you have to adjust the site’s logo, colors, typography, layout, and various other options as necessary to customize the appearance of your marketplace.
To do this, go to Appearance > Customize from the admin menu bar.

You’ll get all the options here, like header, post types, footer, menus, widgets, and more. You can customize them by clicking the expand option. Whatever you change, make sure to save them before you leave the page.
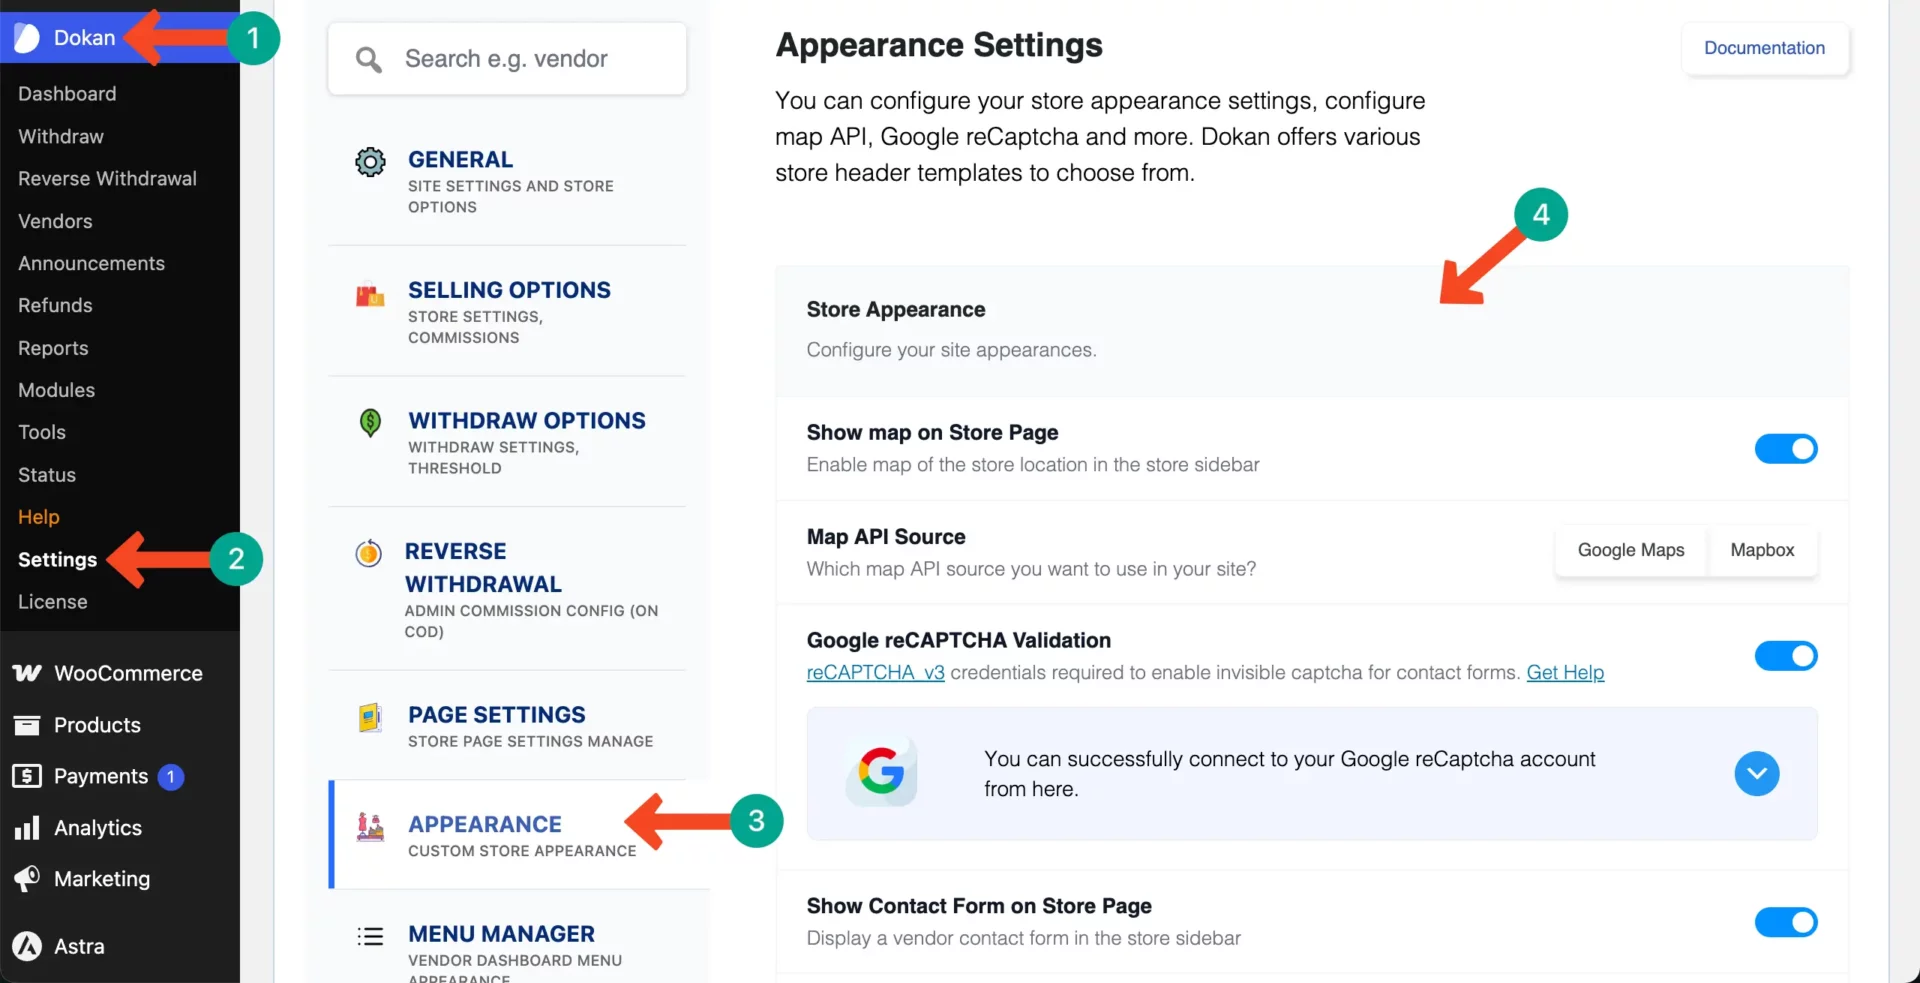
There is one option from which you can do some more customizations for the appearance. Go to Dokan > Settings > Appearance.
You can customize the banner height, width, sidebar theme, font, and more. Hope you can do these changes yourself.
Step 3: Registration Form for Vendors
Without vendors, I knew I couldn’t grow my marketplace. Dokan made it easy for me to create forms so vendors could register and join my marketplace.
# Enabling Registration
Go to Dokan > Settings > General.
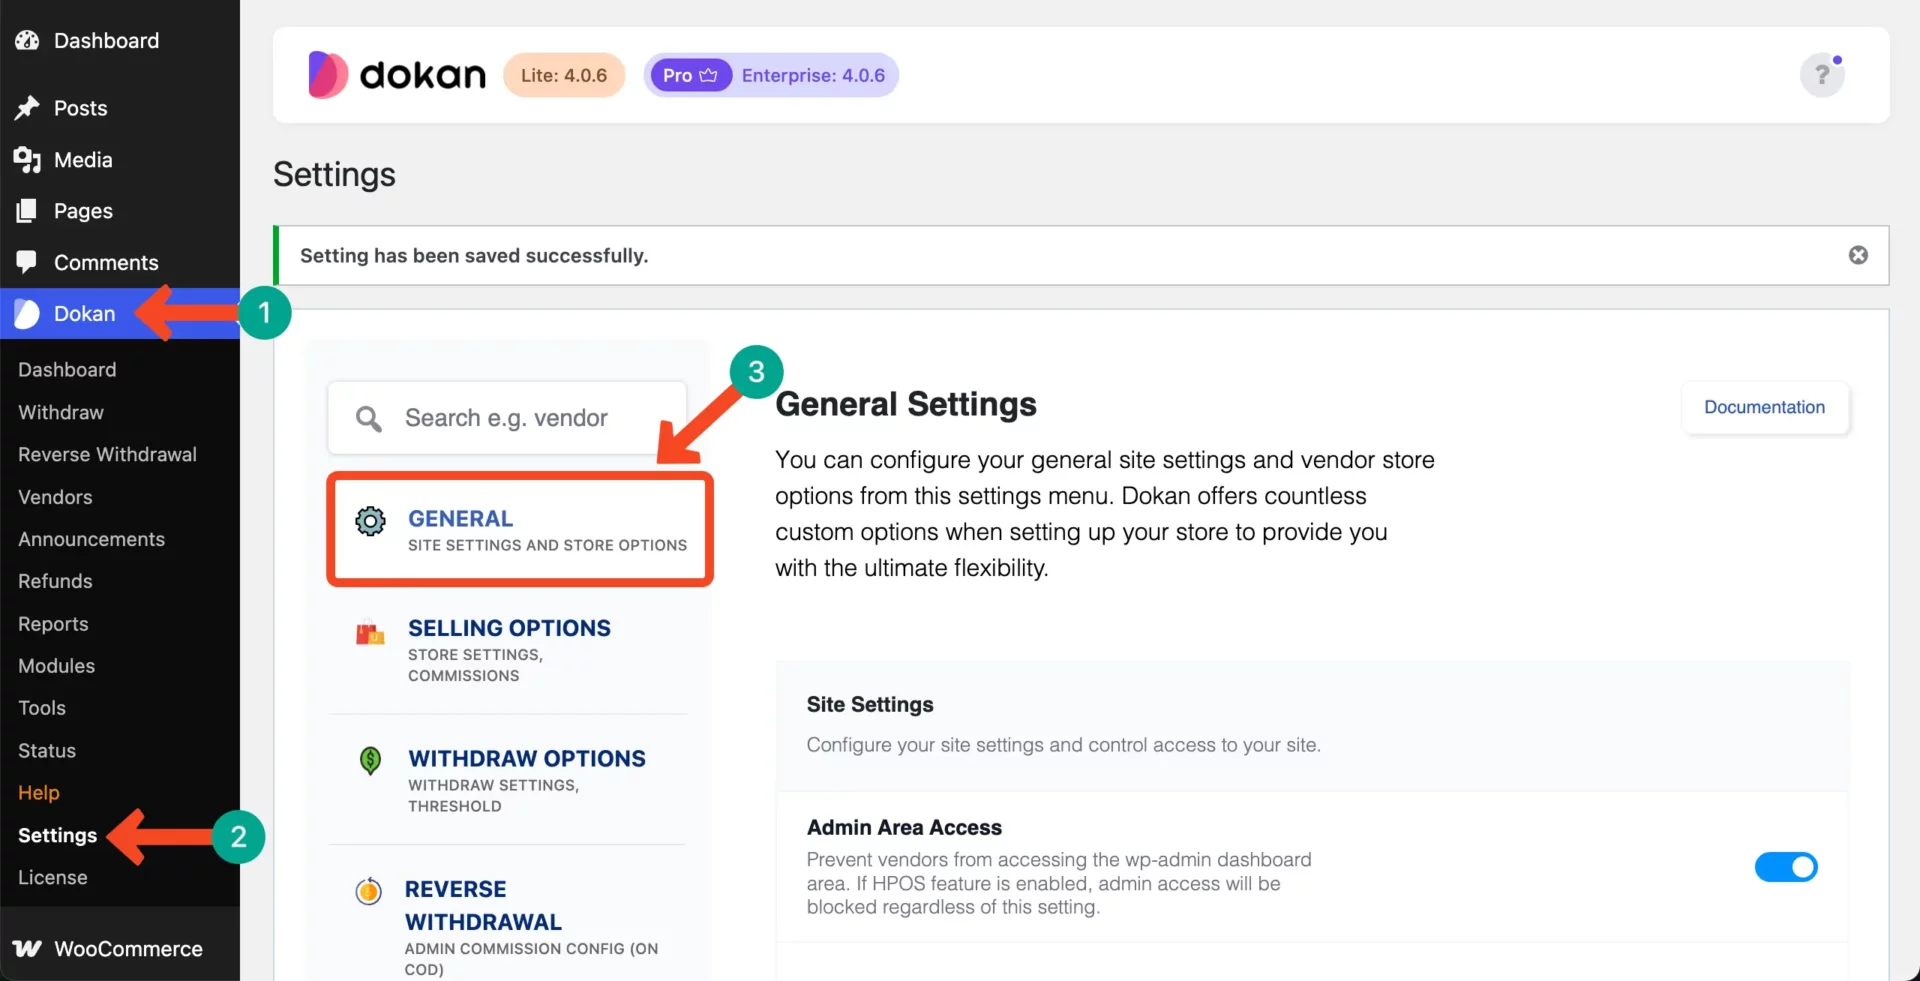
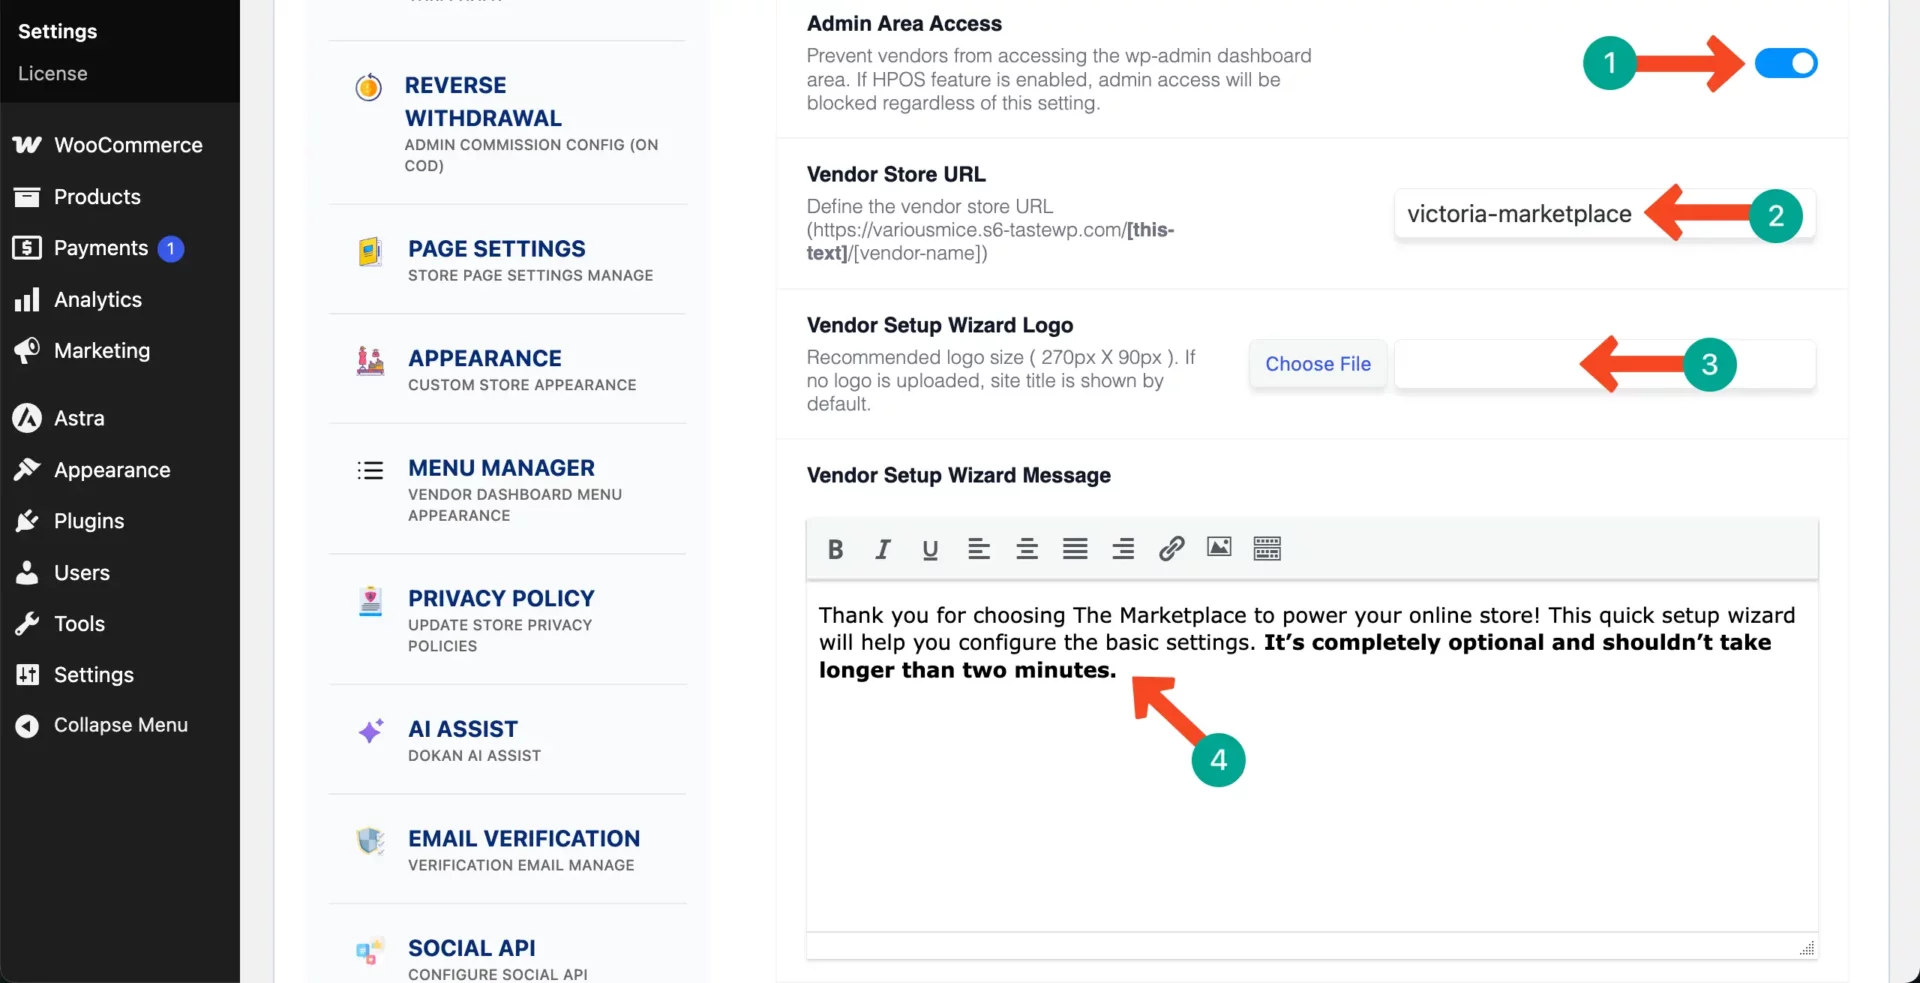
You’ll get all vendor-related options in this section. You can set up a welcome message for the vendor, wizard logo, store URL, etc.
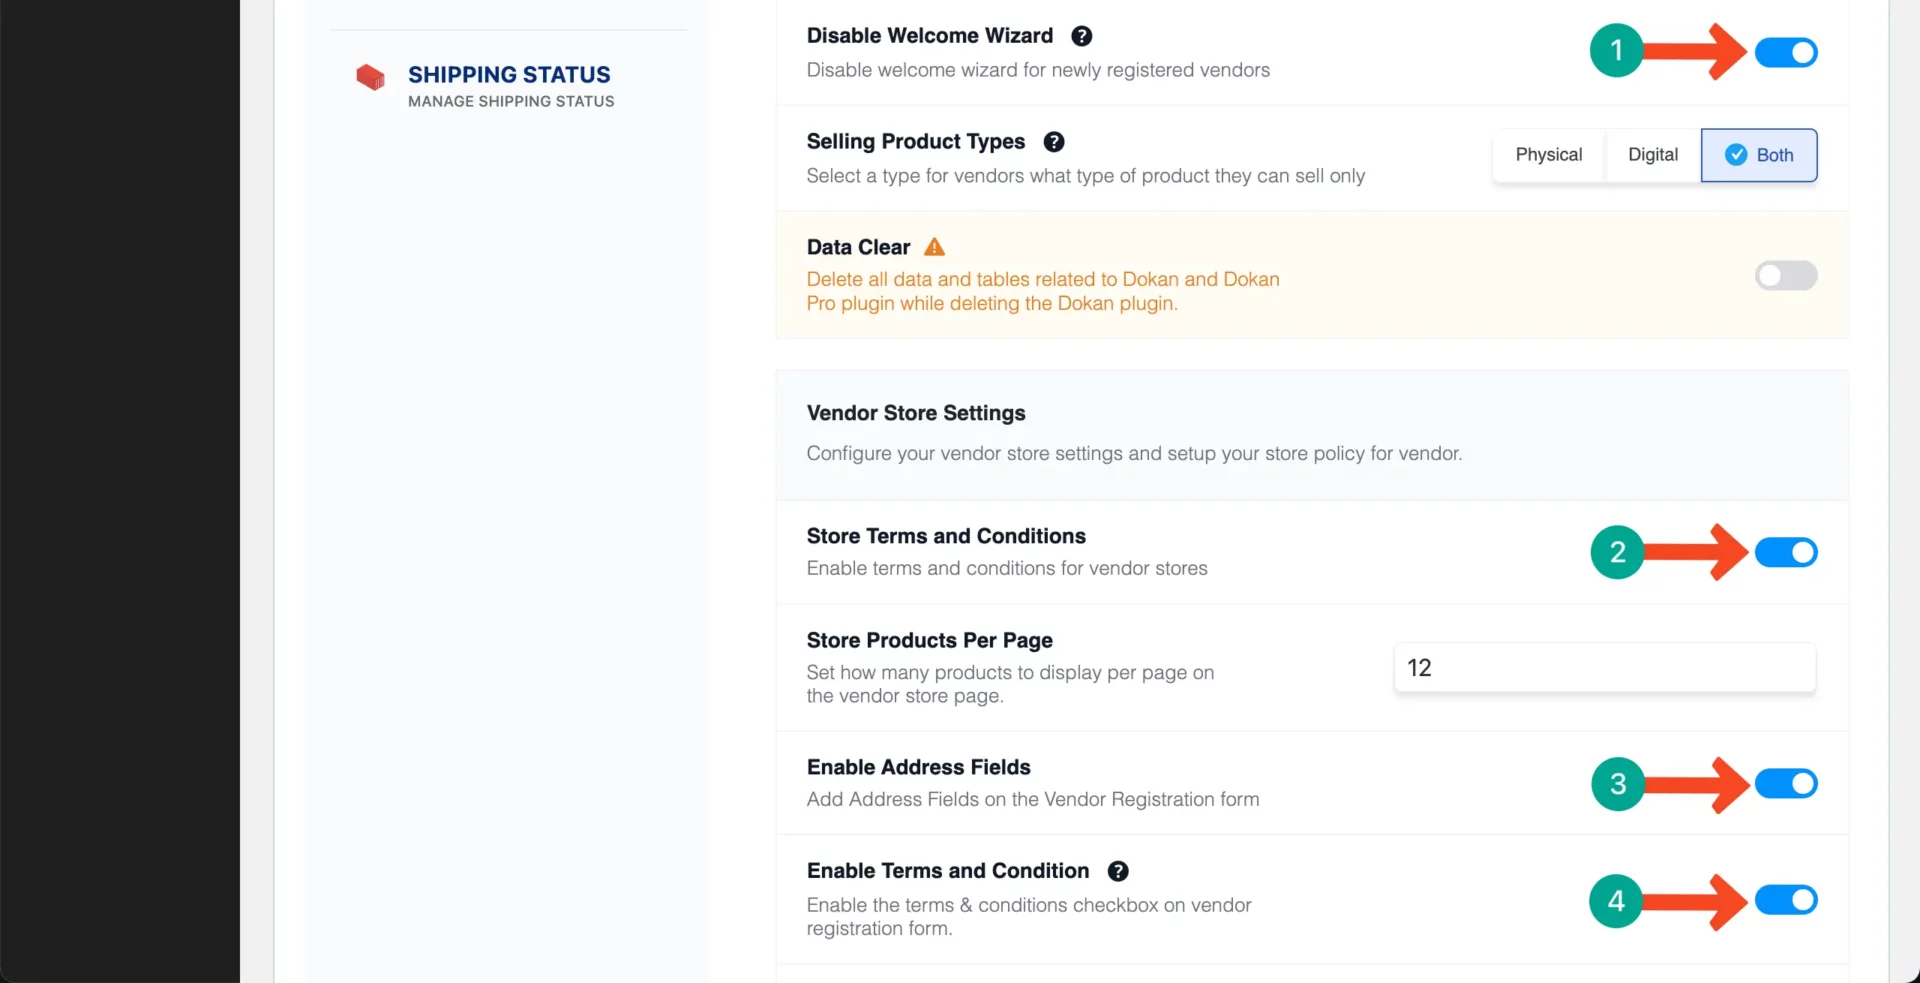
By scrolling down the page a bit, you can enable store terms and conditions, store product per page, enable address files, etc.
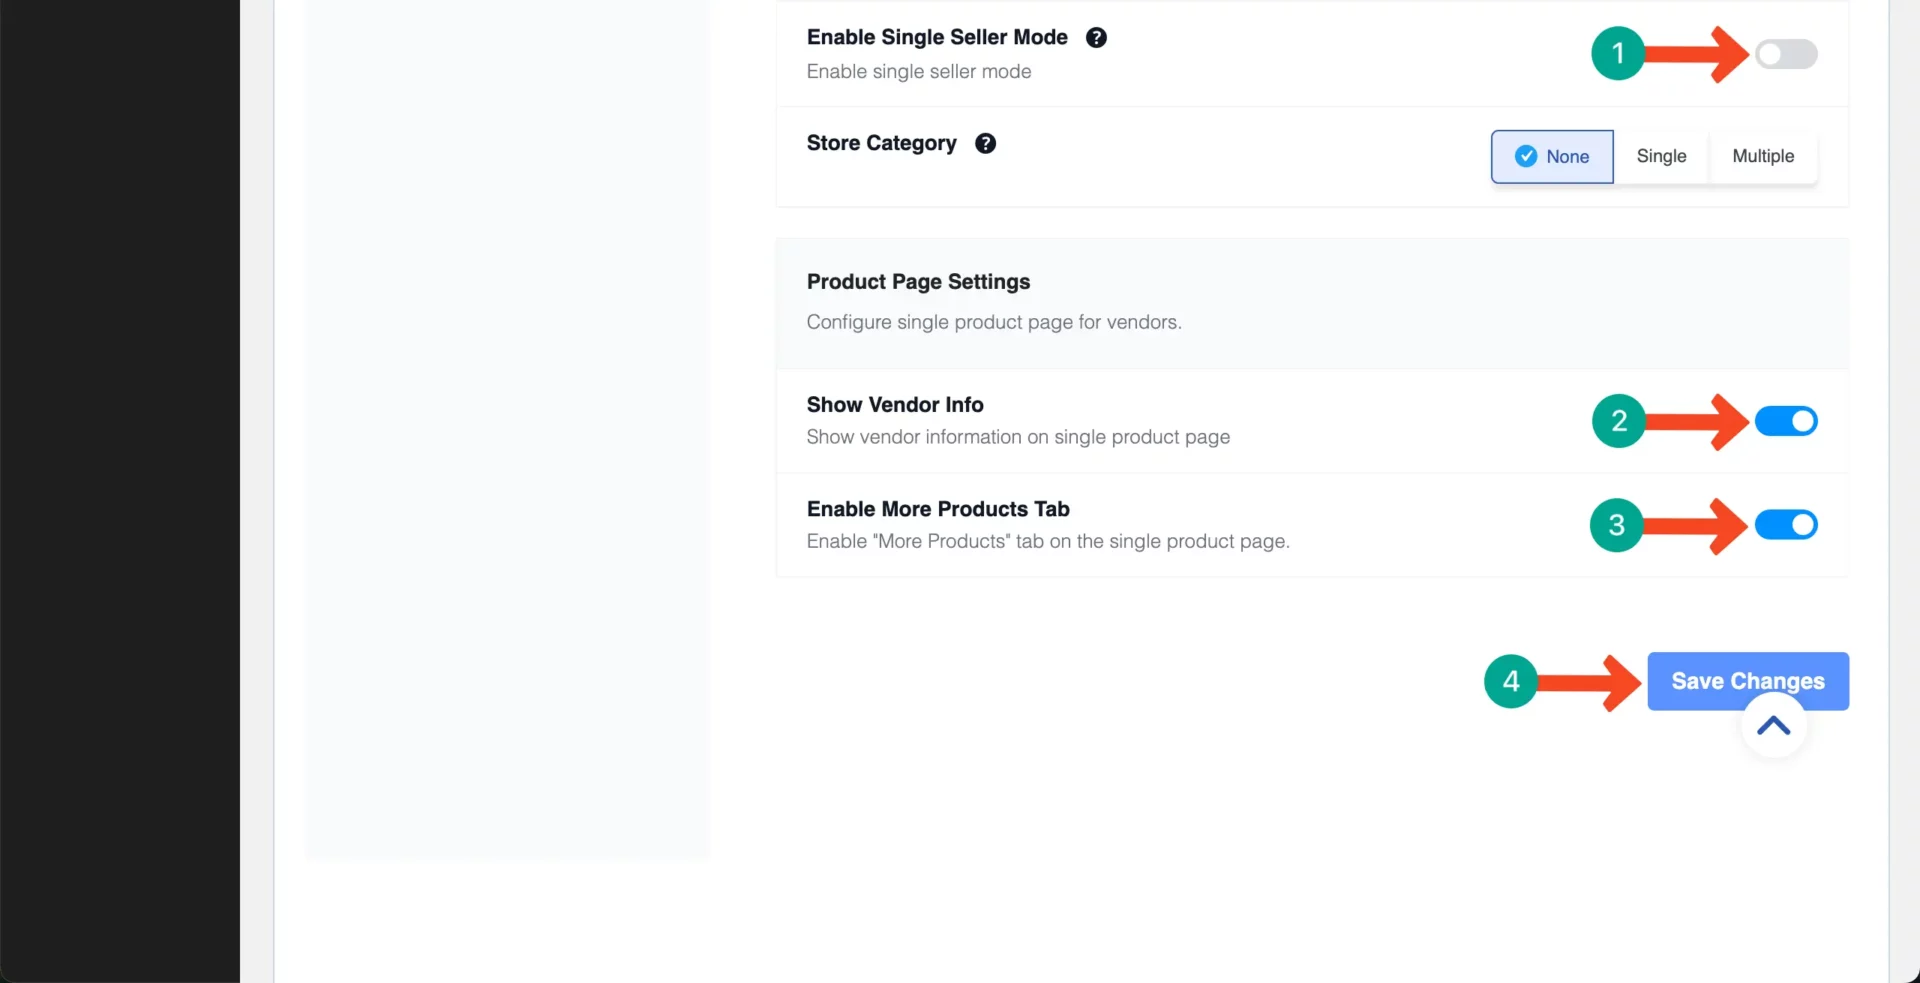
Finally, by scrolling down a bit more, you can enable/disable some more options and save all the changes you have made.
# Create a Vendor Registration Page
You have to create a page for the vendor registration page. Open a page, copy-paste the code [dokan-vendor-registration] into the page, and save it.
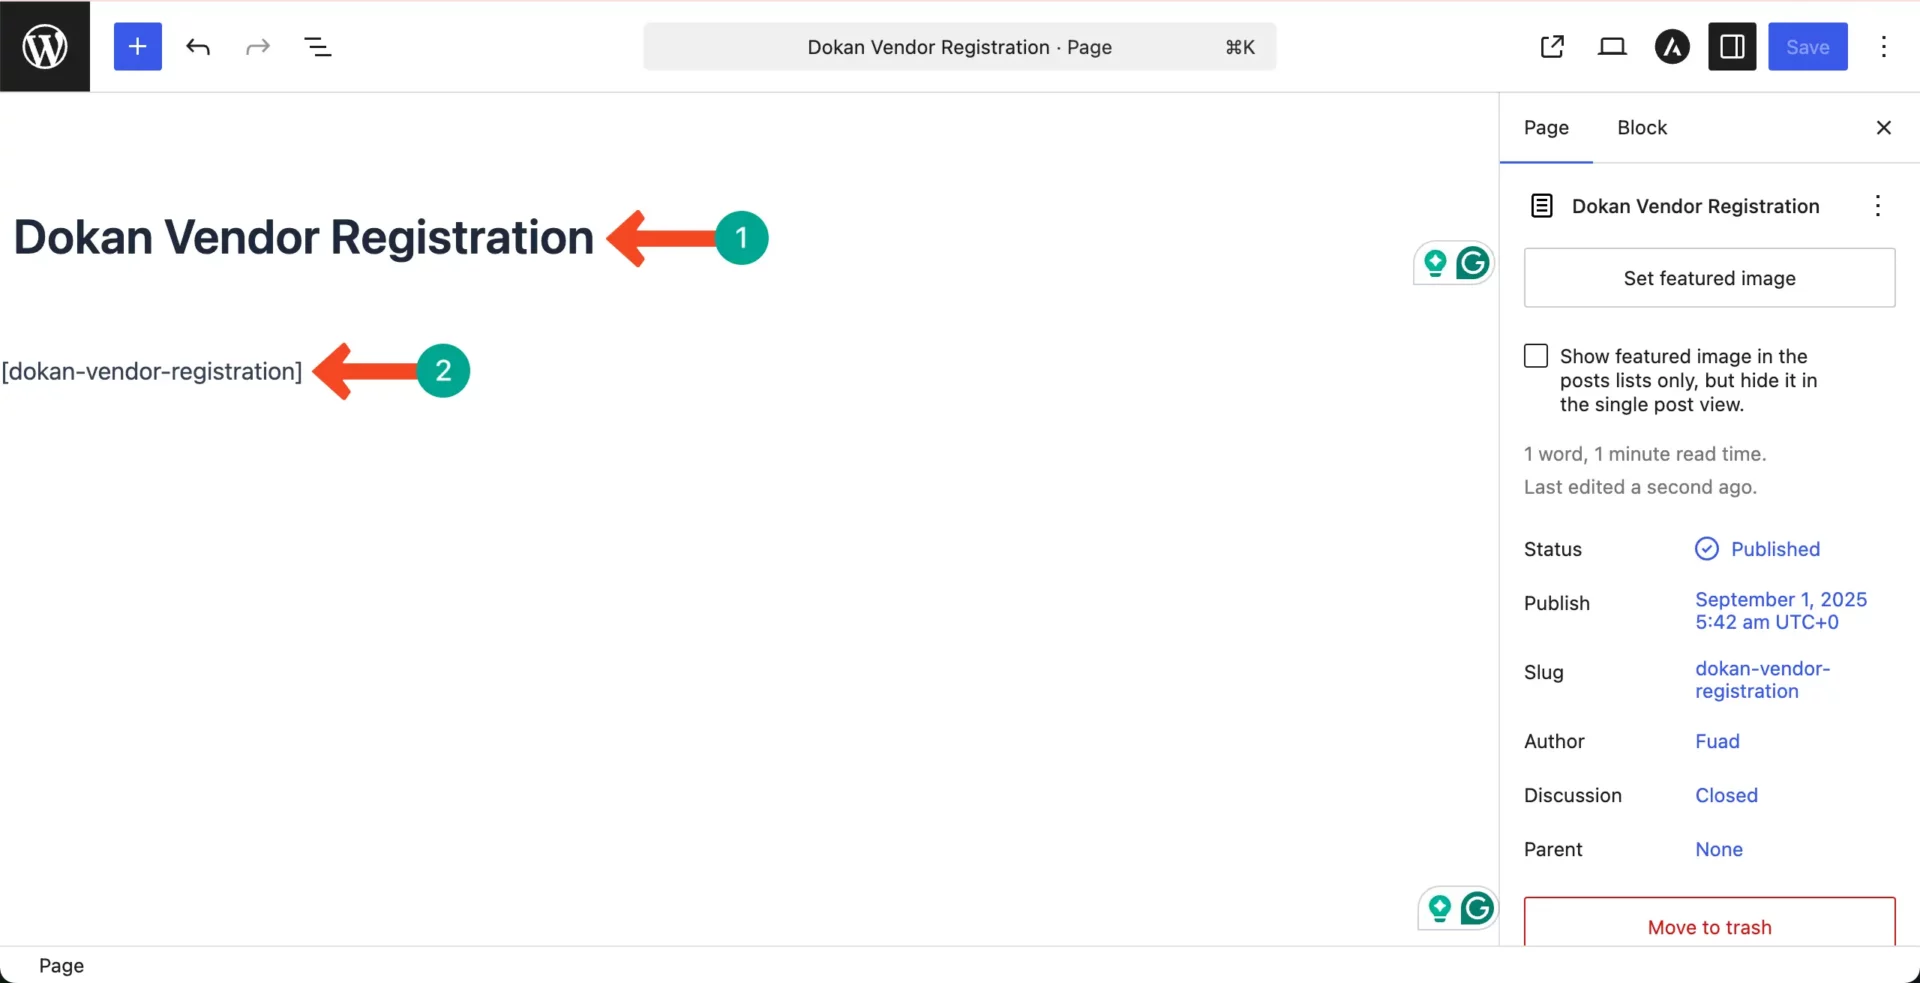
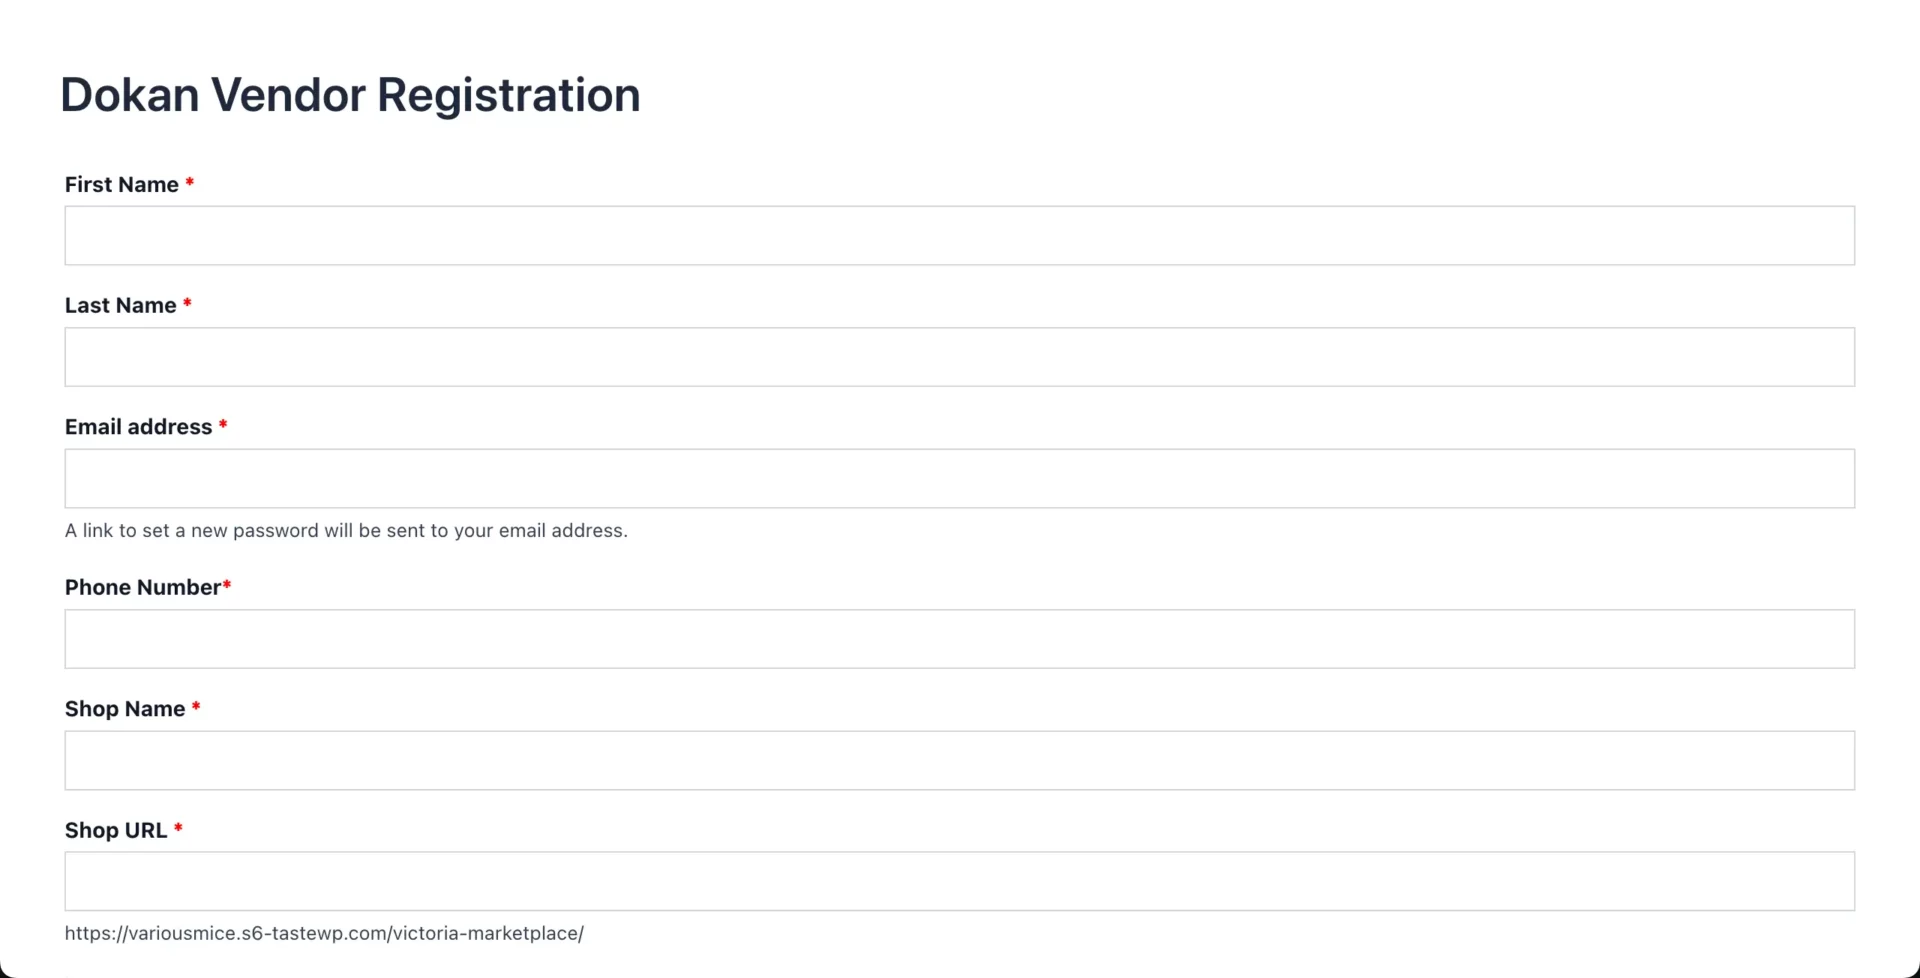
Go to the preview section. You’ll see the registration form on the page.
# Approve/Disapprove Vendors
Vendors used this form to register in my marketplace. Whenever someone applied to join, I could approve or disapprove them directly from my admin dashboard.
To do this, navigate to Dokan > Vendors. You’ll see all your vendors here.
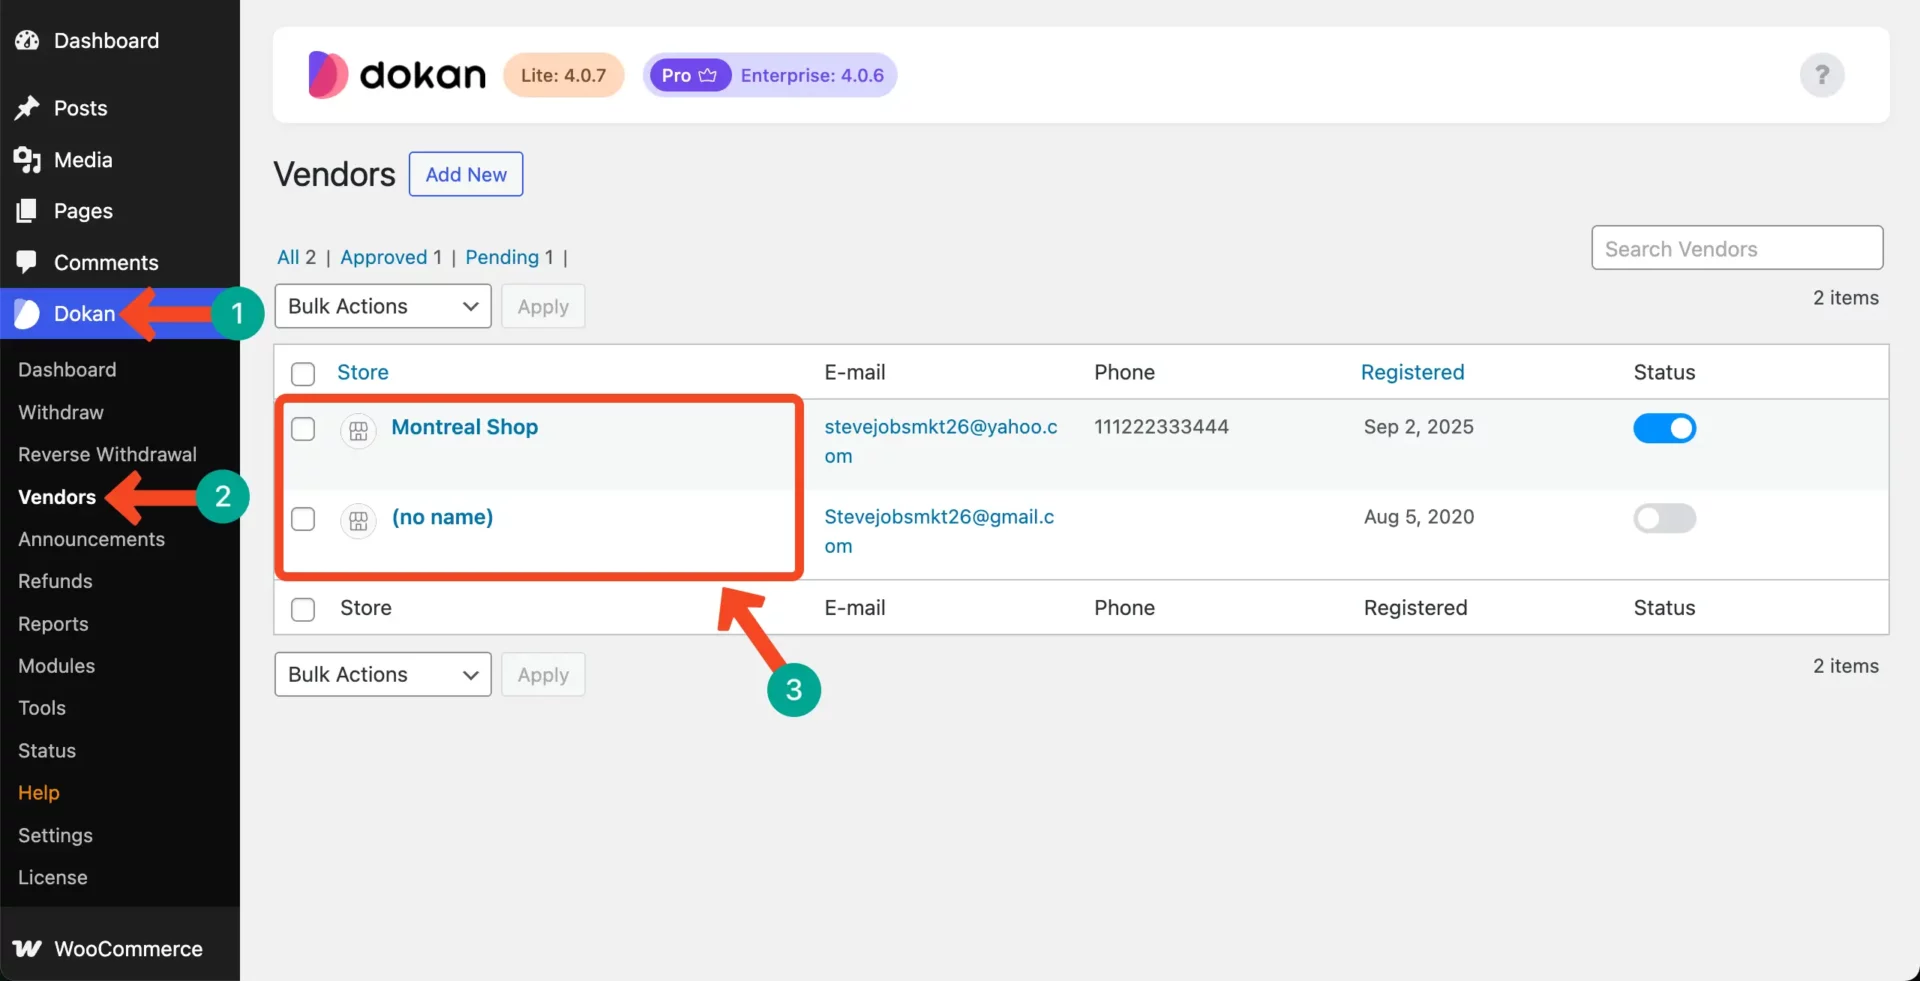
Select an applied vendor by hitting the tick mark, click the dropdown list at the top, choose an option to approve/disable, and press the Apply button.

Thus, you can manually check and approve vendors in your marketplace.
Step 4: Configure Payment Gateway
Dokan supports all the popular payment gateways. For example, PayPal, Stripe, Razorpay, bank transfer, and more. You can configure the payment gateways in multiple ways. Explore them below.
# Configuring in WooCommerce
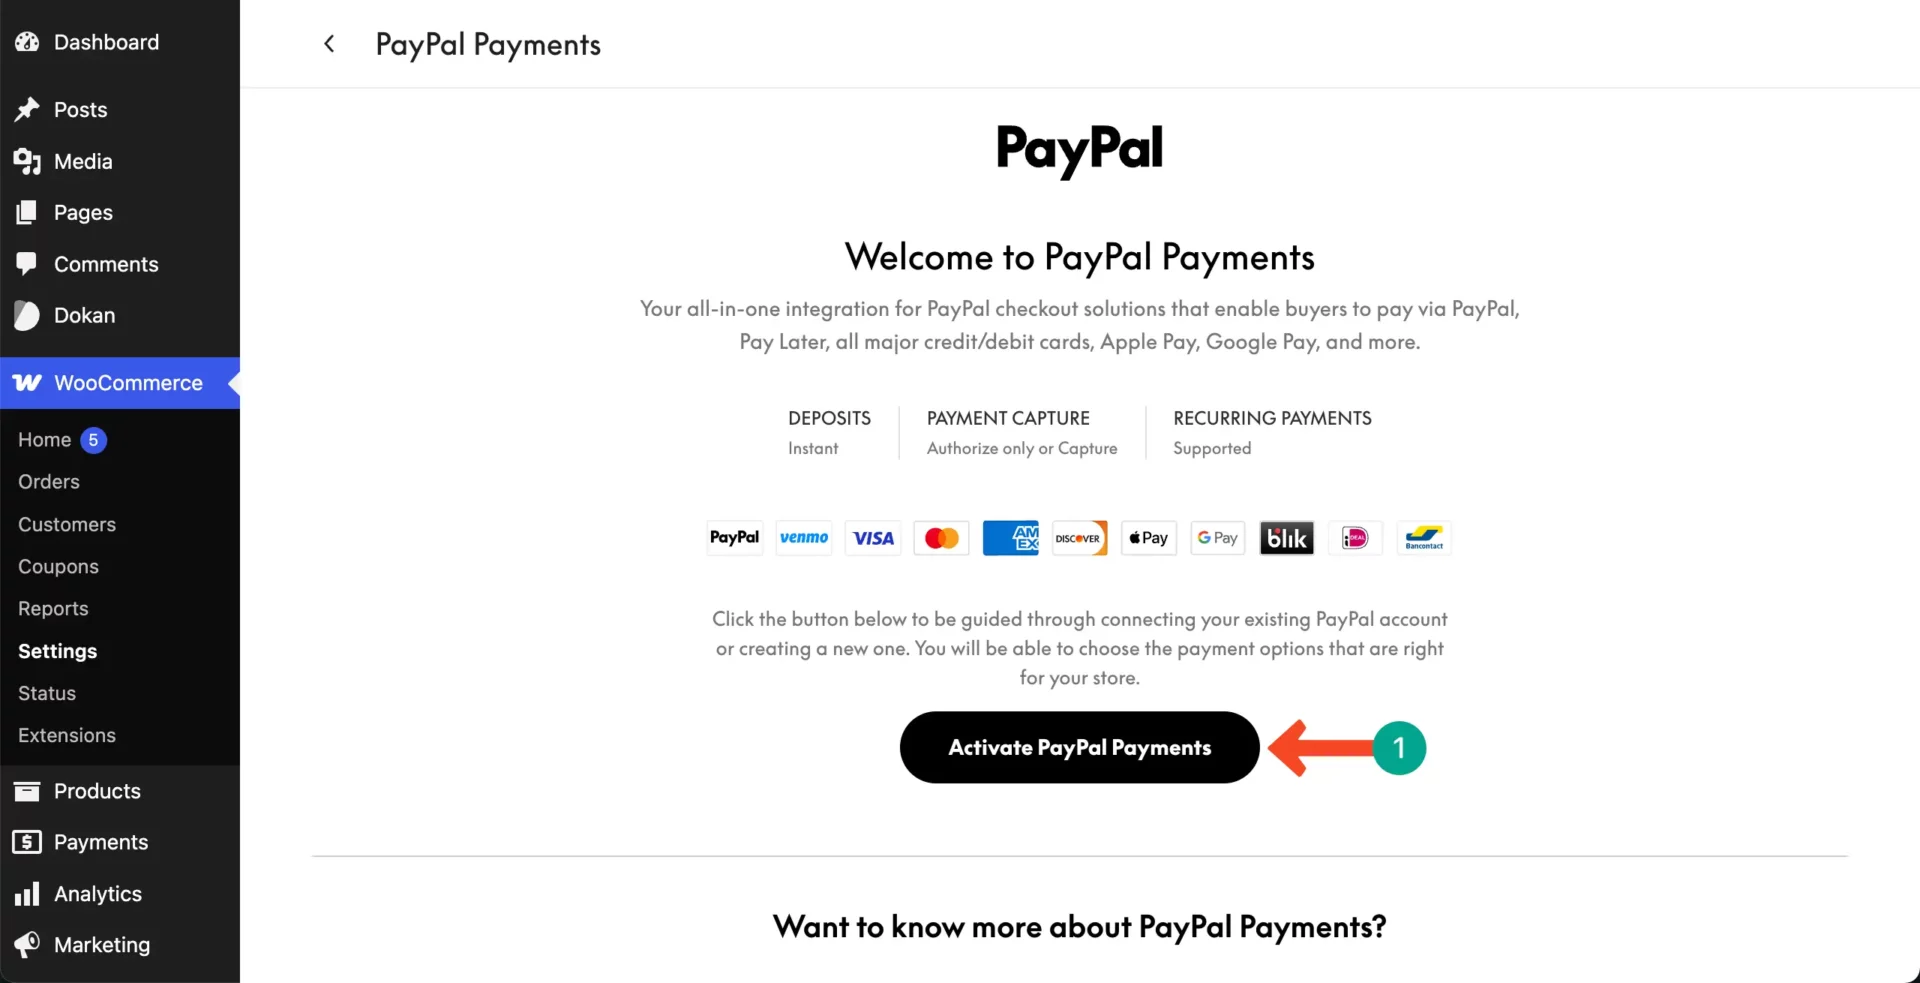
Go to WooCommerce > Settings > Payments. Enable desired gateways (e.g., Stripe, PayPal).
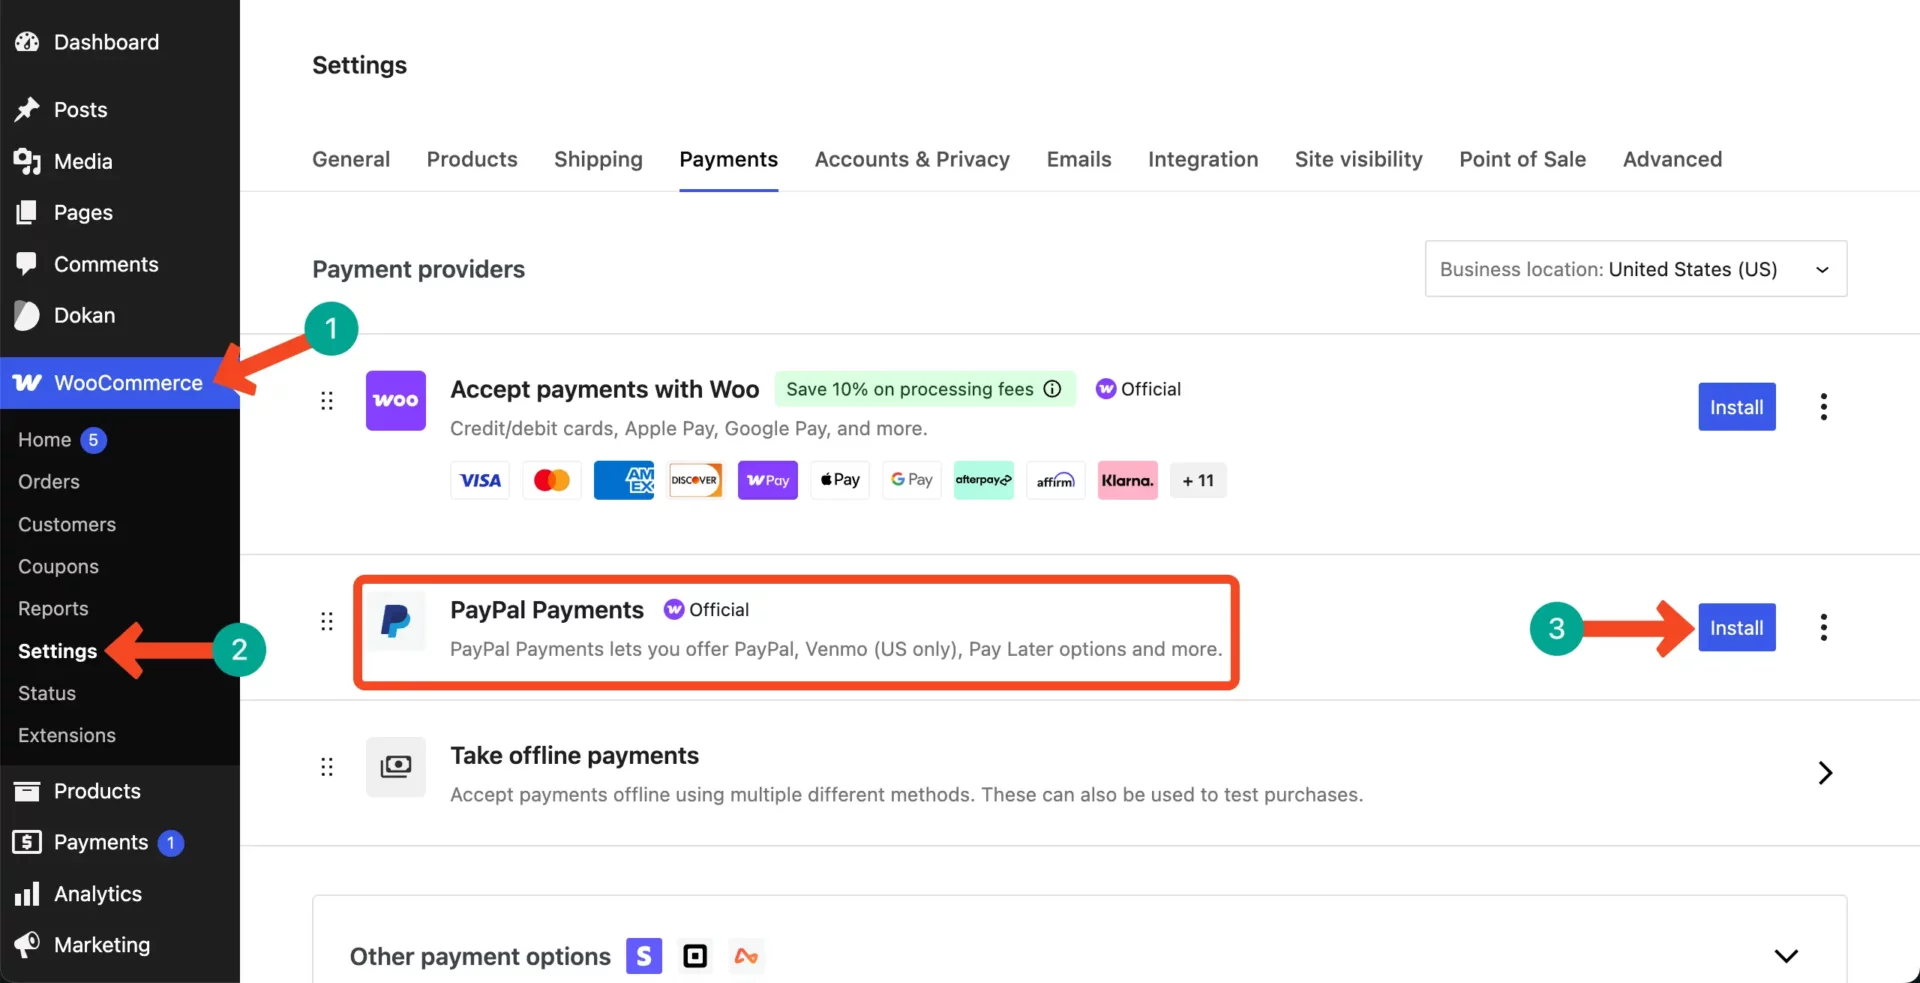
Then, activate PayPal. You’ll be asked to complete various steps throughout the process. These are very simple and easy. Hope you can do them alone.
# Dokan Payment Settings
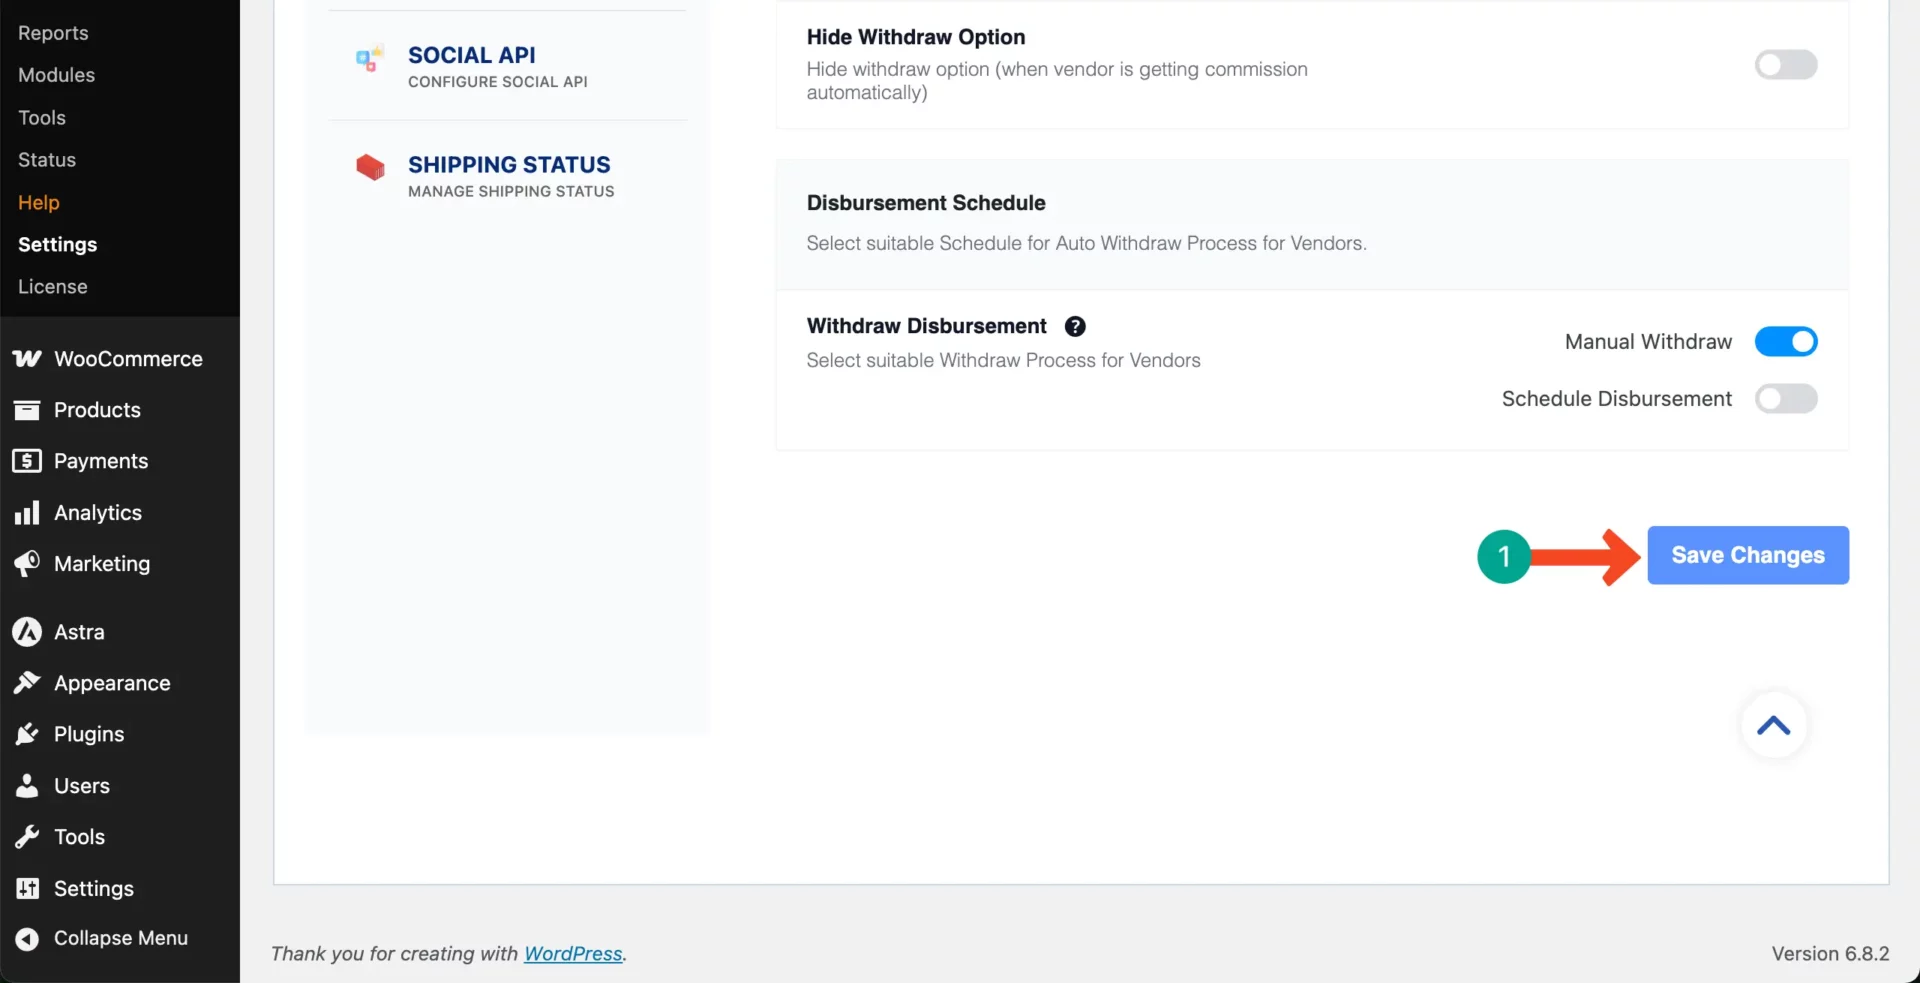
Go to Dokan > Settings > Payments. Enable PayPal, Stripe, or bank transfers for vendors to receive payouts. As I used PayPal just a while ago, we have enabled PayPal here.
Set minimum withdrawal amounts (e.g., $50) and schedules (weekly, monthly).

When all the changes are done, preserve them by clicking the Save Changes button.
# Vendor Payment Setup
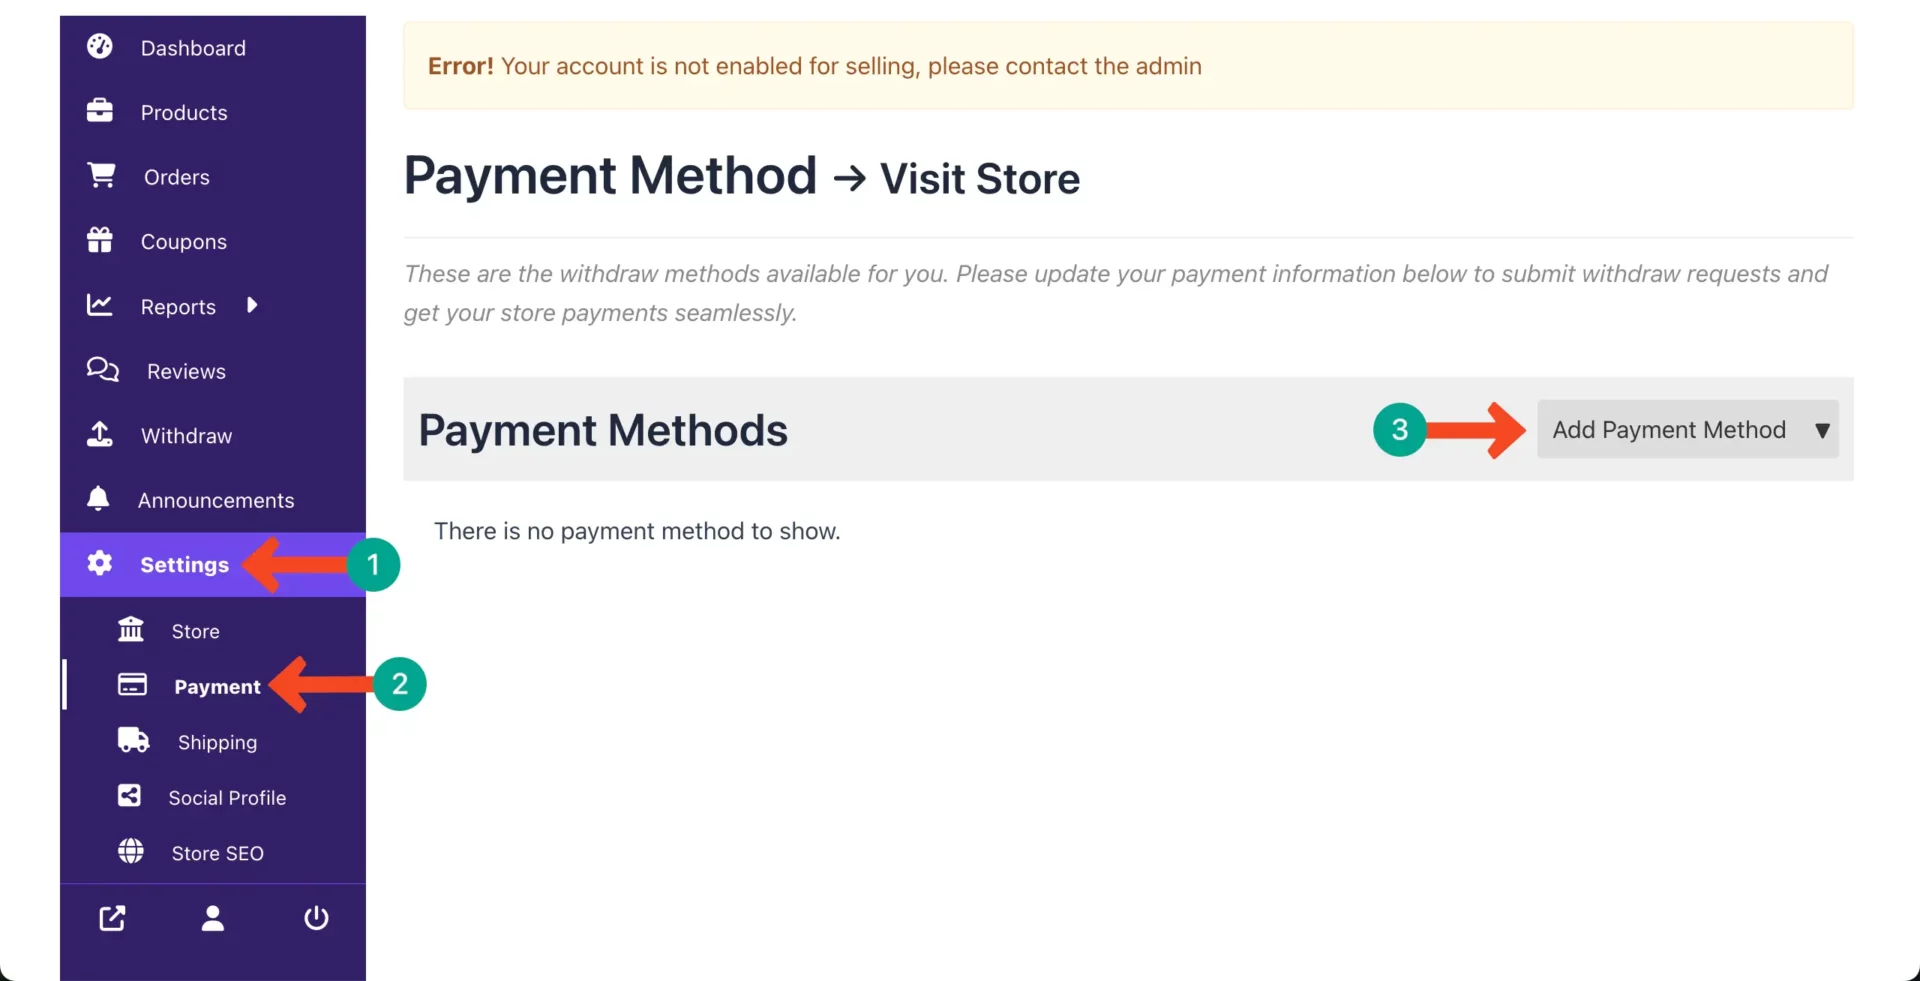
After vendors register, they have to configure how they want to receive their payments from their dashboard.
Vendors, go to your vendor dashboard > Settings > Payment. Now, click the Add Payment Method button and connect the dashboard to your desired payment method.
Step 5: Configure the Taxation System
Taxes can be complex in a multivendor setup, but Dokan simplifies it. Let’s take a look at the process below.
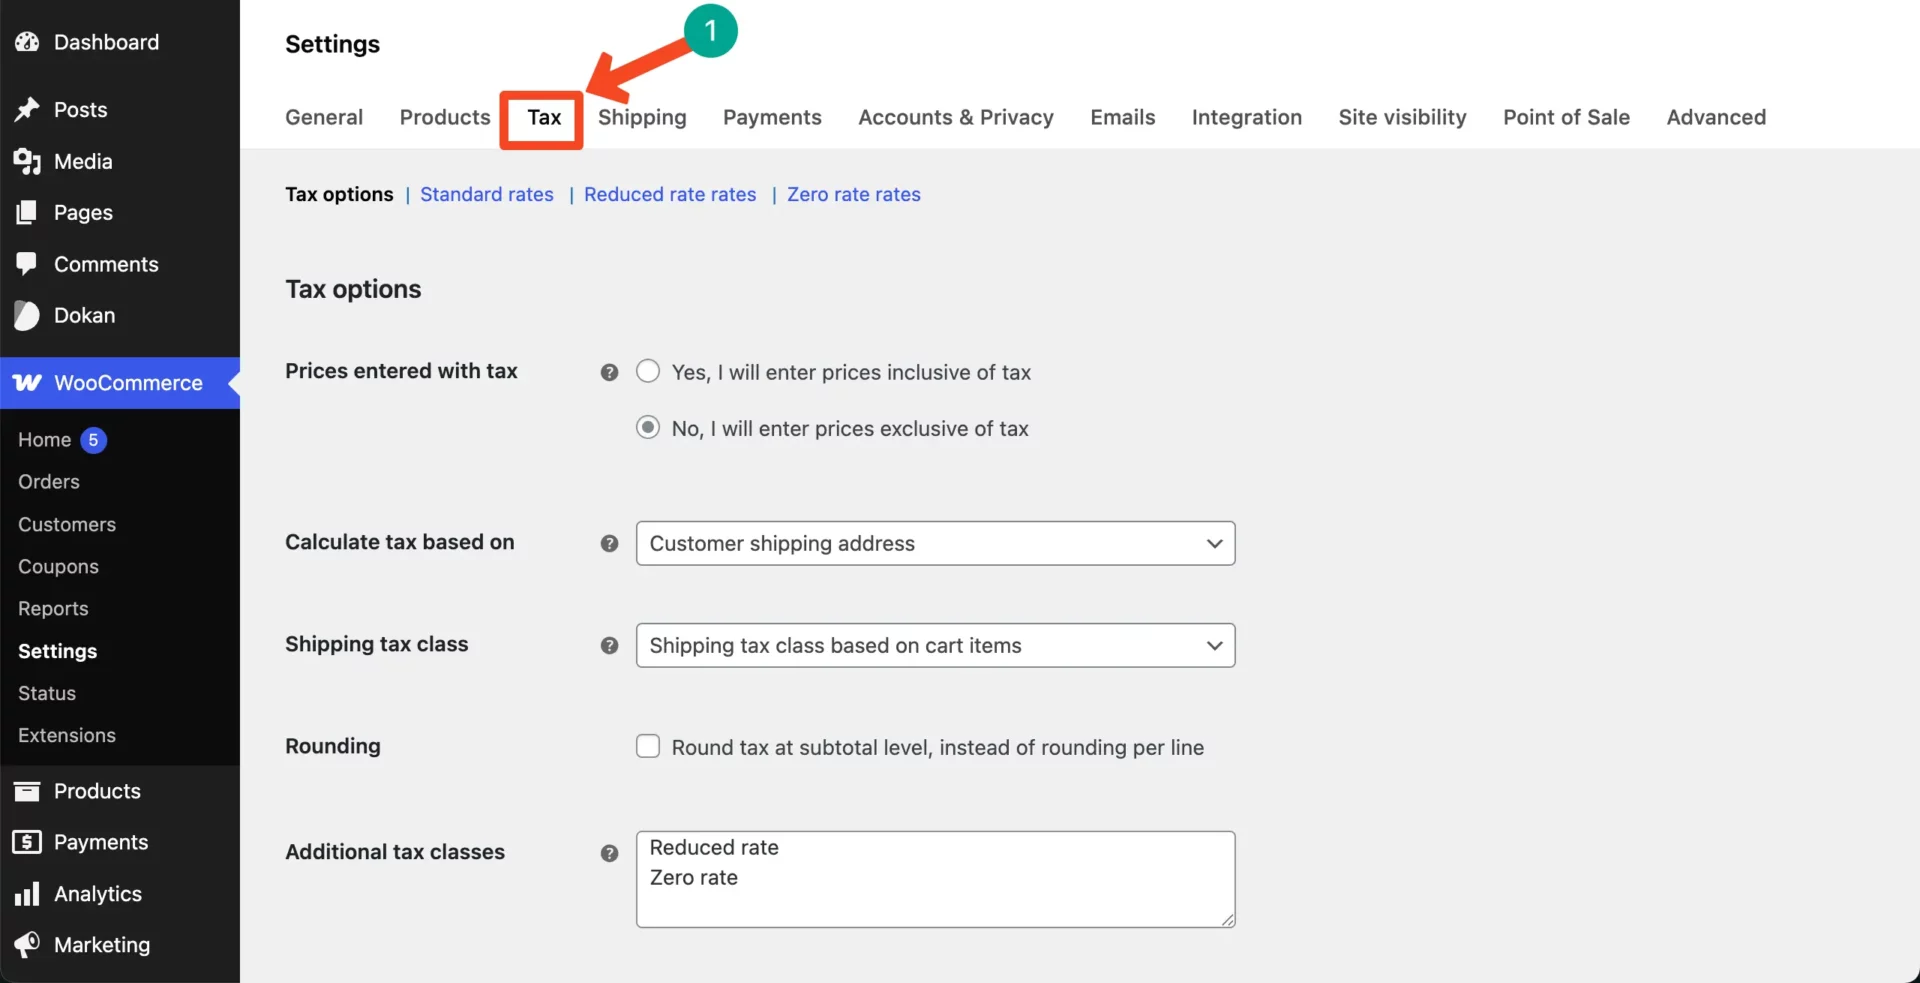
# WooCommerce Tax Setup
Go to WooCommerce > Settings > Tax. Scrolling down the page a bit, enable tax rates and calculations.
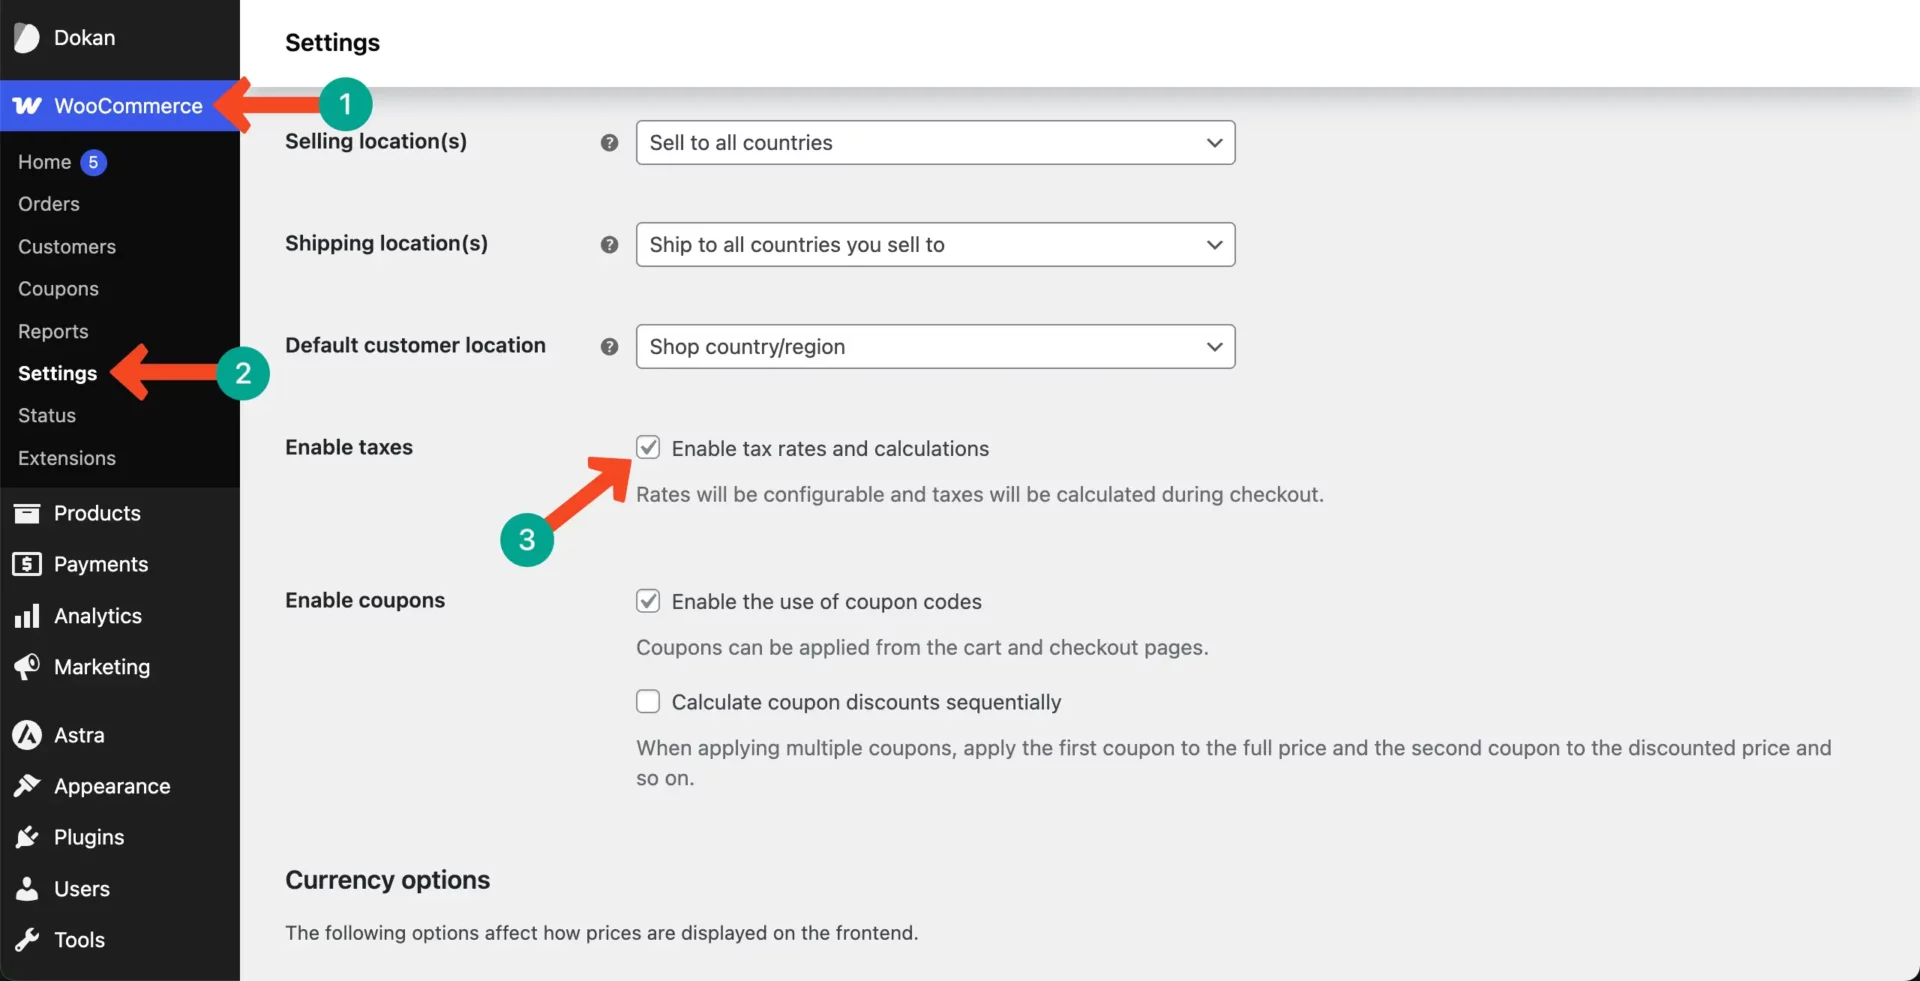
This will enable the Tax tab on top. Configure the necessary taxation systems from the tab.
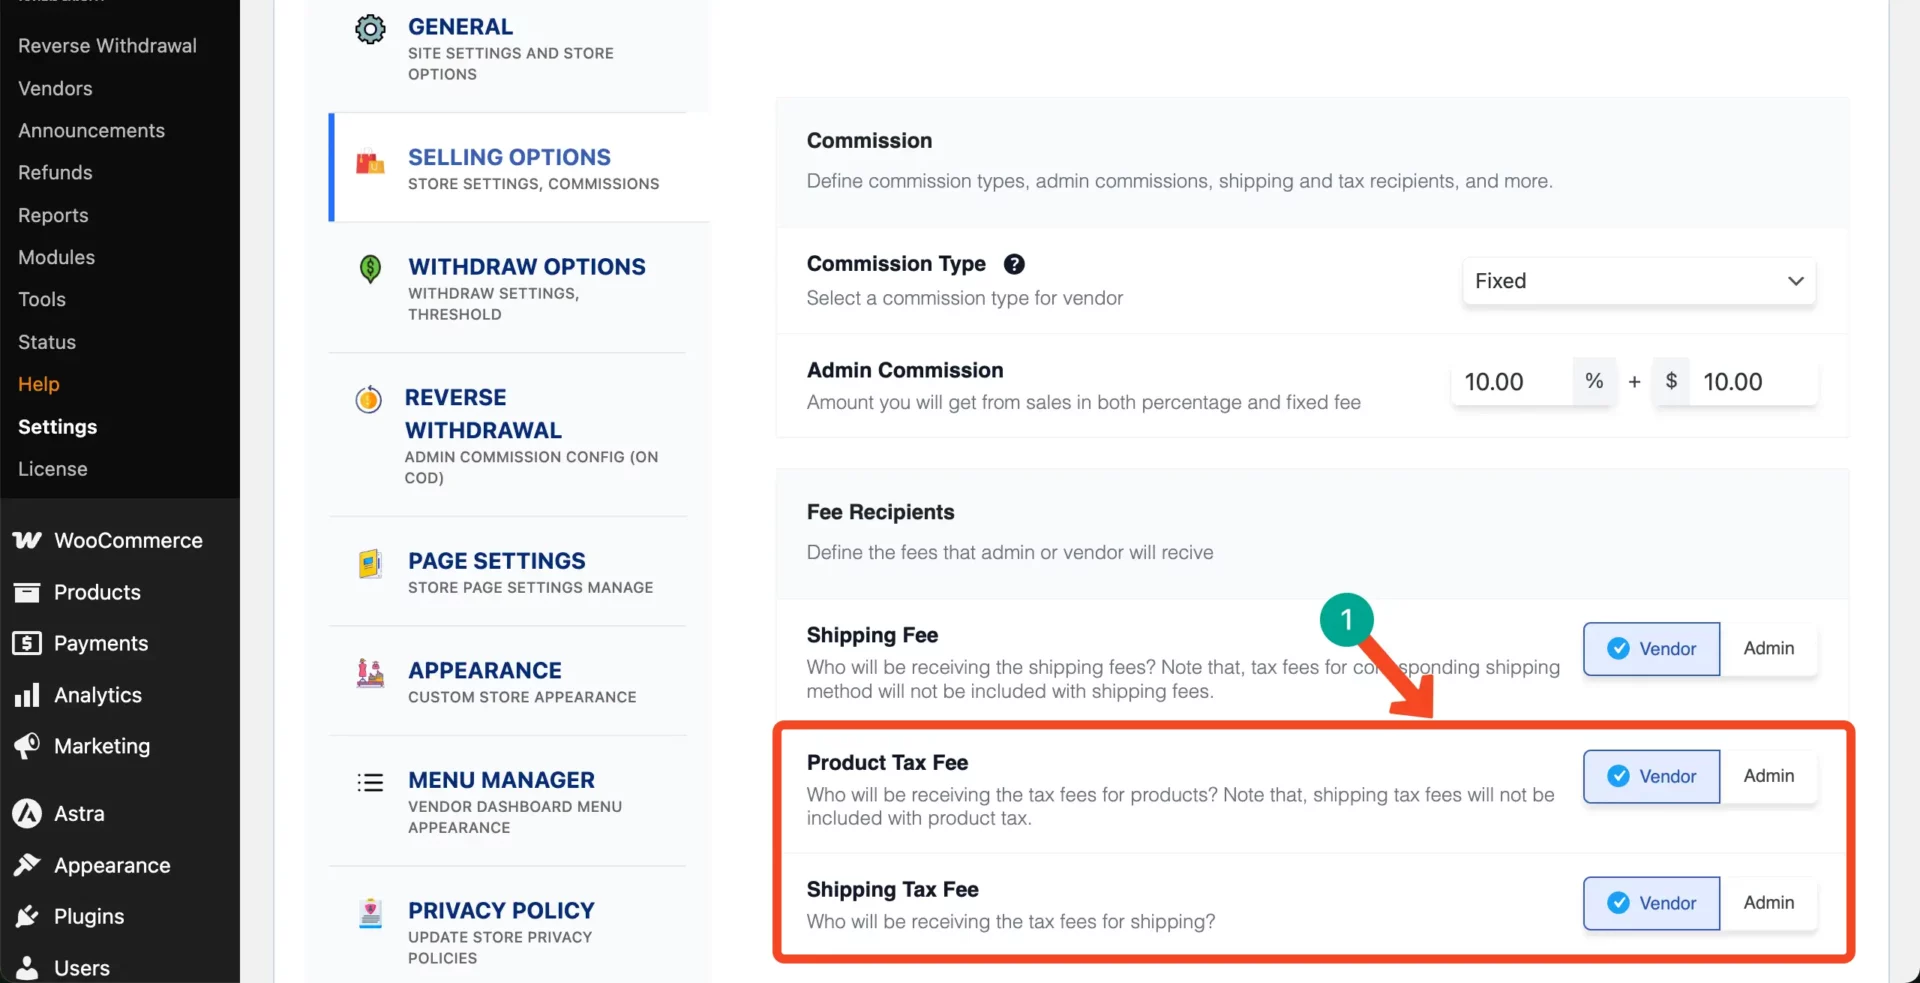
# Dokan Tax Configuration
Go to Dokan > Settings > Tax.

Scrolling down the page a bit, you’ll find these options from which you can define who will receive the product and the shipping tax. The one who receives the tax will be in charge of paying it to the respective authority in due time.
Step 6: Set Shipping Settings
Shipping is a critical aspect, as vendors often manage their own logistics. You can configure both global shipping and vendor-specific shipping settings.
# Global Shipping Setup
Navigate to WooCommerce > Settings > Shipping. Click the Add Zone button to define your preferred zones.
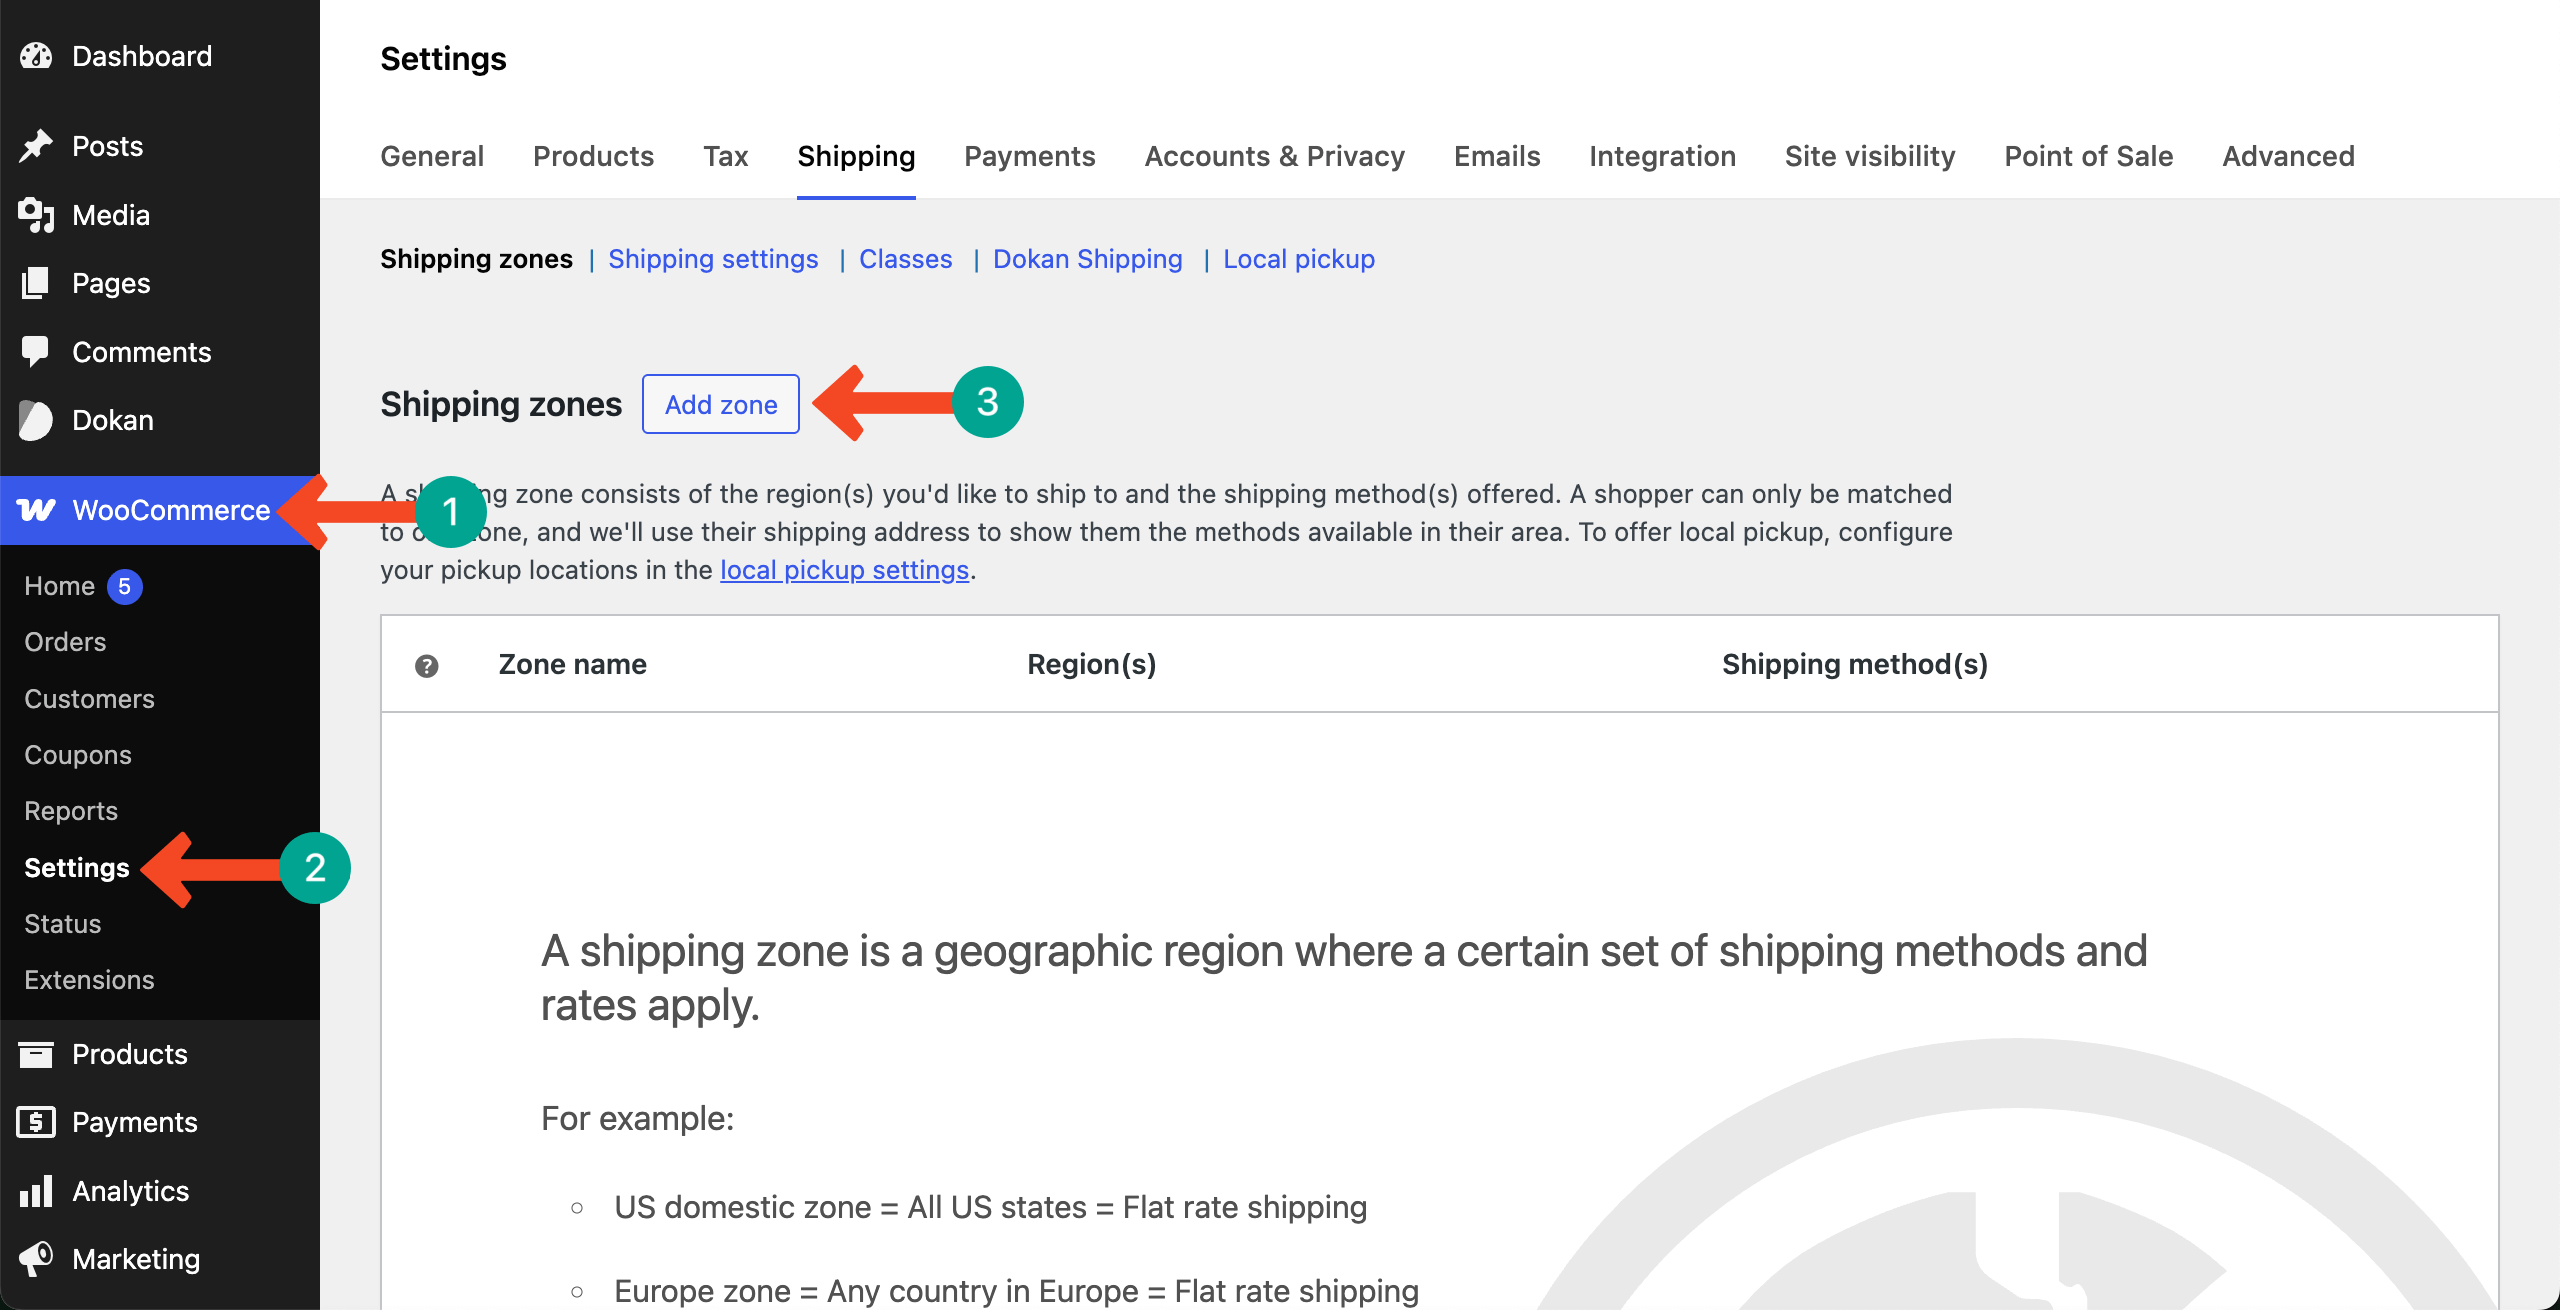
Write a zone name. Then, select the zone regions you want, as many as you like, for example, Europe, North America, etc.

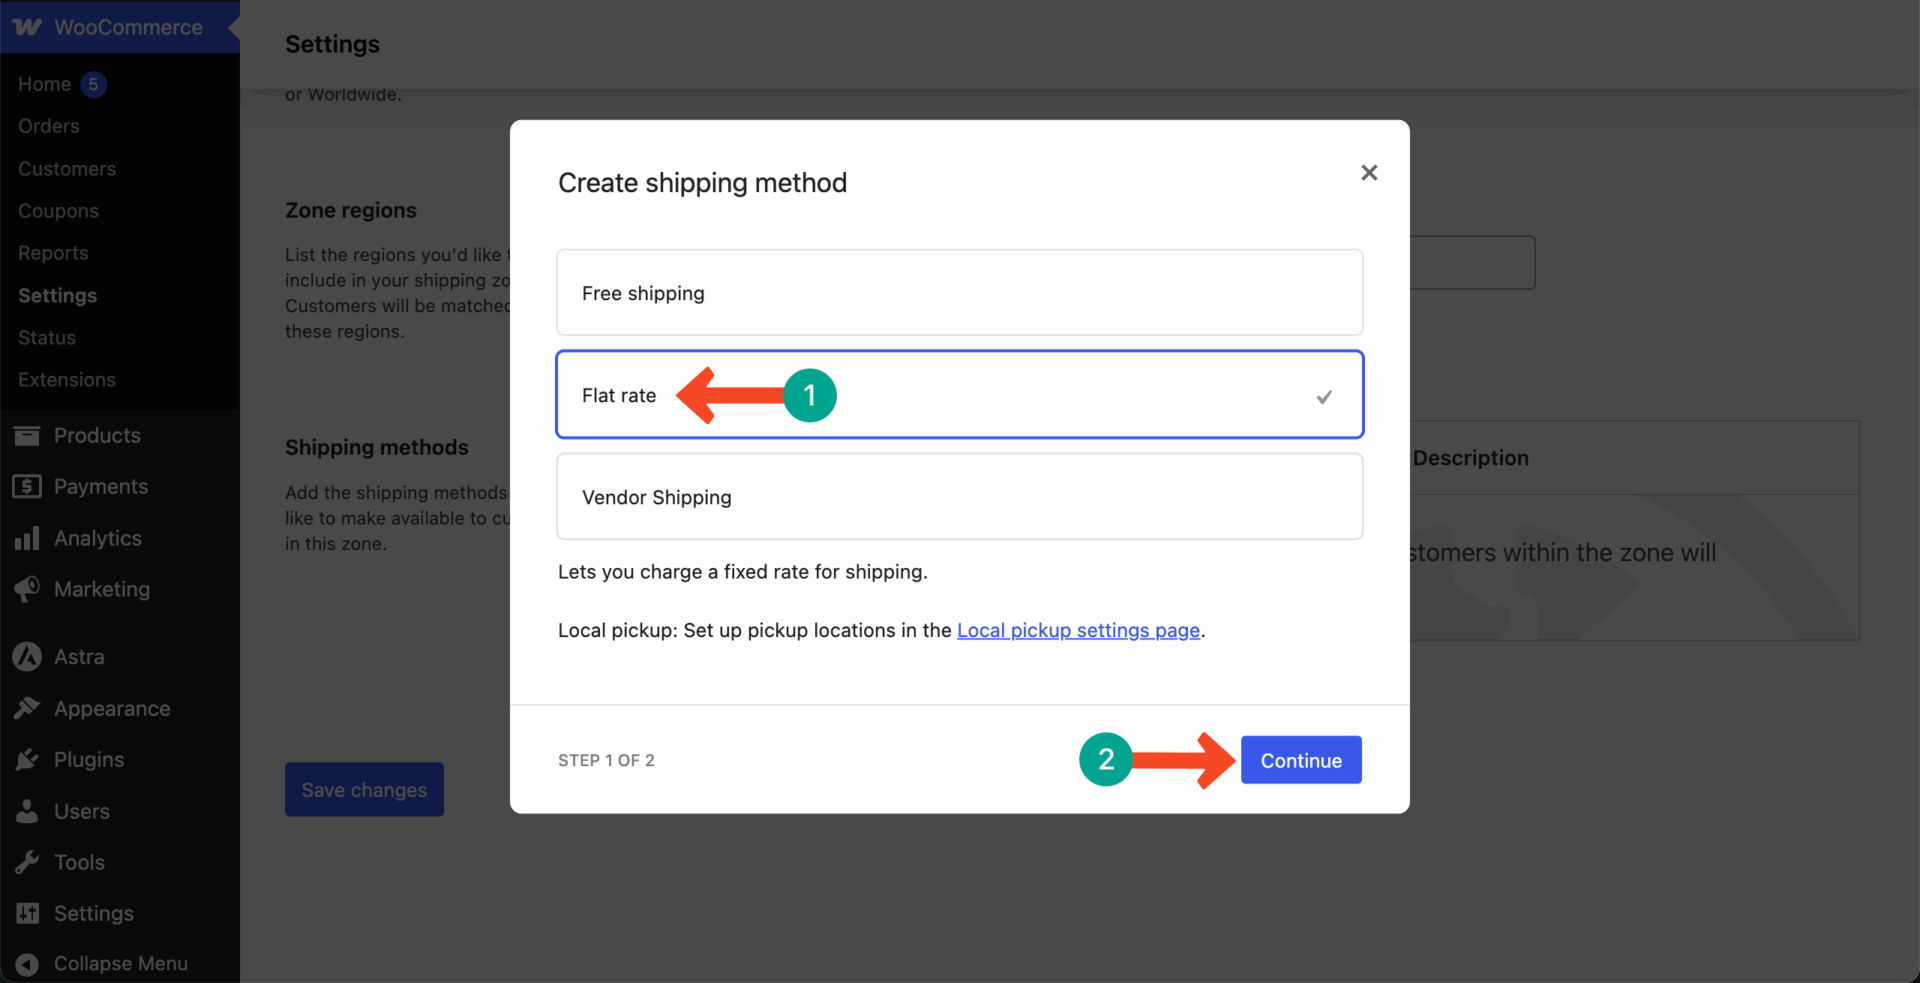
Next, click the Add shipping method button to set a shipping method.
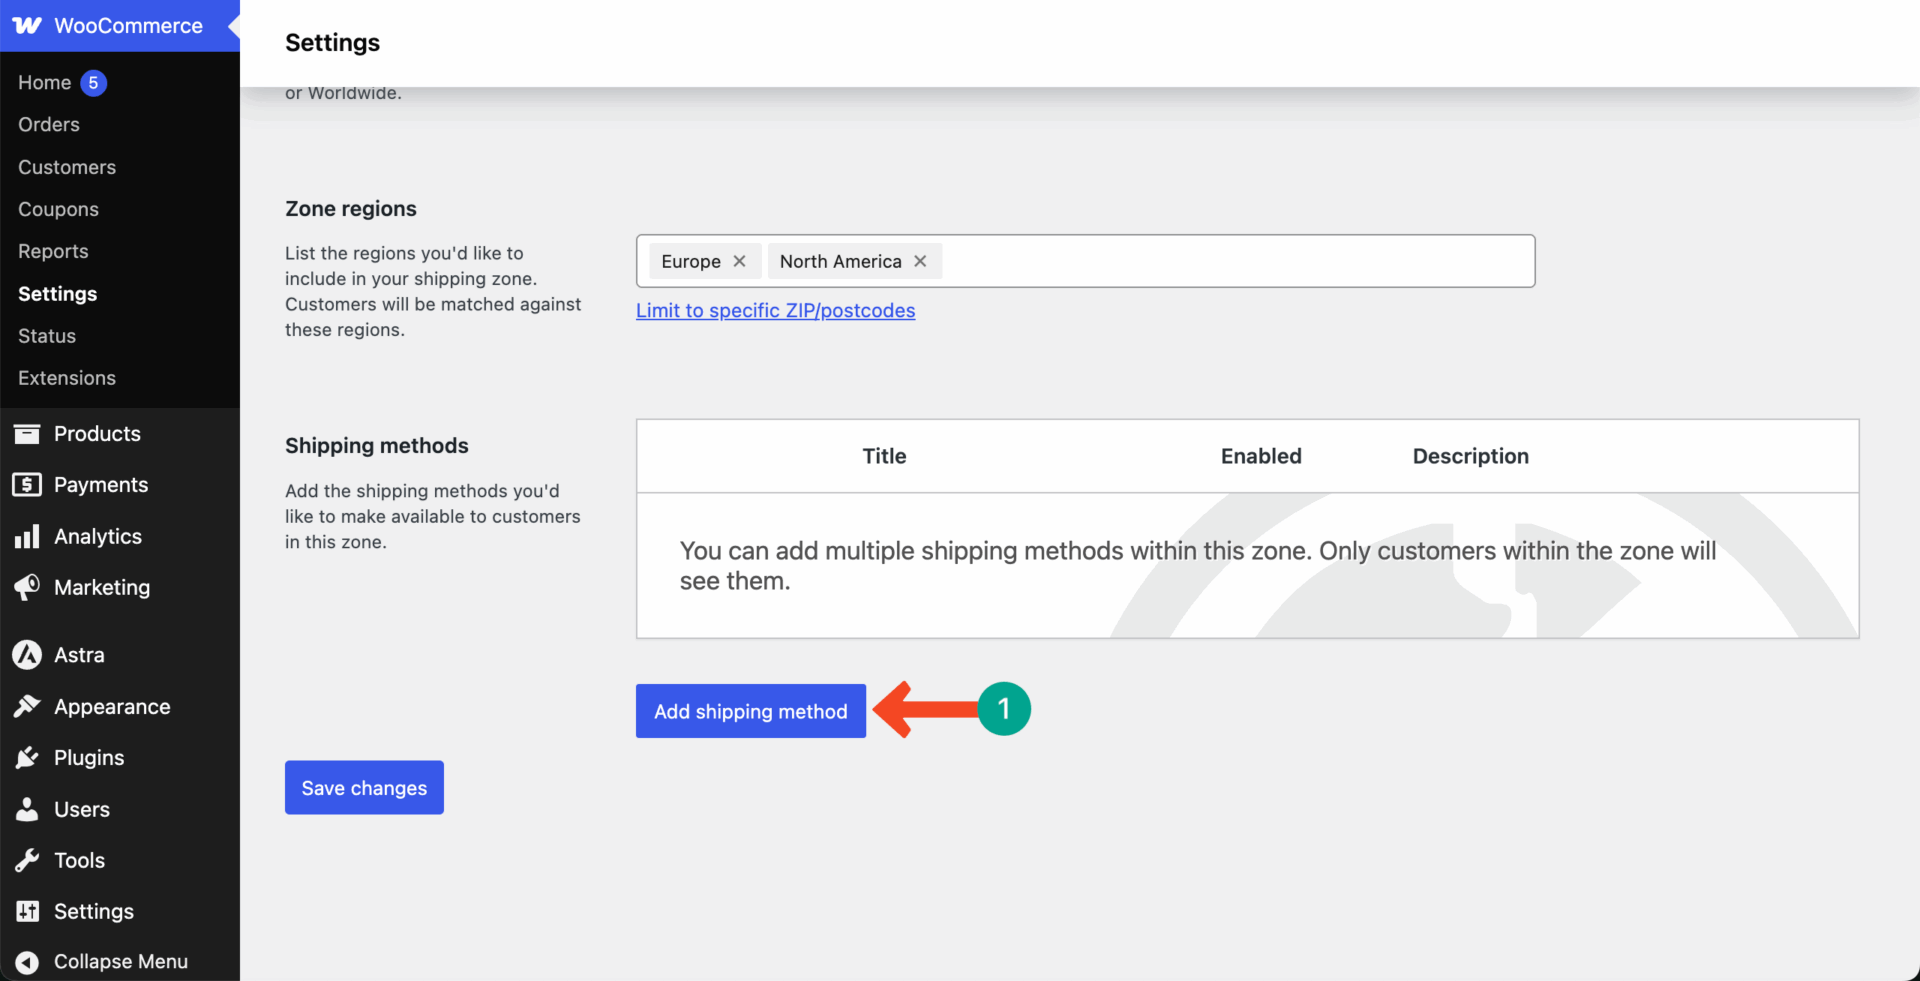
Add the shipping method you like and click the Continue button.
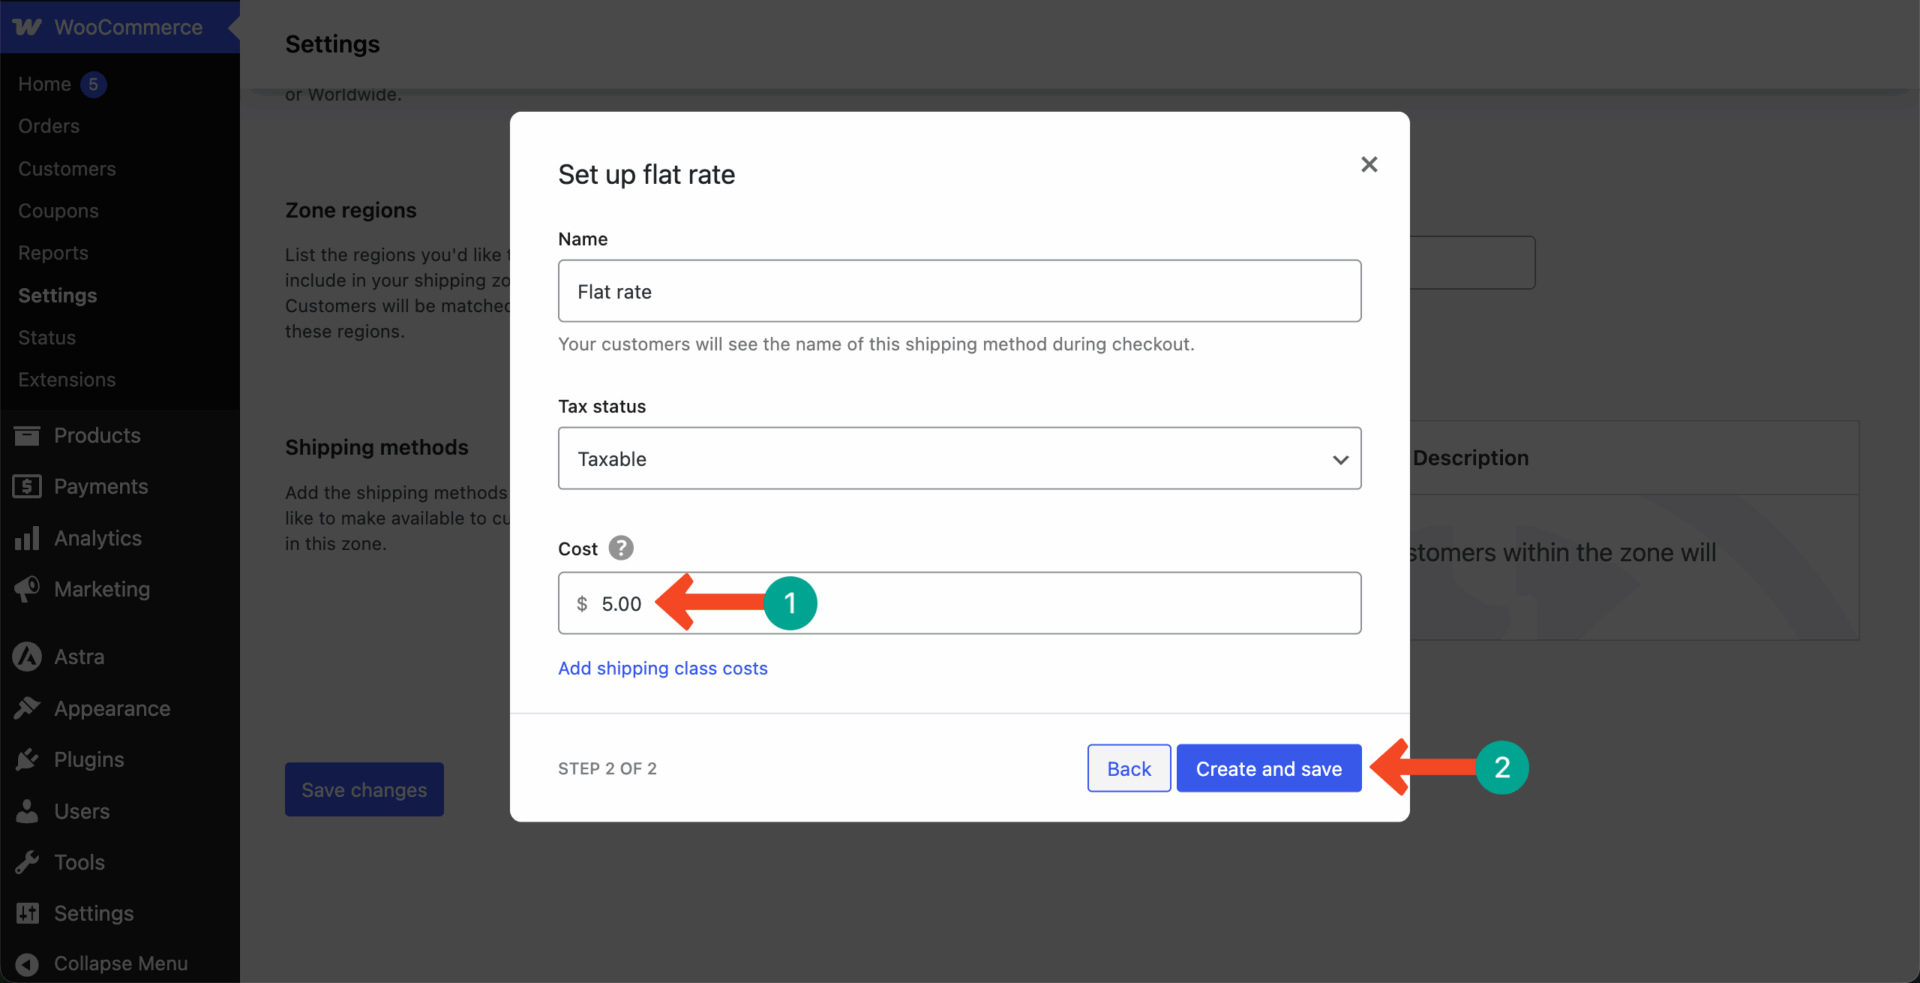
Finally, set a shipping rate you want to charge for each order.
# Vendor-Specific Shipping
Go to Dokan > Settings > Shipping Status.
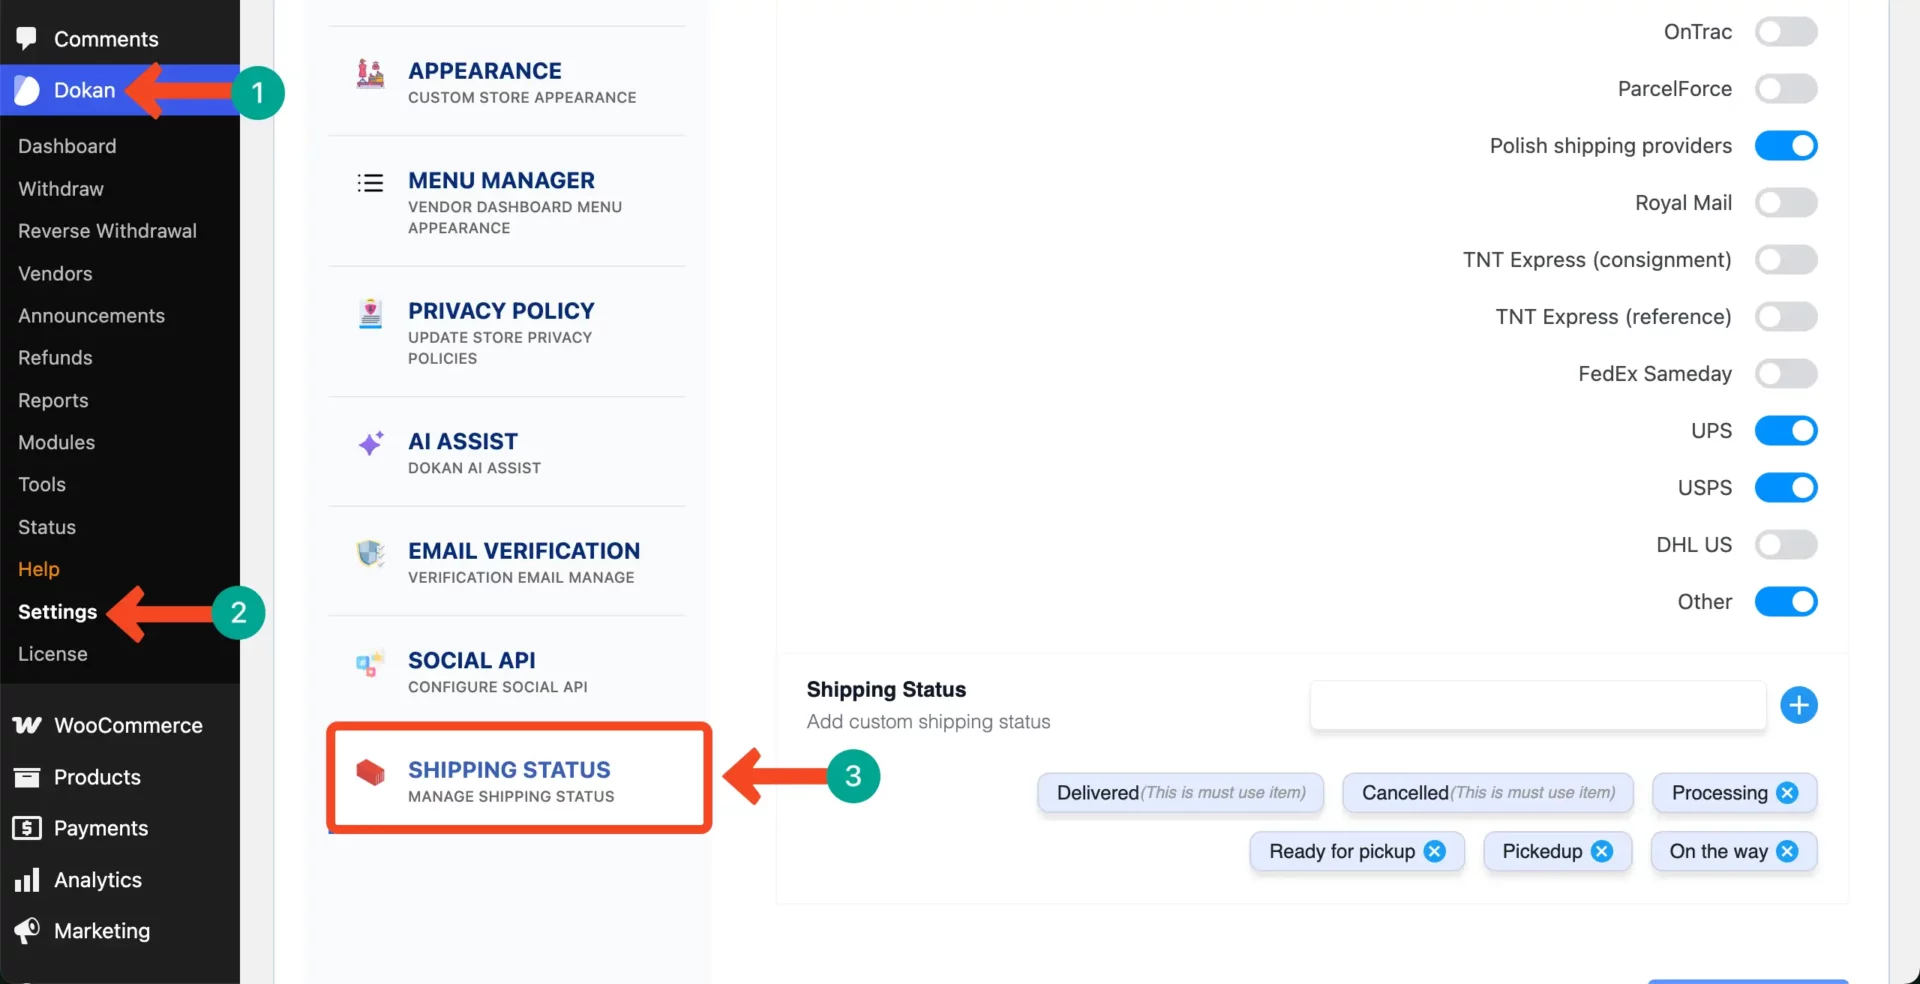
Scroll up the page. You will get the Allow Shipment Tracking for vendors. Enable this option by toggling it on.
You can even enable/disable your preferred shipping providers from here. Save all the changes when everything is done.
Step 7: Product Upload
Vendors drive your marketplace by uploading products. Dokan’s dashboard makes the process quite simple and easy.
# Log in to the Vendor Dashboard
The respected vendor has to log into his/her vendor account by using all the credentials he/she used while registering the account.
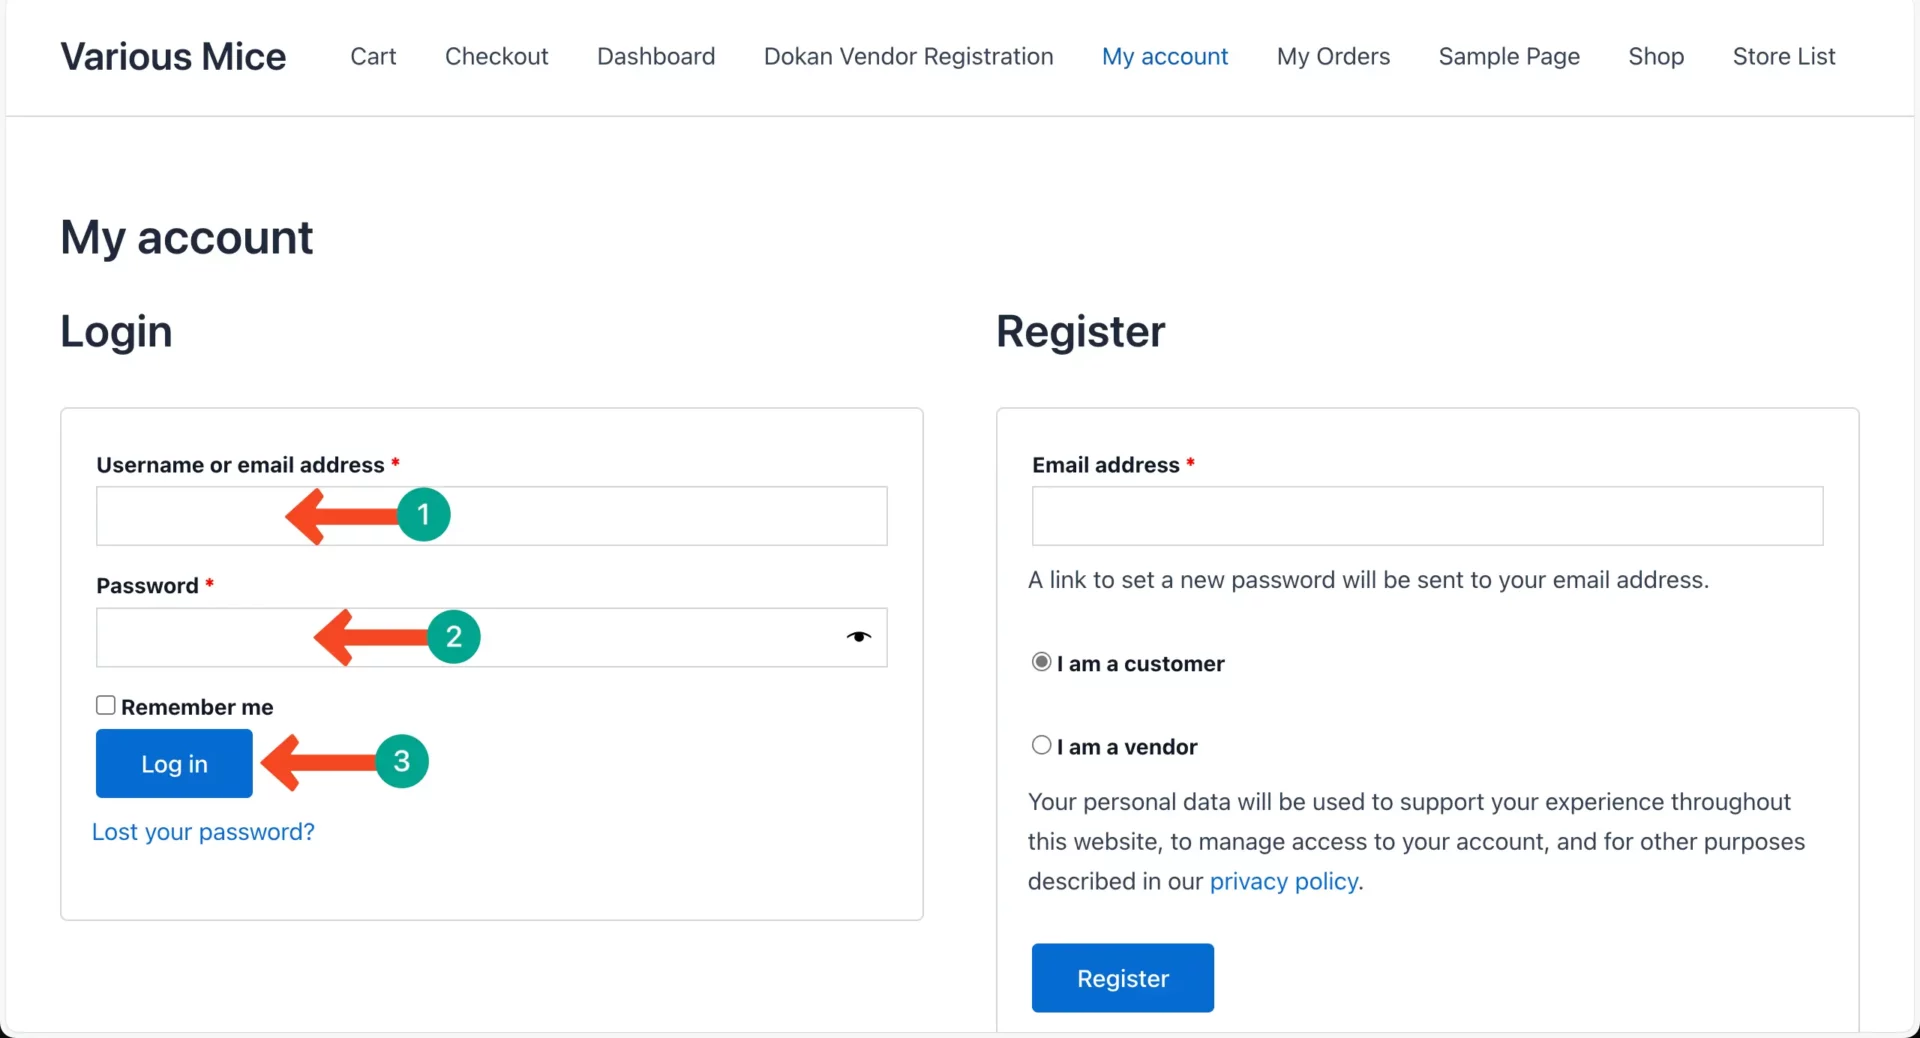
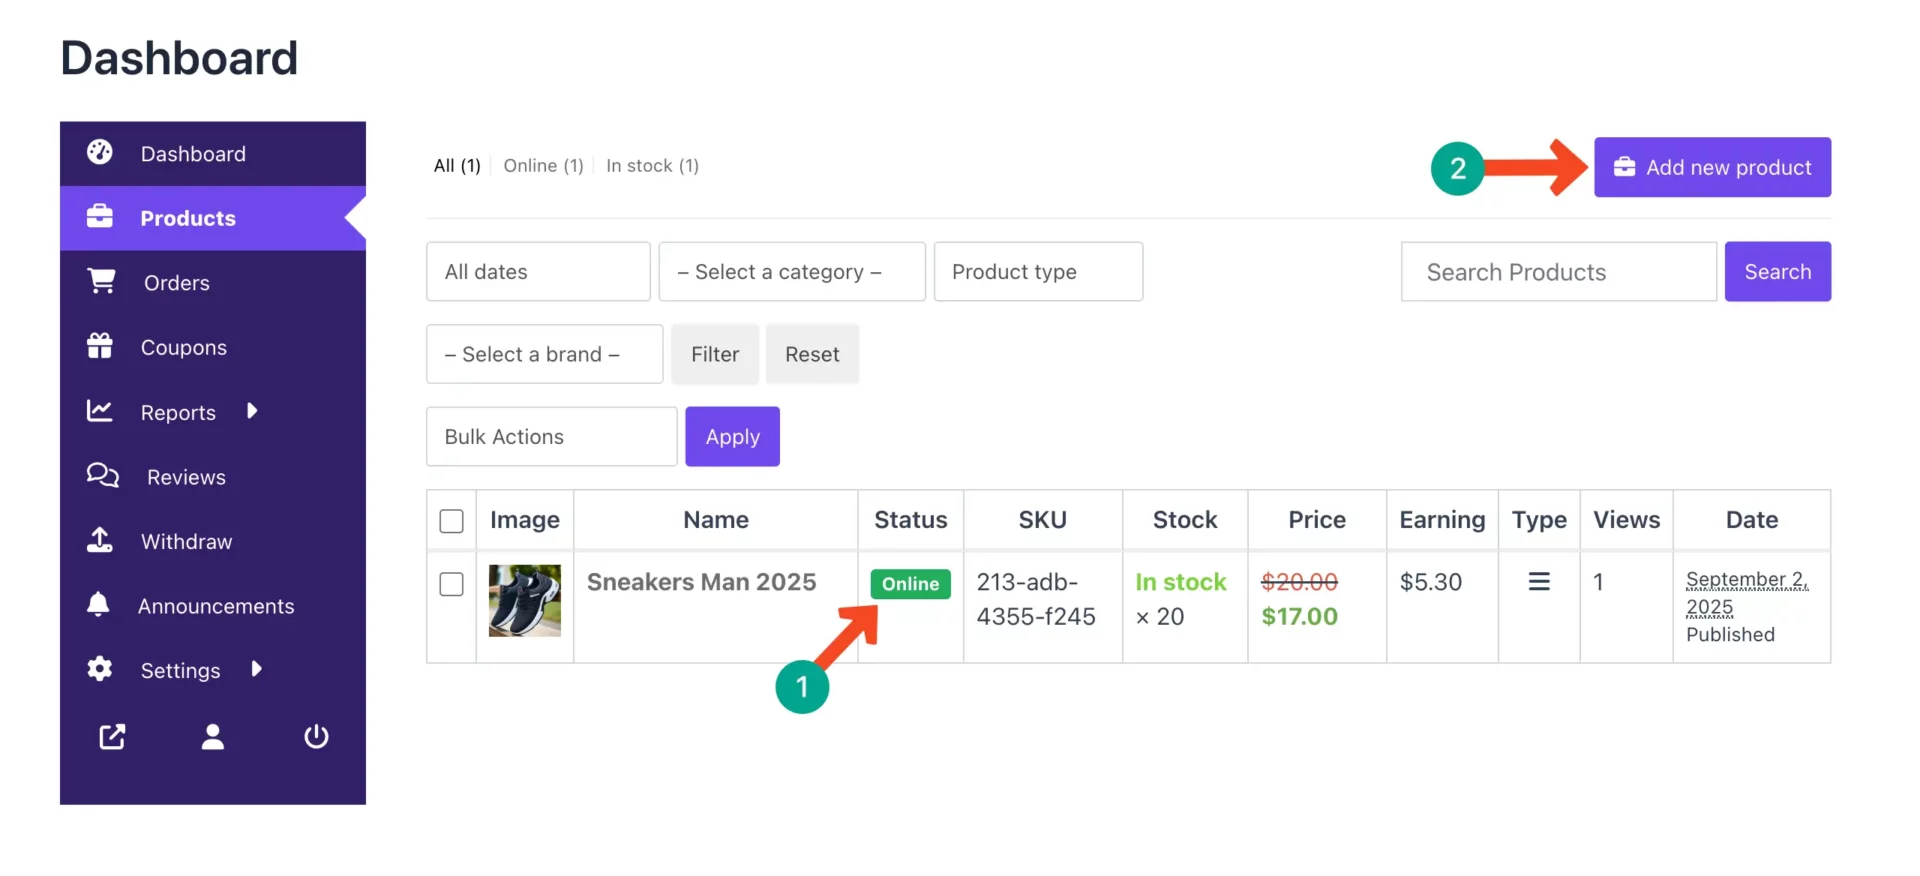
You will get an interface like the image below. Click Products on the left menu bar. Hit the Add new product button. This will take you to a new page for adding products.
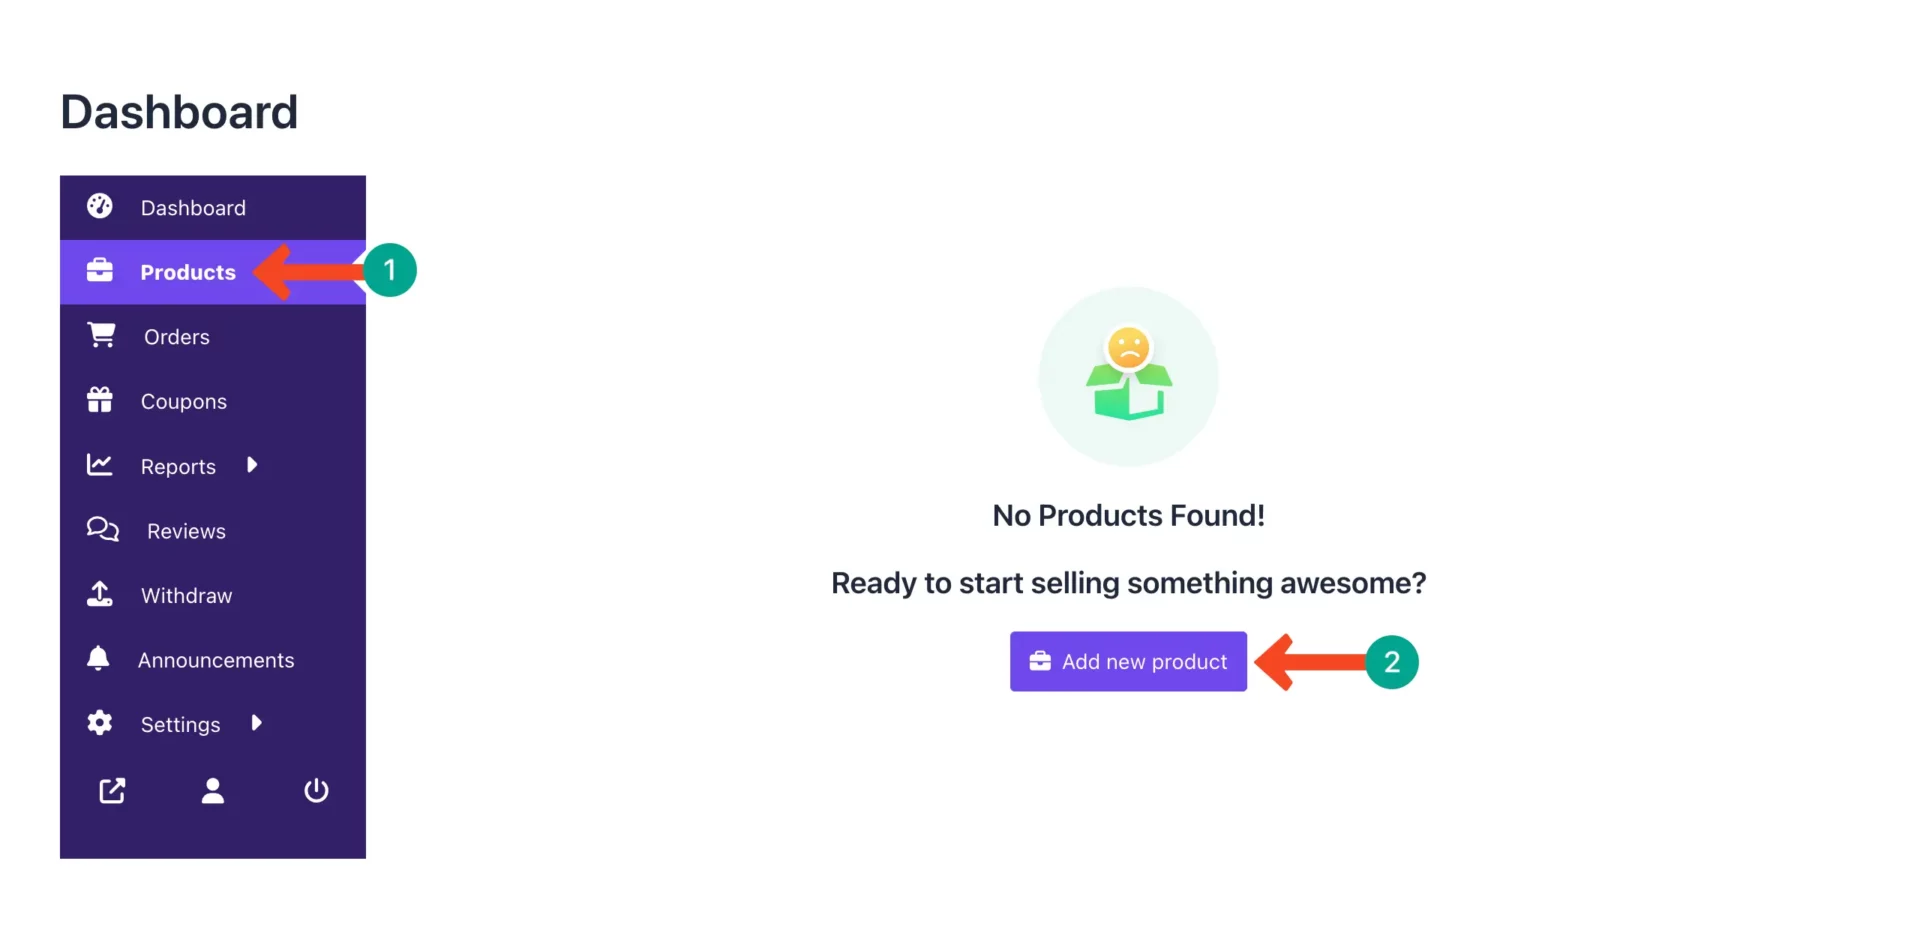
Now, it’s time to add your product and information about it.
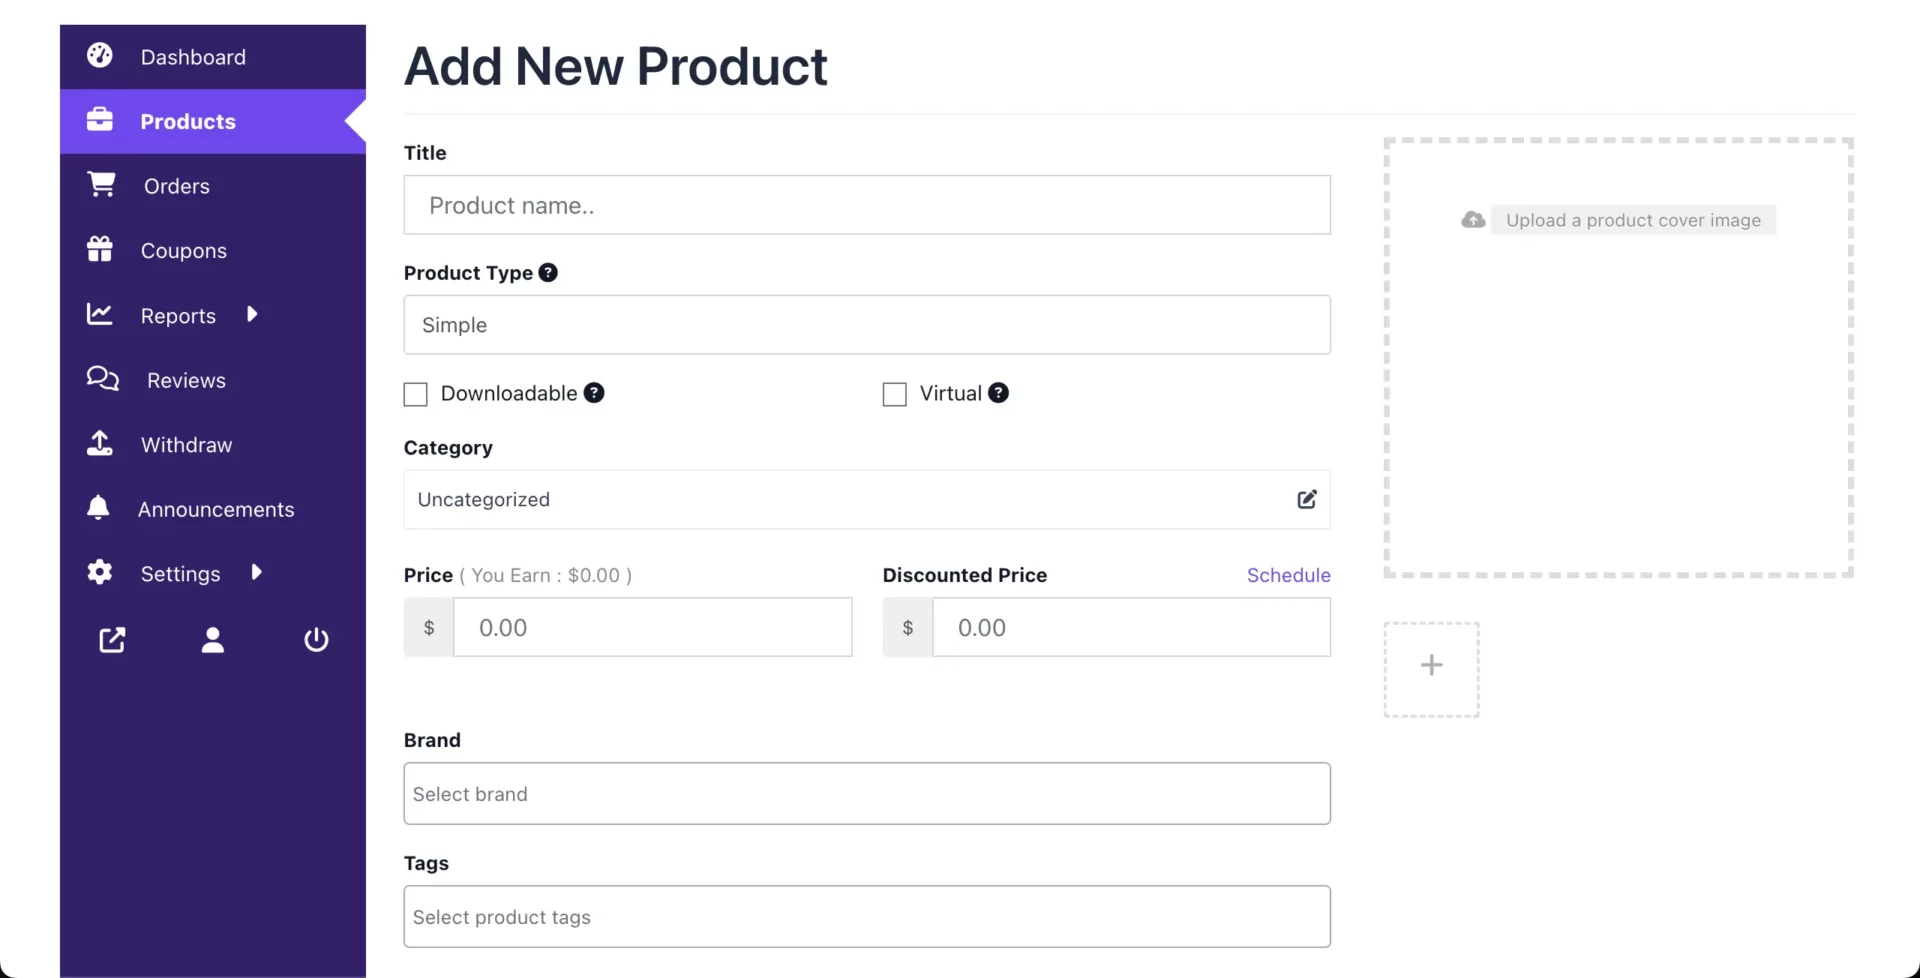
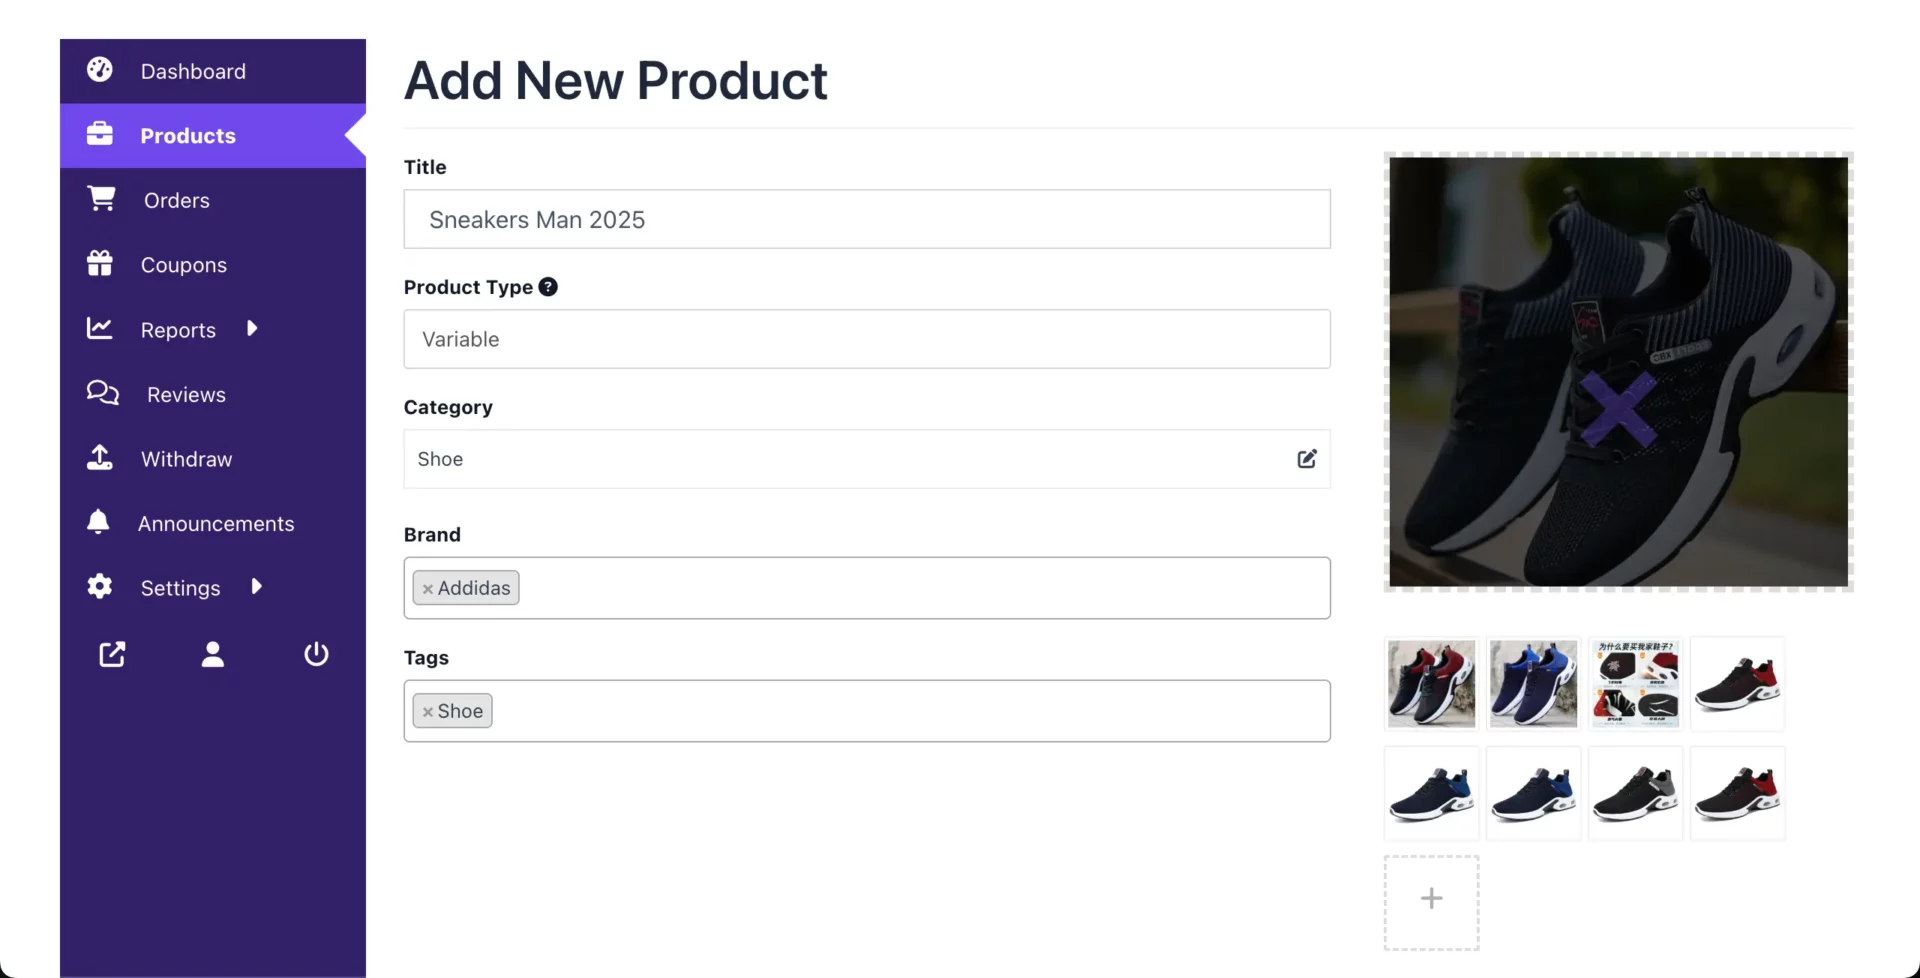
Now, add all the necessary information about your product, name, type, images, prices, variables, a short description, etc., which you feel are important.
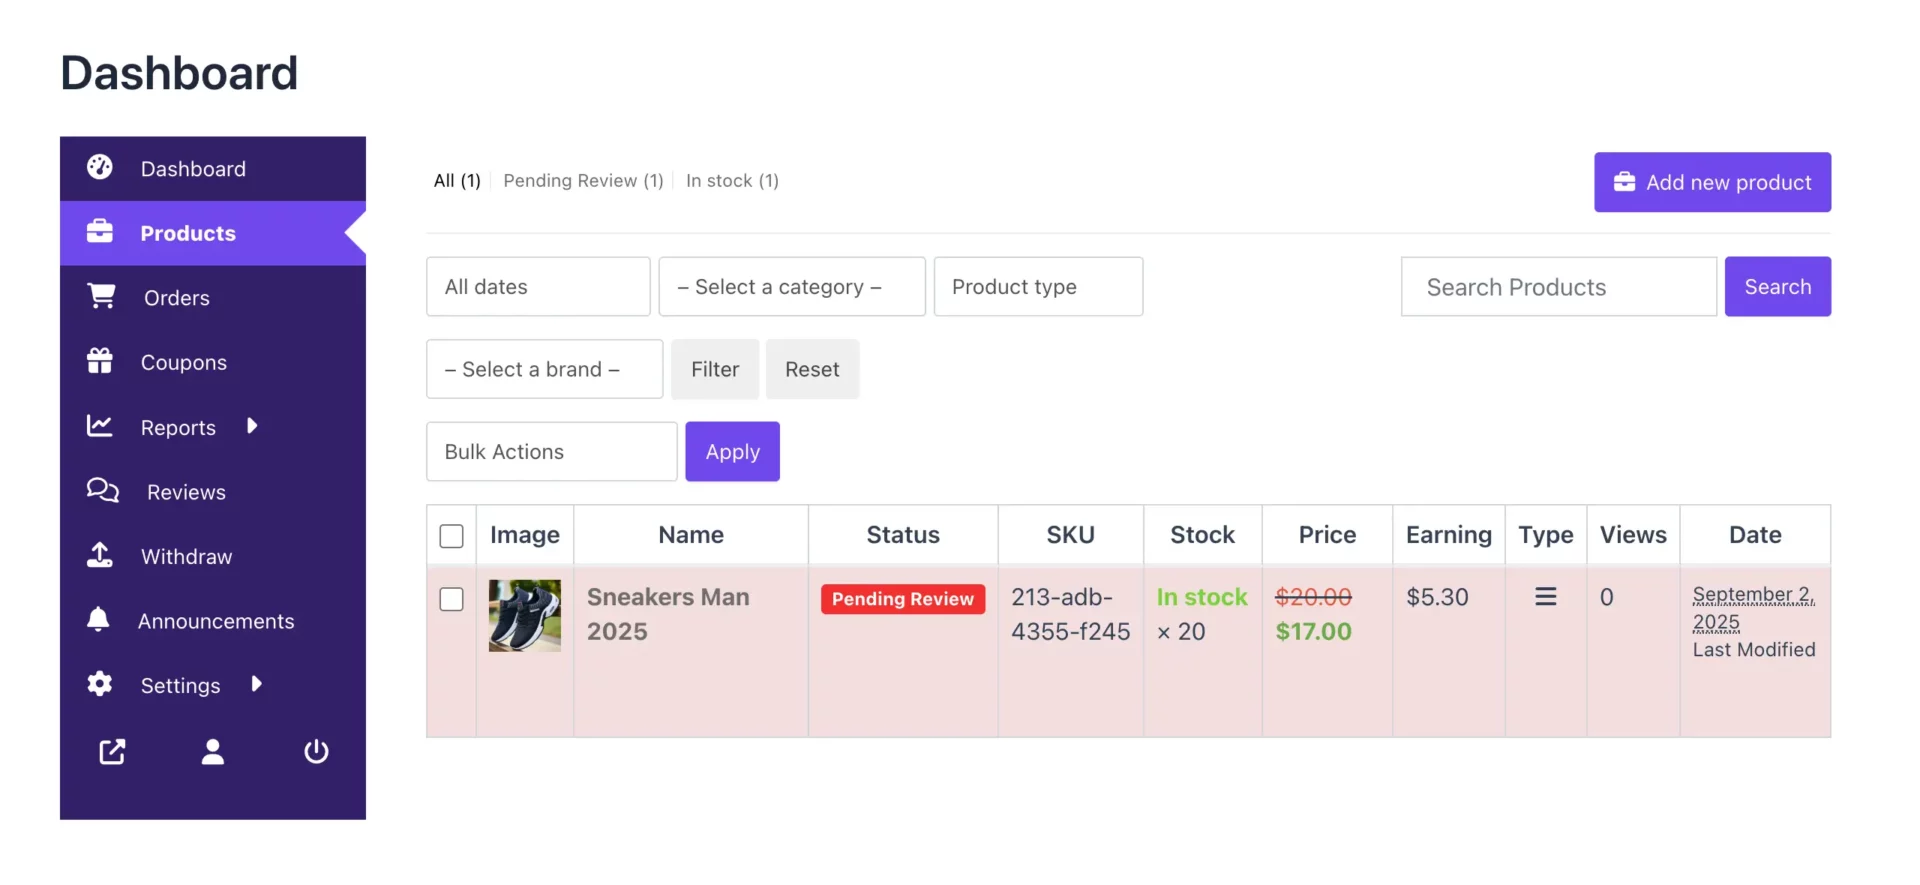
After the information is added, the vendor’s product will be in the pending status unless the marketplace admin approves it.
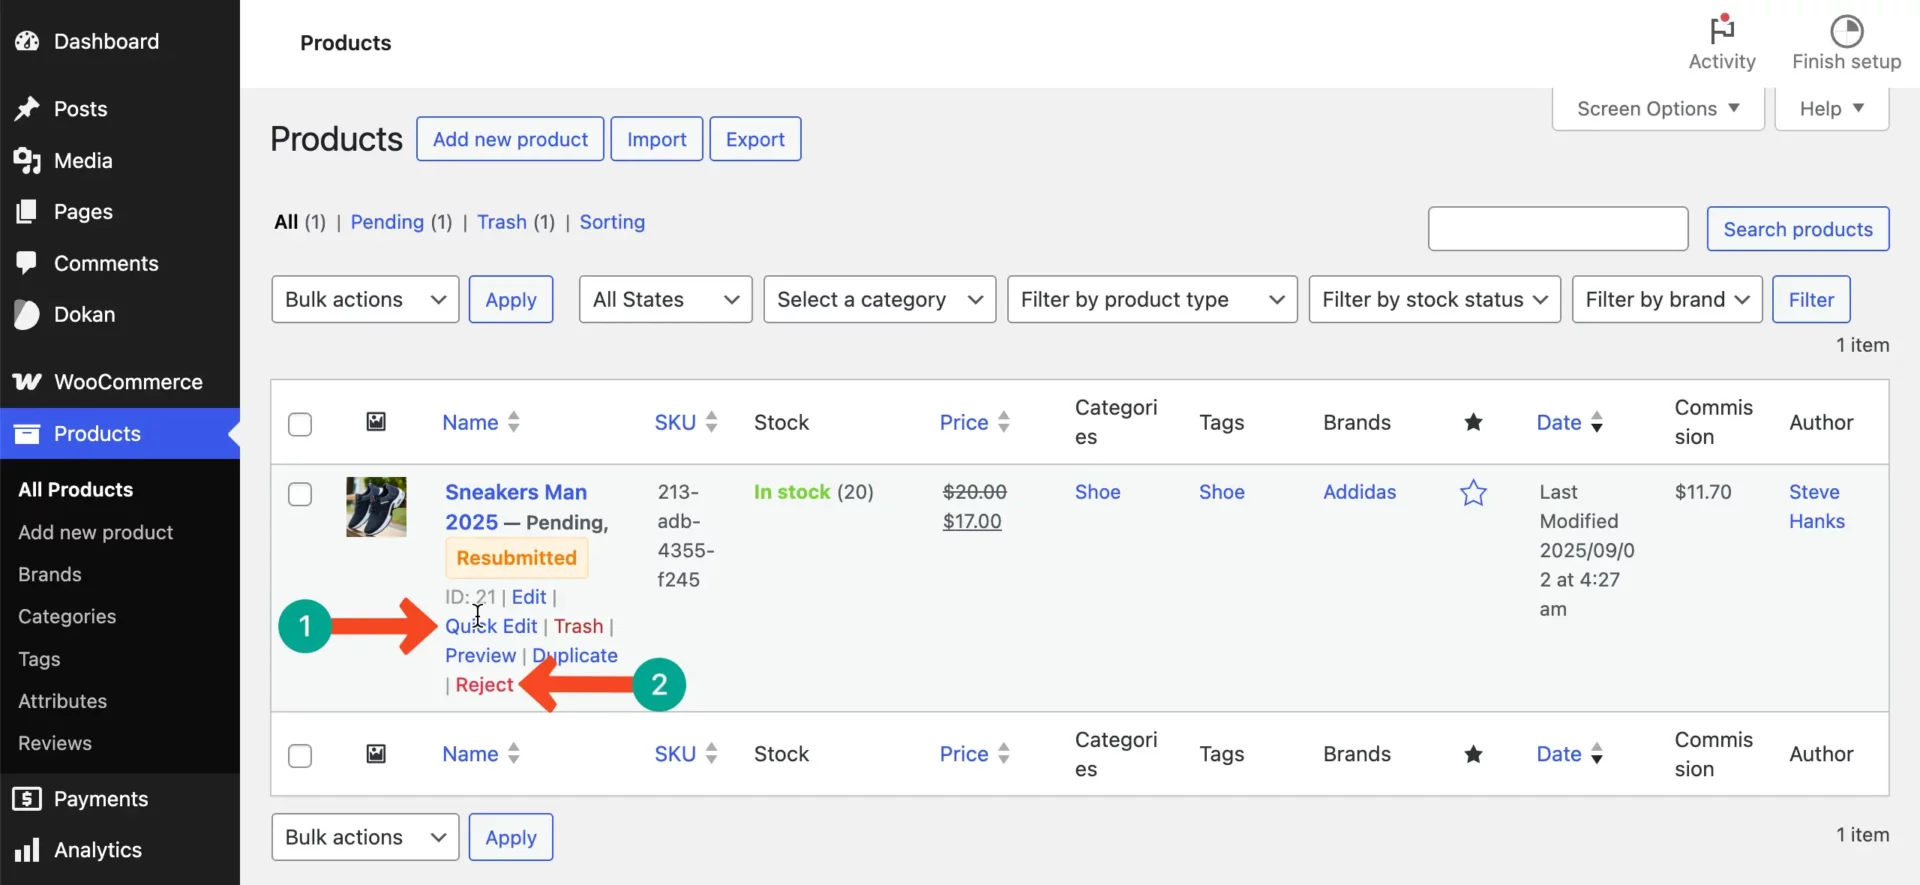
As a marketplace admin, to approve or reject the product, go to the WooCommerce Product section on the WordPress dashboard. You may reject it right away if you don’t like it.
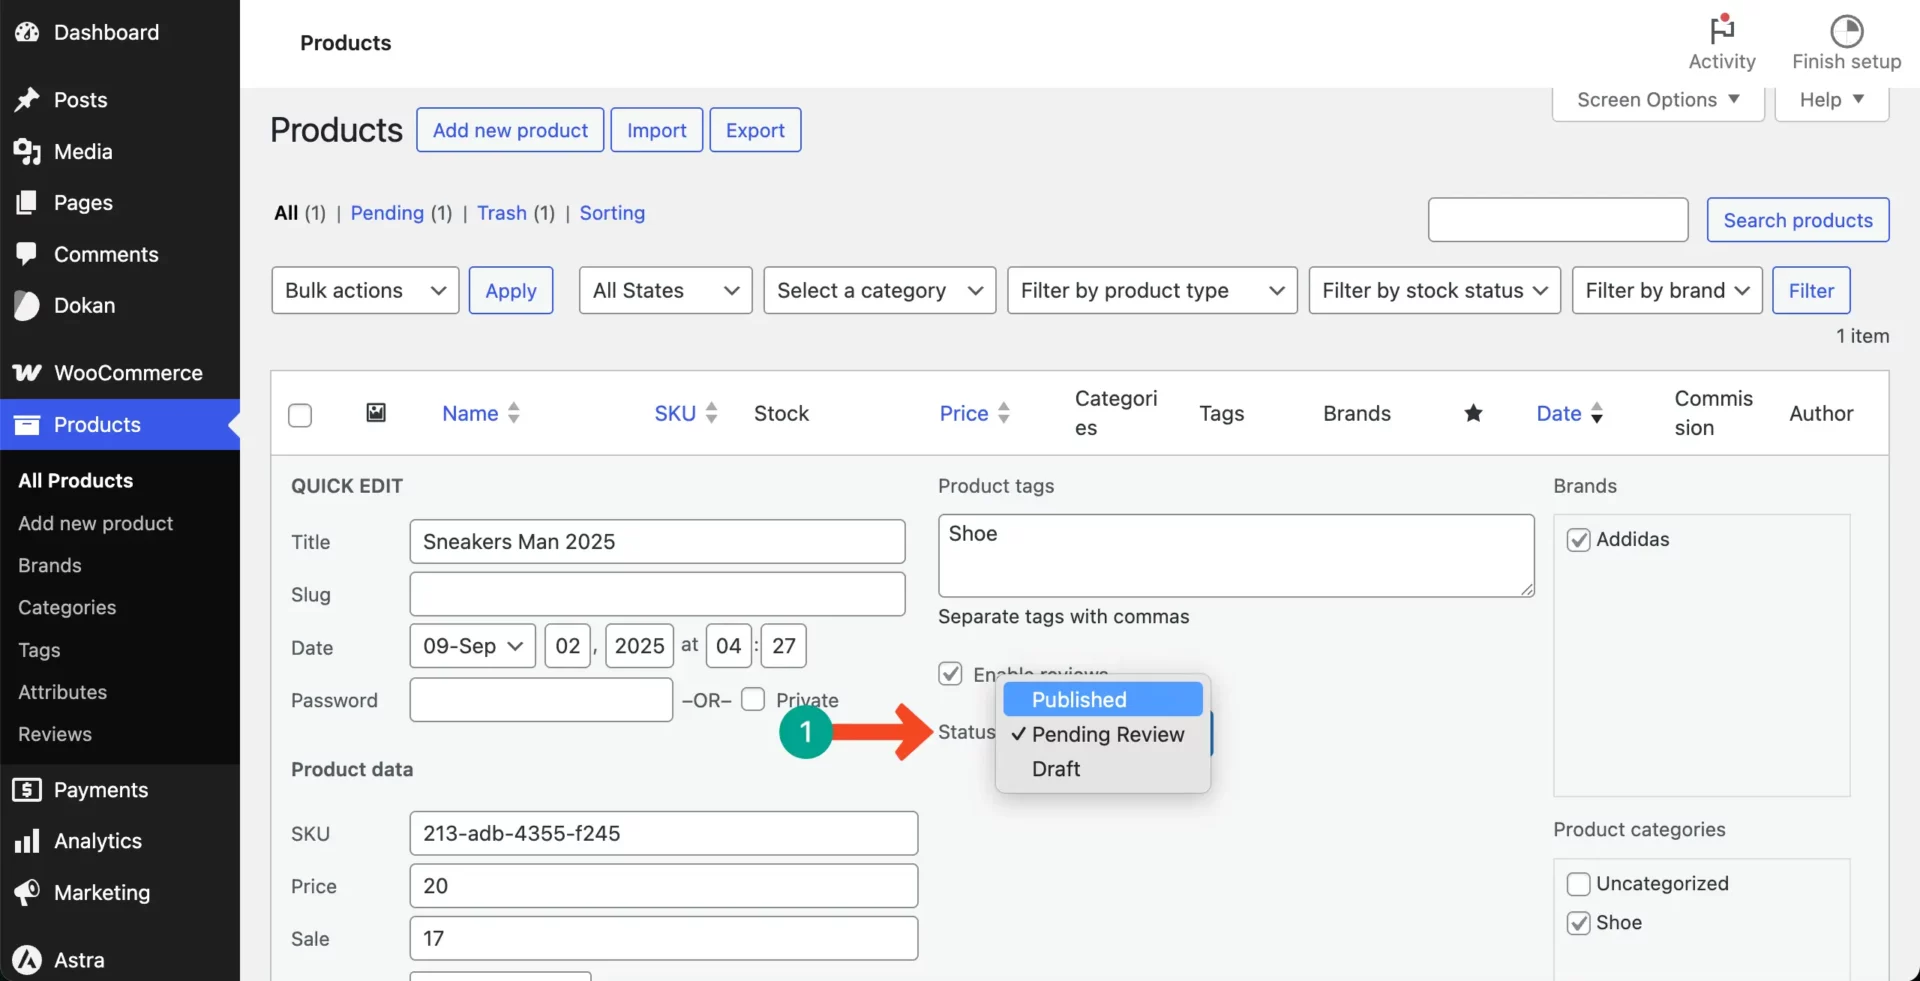
But to approve it, first click the quick edit option.
Next to the Status option, you will see a drop-down option. From there, select the Published option and then save all the changes.
The product will be listed on the vendor’s dashboard.
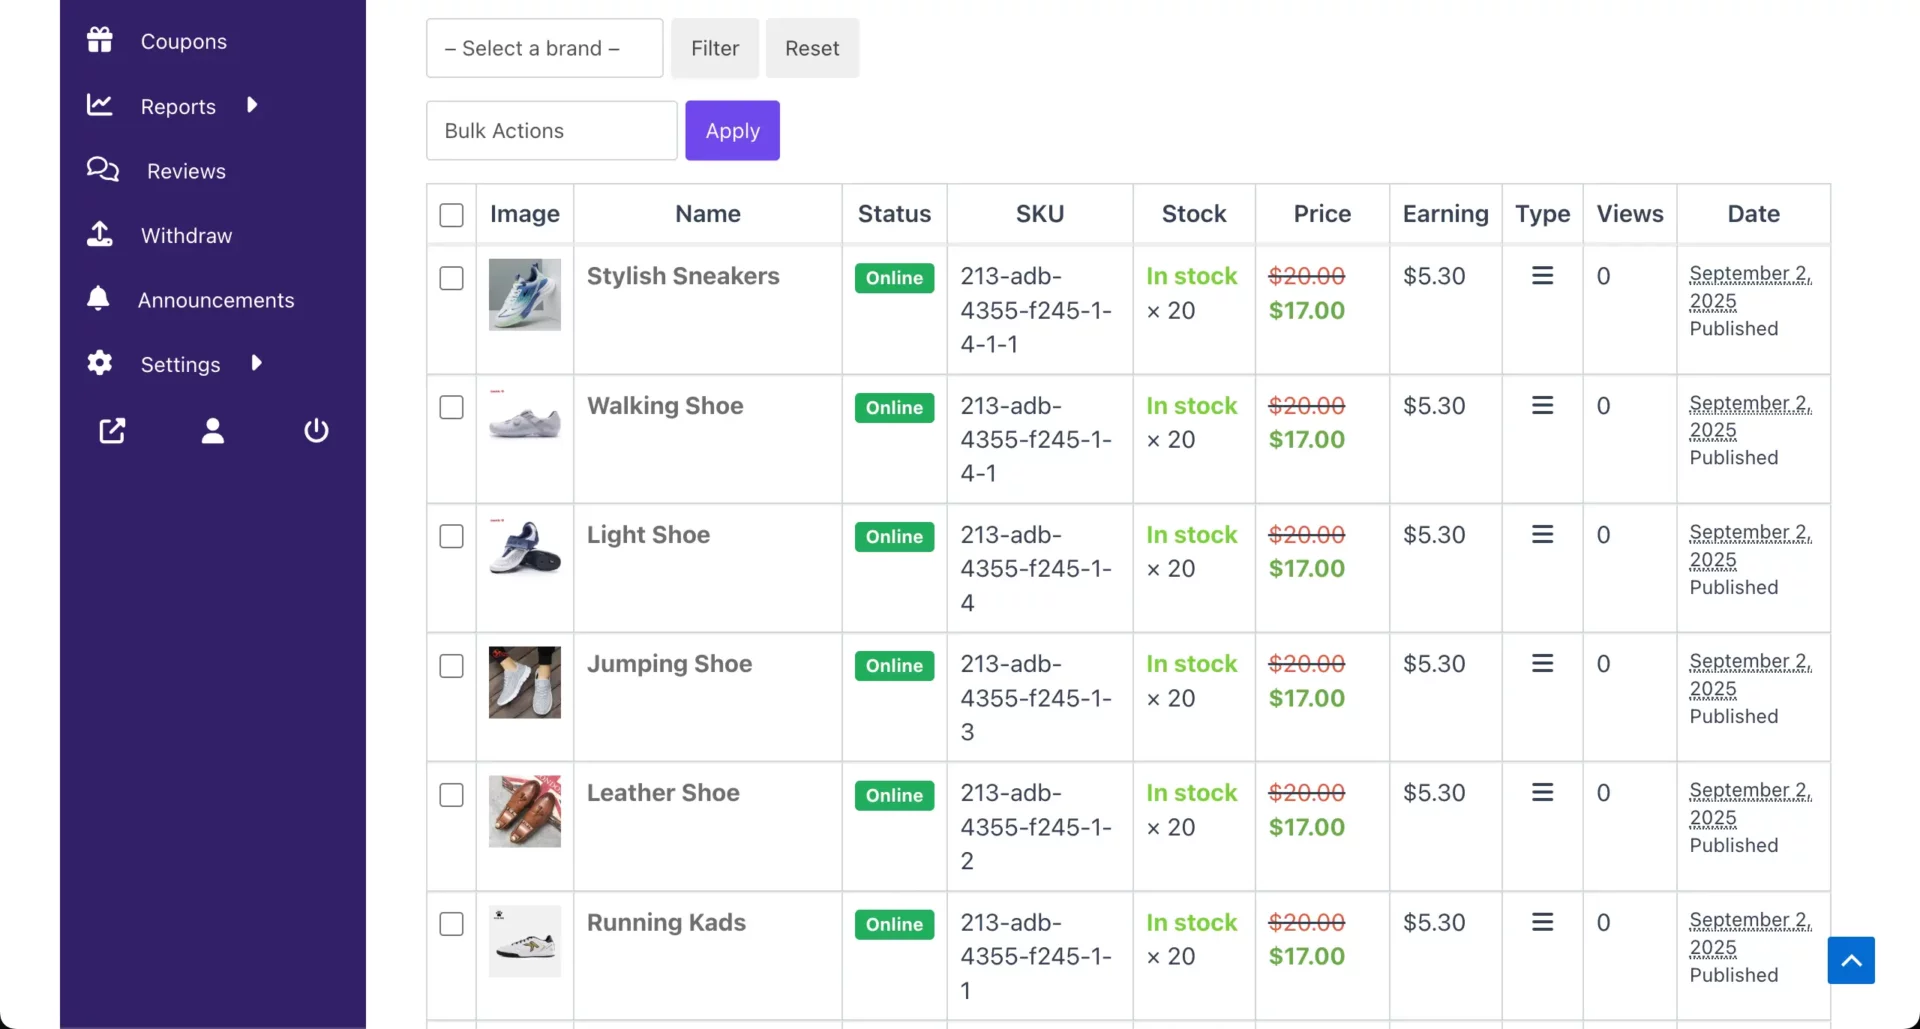
Thus, keep adding as many products as you (vendor) want to your store. The marketplace admin will approve them right away from the backend.
Step 9: Get the First Sale
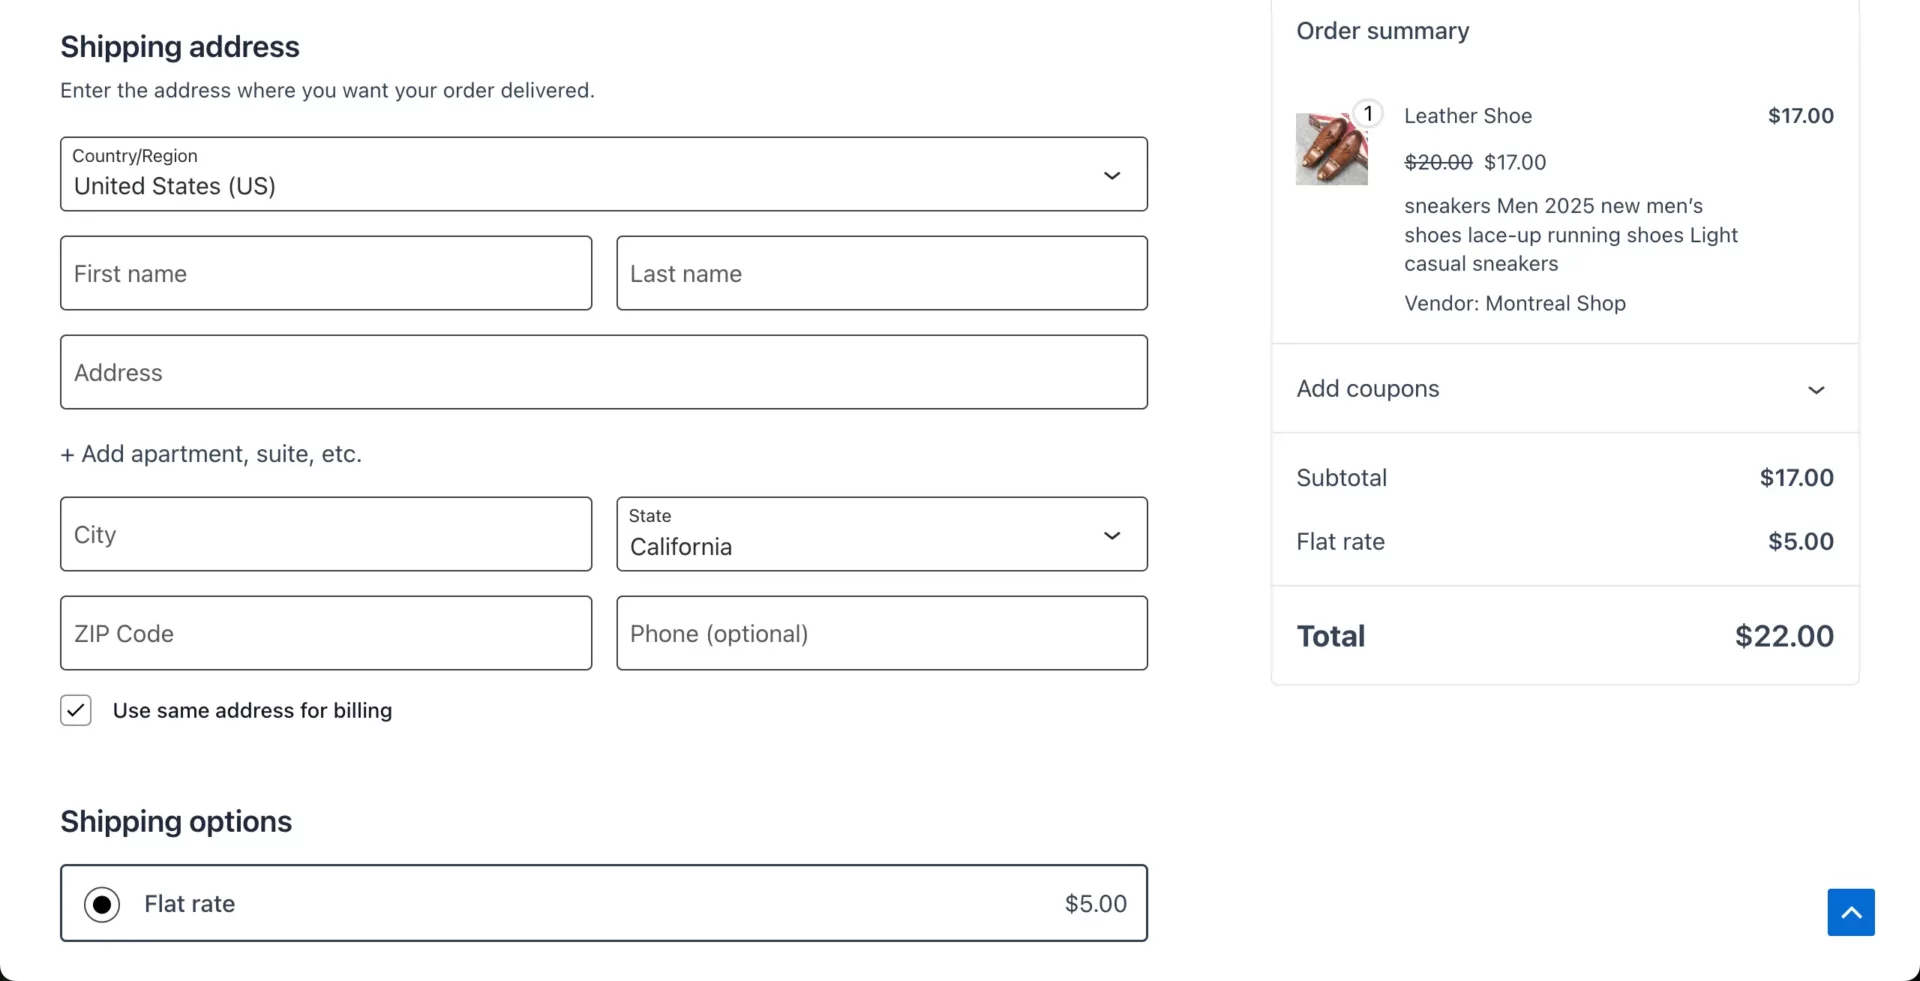
Here, we’ll experimentally show you how customers will buy products from your marketplace, meaning the process.
It’s quite simple and the same as any other marketplace. Customers will visit your shop page and add a product to the cart.

From the checkout page, they can complete purchasing the product by paying the bill.
Step 10: Promote Your Marketplace
Once my marketplace infrastructure was in place, I realized promotion was critical to attract both vendors and customers and to drive growth. Effective marketing ensures your platform stands out in a competitive eCommerce landscape.

# Approaches to Bring More Vendors
Without vendors, it’s impossible to grow as a marketplace and make revenue. There are several common approaches you can follow to create traction in the market and onboard more and more vendors over time to your marketplace. Some of them are:
- Content Marketing
Publish articles on your site about the benefits of selling on your platform (e.g., ‘Why Sell on your marketplace’). Optimize for SEO with keywords like ‘multivendor marketplace’ or ‘sell online.’ Share success stories of early vendors to inspire others.
- Email Campaigns
Use tools like Mailchimp to send targeted emails to potential vendors (e.g., local artisans, small businesses). Offer incentives like a free first month or discounted commissions for early sign-ups.
- Social Media
Post on platforms like X, Instagram, or LinkedIn, targeting niche communities (e.g., craft groups for handmade goods). Use hashtags like #eCommerce, #SellOnline, or #Marketplace to increase visibility. Run paid ads targeting sellers in your niche, with clear CTAs to your vendor registration page.
- Partnerships
Collaborate with industry influencers or bloggers to promote your platform. Partner with local business associations or eCommerce meetups to recruit vendors.
- Affiliate Programs
Use Dokan’s affiliate module or plugins like AffiliateWP to reward users for referring new vendors.
Check proven and well-researched marketing strategies for eCommerce marketplaces.
# Approaches to Get Customers and Make Sales

Marketing is a continuous process. In my marketplace, both my vendors and I had to work together to get customers consistently. So, as a marketplace admin/owner, you can do the following things to make your marketplace popular and make sales.
- SEO Optimization
Optimize product pages and vendor stores with keywords using plugins like Yoast SEO. Create category pages (e.g., /electronics, /fashion) to improve search rankings.
- Social Media Marketing
Share product highlights, vendor spotlights, or promotions on X, Facebook, and Instagram. Run giveaways or contests to drive engagement (e.g., ‘Win a $50 gift card!).
- Paid Advertising
Use Google Ads for keyword-targeted campaigns (e.g., ‘buy handmade jewelry online’). Run retargeting ads to bring back visitors who viewed products but didn’t purchase.
- Email Marketing
Build a customer email list via sign-up forms on your site. Send newsletters with new products, vendor stories, or seasonal discounts.
- Content and Community
Start a blog with buying guides or product reviews to attract organic traffic. Create a community forum using Dokan’s support module or plugins like bbPress to engage customers.
Here’s a detailed guide on how to get your first 100 customers.
# Leveraging Dokan Features

Dokan, by default, offers several exciting features that can help boost your marketplace and get traction. Some notable ones are:
- Store Listing Page
Promote the [dokan-stores] page to showcase all vendors, encouraging customer browsing.
- Geolocation Module (Pro)
Highlight local vendors to attract nearby customers.
- Live Chat Module (Pro)
Enable real-time support to improve customer trust and conversion rates.
- Vendor Badges
Use Dokan’s verification or badge system to highlight trusted vendors, attracting more customers.
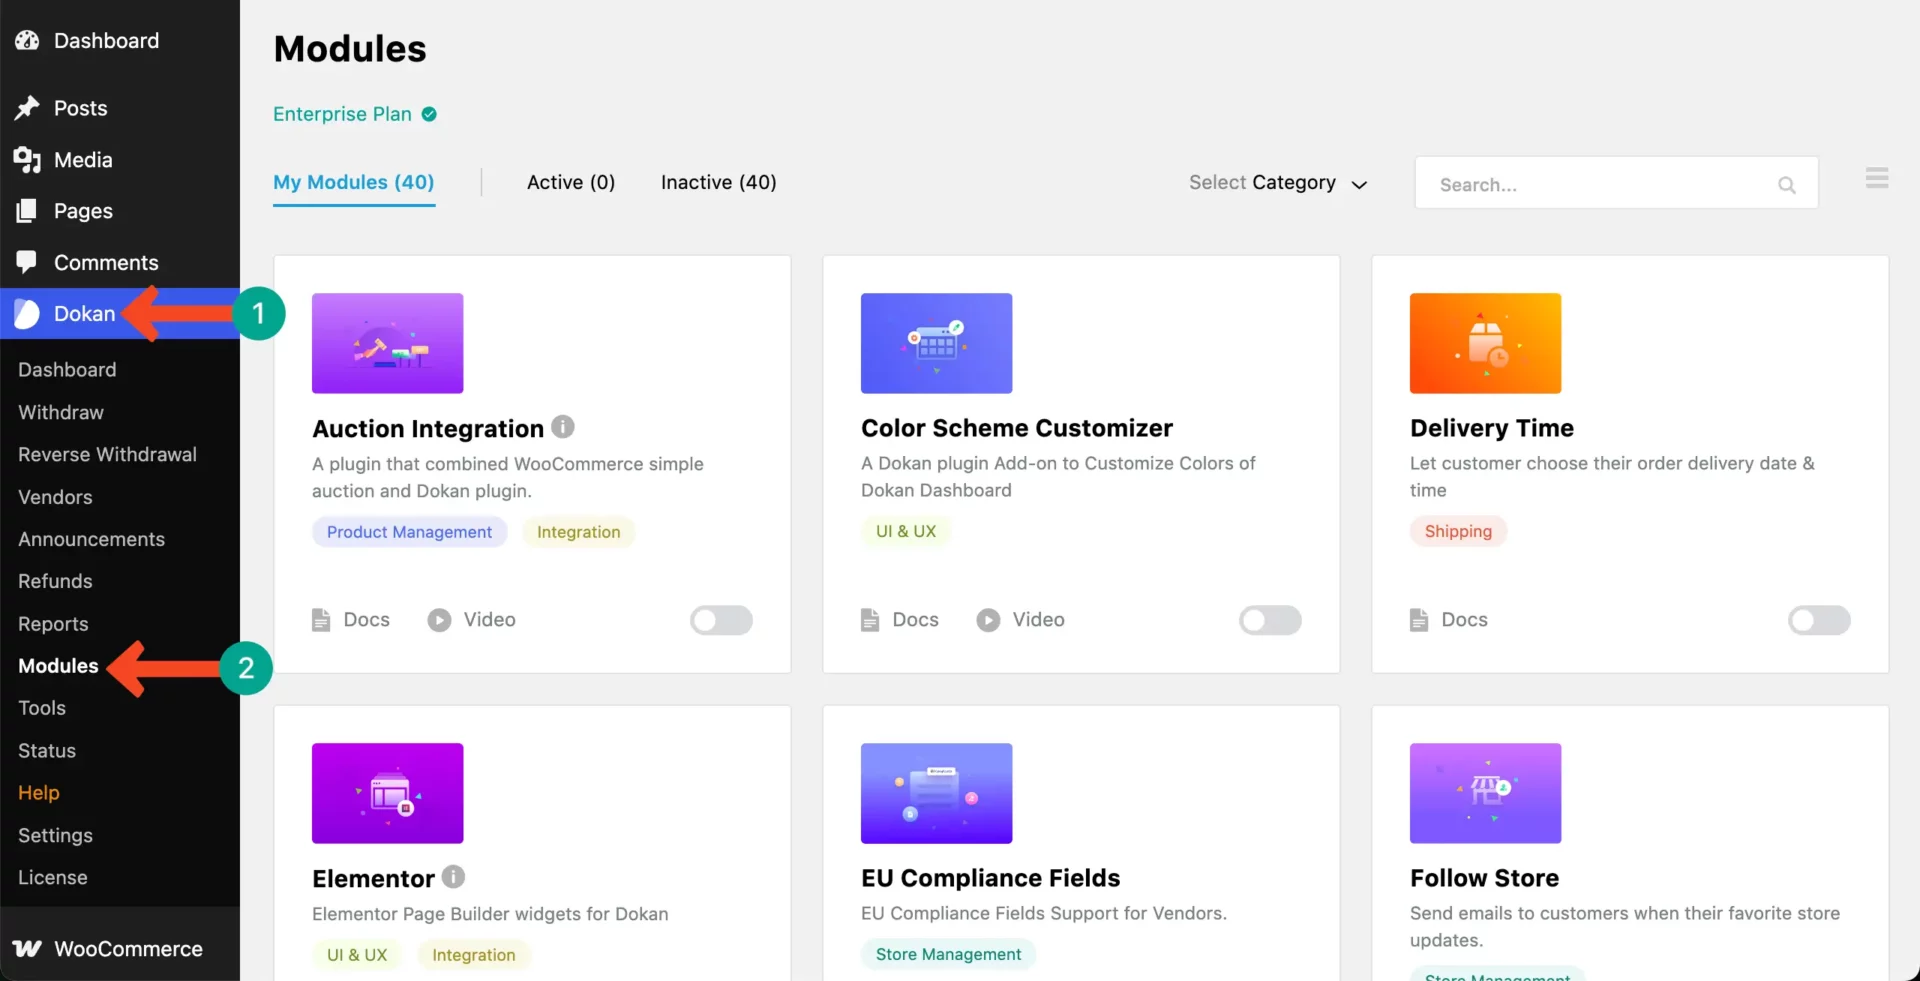
Step 11: Important Module Selection and Enable
Dokan’s modular system lets you enhance functionality. Select and configure key modules for a competitive edge. Go to Dokan > Modules in the admin panel. The free version includes basics, while Pro offers advanced options.
# Recommended Modules
- Vendor Subscription: Create tiered plans (e.g., Basic, Premium) to monetize vendor access.
- Live Chat: Enable real-time support for customers and vendors.
- Product Addons: Allow custom fields (e.g., gift wrapping) for products.
- Geolocation: Show nearby vendors or products based on customer location.
- Auction/Booking: Add niche functionality for specific markets.
- Vendor Verification: Verify vendor identities for trust (Pro feature).
Check all Dokan modules.
Final Words!
The Dokan onboarding journey felt like a lot when I started, but once I set up everything step by step, the process became smooth. From installing the plugin to configuring your store and inviting vendors, Dokan makes multi-vendor marketplace creation easy.
With its flexible features, you can turn a simple WordPress site into a professional eCommerce platform. To get the best results, follow a few best practices during onboarding. Always choose a lightweight and responsive theme that works well with Dokan. Set clear vendor policies before opening registrations to avoid confusion later.
Keep your product categories well-organized so that vendors and customers can easily navigate your site. It’s also a good idea to test your payment gateways and shipping options before going live. Provide them with clear guides, FAQs, or even a welcome email with resources to help them start selling quickly.
When vendors feel supported, they are more likely to stay active and bring more sales to your marketplace. By following these simple practices, you can make the Dokan onboarding journey smooth and successful for both you and your vendors.


Leave a Reply