
Could you imagine spending a day without using any electronic products? It’s hard, right? We are deeply connected to electronic products for various purposes in our daily lives.
That is why electronics is a rapidly growing industry. According to a report by Statista,
The global electronics market is projected to grow by $1.8 trillion by just this year (2024).
If you want to take a small slice from this pie, WordPress is there to welcome you.
How?
Well, you can create an online full-fledged electronic products marketplace using WordPress and start selling electronic products to be a part of this industry.
In this step-by-step tutorial, we are going to show you how to build an electronic products marketplace using WordPress and Dokan multivendor plugin. So, keep reading!
Why Should You Create an Electronic Products Marketplace?
As we have said already electronics industry is getting bigger with new gadgets and technologies being released every year. As more and more people become interested in these products, there is a growing demand for a centralized marketplace that offers a wide range of options.
Now let’s focus on what you’ll get if you can create a centralized marketplace to sell electronic products online:
- Profit Potential: With a wide range of electronics available, there is the potential for high-profit margins in the electronics industry. By creating a marketplace, you can benefit from these profits while also offering a platform for other vendors to sell their products.
- Diverse Customer Base: Electronics are used by people of all ages and backgrounds, from tech enthusiasts to casual users. By creating a marketplace, you can appeal to a diverse customer base and offer products that meet the needs of a wide range of people.
- Innovation: As the electronics industry continues to evolve, there will always be new products and technologies to offer. By creating a marketplace, you can stay on top of these trends and offer innovative new products to customers, keeping them engaged and interested in your platform.

- Scale: An electronics marketplace can be scaled up or down based on demand, which can allow for a wide range of vendors and customers to participate in the marketplace. Additionally, with the advent of drop-shipping, you can avoid inventory and logistics costs, making it easier to scale up your marketplace without a significant increase in operating costs.
Are you new to the eCommerce business? Dive into the world of online selling with our ultimate eCommerce glossary!
6 Steps to Build Your Electronic Products Marketplace Using Dokan

Creating an online electronic products marketplace is tough and complicated, to be honest, if you want to do it from scratch by coding.
To make this journey easier, WordPress comes with built-in marketplace solutions like WooCommerce and Dokan multivendor plugin. You can use these plugins to create and launch your online marketplace without coding or hiring any expert.
Just follow these 6 steps to get your job done:
- Install and Activate the Dokan Multivendor Plugin
- Install a Dokan Compatible Marketplace Theme
- Configure The Basic Settings of Dokan Multivendor Plugin
- Upload Products to Set up Your Admin Shop
- Allow Vendors to Register on Your Marketplace
- Enhance User Experience with Advanced Features for a Marketplace
Before jumping into the first step to get started with this tutorial, let us show you the prerequisites you need to prepare before following these steps.
Prerequisites to build an online electronic products marketplace:
- A unique domain name and a hosting plan
If you aren’t ready with these prerequisites, don’t be worried. We have dedicated blogs to get these things done with ease.
- How to Choose The Best Domain Name for eCommerce Website
- Get the Best WooCommerce Hosting to Keep Your Site Performance High and Rocking
Step 01: Install and Activate the Dokan Multivendor Plugin
The first step that you need to follow is to install and activate the Dokan Multivendor plugin on your site. As it’s a WordPress multivendor plugin, you can turn your eCommerce site into a multivendor marketplace by installing this plugin.
Installing Dokan is as simple as installing any other WordPress plugin. You can install the plugin directly from your WordPress dashboard.
- Navigating to your Admin Dashboard -> Plugin -> Add New -> Click the search
- Type Dokan -> Install -> Activate.

When you install the Dokan plugin for the first time on your WordPress-powered website, you get the opportunity to use this setup wizard. It gives you a step-by-step guideline to set up the Dokan plugin easily.
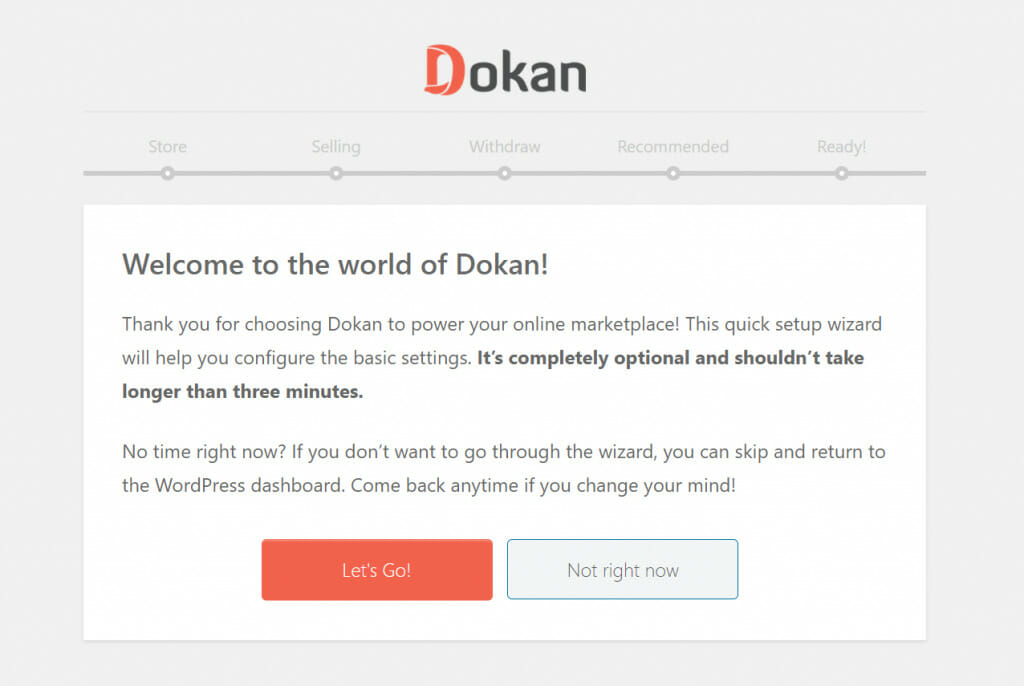
You can check our admin mult-step setup wizard for a clearer understanding.
If you have not installed the WooCommerce plugin in the first place, don’t worry. Because when you install the Dokan multivendor plugin, it automatically installs WooCommerce.

If you find it difficult to configure the Dokan plugin, you can watch our video on the Dokan installation guide.
Step 2: Install a Dokan Compatible Marketplace Theme
After installing Dokan, you need to install a Dokan-compatible theme. You can install any theme that is compatible with Dokan. The good news is any theme that is compatible with WooCommerce is also compatible with Dokan.
If you are not sure which theme you should consider for designing your electronic products marketplace, we are recommending the Dokani theme for you. This theme is created by the same company behind the Dokan plugin.
Plus, this theme is free to use.
Just head to the Dokan website and download the Dokani theme in a few seconds. Then navigate to your WordPress dashboard -> Themes -> Add New -> Upload Theme -> Choose File.
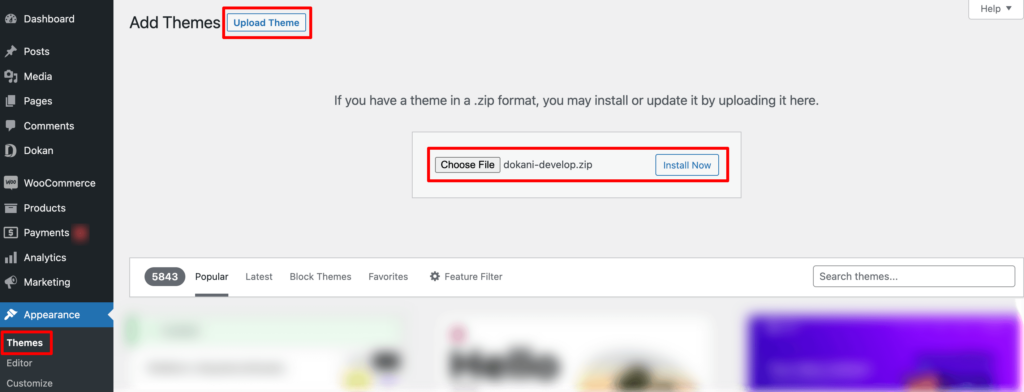
Then install and activate the theme to use it on your site. That’s it!
Step 3: Configure the Basic Settings of the Dokan Multivendor Plugin
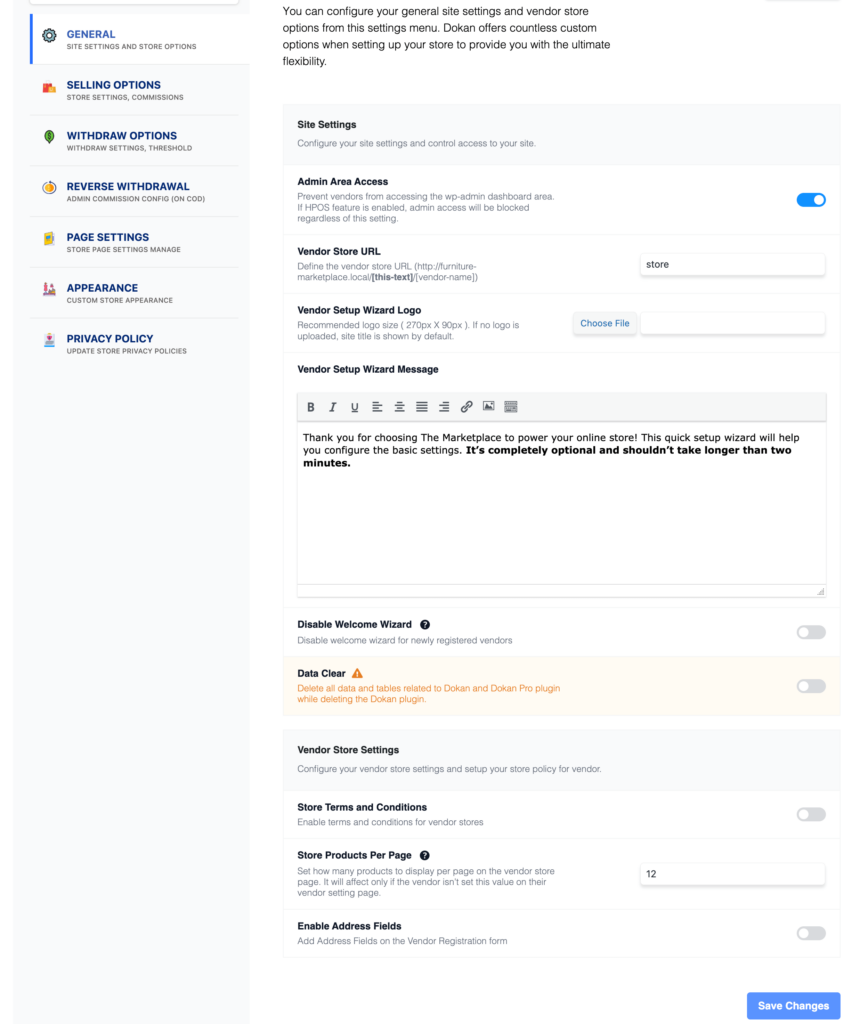
After installing and activating the Dokan plugin, now you need to configure all the basic settings. You will find all the settings options at WP-Admin –> Dokan –> Settings.
You’ll find here:
- General Settings
- Selling Options
- Withdraw Options
- Payment Gateways
- Reverse Withdrawal
- Page Settings
- Appearance
- Privacy Policy
You can select the pages for the vendor dashboard, order page, store listing, and terms and conditions page from here.
Now you need to set the commission type and rate. Go to WP Admin Dashboard -> Dokan -> Settings -> Selling Options. There you’ll find the Commission Type and Admin Commission options.
Set the commission type and rate according to your convenience.

Don’t forget to click the Save Changes button after configuring all the settings. Otherwise, you will lose all the changes that you’ve made now.
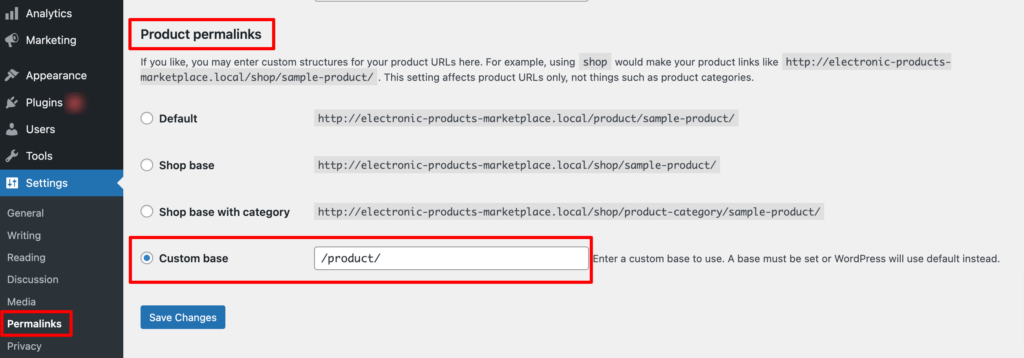
Now if you want to set the permalink settings of your product page, you can do that from WP Admin -> Settings -> Permalinks -> Product Permalinks.
For example, using “product” would make your product links like http://yourdomainname.com/store/sample-product/.
This setting affects product URLs only, not things such as product categories.
Select the check box “Custom Base” for product permalinks and write “/product” (or, whatever you want) on the box. Then hit the Save Changes button to save the settings.
Now let’s discuss two basic yet crucial settings of the Dokan multivendor plugin:
a) Configure Payment Gateways
You can’t control your customers which payment gateway they should choose, right? So, it’s always a better decision to ensure several payment gateways on your marketplace.
Dokan supports all WooCommerce-compatible payment gateways. You will get a wide range of choices to make the transaction process easier on your marketplace.
With Dokan Lite you can use non-adaptive payment gateways like PayPal, bank account transfer, cash on delivery, etc. The Pro version supports adaptive payment solutions like Stripe Connect and MOIP.
Go to your WordPress dashboard -> WooCommerce -> Settings, then click on the Payment tab to get the available payment methods.
Note: In case the PayPal option isn’t there, you should install the “WooCommerce PayPal Payments” plugin and you will find the PayPal option here.

b) Enable Withdraw Methods
Another important part of running an interactive online marketplace is to ensure a smooth withdrawal system. Dokan helps you take care of this section as well.
Go to WP Admin -> Dokan -> Settings -> Withdraw Options. Here you’ll find options to customize the withdrawal method and set the minimum balance a vendor needs to make a withdrawal limit.

You can also customize other Dokan settings following the same process that we have shown here.
Step 4: Upload Products to Set up Your Admin Shop
This is an optional step. You can create your own store on your marketplace if you want to earn some extra money. All you need to do is enable yourself to sell.
Go to Dokan –> Vendors. There you need to enable selling by toggling the button.

Now you can upload products to your shop.
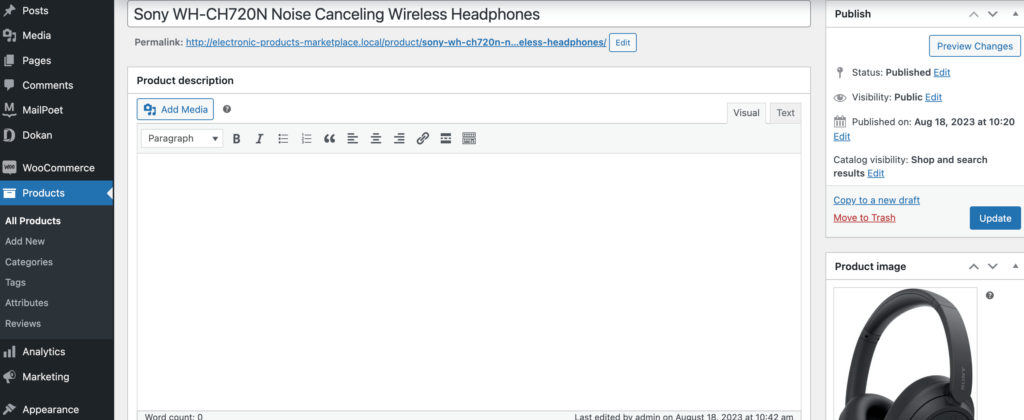
Go to your WordPress Dashboard -> Visit Vendor Dashboard -> Products. Then click on the Add new product.
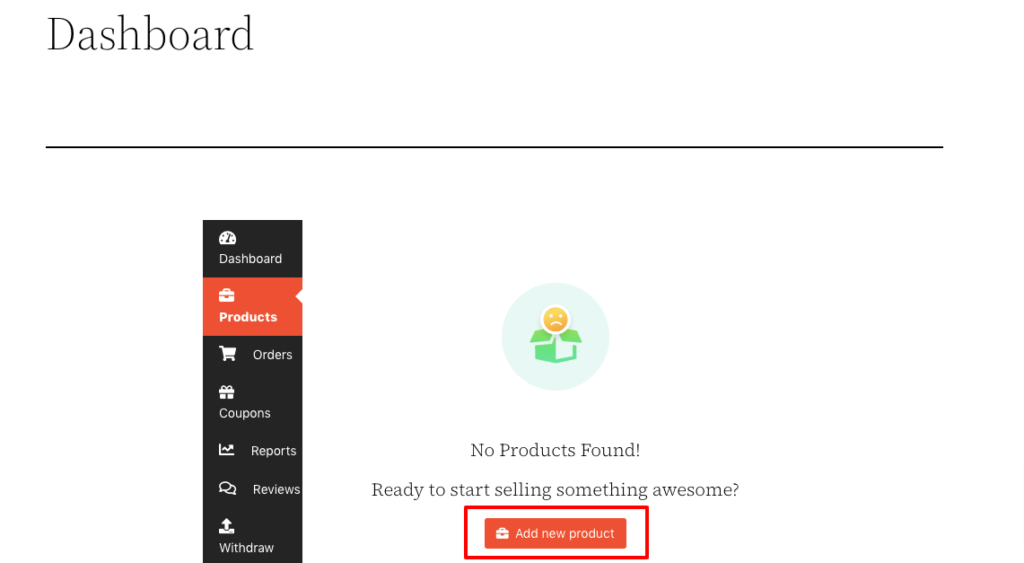
Now set the product details and click on Create Product to save the product.

Note: If you can’t select a category from the frontend, it means that you need to create categories from the backend first. Once you’ve done that, you’ll be able to choose a category from the frontend. To create categories navigate to your WordPress dashboard -> Products -> Categories.
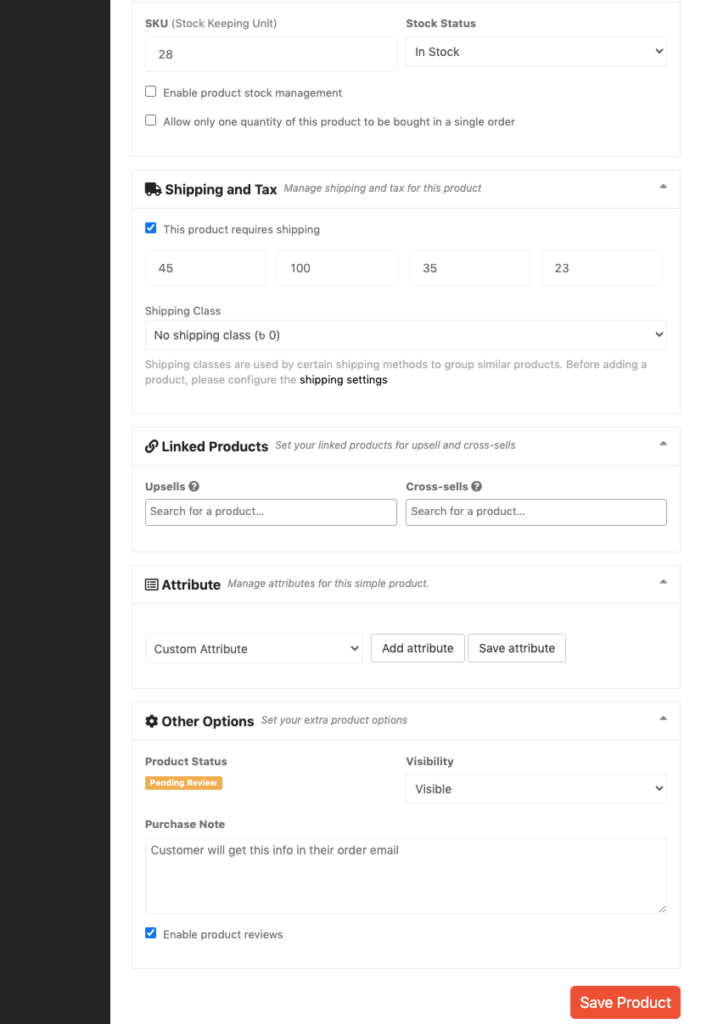
You have to add a few more details related to the product. After fulfilling these fields, click on Save Product to complete the process.
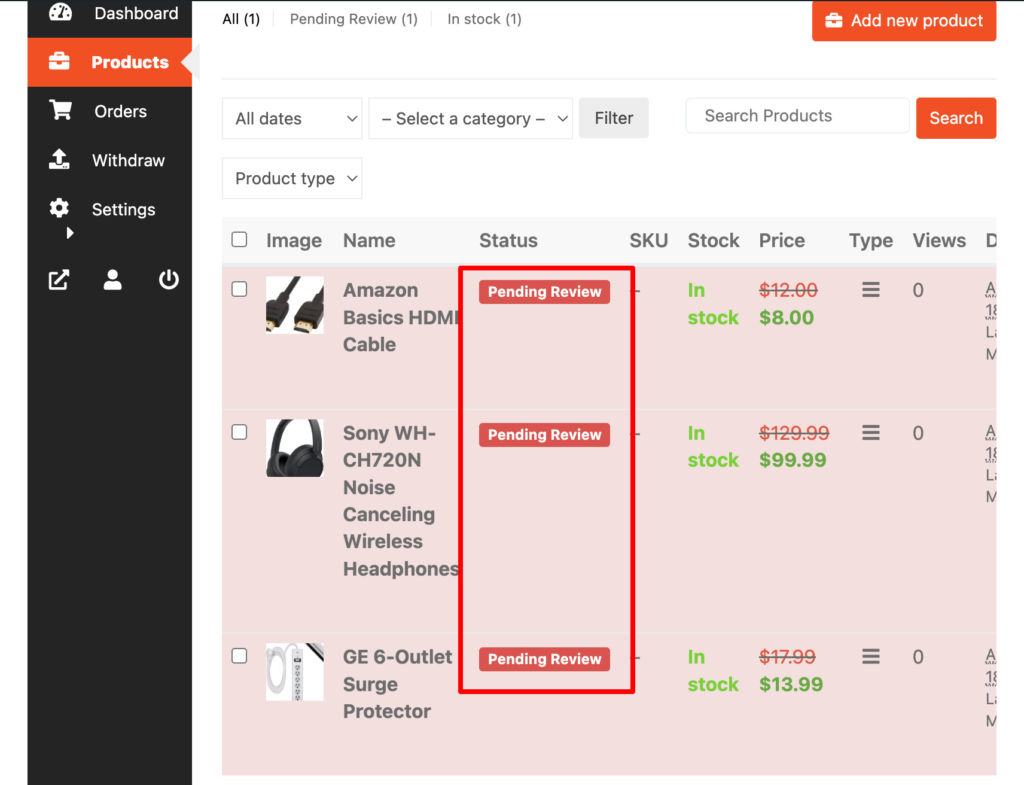
Now if you visit the Products tab, you’ll find all of your newly added products are with pending status. Because the admin needs to approve these products to make them public.
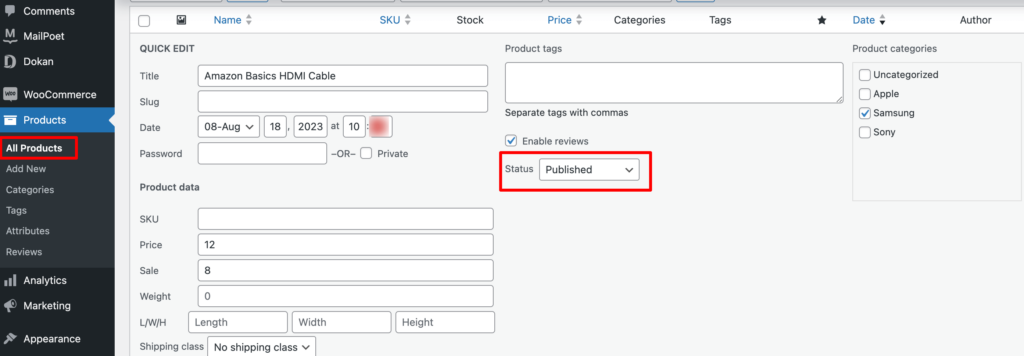
Now as an admin, visit your backend and approve these products to make them public. Click on the Products option, then click on the Quick Edit. There you will find the Status option. Choose the Published option and click the Update button to approve and publish the pending products.
That’s all!
In case you want to upload products from the backend, you can do that too. To do that navigate to your WordPress dashboard -> Products -> Add New to upload new products.
You can customize your store design by going to Vendor Dashboard -> Settings. From here you can update your store name, address, opening & closing time, etc.
After customizing your store, visit the store to check the front-end view.

Step 05: Allow Vendors to Register
After adding all the functionalities and configuring your marketplace, you can invite vendors to sign up for your marketplace.
To make sure vendors can sign up for your marketplace, enable the “Anyone can register” option from WP Admin –> Settings -> General.
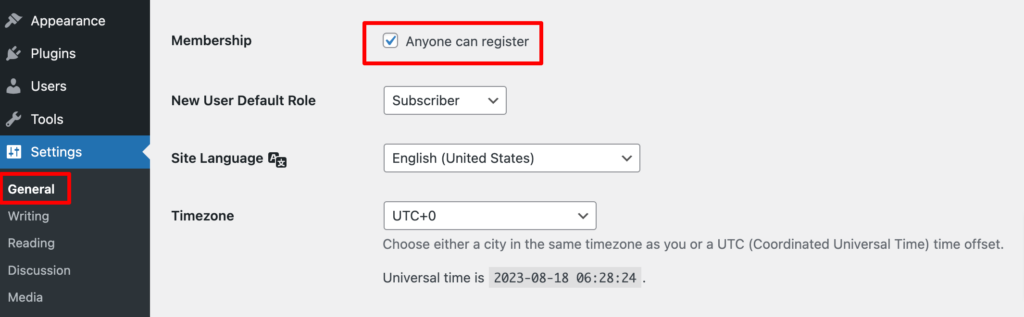
So, it will open the default registration form for vendors to sign up.

Or you can create customized registration forms with the necessary fields, especially for your marketplace.
For vendors to start selling, you need to enable selling status from Dokan –> Vendors.

Also, if you want the vendors to upload their products, then you need to change the product status from Dokan –>Settings –> Selling options. You need to enable the New Vendors Product Upload

Now navigate to your WordPress dashboard then click on the Visit Stores to check all the registered stores on your electronic products marketplace.
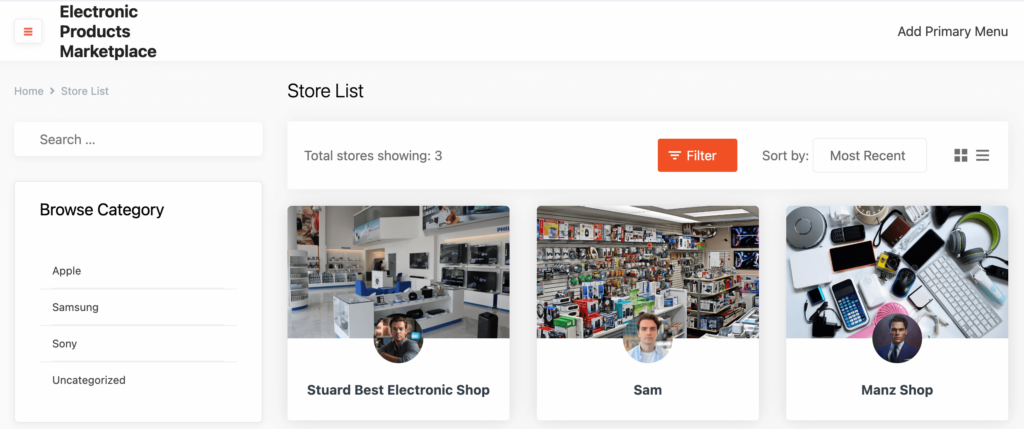
Once approved by the admin, vendors gain the freedom to create their own stores with unique URLs. Dokan also provides each vendor with an individual vendor dashboard, empowering them to effortlessly upload, manage, and successfully sell their products.
The store customization process for vendors is the same as we’ve shown above for an admin. From the frontend dashboard, a vendor can easily set up his shop.

Step 6: Enhance Your Marketplace User Experience with Advanced Features of Dokan
No doubt about it – you’ve got a bunch of competitors to compete with you out there. But hey, if you’re aiming to stand out and really show those competitors who’s boss, you have to come up with some seriously cool features. That’s how you give people solid reasons to pick you over the rest.
Here’s a lineup of top-notch features that you absolutely need to have. These are the features that will make you the go-to choice for online buyers in your niche:
- Customizable Vendor Storefronts: Allow vendors to customize their store layouts, branding, and product displays to create a unique identity.
- Advanced Search and Filtering: Implement robust search functionality with filters, categories, and sorting options to help users find products quickly.
- Multi-Language and Currency Support: Enable users from different regions to access the platform in their preferred language and currency.
- Mobile App: Develop a dedicated mobile app for both buyers and sellers, offering a seamless and optimized experience on smartphones and tablets.
- AI-Powered Recommendations: Utilize machine learning algorithms to suggest relevant products to users based on their browsing and purchase history.
- Reviews and Ratings: Implement a comprehensive review and rating system for products and vendors to build trust among users.
- Escrow Payment System: Set up an escrow payment system to ensure secure transactions between buyers and sellers, releasing funds only when the transaction is complete.
- Shipping Integration: Integrate with popular shipping carriers to provide real-time shipping rates, order tracking, and delivery options.
- Flexible Commission Structures: Offer various commission models for different types of products or vendors, providing a fair and customizable revenue-sharing system.
- Live Chat and Customer Support: Implement real-time chat functionality to connect buyers with sellers or customer support representatives.
- Localized Experiences: Customize the marketplace experience based on users’ geographical locations and preferences.
If you are thinking about how would you manually implement all these features for your marketplace, no worries! Because Dokan multivendor plugin comes with 35+ modules to take care of these advanced features. You just need to enable each module for each purpose, and that’s all! Cool, nah?
FAQs on Electronic Products Marketplace
What are the essential features of an electronics marketplace?
An electronics marketplace should have features like product listings, vendor registration, order management, payment processing, shipping and logistics management, customer support, reviews and ratings, and more.
How do I attract customers to my electronics marketplace?
To attract customers, you’ll need to promote your marketplace through advertising, social media, email marketing, and other channels. You can also offer incentives like discounts, rewards, and exclusive deals to encourage customers to shop on your platform.
How do I ensure the security of my electronics marketplace?
To ensure the security of your marketplace, you’ll need to implement secure payment gateways, SSL certificates, and data encryption. You can also use tools like two-factor authentication, CAPTCHA, and firewalls to prevent unauthorized access and hacking attempts.
How do I manage vendor relationships in my electronics marketplace?
To manage vendor relationships, you can offer support and training to help vendors set up and manage their shops. You can also provide tools and resources for vendor analytics, inventory management, and marketing.
How do I scale up my electronics marketplace?
To scale up your marketplace, you’ll need to invest in marketing and advertising, improve the user experience, expand your product offerings, and streamline your operations. You can also explore partnerships with other businesses, offer affiliate programs, and expand into new markets.
Start Building Your Own Electronic Products Marketplace Now!
Now you know how to create an online electronic products marketplace using WordPress. So, what are you waiting for?
Follow these steps that we have shown in this blog and start building your own electronic products marketplace. Then follow our tips to get vendors on your marketplace.
Remember, it will take a long time to be a trustworthy platform for vendors and customers. So, if you are not getting too much traction in a few months, don’t be upset. Instead, you should keep working hard and changing your strategies to become the go-to marketplace for vendors and customers.
If you have any questions in your mind regarding the online electronic products marketplace, feel free to ask us using the comment box below. We would love to address your queries. Good luck!


Leave a Reply