


Most users visit your website for the first time. Only 25% of them return and give a 2nd visit. This is the nature of online audiences as there are lots of options. You can increase that number by building an emotional connection with your readers.
Adding an email subscription to your WordPress website is a great way to build connections with your visitors. It keeps your readers up-to-date with your latest content.
If you’re not familiar with the technical side of things, setting up an email subscription might become complex. But don’t worry, we’re here to help!
In this blog, we’ll guide you through the process of adding an email subscription to your WordPress blog. We’ll cover everything from selecting the right email marketing service to integrating it with your WordPress site.
Let’s start with the basic query-
Why Should You Create an Email Subscription for WordPress Blog?
Email subscription is a process where people willingly sign up to get regular updates from your brand or business. You have the consent of your subscribers to send anything related to your business directly to their inboxes.
You rarely find a business that doesn’t use email marketing to promote their business, doesn’t matter if it’s an eCommerce business or a blog website.
Here are some reasons why entrepreneurs like you use an email subscription for their business:
- Highest ROI: You may already know that the ROI of email marketing is more than any other marketing channel. But how much more? The average ROI of email marketing is a whopping 3600% whereas the average ROI of paid marketing is only 200%.
- Direct Communication with Your Audience: As we have discussed earlier, email subscription lists provide a direct line of communication between your business and your audience. You can use this channel to share updates about your products, services, and promotions.
- Build Relationships with Your Customers: Regularly sending emails to your subscribers can help you build relationships with your customers. You can use this opportunity to share helpful tips, advice, and other valuable content that can help them solve problems or improve their lives.
- Increase Sales: Email marketing can be an effective way to increase sales. By sending targeted emails that promote your products or services, you can encourage subscribers to make a purchase.
- Cost-Effective Marketing: Compared to other marketing channels, email marketing can be relatively inexpensive. With the right email marketing platform, you can create and send emails to your subscribers at a low cost.
Now if you are ready to add an email subscription, let’s jump on to the next part.
How to Add Email Subscription to WordPress Blog: 5 Easy Steps to Follow

Here are the 5 steps you need to follow in order to add an email subscription to your WordPress blog:
- Choose an Email Subscription Tool
- Create an Email List
- Design Your Subscription Form
- Add Your Signup Form to Your Blog
- Send Your First-ever Email Newsletter to Subscribers
Now let’s discuss each of the above-mentioned points in detail, starting with the first step-
Step 01: Choose an Email Subscription Tool
The first step of creating an email subscription for your business is to choose an email marketing tool that fully aligns with your requirements.
To be very honest, there are several email marketing tools available around you. But you can not choose a random one for your business.
Instead, you should make a checklist of what you need and what features your selected tool should include meeting your expectation.
Here is a feature checklist to choose an email marketing tool for you:
- Message Automation
- HTML, Responsive Layout
- Advanced List Maintenance
- CAN-SPAM Compliance Built-in
- Easy Integration
- Template Variety
- A/B Testing
- Fast Support System
You don’t need to go elsewhere to find a tool that comes with the above-mentioned features. To help you out, we did the research part and come up with the most suitable tool for you.
We would like to recommend that you use weMail. This is the cheapest yet one of the most potential email software for WordPress to get your job done.
In this tutorial, we are going to use weMail to show you the process of creating an email subscription to your website.
Note: For sending email newsletters to your subscribers, you’ll need an email-sending gateway while using weMail. The good news is weMail has integration with several sending APIs like Amazon SES, SendGrid, SMTP, Mailgun, SparkPost, and Elastic Email by default. So, while you installing weMail, don’t forget to integrate any of these email-sending gateways.
Step 02: Create an Email List
After installing weMail on your WordPress site, it’s time to move on to the second step- creating an email list.
To create a list, just go to weMail -> Lists, and click on Add New.
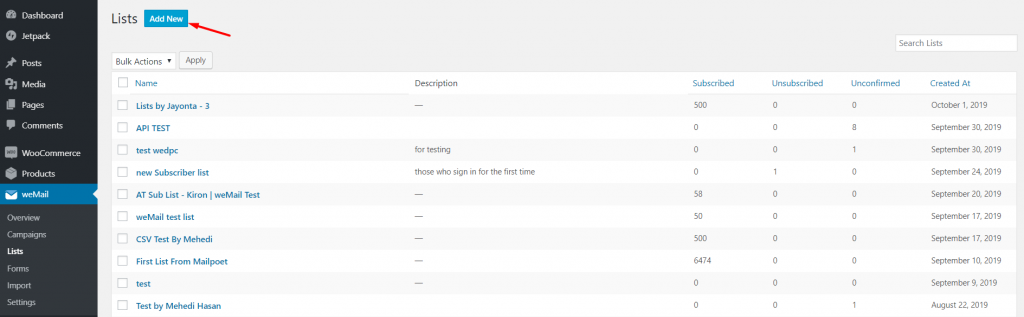
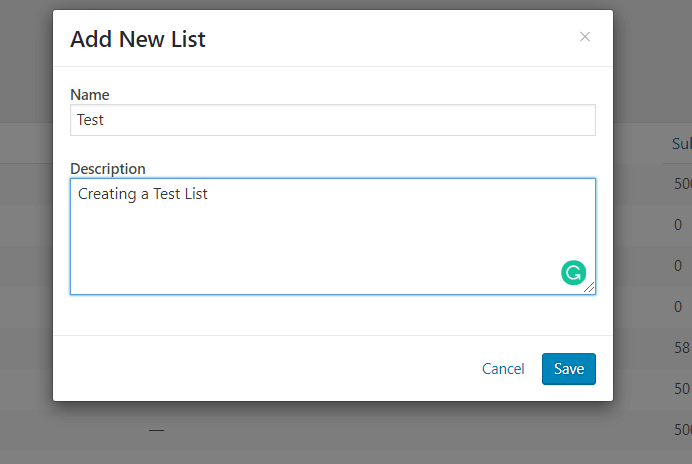
You will get a pop-up window, type your List name. You can add a description of the list if you want. Then hit the Save button, and your list will be created.
Step 03: Design Your Subscription Form
With weMail, you can create any type of form. It can be a big form including the first name, last name, email address, date, home address, website URL, and many more. Or, it can be a small form with only a name and an email address.
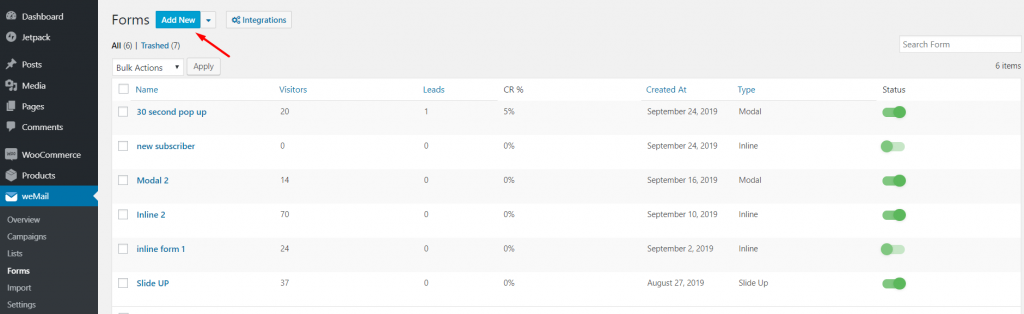
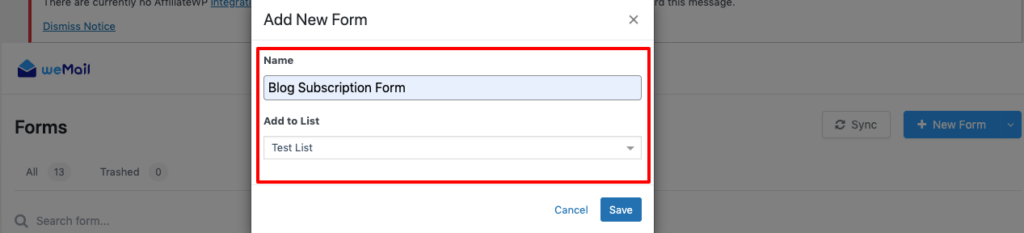
To create your first form, go to weMail -> Forms, and click on Add New.
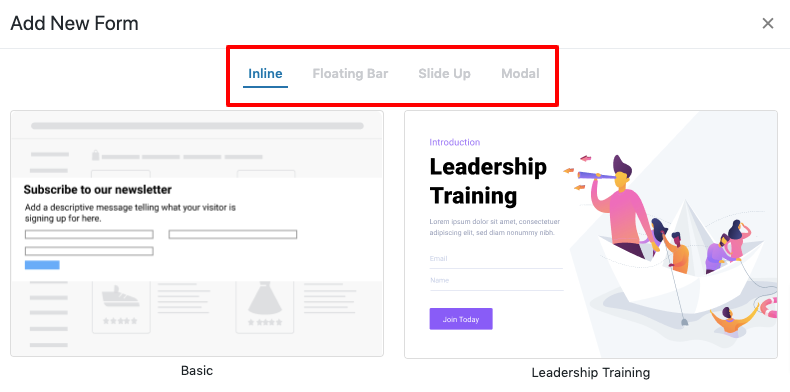
You will get a pop-up window. Give your form a name, and select the style of the form you want to show on your webpage.
There are 4 styles of forms.
- Inline Form
- Floating Bar
- Slide Up
- Modal
We are using the Floating Bar form.
Choose a type of form that you want to use. Then assign this form to any of your created lists. Just click on the list option to see all your available lists.
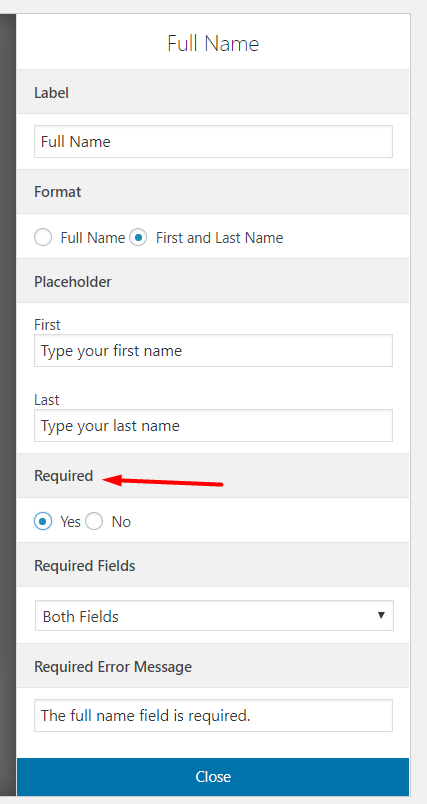
Now, design your form. There are many fields available for you to choose from. Design your form so that it looks interesting and engaging.

Look at the options you will get to design every field of your name. Here are the options to design your Name field.
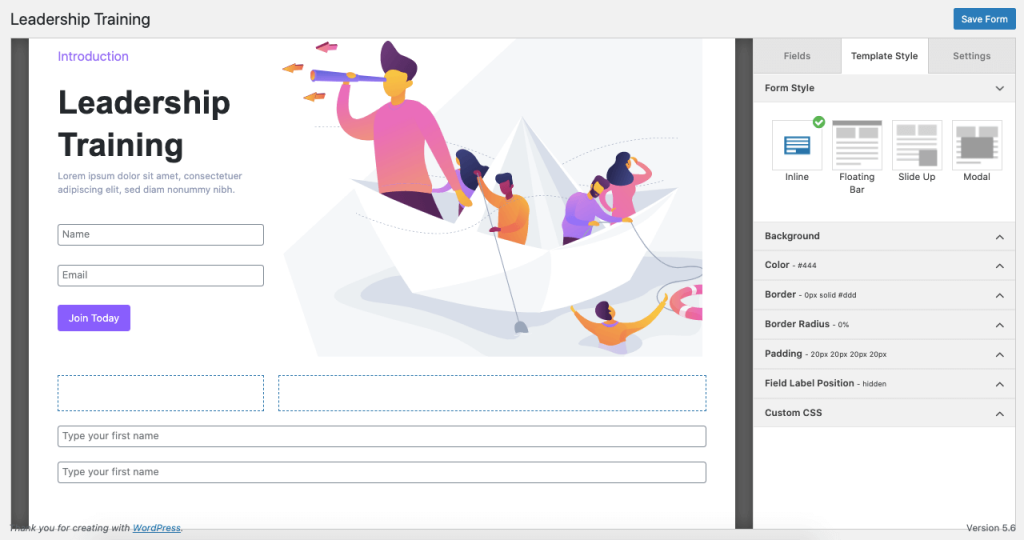
You can also design the whole form altogether. There are a lot of options available to design the form.
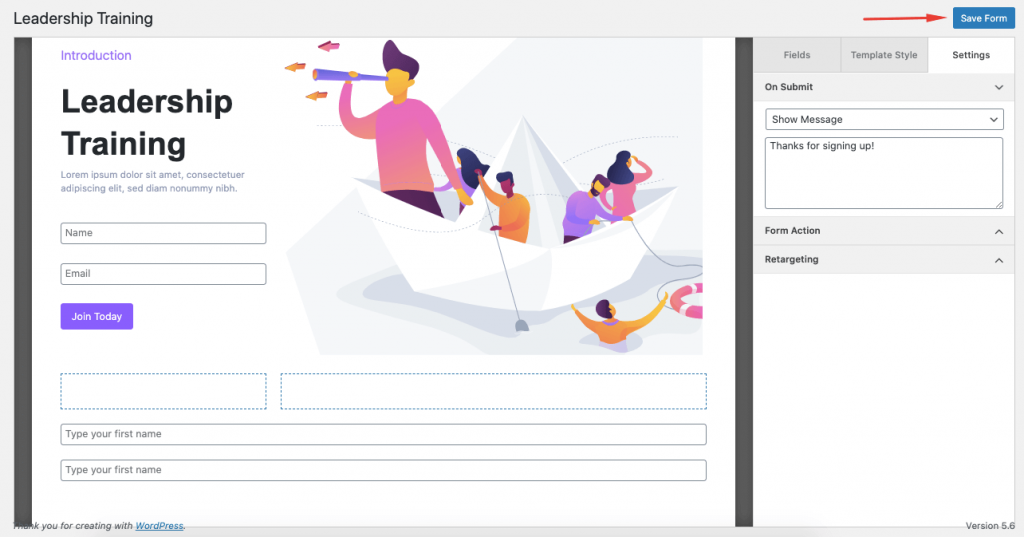
In Settings, you can edit what your form will say after submitting it. You have the option of retargeting as well.
Step 04: Add the Signup Form to Your Blog
You have created the signup form successfully. Now it’s time to add this signup form to your blog page.
Basically, you can display the signup form on any page you like. You can display the form on:
- Sitewide
- Homepage
- Specific Pages ( The pages you want the form to appear)
- Exclude Pages ( The pages you don’t want the form to appear)
To add the signup form to your WordPress blog page, click on the Display Option. Then click on the Specific Pages option. There you’ll find a Blog option to add your subscription form to the blog page.
Choose the Blog page from the drop-down list. After completing the whole process, don’t forget to hit the Save Form option.
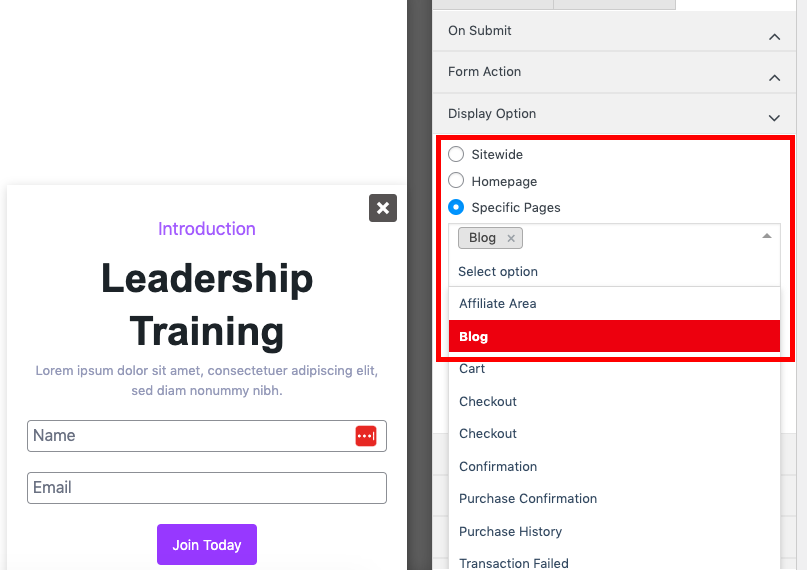
Here is the preview of our newly created blog subscription form.

Step 05: Send Your First-ever Email Newsletter to Subscribers
In terms of sending an email newsletter to your subscribers, first, you need to create a subscriber list.
When you’ll have a list of subscribers, then you will be able to send newsletters regularly to them.
Let’s assume, you already have a subscriber list. Now follow the below procedures to send newsletters to them.
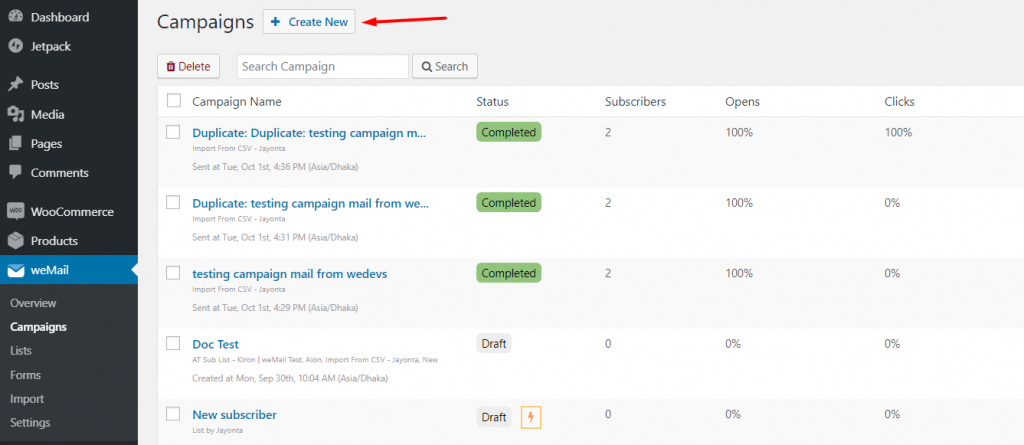
Go to weMail -> Campaign, and click on Create New.
You will be directed to a Setup page.
Here you’ll have to:
- Put your Campaign Name
- Select Campaign Type (Standard or Automatic)
- Select your Email Lists
You may have two or more lists of subscribers. You can choose any of them to send your email. Check the page below.
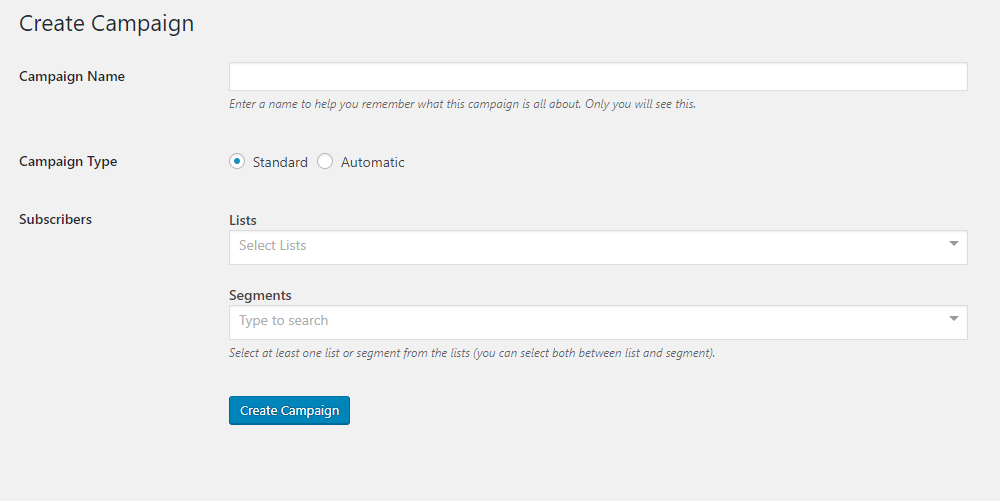
Choose a list for that campaign and a segment, also a time as when to send the email. Click on Create Campaign and your Automatic Campaign will be created.
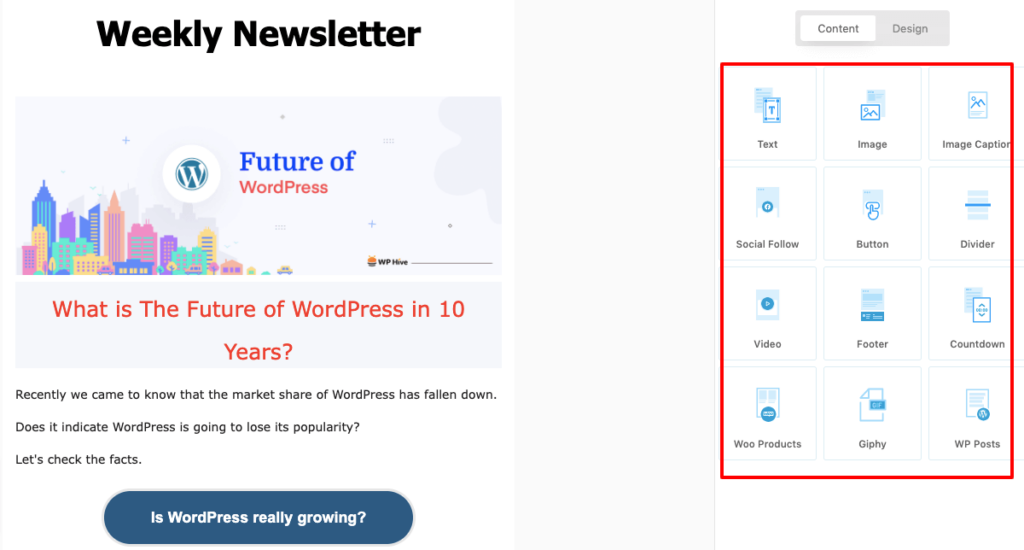
Next, you will be directed to the Template page. Here you will get to select the templates for your email campaign.

On the Design page, you can design your template from the Content section. You can add text, images, image captions, videos, footer, etc to your template.
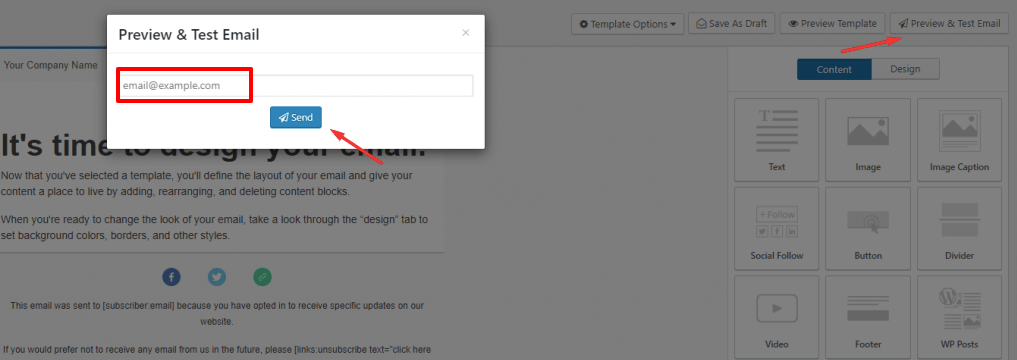
You can test your newsletter by sending a test email to your email account. Click on Preview & Test Email. You will get a pop-up window where you will type your email address.
Click on Send, your email will be sent to that particular address.
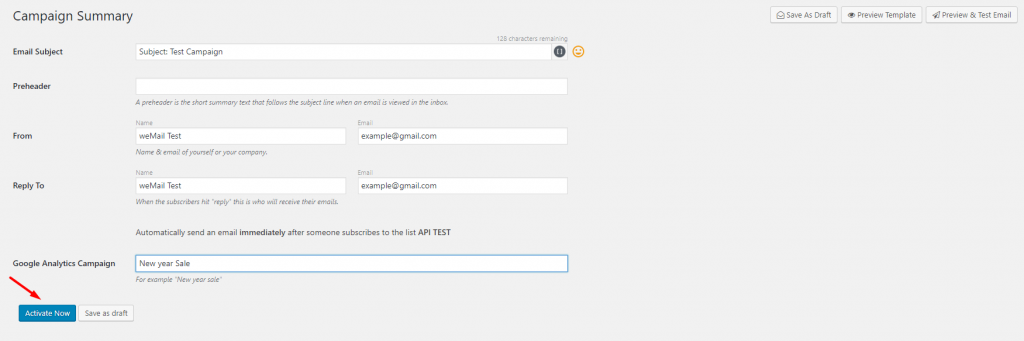
After finishing all this, you will be in your last step. Next,
- Type your Email Subject, Preheader
- Type the email address you are going to send it from
- And receive your confirmation email
After sending the newsletter, if you want to see the details of the newsletter, just click on the Campaign. After that, you can see the overview of your newsletter.

That’s all! Now you know how to add email subscription to a WordPress blog.
It’s time to discuss how to make your email subscription stand out from the crowd.
Bonus 1: What Makes a Signup Form Standout From the Rest?
An email subscription form is a critical component of your website, as it is the first interaction the potential subscribers have with your business. To make your signup form stand out from others and encourage people to sign up, consider using the following:
- Clear and Concise Headline: Your headline should clearly communicate what the subscriber will receive by signing up for your email list. Use action-oriented language to make it clear what benefit they will receive from subscribing.
- Minimalistic Design: A clean and minimalistic design can make your signup form look more professional and easier to read. Use simple colors and fonts, and avoid clutter or excessive graphics.
- Visible and Easy-to-Use: Ensure that your signup form is easy to find and use. Place it in a prominent location on your website and make it clear what information you require from subscribers.
- Incentives: Offer an incentive to encourage subscribers to sign up, such as a discount or freebie. This can make your signup form stand out from others and provide added value for potential subscribers.
- Mobile-Friendly: With more and more people accessing the internet from their mobile devices, it’s essential that your signup form is mobile-friendly. Ensure that it looks good and functions well on mobile devices.
- Trust Symbols: Include trust symbols, such as social proof or security badges, to instill trust in potential subscribers and make your signup form stand out from others.
Bonus 2: Top Email Marketing Tools to Send Email Newsletters (Other than weMail)
As we have said earlier, there are several email marketing tools online. You can choose any of the tools that perfectly align with your requirements, But if you want us to recommend you the top 3 tools, then here is our list:
a) Mailchimp
Mailchimp is a popular email marketing tool used by many businesses to send newsletters, automated messages, and targeted campaigns to their subscribers.
Key Features
- Drag-and-drop email builder
- Advanced segmentation and targeting options
- Automation workflows to send personalized emails based on user behavior
Note: The Mailchimp free plan includes up to 500 contacts and 1,000 sends per month, with a daily send limit of 500.
b) Constant Contact
Constant Contact is a user-friendly email marketing platform that helps businesses create and send professional-looking newsletters, promotional emails, and surveys.
Key Features
- Customizable templates with a drag-and-drop editor
- List building tools like pop-up forms and landing pages
- Autoresponder series to send automated emails based on user actions
Note: The service offers a free plan that allows unlimited contacts, but it’s only for 300 email sends per day.
c) MailPoet
MailPoet is another popular WordPress email marketing plugin. You can easily build and manage your subscriber list. It easily integrates with WooCommerce which is why it is a solid option for eCommerce sites.
Key Features
- Automatic email notifications
- Amazing Email templates
- Signup forms
Note: Using MailPoet free version, you will be able to send up to 5,000 emails per month with a 1.000 subscribers limit.
Adding Email Subscription to WordPress Blog- Key Takeaways
Adding an email subscription to your WordPress blog is an essential step. You are building a loyal audience and keeping them engaged. With the right tools and guidance, you can easily set up an email subscription form on your website, customize it to match your branding, and start collecting subscribers.
In this blog, we have shown how to add email subscription to WordPress blog using the weMail email marketing software.
Here is a recap of the 5 steps that you need to get your job done:
- Choose an Email Subscription Tool
- Create an Email List
- Design Your Subscription Form
- Add Your Signup Form to Your Blog
- Send Your First-ever Email Newsletter to Subscribers
You already know how much beneficial it will be for you to add an email newsletter to your WordPress blog. So, whether you are a blogger, marketer, or business owner, adding an email subscription form to your WordPress blog is a smart way to stay connected with your audience and grow your online presence.


Leave a Reply