With the Team Member widget, you can display your team members or hotel staff on your hotel website. The Otel theme has integration with Elementor that enables you to use this widget to display your hotel members.
Let’s see how to use this widget to customize your hotel website.
Note: You need to install the Elementor plugin in order to use this widget.
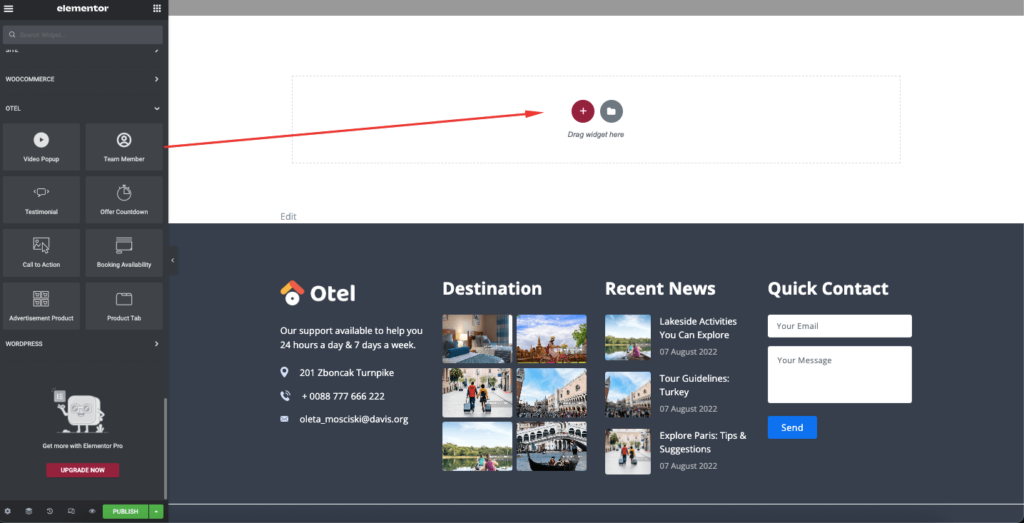
Step 1: Drag n Drop the Team Member Widget in the Customization Area
First, you need to drag the team member widget from the sidebar and drop it in the customization area. Select the widget from the menubar.
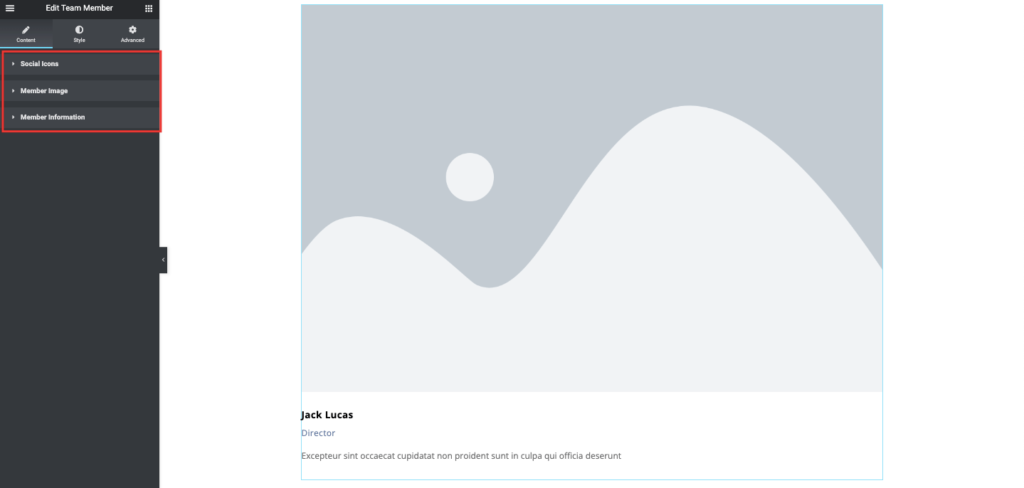
Step 2: Customize the Content Section of team Member Widget
After adding the widget, you need to finalize the content section information like,
- Social Icons
- Member Image
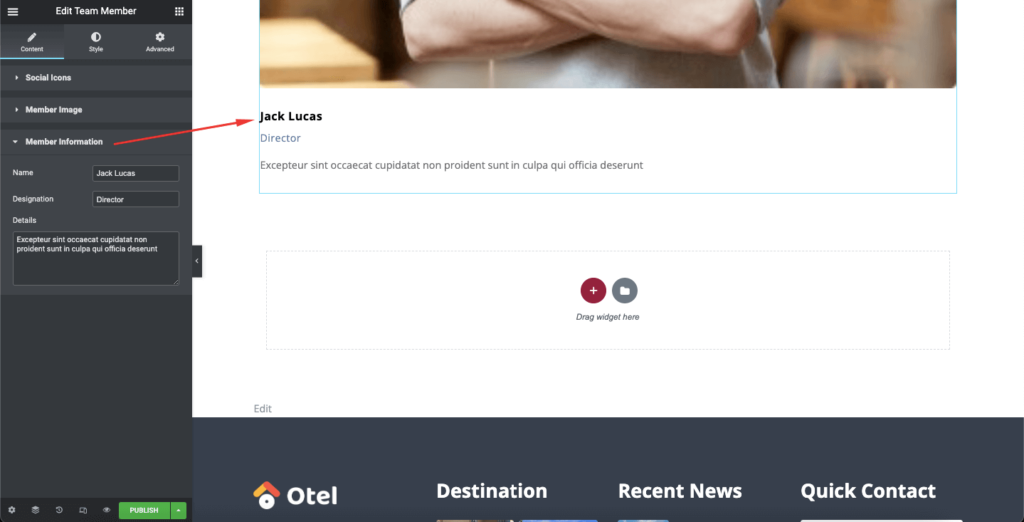
- Member Information
You can add the Social Profile of the team members by using the Social Icon section. The social icons will appear when anyone hovers over the image.
You can add more social profiles by clicking the Add Item button, Add profile links, and Adjust their background colors.
You can upload members’ images and adjust the image size from the Member Image section.

Add the member name, designation, and member details in the Member Information section.
Step 3: Stylize the Team Member Widget
In the Style section, you can customize the Image and member info.
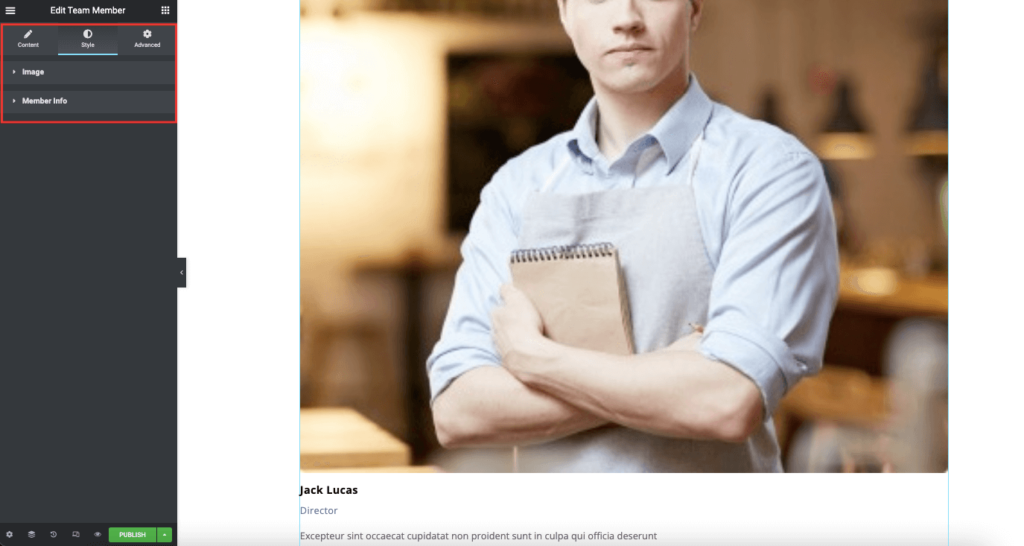
Fix the Overlay color and spacing of the images from the Images section.
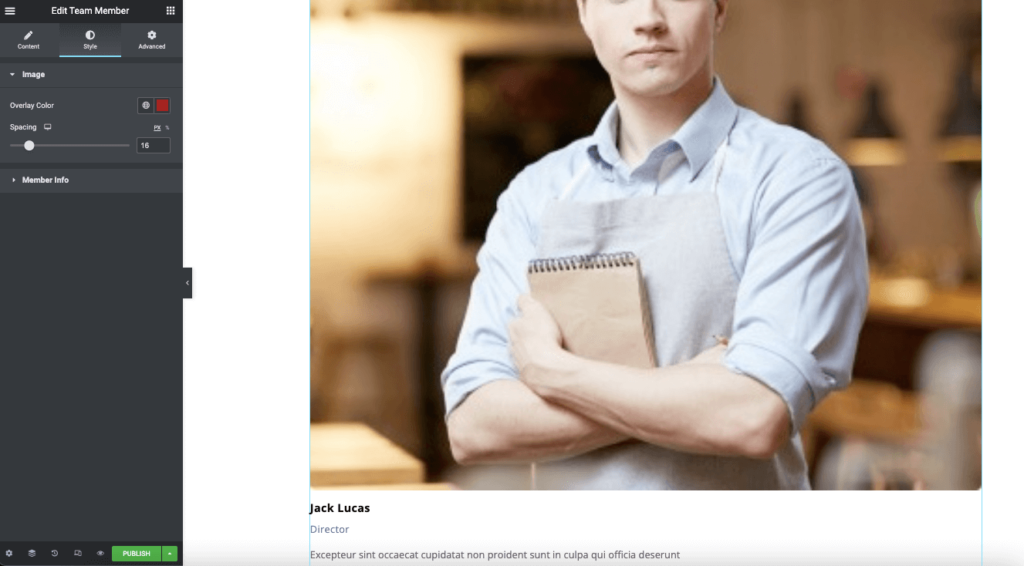
Also, you can fix the color, typography, and spacing of Member Name, Designation, and Details from the Member Info section.

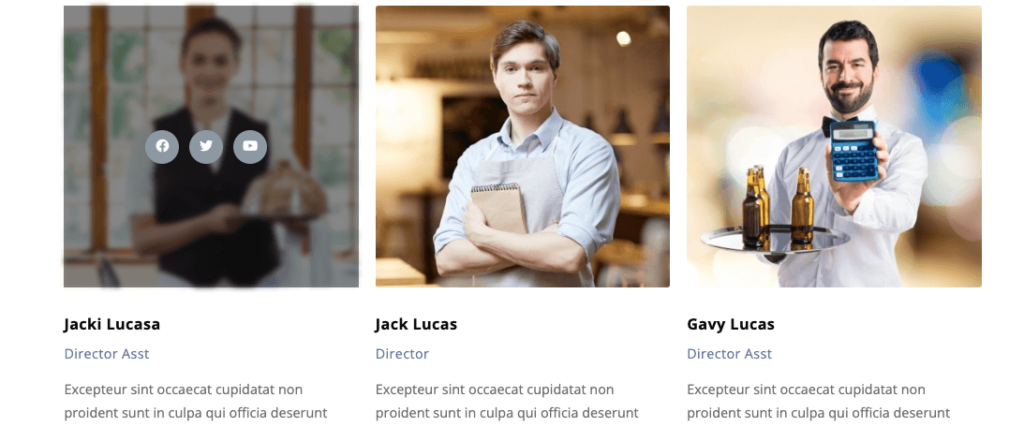
After customizing, here is the final result,
That’s it.

