From the Otel Theme Menu settings, you can edit the existing primary menu and its items, you can create a new menu with whatever items you want to add, and you can choose which menu you want to show.
Edit the Primary Menu
The Otel theme menu is completely customizable. You can edit, delete, or create new menu items with ease.
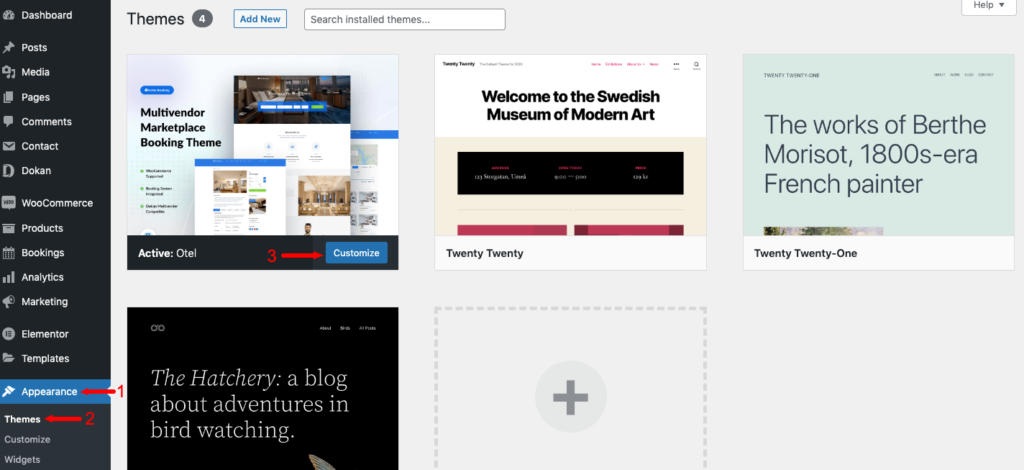
First, log in to your WordPress dashboard. Then navigate to Appearance -> Themes -> Customize to access the Menus settings.
Now click on the Menus option from the left sidebar.
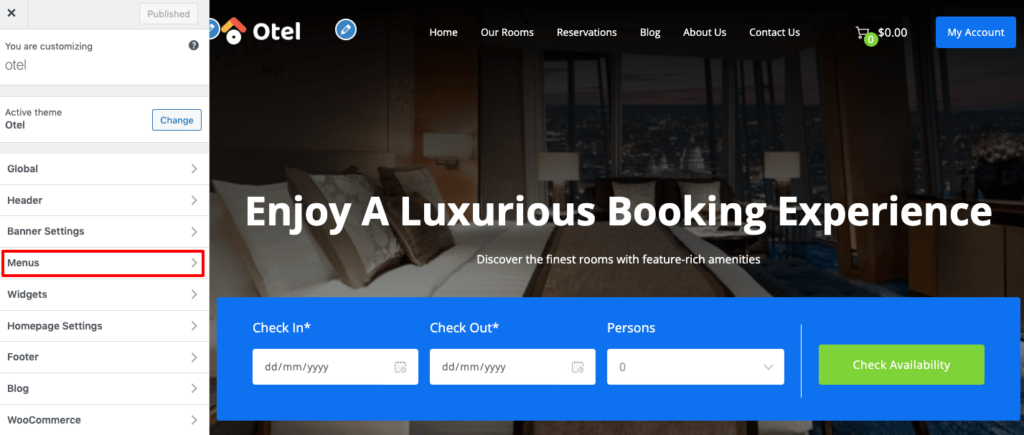
There you’ll find the Primary menu option. If you want to edit and update the existing menu, click on the “Primary menu” option.

You will find all the primary menu options here.
From here you can add a new menu item by clicking the “Add Items” option.
You can reorder the list from the “Reorder” option. Or, you can drag a menu item and drop it anywhere in the list to reorder.
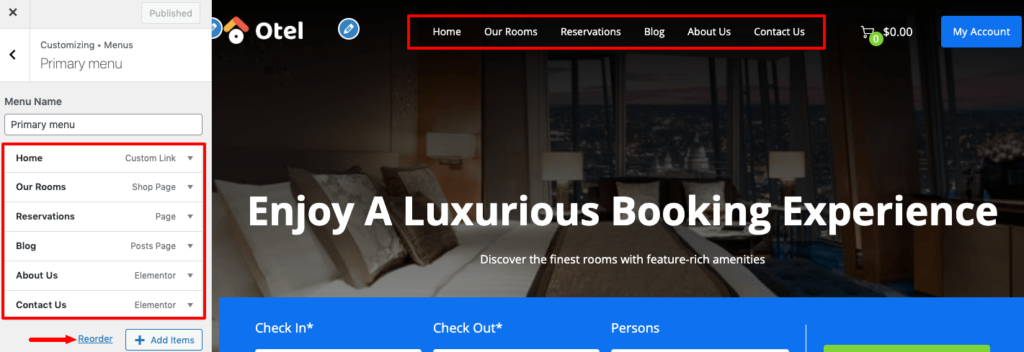
If you want to rename an existing menu item, just click on that particular item.
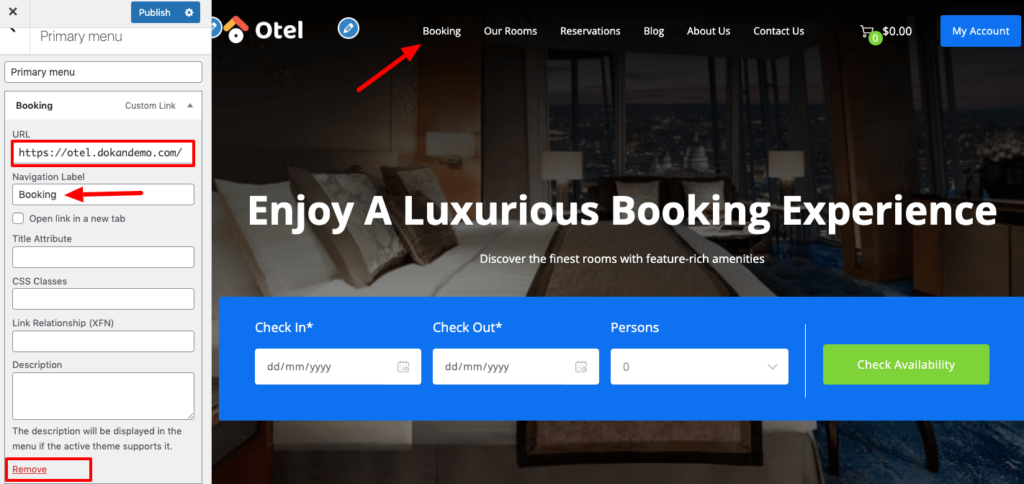
Then you’ll find the rename option.
Set the link into the URL box to decide where you want to redirect your traffic when they click on that menu item.
You can even delete a particular menu item from here. If you focus on the bottom, you’ll find the “Remove” option to delete that item.
Create a New Menu
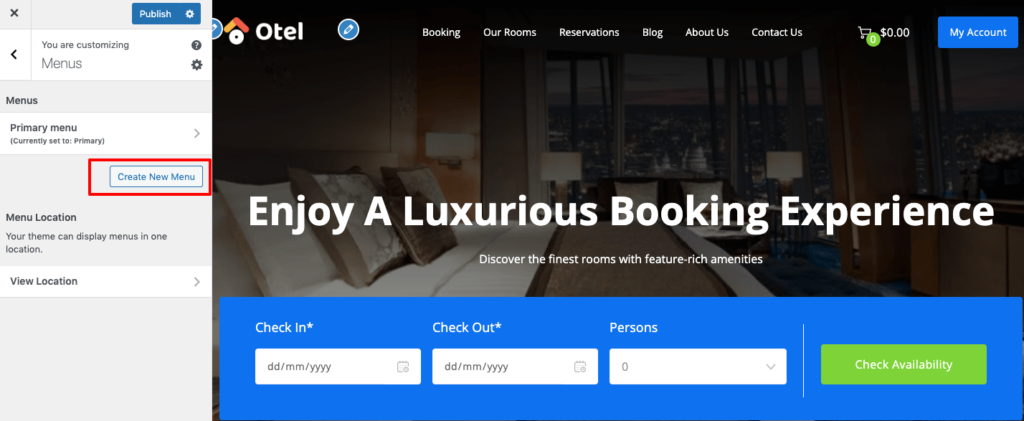
If you want to create a whole new menu, click on the “Create New Menu” option.
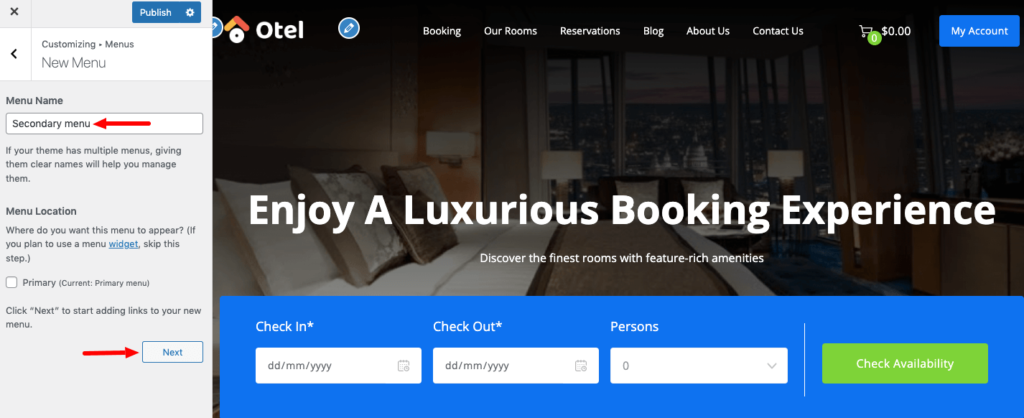
Then give this menu a name and click the “Next” button.
Now click the “Add Items” and click the “+” sign of which items you want to add to your menu.
Customize the Menu Location
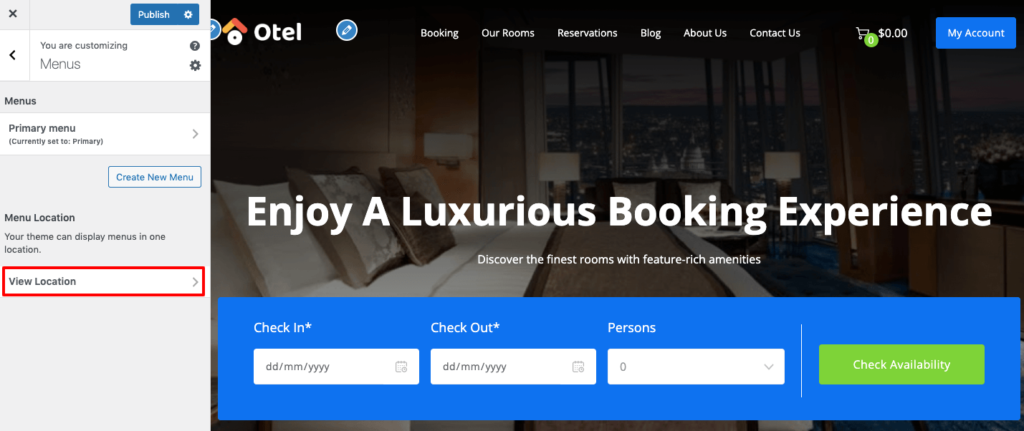
If you want to show the newly created menu instead of the primary menu, click the “View Location” option.
Then choose which menu you want to show from the drop-down list.
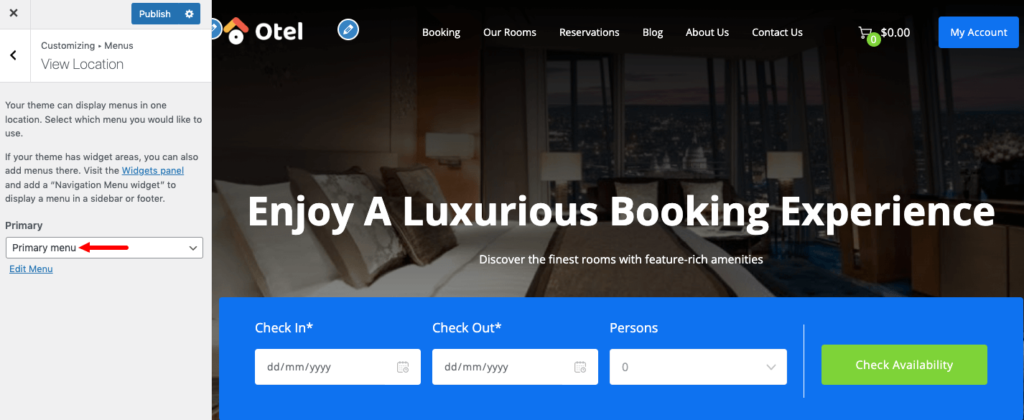
Finally, click the Publish button to save and see all the changes.