
WordPress is popular because it’s easy to install, configure and maintain. Probably you’ve chosen it for the same reasons. But, having WordPress installed on your website isn’t enough to start publishing content. You need to prepare your website before it becomes public to visitors.
In this article, we have shown you what to do after installing WordPress from the scratch.
Before that, we want to congratulate you on installing WordPress successfully! You’ve completed the difficult steps, now it’s time to reap the benefits of the vastness of the WordPress ecosystem.
Have a look at the following steps we’ve discussed here. You’ll learn the most essential things to do after WordPress installation.
What to Do after Installing WordPress?
Though It may seem a little bit intimidating at first sight, WordPress is actually quite easy to learn and use. We covered the most essential steps throughout this guide to facilitate your learning process, without overwhelming you with unnecessary tutorials.
Let’s check out this handy guide on 12 things you should do after installing WordPress.
- Know Your WordPress Admin Panel
- Write Your Site Title with a Catchy Tagline
- Select Your Preferred Timezone & Language
- Personalize Your User Profile
- Install a Theme & Customize It
- Add Your Logo & Favicon
- Customize the Permalink Structure
- Remove the Default WordPress Contents
- Configure SEO for Your WordPress Site
- Connect Google Analytics & Search Console
- Install the Essential Plugins for Your Website
- Write, Edit & Publish Your First Blog
Now let’s dive into details.
1. Know Your WordPress Admin Panel
You’ll be directed to your WordPress website’s backend once you log in to the admin panel. You can easily access the admin panel by adding /wp-admin at the end of your website’s URL. Suppose your URL is website.com, you need to type website.com/wp-admin to access the WordPress dashboard. Use the required credentials while logging in.
Once you’re logged in, you will see a page like the following picture.
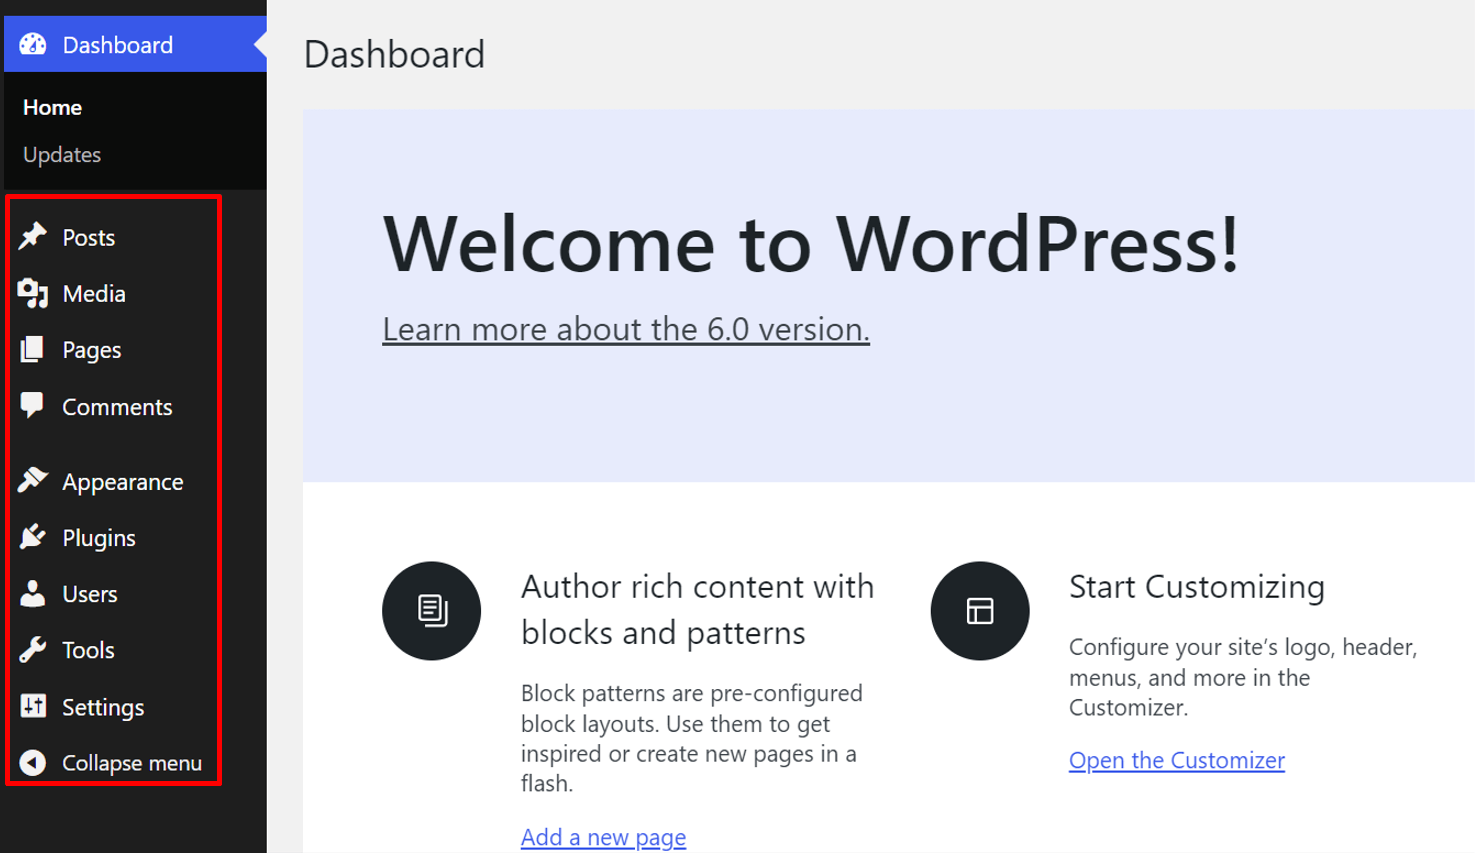
There are a few menus on the left sidebar, and each of them has multiple sub-menus. Hover over them or click on them to expand the submenus. Explore each option to acquaint yourself with all WordPress functionalities.
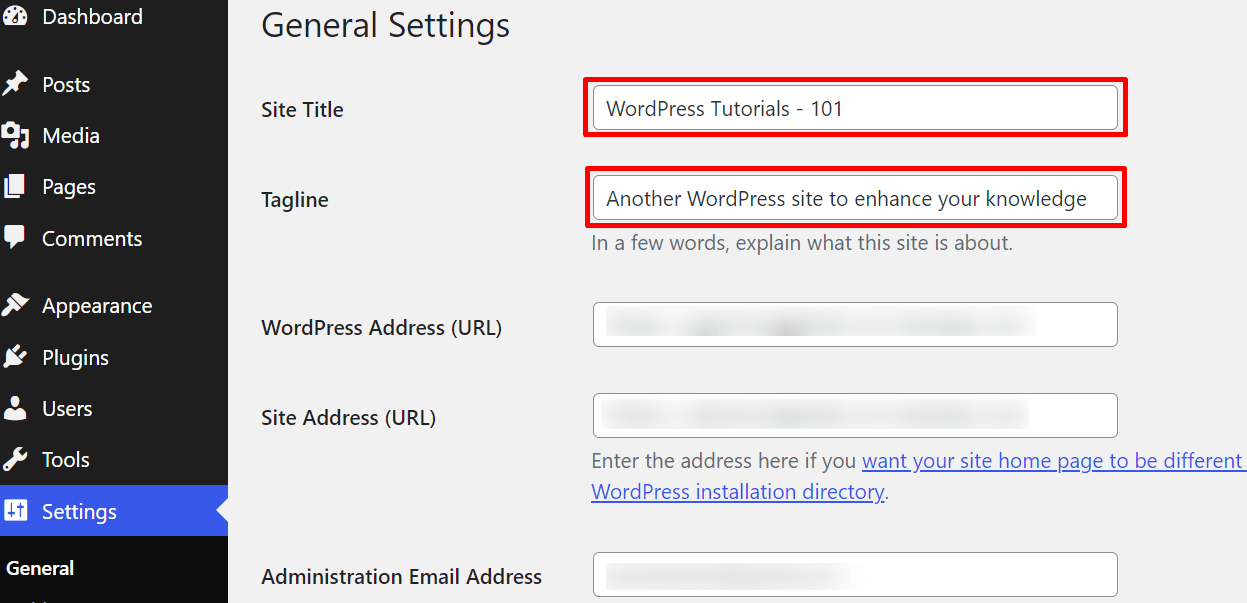
2. Write Your Site Title with a Catchy Tagline
Now give your website a suitable title that matches partially or entirely with the domain name. And add an attractive tag line in a few words. The tagline should explain what your site is about. Visit Settings> General and you’ll find the respective fields for Site Title and Tagline. Click on the Save Changes button after writing your title and tagline.
3. Select Your Preferred Timezone & Language
Setting up your preferred time zone is important. The time zone will help you keep track of the scheduled posts. We recommend you align the timezone with the area of your target audience. You can set up a timezone by visiting Settings> General. Then scroll down and click on the dropdown menu beside Timezone.
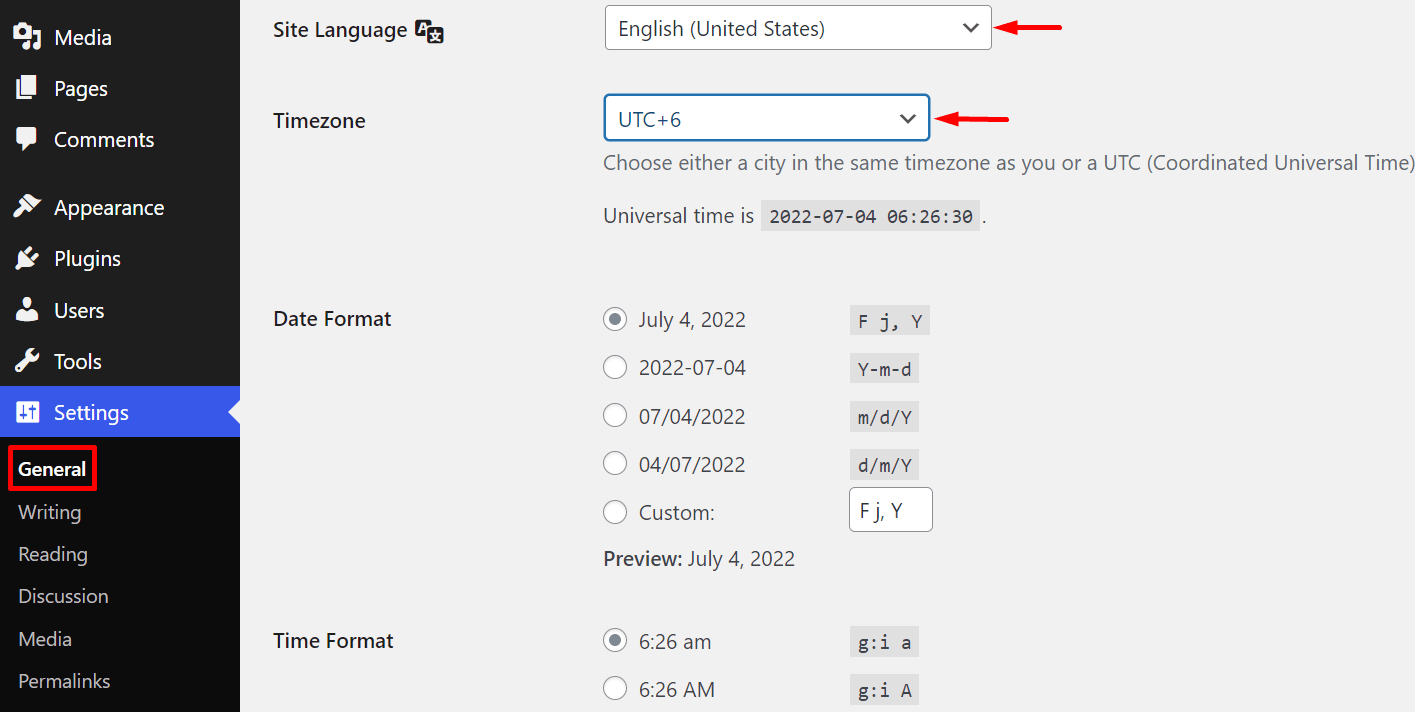
You can choose either a city in your preferred timezone or a UTC (Coordinated Universal Time) time offset as you see fit. You can also select the language you want to see across your website from here. Simply, select your choice of language from the dropdown menu beside Site Language and save the changes.
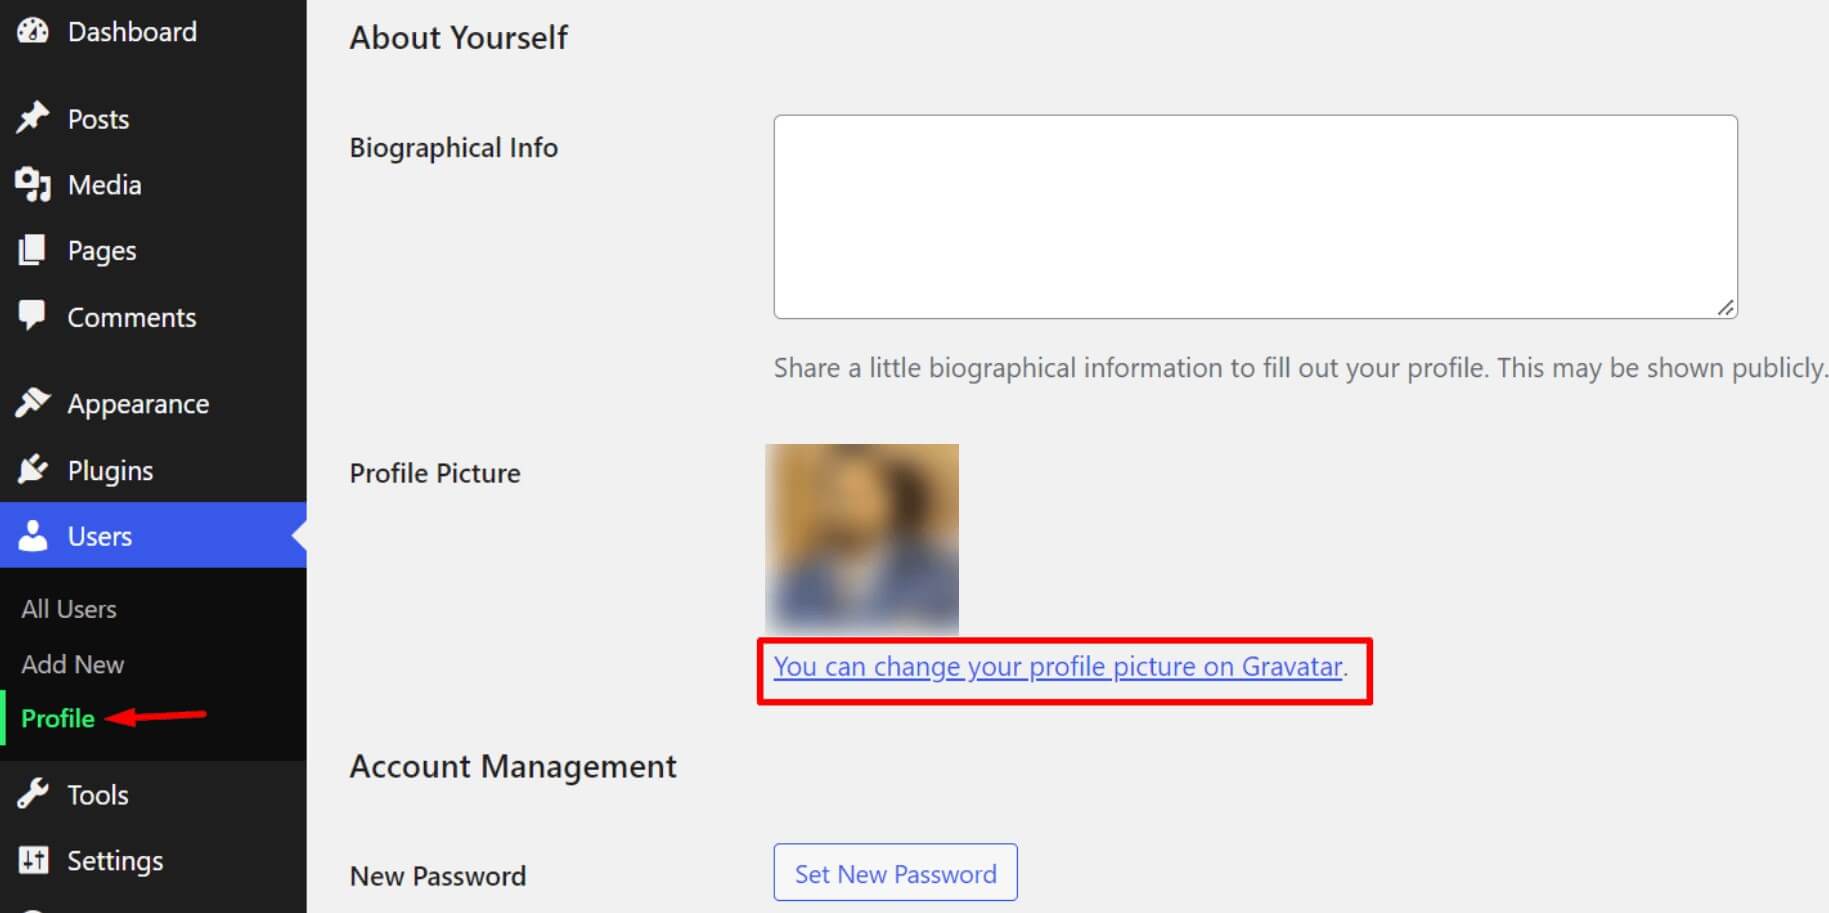
4. Personalize Your User Profile
WordPress by default provides its user with only a username. You can add First Name, Last Name, Nick Name, etc. from the Users>Profile section of the admin panel. You can also add more information like Email, Website, and Biographical Info of the author from here.
Add a Profile Picture to establish an identity for your name on the internet. Click on the “You can change your profile picture on Gravatar.” link to create a Gravatar- Globally Recognized Avatar. Or you can directly visit https://en.gravatar.com/ and create an avatar for yourself.
5. Install a Theme & Customize It
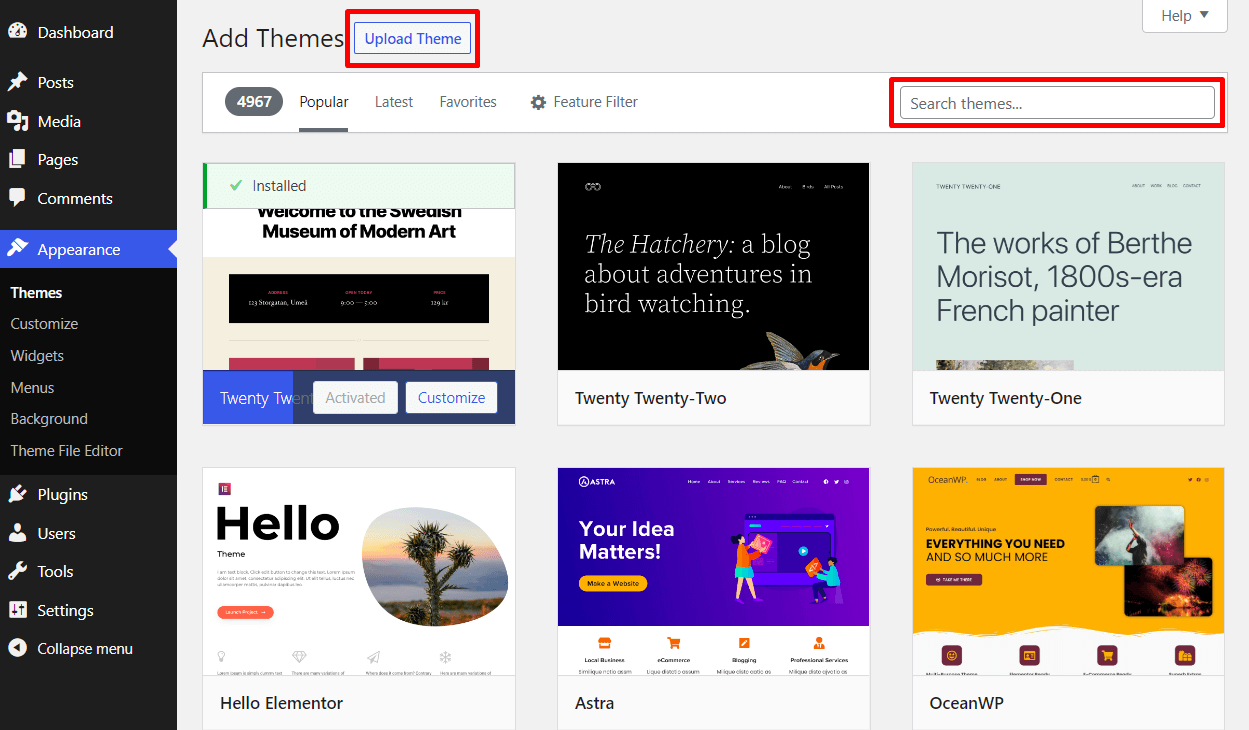
WordPress comes with a default theme. You can use it or add a new theme from the thousands of themes available in the WordPress repository. There are two ways of adding a new theme to your WordPress website.
- Visit Appearance>Themes> Add New, then search by the name of the theme you want to choose.
- Search your favorite theme and download its .zip file from WordPress.org. Then upload the theme to your website.
You can customize your installed theme by visiting Appearance> Customize. Most of the WordPress themes offer great features with the free version. Buy the premium version for advanced features. However, you can customize the design and outlook of your website from the left sidebar as shown below.
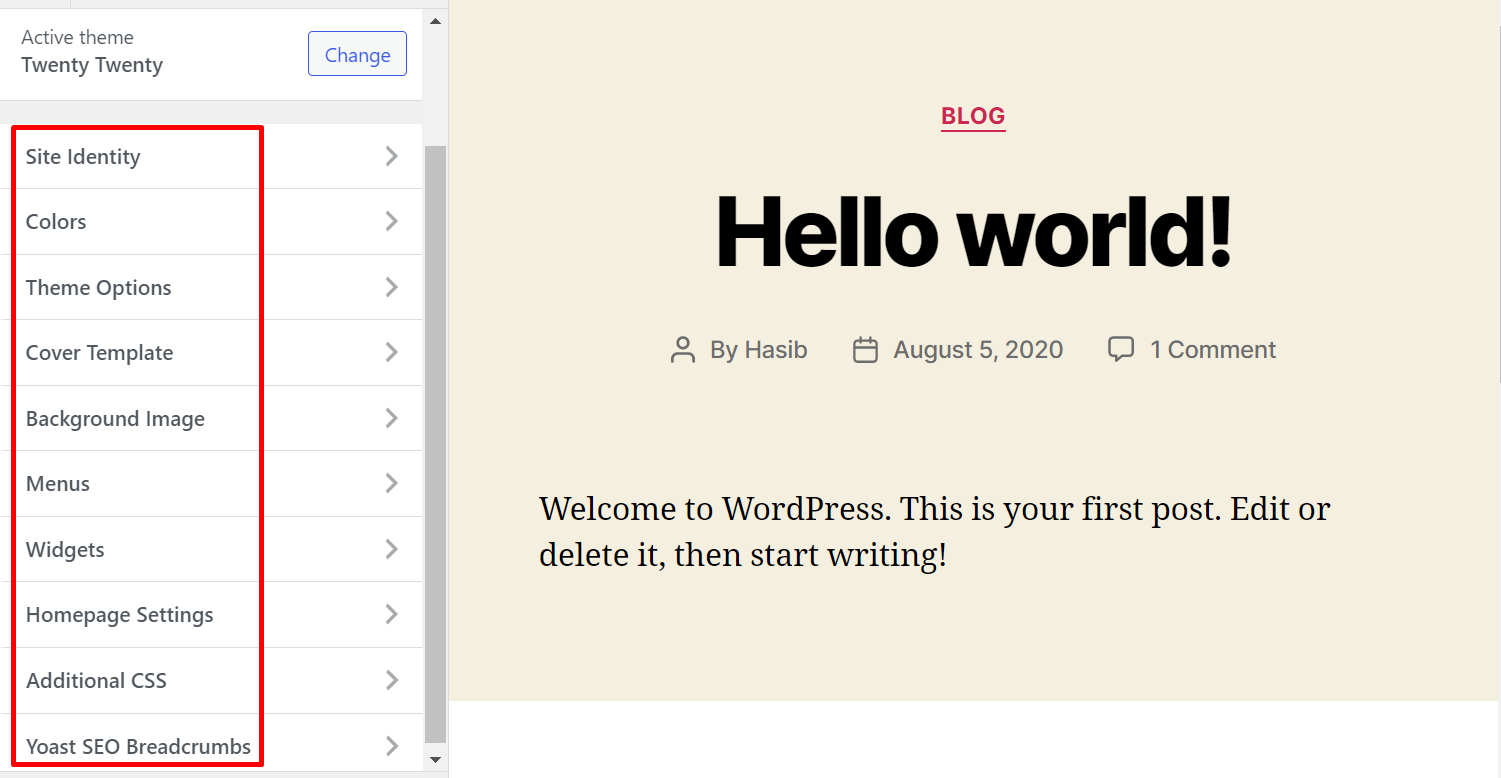
Explore each of these options to see what customizations a WordPress theme usually provides. Here, we’ve shown how you can create a menu for your website. Click on the Menus option, then hit the Create New Menu button.

The Create New Menu button will expand more options for you. You can set a location for the newly created menu from this section. The available locations are Desktop Horizontal Menu, Desktop Expanded Menu, Mobile Menu, Footer Menu, and Social Menu.
Most of the themes also come with widgets that make this menu management more efficient. If you plan to use a menu widget, skip this step of setting up Menu Locations. Also, read How to Customize a WordPress Theme to know the details.
6. Add Your Logo & Favicon
A logo can play a vital role in creating brand identity across the world of the internet. Design a logo according to your niche. It’s better to employ a professional designer to create your logo since it will represent your company/brand/blog to the visitors.
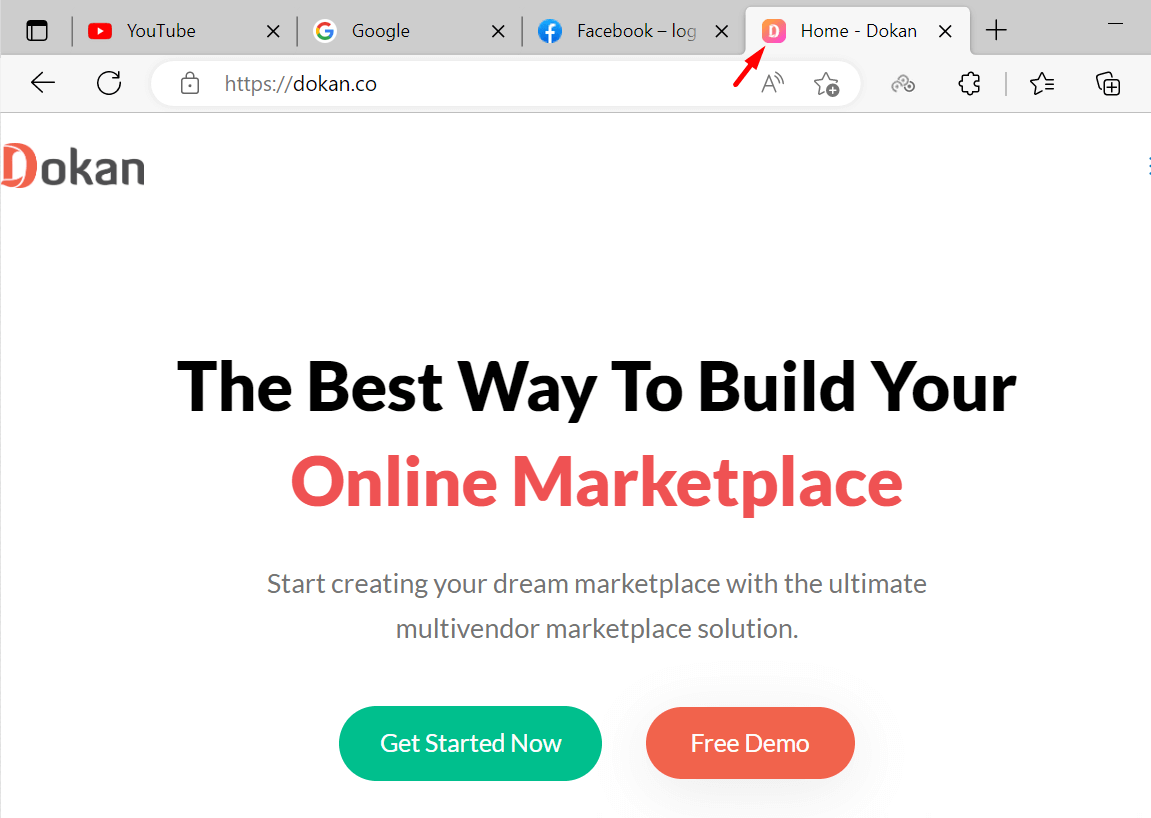
Make a small version of the logo, known as Favicon. Favicon is the small image that appears in the search results, browser tabs, bookmark bars, and within the WordPress mobile apps. Here’s an example of the Dokan favicon.
Once you have the logo, convert it to a favicon by using favicon generator websites (like https://www.favicon-generator.org/). Then upload your logo and favicon to the designated area of your WordPress admin sidebar.
Go to Appearance> Customize> Site Identity, then choose your logo and site icon from your computer.
Note: Site Icons should be square and at least 512 × 512 pixels.
7. Customize the Permalink Structure
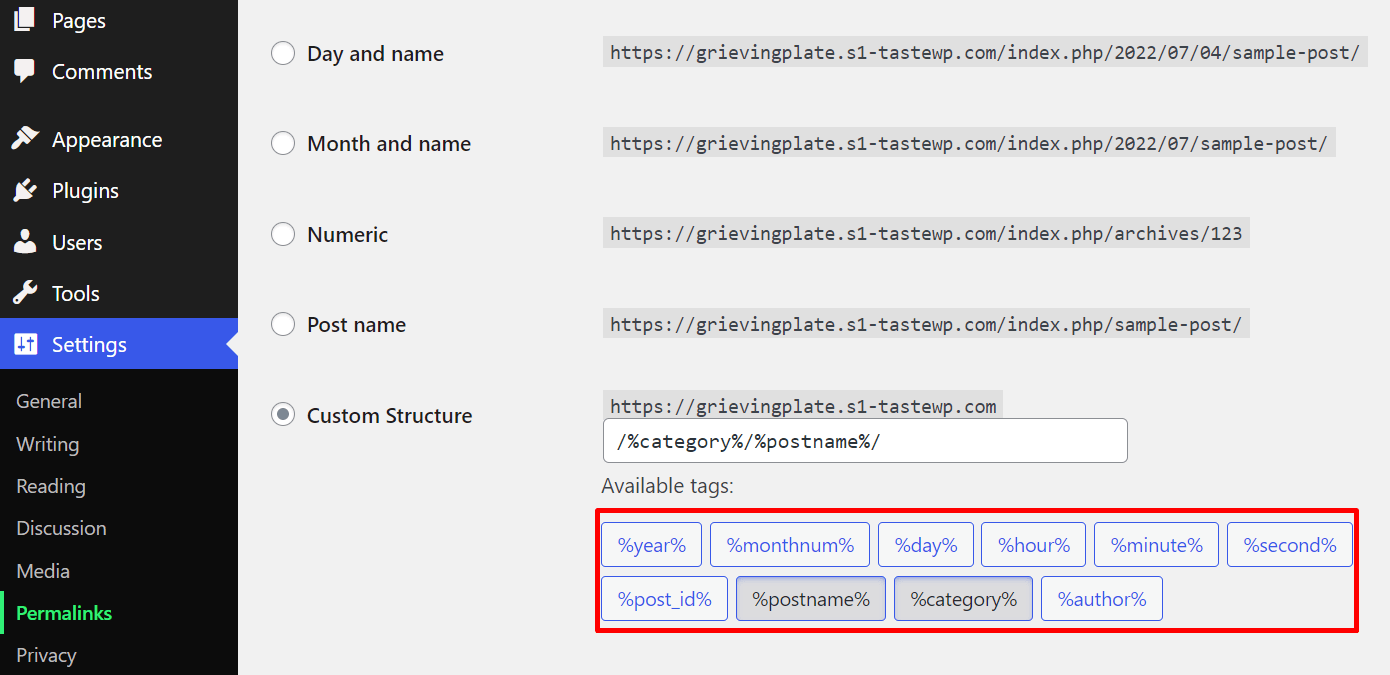
You can fix the URL view of your post by configuring the permalink settings. WordPress offers a wide range of customization for permalinks. You can select any of the structures from the available option.
Go to Settings> Permalinks, and choose the structure you prefer for your website. We suggest using a Post name or custom structure as per your needs. Here we chose category/postname for our site. Save the changes after configuring the URL structure.
8. Remove the Default WordPress Contents
WordPress automatically creates a few pages, one post, and one comment just after the installation. You can delete these to keep your website clutter-free. If you have any plugins or themes that you don’t need, uninstall them too.
Keep your website as lightweight as possible. You can access these items from the left sidebar of your WordPress dashboard. Find the default contents from the following steps and delete the unnecessary items.
- Go to Posts > All Posts to find all posts on your website.
- Go to Pages > All Pages for all available pages.
- Go to Appearance > Themes to see all themes.
- Go to Plugins > Installed Plugins to get the list of plugins.
9. Configure SEO for Your WordPress Site
SEO is a crucial component of any website. The right SEO tactics will help your website get search engine visibility and drive traffic to the site. There are several top-notch SEO plugins dedicated to WordPress, Yoast SEO is one of the oldest and most effective WordPress SEO plugins. There are more options like Rank Math and All in One SEO.
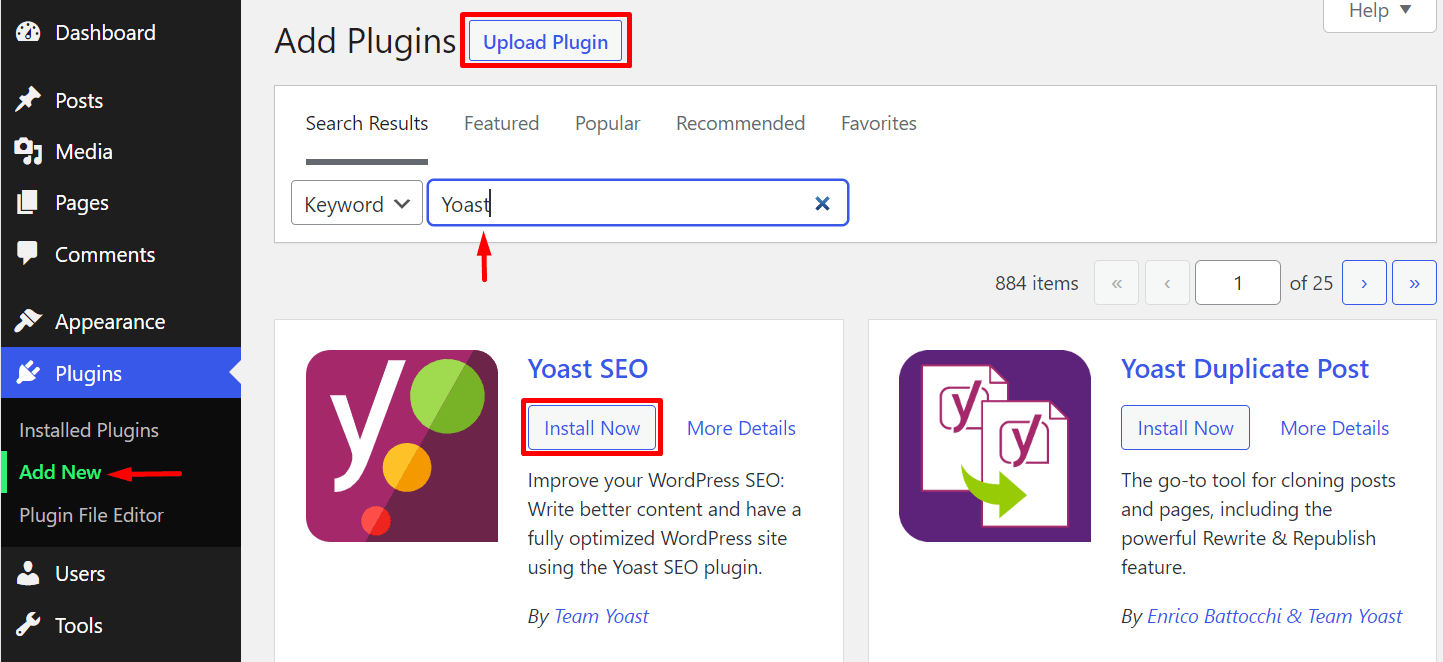
Go to Plugins > Add New, and type Yoast on the search bar. Then install and activate the plugin. You can install this plugin to your WordPress site manually as well. Download the .zip file from WordPress.org, then upload the plugin to your website.
Learn how to use Yoast for the best performance from this video tutorial.
10. Connect Google Analytics & Search Console
This is a significant step. You need to connect Google Analytics and Search Console with your WordPress website. First, go to https://analytics.google.com/ and create a property for your domain. You’ll get a Measurement ID provided by Google. Then, visit https://search.google.com/ to verify your ownership of the domain. Make sure to use the same email for both Google Analytics and Search Console.
Then install the Google Site Kit plugin from the WordPress plugin directory. Sign in to your linked Google account. It will connect Google Analytics with your website. Then connect the Site Kit with your Search Console as well.
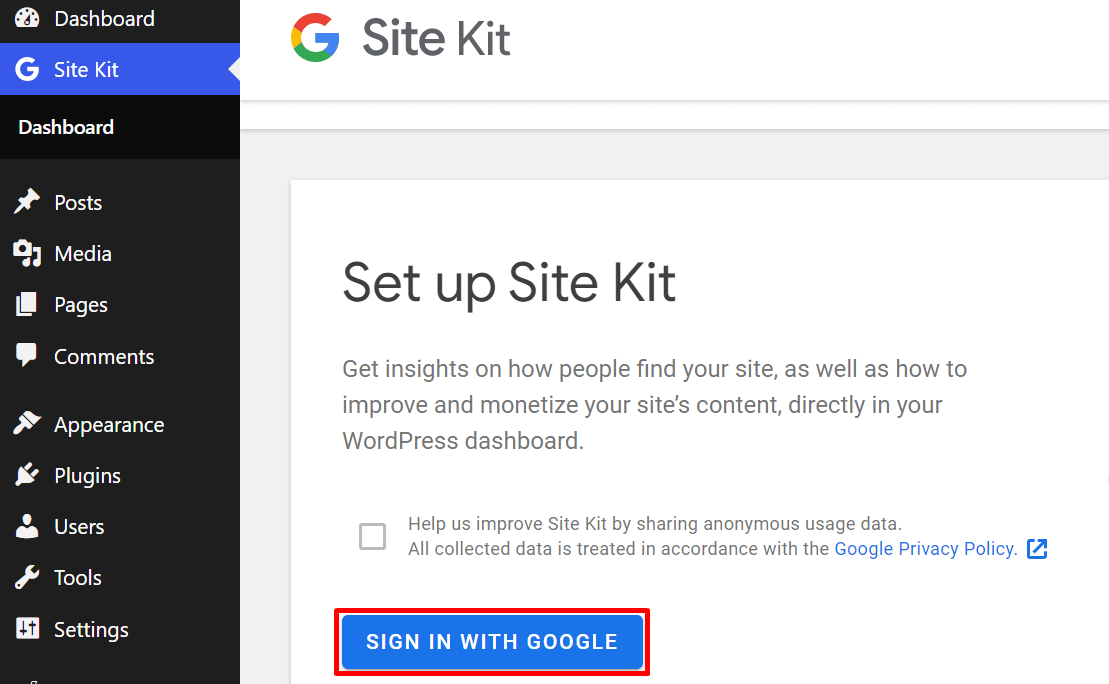
Upon successful connection, you’ll be able to see the total impressions, total clicks, unique visitors from search, and other data related to traffic, content, and speed from the Site Kit Dashboard.
11. Install the Essential Plugins for Your Website
Now your website’s basic configuration is ready. You need a few other important plugins to add more functionalities to your WordPress website. Here’s a list of the essential plugins for WordPress you need for an optimal WordPress site.
- Akismet: An anti-spam plugin to block spam comments that contain malicious links.
- Contact Form 7: A simple WordPress form builder to create contact forms.
- WP Super Cache: It quickly manages to cache and improves the website speed.
- UpdraftPlus: It is one of the best plugins for WordPress site backup.
- Jetpack: A security plugin with malware scans and brute force protection.
12. Write, Edit & Publish Your First Blog
You’re all set! Congratulations again for coming this far. Now you’re ready to publish your first blog. Choose a topic that matches your niche and caters to the needs of your target audience. You should perform intensive keyword research before writing on any topic.
Keep writing. Once you’re done with writing, edit it with a knife. Omit the clutter, break down the long paragraphs, and make the blog presentable. Read your blog from a reader’s viewpoint and make necessary changes to enhance the user experience.
Keep each of your images within 100 KB to help the site load faster. Add alt text to the images. Optimize the blog according to Yoast SEO parameters. Then, finally, hit the publish button only if you’re sure about the quality of your content.
FAQs on Things to Do After Installing WordPress

As a beginner, you may have a few questions hovering in your mind. The following FAQ section will be of great help. If you have more questions, let us know in the comment section.
1. What is the difference between a website and WordPress?
Custom-built websites are made from scratch with coding languages, whereas you can build an entire website with WordPress without using a single line of code. So, WordPress is easy to build, maintain, and update. But, custom-built websites are faster and more secure than websites made with CMS like WordPress, Wix, Joomla, and more.
2. Can I use WordPress without a domain?
Yes, you can build a free website on a subdomain on WordPress.com. Your domain name will look like yourdomain.wordpress.com.
3. Which hosting is best for WordPress?
There are multiple top-notch hosting providers that perform excellently in hosting WordPress websites. Here’s a list of my top five.
1. Bluehost
2 Kinsta
3. WP Engine
4. Cloudways
5. IThemeHosting
Read this blog <11 Things to Know Before Buying a Hosting Plan for Your Website> to know more about hosting.
4. Which WordPress theme is best for beginners?
The WordPress ecosystem has thousands of themes. It’s really a challenging task to choose the right one for your needs. Check the following WordPress starter themes you can try.
1. Astra
2. GeneratePress
3. Kadence
5. Genesis
5. How many days it will take to learn WordPress?
That depends on how hard you’re trying. It shouldn’t take more than seven days to learn the basics of WordPress. But, you may need a few days more to learn the basic HTML and CSS required to operate WordPress CMS like a pro.
Over to You!
Hope now you know what to do after installing WordPress. What’s next? Build your first website following our guide. Experiment with the websites by adding new plugins and tweaking the designs. You can run A/B testing before you finally settle on a long-term WordPress setup for your WordPress site.
Explore the amazing world of WordPress. Don’t forget to create a backup of your website before making any major changes. All the best!


Leave a Reply