With this version, you can create a cash memo just like creating in any other super shop. This feature comes with the wePOS pro.
Requirements:
- WooCommerce
- wePOS free
- wePOS pro
For Admin
To activate this feature, you need to install the WooCommerce and wePOS free &wePOS pro.
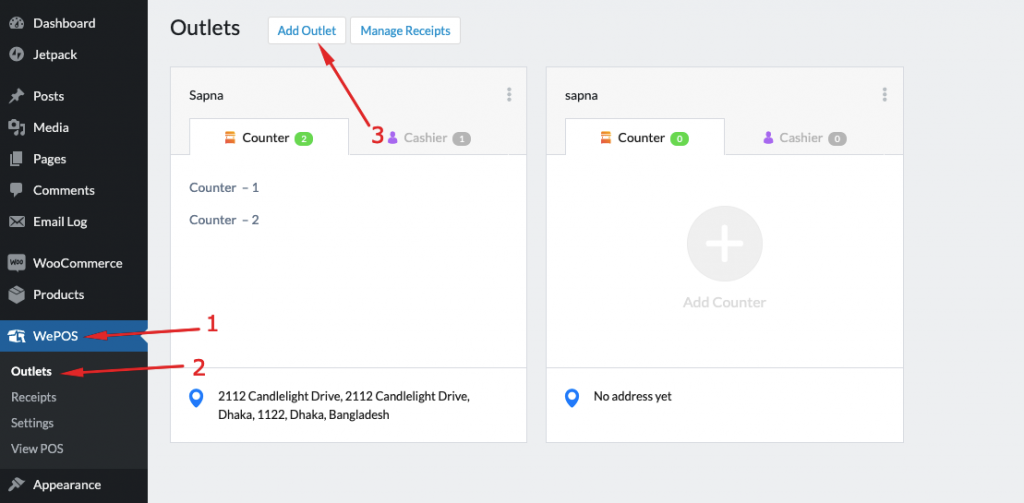
Adding Outlets
After installing all of them like any other WordPress plugin, you will need to navigate to the WP Admin Dashboard → wePOS → Add Outlet.
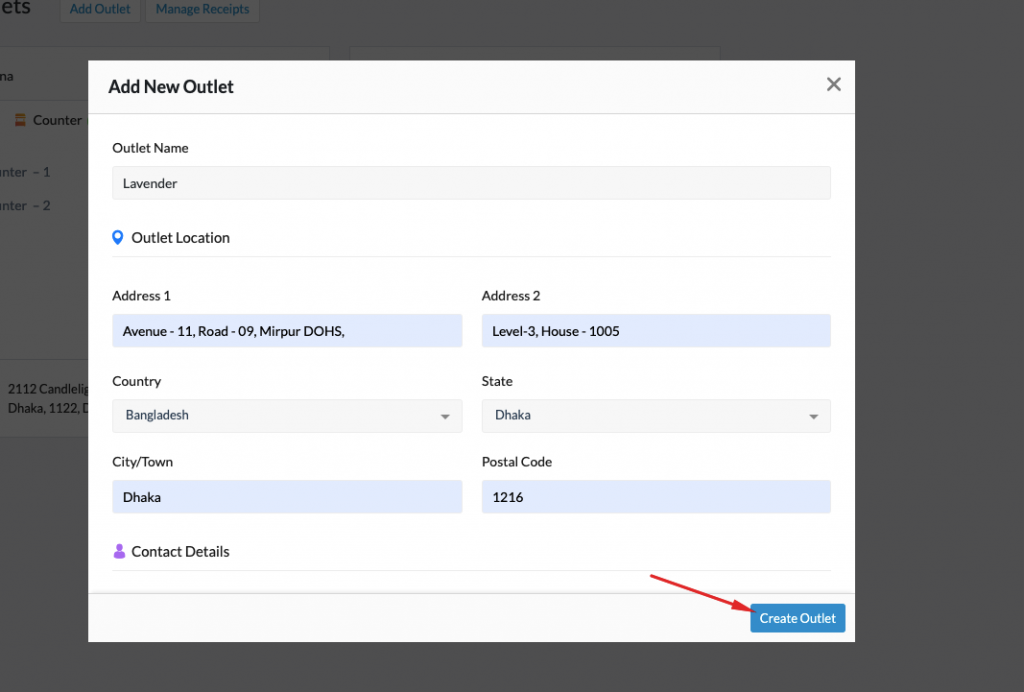
A modal window will pop up. Fill out the modal with the credentials & hit the “Create Outlet” button:
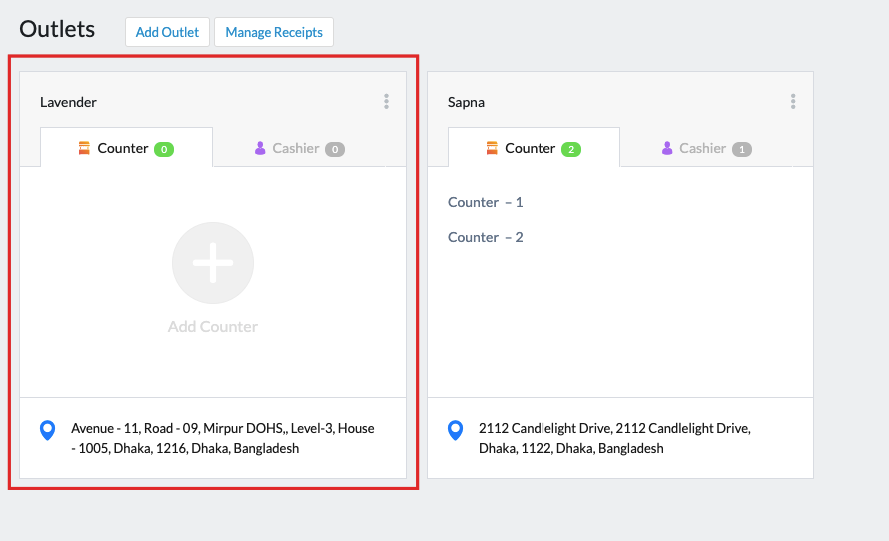
Now, the counter (here ‘Lavender’) will be created just like the following:
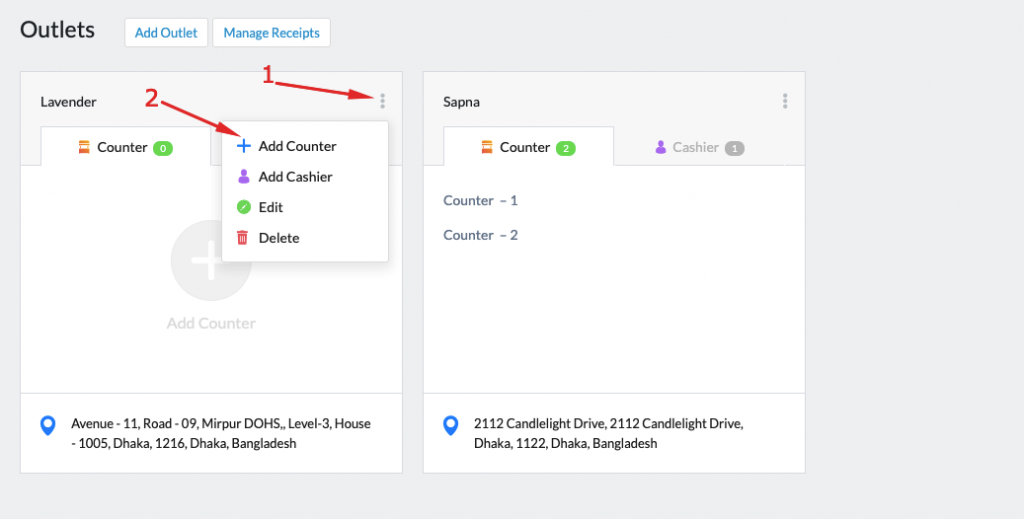
Adding Counter
To add a counter, click on the three vertically aligned dots and then click on the “Add Counter” button:
A modal window will pop up. Give a counter name and a counter number. Click on the “Create Counter” button.

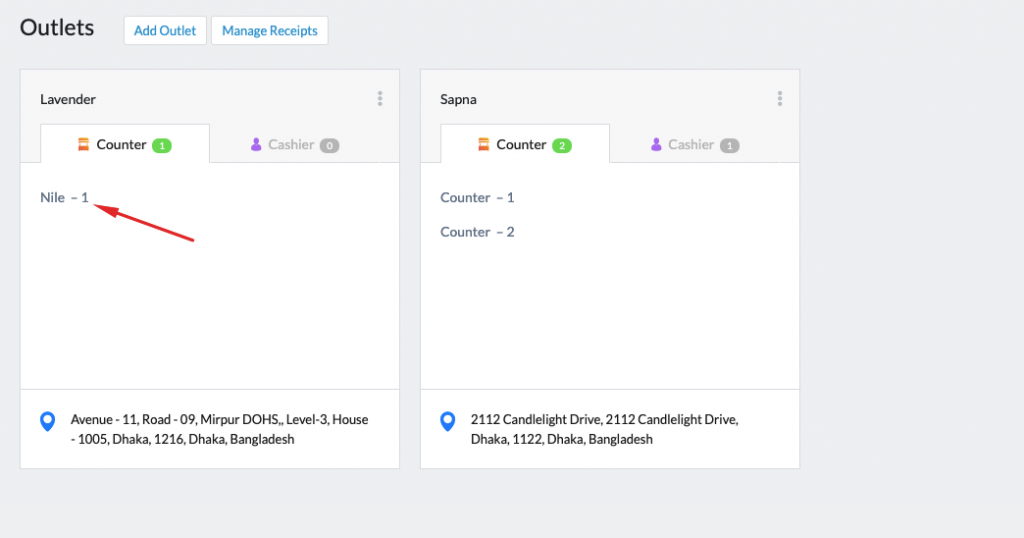
Now, the counter (here ‘Nile-1’) will be created.
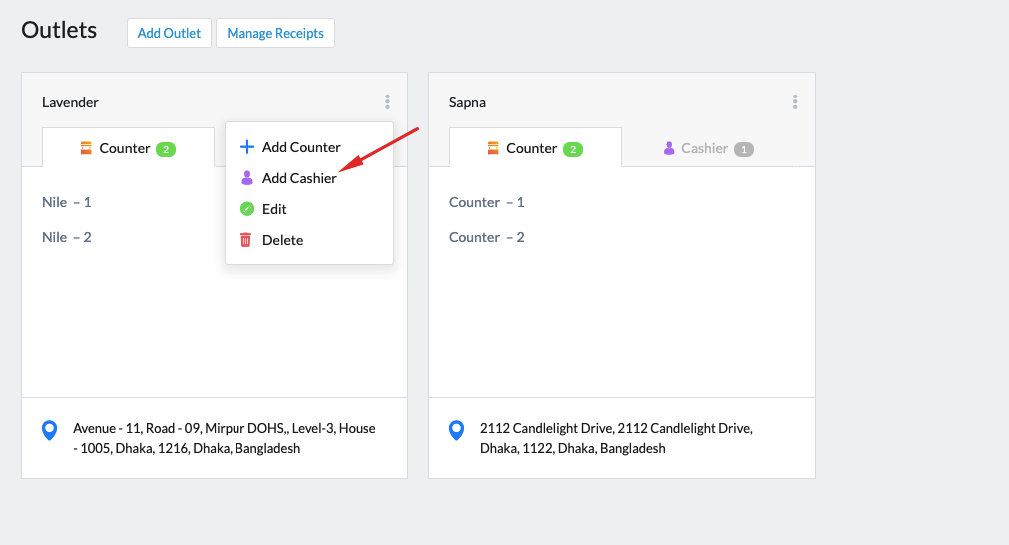
Adding Cashier
To add a cashier, click on the three vertically aligned dots and then click on the “Add Cashier” button:
Now a modal window should appear on the screen. If you are creating cashiers for the first time, you will get the “Want to Create New?” option:
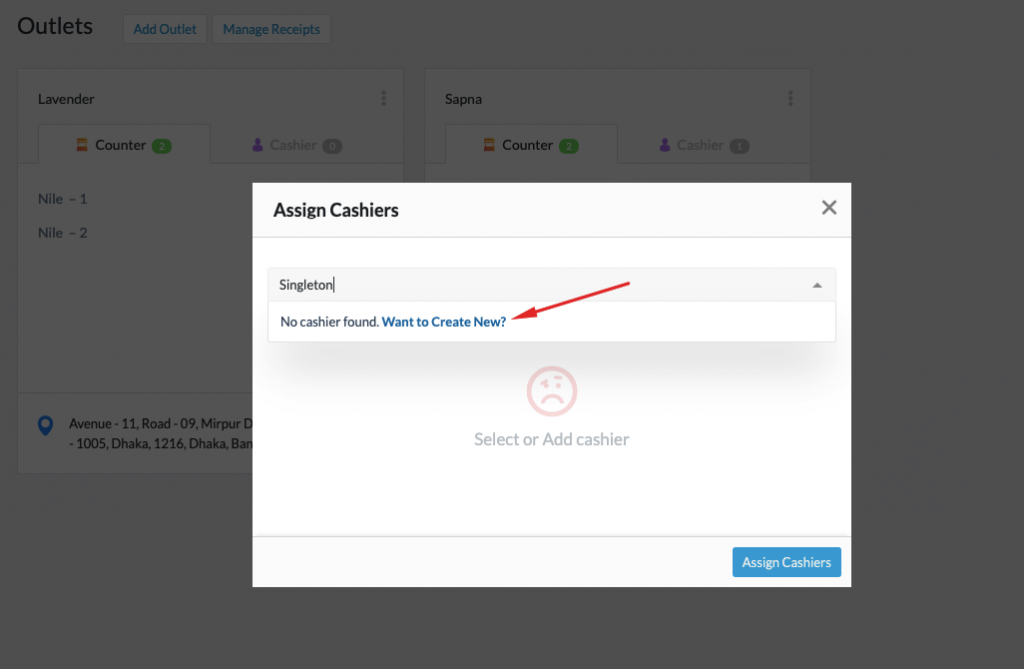
Clicking on the option will show another modal to create a cashier. After entering all the credentials, hit the “Create Cashier” button.

If you have cashiers created from all along, you can enter one or two characters of the cashier’s name and soon the names matching with the characters will appear on the dropdown menu. Select your desired cashier and hit the “Assign Cashiers” button.
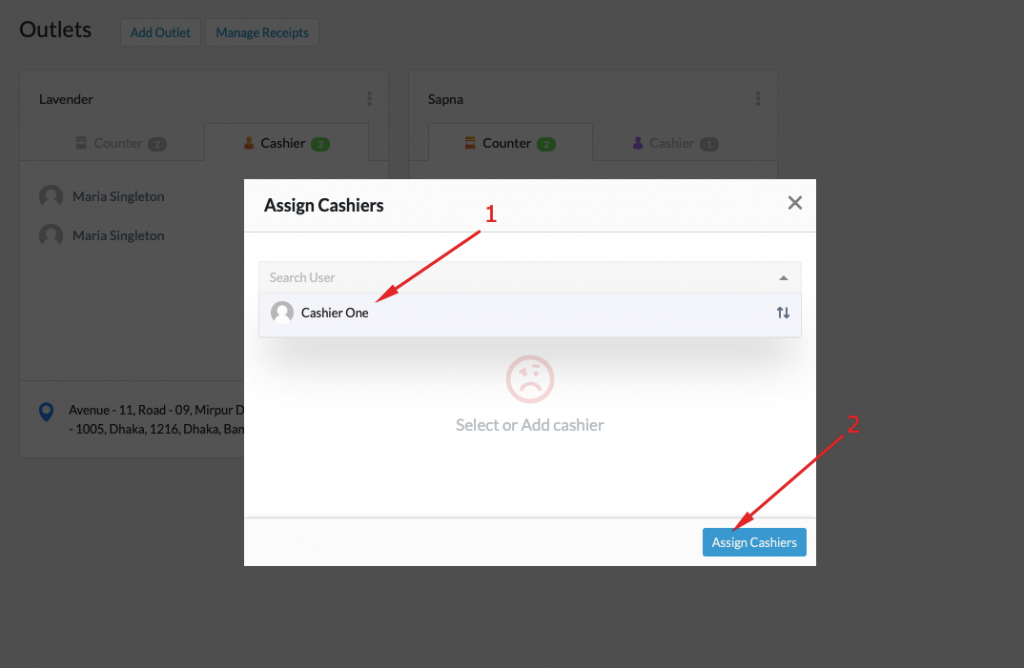
Now, you will see that the cashier has been added to the outlet.
Now, you should create a password for your cashier so that he or she can log in to your website. If you don’t know how to create a password for a user, then you can go through this short documentation.
Bonus Tips: If you want you can create a menu with this customized URL as View Pos, so your customers do not have to write the URL every time.

Cashier’s Panel
After logging in, the cashier can use their POS machines to add products to create a cash memo. However, they can also create a cash memo manually by selecting items.
How will a Cashier Use the wePOS Plugin in His/Her Outlet?
Follow these steps:
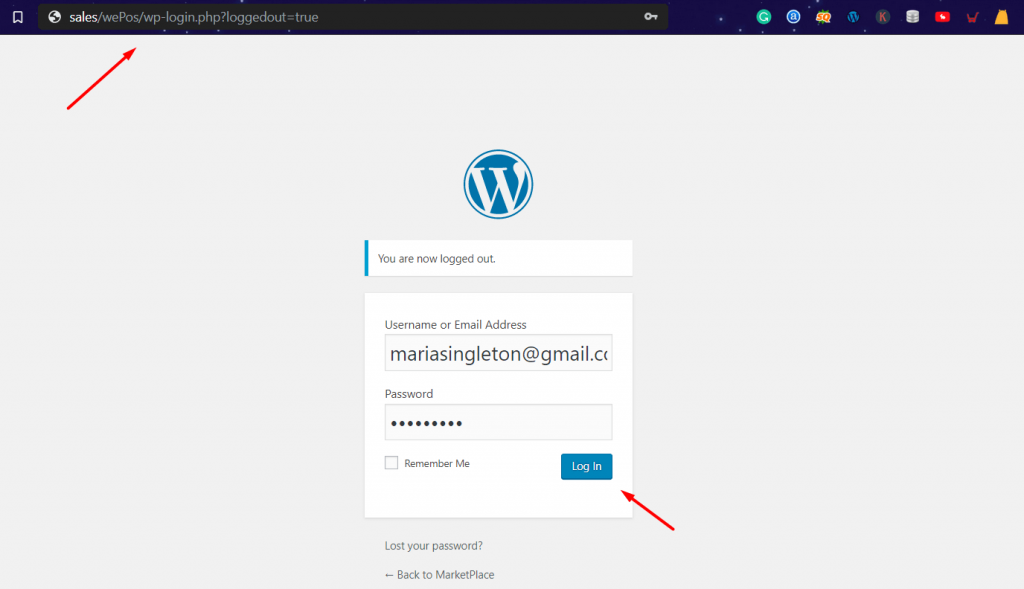
Step: 1
At first, your cashier has to log in on his/her wp-admin dashboard:
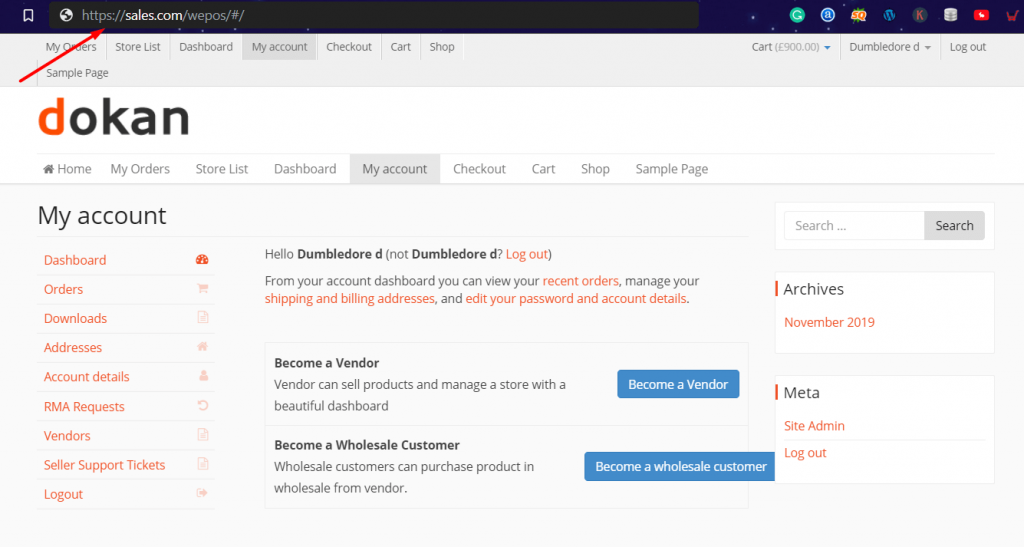
Step: 2
Change the URL to www.yourdomain.com/wepos/#/
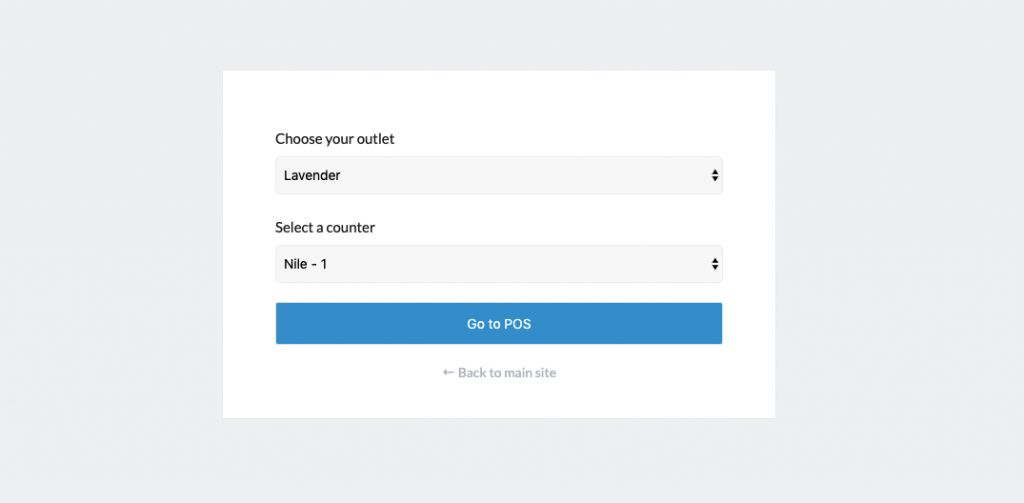
Step:3
Now your cashier has to select the outlet and counters.
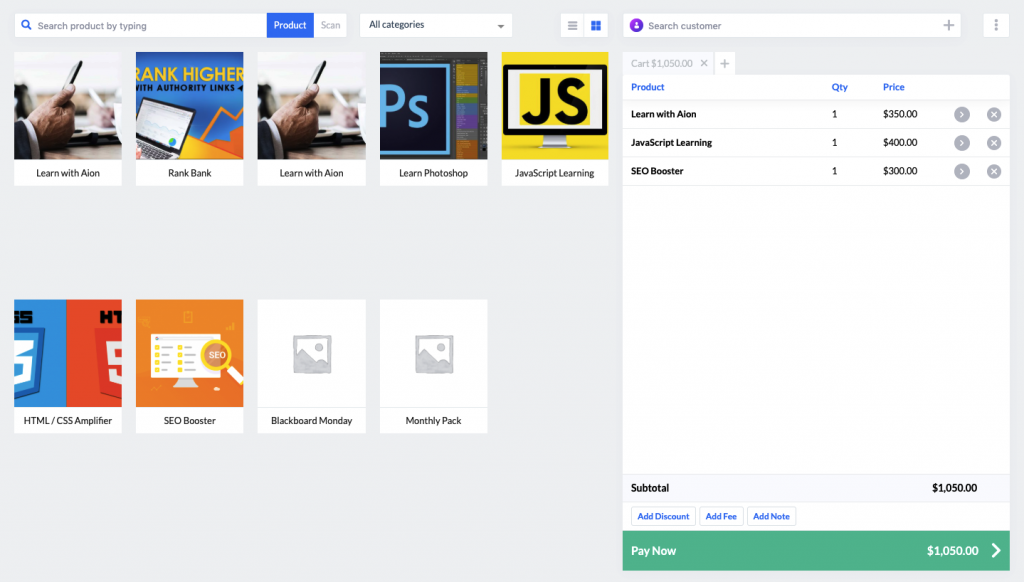
Step:4
Next up, your cashier will begin scanning your products with the POS machine and can make a bill. If any product is not scannable it can be manually added to the cash memo.
Switching among counters
It’s also possible for your cashier to switch between different counters. For example, if one of your customers is holding you for a moment you can switch to another counter and can start billing that customers.
To do so, your cashier just has to click the following icon:
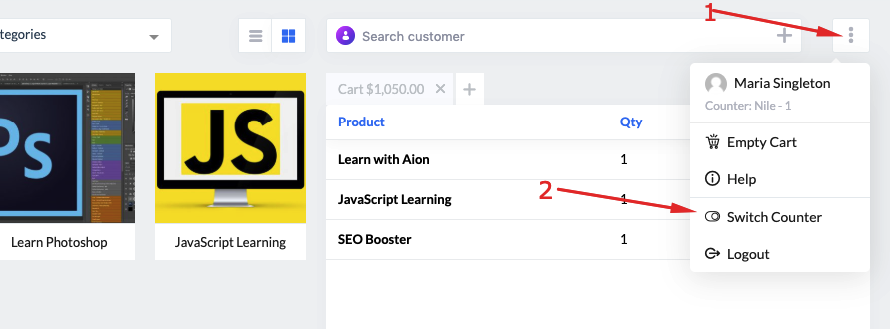
Now, your cashier has to select the other counter:
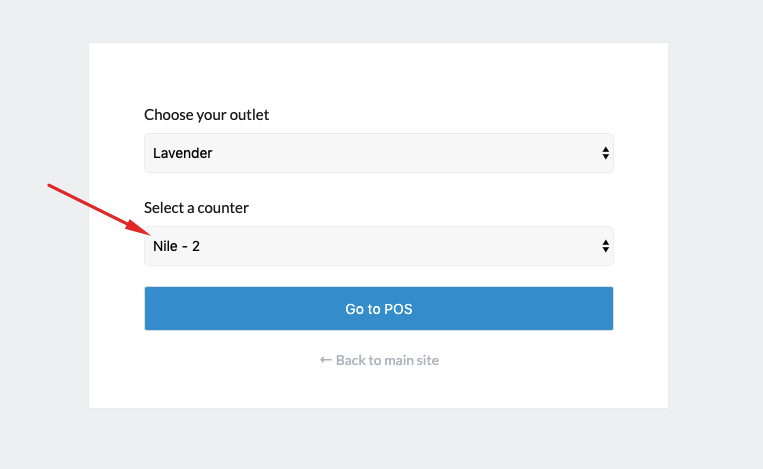
And can start billing another customer:

Step: 5
Now, it’s time to receive the payment from your customers. The wePOS supports cash and card payments.

It supports cards like Visa, MasterCard, American Express, Diner’s Club, Discover, JCB, UnionPay and what not.
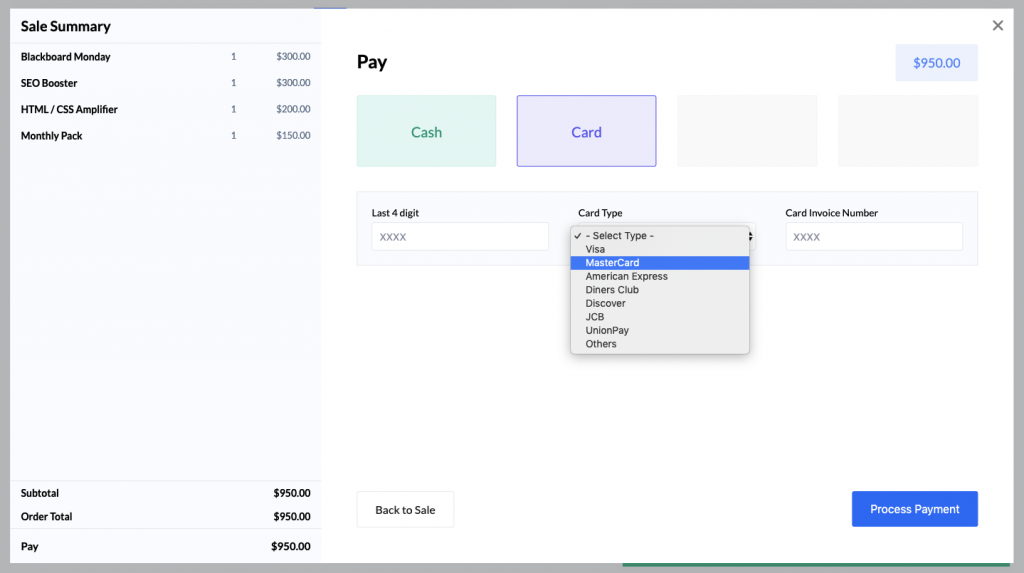
That’s it! Your cashier now has to hit the “Process Payment” button to complete the payment process. Finally, your cashier will get the following success message:
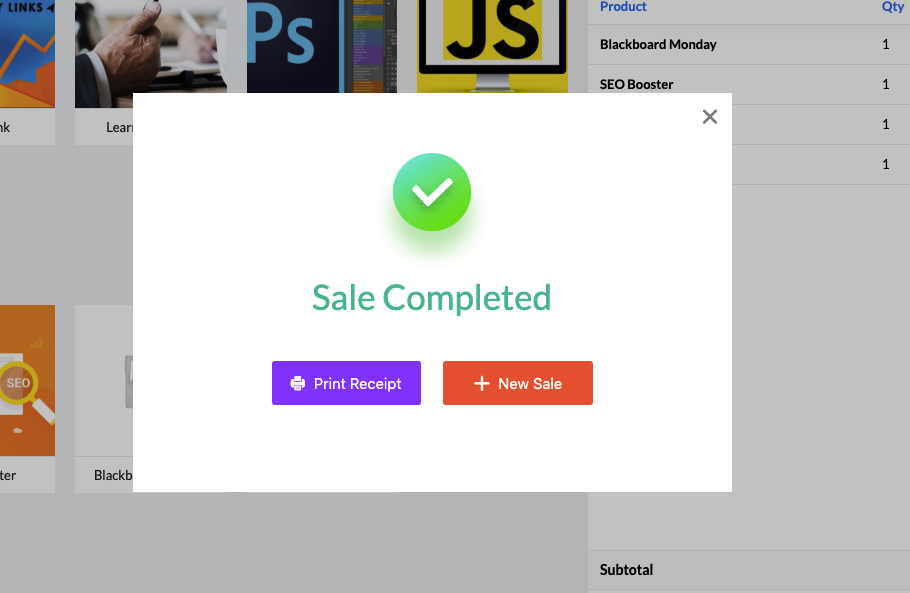
On hitting the New Sale button, the cashier can start billing another customer instantly.
That’s how your cashier can use the wePOS plugin to bill your customers and create a cash memo.

