If you’re planning to build your online marketplace, Dokan Cloud can be a powerful and user-friendly solution. With its amazing features and no coding requirements, Dokan Cloud simplifies creating a professional marketplace from scratch.
If you’re targeting a niche audience or a large-scale platform, this guide will walk you through every step of building an online marketplace website using the Dokan Cloud marketplace.
We are going to go over all the required steps, from signing up to configuring all the necessary settings.
Let’s get started-
Multivendor Marketplace Industry Stats
By 2026, sales via multi-vendor marketplaces are forecasted to reach a staggering $8.7 trillion, highlighting the growing dominance of these platforms. In India alone, the GMV of online marketplaces is expected to hit $350 billion by 2027.
This growth aligns with consumer preferences, as 75% of frequent online buyers wish their favorite retailers offered marketplace options.
Furthermore, by 2027, 62% of global eCommerce sales will be conducted through marketplace websites. Reflecting the widespread adoption, 88% of consumers already have at least one marketplace app on their phones, and 57% of global online sales are generated through multi-vendor marketplaces.
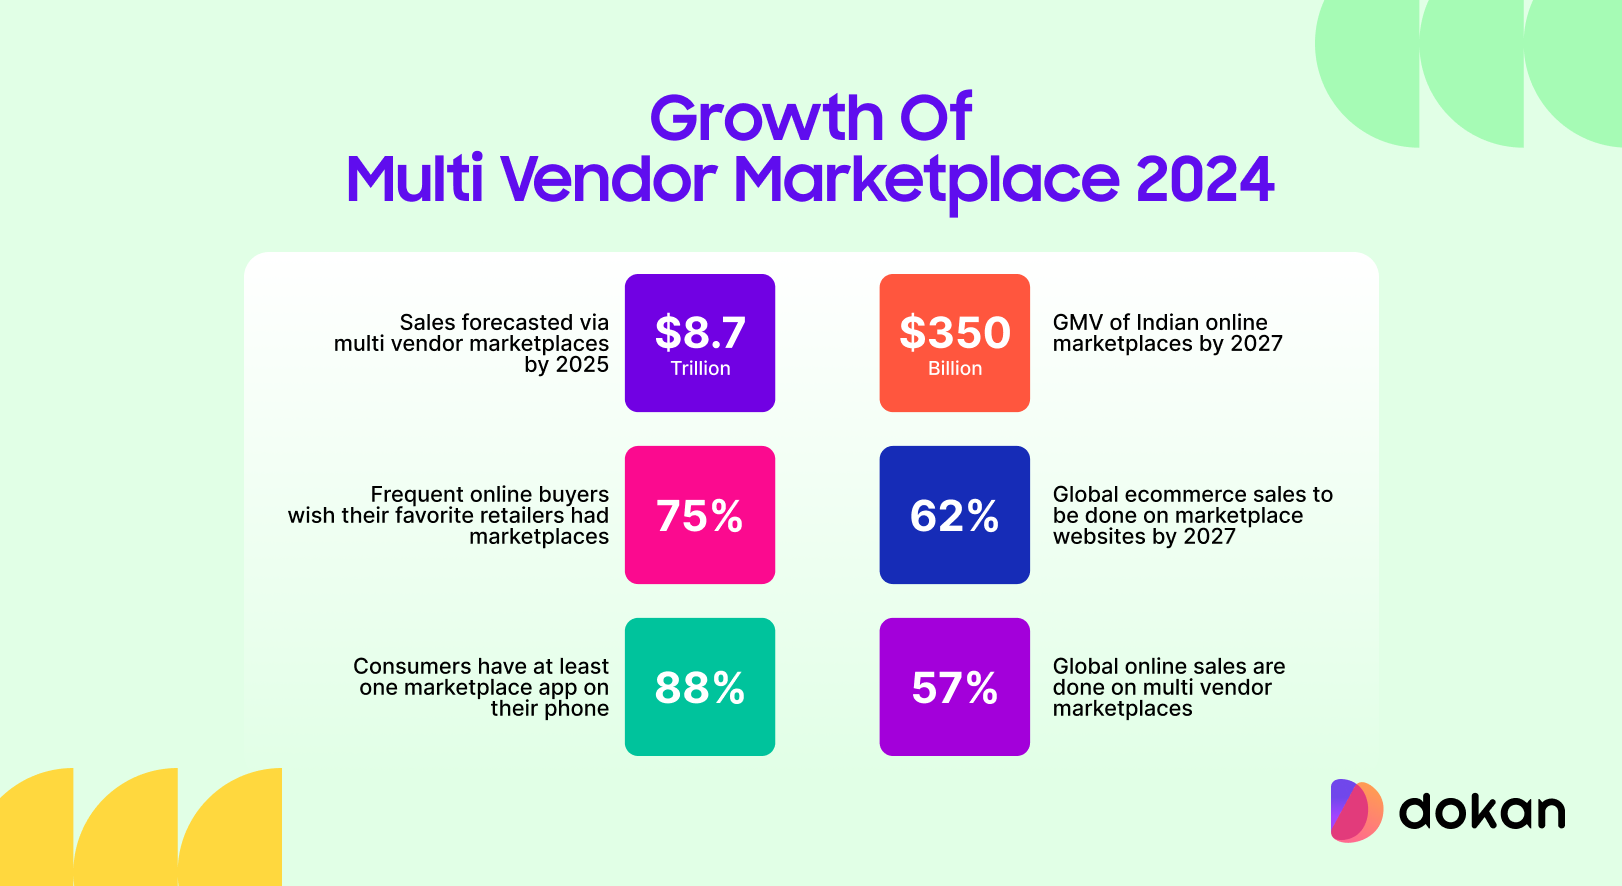
We can safely say, that the multivendor marketplace industry has a great future ahead.
How to Build an Online Marketplace Website from Scratch
So we are at the business end of our article. Now we are going to show you how to build an online marketplace from scratch using the Dokan Cloud marketplace platform.
Here are the steps-
- Step 1: Signup to Dokan Cloud Platform
- Step 2: Complete the Setup Wizard & Onboarding Process
- Step 3: Configure Your Business Details, Domain Name, etc
- Step 4: Create Categories and Brands for the Products
- Step 5: Create Subscription Plans for Vendors
- Step 6: Configure Shipping
- Step 7: Set up Payment and Payout for Your Marketplace
- Step 8: Configure the Tax Settings
- Step 9: Design Your Marketplace with Page Builder
- Step 10: Integrations
- Step 11: Configure Other Settings and Launch Your Marketplace
Now let’s see the steps in detail-
Step 1: Signup to Dokan Cloud Platform
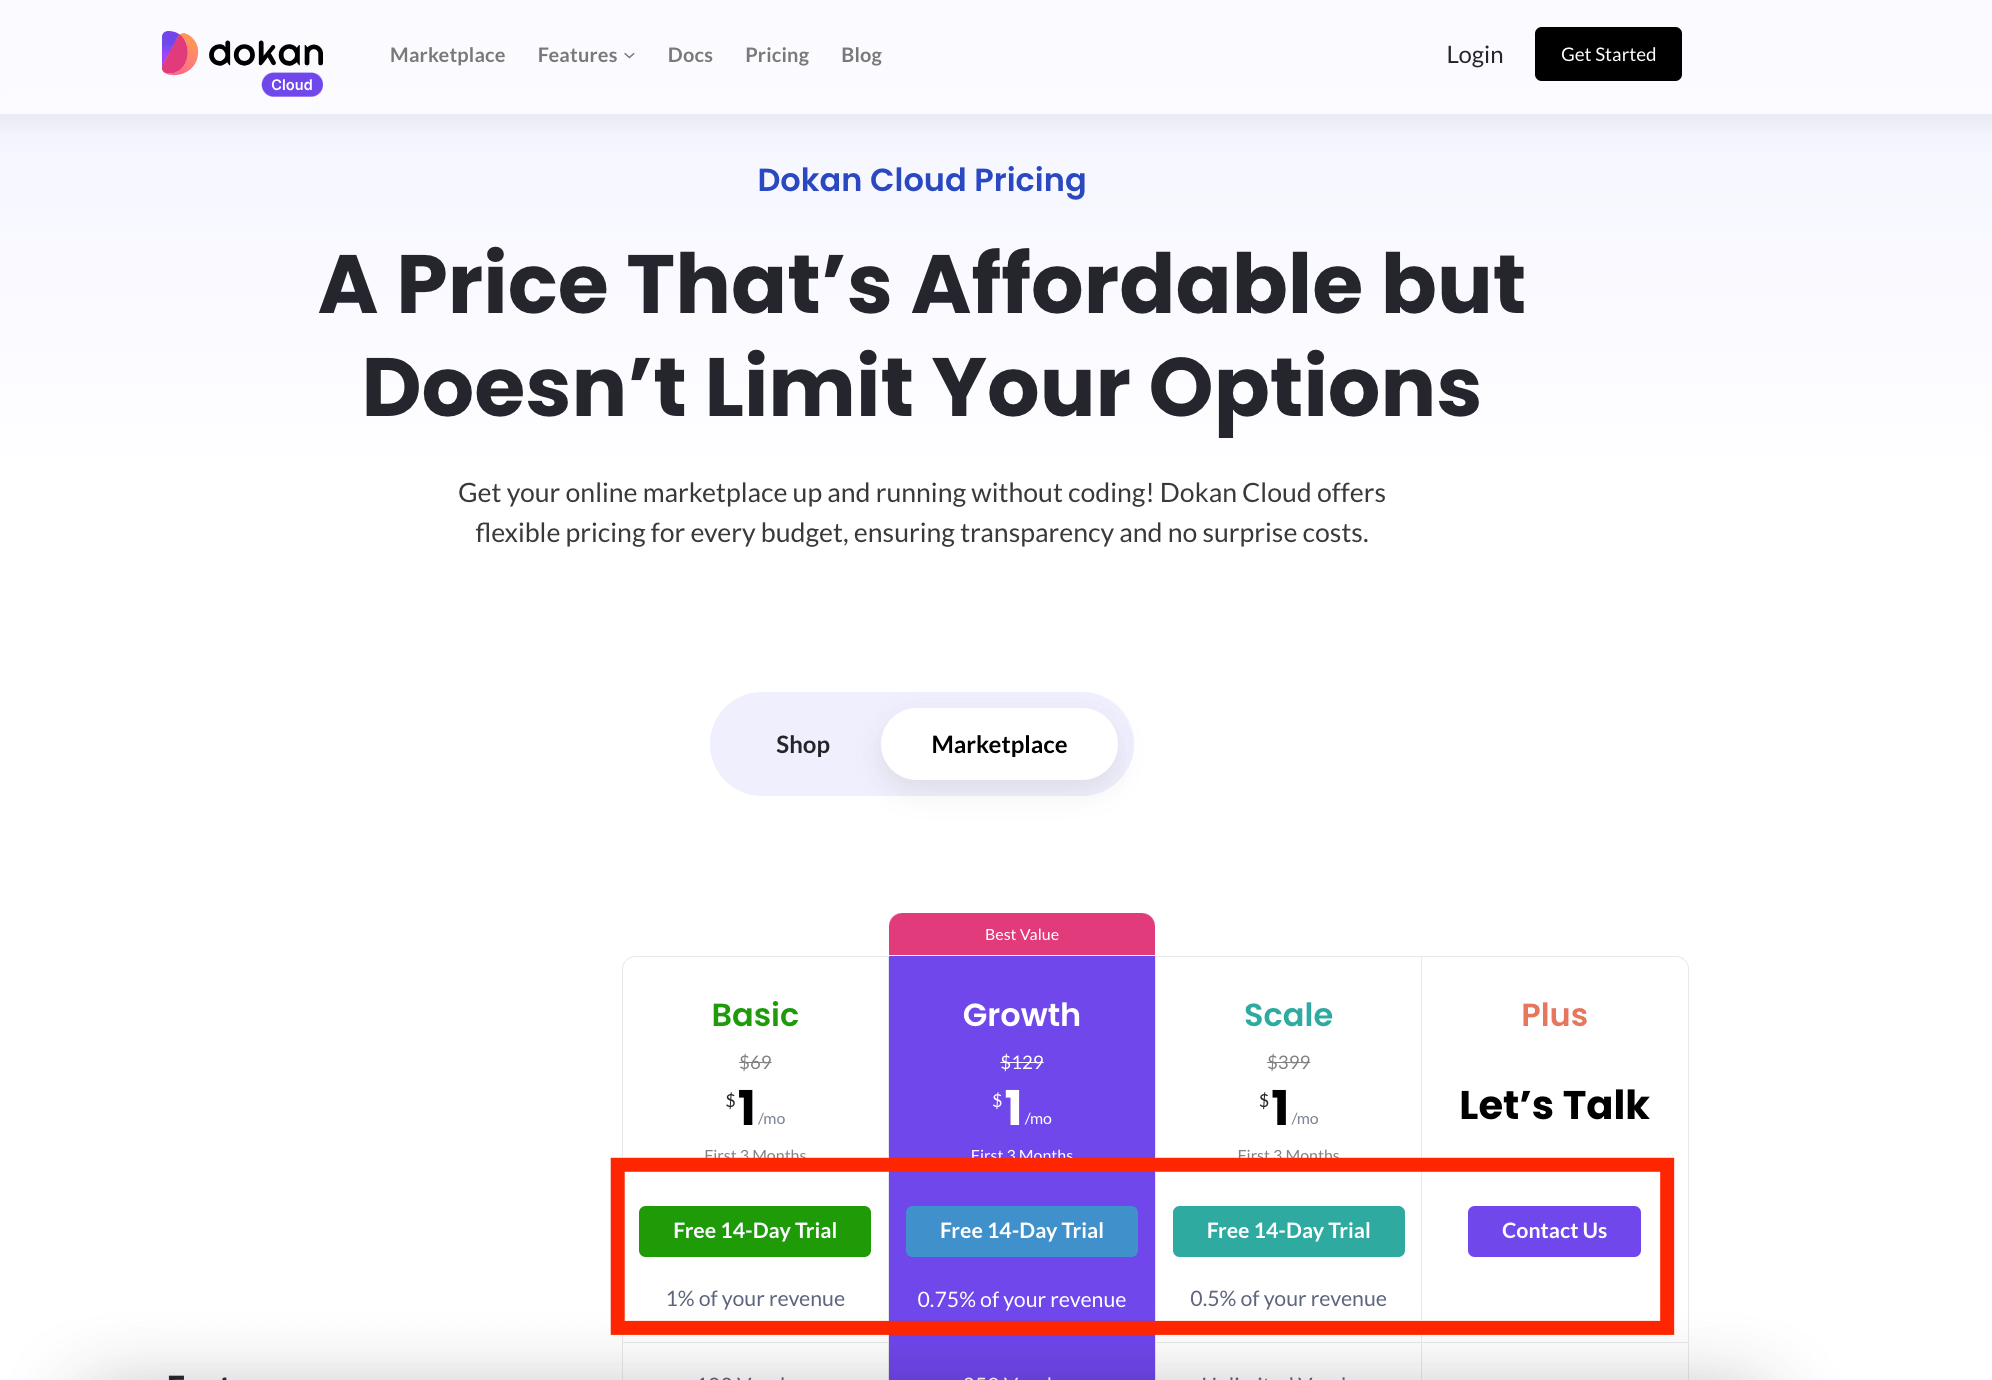
First, you need to sign up for the Dokan Cloud platform to get started. Dokan Cloud offers a 14-day trial period. So you will get plenty of time to explore and test the available features before you make your final decision.
Also, after purchase, you will only need to pay $1 per month for the first 3 months. This will give you time to test whether your idea is market-fit.
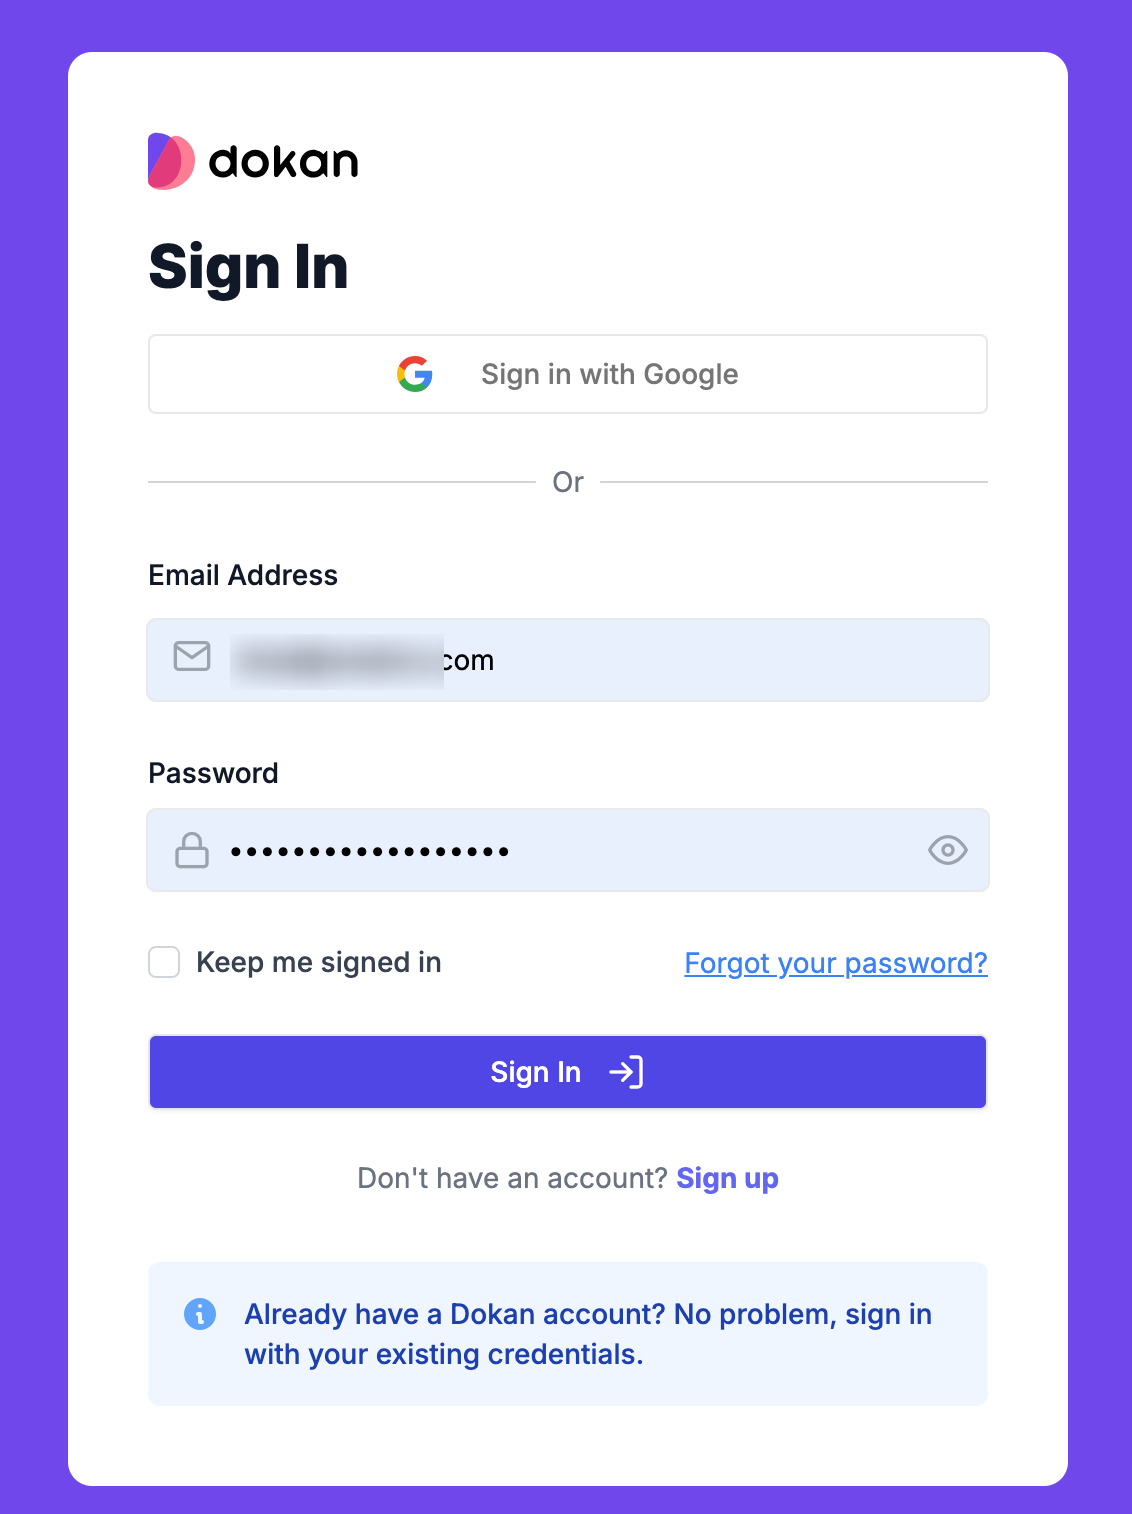
While signing up, you need to add your email address and set a password.
Dokan Cloud will take a few minutes to set up the marketplace and you will get a message that your marketplace is created.
Step 2: Complete the Setup Wizard & Onboarding Process
You need to complete the setup wizard in order to start your marketplace. Choose the Marketplace option, and add the necessary information like your store address, business name, etc to finish-
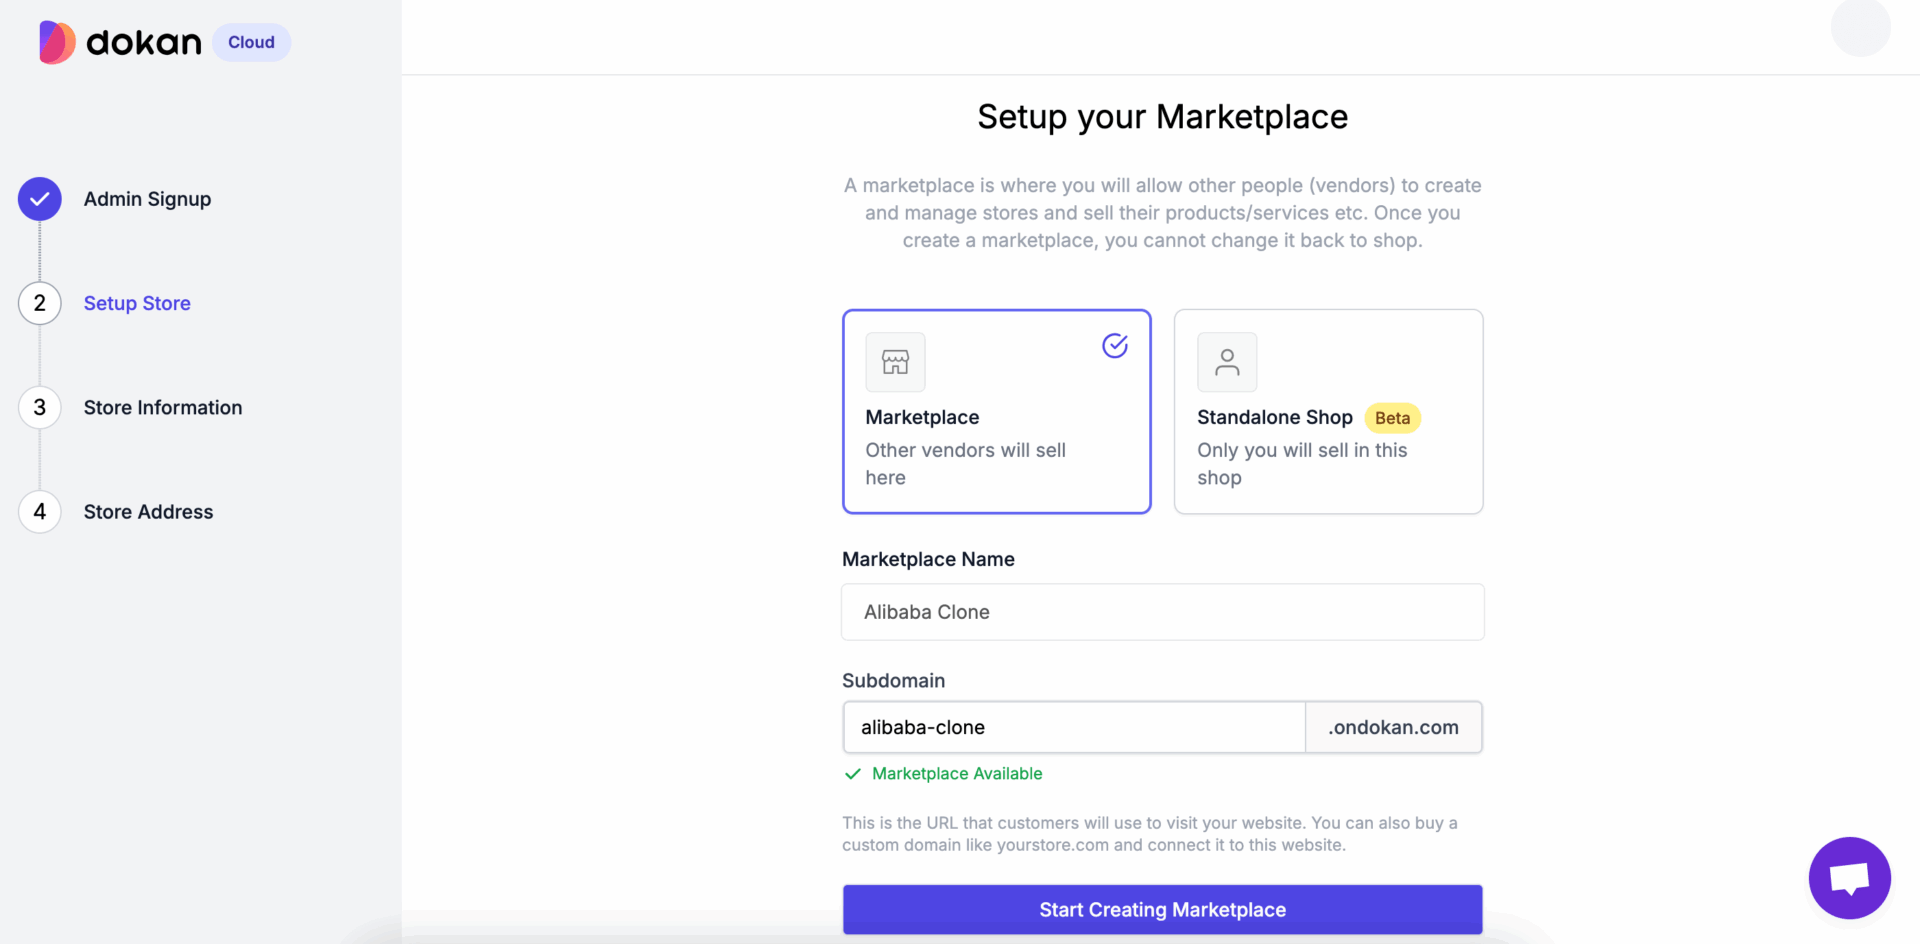
You can read the documentation on the onboarding process to get a better idea.
Step 3: Configure Your Business Details, Domain Name, etc
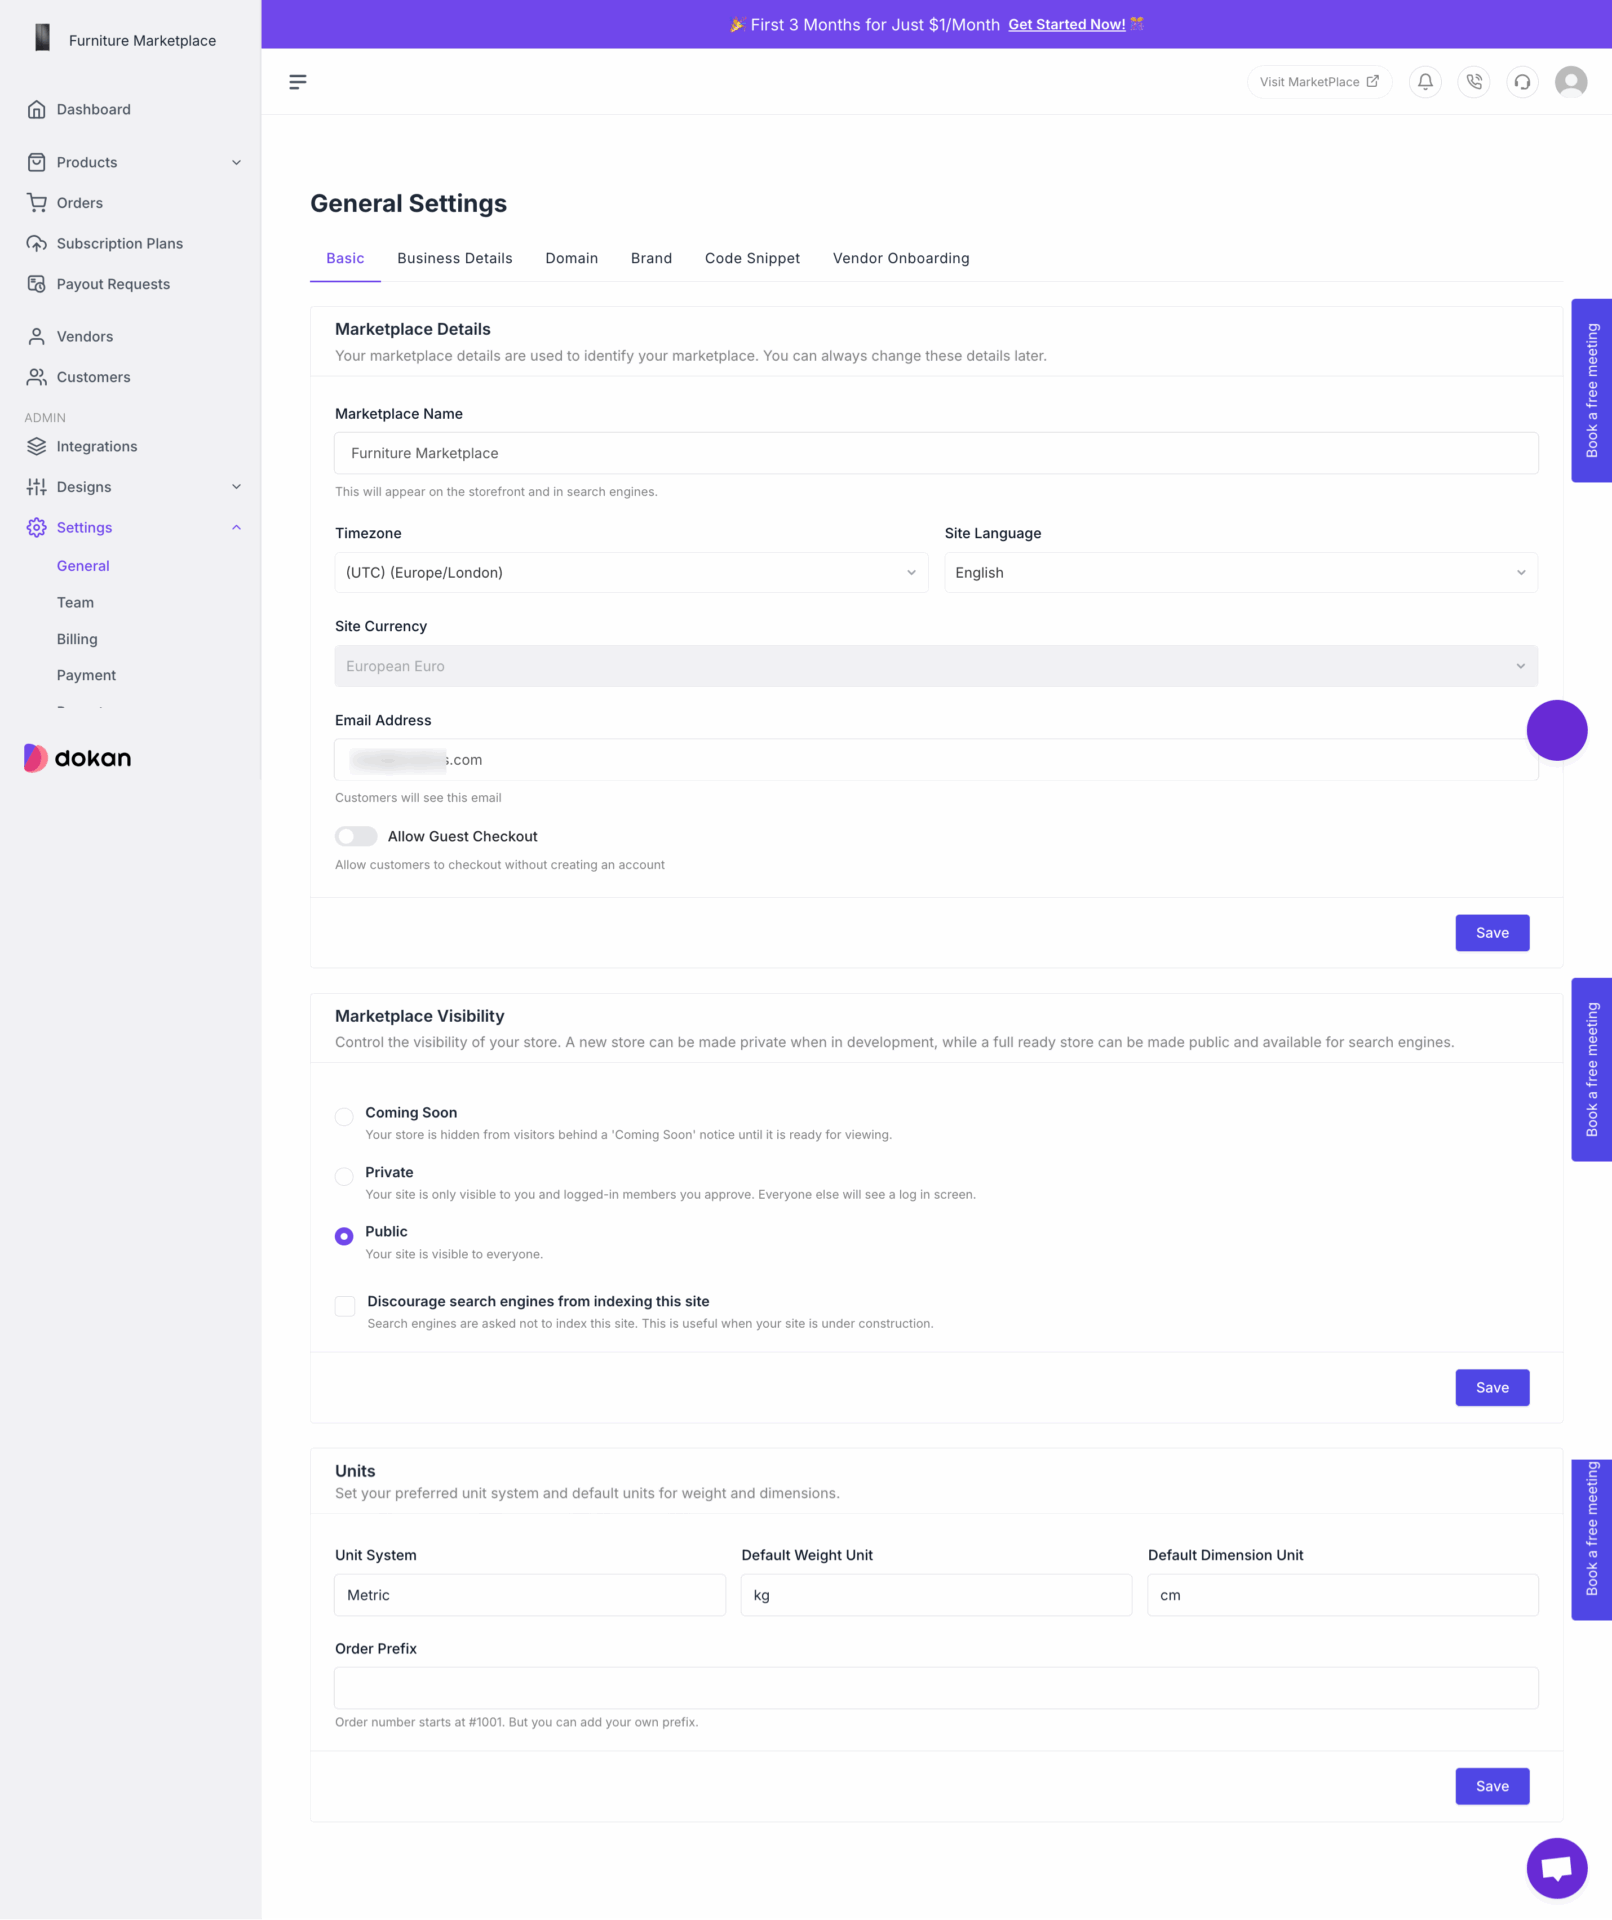
In this step, you need to configure your marketplace name, business details, brand, custom code for your site customization, vendor onboarding settings, etc.
Go to Settings–> General to find these options-
Step 4: Create Categories and Brands for the Products
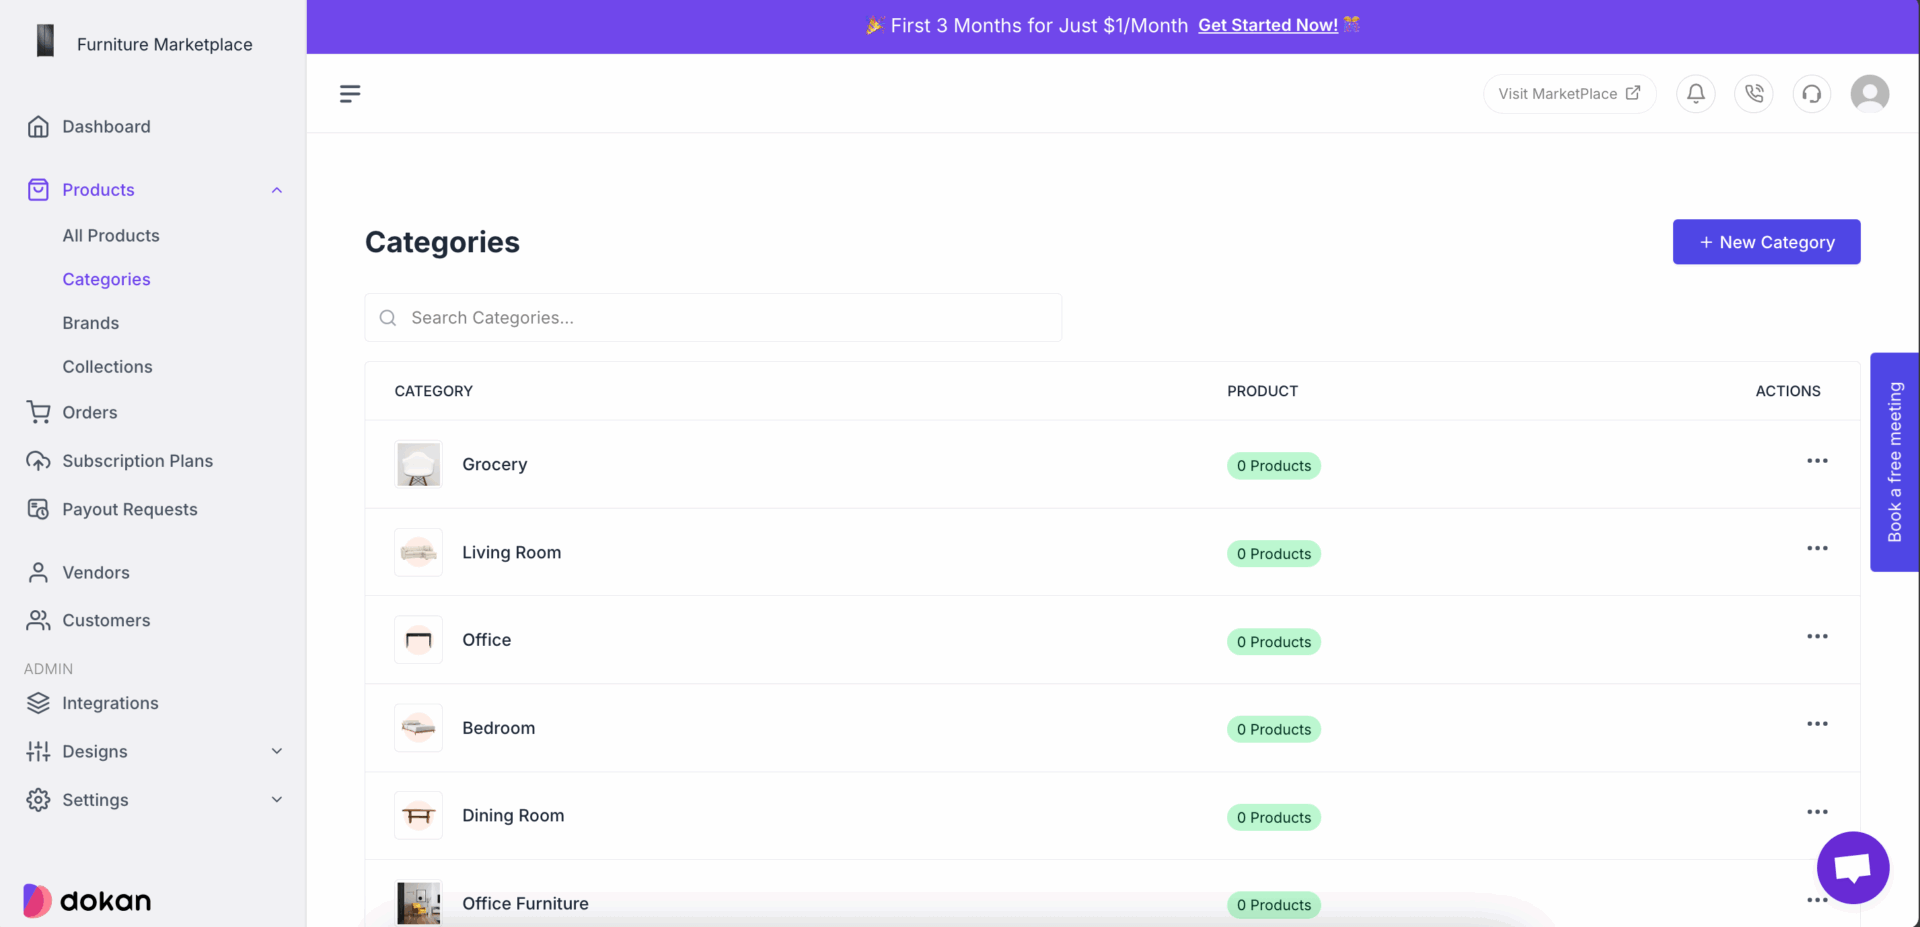
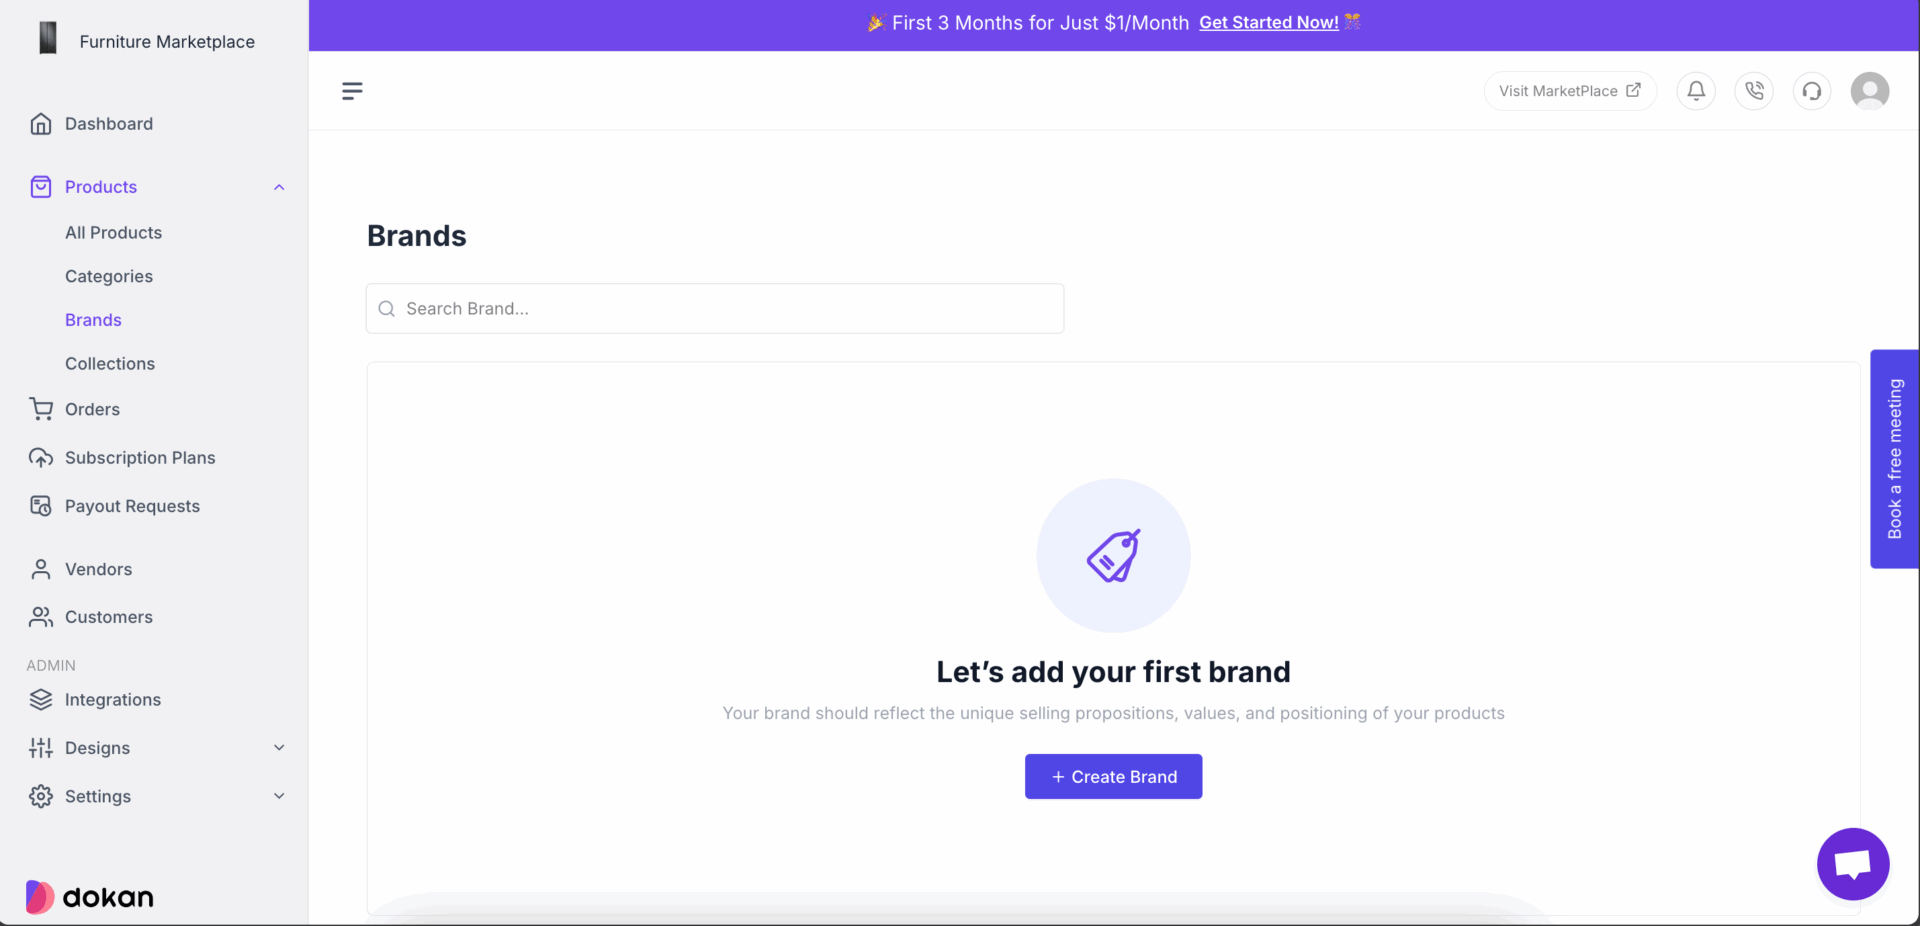
Create categories for your products. That way, when vendors upload their products, they can choose the categories for their products. Also, you need to create brands if you are planning to sell branded products.
Go to Products–> Categories to create categories-
And Products–> Brands to create brands–
Step 5: Create Subscription Plans for Vendors
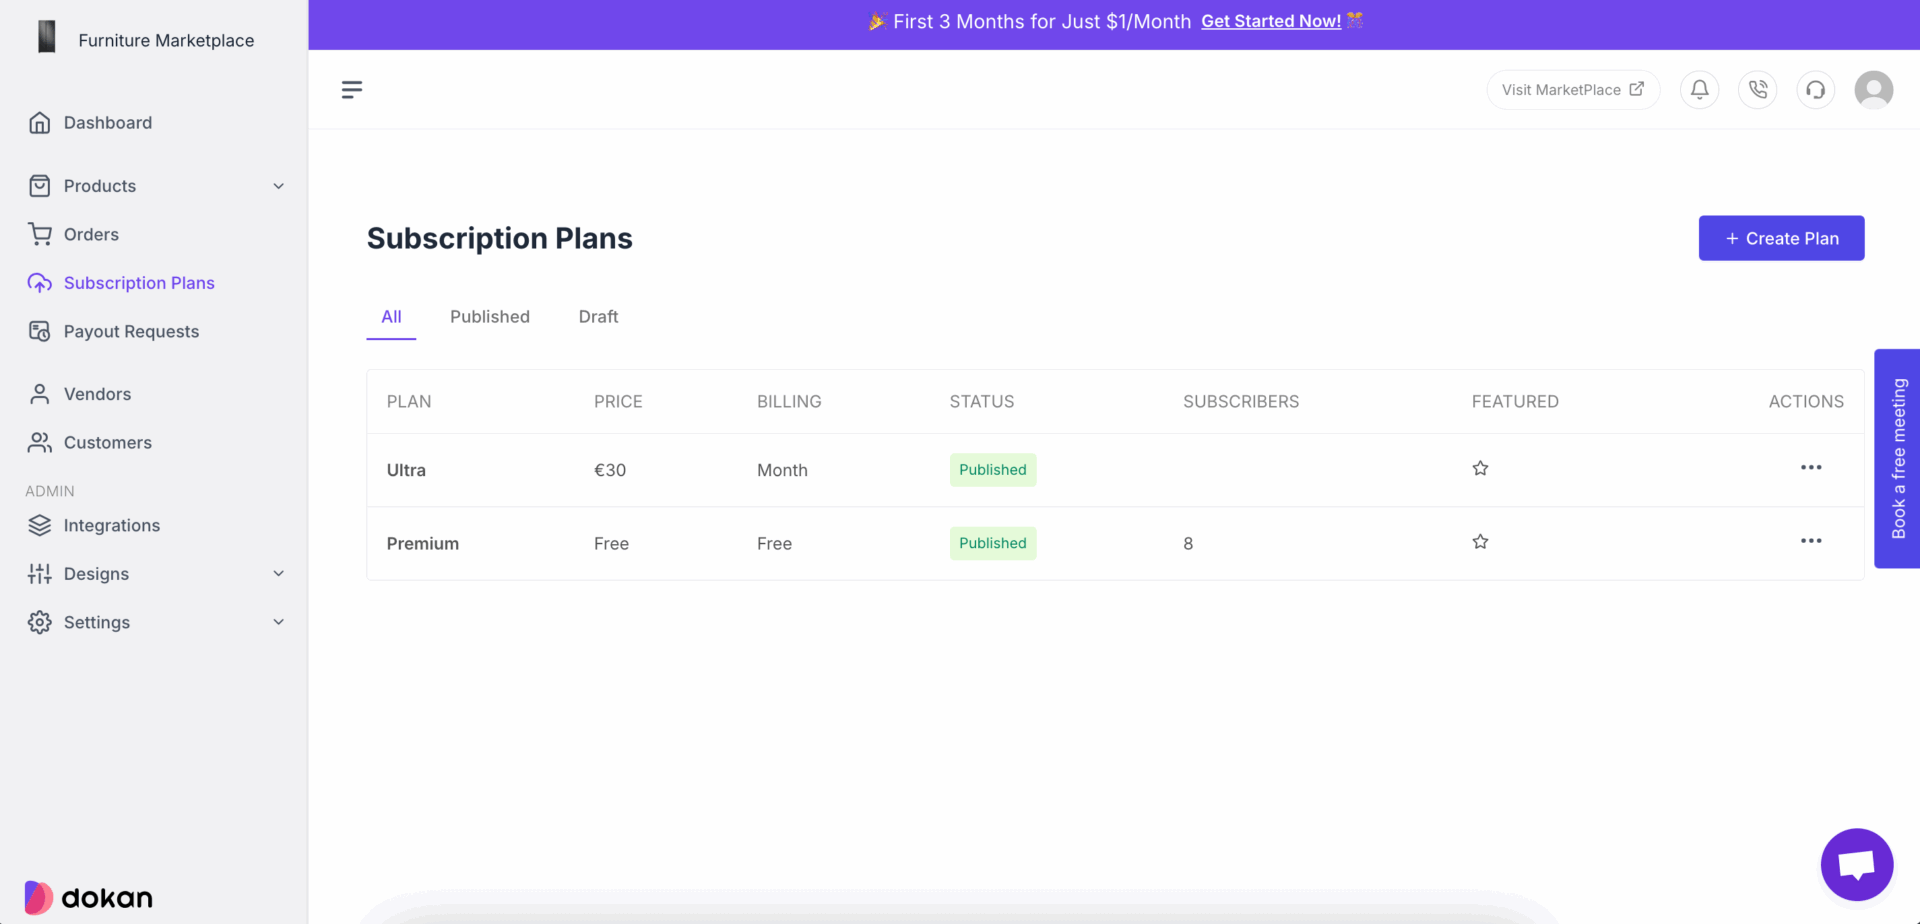
If you haven’t created any subscription plans for vendors while completing the setup wizard, then you can do that from the dashboard.
Just click on the Subscription Plans option to create subscription plans for the vendors-
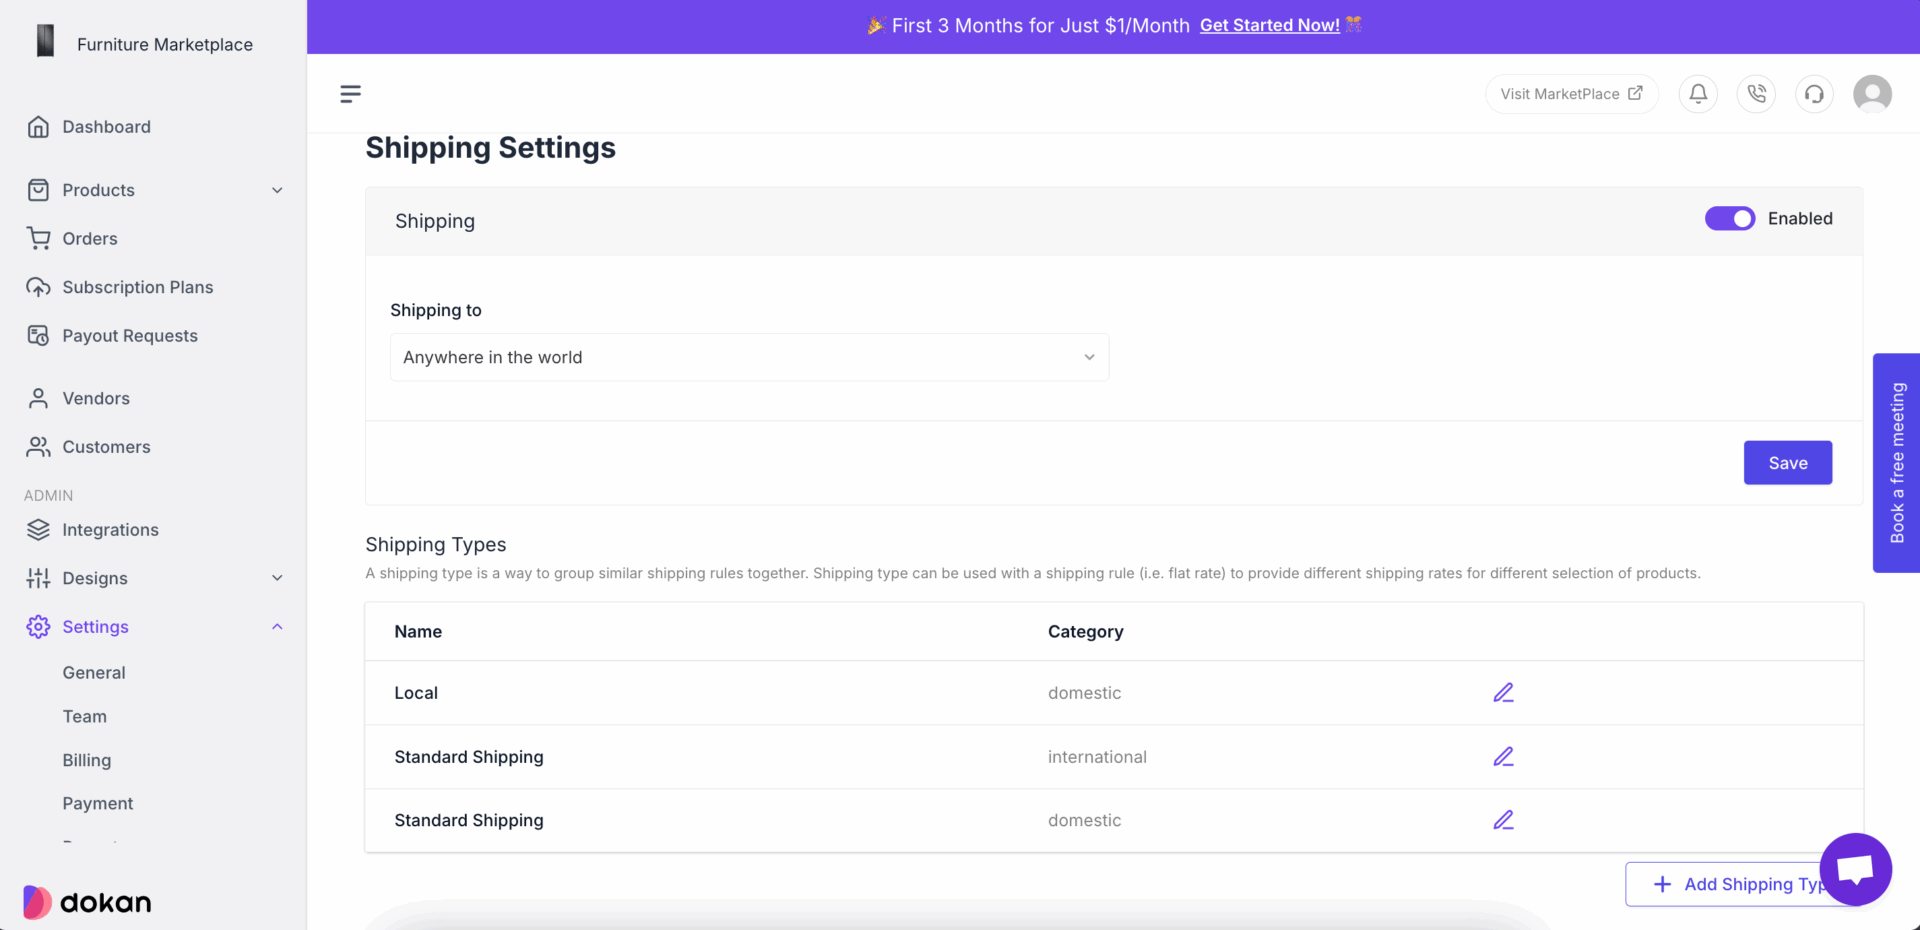
Step 6: Configure Shipping
Shipping is a very important part of any marketplace. And it is quite complicated as well. However, the Dokan Cloud marketplace makes it easy to configure shipping for vendors. All you need to do is create a shipping profile and shipping types for vendors from Settings–> Shipping–
Step 7: Set up Payment and Payout for Your Marketplace
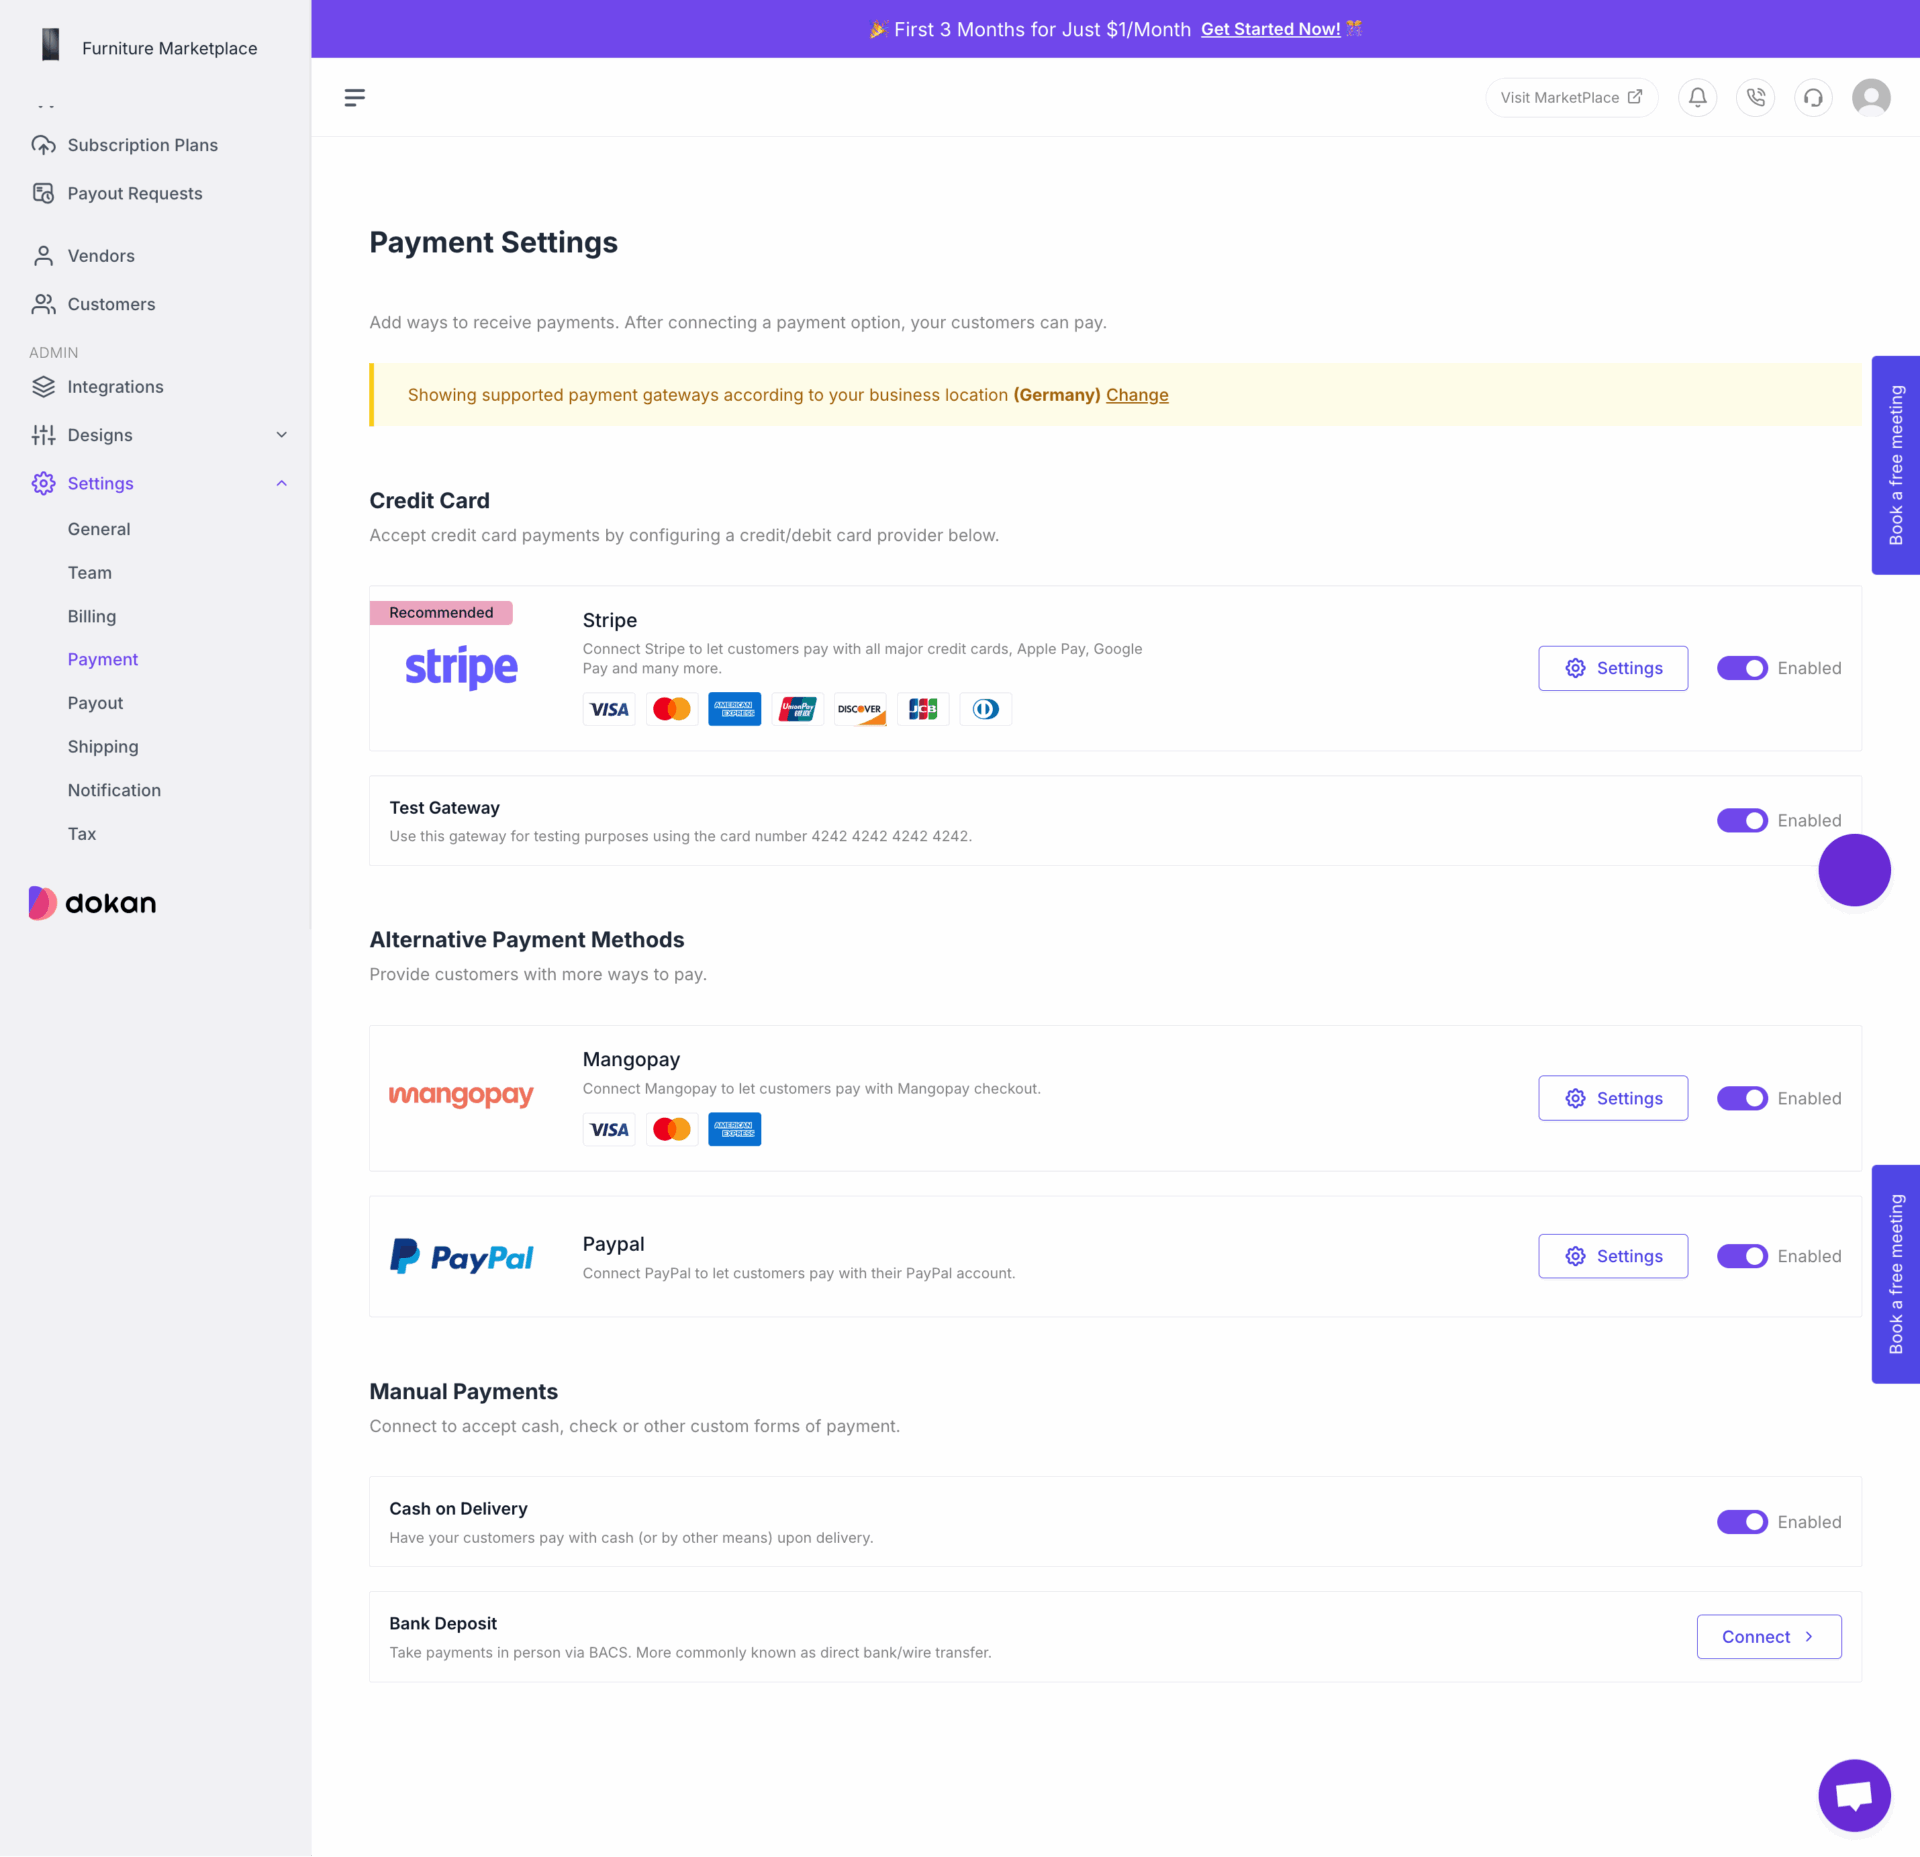
Dokan Cloud marketplace offers various payment methods including Stripe, PayPal, Paystack, Mangopay, Bank Payment, etc. You will get the payment method based on your location.
You can set payment method from Settings–> Payment–
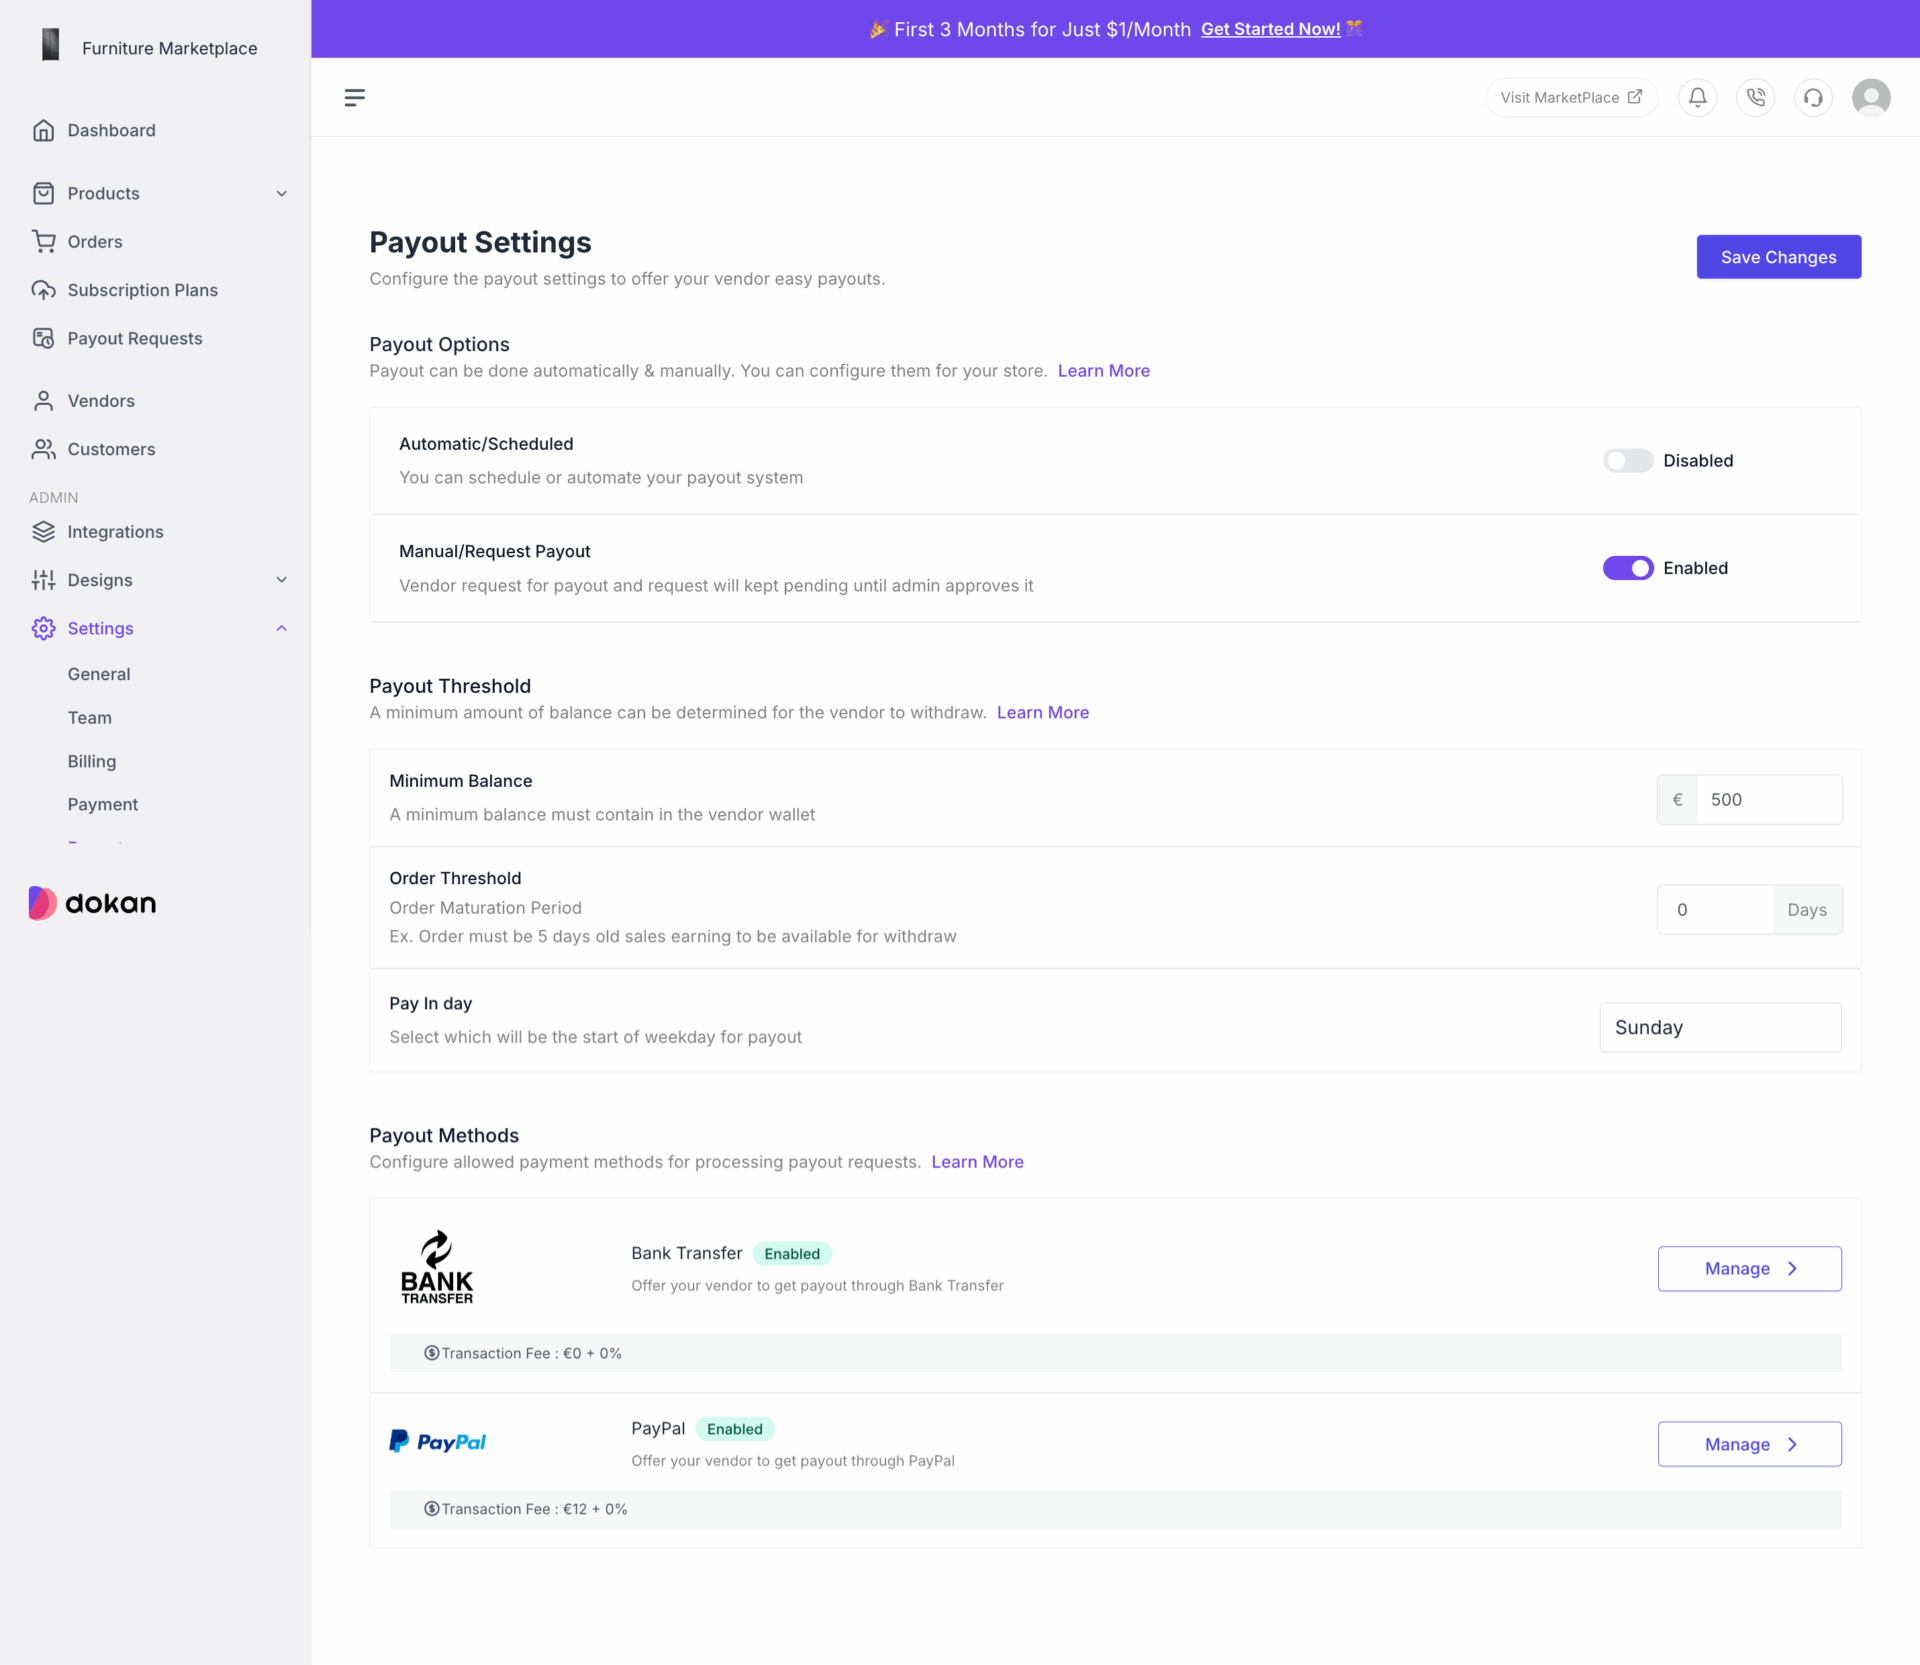
Also, to allow vendors to withdraw their earnings you can setup payout methods from Settings–> Payout-
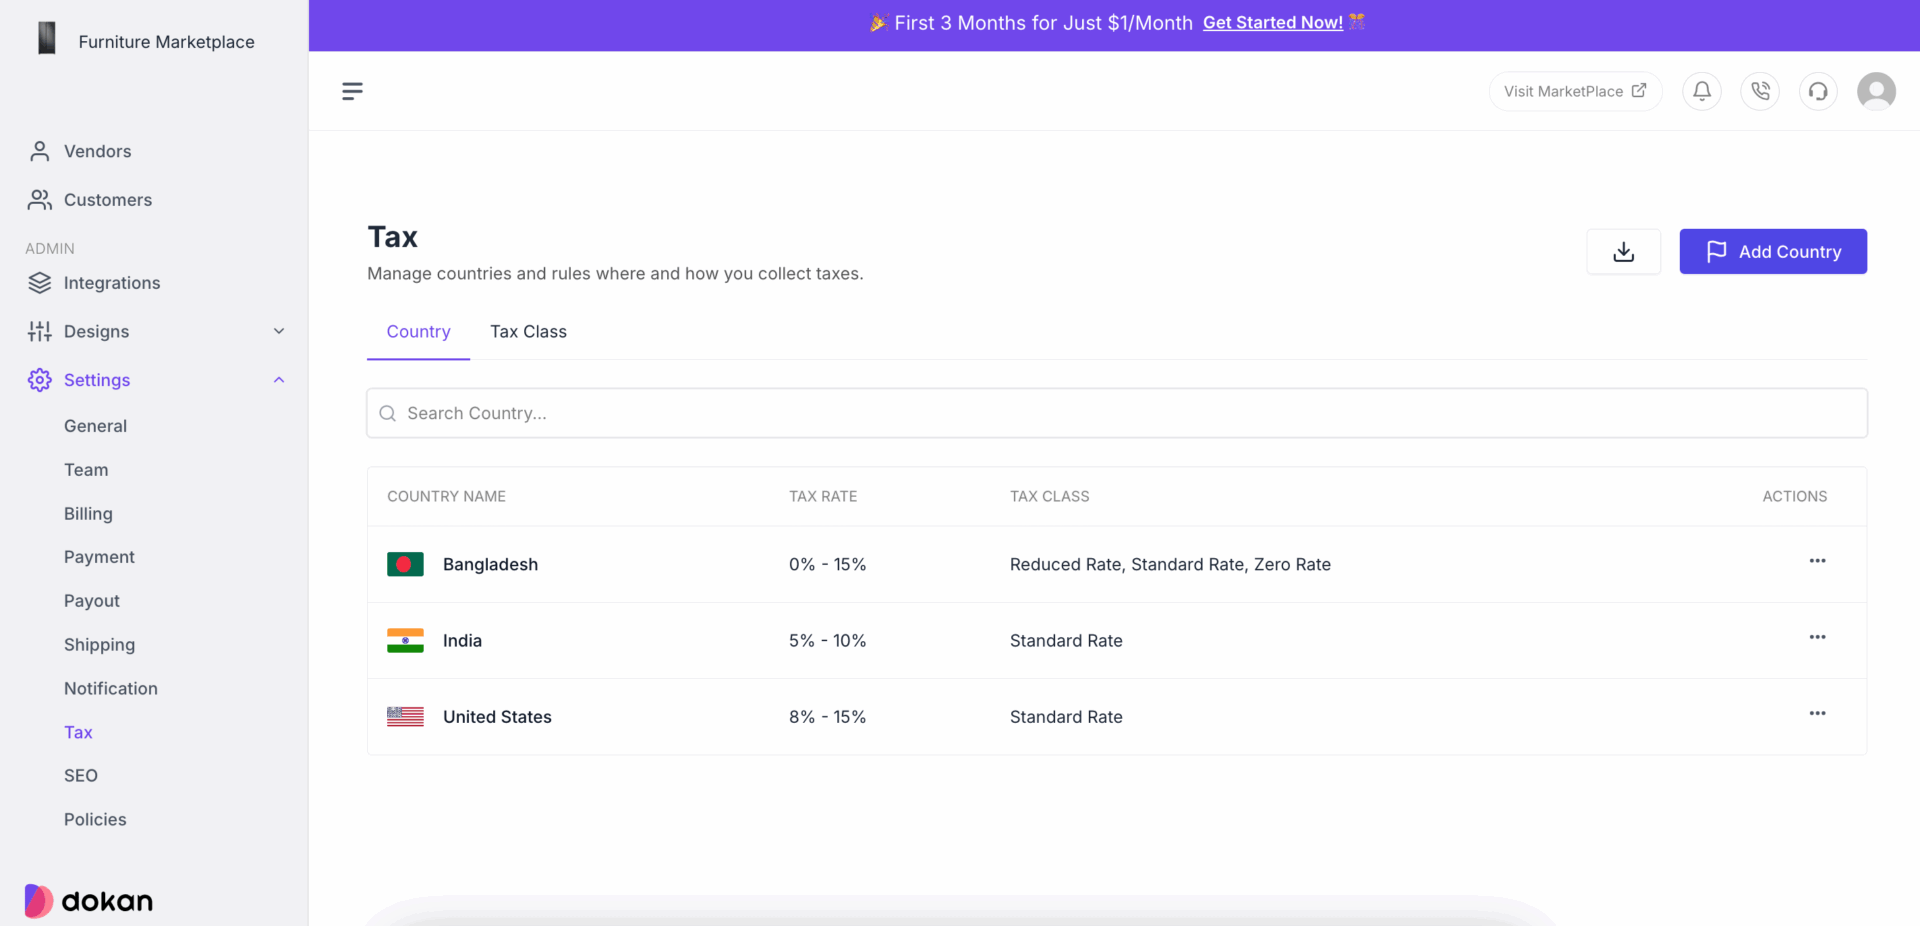
Step 8: Configure the Tax Settings
Dokan Cloud marketplace has an amazing tax feature that can handle tax settings for any location. You can find all the tax-related settings from Settings–> Tax-
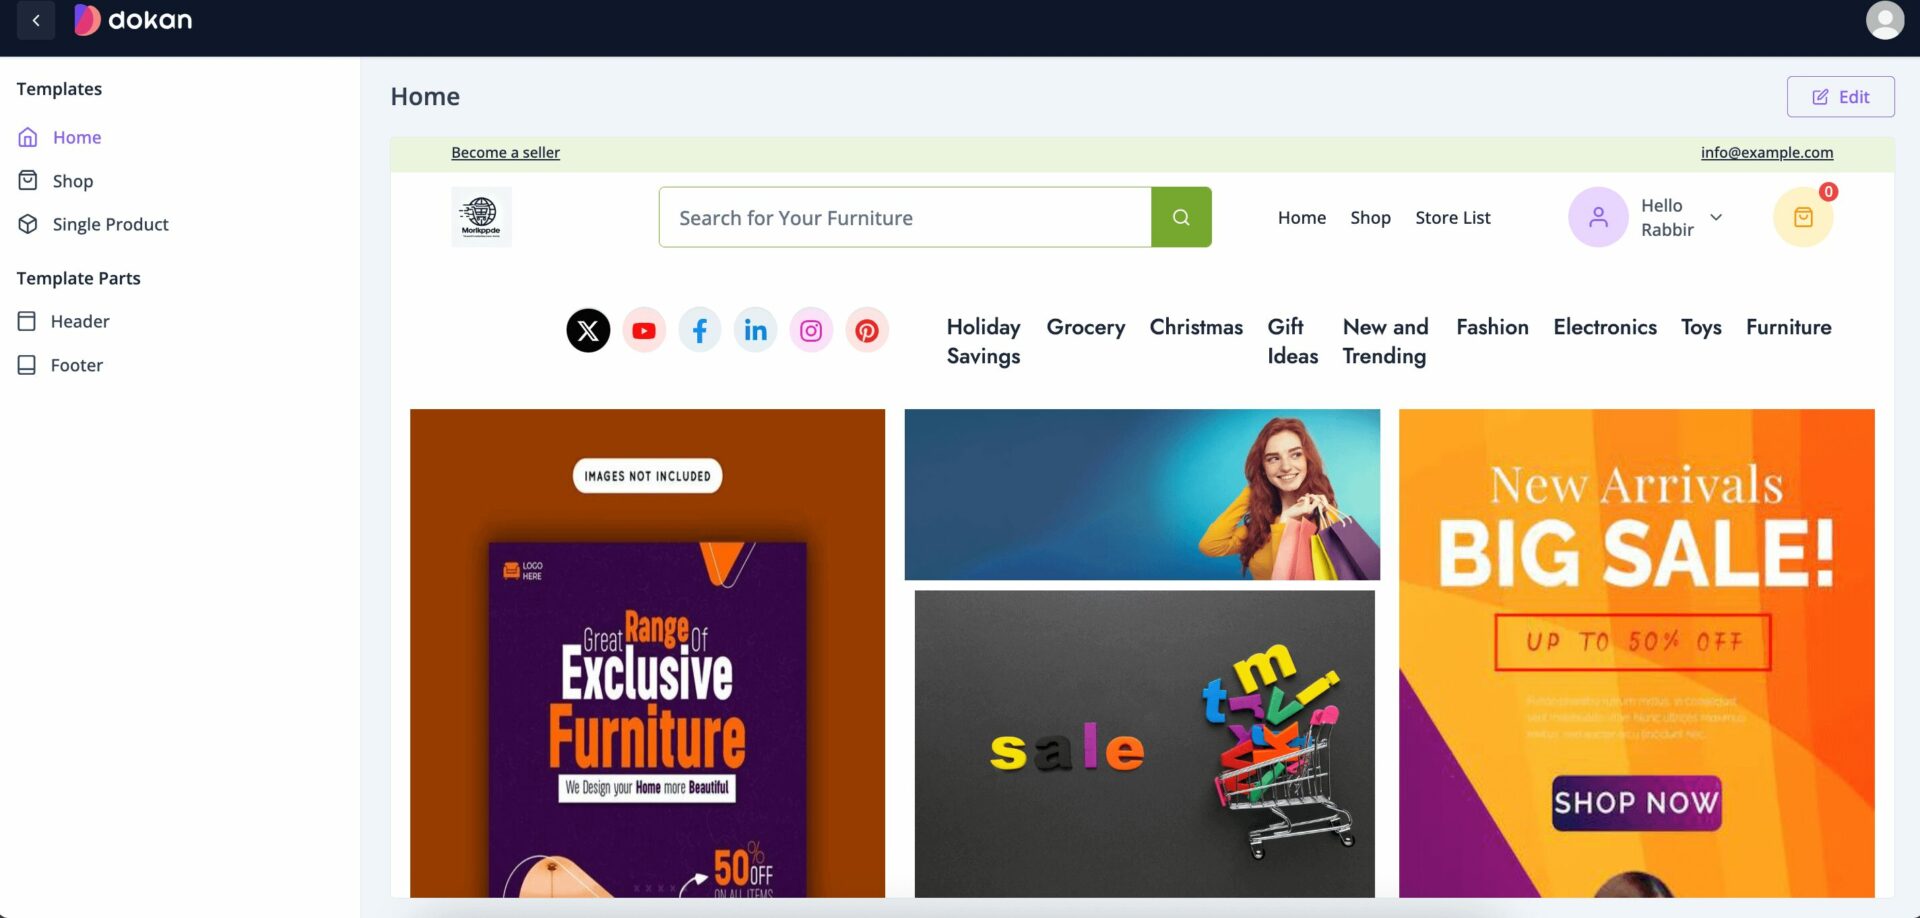
Step 9: Design Your Marketplace with Page Builder
Yes, the Dokan Cloud marketplace has a page builder that will help you design a unique marketplace for you to standout.
The page builder has all the necessary blocks to design your shop page, home page, header, footer, single product page. Go to Design–> Themes and click on the customize button of your activated theme-
Step 10: Integrations
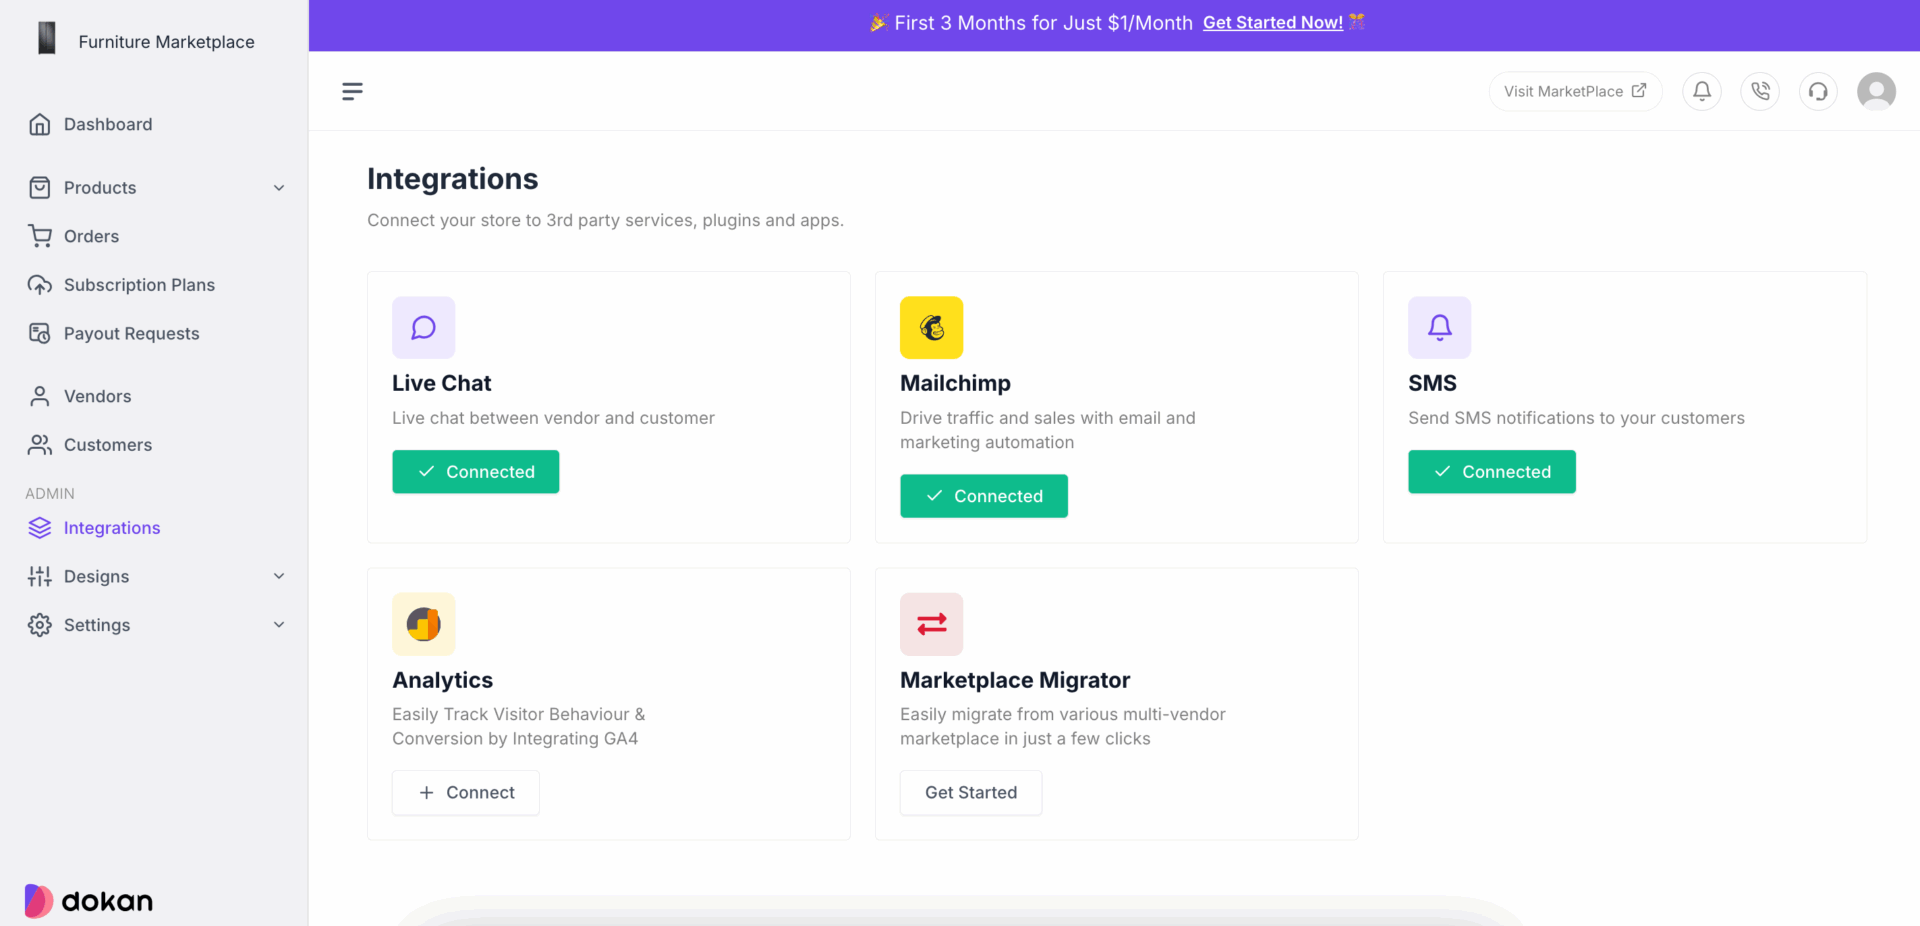
Dokan Cloud marketplace has integrations for live chat, analytics, email sending, marketplace migrator, and SMS gateway. You will find all of them in the Integrations section-
Step 11: Configure Other Settings and Launch Your Marketplace
You are almost there. Now you need to configure other settings like SEO, Notifications, Teams, etc and you are one your way.
Now you are ready to launch your marketplace. Invite vendors to your marketplace and help them setup their stores on your marketplace.
This is how you can easily launch a marketplace using the Dokan Cloud marketplace software.
Create Your Dream Marketplace Today!
Building an online marketplace website from scratch may seem daunting, but Dokan Cloud Marketplace makes it accessible and efficient for entrepreneurs.
By following our guide, you can create a unique, and scalable platform that fits your vision. From vendor management to amazing user experiences, Dokan Cloud gives you all the tools needed to launch and grow your marketplace.
Take the first step today and turn your marketplace idea into a thriving online business.

Subscribe to
Dokan blog



Leave a Reply