

The online furniture marketplace is growing rapidly. People now feel more comfortable buying furniture online than visiting physical stores. According to Statista,
Worldwide online furniture sales are expected to grow at an average growth rate of 10% between 2019 and 2023, resulting in a market volume of $289.3 billion in 2023.
Suppose you want to help these vast consumers by providing all the amazing types of furniture at their fingertips. In that case, all you need is to create an online platform where multiple sellers will be able to sell to multiple buyers.
Creating an online furniture marketplace has become easier than ever before. You just need to follow the right track to get your job done.
And to guide you through the right path, here we are with a 6 steps tutorial to create an online furniture marketplace with ease using WordPress and Dokan multivendor plugin.
So, let’s get started!
The Possibilities of Online Furniture Marketplace in 2024
People nowadays want to buy anything online. Furniture isn’t out of the list. Going to several brick-and-mortar stores to buy furniture is a time-consuming task. That’s why buyers prefer online furniture marketplace more than physical stores.
This is not just a statement. We have data behind this statement. It shows that the revenue in the ‘Furniture’ segment of the eCommerce market in the United States was forecast to continuously increase between 2023 and 2027 by in total 28.2 billion U.S. dollars (+31.25 percent).
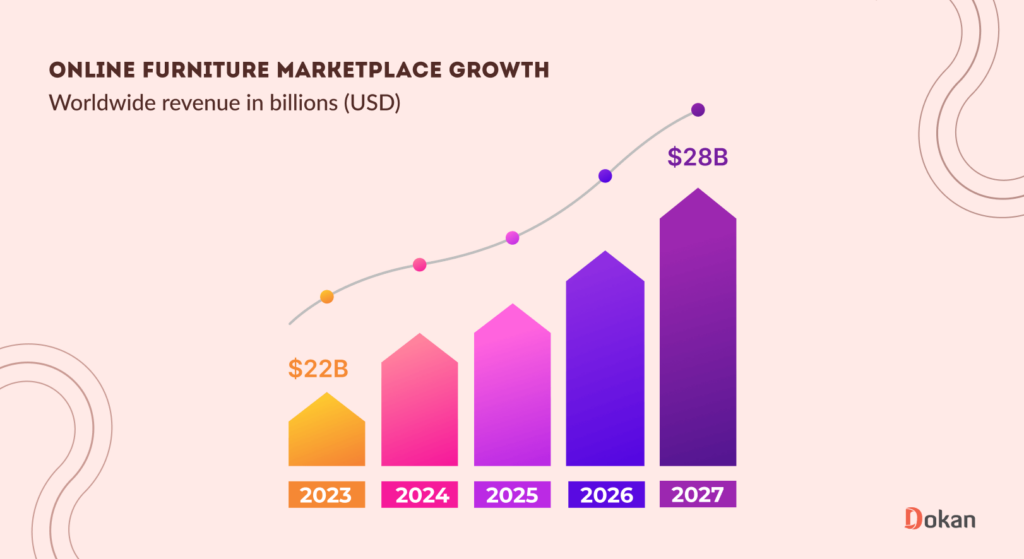
According to another study driven by giants such as Amazon and IKEA, 8 out of 10 consumers have now bought furniture online with help from things like hyper-personalized marketing, augmented reality, and the ability to contextualize potential purchases within their own home environments.

With online sales representing over 90% of the growth in the eCommerce furniture industry, these are really exciting times for retailers! So, if you want to create an online furniture marketplace and invite retailers to your website, it’s high time to do that.
How to Create an Online Furniture Marketplace As a Beginner
We have said earlier that creating an online marketplace has become comparatively easier nowadays. Because there is WordPress for you. WordPress makes the process smoother for even those who don’t know much about coding.
Using WordPress and it’s one of the most popular free plugins- WooCommerce, you can create any online store within moments. And to turn it into a multivendor marketplace, there is another dedicated plugin called Dokan.
Dokan is a freemium WordPress plugin with more than 60,000 active installations. It comes with many advanced features and functions to run your marketplace with ease. Now allow us to show you how to build an online furniture marketplace using WordPress, WooCommerce, and Dokan multivendor.
- Install and Activate the Dokan Multivendor Plugin
- Choose a Dokan Compatible Theme and Install It
- Configure the Basic Settings of the Dokan Multivendor Plugin
- Upload Products and Setup Admin Shop
- Allow Vendors to Register
- Optimize Your Marketplace with Dokan Advanced Features
Just a heads up: Let’s assume, you already have a ready WordPress website with WooCommerce installed in it. But if you don’t have a ready website, no worries. Because we have got you covered.
To create a WordPress website, first, buy a domain name and hosting plan, then install WordPress on it. Follow these blogs to get your job done:
- How to Choose The Best Domain Name for eCommerce Website
- Get the Best Hosting for Your eCommerce Site
- How to Install WordPress on cPanel in 10 Minutes
After completing these parts, follow the below steps to create your own furniture marketplace!
Step 01: Install and Activate the Dokan Multivendor Plugin
As you already know Dokan is used to create multivendor marketplaces. So, the first step in creating your furniture marketplace is to install and activate the Dokan plugin.
Installing Dokan multivendor is as simple as installing any other WordPress plugin. You can install the plugin directly from your WordPress dashboard.
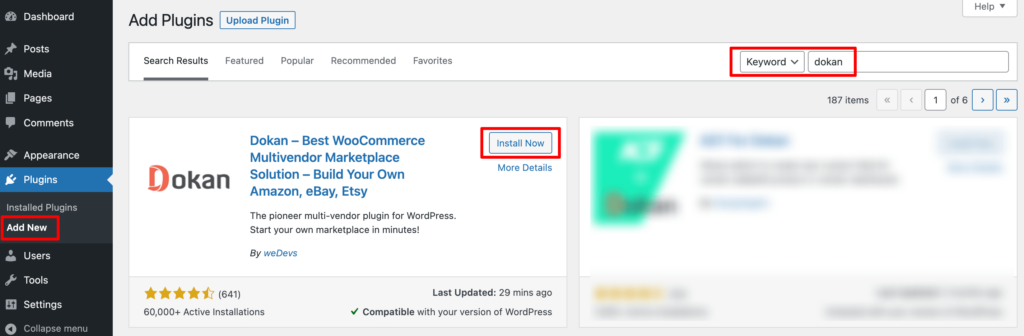
Simply, go to your WordPress dashboard -> Plugin -> Add New. Then use the search box to type the plugin name “Dokan” and click the “Install” button to install the plugin from the search result.
Don’t forget to activate the plugin by clicking the “Activate” button.
When you install the Dokan plugin for the first time on your WordPress-powered website, you get the opportunity to use this setup wizard. It gives you a step-by-step guideline to set up the Dokan multivendor plugin easily.

You can check our admin mult-step setup wizard for a clearer understanding.
Important note: If you have not installed the WooCommerce plugin in the first place, don’t worry. Because when you install the Dokan multivendor plugin, it automatically installs WooCommerce.
If you find it difficult to configure the Dokan plugin, you can watch our video on the Dokan installation guide.
Step 2: Choose a Dokan Compatible Marketplace Theme and Install It
After installing Dokan, you need to install a Dokan-compatible marketplace theme. You can install any theme that is compatible with Dokan. The good news is any theme that is compatible with WooCommerce is also compatible with Dokan.
If you are not sure which theme you should consider for designing your online furniture marketplace, we are recommending the “Dokani” theme for you. This theme is created by the same company behind the Dokan plugin. On top of that, this theme is absolutely free to use.
To install this theme on your marketplace, go to your WordPress dashboard -> Appearance -> Themes -> Add New -> Upload Theme. Don’t forget to activate the theme after uploading it.

That being said, if you want to use any third-party premium theme, we have a backup for that as well. We have compiled a list of the best third-party premium Dokan-compatible marketplace themes for you on our website. Click this button to get the list!
Step 3: Configure the Basic Settings of Dokan Multivendor Plugin
After installing and activating the Dokan plugin, now you need to configure all the basic settings. You will find all the settings options at WP-Admin –> Dokan –> Settings.
You’ll find here:
- General Settings
- Selling Options
- Withdraw Options
- Payment Gateways
- Reverse Withdrawal
- Page Settings
- Appearance
- Privacy Policy

You can select the pages for the vendor dashboard, order page, store listing, and terms and conditions page from here.
Now you need to set the commission type and rate. Go to WP Admin Dashboard -> Dokan -> Settings -> Selling Options. There you’ll find the Commission Type and Admin Commission options.
Set the commission type and rate according to your convenience.

Don’t forget to click the Save Changes button after configuring all the settings. Otherwise, you will lose all the changes that you’ve made now.
Now if you want to set the permalink settings of your product page, you can do that from WP Admin -> Settings -> Permalinks -> Product Permalinks.
For example, using “product” would make your product links like http://yourdomainname.com/store/sample-product/.
This setting affects product URLs only, not things such as product categories.
Select the check box “Custom Base” for product permalinks and write “/product” (or, whatever you want) on the box. Then hit the Save Changes button to save the settings.

Now let’s discuss two basic yet crucial settings of the Dokan multivendor plugin:
a) Configure Payment Gateways
You can’t control your customers which payment gateway they should choose, right? So, it’s always a better decision to ensure several payment gateways on your marketplace.
Dokan supports all WooCommerce-compatible payment gateways. You will get a wide range of choices to make the transaction process easier on your marketplace.
With Dokan Lite you can use non-adaptive payment gateways like PayPal, bank account transfer, cash on delivery, etc. The Pro version supports adaptive payment solutions like Stripe Connect and MOIP.
Go to your WordPress dashboard -> WooCommerce -> Settings, then click on the Payment tab to get the available payment methods.
Note: In case the PayPal option isn’t there, you should install the “WooCommerce PayPal Payments” plugin and you will find the PayPal option here.

b) Enable Withdraw Methods
Another important part of running an interactive online marketplace is to ensure a smooth withdrawal system. Dokan multivendor helps you take care of this section as well.
Go to WP Admin -> Dokan -> Settings -> Withdraw Options. Here you’ll find options to customize the withdrawal method and set the minimum balance a vendor needs to make a withdrawal limit.

You can also customize other Dokan settings following the same process that we have shown here.
We have step-by-step documentation for each Dokan setting, so, if you need any further help with any Dokan setting, don’t forget to check our documentation for Dokan settings, especially created for beginners.
Step 4: Upload Products and Setup Admin Shop
This is an optional step. If you don’t want to sell products as a vendor from your own marketplace, you can skip this step and process to step 5.
That being said, if you want to sell as a vendor on your marketplace, you can create an admin shop. Follow the below procedures to get your job done:
Before designing your admin shop, you need to enable yourself as a vendor. Go to Dokan –> Vendors, and turn on the selling capability status button.

Now start uploading products to your admin shop.
As an admin, you can upload products from both backend and frontend. But remember, your registered vendors will only be able to upload products from frontend.
So, first, let’s check how to upload products from backend.
Navigate to your WordPress dashboard -> Products -> Add New. There you’ll find options to add the product’s name, description, images, category, tags, etc.
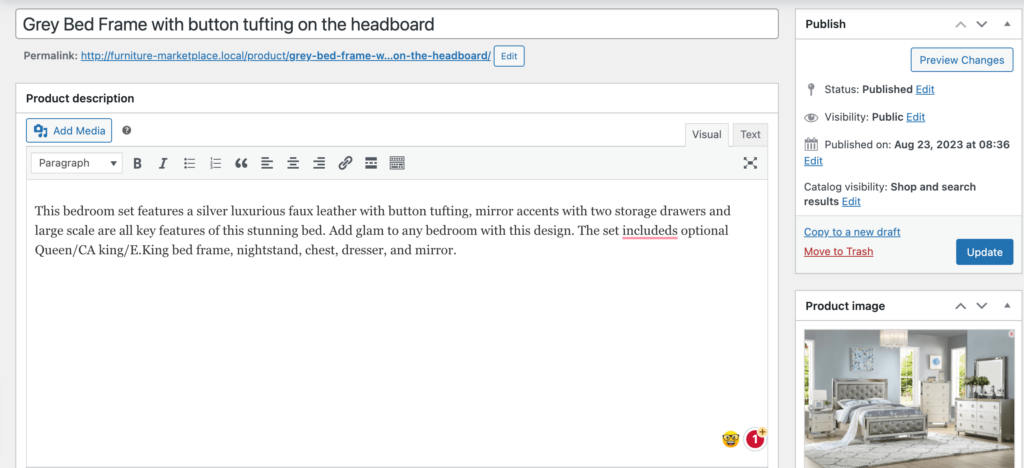
If you didn’t create Categories and Tags before, you won’t be able to add Categories and Tags from here.
To assign a category and different tags from the frontend, you have to create categories and tags from the backend. So, navigate to your WordPress dashboard -> Products -> Categories to add new categories.
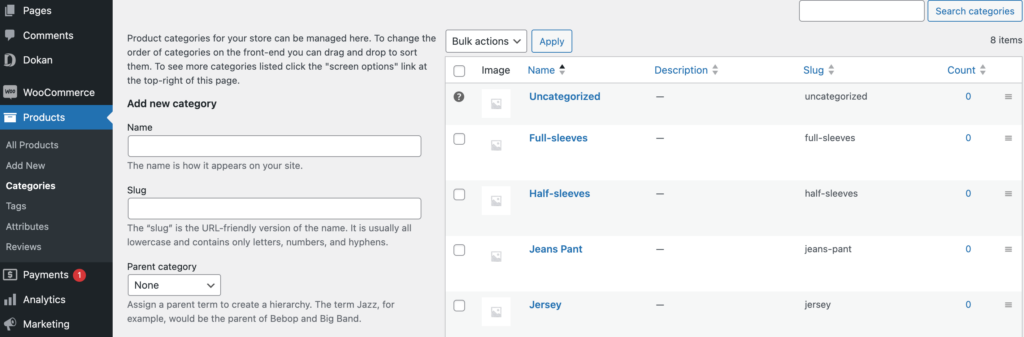
In the same way, go to your WordPress dashboard -> Products -> Tags to add new tags.
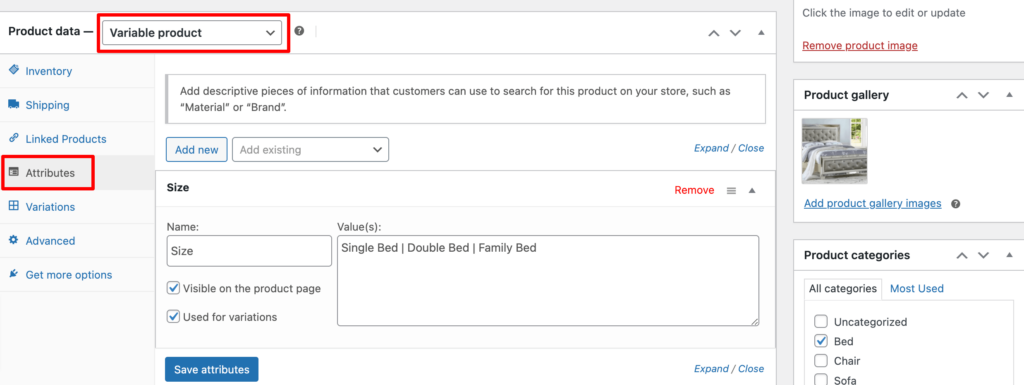
Since it’s a furniture store, you’ll need to showcase different sizes for the same product. That is called variable products. To add a variable product, you have to choose the “Variable” option from the drop-down menu.
Then add attributes with different values. For example, you can add different sizes like Single, Double, and Family for a bed.
Now you need to add variations for each attribute. Basically, in this section, you have to assign different prices for different attributes.
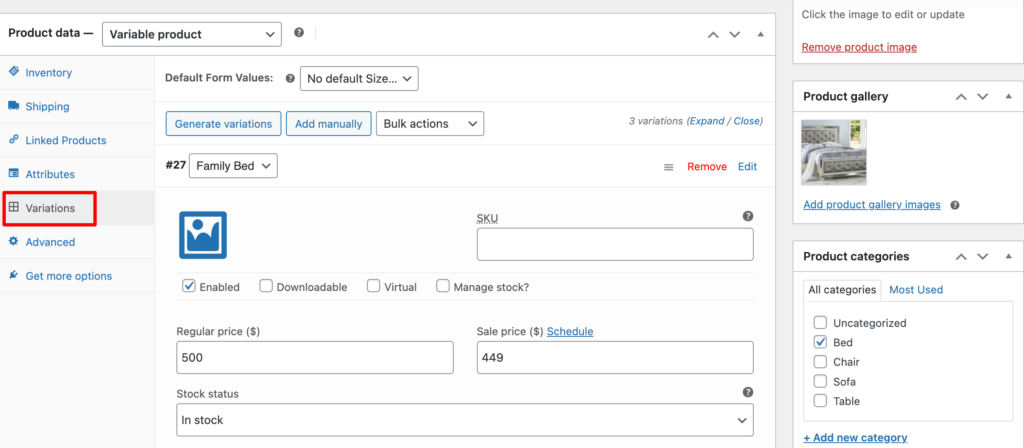
After adding variations, hit the “Save Product” to save all the changes.
Now if you visit the Products tab, you’ll find all of your newly added products are with pending status. Because the admin needs to approve these products to make them public.
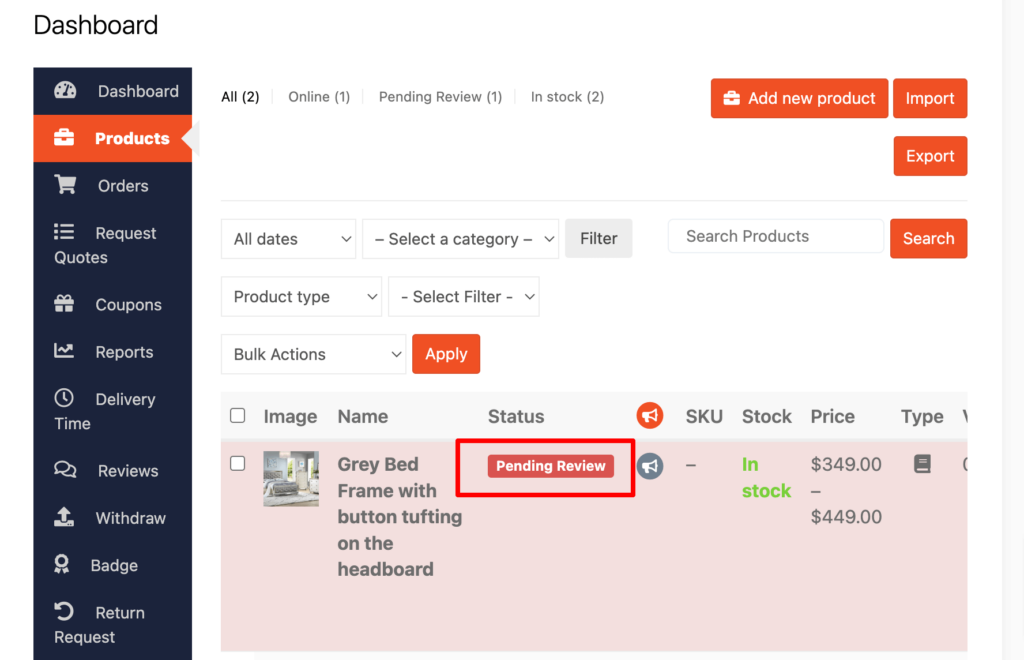
If you don’t enable auto product approval for vendors, you need to manually approve it. Navigate to your WordPress dashboard -> Products -> Edit to approve the product. You can check our selling options doc to know more about it.
That’s how you can add products from the backend.
Now let us show you how you can add products from the frontend.
In order to add variable products from the frontend, you have to upgrade your Dokan plugin to the premium version. It’ll take only a few minutes to upgrade to the premium version.
Visit the Dokan pricing page and choose a package to buy.
For further assistance follow this documentation on the installation of the pro version of the Dokan plugin.
Now go to WordPress Dashboard -> Visit Vendor Dashboard -> Products. Then click on the Add new product.
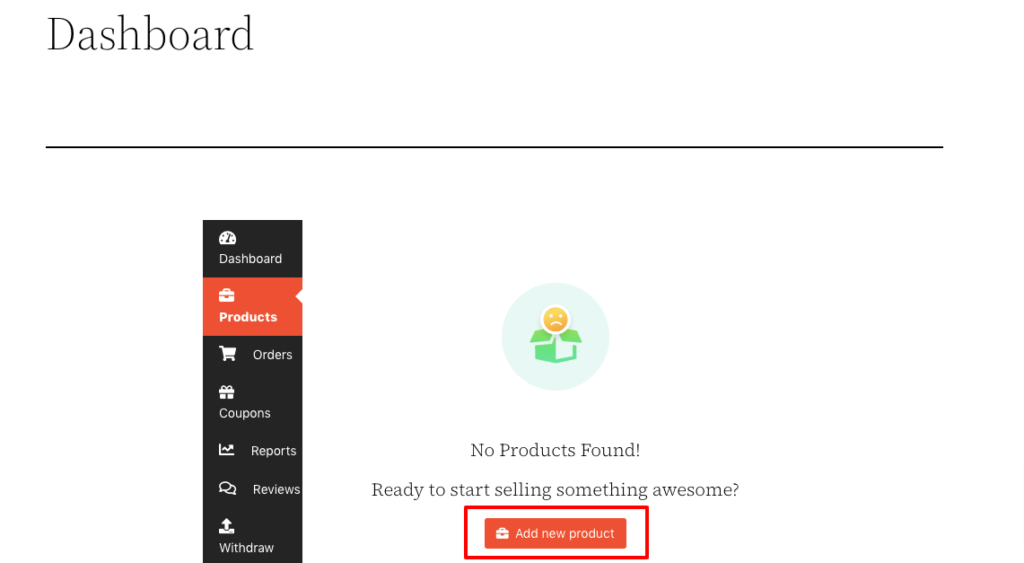
You will be redirected to a new interface after clicking the “Add new product” button. There you’ll find a few options like product name, gallery, category, tags, and description to add your products.
Since it’s a variable product, you don’t need to set the price here.
After inserting all the information, hit the “Create product” option.
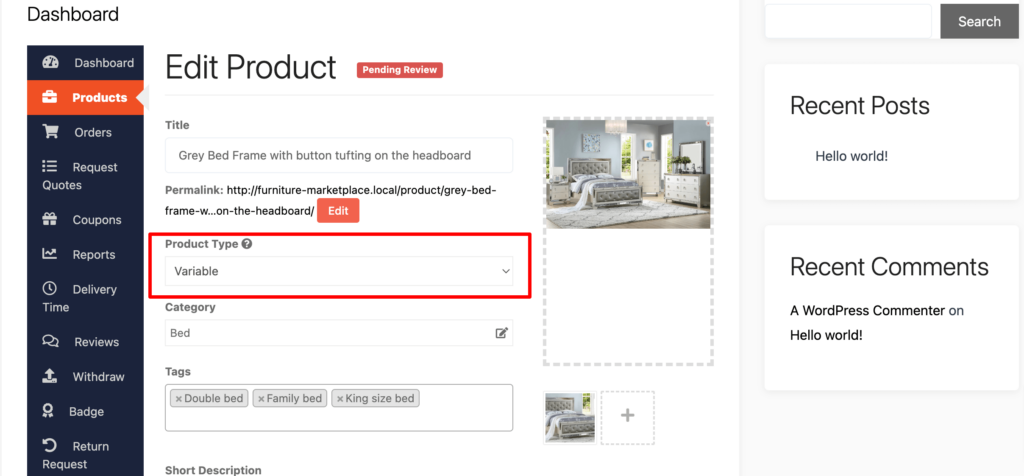
Now you will be taken to a new interface, where you have to add a few more information for your newly added product.
The first thing that you need to do is to set this product type as a variable product. You can do it from the drop-down list.
Now scroll down a bit and you’ll get the attribute and variation option. Click on Add attribute to add different attributes. Give a Name to your attribute, add Values for the attribute, tick the Used for Variations box, and then hit the Save attribute to complete the process.
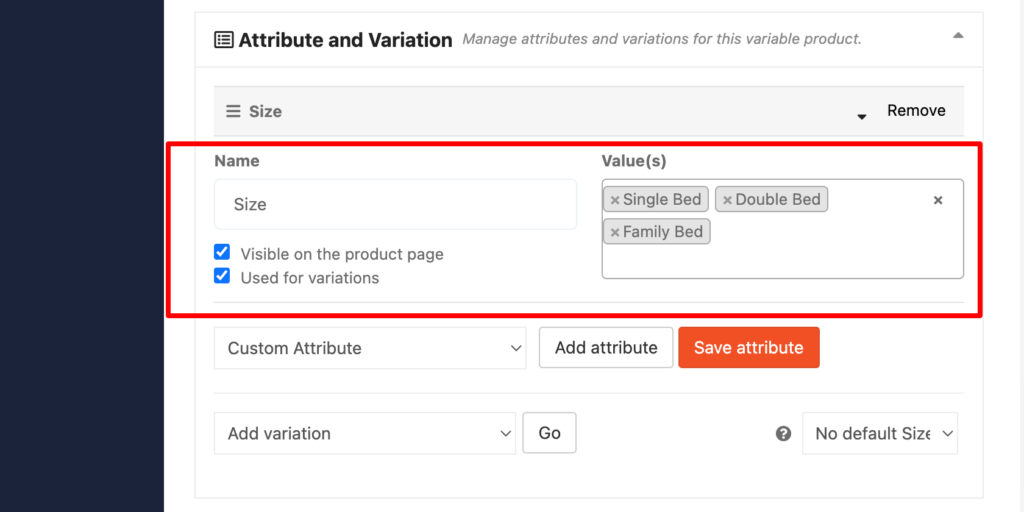
Then you need to add variation. You will get the “Add Variation” right after the Attribute option. Press the Go button and you’ll get options to add variations.
Here we have added three attributes i.e., Single Bed, Double Bed, and Family Bed. So, we need to add 3 variations for these attributes. That means we will set 3 different prices for 3 different sizes of the same bed.
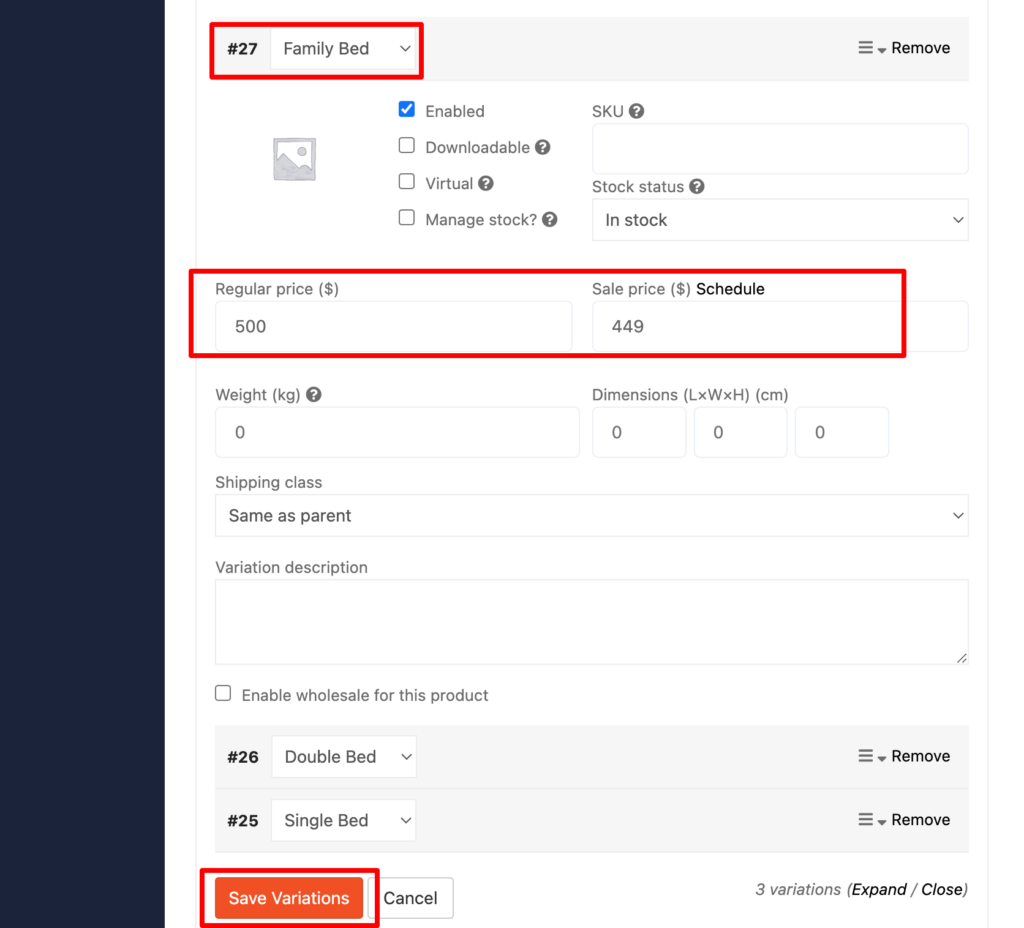
After adding each variation, don’t forget to hit the Save Variations button. Then finally, publish the product to make it available for everyone.
That’s all!
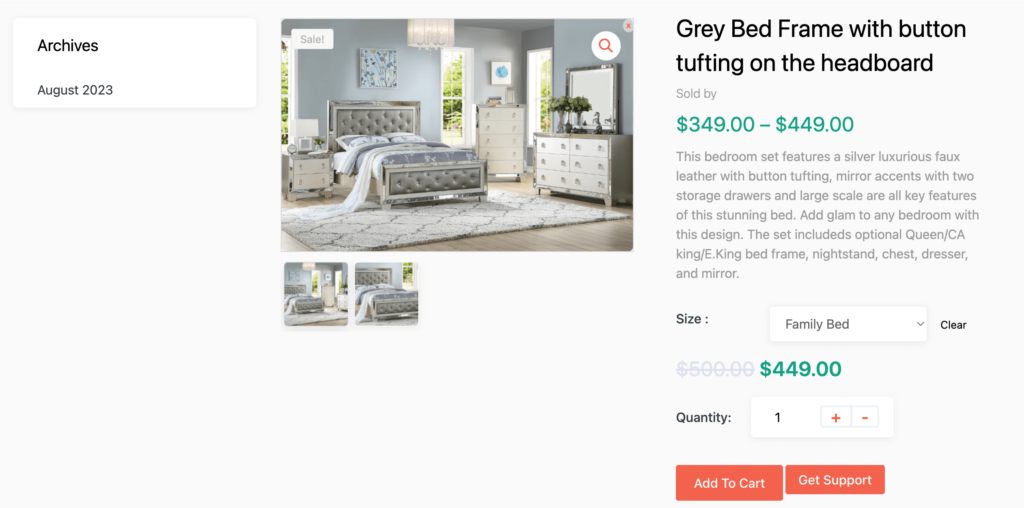
This is the product that we have just added:
You can customize your store design by going to Vendor Dashboard -> Settings. From here you can update your store name, address, opening & closing time, etc.
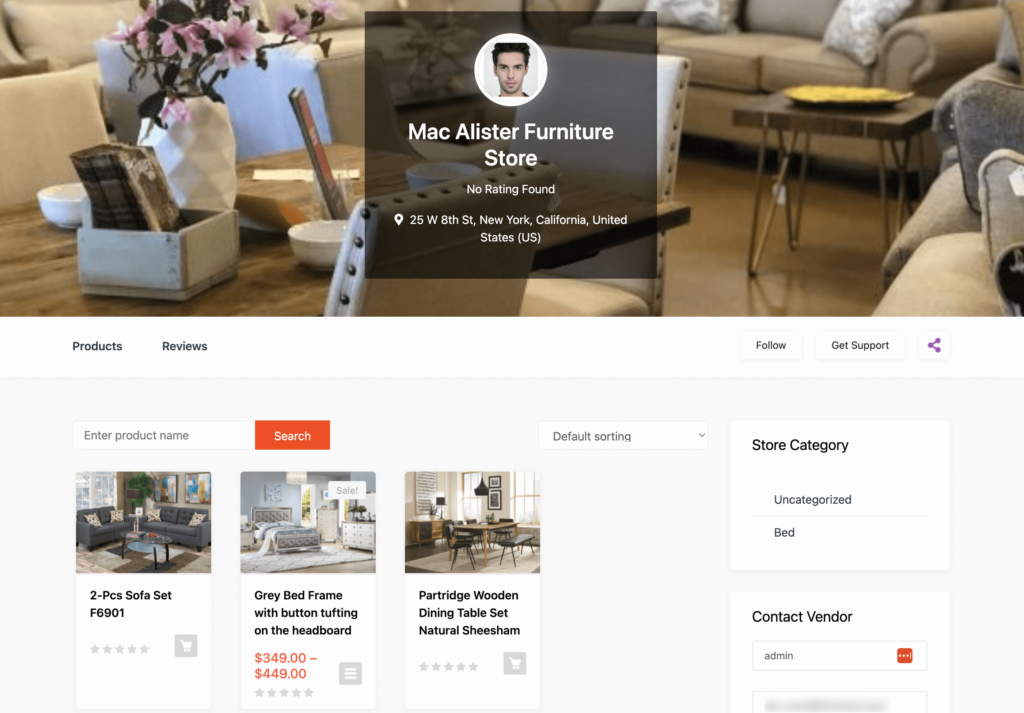
Here is the frontend view of your newly created store:
Wasn’t it easy and straightforward? We hope so. If you want to sell products from your own online marketplace, you can follow this step to get your job done.
Step 05: Allow Vendors to Register
After adding all the functionalities and configuring your marketplace, you can invite vendors to sign up for your marketplace. To make sure vendors can sign up for your marketplace, enable the “Anyone can register” option from WP Admin –> General –> Settings.
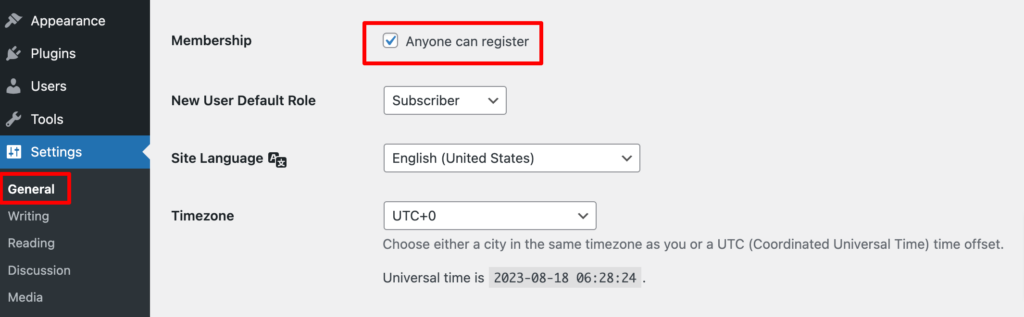
So, it will open the default registration form for vendors to sign up.

Or you can create customized registration forms with the necessary fields, especially for your marketplace.
For vendors to start selling, you need to enable selling status from Dokan –> Vendors.

Also, if you want the vendors to upload their products, then you need to change the product status from Dokan –>Settings –> Selling options. You need to enable the New Vendors Product Upload.

Now navigate to your WordPress dashboard then click on the Visit Stores to check all the registered stores on your furniture marketplace.
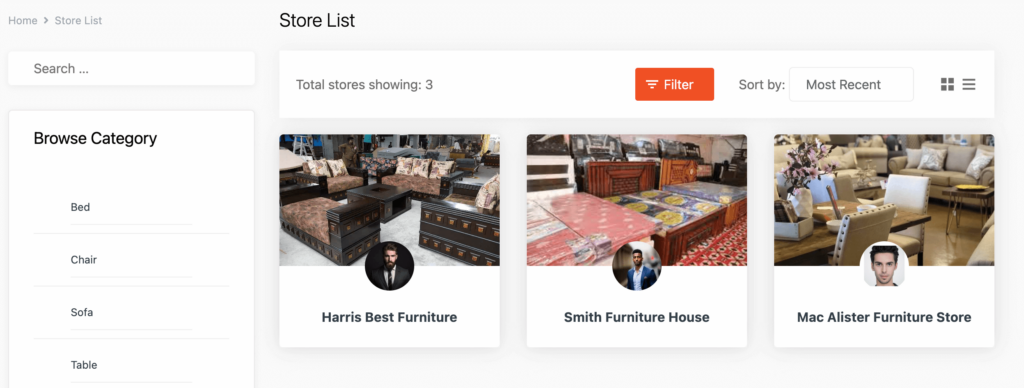
This is the frontend view of our newly created furniture marketplace that shows the registered store list. That means when a vendor registers for your marketplace and creates his store will appear in this list.

Step 6: Optimize Your Marketplace with Dokan Advanced Features
You are using the Dokan premium which means you have access to 35+ Dokan modules for more advanced features. Here is how you can optimize your marketplace with these Dokan premium modules to ensure a better user experience:
- Live Chat
- Return and Warranty Request
- Shipping Management
- Product Addon
- Payment Gateway
Now let’s talk about how you can implement these features for your furniture marketplace with Dokan modules.
i) Live Chat
In the fast online marketplace world, giving quick and good customer support is really important. We know fixing problems fast matters to make customers happy and keep them returning.
That’s why Dokan has a Live Chat feature. This module lets vendors give fast help to customers in real-time. They can use Facebook Messenger, WhatsApp, Talk.Js, or Tawk.to. It’s a big help! So, don’t forget to implement a live chat feature for your marketplace.
ii) Return and Warranty Request
Many stores give customers 15 to 30 days to return items and get a refund. This builds trust for your business. Dokan’s refund module makes managing refunds easy for both admins and vendors.
Admins have total control over refunds. They can handle requests well and make sure customers are happy. So, implement return and warranty request feature to build trust and makes shopping better.
iii) Shipping Management
If you want vendors to choose their own shipping rates, our Table Rate Shipping module is perfect. It lets vendors set flexible rates for their products.
Shipping costs can change because of distance, weight, price, and more. Our platform lets vendors make these changes for accurate calculations that match their business needs.
iv) Product Addons
Imagine a customer who loves a furniture piece on your marketplace but wants matching cushions, a stylish throw blanket, and decorative pillows. Our Product Addons module lets them easily add these extras to their cart, making a personalized package.
Here’s the exciting part.
Unlike usual shopping, where everything’s in one bundle, our module lets customers pay separately for each extra item.
This flexibility is clear and lets customers choose what they want within their budget.
e) Payment Gateway
Having various payment gateways is crucial for an online marketplace’s success. They give customers the flexibility to buy easily. By offering options like credit cards, debit cards, digital wallets, and bank transfers, a marketplace meets different preferences and makes checkout smooth.
Dokan’s multivendor solution includes payment gateways like MANGOPAY, Razorpay, PayPal, and more. This means you can have multiple payment options on your furniture marketplace using Dokan.
Create Your Own Online Furniture Marketplace Now!
Now you know how to build an online furniture marketplace using WordPress, WooCommerce, and Dokan. Following the steps outlined in this guide, you can bring your vision to life and establish a thriving platform where buyers and vendors can connect seamlessly.
The combination of WordPress’s user-friendly interface and Dokan’s powerful features provides you with the tools needed to create a unique and appealing marketplace that caters to the growing demand for furniture shopping online.
Remember, the key lies in understanding your target audience, curating a diverse range of furniture products, and offering an exceptional user experience. Leverage the customization options, payment gateways, and multivendor capabilities of Dokan to differentiate your marketplace from the competition.
So, roll up your sleeves, start building, and watch your online furniture marketplace flourish in the digital landscape.


Leave a Reply