
The size of the online book-selling industry in the US has grown 9.3% per year on average between 2018 and 2023. If you are a book lover then there is a big opportunity to create an online book store and make money from it.
B2C marketplaces are estimated to reach $3.5 trillion by 2024. 47% of digital purchases worldwide happened via online platforms. Of that, 63% is performed via multivendor marketplaces.
In this post, we are going to show you how to create an online book marketplace using Dokan multivendor, the most popular multivendor marketplace plugin on WordPress.
Let’s jump right in.
5 Steps to Create an Online Book Store

WordPress makes it easy to create a website. And WooCommerce helps turn that site into an interactive eCommerce site. And finally, with the help of Dokan, you can turn that eCommerce store into a multivendor marketplace and earn.
Dokan is a popular marketplace with 60000+ active installations. The plugin has more than 35+ amazing modules and great features to enhance your marketplace experience. However, the plugin also has enough features in the free version to get you started.
To start an online bookstore marketplace, you need to have:
- Domain and Hosting
- A WordPress Site
- WooCommerce
- Dokan Multivendor Marketplace Solution
- A Compatible Dokan theme
We will show you how you can create an online bookstore marketplace using Dokan. Here are the steps,
- Install and Activate Dokan
- Install a Dokan Compatible Theme
- Configure Dokan Basic Settings
- Upload Products and Setup Admin Shop
- Allow Vendors to Register
Let’s see the steps in detail.
Step 1: Activate Dokan to Create Multivendor Marketplace
As WooCommerce creates a single store for your website you need Dokan to create a multivendor marketplace for your bookshop.
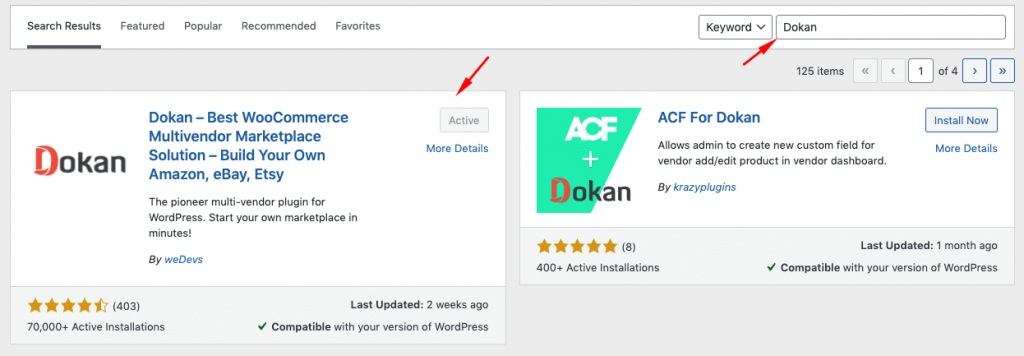
Installing Dokan is as simple as installing any other WordPress plugin. You can either install the plugin from the WordPress dashboard by,
- Navigating to Admin Dashboard → Plugin → Add New → Click the search
- Type Dokan → Install → Activate.
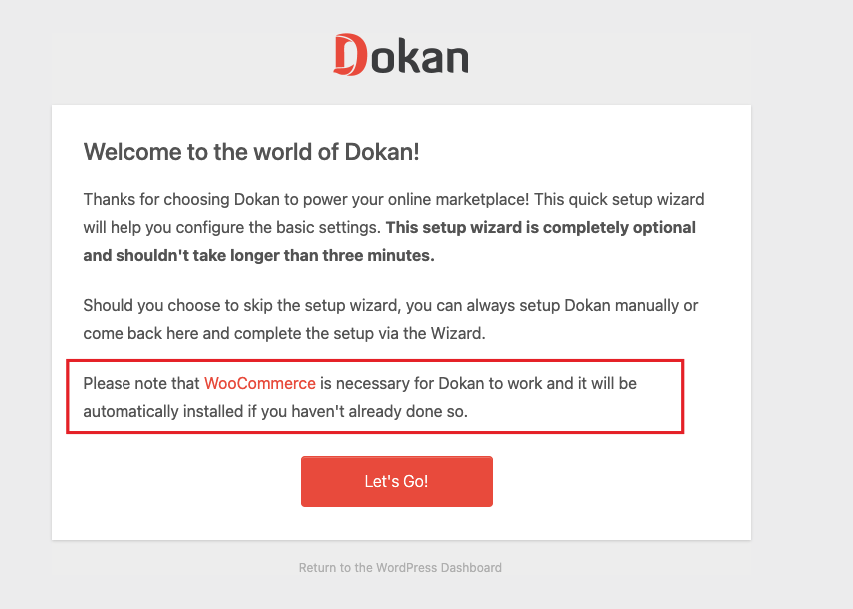
Dokan will also provide a setup wizard that will help you easily set up your marketplace. Configuring Dokan is very easy by using its own Wizard.
As the Dokan multivendor plugin is powered by WooCommerce, you need WooCommerce to create your marketplace.
However, you don’t need to install WooCommerce separately. When you install Dokan, it automatically installs WooCommerce.
If you are still confused, go through the video tutorial on Dokan installation.
Before you install Dokan, you need to configure all the basic WooCommerce settings. So you can read the guide on How to Fully Customize WooCommerce to configure the plugin correctly.
Step 2: Install a Dokan Compatible Theme
After installing Dokan, you need to install a Dokan-compatible theme. Any WordPress theme that is compatible with WooCommerce is also compatible with Dokan. However, Dokan has its own theme “Dokani” that you can use for your convenience.
You can download the Dokani theme.
You can also find other themes in WP-Admin→ Appearance→ Themes. But make sure the theme is Dokan compatible.
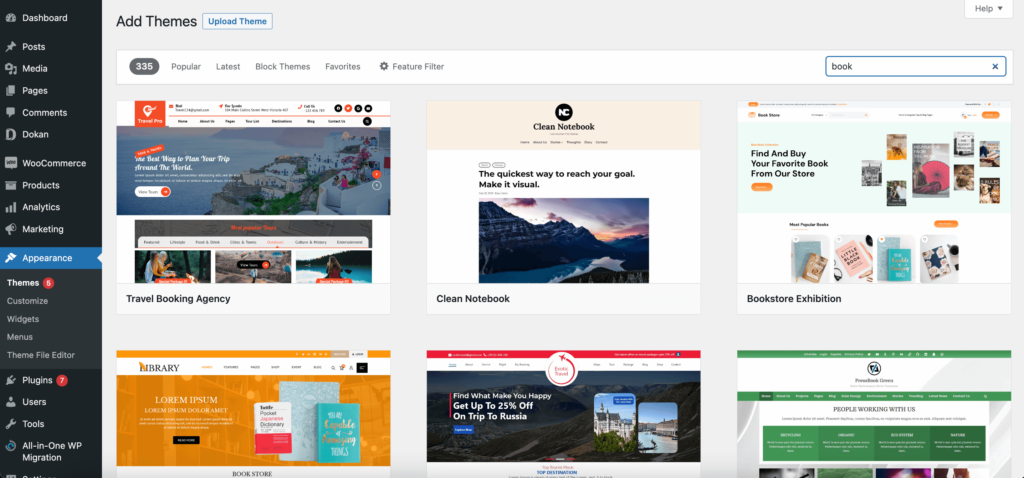
If you choose any other theme then you will need to customize the theme to make it compatible with Dokan.
Step 3: Configure the Basic Settings of Dokan
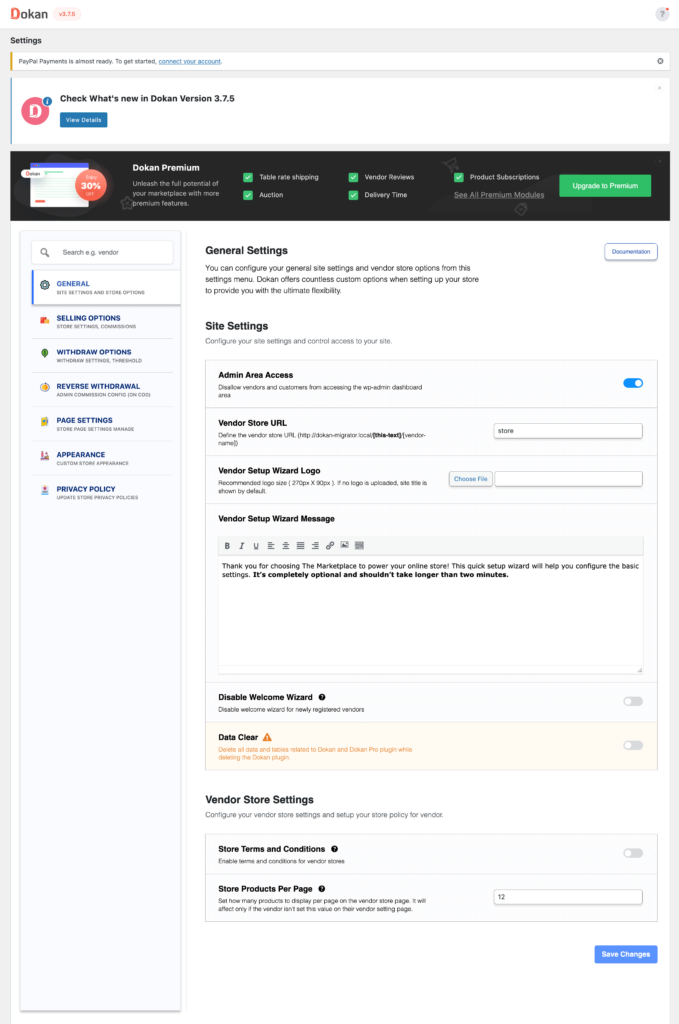
After installing and activating Dokan, now you need to configure all the basic settings. You will find all the settings options at WP-Admin→ Dokan→ Settings.
From here you need to:
- Set up your store terms and conditions
- Create store categories for vendors can add different categories for their stores
- Allow vendors to upload new products
- Upload vendor setup wizard logo
- Enable payment gateways (more on this in the next part)
- Configure withdrawal methods (more on this in the next part)
- Set vendor setup wizard message
- Set new product status
You can select the pages for the vendor dashboard, order page, store listing, and terms and conditions page.
Don’t forget to click the Save Changes button after configuring all the settings. Otherwise, you will lose all your settings.
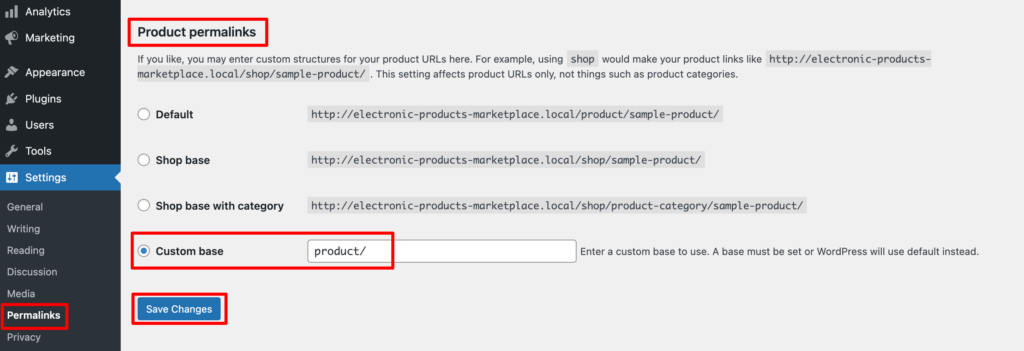
Also, you need to configure your permalink settings as well. Go to WP Admin → Settings → Permalinks → Permalink Settings → Product Permalinks. Select the check box “Custom Base” for product permalinks and write “/product” on the box.
You have to set your commission rate as well. Go to WP Admin Dashboard → Dokan → Settings → Selling Options → Admin Commission.
You’ll find different options to insert the percentage or fixed amount. Dokan supports various types of vendor commissions.
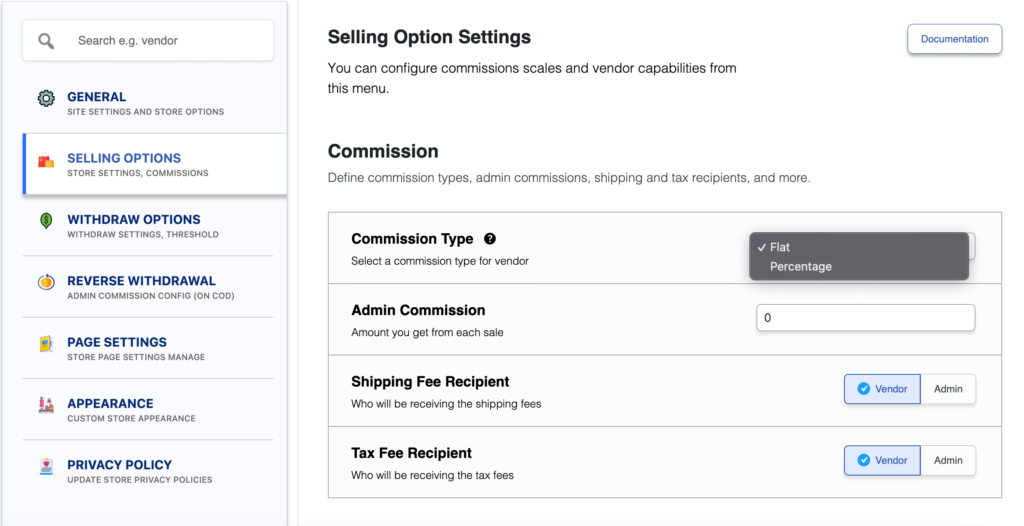
Dokan also enables you to set the category-based commission rate for the vendors. So you can define individual commission rates for different vendors.
Learn more about Dokan’s advanced features by visiting the Dokan features page.
Configure Payment Gateways
Having various payment gateways is a big bonus. Payment gateways help make the transaction process smooth and build trust among customers.
Dokan supports all WooCommerce-compatible payment gateways. You will get a wide range of choices to make the transaction process easier on your marketplace.
With Dokan Lite you can use non-adaptive payment gateways like check payments, bank account transfers, cash on delivery, etc.
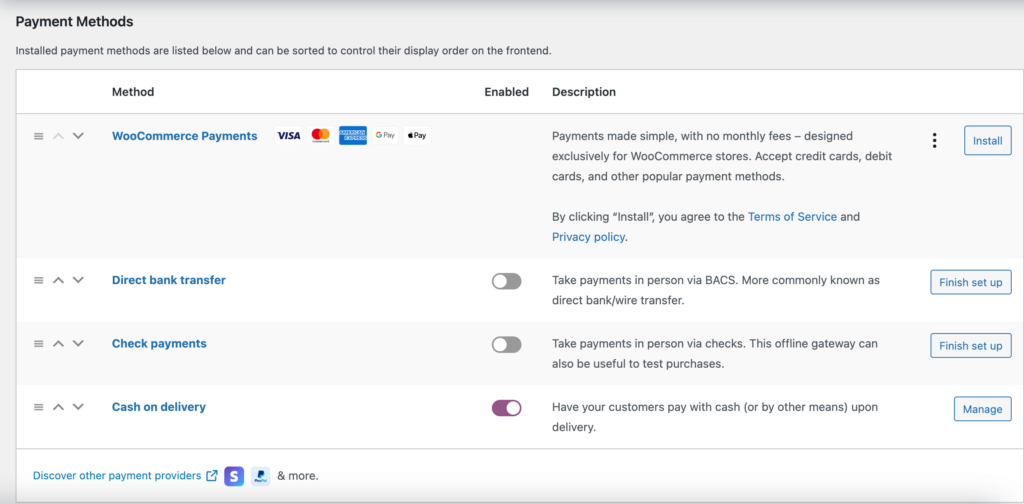
However, if you want your marketplace to support adaptive payment solutions like Stripe Connect and MOIP you need to install the Dokan Pro version.
Enable Withdraw Methods
Another important part of running an interactive online marketplace is to ensure a smooth withdrawal system. Dokan helps you take care of this section as well.
Go to WP Admin → Dokan → Settings → Withdraw Options. Here you’ll find options to customize the withdrawal method and set the minimum balance a vendor needs to make a withdrawal limit.

However, there are more settings options and you can read this guide on Dokan Basic Settings to configure all the settings.
Also, you will get more withdrawal options with the Dokan Pro version.
Step 4: Upload Products and Setup Admin Shop
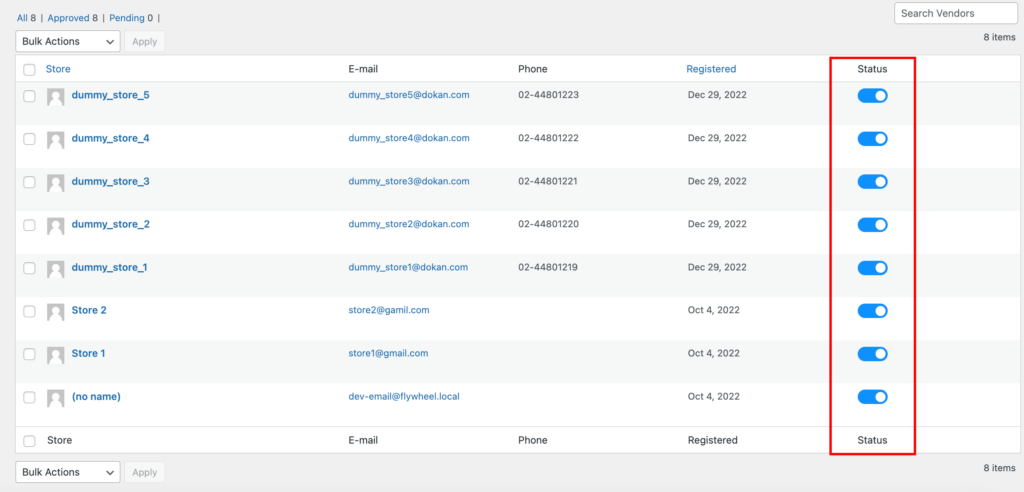
This is an optional step. You can create your own store on your marketplace if you want to earn some extra money. All you need to do is enable yourself to sell.
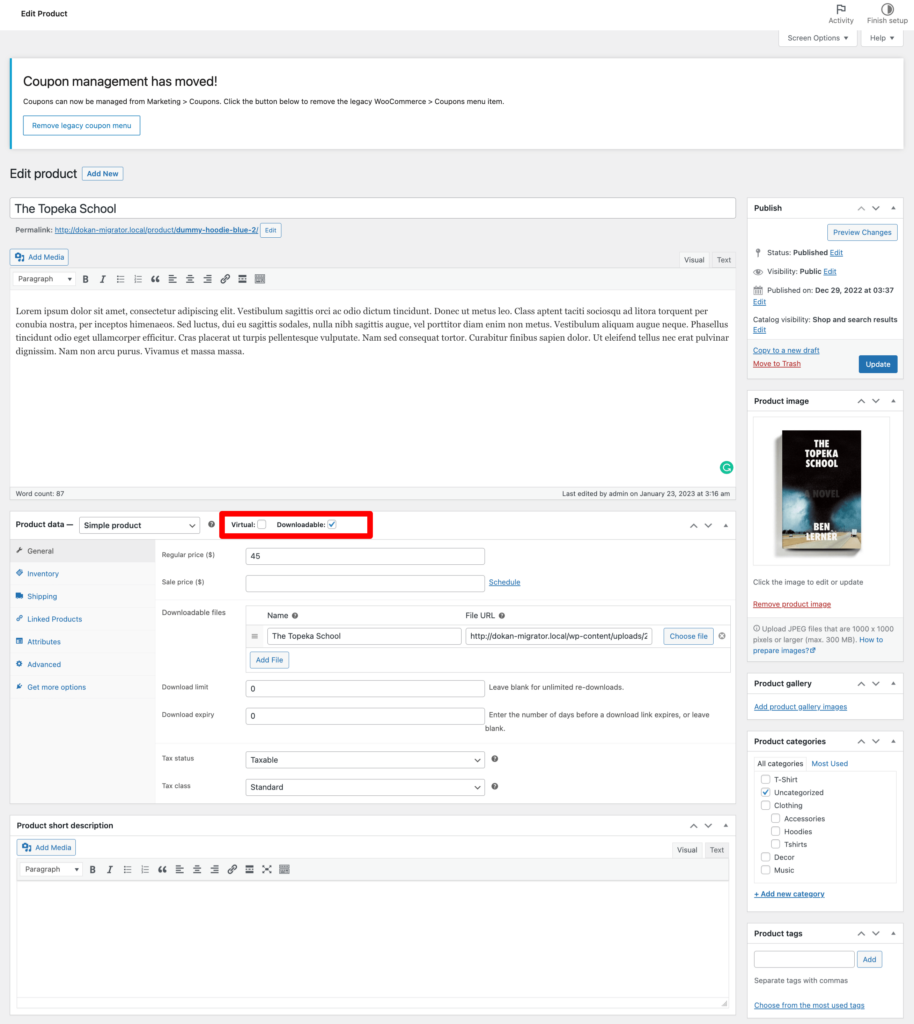
Go to Dokan→ Vendors. There you need to enable selling by toggling the button. You can upload your products by navigating to WordPress Backend → Products → Add New.
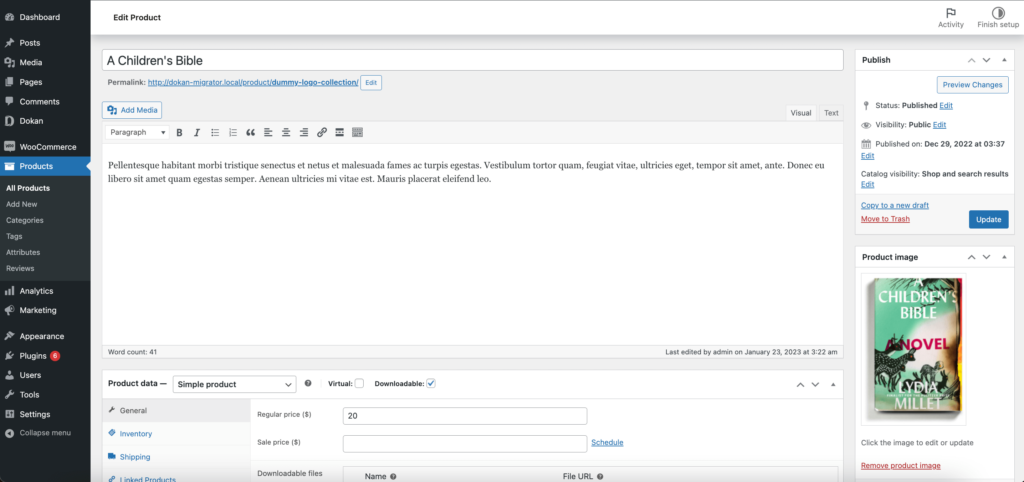
Note: If you want to sell PDF versions of books, then you have to make the book downloadable. To do that, just choose the Downloadable option when adding the product. And then, upload the pdf file.
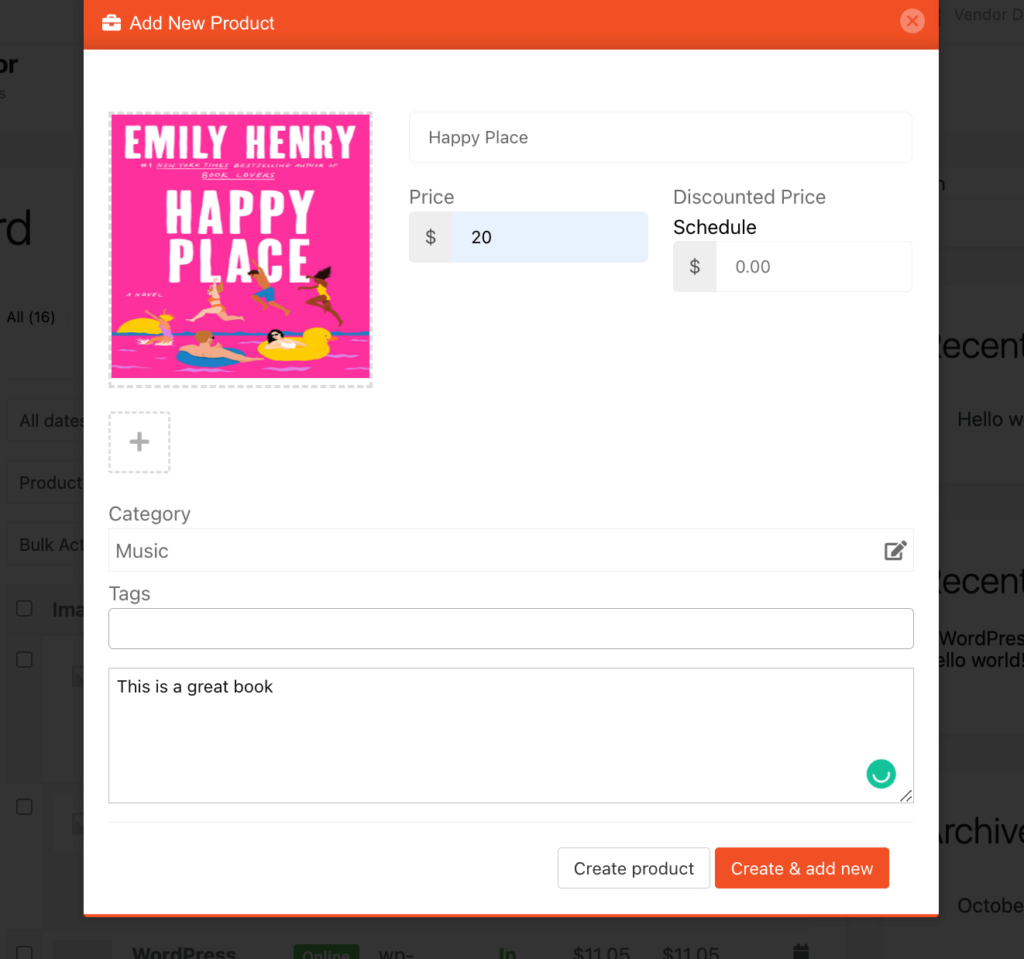
Vendors need to upload products from the front end. They need to navigate to, WordPress Dashboard → Visit Site → Vendor Dashboard → Setting. Your registered vendors will upload products this way.
Vendors also need to choose the Downloadable option when they are editing the product details-
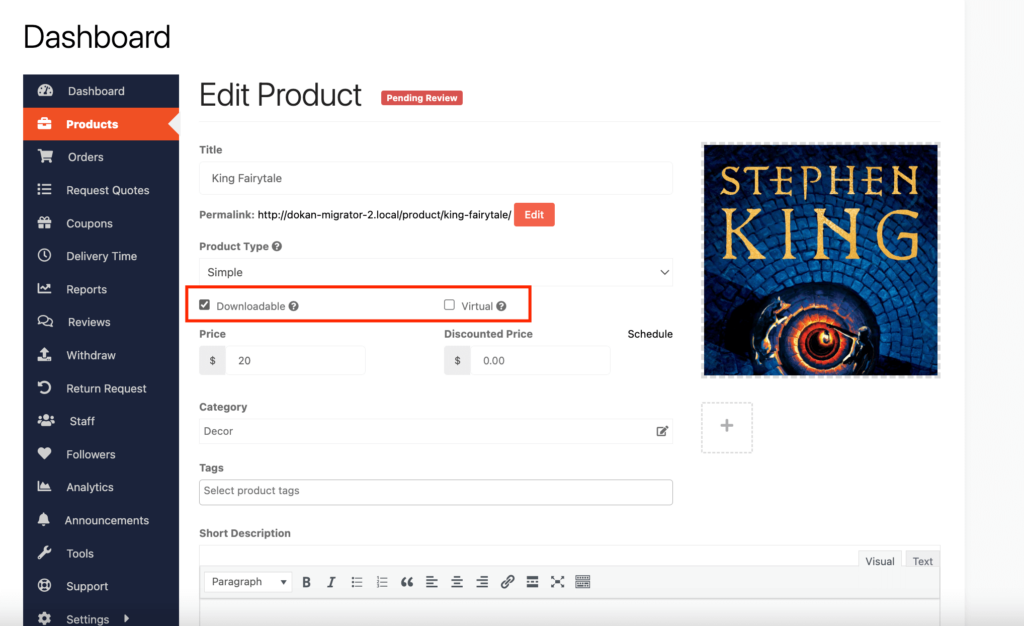
Vendors need to make sure to properly fill the stock options. As it is a book marketplace, it is important to keep count of how many books are available in the inventory.
Step 5: Allow Vendors to Register on Your Marketplace
After adding all the functionalities and configuring your marketplace, you can invite vendors to sign up for your marketplace. To make sure vendors can sign up for your marketplace, enable the “Anyone can register” option from WP Admin–> General–> Settings. So, it will open the default registration form for vendors to sign up.
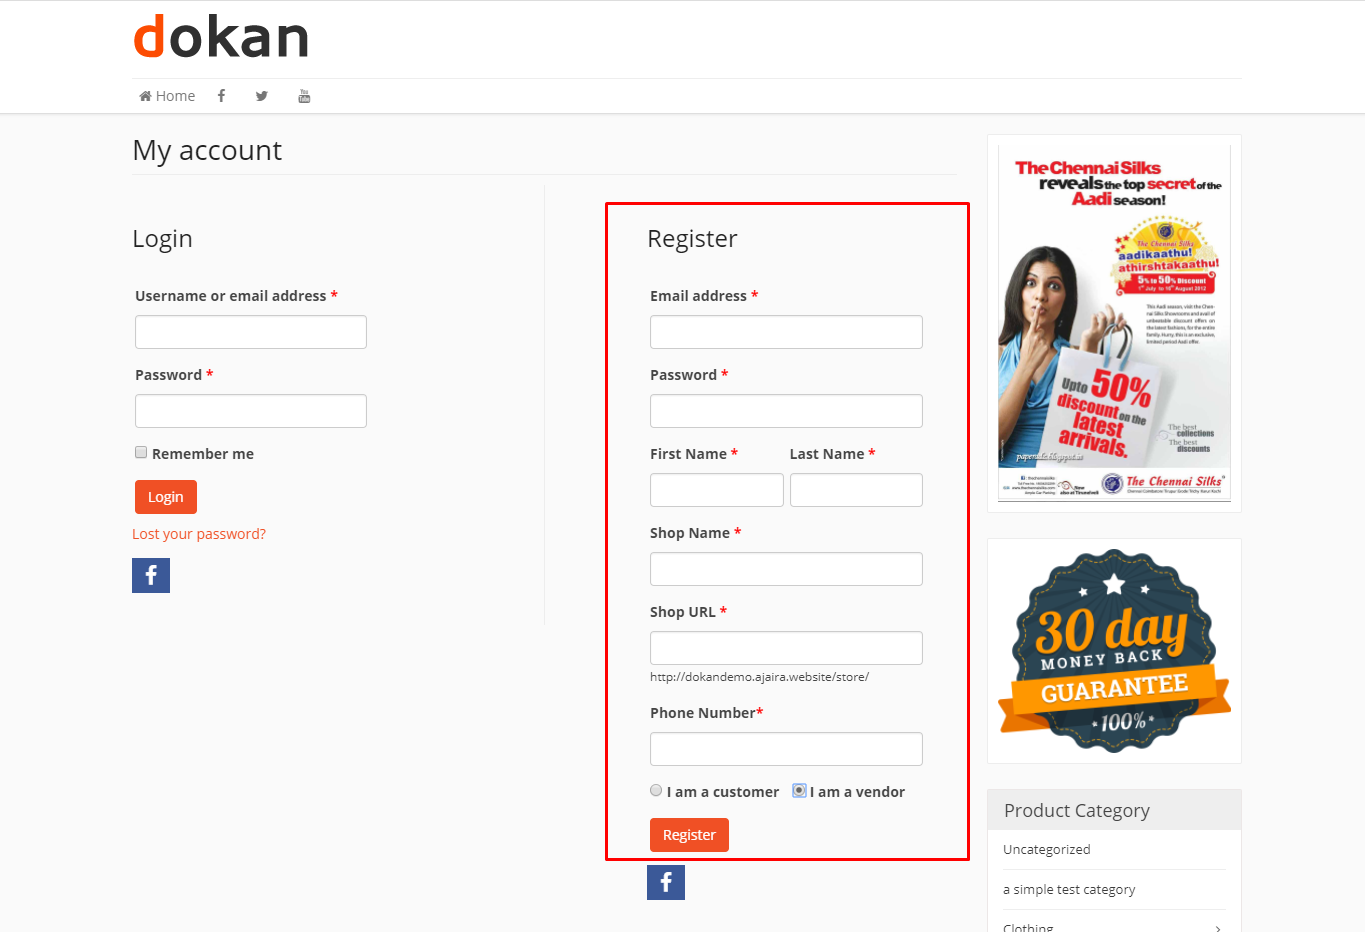
Or you can create customized registration forms with the necessary fields, especially for your marketplace.
For vendors to start selling, you need to enable selling status from Dokan–> Vendors.
Also, if you want the vendors to upload their products, then you need to change the product status from Dokan–>Settings–> Selling options. You need to enable the New Vendors Product Upload

Your Online Book Marketplace Preview
Your marketplace is ready. Here is a preview of what your marketplace may look like-
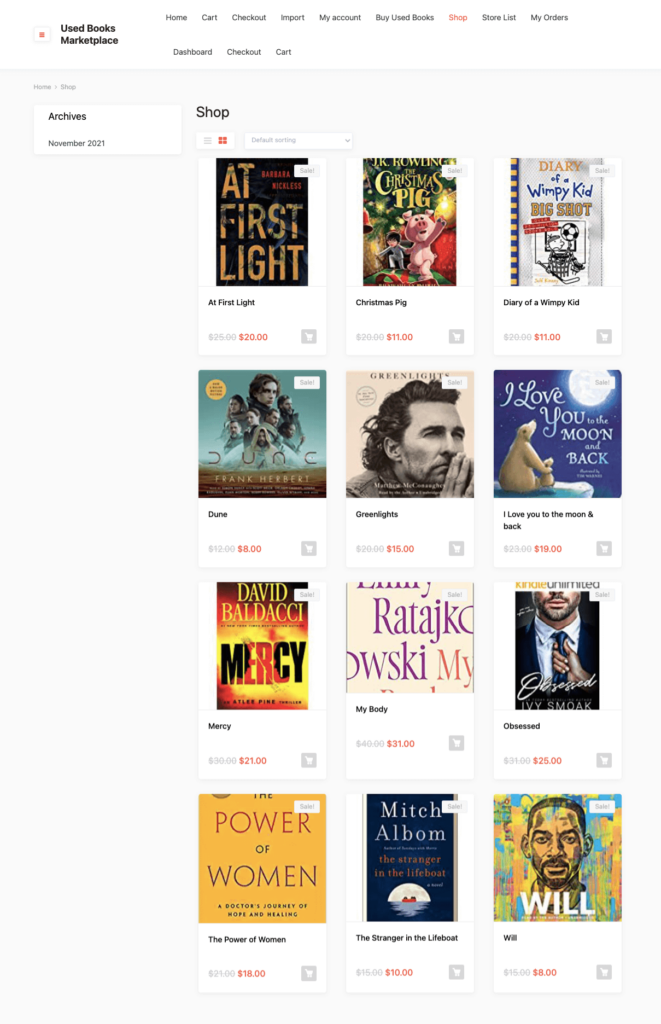
We are using the Dokani Theme. But if you are using any other theme, then the design of the marketplace will look different.
This is quite a basic version of a book marketplace. It will get the job done but customers expect a more optimized experience while visiting a book marketplace. So, you need advanced features like-
- Vendor review system
- Delivery and Shipping
- Min Max Order System
- Product Addon
- Return and Warranty System
- Store Support System.
Fortunately, Dokan has all these functionalities to help you.
Bonus: How to Compete with Already Established Book Marketplaces
Having created and launched your online bookstore marketplace, it is time to start selling.
There are many giant online book marketplaces (Amazon, Flipkart, Snapdeal, eBay, Barnes & Noble) that are top of the hierarchy. Only Amazon sold 300 million books in the US last year. The numbers are very big and it will certainly create some doubts in the beginner’s mind.
But not to worry. If you can do some basic things right, then you can surely make your book marketplace stand out. Here’s what you need to do.
- Make Your Brand Unique
- Focus on One Niche
- Offer Curated Experience
- Focus on Customer Service and Relationships
- Create a Community.
Do these basic things right and you are 70% there to compete with big brands. Rest depends on your marketplace uniqueness. Study your competitors and come up with what you can do differently to make sure the audience visits your store.
FAQ(s) on Online Book Marketplace
While researching, we found a couple of interesting questions on a few forums. We have tried to answer them with our own views-
Question: How do I sell my first 1000 books?
Ans: Here is how you can sell your first 1000 books-
1 . Market for the Good of Your Audience. Nobody buys books for the author, they buy books for themselves.
2. Share Book Content. As you’re writing your book, share what you’re learning.
3. Make Sharing Your Book Easy.
Question: Is it legal to sell books online?
Ans: A basic understanding of Copyright Law might make us think that reselling books is illegal and infringes on the copyright of the author or the publisher. Fortunately, this is not the case. The reselling of books is protected by the concept of the “First Sale Doctrine”.

Create Your Dream Marketplace Now!
If you have the right tools and follow the right guide, then you can easily create your own marketplace.
After creating the marketplace, you need to promote your marketplace. Here are some basic things you can do to promote your online bookstore marketplace,
- Use email marketing
- Use social media platforms
- Look for potential vendors and customers on different platforms and forums
- Publish blogs and informational content.
Although these are the basic promotional techniques, you can still stand out by adding your style to them. You can come up with a unique email subscription or publish some eye-catching content.
In this tutorial, we have shown the detailed steps of how to create an online bookstore marketplace. Yes, creating a marketplace is complex. But if you follow them correctly, then there is no reason you will have trouble creating your own store.
If you still face any problems, then do let us know in the comment section. We have expert people who will be happy to help you.


Leave a Reply