Starting a raw material marketplace is a great business opportunity these days.
Suppliers are often faced with challenges in finding different raw materials in one place. Vendors take this advantage and jack up the prices of the products. As a result, customers are not only spending extra time to find the raw materials but also paying extra to get their products.
But a robust raw material marketplace can solve this problem by establishing a common platform to buy and sell products from multiple vendors.
If you are interested in this business, this blog could be a roadmap for you. Today, we’ll also show you how to create a marketplace of raw products using WordPress and Dokan multivendor.
Let’s start with this question!
Why Should You Consider Building a Raw Material Marketplace?
Before we show you how to create a raw product marketplace, you should know why you should start one.
There are quite a few reasons to start your own raw material marketplace. Such as,
- Steady Source of Materials: A raw material marketplace can provide a centralized platform for businesses to find and purchase the raw materials they need. This can help streamline the sourcing process and reduce the time and effort required to find and purchase materials.
- Reduce Product Prices: You can bring together multiple suppliers of raw materials, which can increase competition and drive down prices. This will benefit both buyers and suppliers, as buyers can get better deals and suppliers can reach a larger customer base.
- Increase Transparency: It will provide greater transparency into the pricing and availability of raw materials. This can help buyers make more informed purchasing decisions and suppliers better understand market demand.
- Open New Market for Suppliers: You can open up new markets for suppliers to sell their raw materials, potentially increasing their sales and revenue.
- Reduce Waste: The online marketplace will help reduce waste by facilitating the sale of excess or unused materials. This can benefit both buyers and sellers, as buyers can get discounted materials and sellers can recoup some of their costs.
Now, let’s start with how you can create a marketplace for your raw products.

Subscribe to
Dokan blog
6 Steps to Create a Raw Material Marketplace
With WordPress, you can create any kind of site, including eCommerce sites. Its eCommerce plugin WooCommerce will help you create an online store with ease.
To turn that online store into a marketplace, you need the Dokan Multivendor Plugin. This is one of the most popular marketplace plugins with more than 60,000+ active installations. The plugin has 35+ modules and numerous features that will help you create a marketplace for free. We will show you how.
To start a raw material marketplace, you need the following items:
- Domain and Hosting
- A WordPress Site
- WooCommerce
- Dokan Multivendor Plugin
- A Dokan Compatible Marketplace theme
Here are the steps to create a cosmetics marketplace in 6 steps:
Now let’s see the details-
Step 1: Activate Dokan to Create Multivendor Marketplace

Dokan will also provide a setup wizard that will help you easily set up your marketplace. Configuring Dokan is very easy by using its own Wizard.
As the Dokan multivendor plugin is powered by WooCommerce, you need WooCommerce to create your marketplace.
However, you don’t need to install WooCommerce separately. When you install Dokan, it automatically installs WooCommerce.
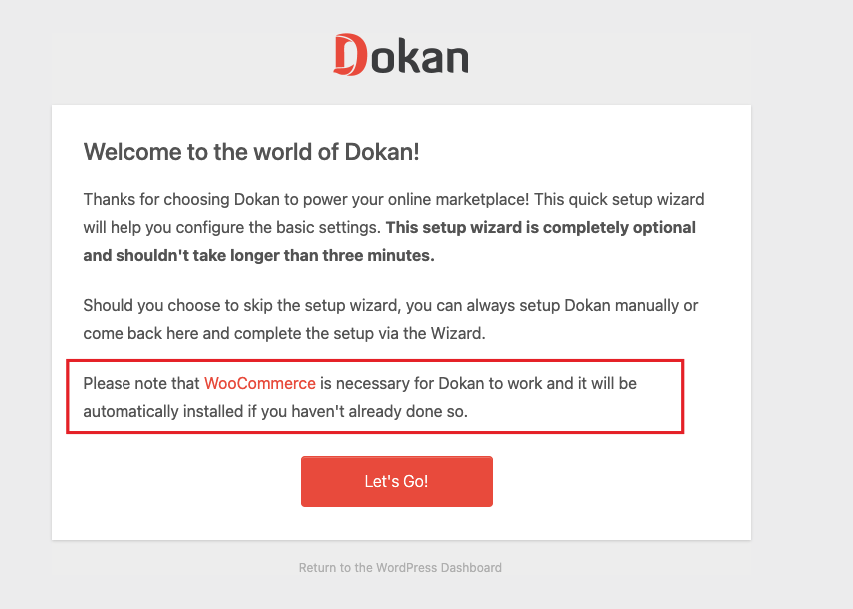
If you are still confused, go through the video tutorial on Dokan installation.
Before you install Dokan, you need to configure all the basic WooCommerce settings. So, give a check on A Complete Guide To WooCommerce Customization Tutorial.
Step 2: Install a Dokan Compatible Marketplace Theme
After installing Dokan, you need to install a Dokan-compatible theme that compliments your marketplace.
However, any WordPress theme that is compatible with WooCommerce is also compatible with Dokan. However, Dokan has its own theme “Dokani” that you can use for your convenience.
You can download the Dokani theme.
You can find other themes by navigating to WP-Admin–> Appearance–> Themes.
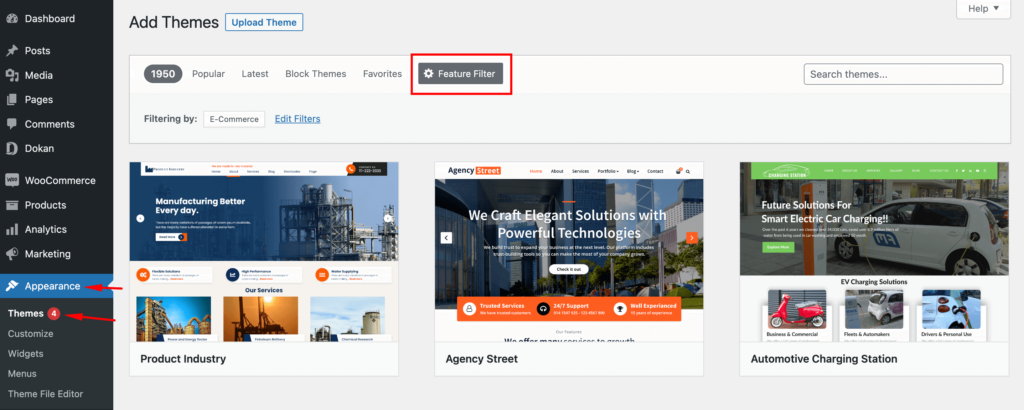
Step 3: Configure the Basic Settings of Dokan Multivendor
After installing and activating the Dokan plugin, now you need to configure all the basic settings. You will find all the settings options at WP-Admin–> Dokan–> Settings.
From here you need to:
- Set up your store terms and conditions
- Create store categories for vendors can add different categories for their stores
- Allow vendors to upload new products
- Upload vendor setup wizard logo
- Enable payment gateways (more on this in the next part)
- Configure withdrawal methods (more on this in the next part)
- Set vendor setup wizard message
- Set new product status.
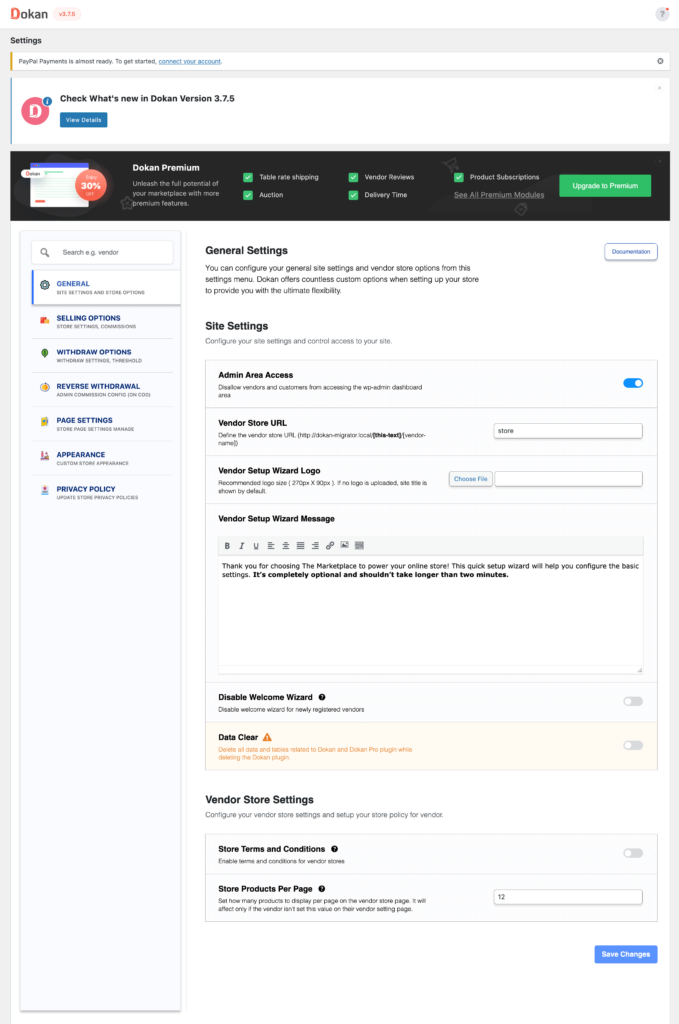
Don’t forget to click the Save Changes button after configuring all the settings. Otherwise, you will lose all your settings.
Also, you need to configure your permalink settings as well. Go to WP Admin → Settings → Permalinks → Permalink Settings → Product Permalinks. Select the check box “Custom Base” for product permalinks and write “/product” on the box.
Otherwise, you may get a 404 error on certain pages.

You have to set your commission rate as well. Go to WP Admin Dashboard → Dokan → Settings → Selling Options → Admin Commission.
You’ll find different options to insert the percentage or fixed amount. Dokan supports various types of vendor commissions.
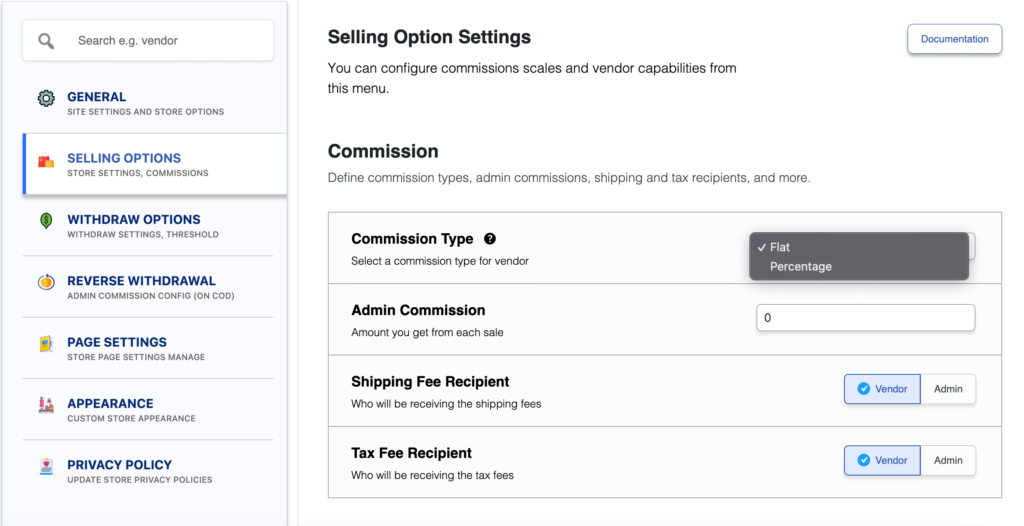
Dokan also enables you to set the category-based commission rate for the vendors. So you can define individual commission rates for different vendors.
Add Payment Gateways
Having various payment gateways is a big bonus. Payment gateways help make the transaction process smooth and build trust among customers.
Dokan supports all WooCommerce-compatible payment gateways. You will get a wide range of choices to make the transaction process easier on your marketplace.
With Dokan Lite you can use non-adaptive payment gateways like check payments, bank account transfers, cash on delivery, etc.
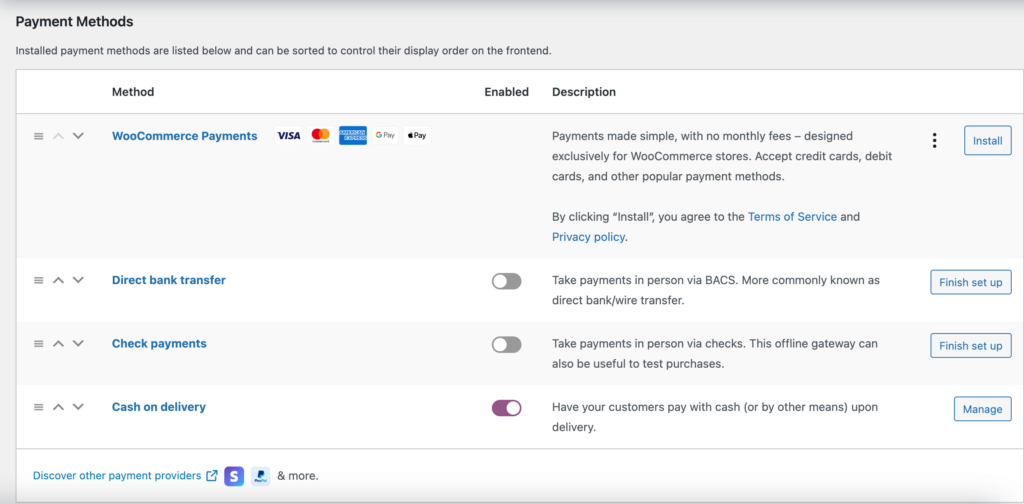
The Pro version supports adaptive payment solutions like Stripe Connect and MOIP.
Enable Withdraw Methods for Vendors
Another important part of running an interactive online marketplace is to ensure a great withdrawal system. Dokan helps you take care of this as well.
Go to WP Admin → Dokan → Settings → Withdraw Options.
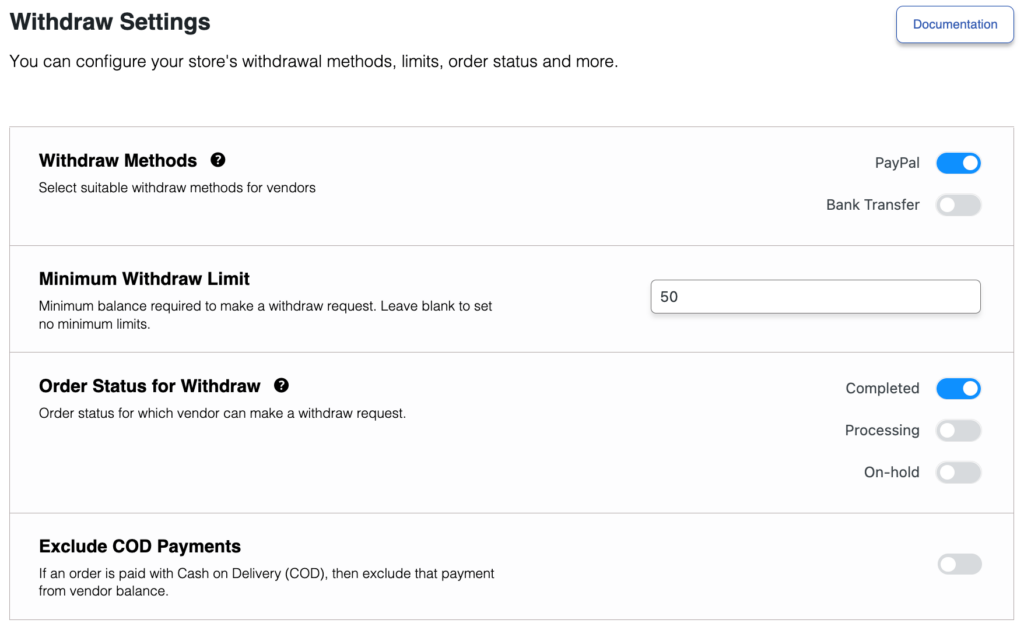
Here you’ll find options to customize the withdrawal method and set the minimum balance a vendor needs to make a withdrawal limit.
You can check the other settings of Dokan for further customizations.
Step 4: Upload Products and Set up Admin Shop
You can create your own store on your marketplace if you want to earn some extra money. All you need to do is enable yourself to sell.
Go to Dokan → Vendors. There you need to enable selling by toggling the button. You can upload your products by navigating to WordPress Backend → Products → Add New.
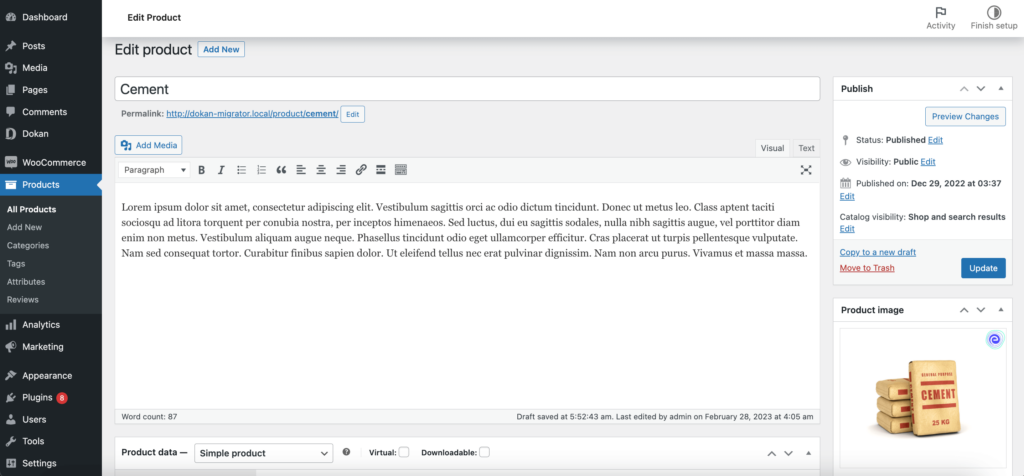
Here’s what the product page will look like,
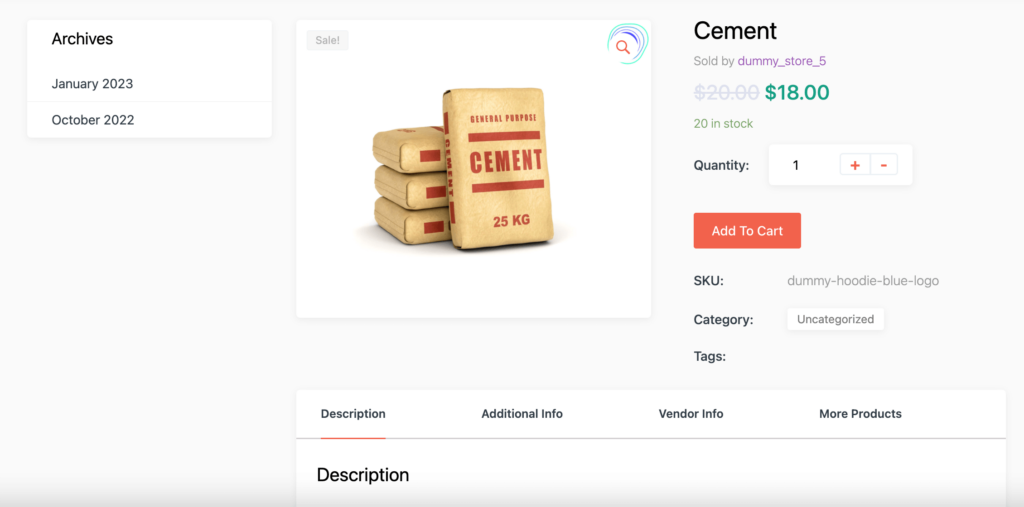
Vendors need to upload products from the frontend. They need to navigate to, WordPress Dashboard → Visit Site → Vendor Dashboard → Products.
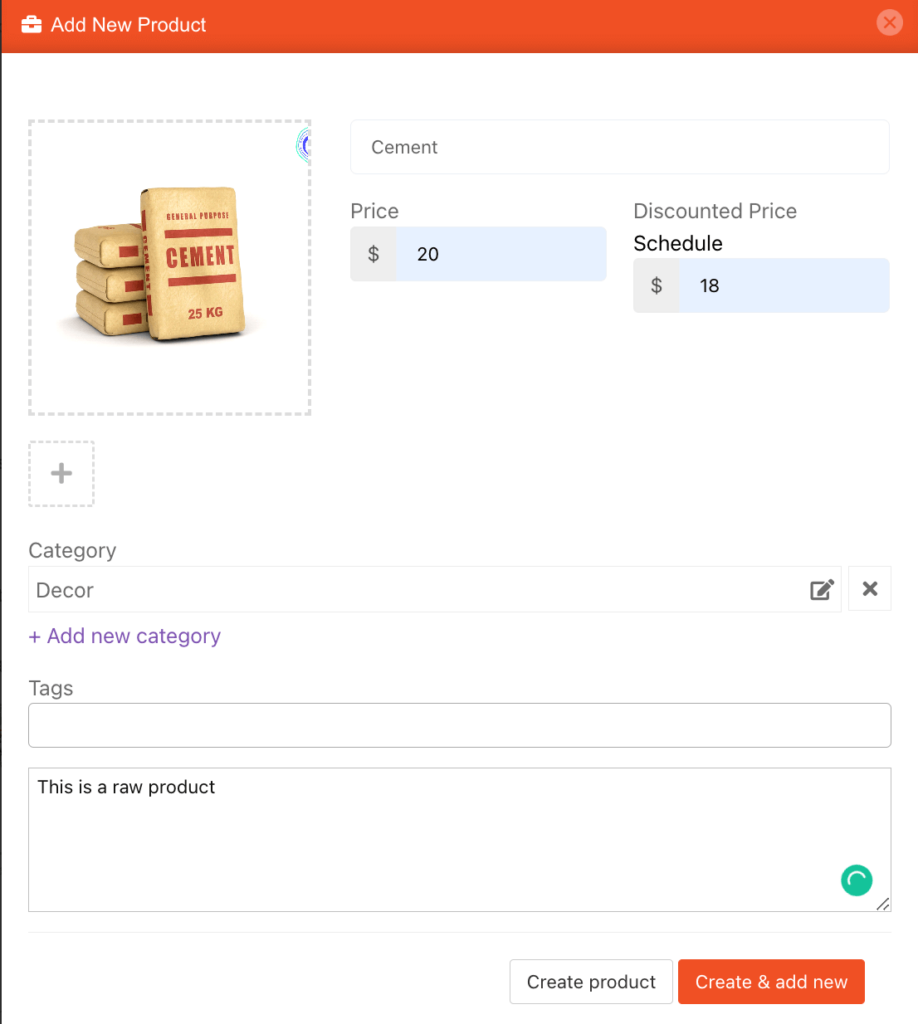
Here is what the product page will look like-
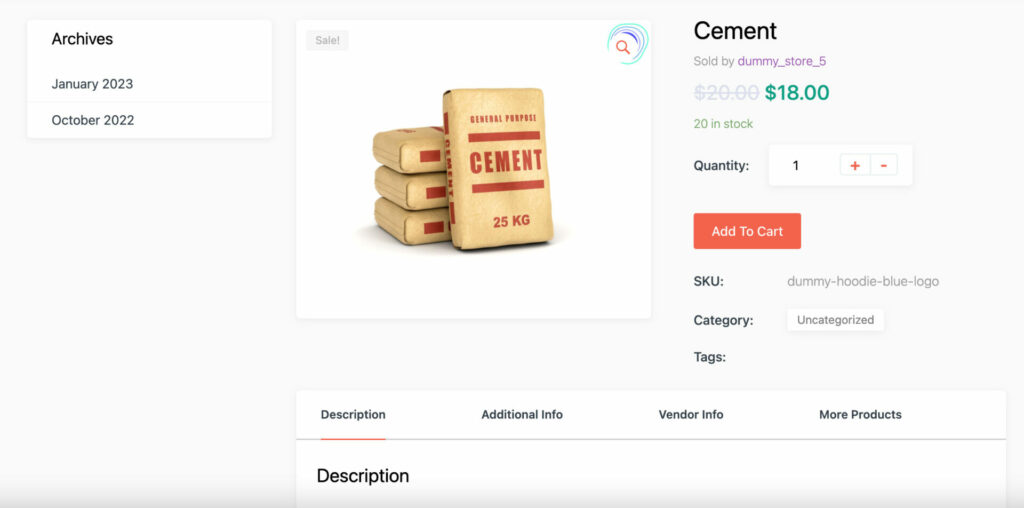
Your registered vendors will upload products this way.

Step 5: Allow Vendors to Register on Your Marketplace
After adding all the functionalities and configuring your marketplace, you can invite vendors to sign up for your marketplace. To make sure vendors can sign up for your marketplace, enable the “Anyone can register” option from WP Admin→ General→ Settings.
So, it will open the default registration form for vendors to sign up.
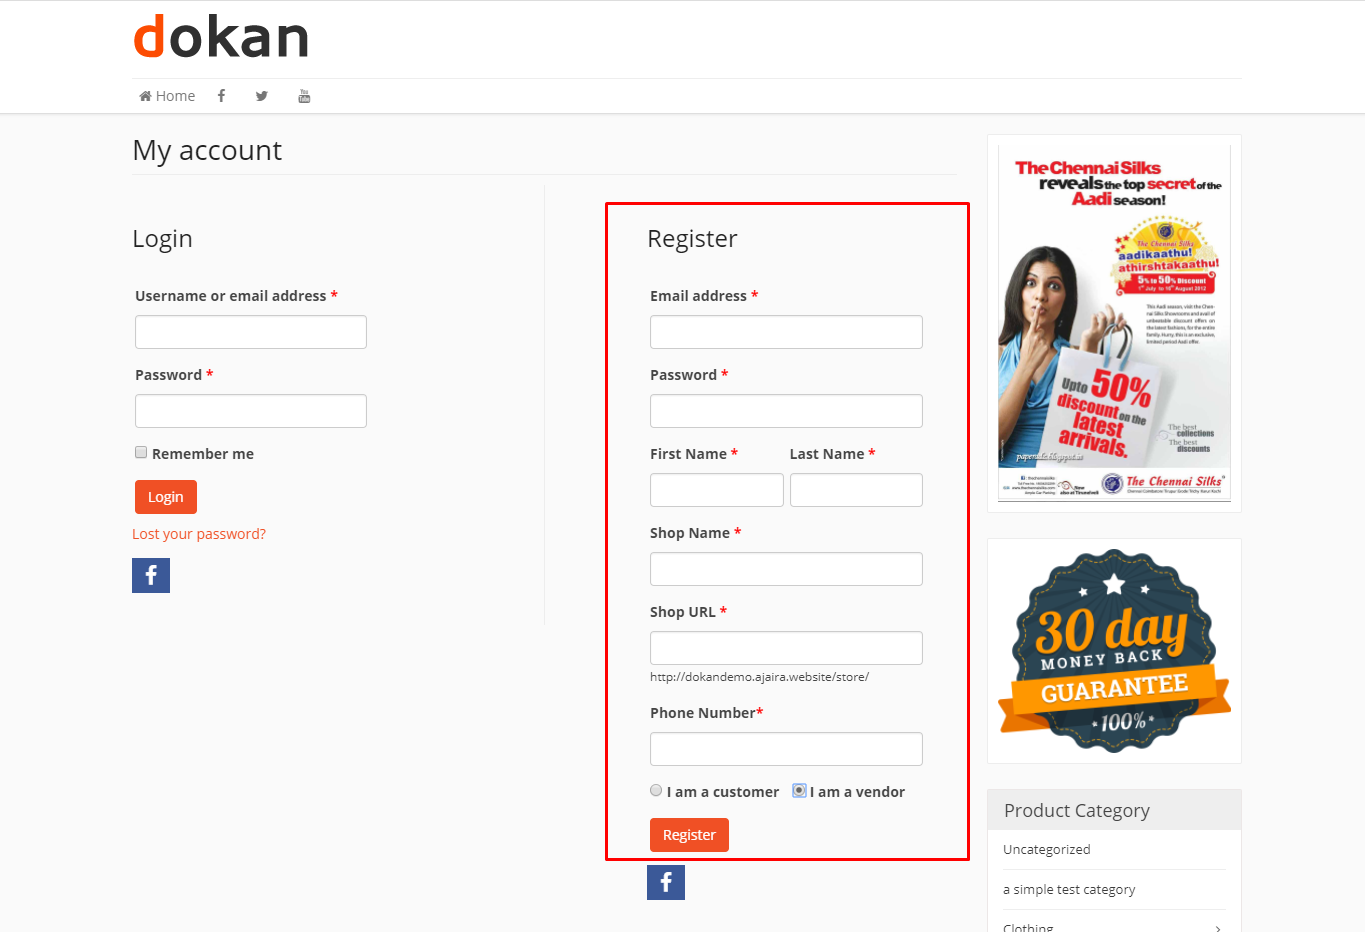
Or you can create customized registration forms with the necessary fields, especially for your marketplace.
For vendors to start selling, you need to enable selling status from Dokan → Vendors.
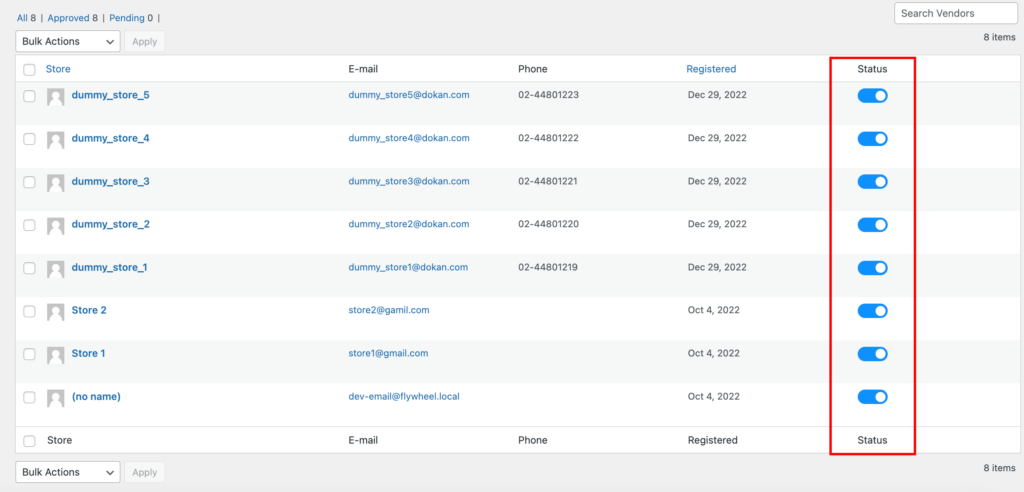
Also, if you want the vendors to upload their products, then you need to change the product status from Dokan →Settings–> Selling options.
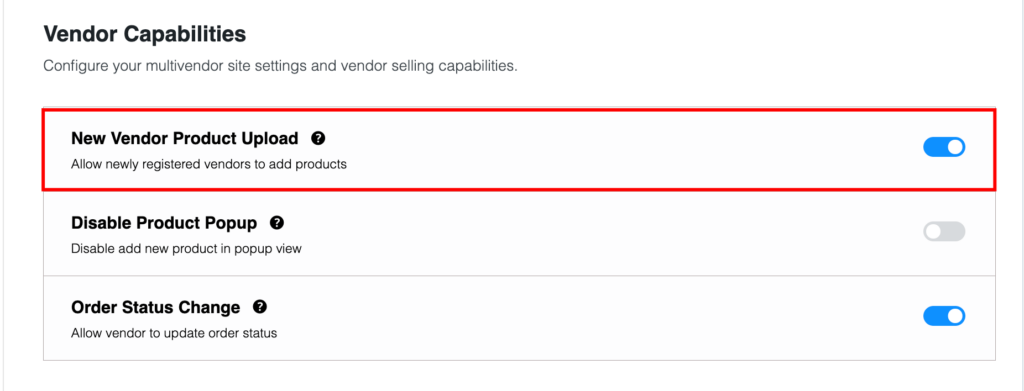
You need to enable the New Vendors Product Upload.
Step 6: Install the Dokan Pro Version to Enable the Request for Quote Feature
Most of the raw product marketplace sells products in bulk. Otherwise, it will be hard to turn profitable. That is why you need to add the request for quote feature on your marketplace.
You can do that with the Dokan Request for Quotation module. This is a premium feature of Dokan Multivendor. So you need to purchase the Dokan Pro version and enable the module from the dashboard.
After configuring the module, your customers will be able to send quotes to buy products in bulk.
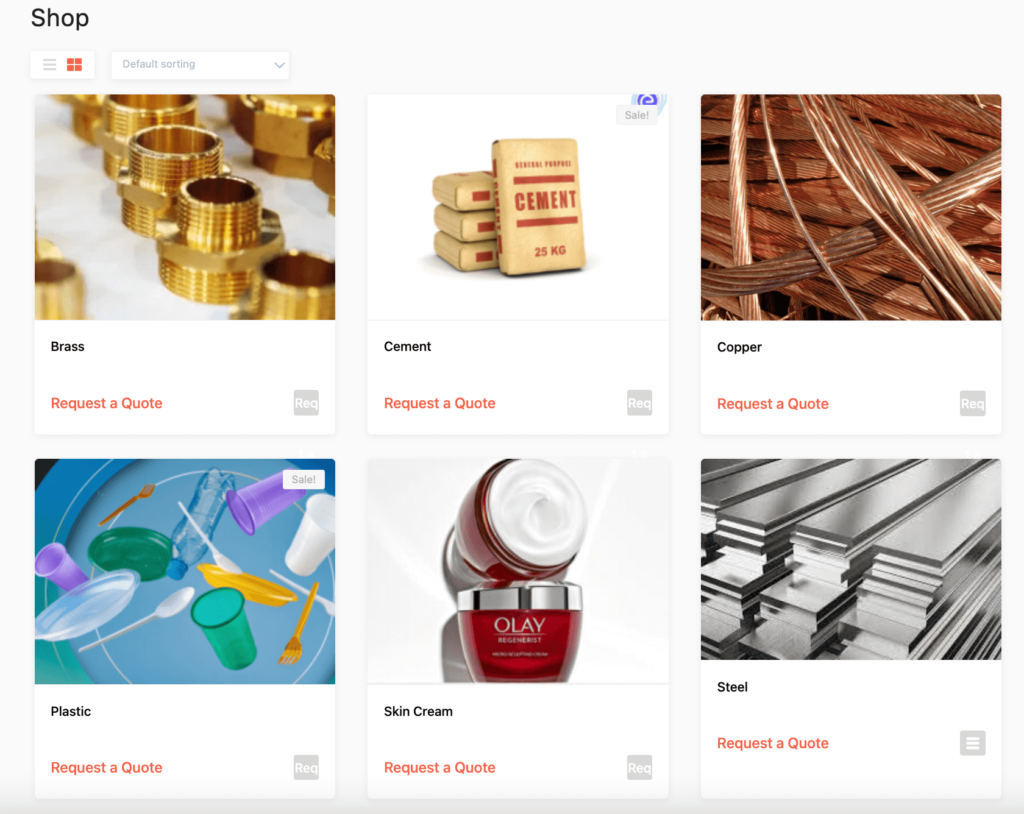
For further assistance, read this documentation and configure the Dokan request for quotation module.
Bonus: Add Dokan Advanced Functionalities to the Marketplace
Customers expect a more optimized experience while visiting a raw material marketplace. So, you need advanced features like-
- Vendor review system
- Delivery and Shipping
- Min Max Order System
- Product Addon
- Return and Warranty System
- Store Support System.
Fortunately, Dokan has all these functionalities to help you.
You need to add and install some other plugins like security plugins, and caching plugins in order to run your marketplace smoothly.
How Much Does it Cost to Create a Raw Material Marketplace?
Here is a rough estimate of what you need to spend in order to create a full-fledged raw material marketplace-
| Tools | Cost |
| WooCommerce | $0 |
| Dokan Business Package | $499/year |
| Domain | $10-$15/year |
| Hosting | $10-450/year |
| MailChimp email marketing – free up to 2,000 subscribers | $0 |
| Google Analytics – free version | $0 |

Start Your Raw Material Marketplace Today!
You may have thought that creating a marketplace is a complicated task. Hopefully, after reading our guide you will become an expert in creating a raw material marketplace.
But for your convenience, here is a recap of the steps you need to create a marketplace-
- Install and Activate Dokan
- Install a Dokan Compatible Theme
- Configure Basic Settings
- Upload Products and Configure Admin Shop
- Allow Vendors to Register
- Add the Request for Quotation Feature.
If you face any problems in any of the steps, do let us know in the comment section.
Subscribe to
Dokan blog
We send weekly newsletters, no spam for sure!





Leave a Reply