You can add a custom domain name from your Dokan Cloud dashboard. The process is straightforward and you can easily configure it.
We are going to show you how.
Steps to Add Custom Domain Name
There are two ways to add your custom domain name. Either-
- Using cPanel
- Using your Hosting dashboard.
If you want to use your Hosting dashboard, you should contact your hosting company for proper guidance. As different hosting company has different kinds of dashboards it isn’t easy to show them all. Also, if you have purchased the domain from a different company and hosting from another company, then the procedure becomes more complicated. So it is smart to approach your hosting company for guidance.
We will show you how to add a custom domain name using cPanel.
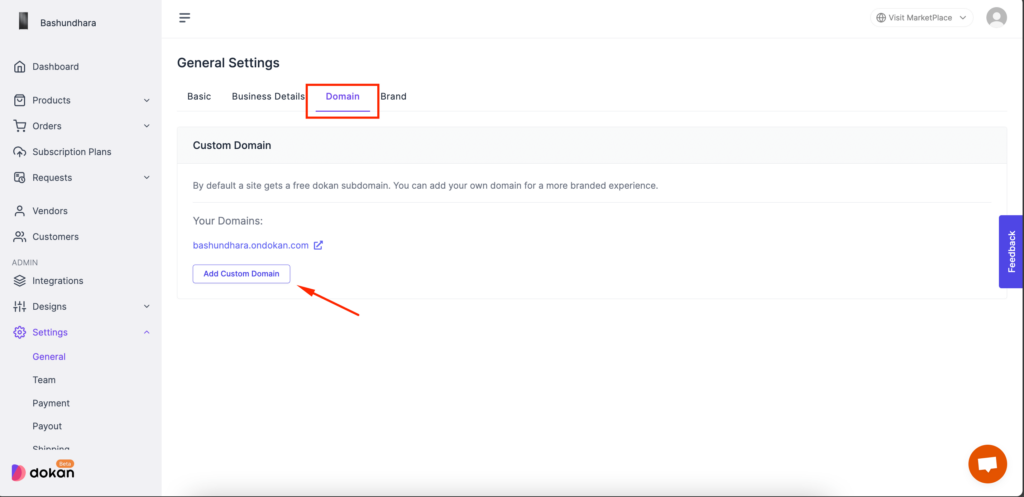
Login to your Dokan cloud dashboard and go to General–> Settings–> Domain. There click on the Add Custom Domain Name button.
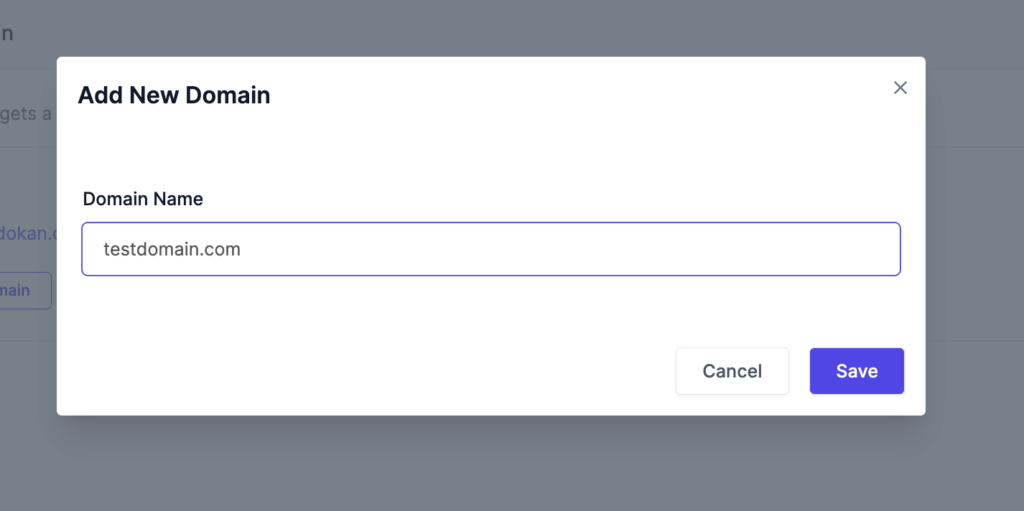
You will get a pop-up. In the pop-up you need to add the custom domain name and click on the Save button.
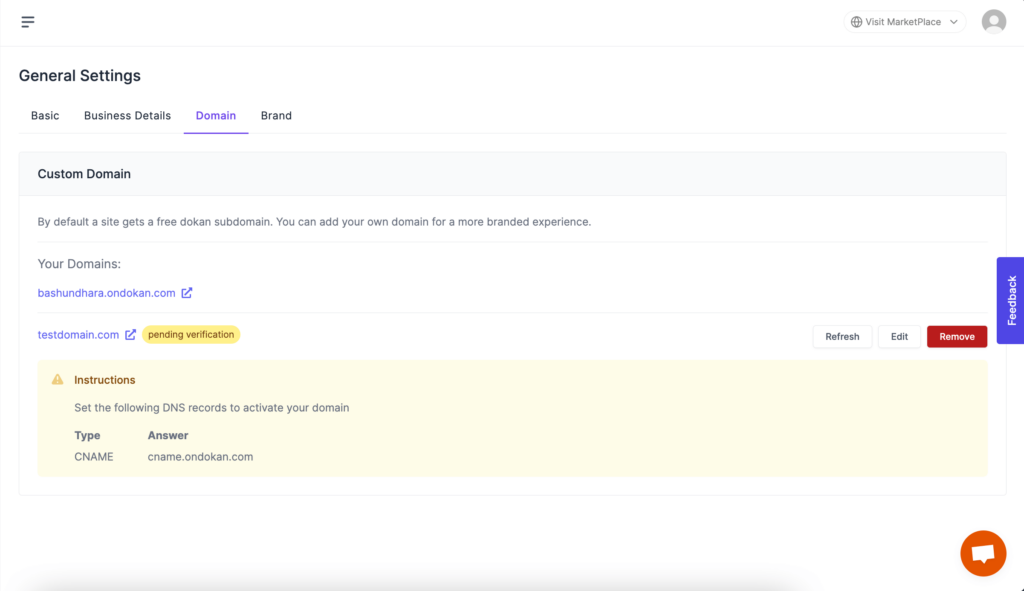
You will see that the domain is added but it is pending verification. That’s because you haven’t added the CNAME to your cPanel. So, copy the CNAME.
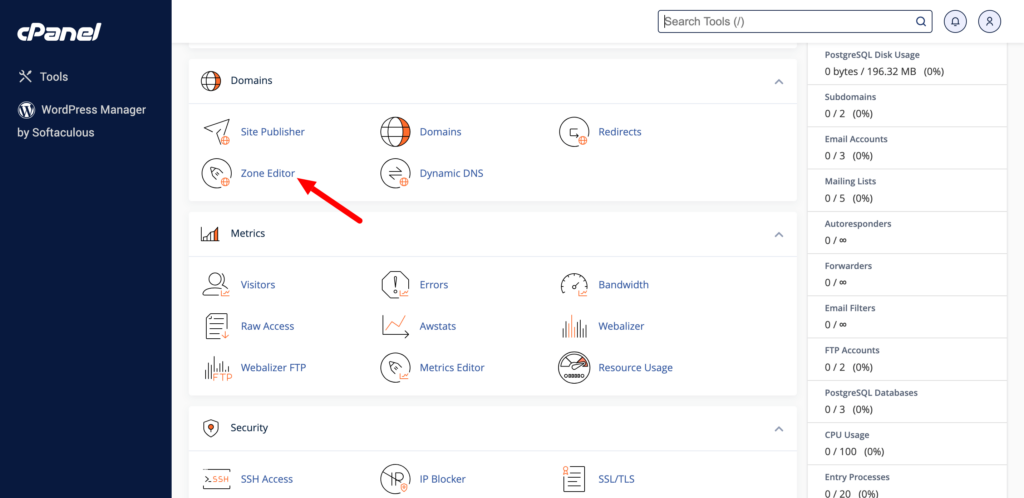
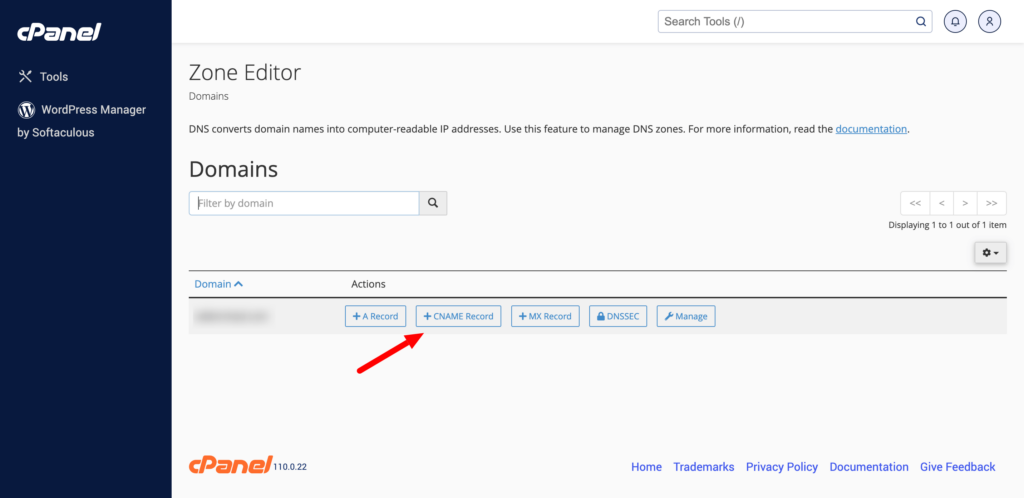
Now, login to your cPanel using your login credentials and find the Zone Editor under domains.
On the next page, click on the CNAME Record button,
Give a domain name, and add the CNAME that you have previously copied in the pop-up-
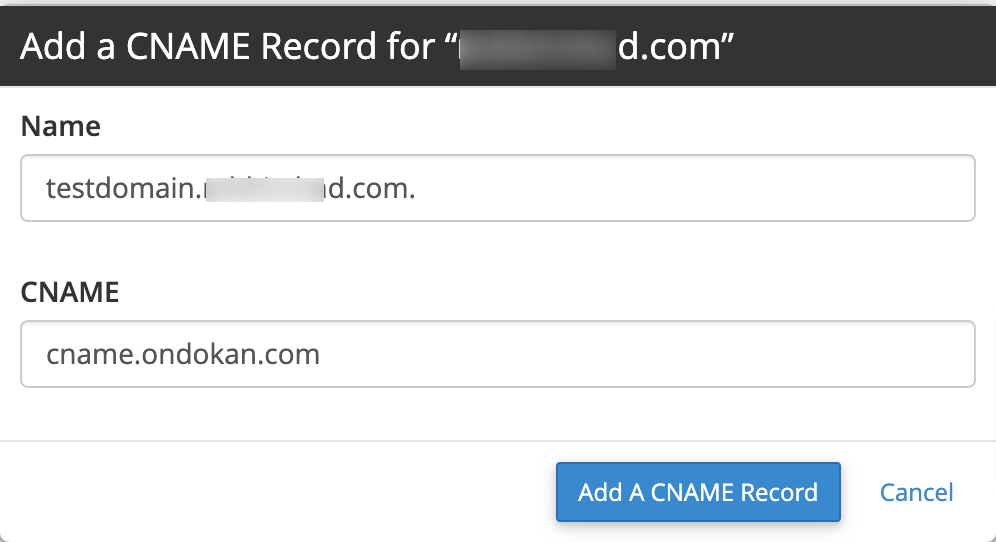
After adding the CNAME, you are done.
Note: It may take a few hours for the verification process to complete. So, wait for some time. But if it isn’t verified after a few hours, please contact our support team.