This guide walks through every item you need and every field in the Vendor App Build Request Form, so you can submit a complete, correct form on the first attempt.
Before You Fill the Form
Collect every item below before opening the form. A missing item mid-submission means delays or starting over.
| Item | What it is | Where to get it |
|---|---|---|
| App icon | 1024×1024 PNG, no transparency | Design tool of your choice |
| Privacy policy URL | A live, publicly accessible page on your store | Your WordPress Pages |
| Apple Developer access | Organizational account, required for iOS submission | developer.apple.com |
| Google Developer access | Google Play Console account, required for Android submission | play.google.com/console |
| Firebase project | Required for Android push notifications | console.firebase.google.com |
| WordPress admin credentials | Admin username and password for your WooCommerce site | Your WP Admin |
Where to Find the Form
- Log in to your Dokan account.
- Go to Mobile Apps > Vendor App in the dashboard sidebar.
- The Build Request Form appears on that page. Scroll down to begin.
Form Walkthrough
Work through each section in order. Filling every field correctly streamlines the build.
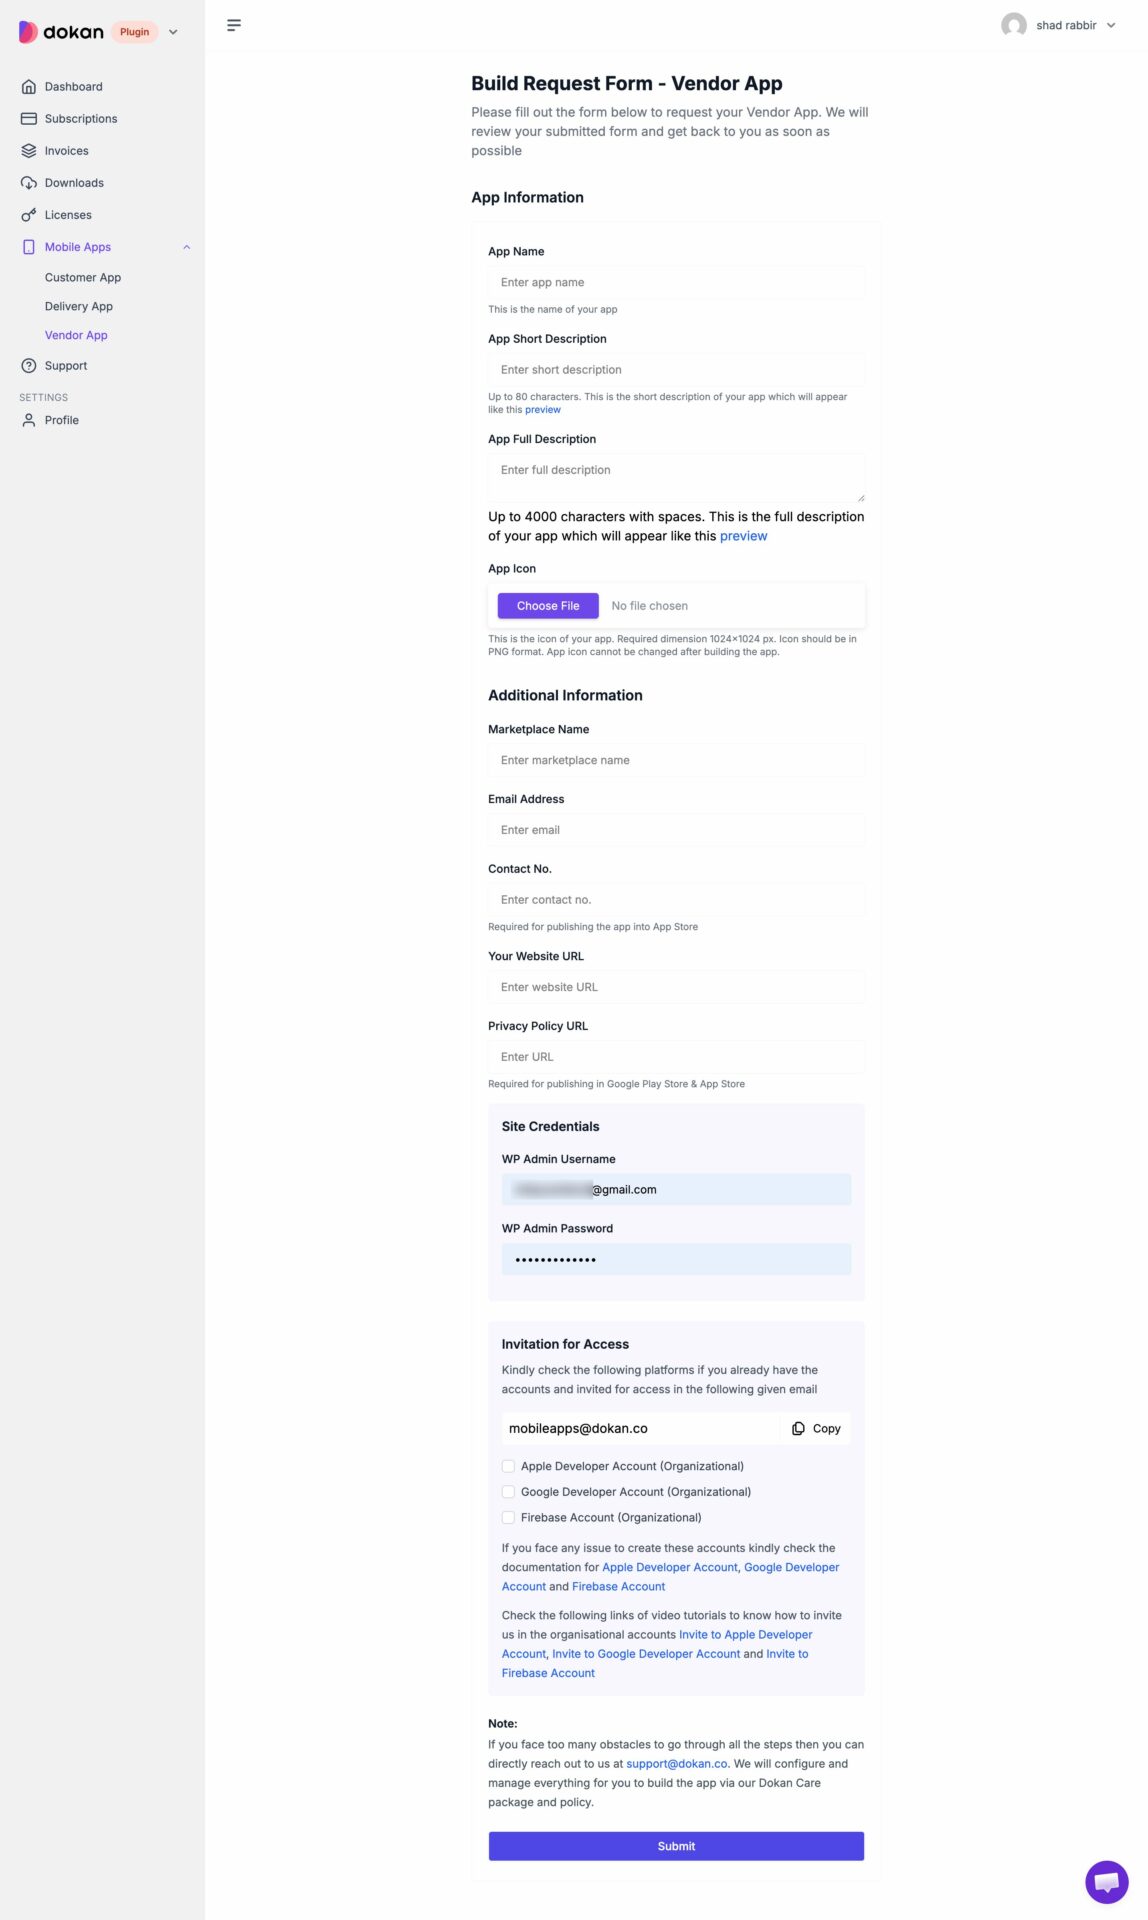
Step 1: App Information
These fields define what appears in the app stores and on your vendors’ devices. Fill them carefully, since app store listings are difficult to change after approval.
- App Name. Keep it short, avoid special characters, and match your store brand.
- App Short Description. Up to 80 characters. This appears in app store search results. Use the preview link to see how it looks.
- App Full Description. Up to 4,000 characters with spaces. This is your full App Store and Google Play listing. Use the preview link to check the layout.
- App Icon. Upload the 1024×1024 PNG you prepared. It must be PNG format, and the icon cannot be changed after the app is built.
Step 2: Additional Information
The build team uses these details throughout the process, and the app stores may contact you directly during review.
- Marketplace Name. The name of your marketplace.
- Email Address. Use an address you monitor daily. This is the primary contact for the build team.
- Contact No. Required for publishing the app to the App Store.
- Your Website URL. Your WooCommerce store URL.
- Privacy Policy URL. Must be a live, publicly accessible page. Required for publishing to both Google Play and the App Store.
Step 3: Site Credentials
Provide admin-level WordPress access so the team can connect your store to the app and configure the necessary settings.
- WP Admin Username.
- WP Admin Password.
Step 4: Invitation for Access
You need to invite the Dokan team to your developer accounts before the build can begin. Send all invitations to this email:
[email protected] (use the Copy button in the form to grab it).
Then check the box for each platform you have set up and invited:
- Apple Developer Account (Organizational). Invite the team as an Admin under Users and Access in the Apple Developer portal.
- Google Developer Account (Organizational). Add the team as Release Manager or Admin under Setup > Users and Permissions in the Play Console.
- Firebase Account (Organizational). Add the team as Owner under Project Settings > Users and Permissions in the Firebase Console.
If you have trouble creating these accounts, the form links to setup documentation for each platform, plus video tutorials showing how to invite the team to each organizational account.
A Note on Doing It for You
If you run into too many obstacles with these steps, you can reach out directly at [email protected]. The team will configure and manage the whole build for you through the Dokan Care package and policy.
After You Submit
- The Dokan team reviews your submission.
- If anything is missing, they contact you by email.
- Once all inputs are confirmed, the team logs in to your WordPress site and installs the app connector.
- Build and testing begin against your live store.
- The team submits your apps to the Apple App Store and Google Play.
- Apple and Google complete their review.
- You receive a go-live notification with your App Store and Play Store links.