Dokan PRO v2.9.7 brings YITH WooCommerce Brands integration to the top multivendor marketplace plugin for WordPress. So that admins can create unlimited Brands for his marketplace and vendors can add and manage Brands from the frontend just as they want.
Prerequisites
Admin Configuration
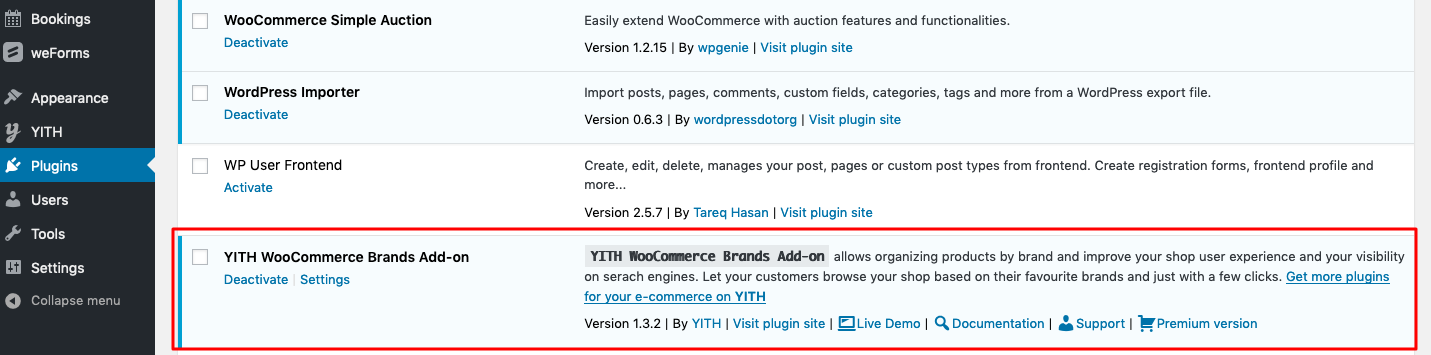
- Install and activate YITH WooCommerce Brands Add-on in your WP Dashboard.
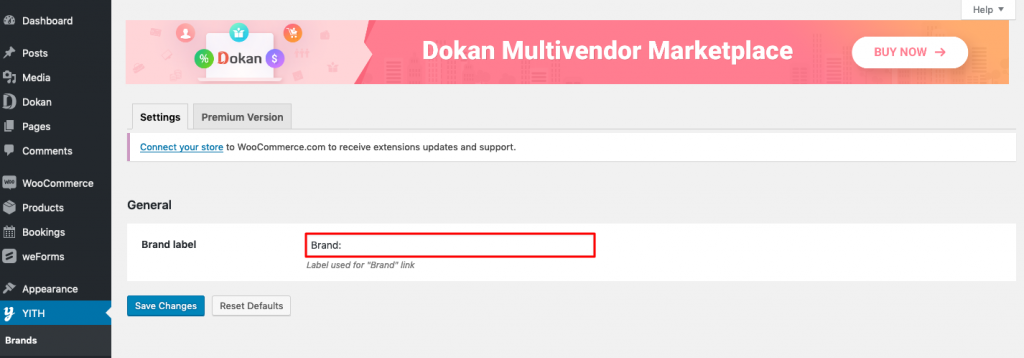
2. Go to YITH>Brands from your dashboard to change the title or Brand Label if you like. If you’ve the premium version, you can avail more functionalities for your marketplace.
3. Then go to Products>Brands to start adding new brands for your marketplace. Only admins can create brands.
4. After that add a name, slug, description, and logo for the brand.
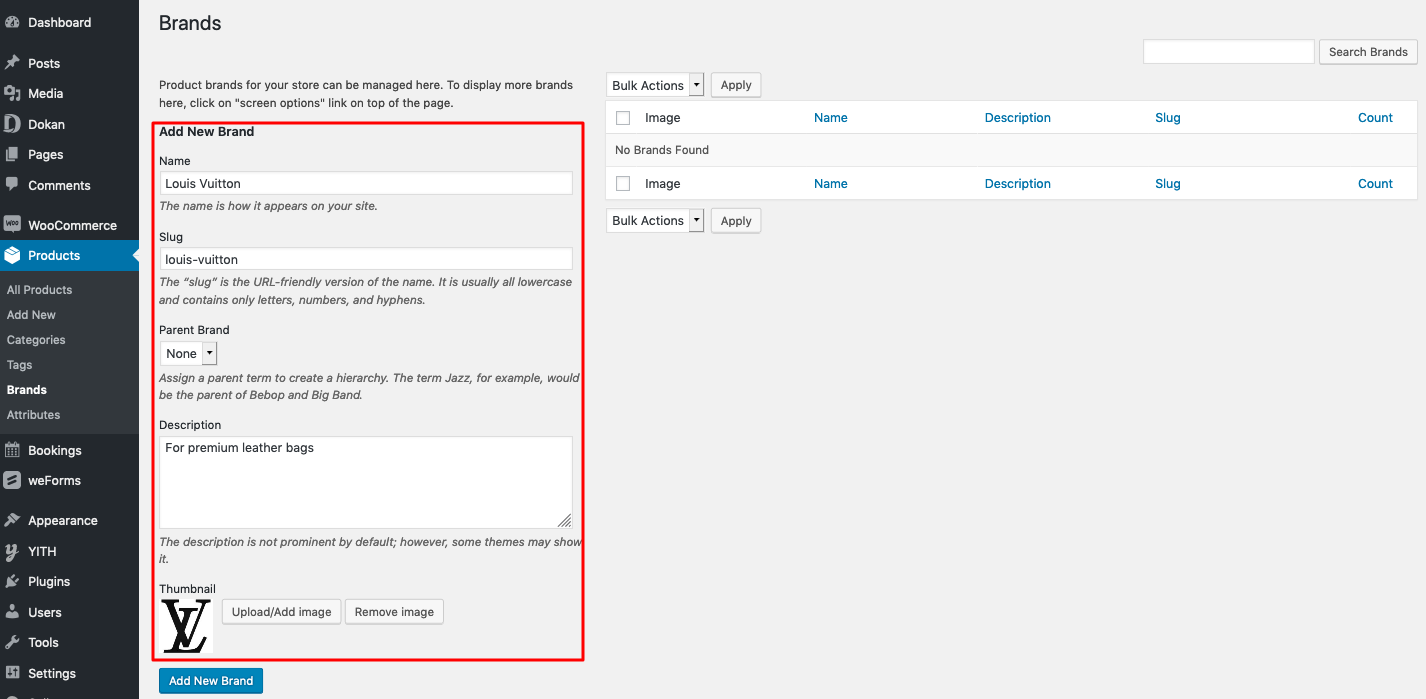
5. Click on Add New Brand.
6. You can edit or delete the Brand later.
7. From Dokan>Settings>Selling Options you can allow vendors to select select single or multiple brands from their frontend dashboard.
8. Click on Save Changes.

Vendor Configuration
Good news! Vendors don’t have any separate nuts and bolts to configure.
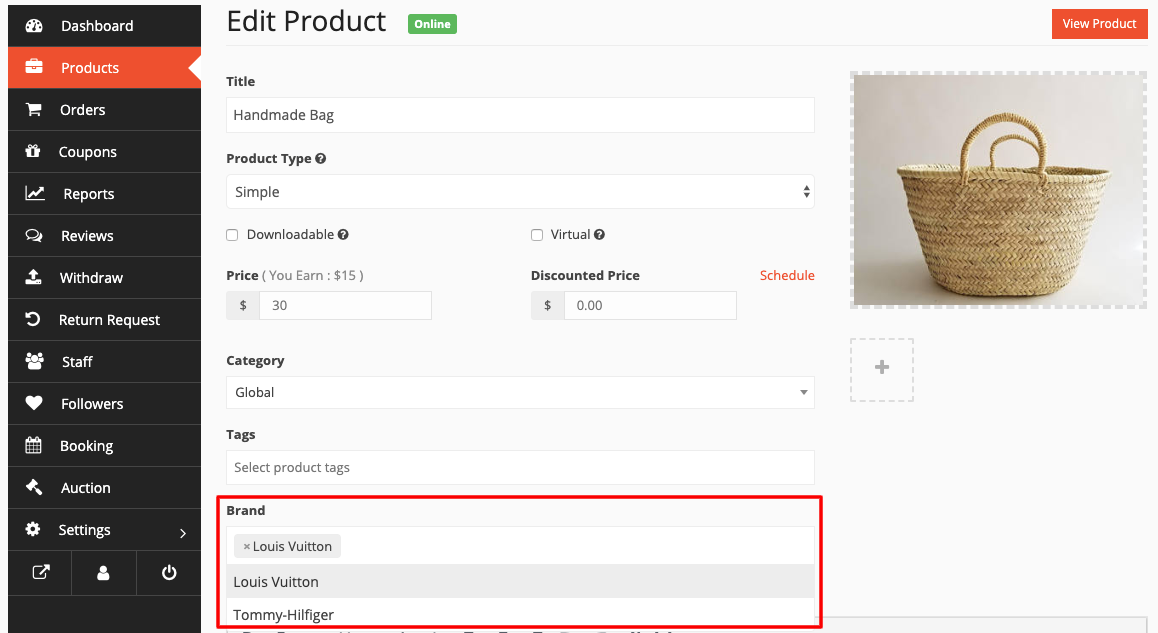
- Vendors simply need to navigate to Vendor dashboard>Products>Edit Product or Add New Product.
- Scroll down to Brands then select from the available labels that apply for the product.
- Click on Save Product.
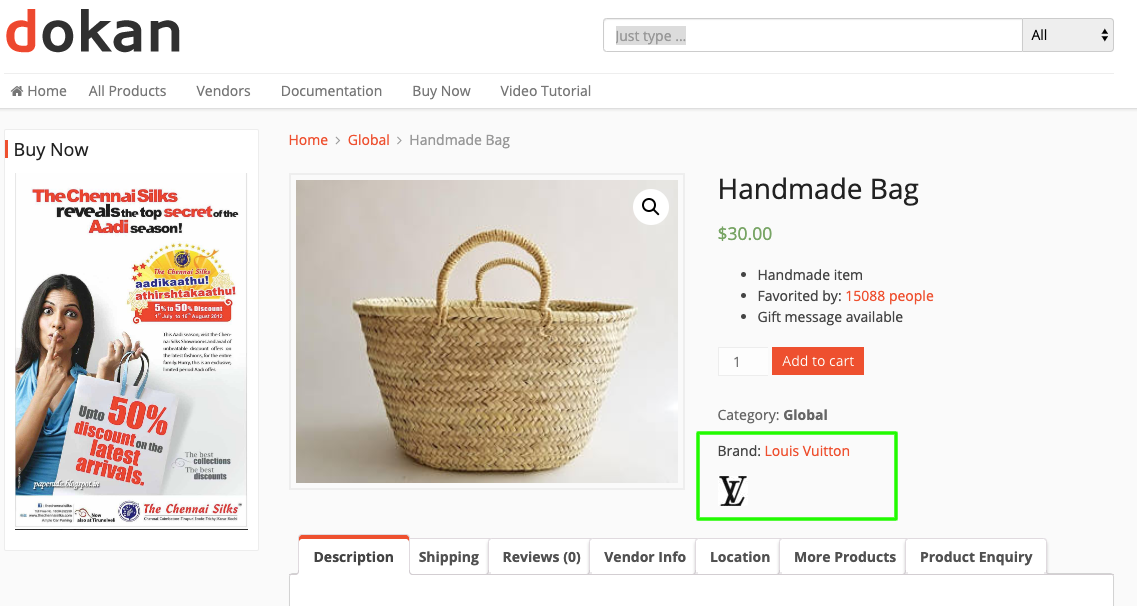
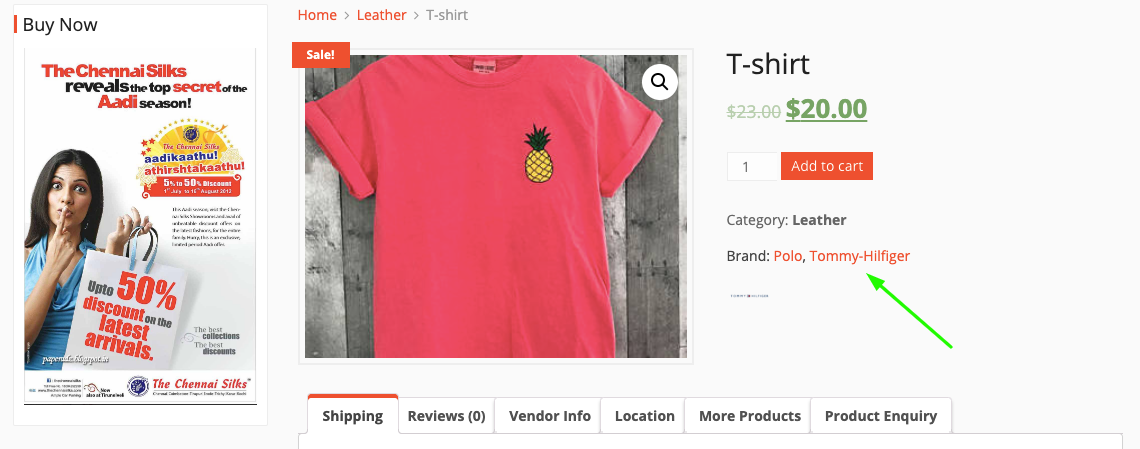
Frontend View
Users and customers will now be able to view the Brand from the single product page in this way:
This completes setting up Dokan YITH WooCommerce Brands.
You can check out this video as well-