Now vendors can set the minimum/maximum order amount for customers using Dokan. That means in order to complete the order customers will have to choose a set quantity of products or his/her subtotal amount has to match a certain amount.
There are two types of Minimum/Maximum order type,
- Minimum/Maximum order based on product quantity
- Minimum/Maximum order based on total order amount.
We are going to show you how to enable this feature for your marketplace.
Activate “Enable Min/Max Quantities” – Admin
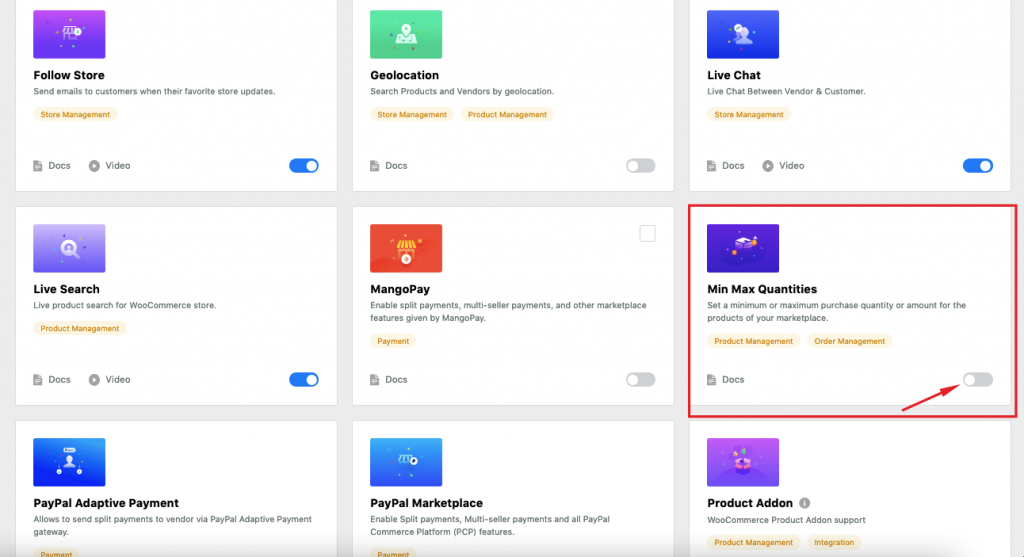
First, navigate to WP-Admin–> Dokan–> Modules and activate the Min-Max Quantities module,
Now admin can enable “Minimum quantity to order” and ” Maximum quantity to order” for individual products from the backend.
You can do that for a new product or you can do that while editing a product as well. Just go to WP-Admin–> Products–> Add New. In the General section you will find the min and max options-

Don’t forget to save the changes.
Min & Max Settings- Vendor
For vendors, they can set amount-based and quantity-based limits from the vendor dashboard.
To set amount-based limits just login to vendor dashboard and go to Settings–> Store. There set the amount for “Minimum amount to place an order” and “Maximum amount to place an order“-
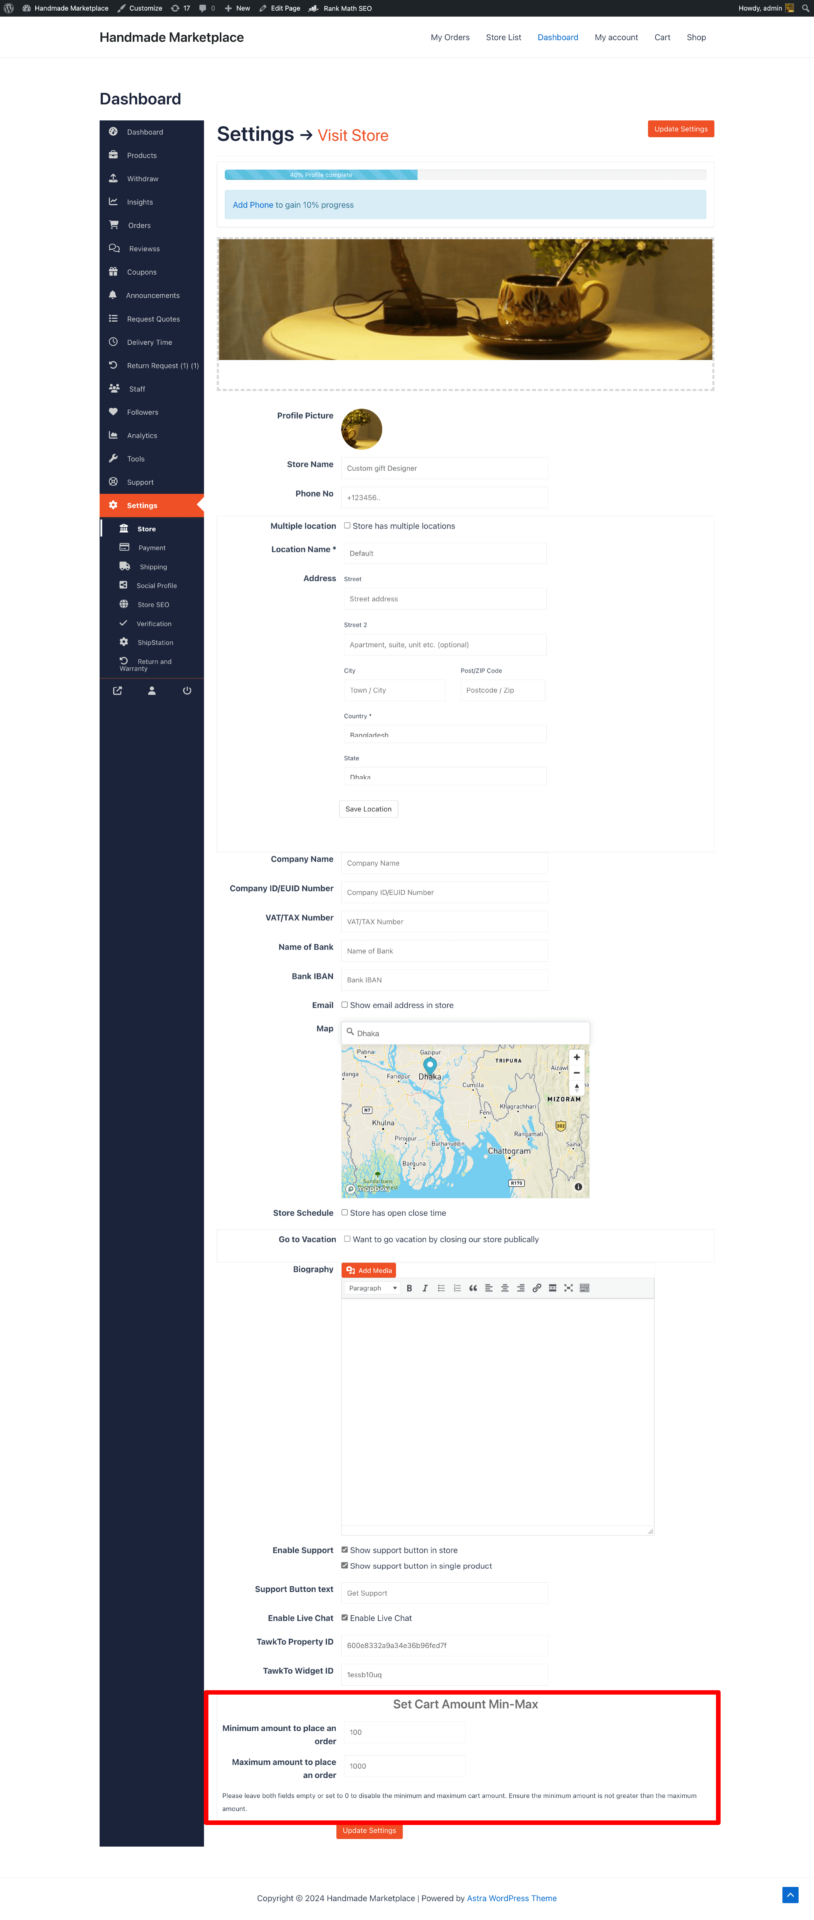
Don’t forget to save changes.
To set quantity-based limits from the vendor dashboard, vendors can do that while adding or editing a product. Just go to Vendor Dashboard–> Products, there the vendors will find the min and max options-
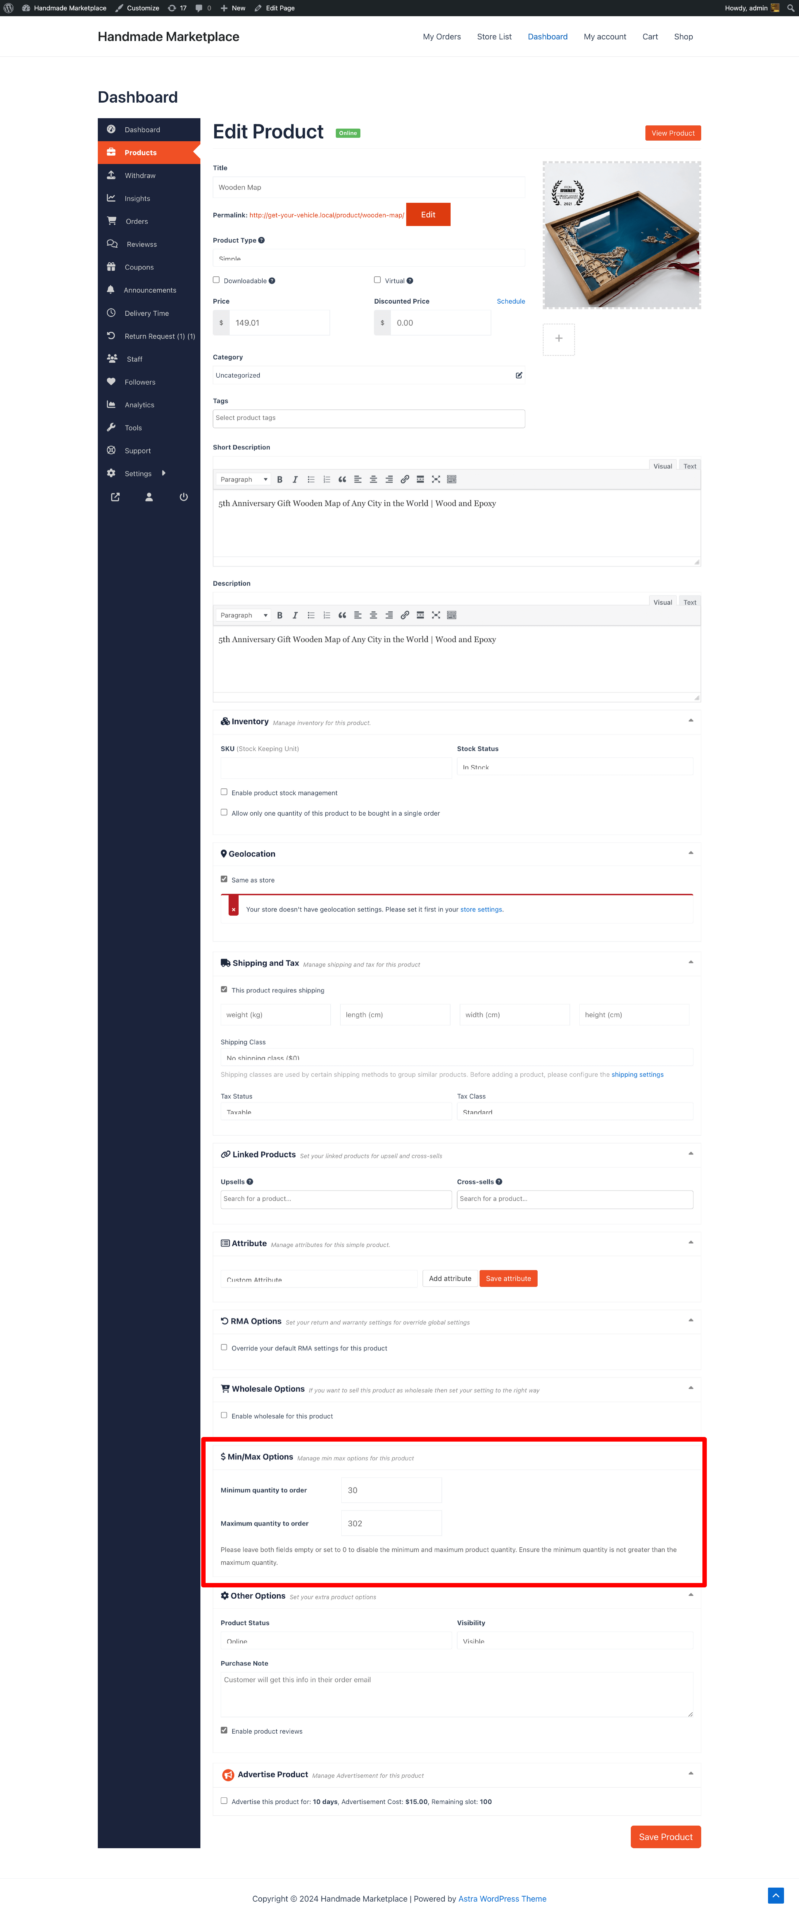
Save the product.
Min & Max Feature for Variation Product
Vendors can set Min & Max option for variable products as well. Vendors needs to set individual min and max quantity for every variations.
When you create a variation, in the collapsed menu section, vendor will find the “Minimum Quantity” and “Maximum Quantity” option under Order Min Max Settings–
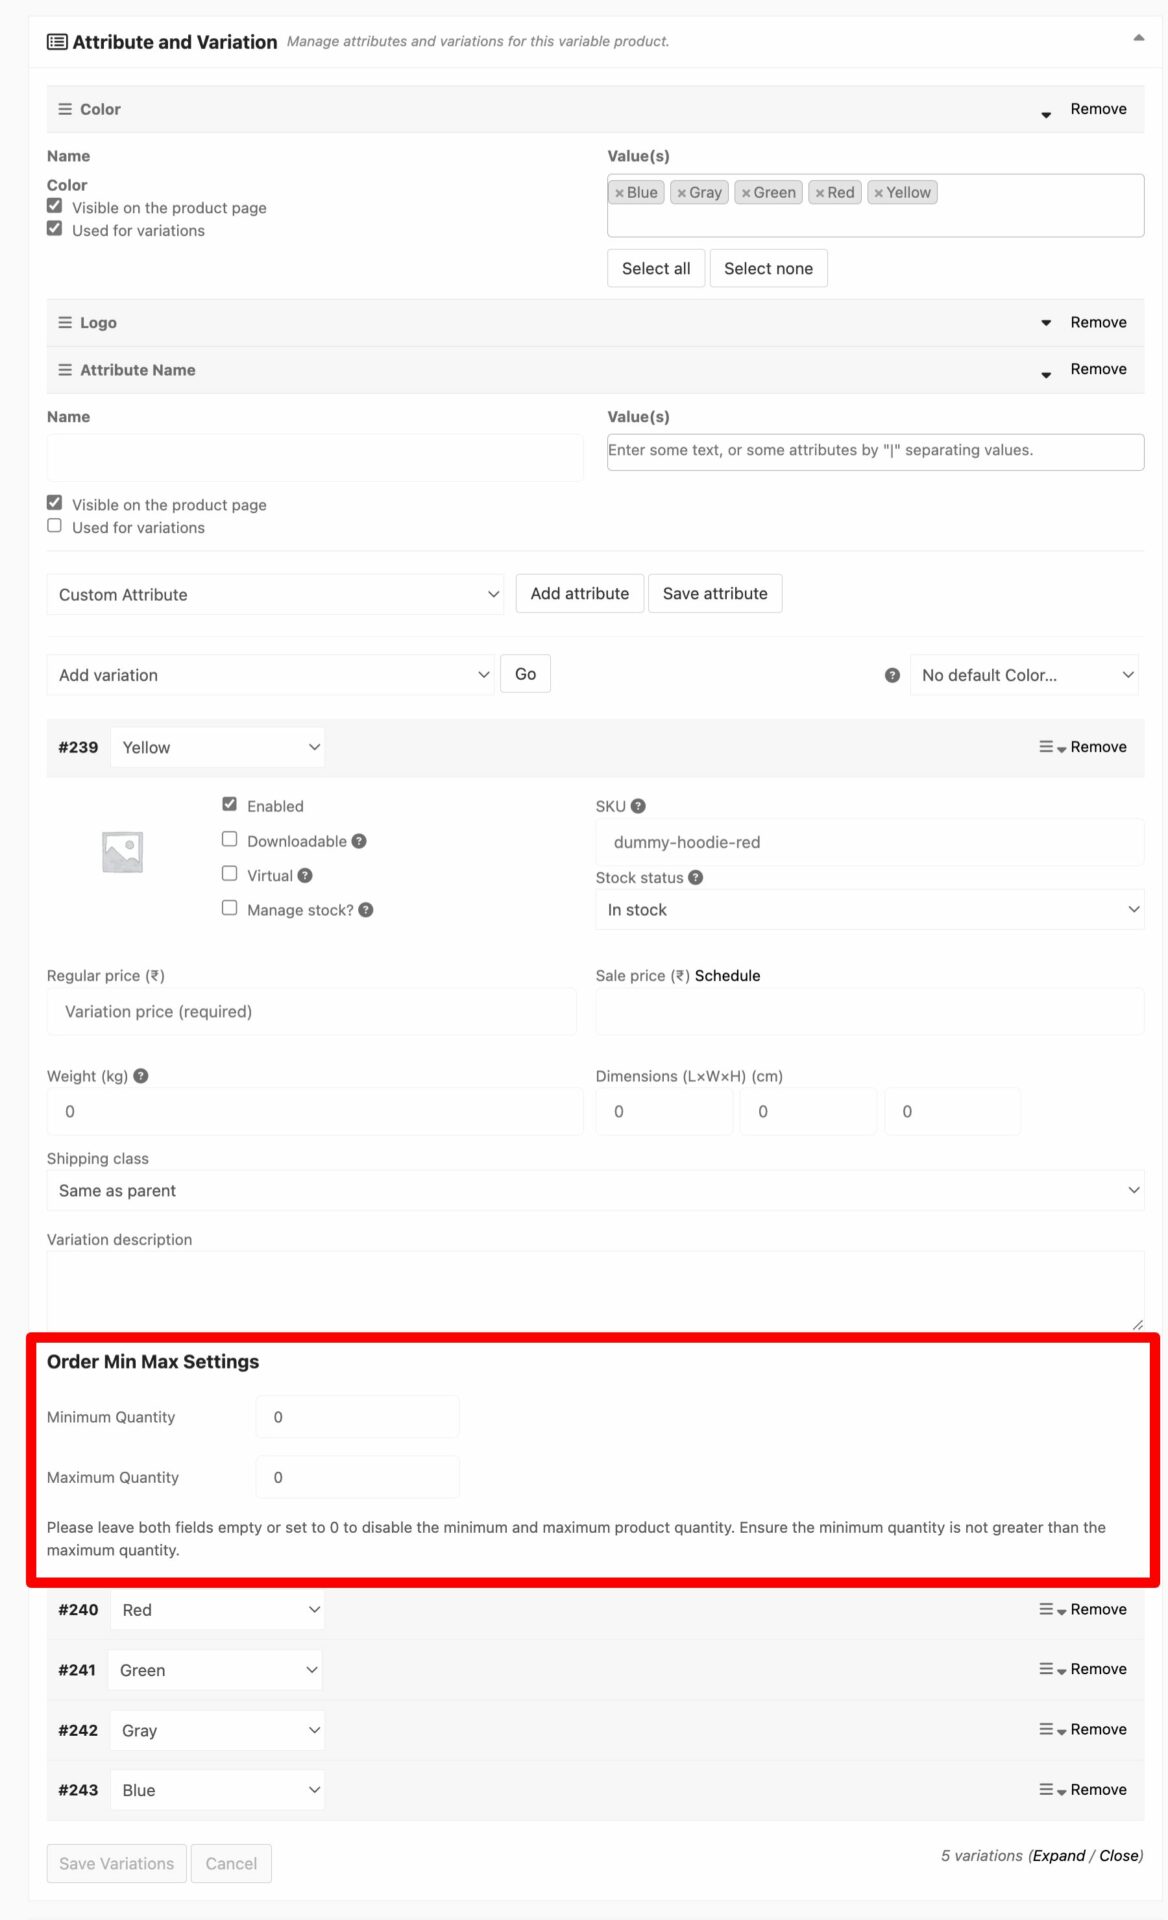
This is how you can create min and max quantity for individual variations.
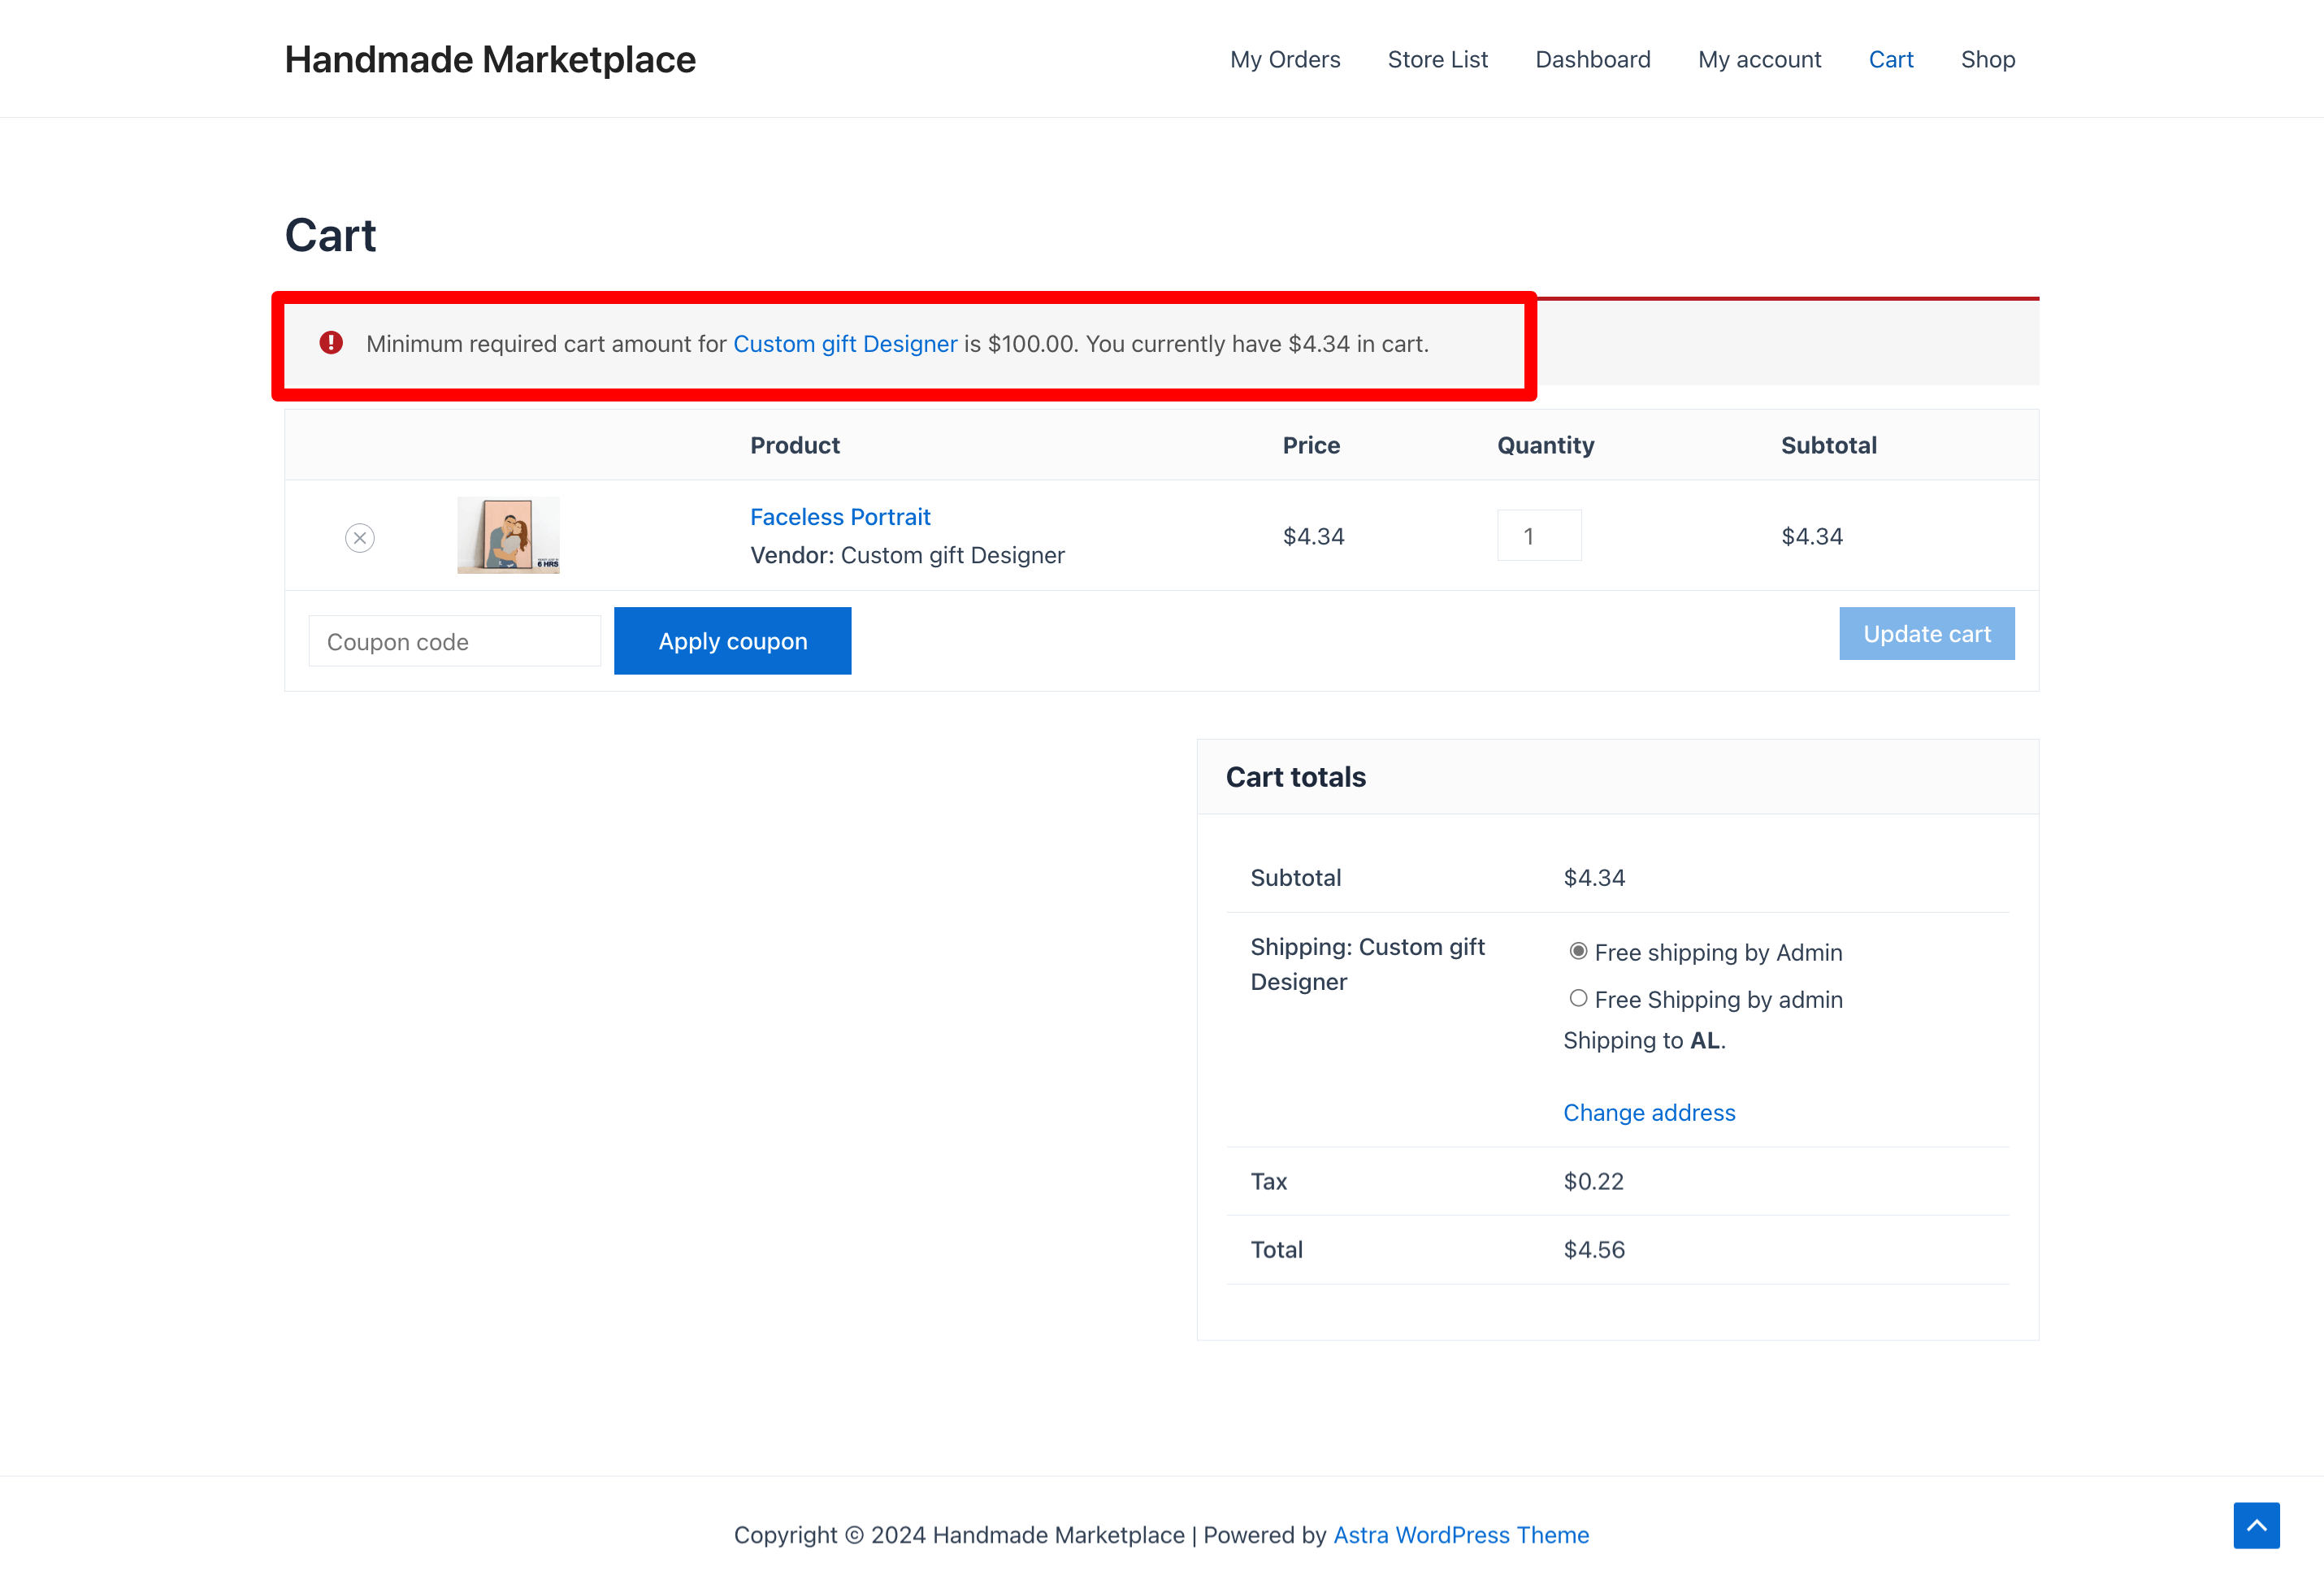
Min & Max Module- Customer View
When the customer adds less than the minimum order amount, they will see this message in the cart-
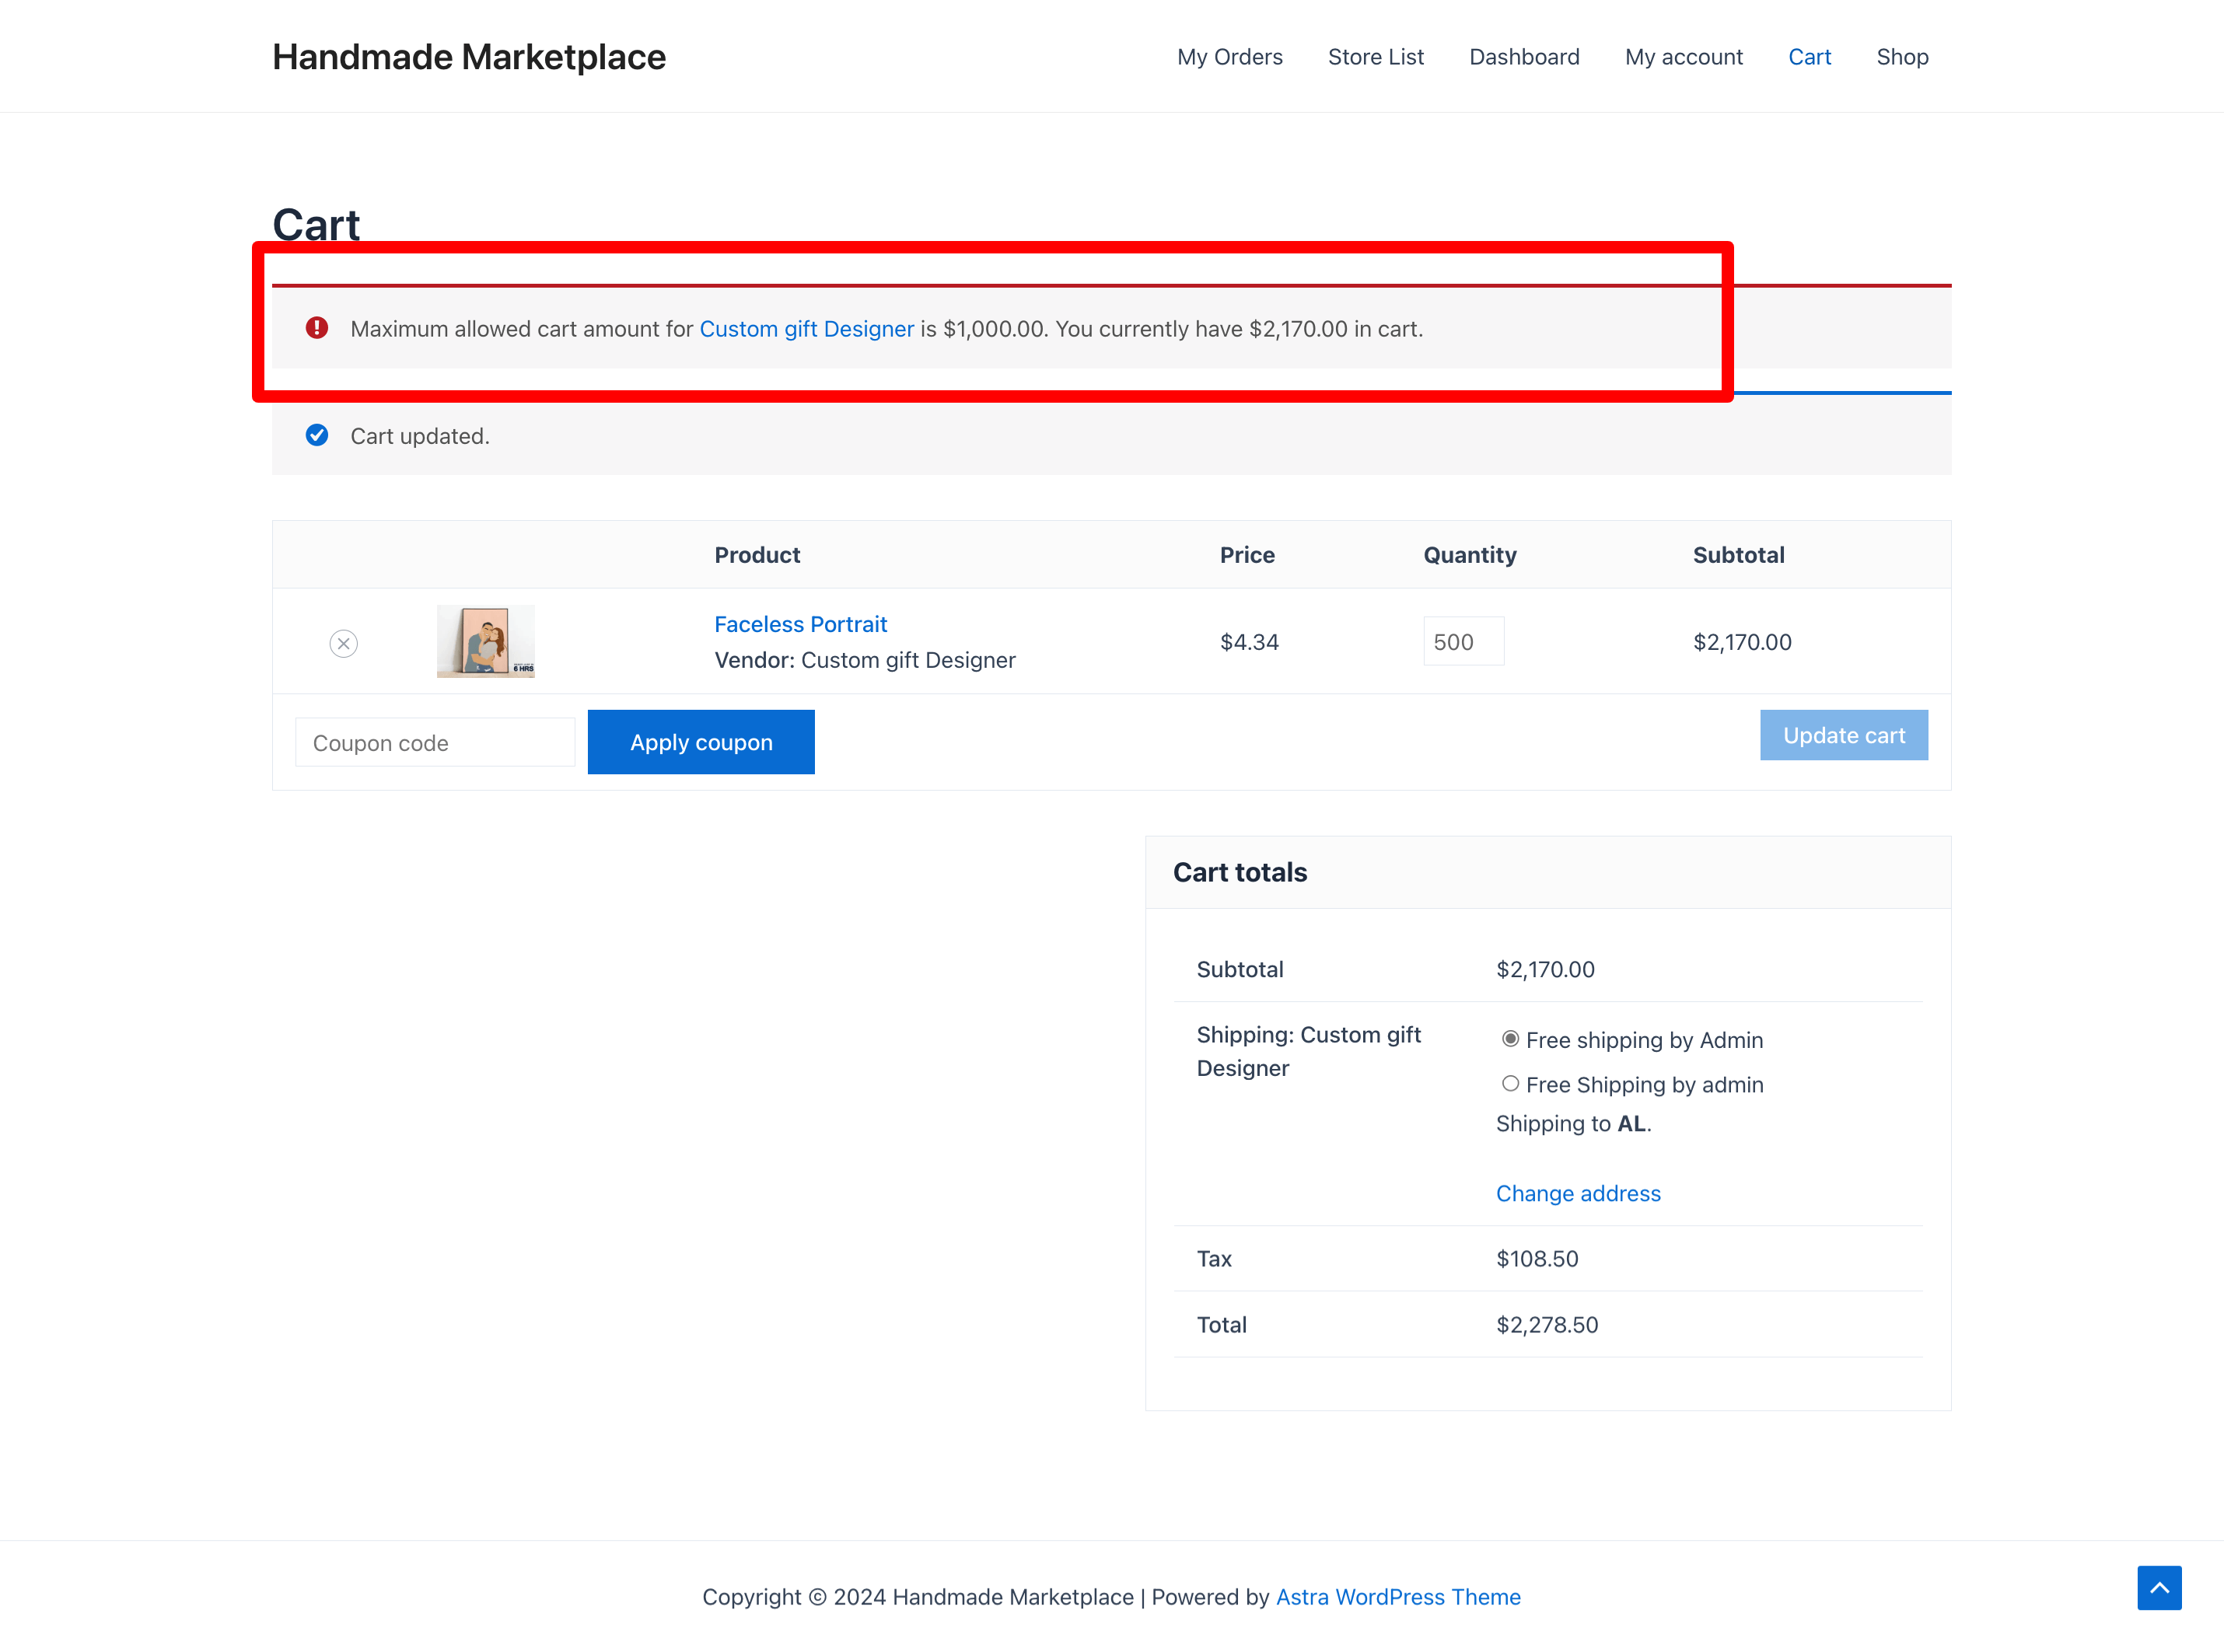
And in case of going over the maximum order amount-
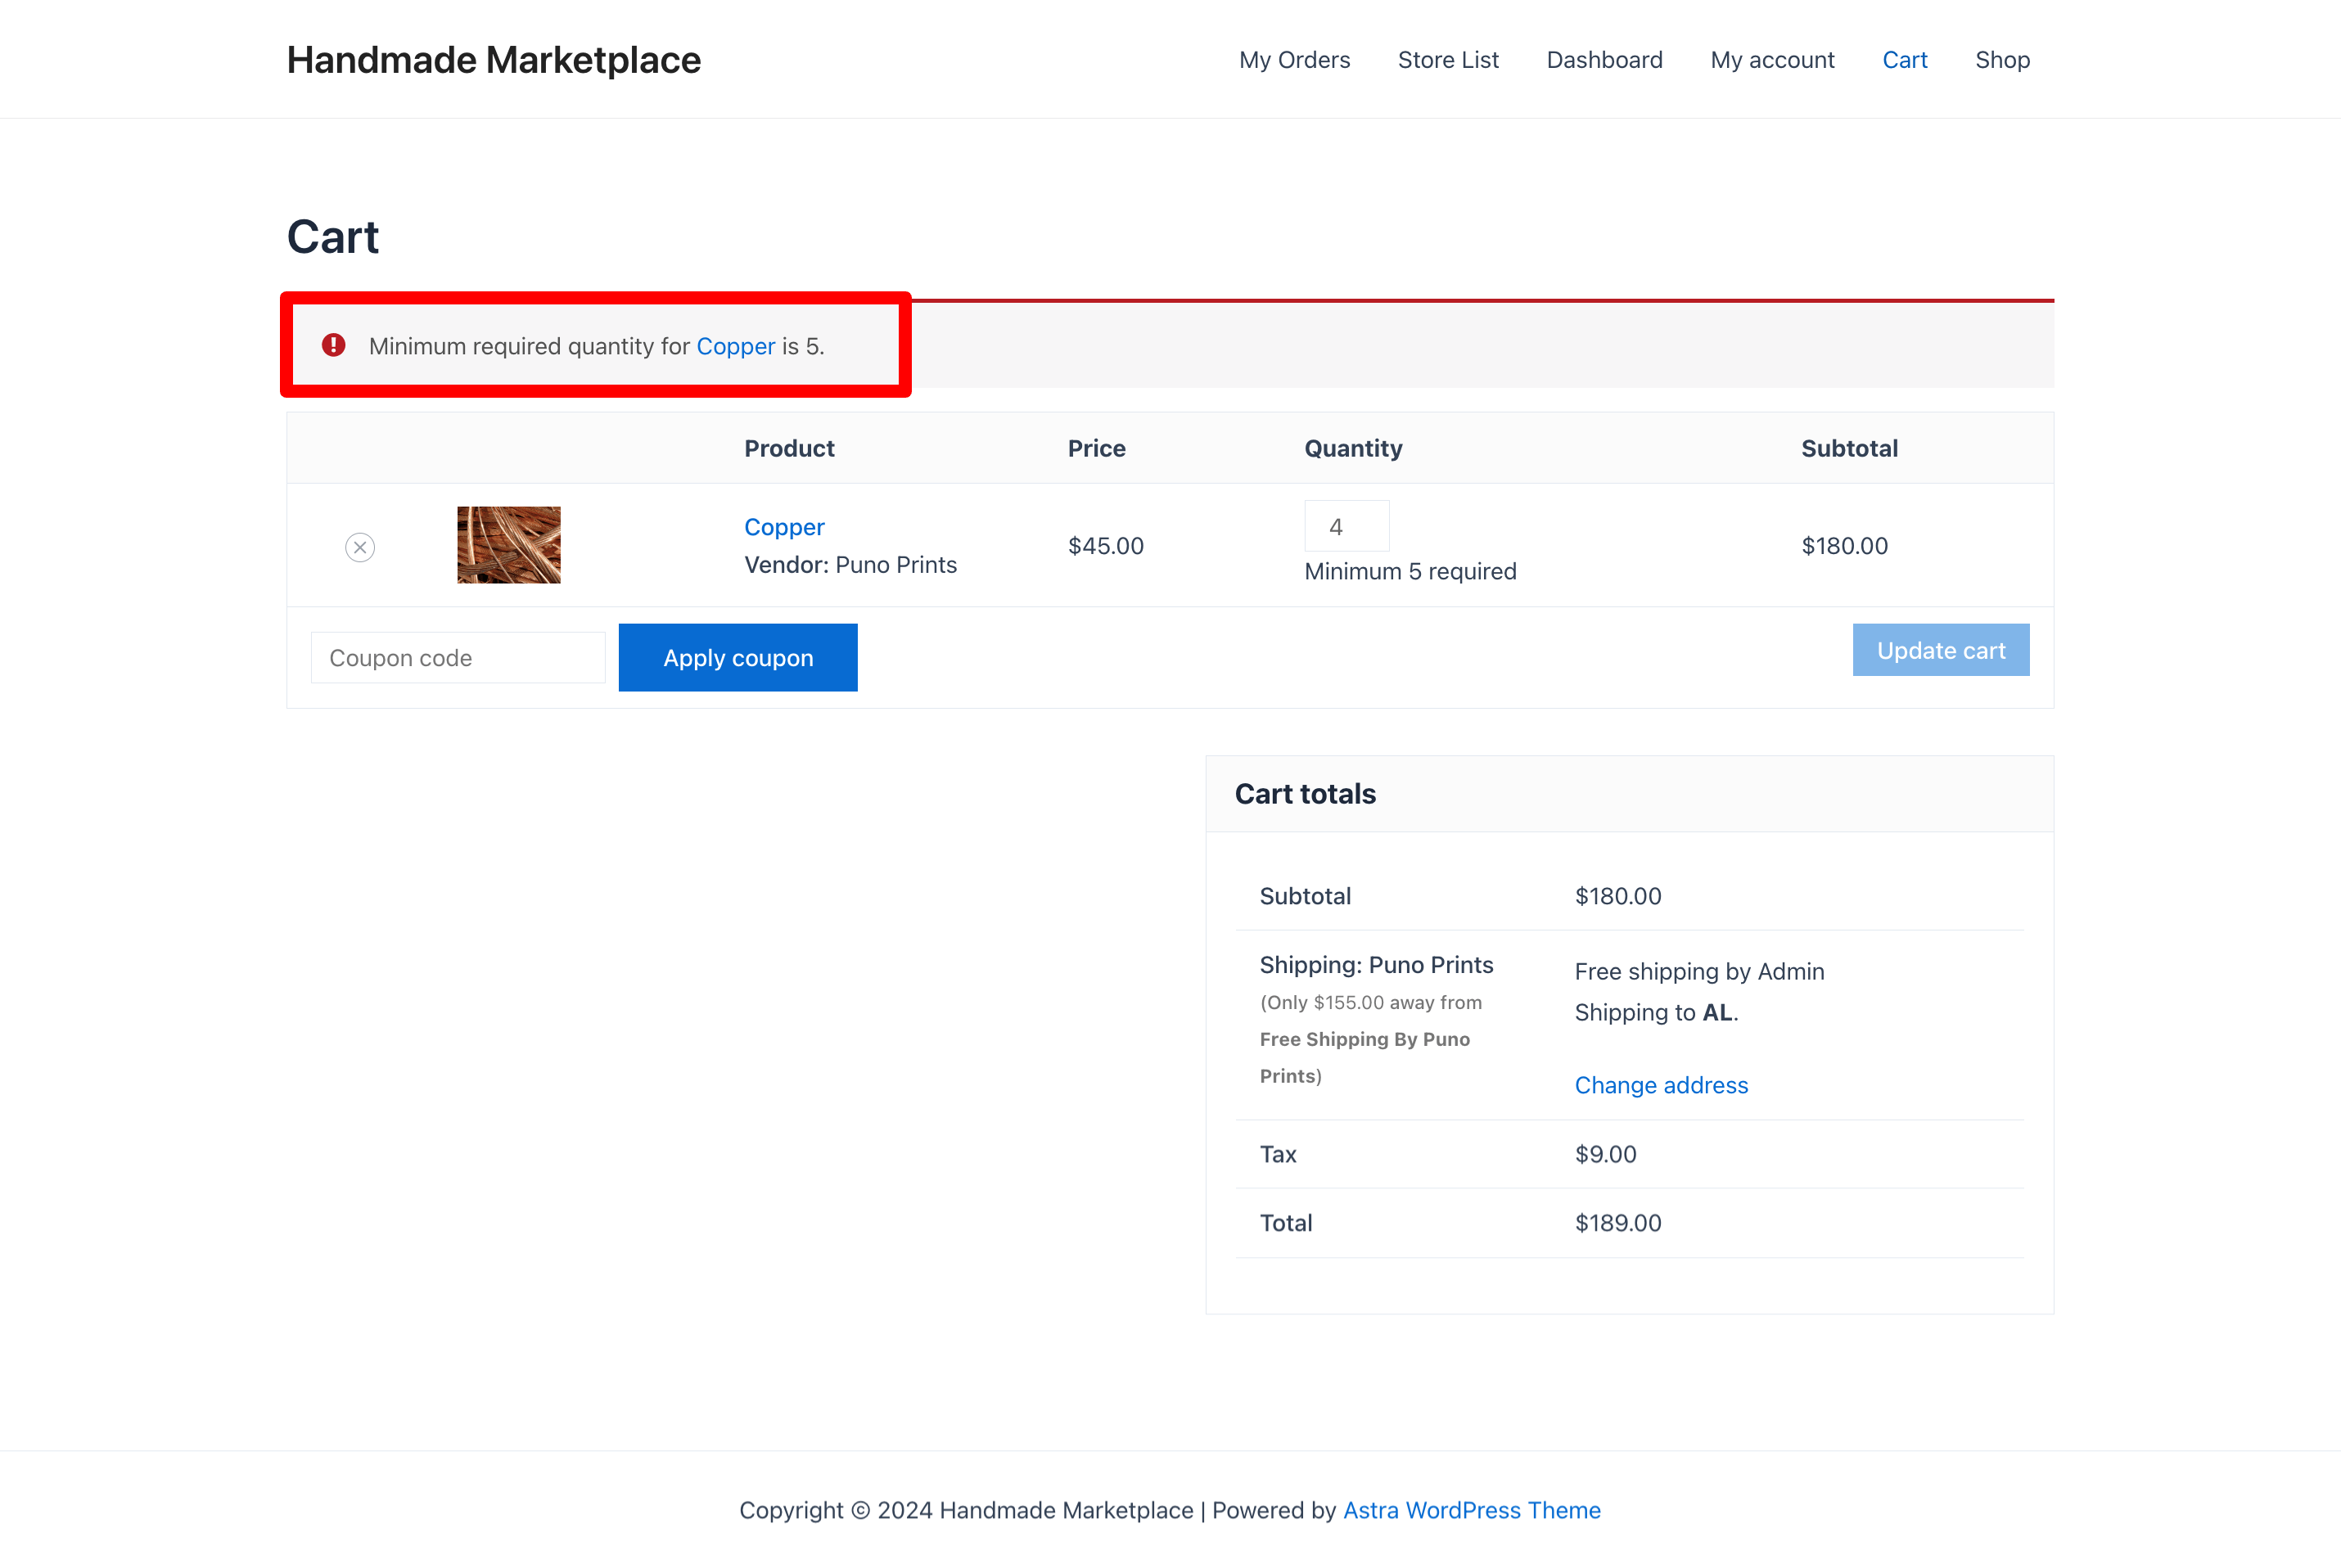
When the customer has less number of products than the minimum quantity-
And for going over the required quantity of products to order-
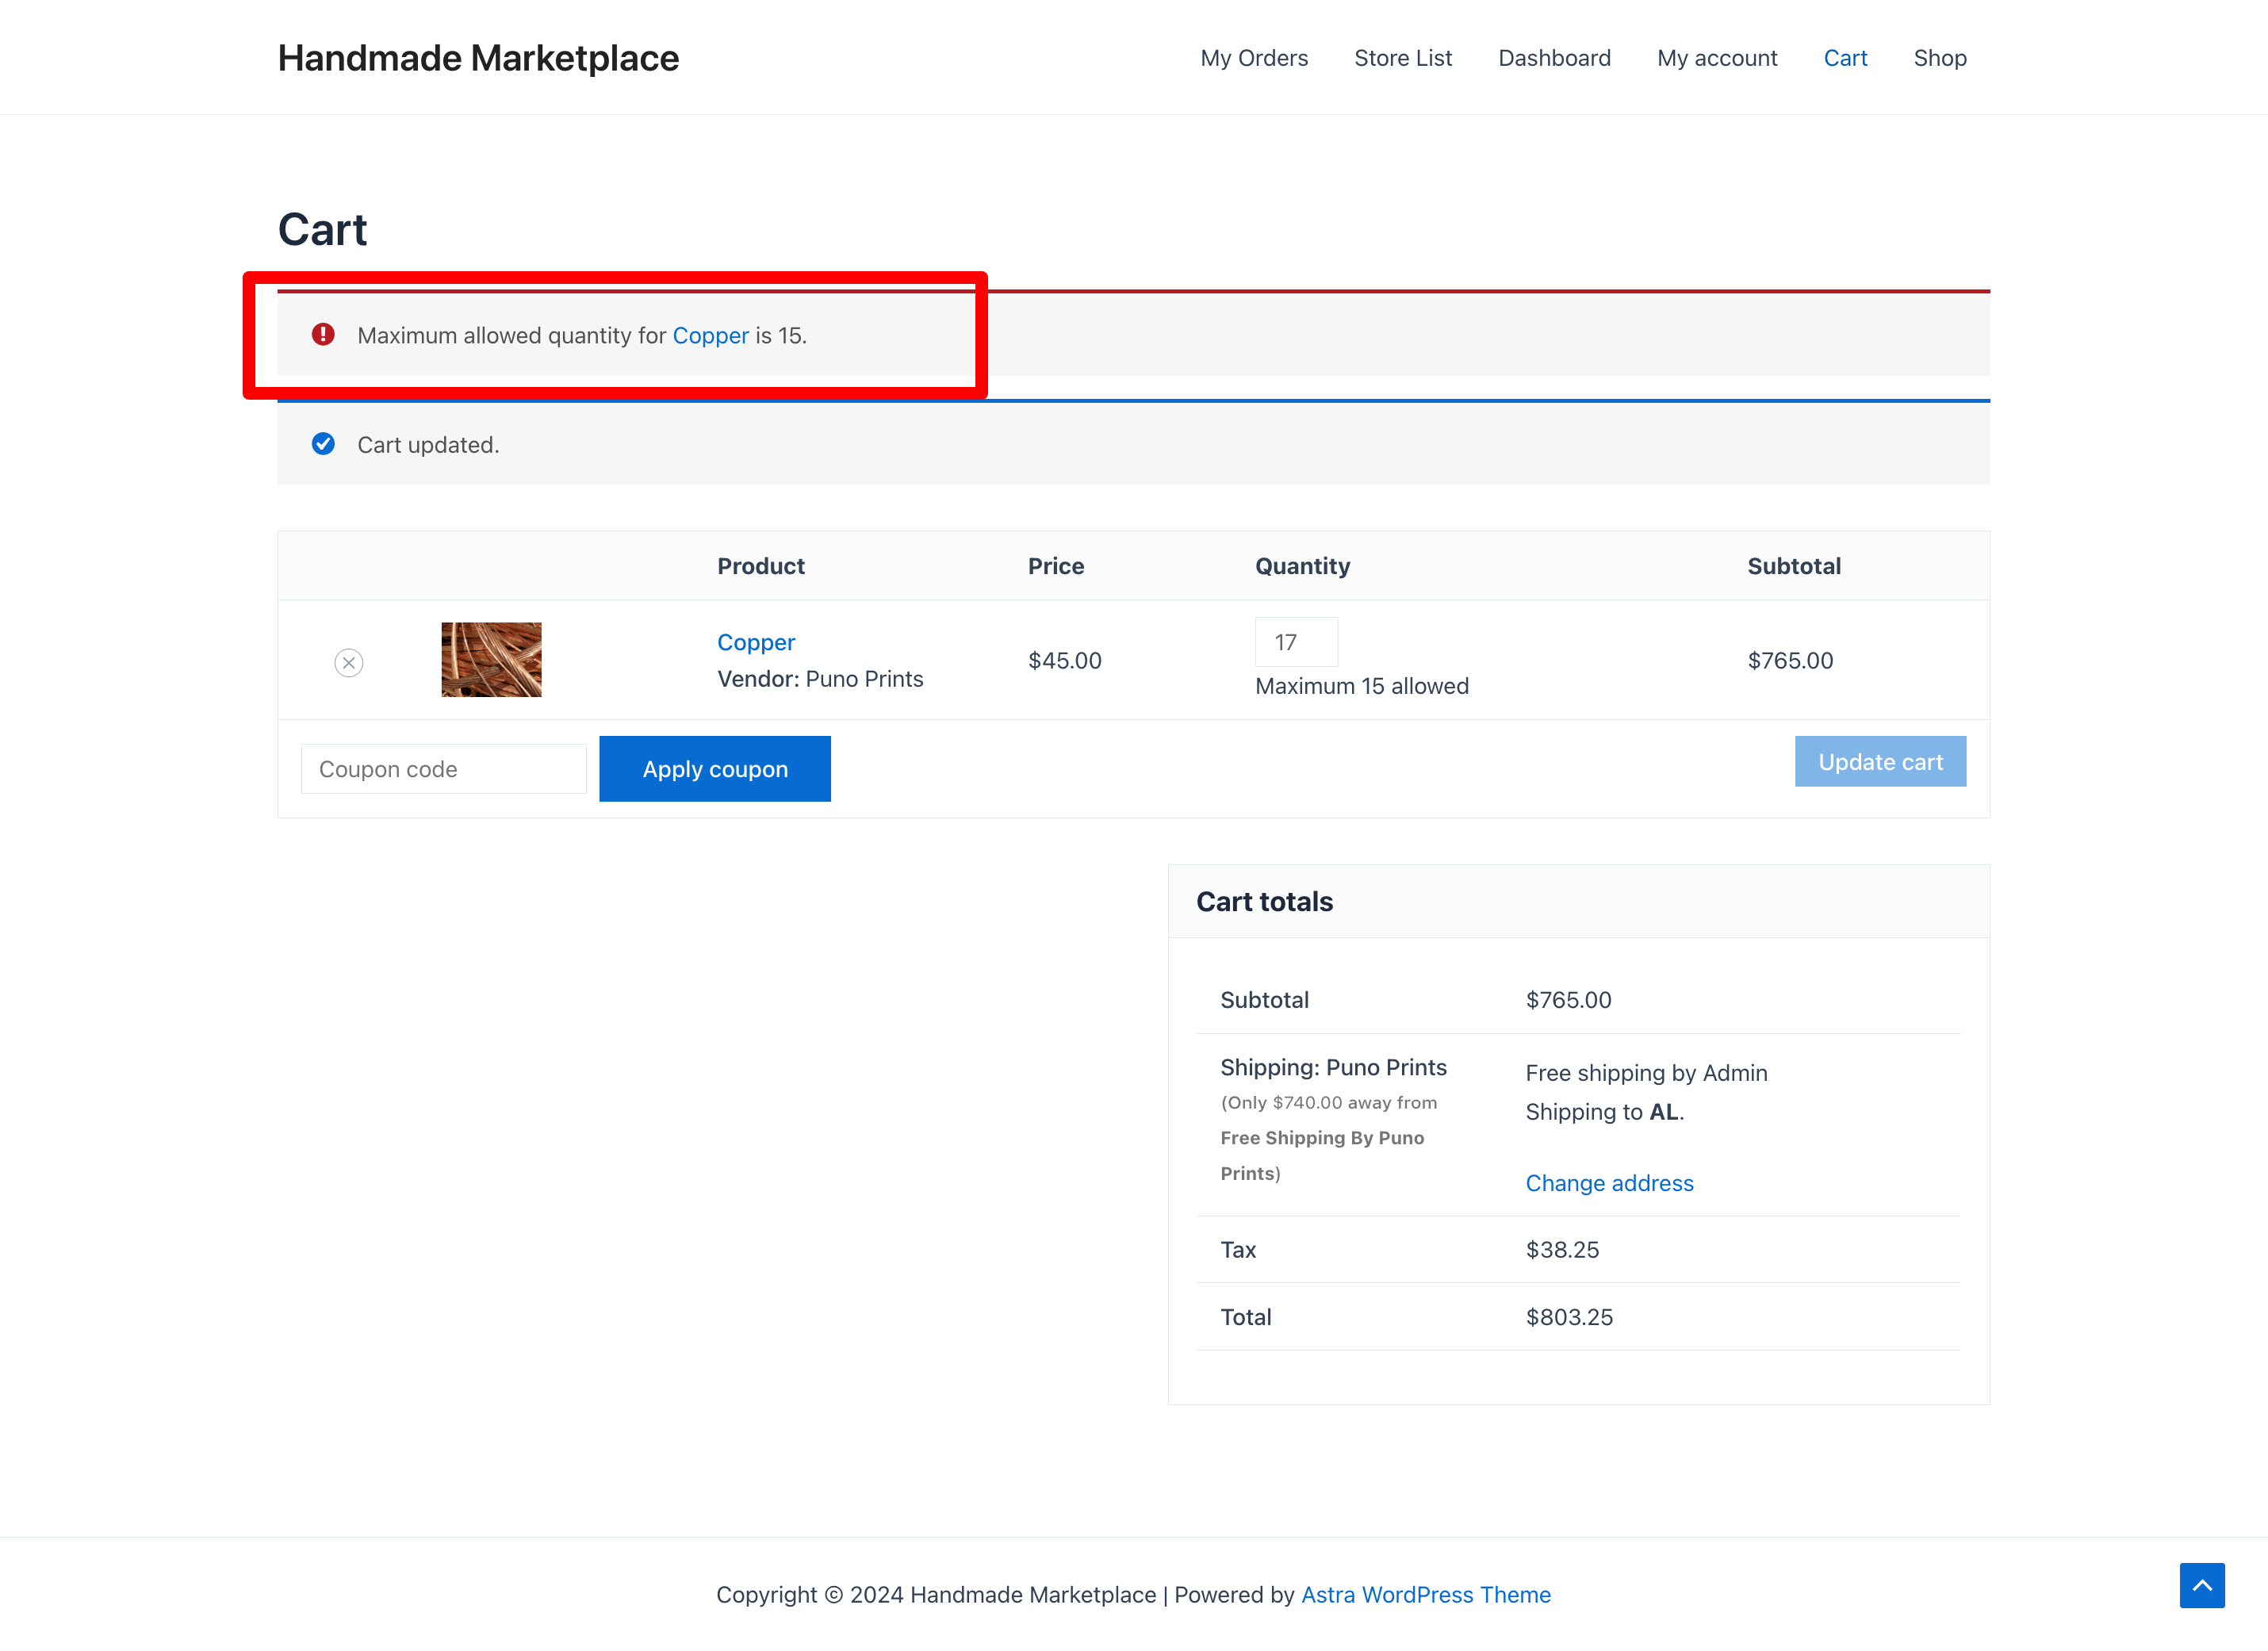
This is how the Minimum and Maximum Module works.
Important Notes:
- If discounts are available and applied, the min-max restrictions are checked after the discount application.
- If RFQ (Request for Quote) is enabled for any product or in the cart, quantity and amount restrictions are not applied
- The Order Min Max feature is ignored for subscription products.
- The Order Min Max feature is ignored for bookable products.
For Wholesale Module-
1. When editing a product, if wholesale is enabled, the min-max quantity fields will not be hidden.
2. For wholesale-enabled products:
– Quantity modifications on single product pages or in the cart are not restricted.
– If the user is eligible for wholesale prices, cart quantity and amount restrictions are not applied.
– If the user is not eligible for wholesale prices, cart quantity and amount restrictions are applied normally.
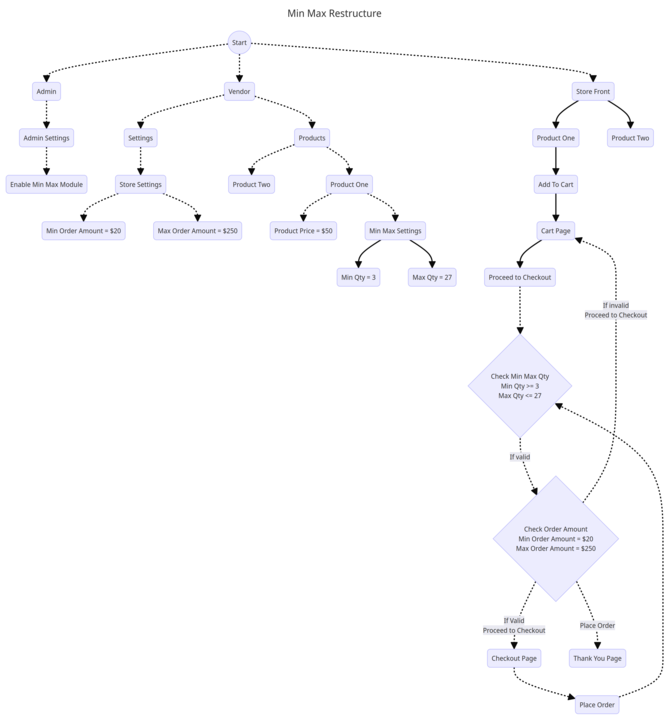
For more understanding you can check out the User FlowChart of the Min/Max Module-