
In this article, we will learn how to configure the Dokan appearance (Store Header Template) settings. To do that, we have to navigate to WP-Admin → Dokan → Settings → Appearance → Vendor Panel.
Vendor Panel settings
The Vendor Panel page lets you choose between the New UI and the Legacy UI for three parts of the vendor dashboard. Go to Dokan > Settings > Appearance > Vendor Panel. You will find these options under Vendor Dashboard Appearance.
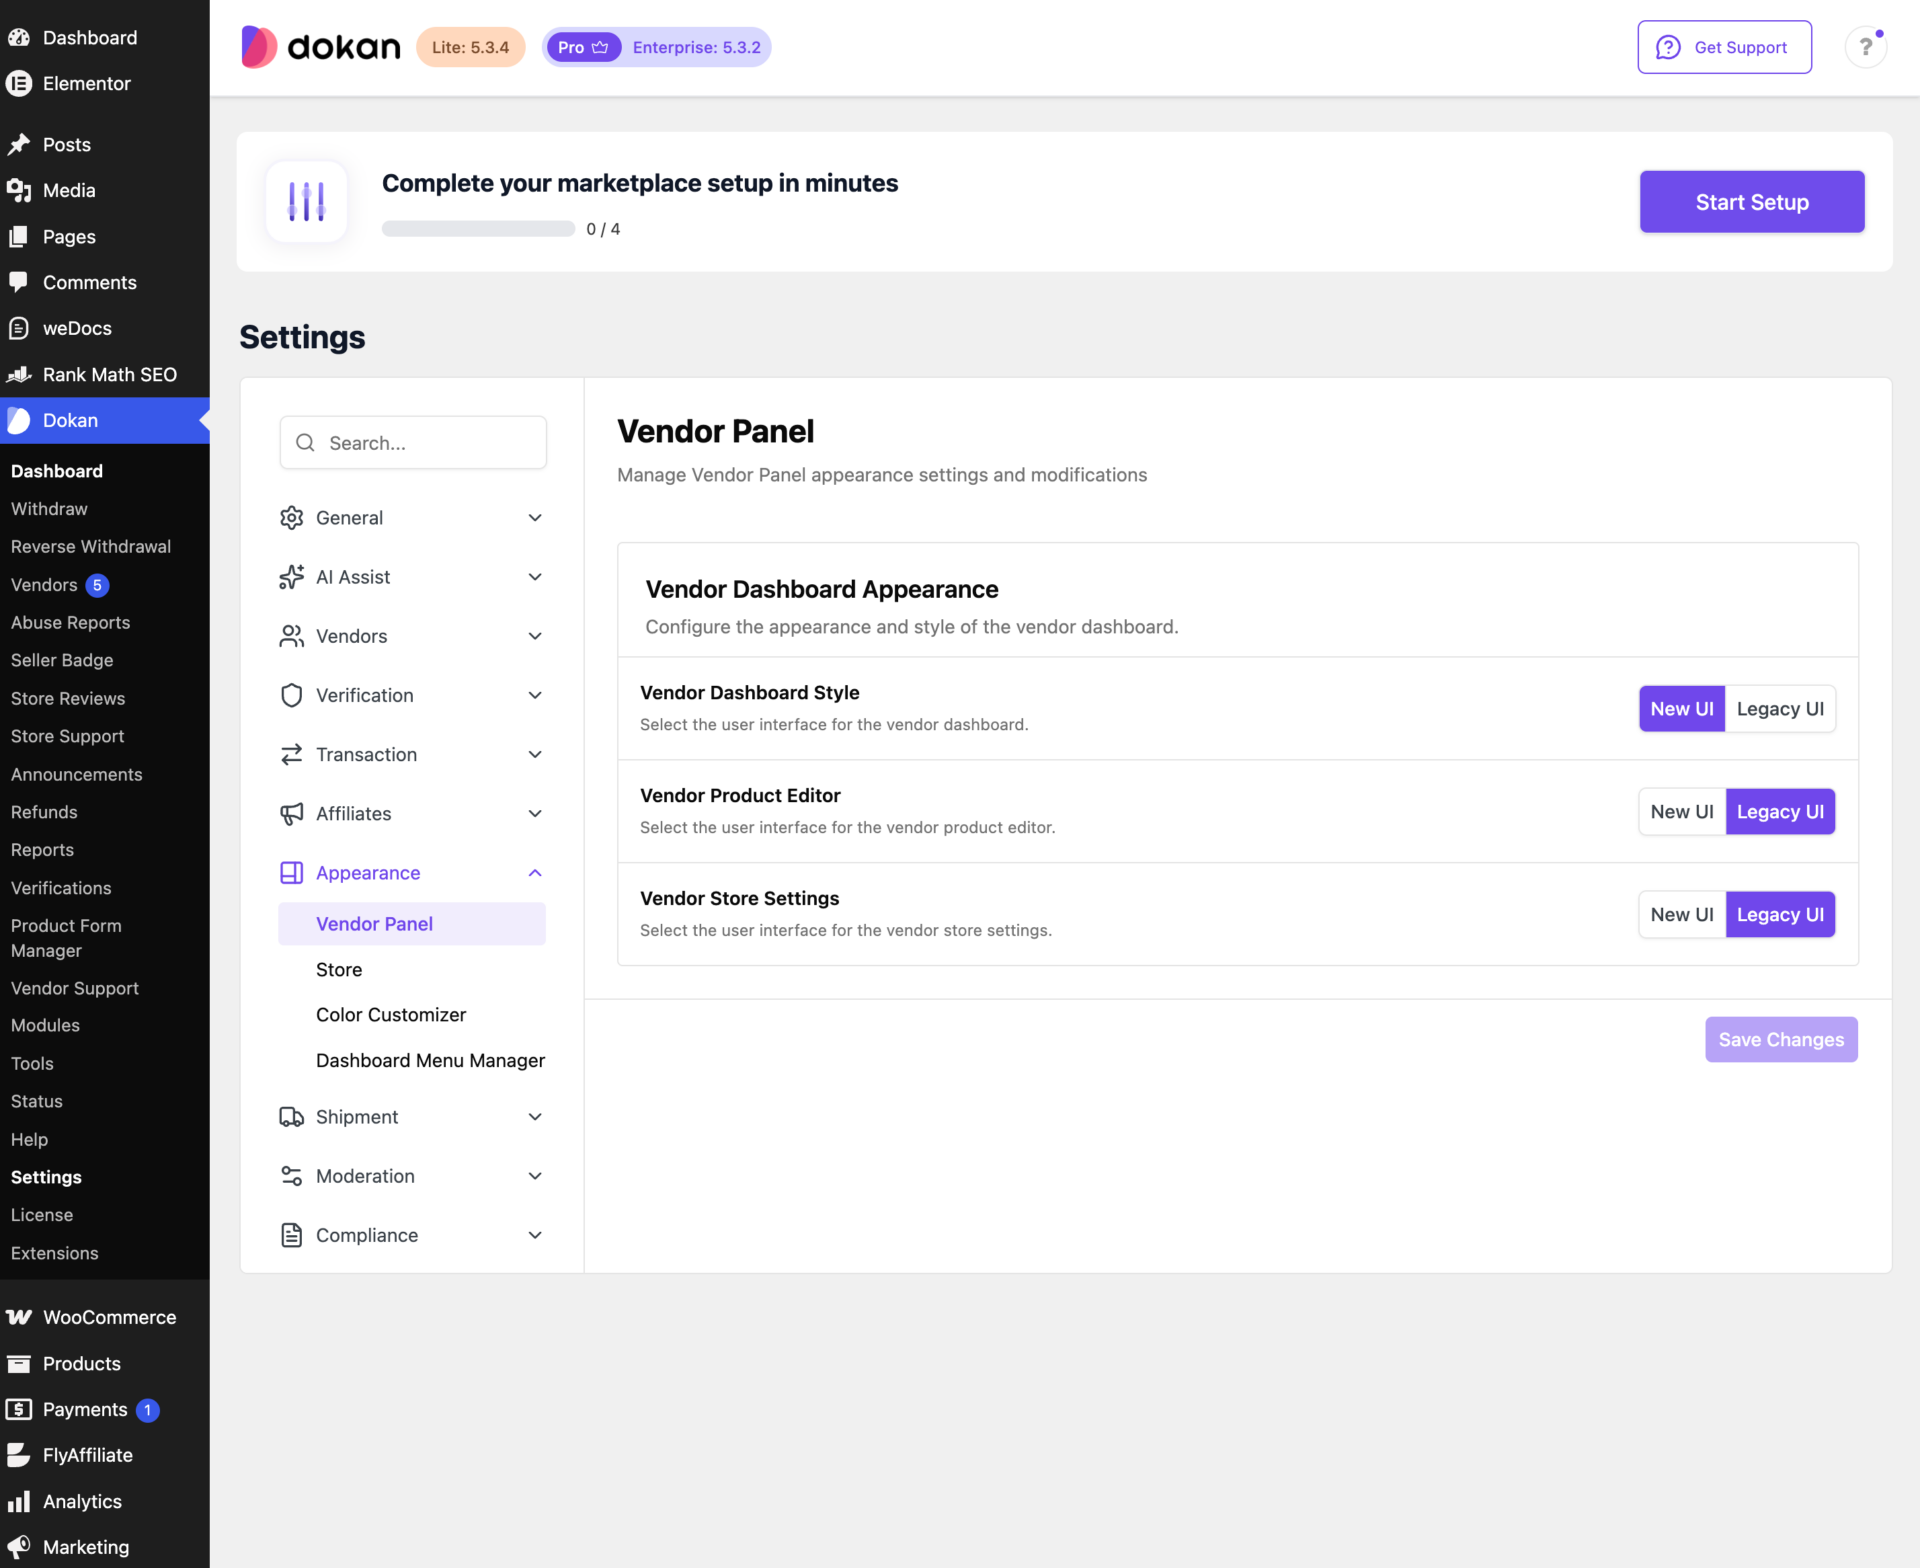
| Setting | What it controls | Options |
|---|---|---|
| Vendor Dashboard Style | The user interface for the vendor dashboard | New UI / Legacy UI |
| Vendor Product Editor | The user interface for the vendor product editor | New UI / Legacy UI |
| Vendor Store Settings | The user interface for the vendor store settings | New UI / Legacy UI |
To set them:
- For Vendor Dashboard Style, click New UI or Legacy UI.
- For Vendor Product Editor, click New UI or Legacy UI.
- For Vendor Store Settings, click New UI or Legacy UI.
- Click Save Changes.
Each setting works on its own. For example, vendors can use the New UI dashboard while still editing products in the Legacy UI.
Store settings
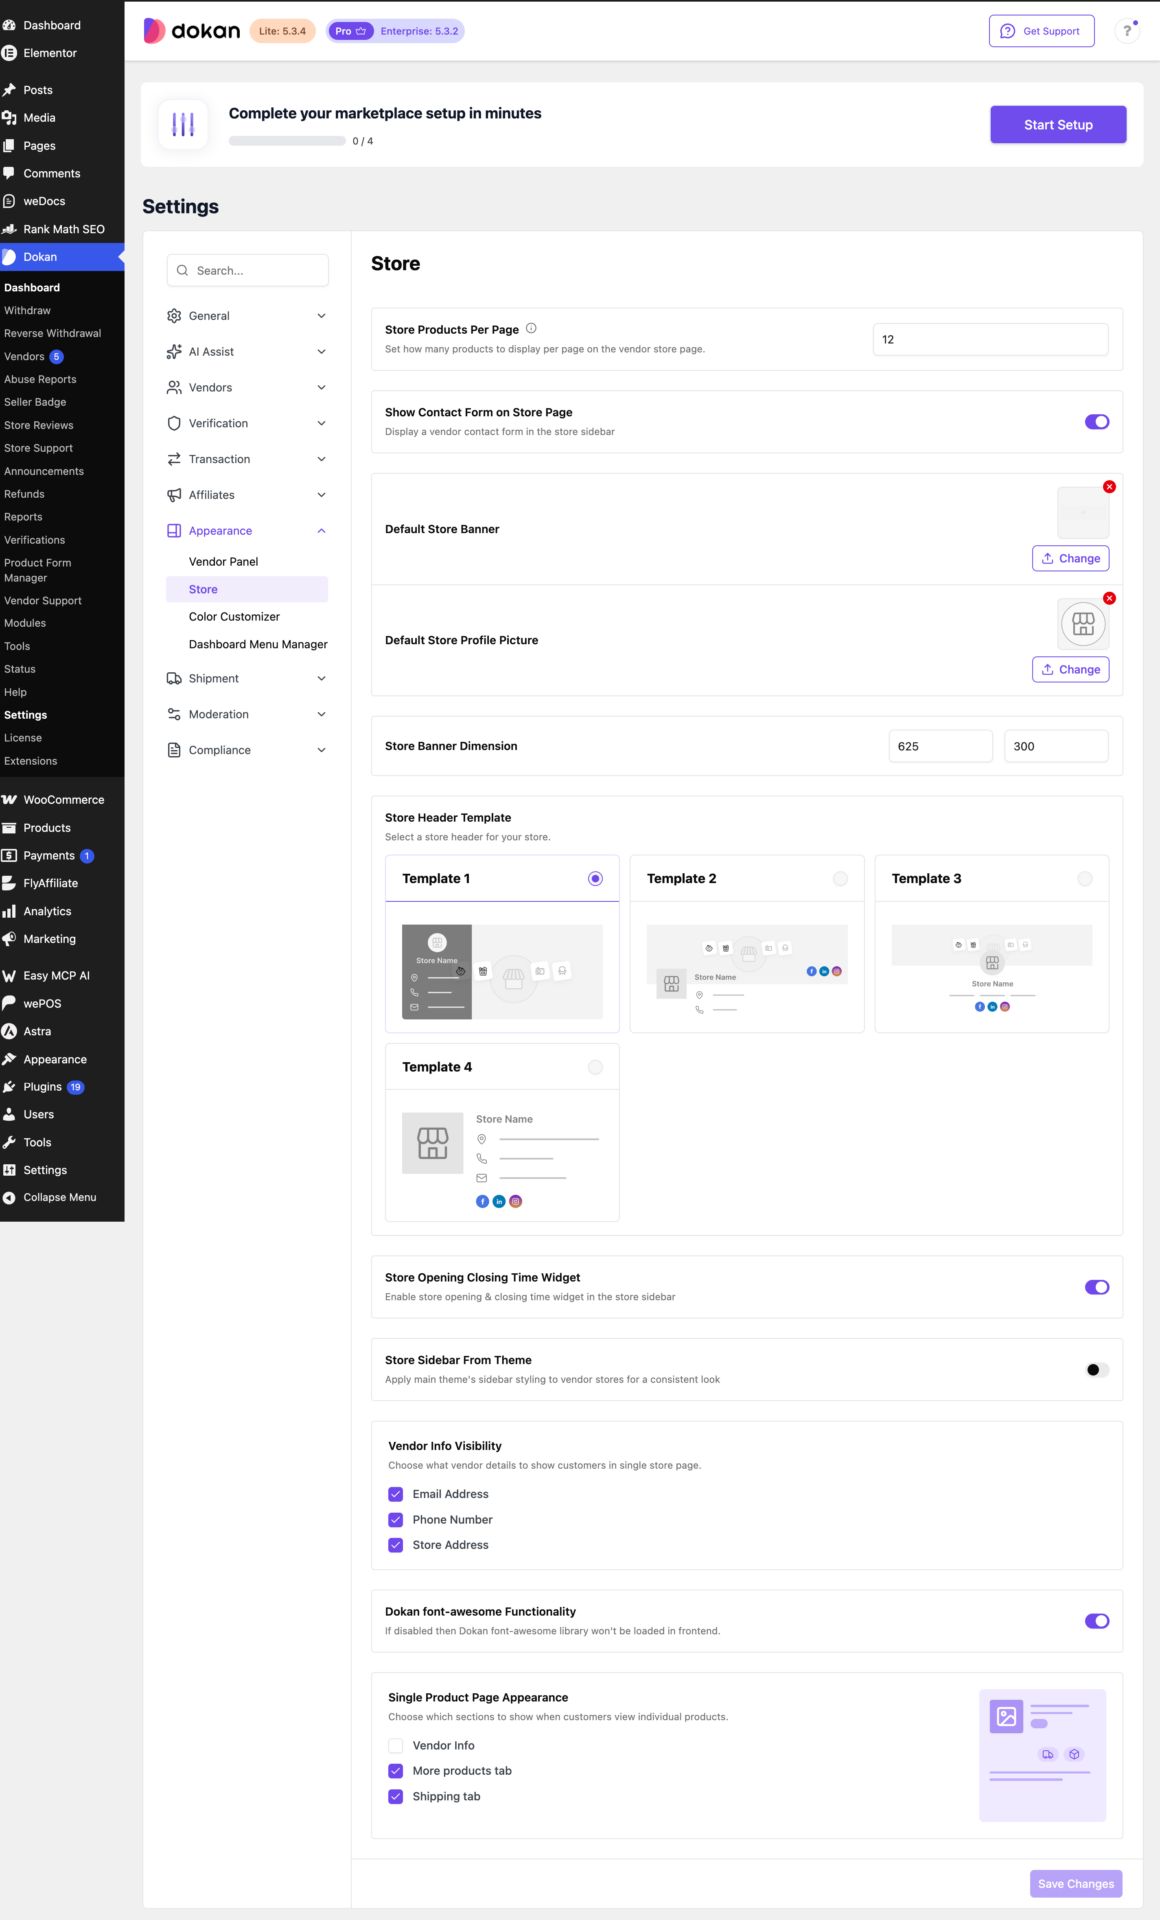
The Store page controls what customers see on each vendor’s store page and on single product pages. Go to Dokan > Settings > Appearance > Store.
Store layout
- Store Products Per Page: enter how many products show per page on the vendor store page. The default is 12.
- Show Contact Form on Store Page: turn this on to show a vendor contact form in the store sidebar.
- Default Store Banner: click Change to upload the banner used when a vendor hasn’t added their own. Click the red x to remove the current one.
- Default Store Profile Picture: click Change to upload the profile picture used when a vendor hasn’t added their own. Click the red x to remove the current one.
- Store Banner Dimension: enter the banner width in the first field and the height in the second. The default is 625 x 300.
Store header template
Under Store Header Template, pick one of four header layouts for your vendor store pages:
| Template | Layout |
|---|---|
| Template 1 | Banner with a dark side panel that shows the store logo, store name and contact details |
| Template 2 | Banner with the store logo and name at the bottom left, contact details below and social icons on the right |
| Template 3 | Banner with the store logo, name and social icons centered below it |
| Template 4 | No banner. The store logo sits on the left with the store name, contact details and social icons beside it |
Click the radio button on the template you want. Template 1 is selected by default.
Sidebar and widgets
- Store Opening Closing Time Widget: turn this on to show the store’s opening and closing time widget in the store sidebar.
- Store Sidebar From Theme: turn this on to apply your main theme’s sidebar styling to vendor stores for a consistent look.
Vendor Info Visibility
Choose which vendor details customers see on the single store page. Tick or untick:
- Email Address
- Phone Number
- Store Address
Dokan font-awesome Functionality
Keep this on to load the Dokan font-awesome icon library on the frontend. If you turn it off, Dokan won’t load the library on the frontend. Only turn it off if your theme or another plugin already loads font-awesome.
Single Product Page Appearance
Choose which sections show when customers view a single product. Tick or untick:
- Vendor Info
- More products tab
- Shipping tab
Save your changes
When you’re done, click Save Changes at the bottom of the page. Save each page separately: changes on Vendor Panel and Store are saved on their own pages.
That’s it. Visit a vendor store page and the vendor dashboard to check the new look.