Marketplace owners have struggled to sort out the commission system for Cash On Delivery (COD) payment gateway. They had to monitor the transactions manually and ask vendors for their commission.
With the Dokan reverse withdrawal feature, admins can easily withdraw their commission. This is a Dokan Lite feature, which means you can use this feature for free.
Let’s see how to set up and use this feature on your marketplace.
Pre-requisites:
Configure Reverse Withdrawl Settings – Admin
At first, the admin needs to configure the settings from the backend. For that, navigate to WP-Admin–>Dokan–>Settings. There click on the Reverse Withdrawal feature.
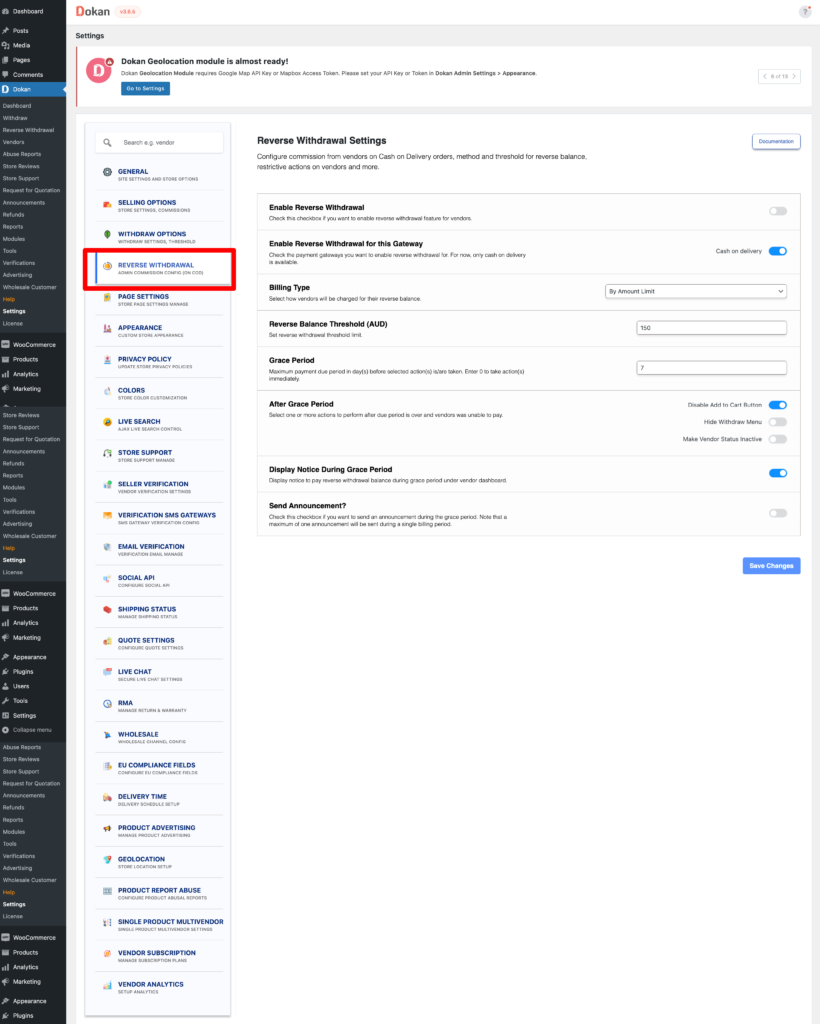
Here you will get a few options,
Enable Reverse Withdrawal: You need to enable this checkbox in order to enable the reverse withdrawal feature for vendors.
Enable Reverse Withdrawal for this Gateway: Choose the payment gateway for reverse withdrawal. For this instance, the payment gateway is Cash on Delivery.
Billing Type: You can charge your vendors in two ways.
- By Amount Limit: You can set an amount threshold. So when that threshold is crossed the vendors need to pay the dues.
- Monthly: Or you can charge your vendors on a monthly basis. You can set a date, on that date the vendors need to pay the balance from the previous month.
If you choose By Amount Limit,
Reverse Balance Threshold (USD): Add a threshold amount here.
If you choose Monthly,
Monthly Billing Date: Add the billing date. On that date, an invoice will be sent to the vendor and also vendors will see a notice about the due payment on their dashboard.
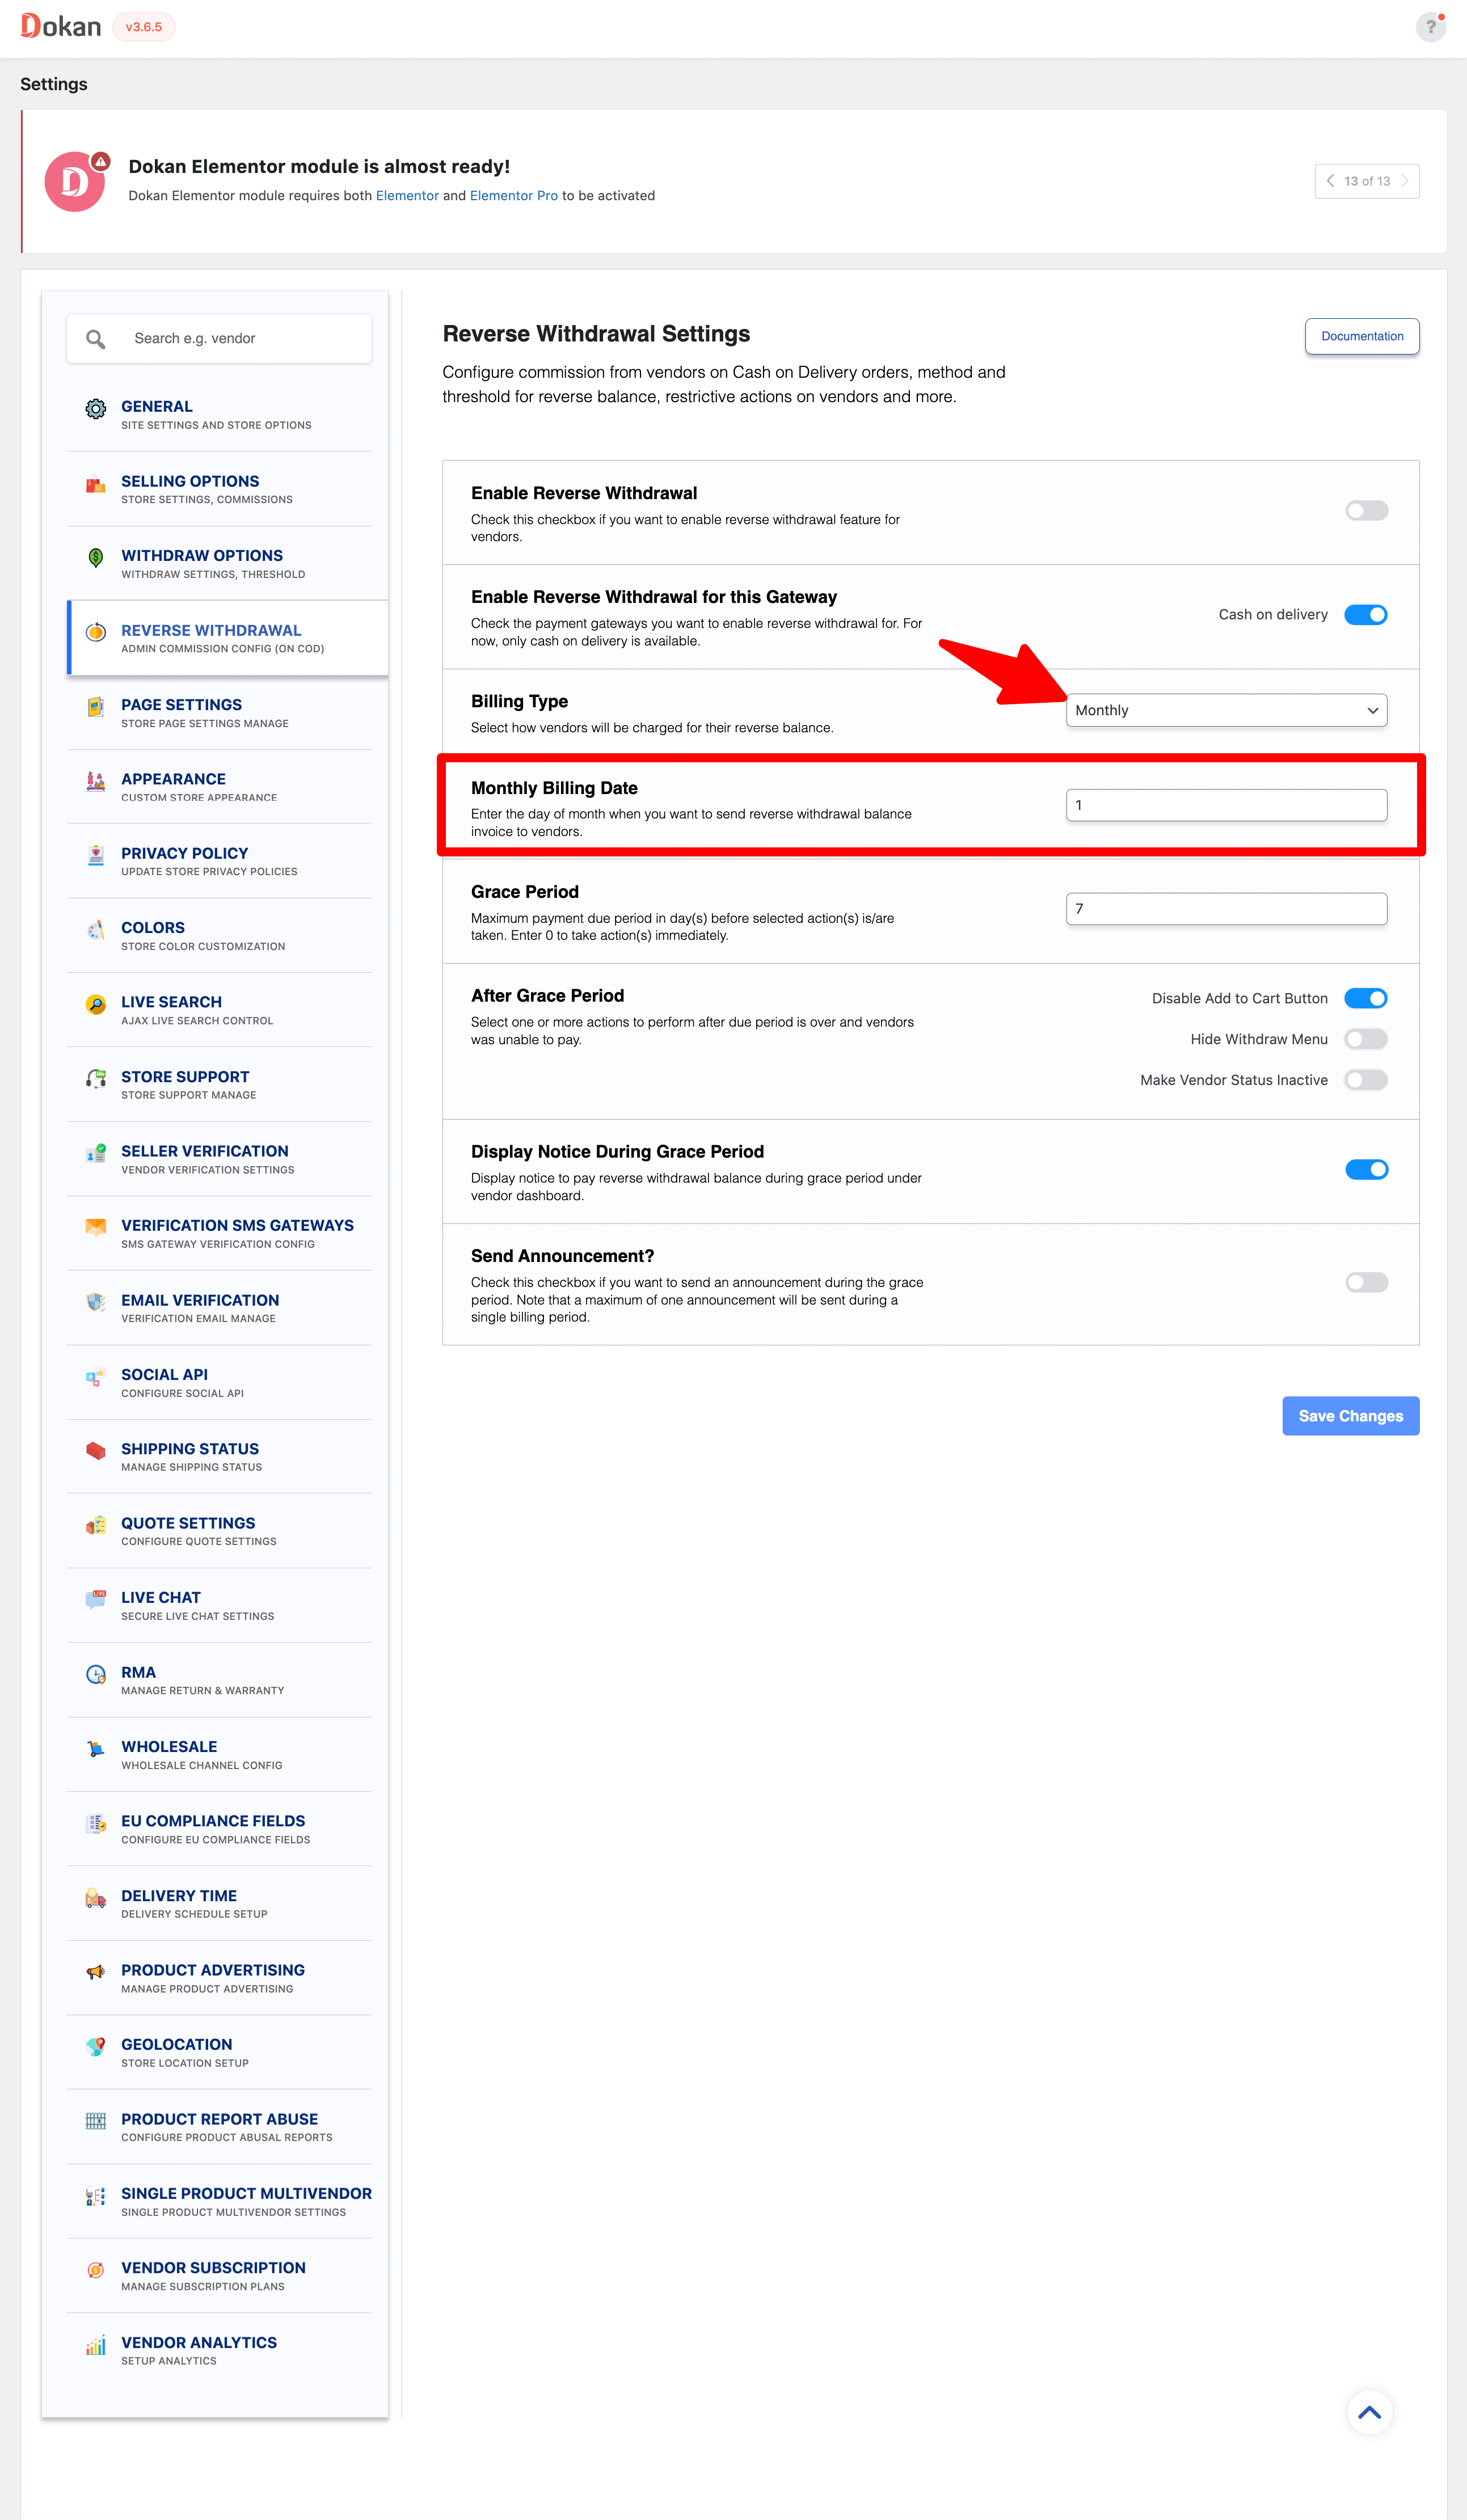
Grace Period: The time you will provide for the vendors to pay their dues. You can provide one week or a few days.
After Grace Period: Choose what actions to take if the vendors fail to pay their dues after the grace period. You can,
- Disable Add to Cart Button: This will prevent any customers to add the vendor’s product to the cart till the vendor clears the payment. The add to cart button will disappear from the vendor’s products.
- Hide Withdraw Menu: The withdraw menu will disappear from the vendor dashboard. So the vendor will not be able to withdraw their money.
- Make Vendor Status Inactive: The vendor’s account will be deactivated from selling in the marketplace.
Display Notice During Grace Period: Enable this to display a notice to pay the reverse withdrawal balance during the grace period under the vendor dashboard.
Send Announcement: You can send an announcement on the vendor dashboard to pay the reverse withdrawal balance.
This is how the admin can configure the settings.
Reverse Withdrawal Detailed Report for Admin
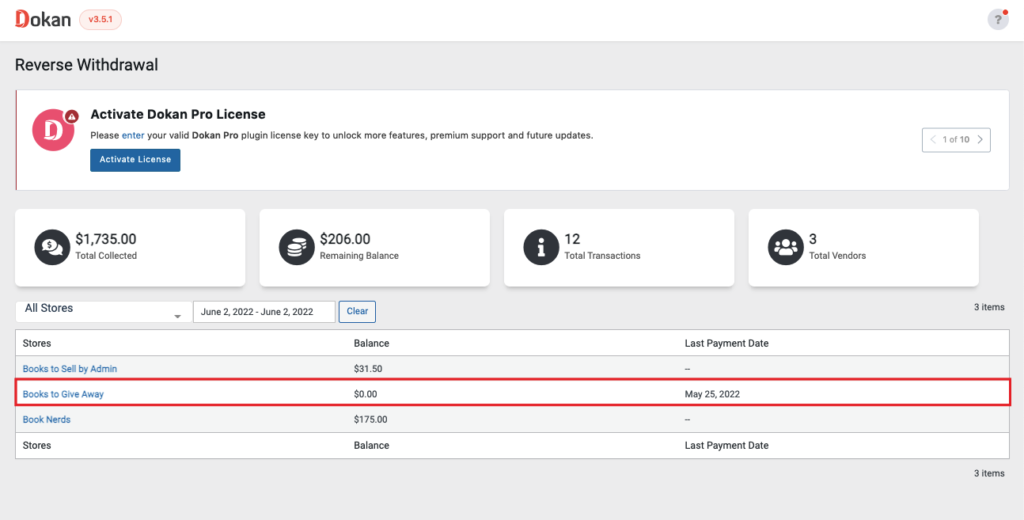
Admin will be able to see the detailed report from the backend. Navigate to Dokan–> Reverse Withdrawal, where admin will be able to see all the details.
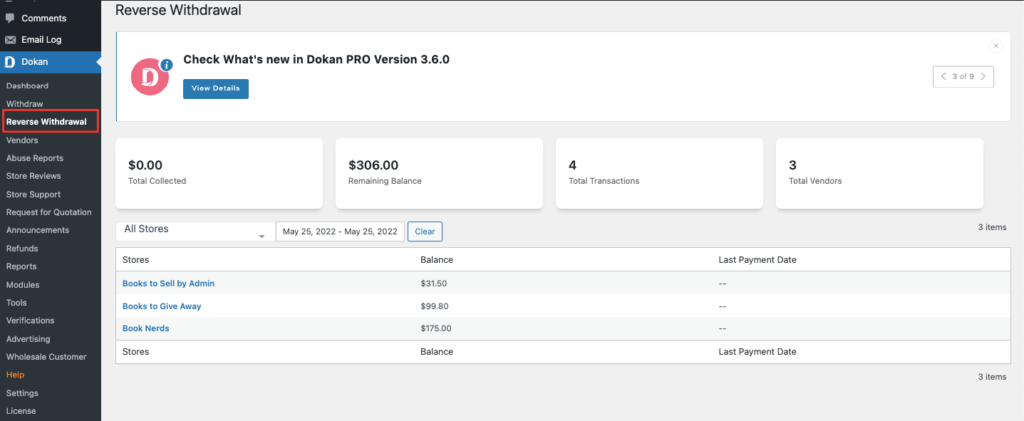
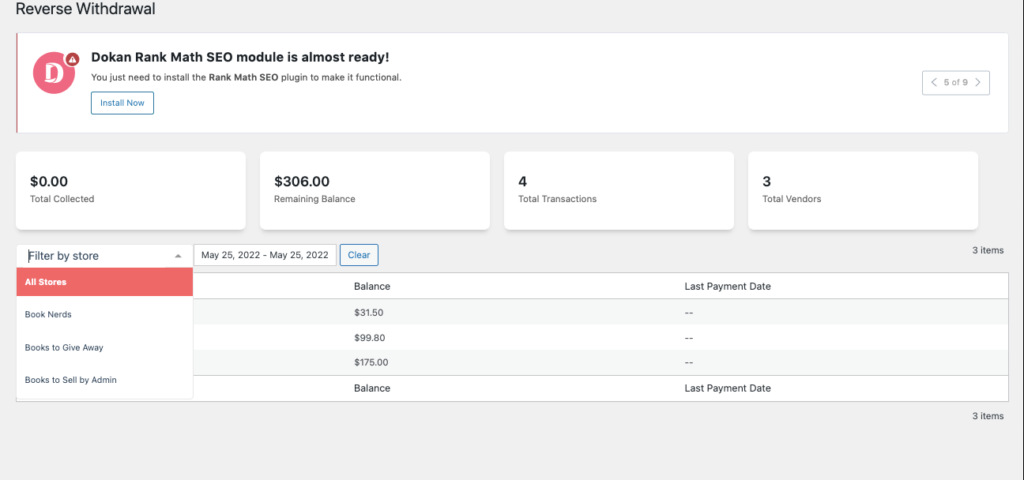
Admin can filter the report by store,
Or if they want they can filter by date,

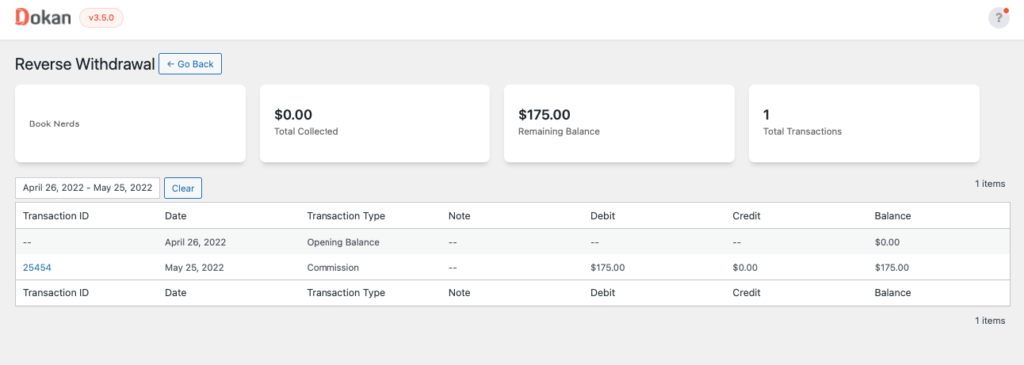
Also, the admin can view the individual store details by clicking on any of the vendors,
How to Configure Reverse Withdrawal Invoice Email
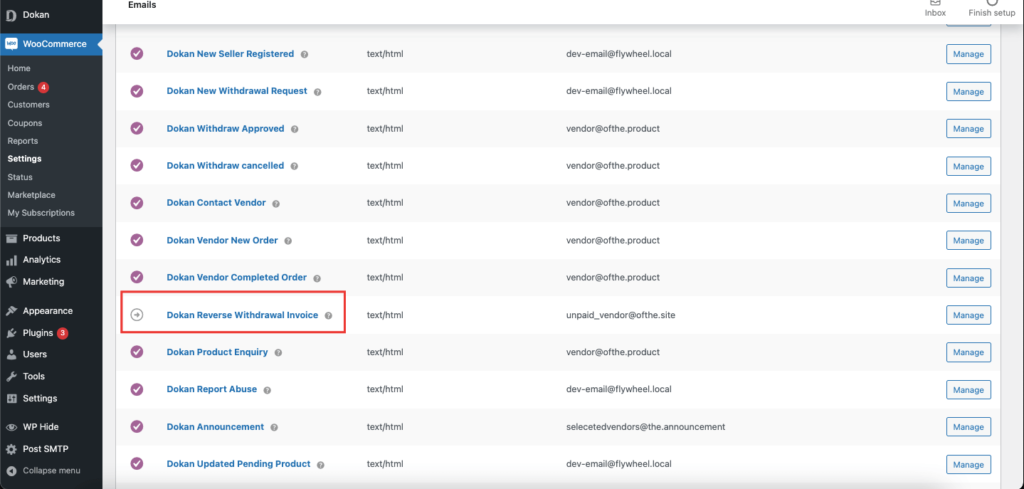
Vendors will be sent an invoice email regarding the reverse withdrawal payment. Admin can configure the email from the backend. Go to WooCommerce–> Settings–> Emails. There choose the Reverse Withdrawal Email.
Next, the admin can configure the email template from there. Subject, Email body, etc.
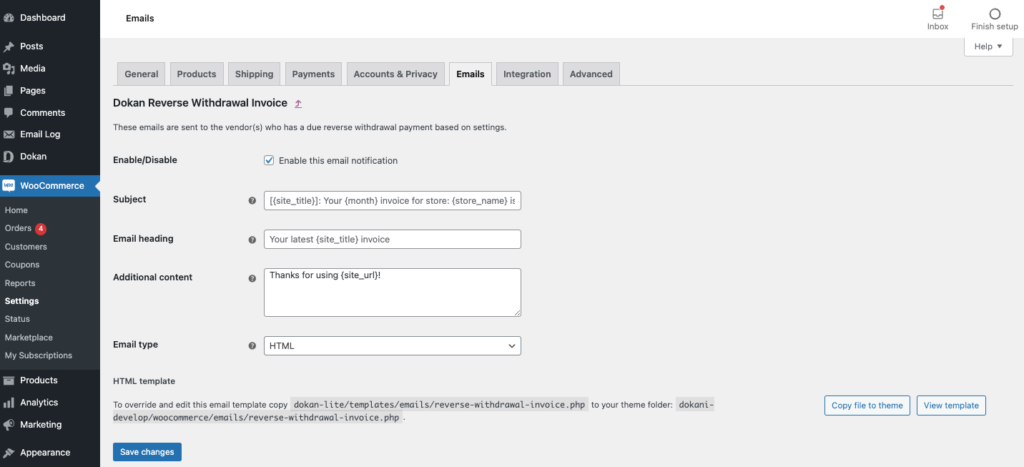
Save the changes to finish.
How to Pay the Reverse Withdrawal Balance – Vendor
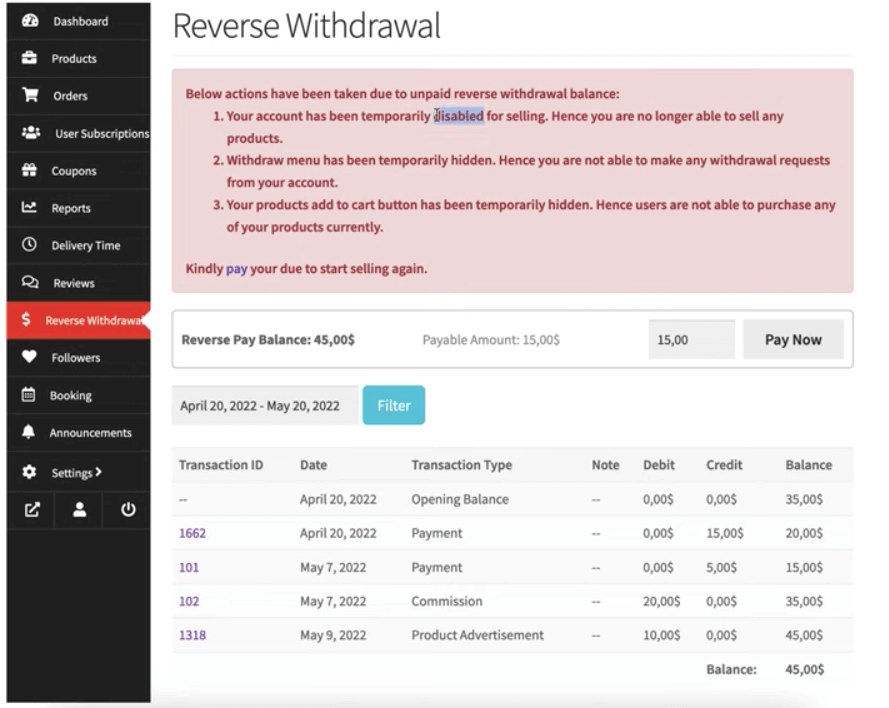
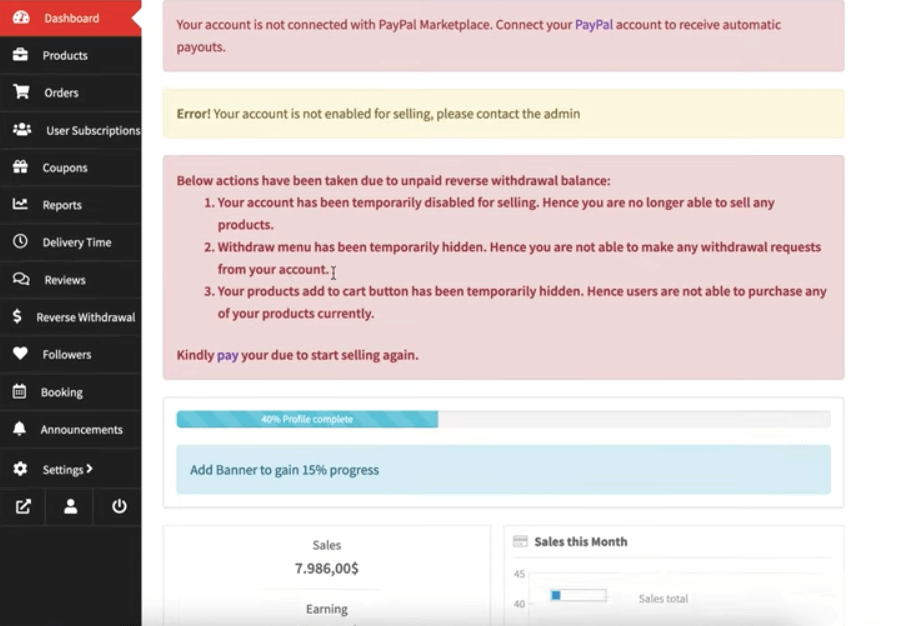
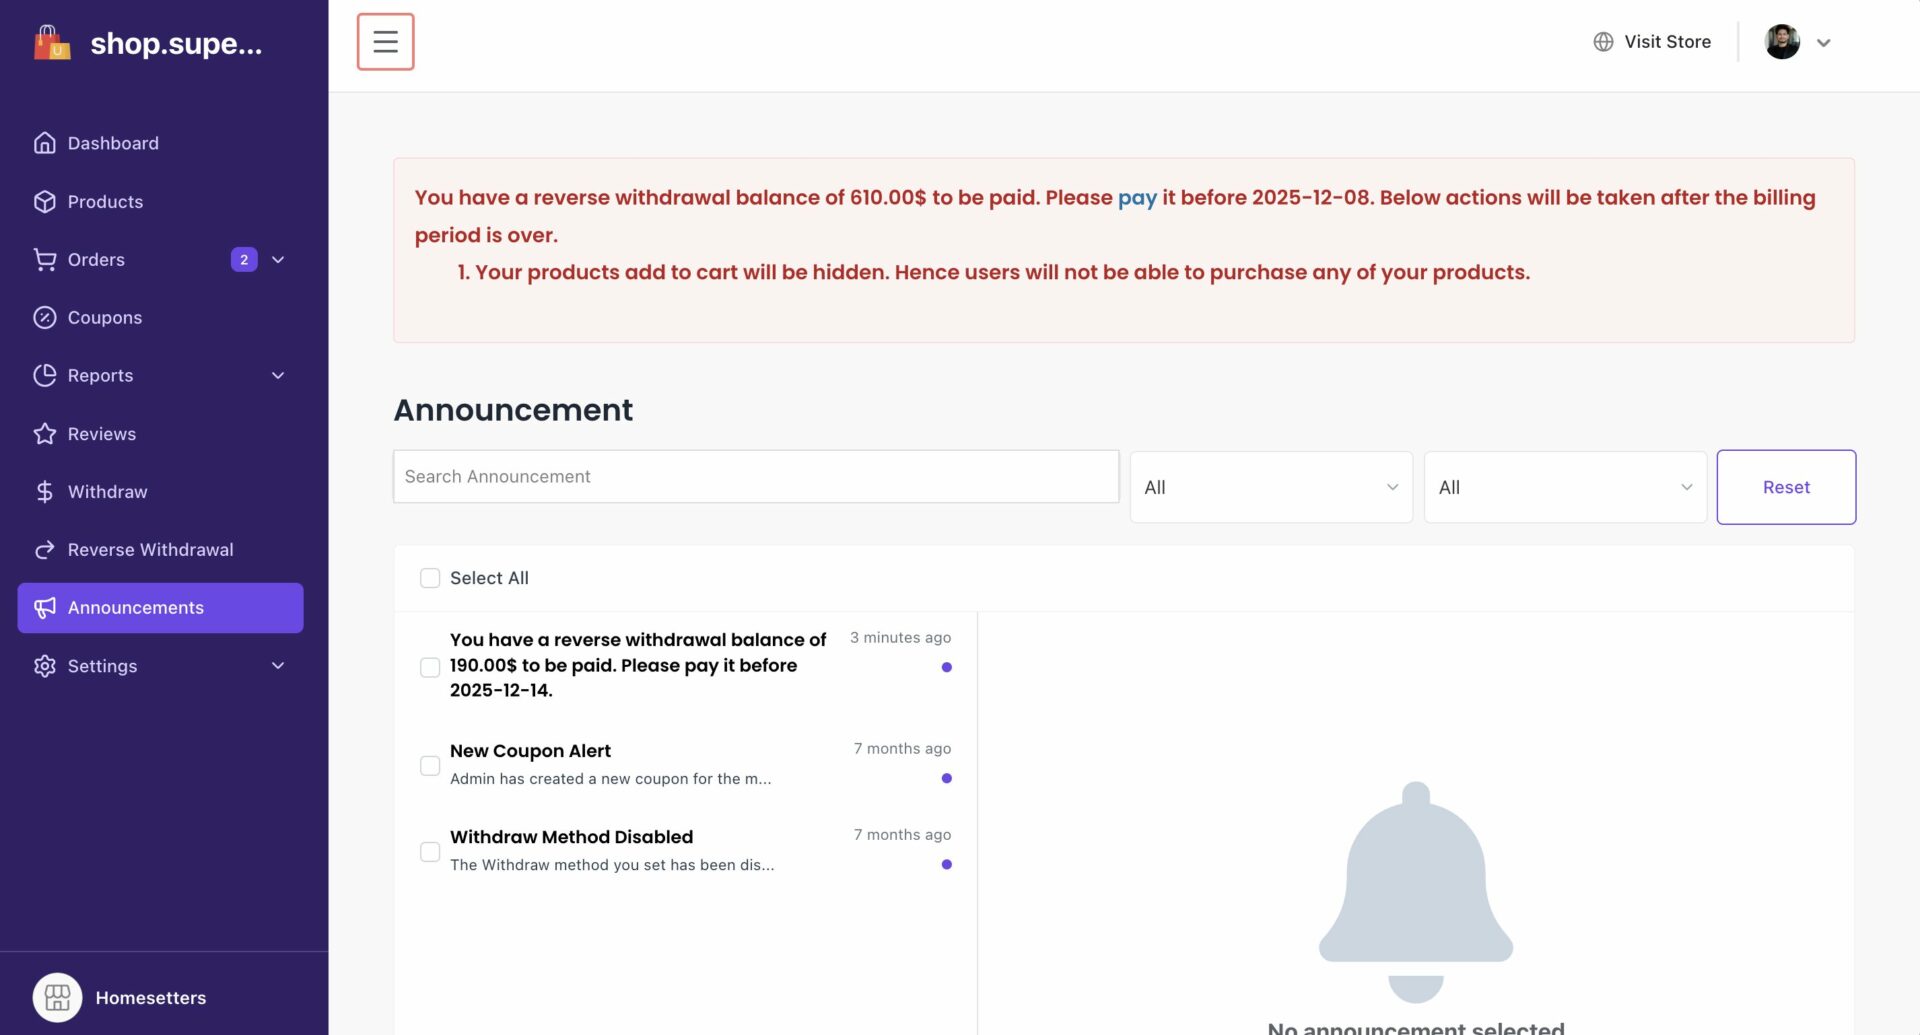
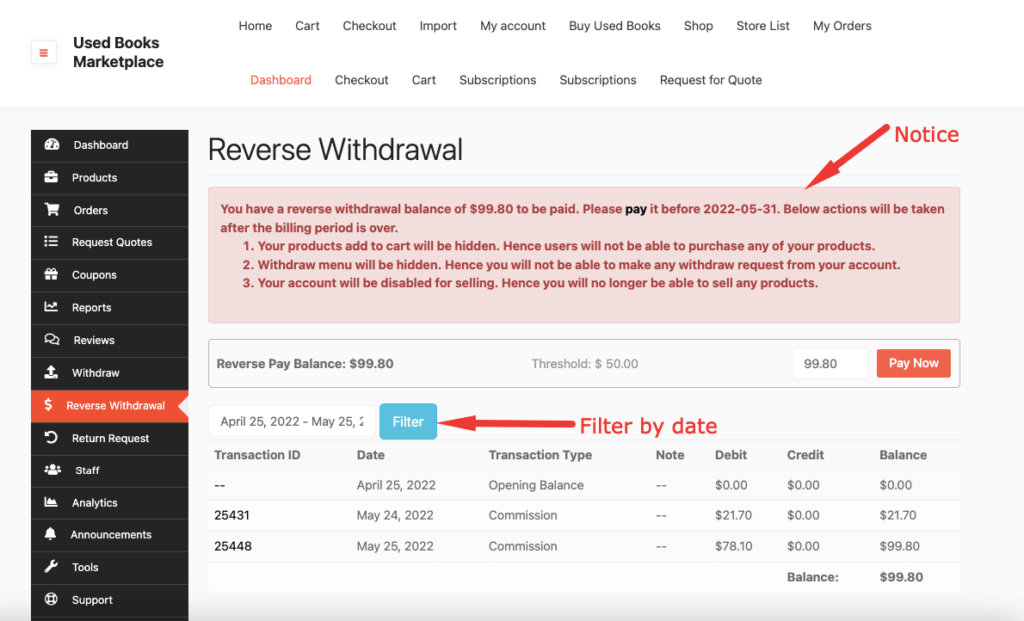
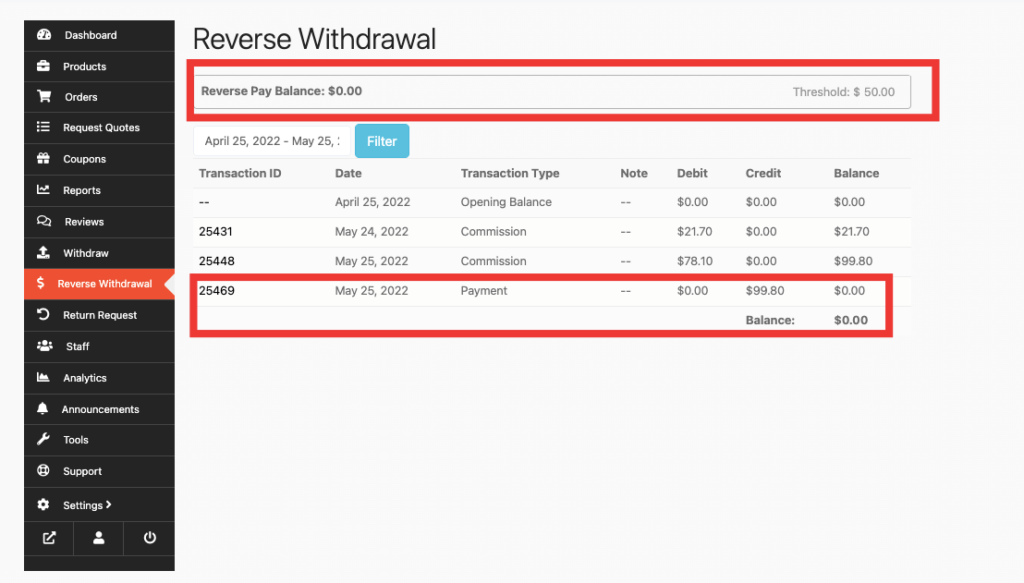
Vendors will be able to see the reverse withdrawal balance from their dashboard. Navigate to Dashboard–> Reverse Withdrawal, there the vendors will see the details.
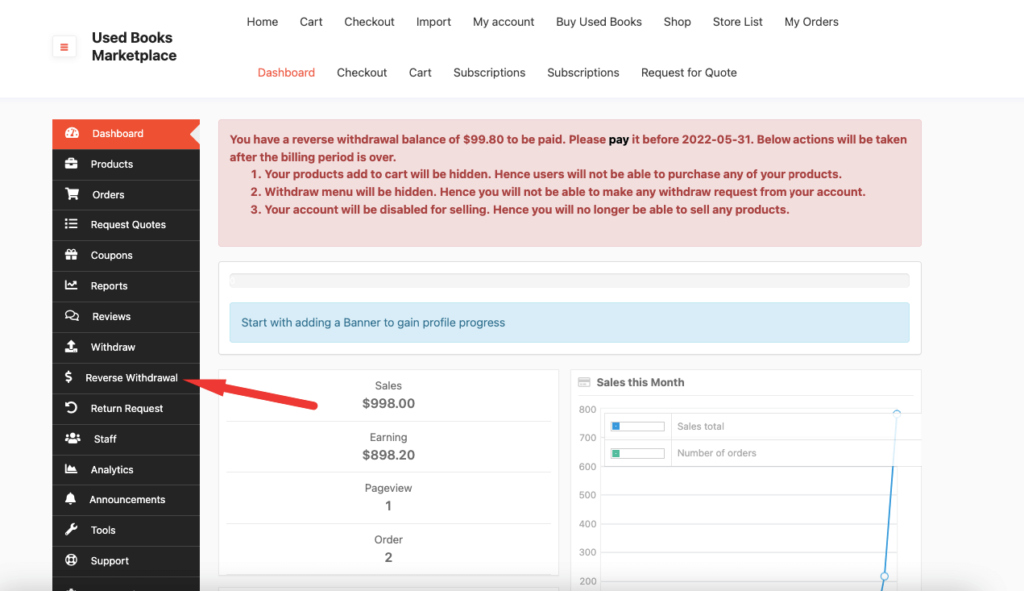
From the dashboard, vendors can see the notices and also filter the balance by date.
This is the scenario if the Billing type is By Amount, vendor will be able to see the Threshold amount.
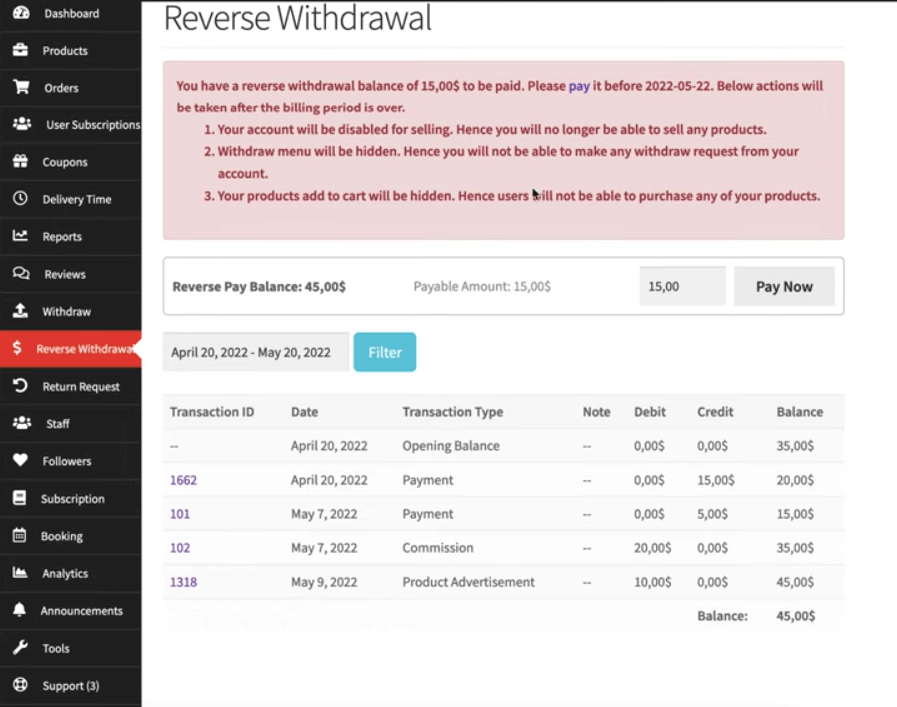
If the billing type is Monthly, then the vendor will see something like this,
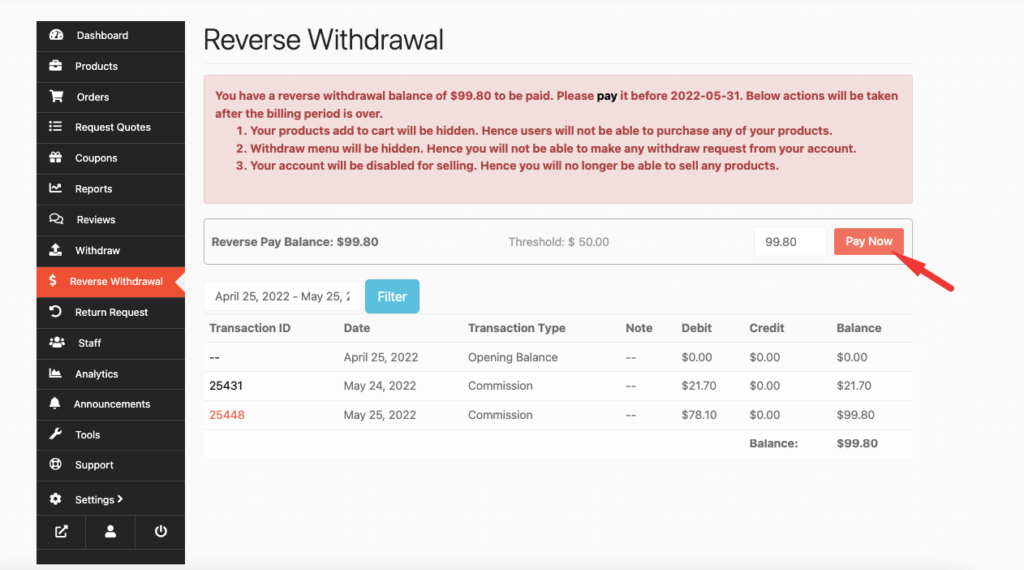
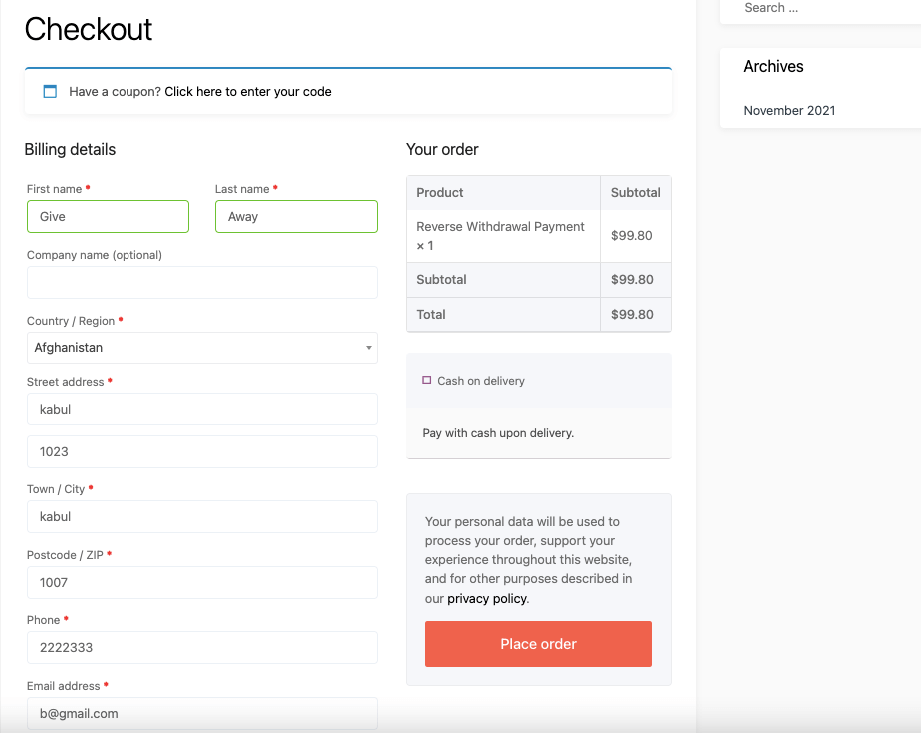
Now, to pay the reverse withdrawal balance, vendors need to click on the Pay Now button,
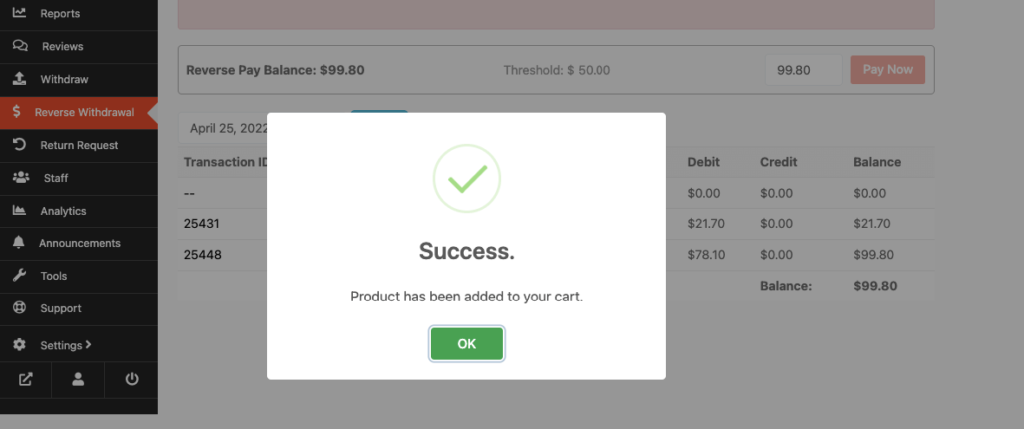
The vendor will get a pop-up that his/her product has been added to the cart,
Next, vendors need to complete the checkout process.He/She can use any payment gateway to finish the checkout. But for Cash on Delivery, the admin needs to complete the order from the backend.
If the payment is completed, then the vendor will be able to see the details in the dashboard. Also, the notice will disappear as well.
Now the admin will be able to see the order details from the backend,
For reverse withdrawal payment, no VAT or Tax will be applicable.

Also, the admin will be able to see the last payment date of every vendor after the payment in the Reverse withdrawal section.
This is how vendors can pay the reverse withdrawal payment.
Note: The values that are shown on the top are the total amount collected by the admin.
How Refund Works for Reverse Withdrawal Payment
In case of a refund, the reverse withdrawal amount will be reversed again to the vendor.
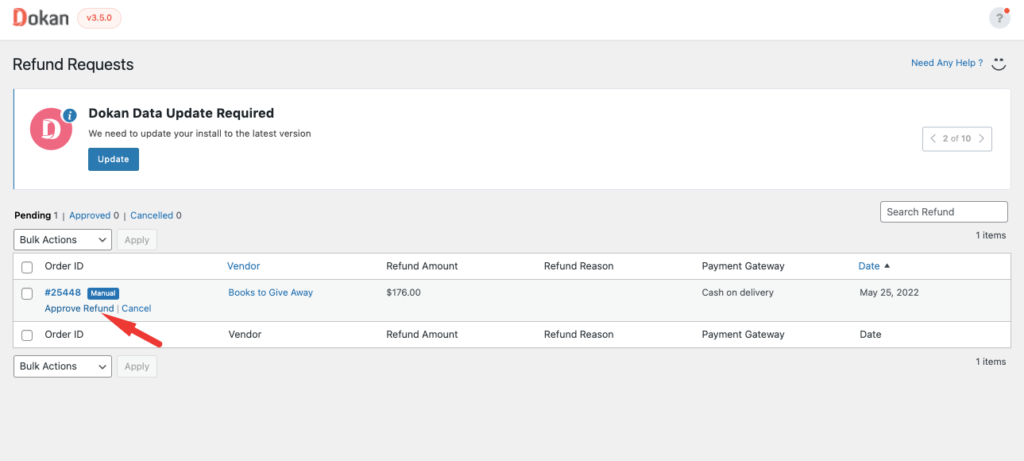
When a vendor requests a refund,
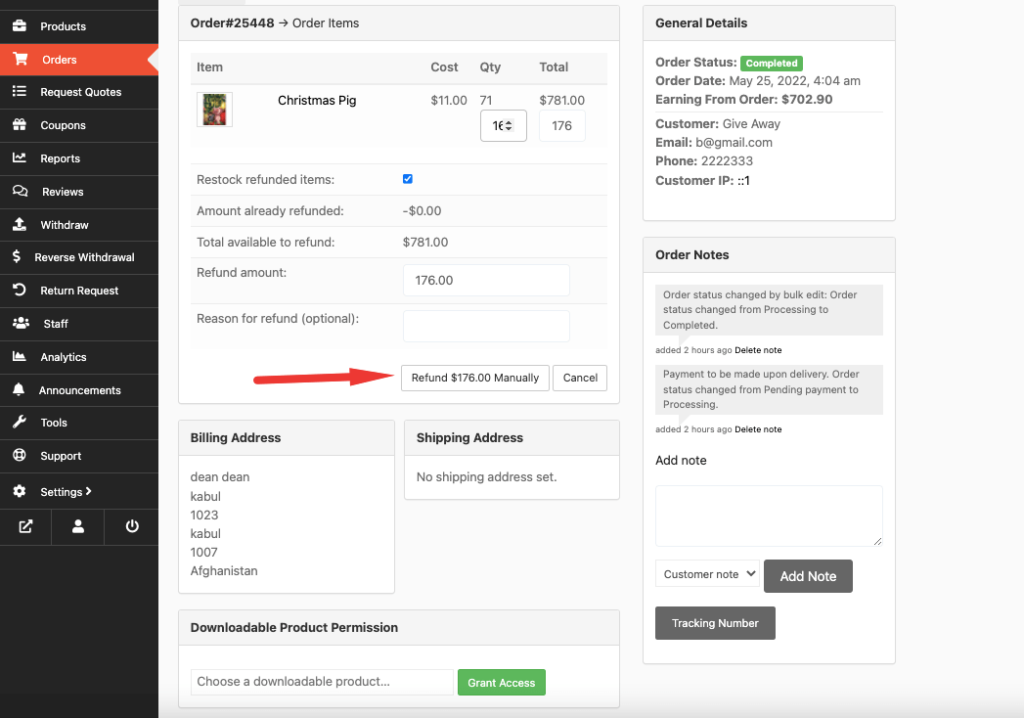
The admin needs to approve the refund from the backend.
After approval, the refunded amount will be reversed to the vendor. The vendor will be able to see that in the vendor dashboard,
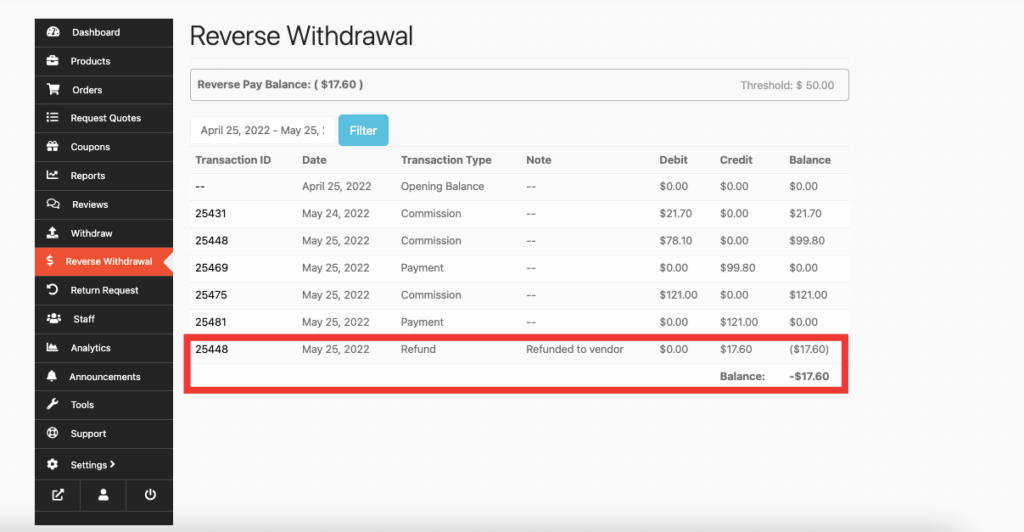
As you can see it is a partial refund, so the commission has been calculated accordingly. In case of a full refund, it will look something like this,
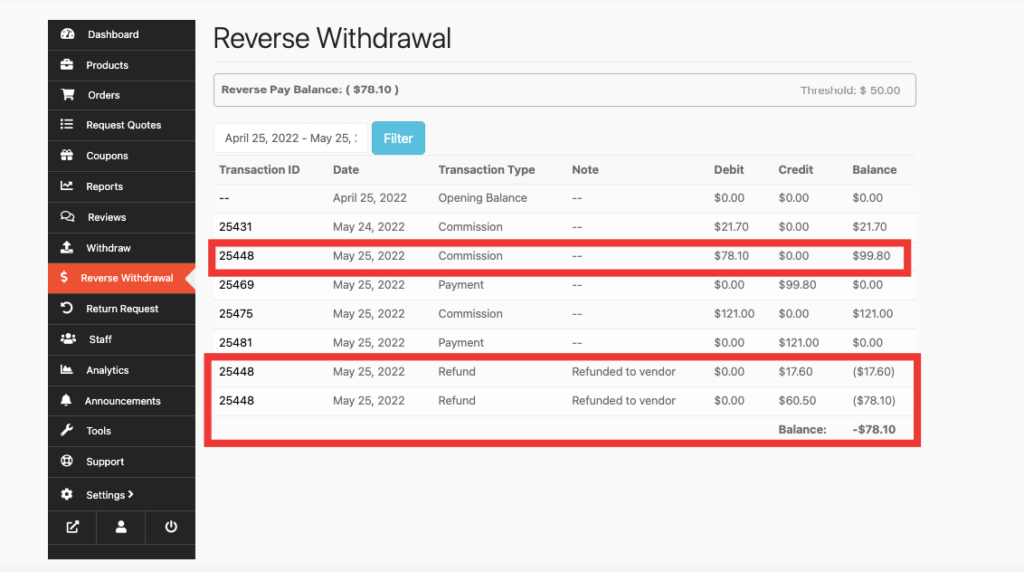
This is how a refund works for the reverse withdrawal feature.
Reverse Withdrawal for Product Advertisement
As you know Dokan Premium version has a product advertisement module, which means vendors can buy advertisement slots for their products.
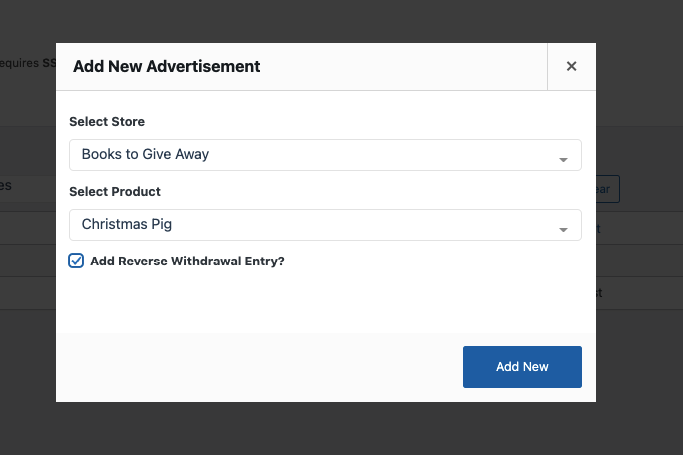
Admin can reverse withdrawal payment for product advertisement as well. To do that, go to Dokan–> Advertising. There click on the Add New Advertisment button.
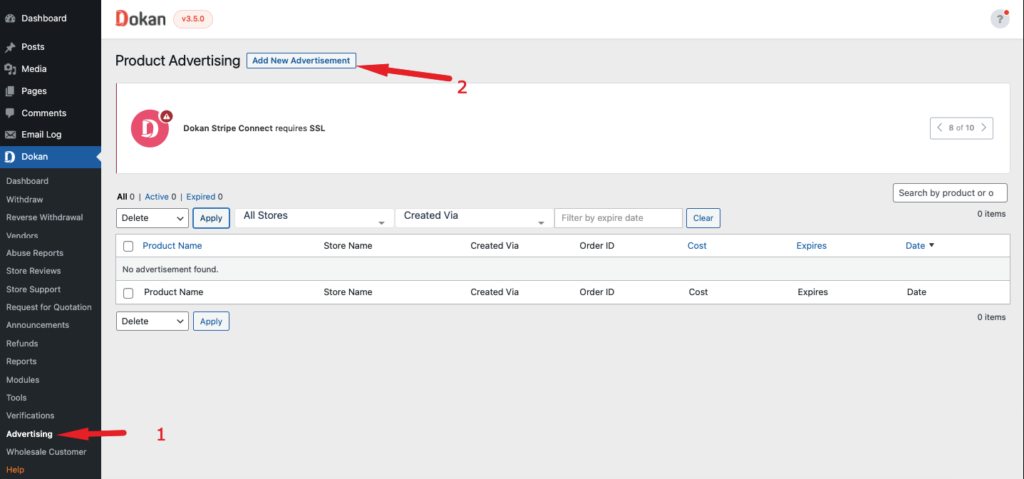
In the pop-up section, the admin needs to choose vendor store and product along with enabling the Reverse Withdrawal option as well.
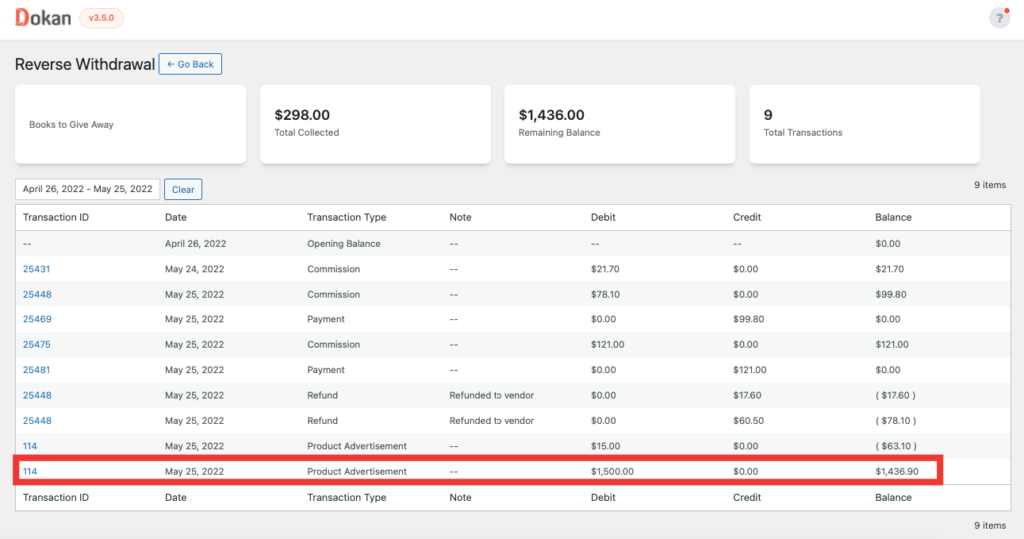
The balance will be shown in the admin report,
Along with vendor dashboard as well,

The process of paying the reverse withdrawal balance for product advertisement is the same as the “How to Pay the Reverse Withdrawal Balance” section.
Note: Make sure to keep the advertisement cost greater than (>) 0.
Also, reverse withdrawal balance will not be added if any vendor buys an advertisement from the slot of their subscription package. If they want to buy an additional slot outside their subscription package then the reverse withdrawal balance will be added.
So this is how to set up and use the Reverse Withdrawal feature of Dokan Lite.