The Dokan Seller Badge module will help admins give vendors credibility with different badges of accomplishments. With Seller Badge, the admin can create conditions and automate the process of making vendors stand out based on their marketplace activity.
Here’s how the Seller Badge Works,
Activate the Seller Badge Module
First, you need to activate the Seller Badge module. To do that, go to Dokan–> Modules. There find the Seller Badge Module and activate it.
Creating a Seller Badge
Now you need to create a seller badge. Go to Dokan–> Seller Badge and click on the Create Badge button.
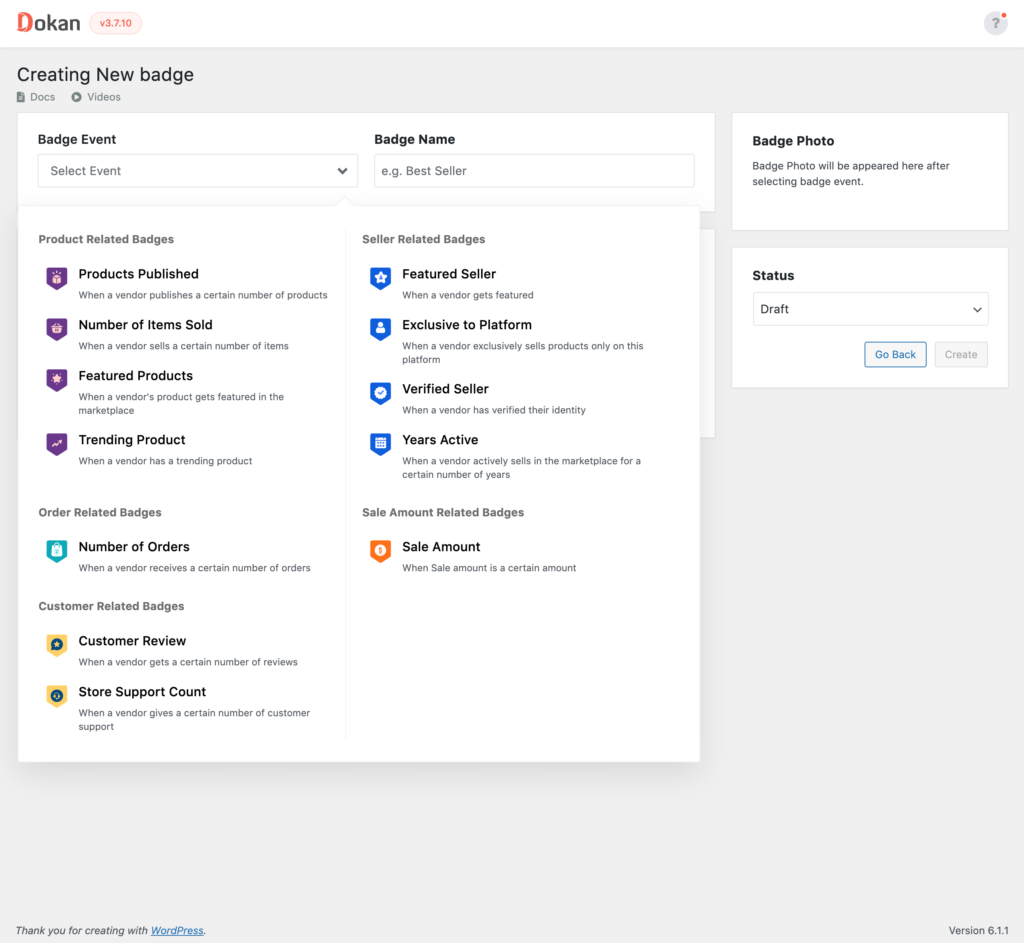
In the next page, select the badge from the dropdown box, add conditions and publish the badge.
After publishing, the admin can view the badges in the dashboard,
By clicking on the Preview button,
Admin can preview the badge and its elements.
There are 5 types of badges.
- Product Related Badges
- Seller Related Badges
- Order Related Badges
- Customer Related Badges
- Sale Amount Related Badges.
We are going to describe them one by one.
Products Published Badge (Product Related Badge)
This badge will be given to the vendor based on the number of products published. This badge is multilevel.
For example, the admin can create level 1 if the vendor has published more than 10 products, level 2 if the vendor has published more than 15 products, and so on.
The admin can view the vendors acquired badges on Dokan–> Vendors–> Selected Vendor page.
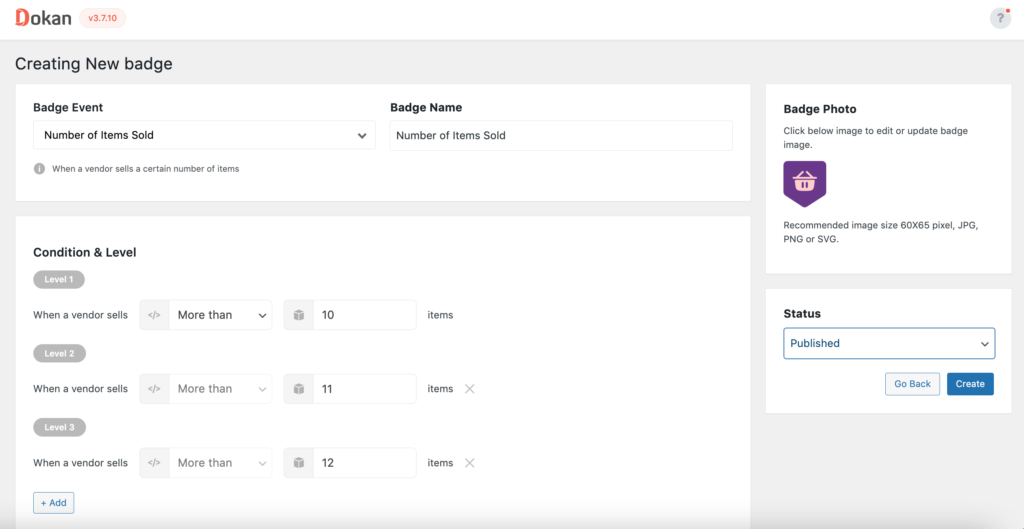
Number of Products Sold (Product Related Badge)
This badge will be given to the vendor based on the number of products sold by the vendor. This badge has multiple levels. That means the admin can create multiple levels to determine the badge value.
For example, the admin can create level 1 if the vendor has sold more than 10 products, level 2 if the vendor has sold more than 15 products, and so on.
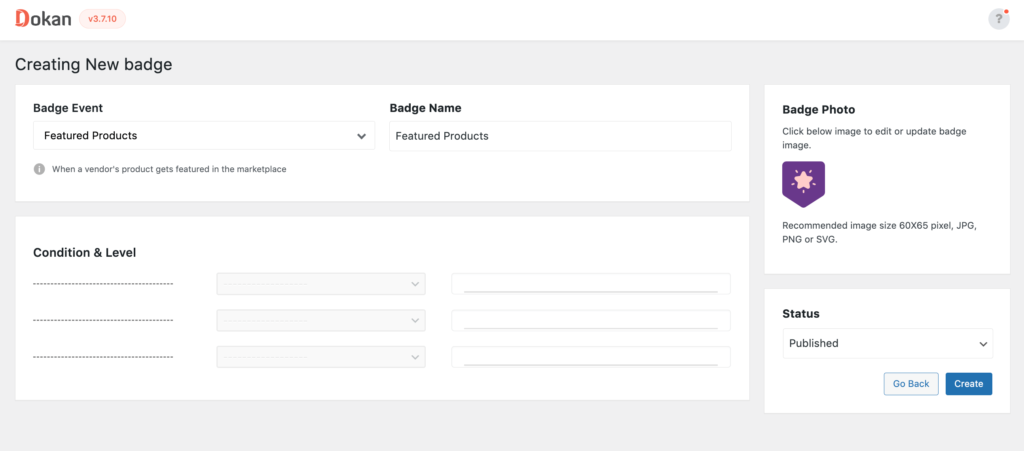
Featured Products (Product Related Badge)
The vendor will get this badge if any of their product has been featured at any time after installing the Dokan plugin. Note that, Badge will not be removed if the product is not featured anymore.
Trending Product (Product Related Badge)
The vendor will get this badge if any of their product has been trending after installing the Dokan plugin. Admin will be able to specify based on how many top-selling products this badge will be distributed based on Conditional ( Weekly/Monthly) sales of the products.
For example, if the condition is set to weekly and the number of products is set to 10, a badge will be assigned to the vendors based on last week best selling 10 products author.
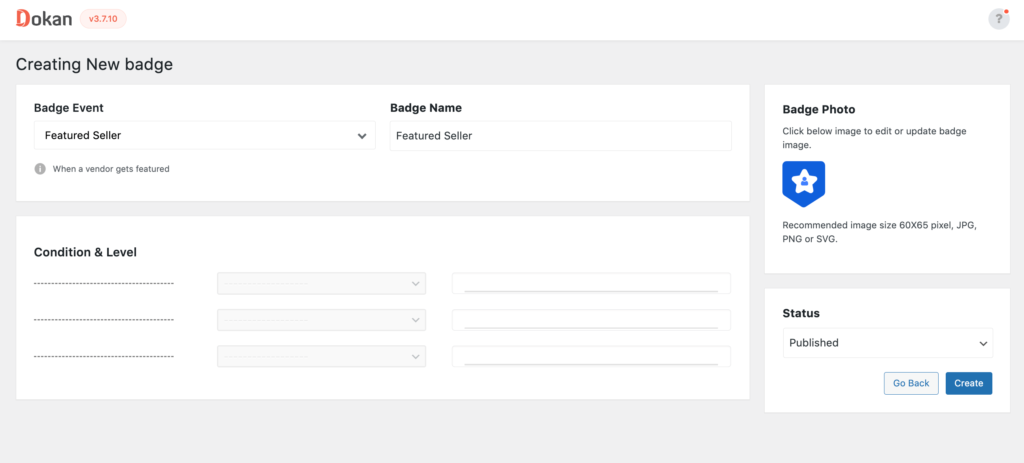
Featured Seller (Seller Related Badge)
Vendors will get this badge when he/she’s featured in the marketplace. The badge will not be removed once it’s given. Because the badge will be given to the vendors who have been featured once in the marketplace.
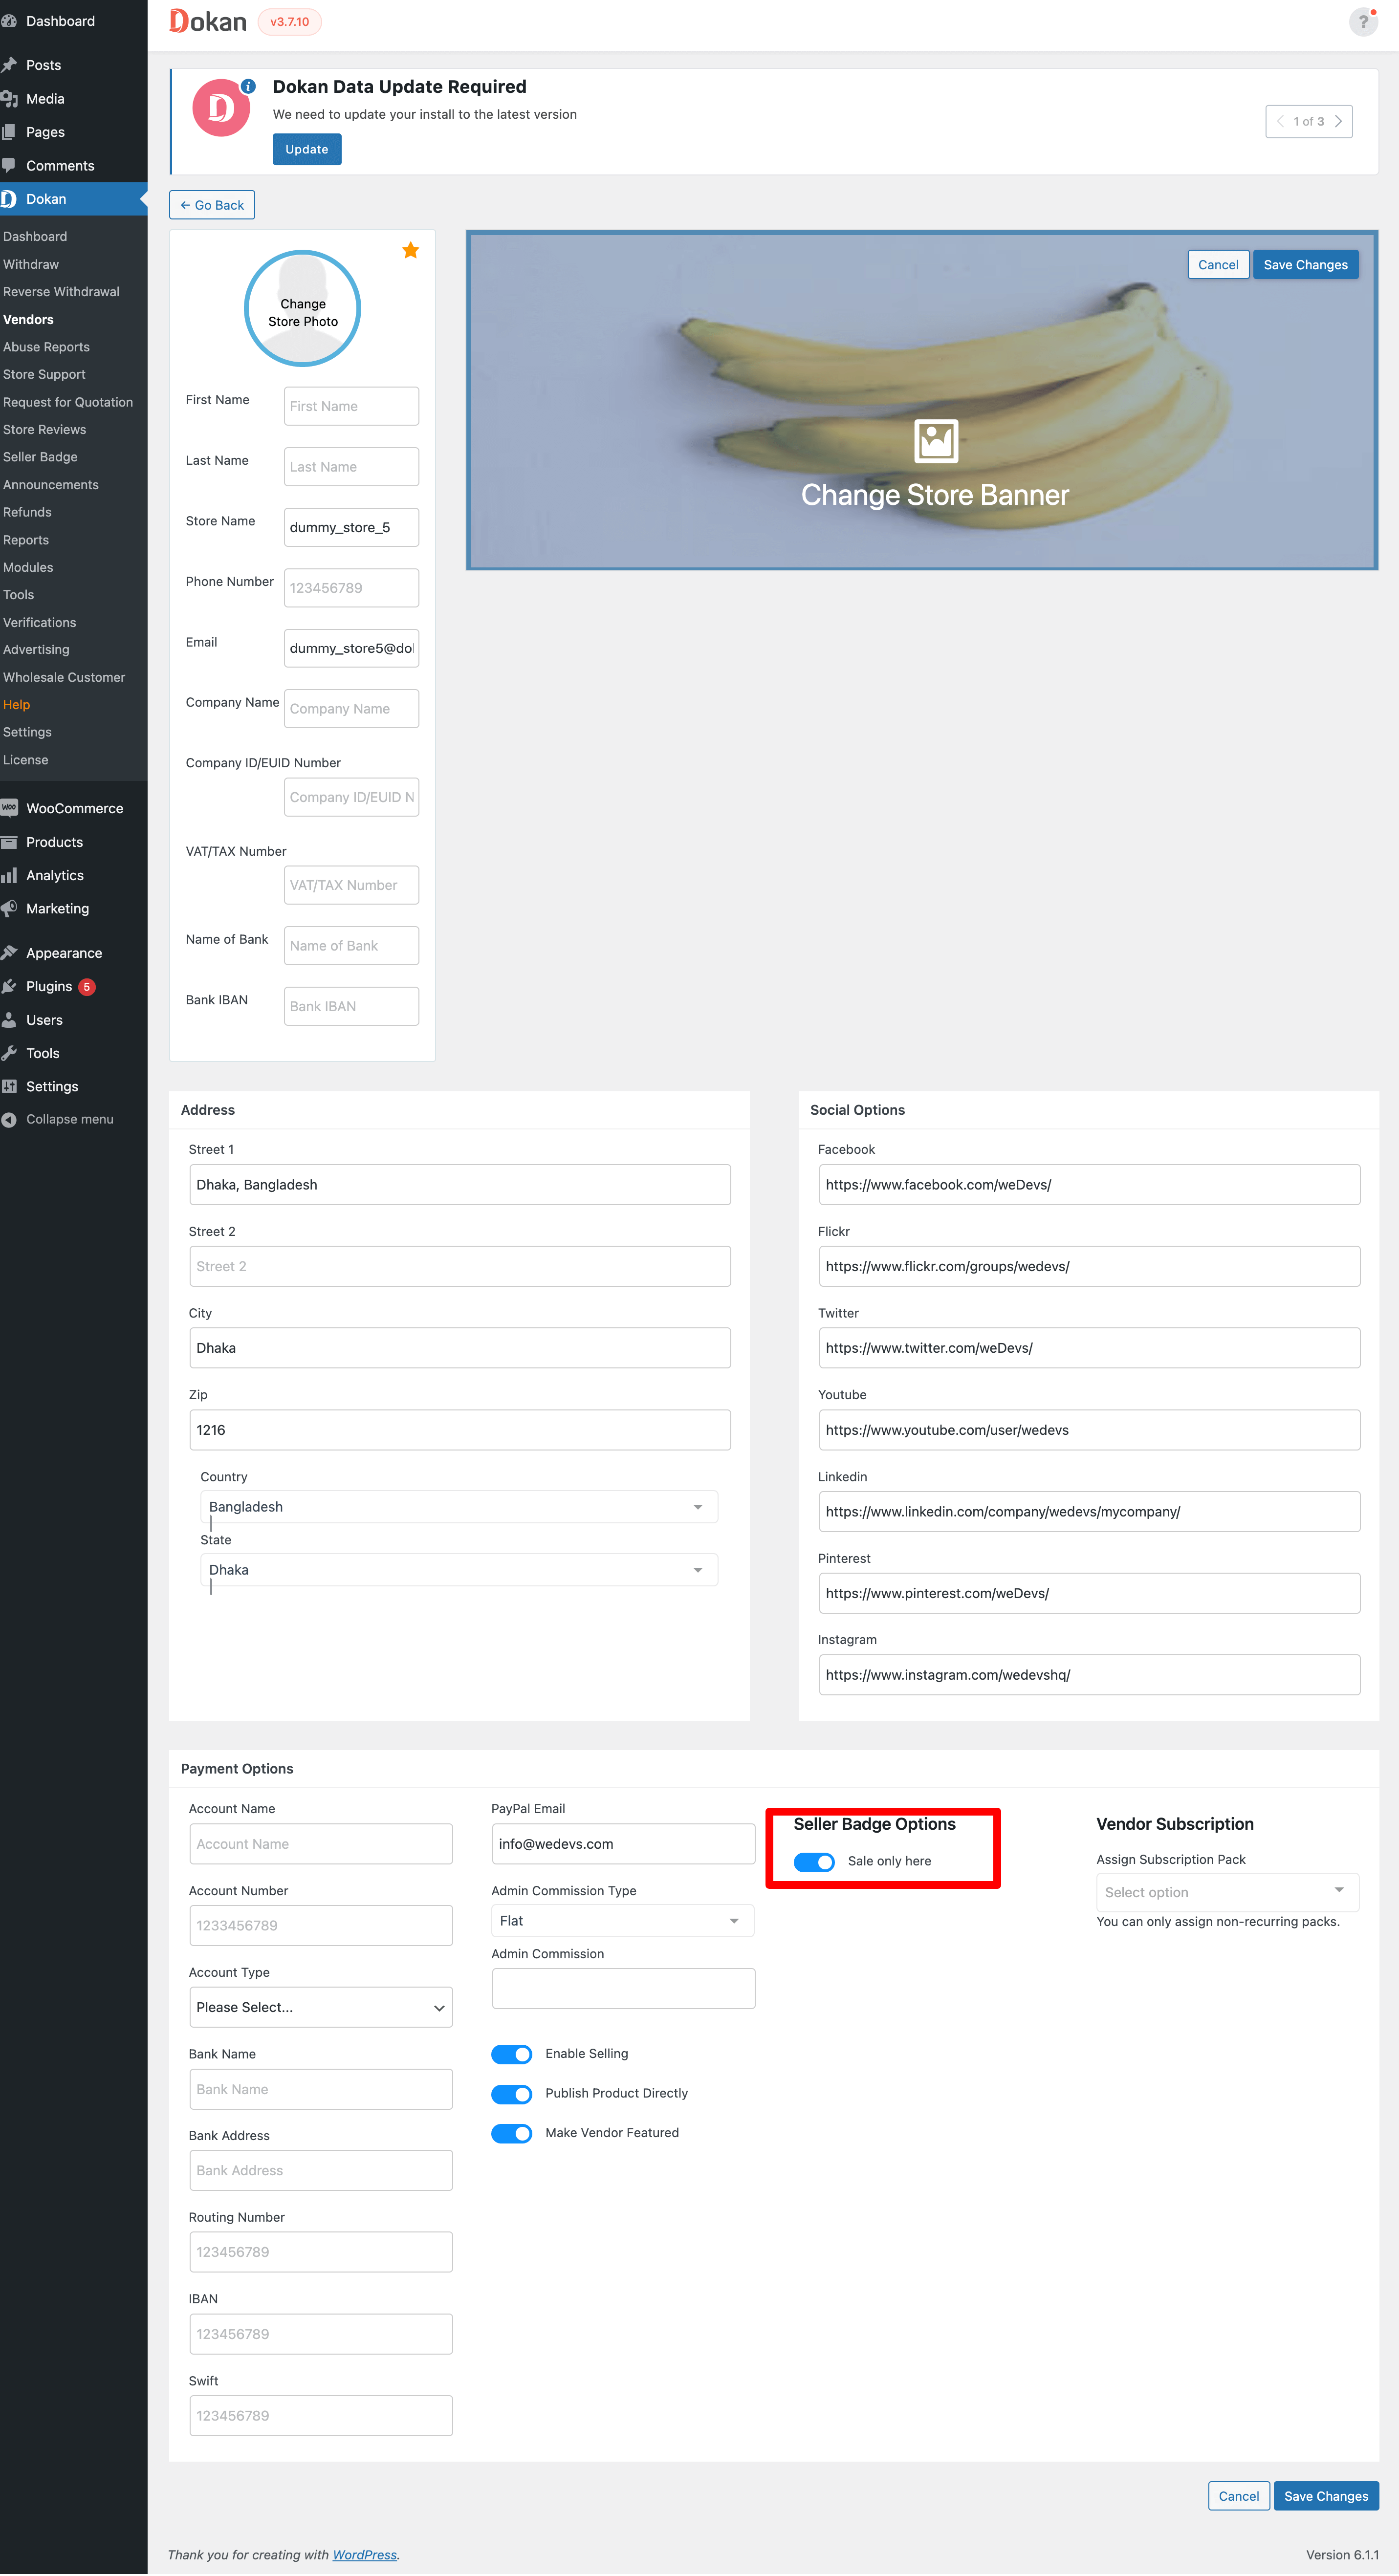
Exclusive to Platform (Seller Related Badge)
This badge will be given to vendors who exclusively sell products in the marketplace.
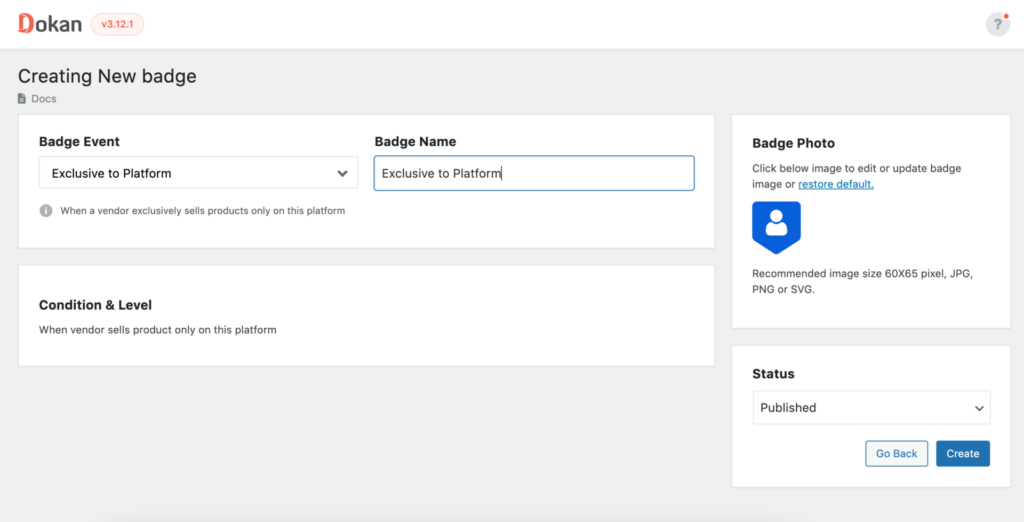
In order to assign this badge to the vendors, the admin needs to go to Dokan–> Vendors and click on the Edit button. There the admin needs to enable the Sale Only Here option.
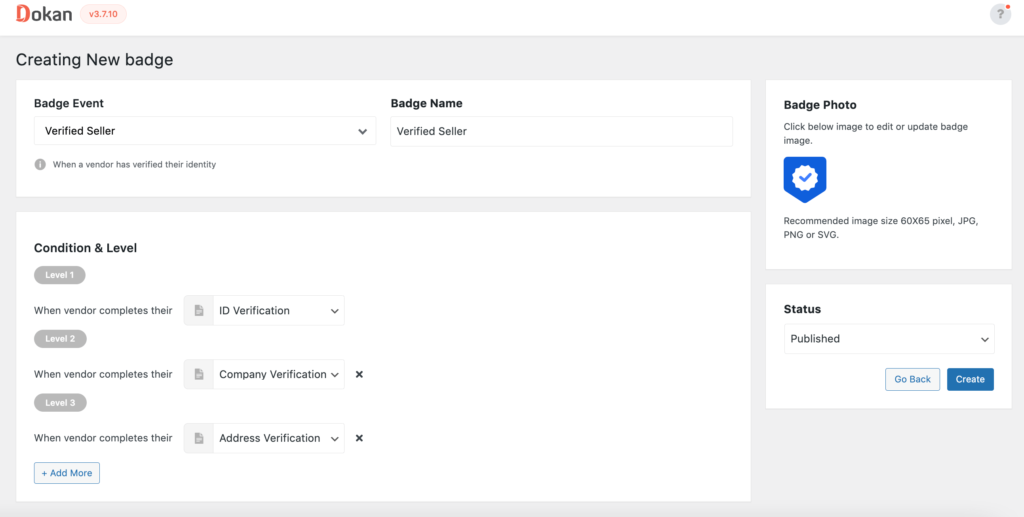
Verified Seller (Seller Related Badge)
Vendors will receive this badge when they verify their identity like,
- Id Verification
- Address Verification
- Company Verification
- Social Verification
- Phone Verification
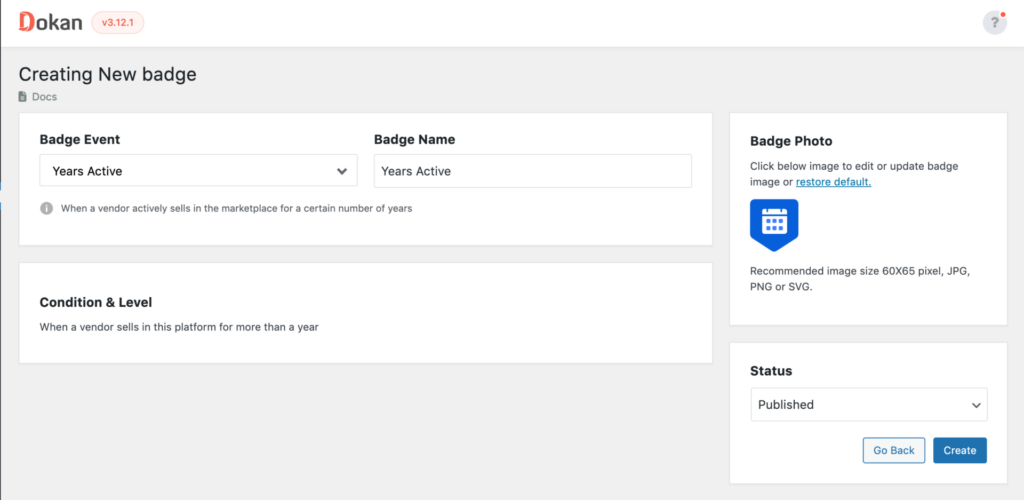
Years Active (Seller Related Badge)
This badge will be given to the vendor when he/she actively sells in the marketplace for a number of years. Admin can create multiple levels defining the number of years, like Level 1 for more than 1 year, Level 2 for more than 2 years, and so on.
Number of Orders (Order Related Badge)
This badge will be given to the vendor based on the number of orders. For example, the admin can assign a level 1 badge if a vendor has more than 15 orders, and a level 2 badge if a vendor has more than 50 orders.
Sale Amount (Sale Related Badge)
When a vendor sells a certain amount of products then the admin can assign this badge. For example, the admin can assign a level 1 badge when a vendor sells more than $500, a level 2 badge when a vendor sells more than $1000, and so on.
Note: The currency will be set according to the marketplace currency.
Customer Review (Customer Related Badge)
Admin can assign this badge when a vendor gets a certain amount of reviews. For example, the admin can assign a badge when a vendor has more than 10 Five-Star reviews.
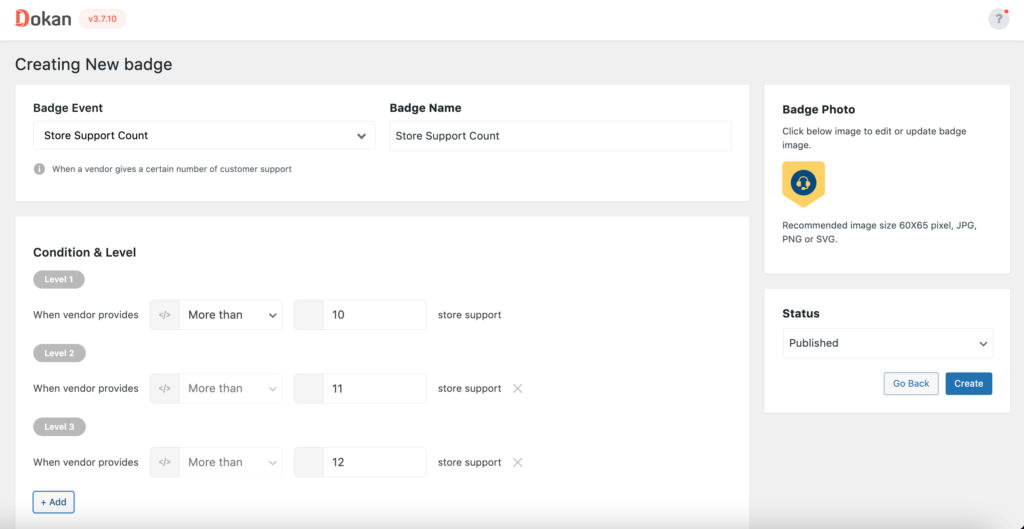
Store Support Count (Customer Related Badge)
Admin can assign this badge when a vendor has resolved a certain number of store supports. For example, the admin can assign a level 1 badge when a vendor has provided more than 10 store supports, a level 2 badge when a vendor has provided more than 100 store supports, and so on.
Drafting a Badge
Admin can draft a badge temporarily. Just click on the ” Set Badge As Draft” option under the badge name. If a badge is drafted, then the admin will get a warning that the “Drafted badge will not be visible from vendor profile page“.
Select the Yes, Draft option to draft the badge.
Publish a Draft Badge
In order to publish a drafted badge, click on the Publish Badge option under the drafted badge,
After the badge is published, it will be assigned to the vendors that were previously assigned or acquired.
Delete a Badge
In order to delete a badge, click on the Delete option. When you delete a badge, all badge-level data, seller acquired data related to the selected badges will be deleted.
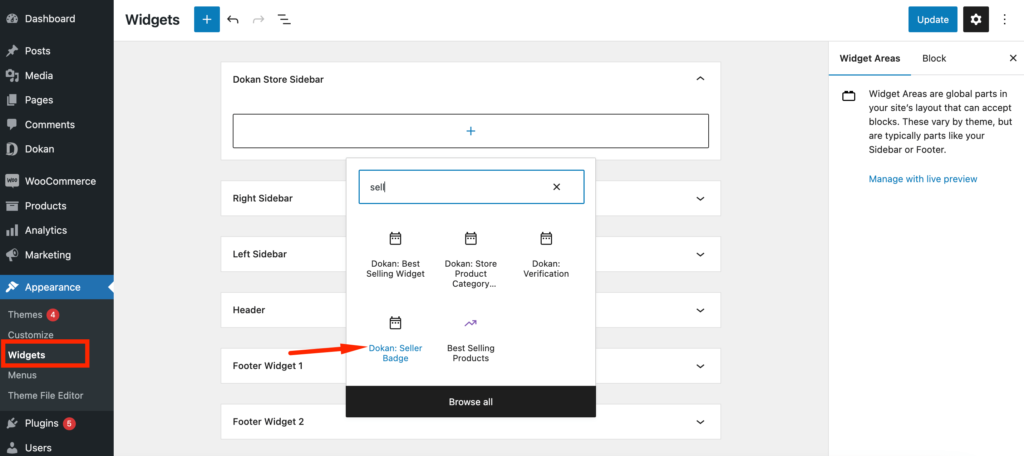
Showing a Badge in the Frontend
In order to show the badge in the vendor store, the admin needs to add the Dokan Seller badge widget. To add the widget, go to Appearance–> Widgets. There search for the Dokan Seller Badge widget and add it.
After updating, the badge will be shown in the single store page.
Note:
- The Trending Product and Years Active badges will be activated at midnight.
- If you change the data of a condition, then the previous badge will be removed.
- Limited time badge will be removed after a certain period of time.