It is a common practice to use email id’s to verify sellers and customers. With Dokan you can easily configure Google to add the email verification to your multivendor marketplace.
Here is the process.
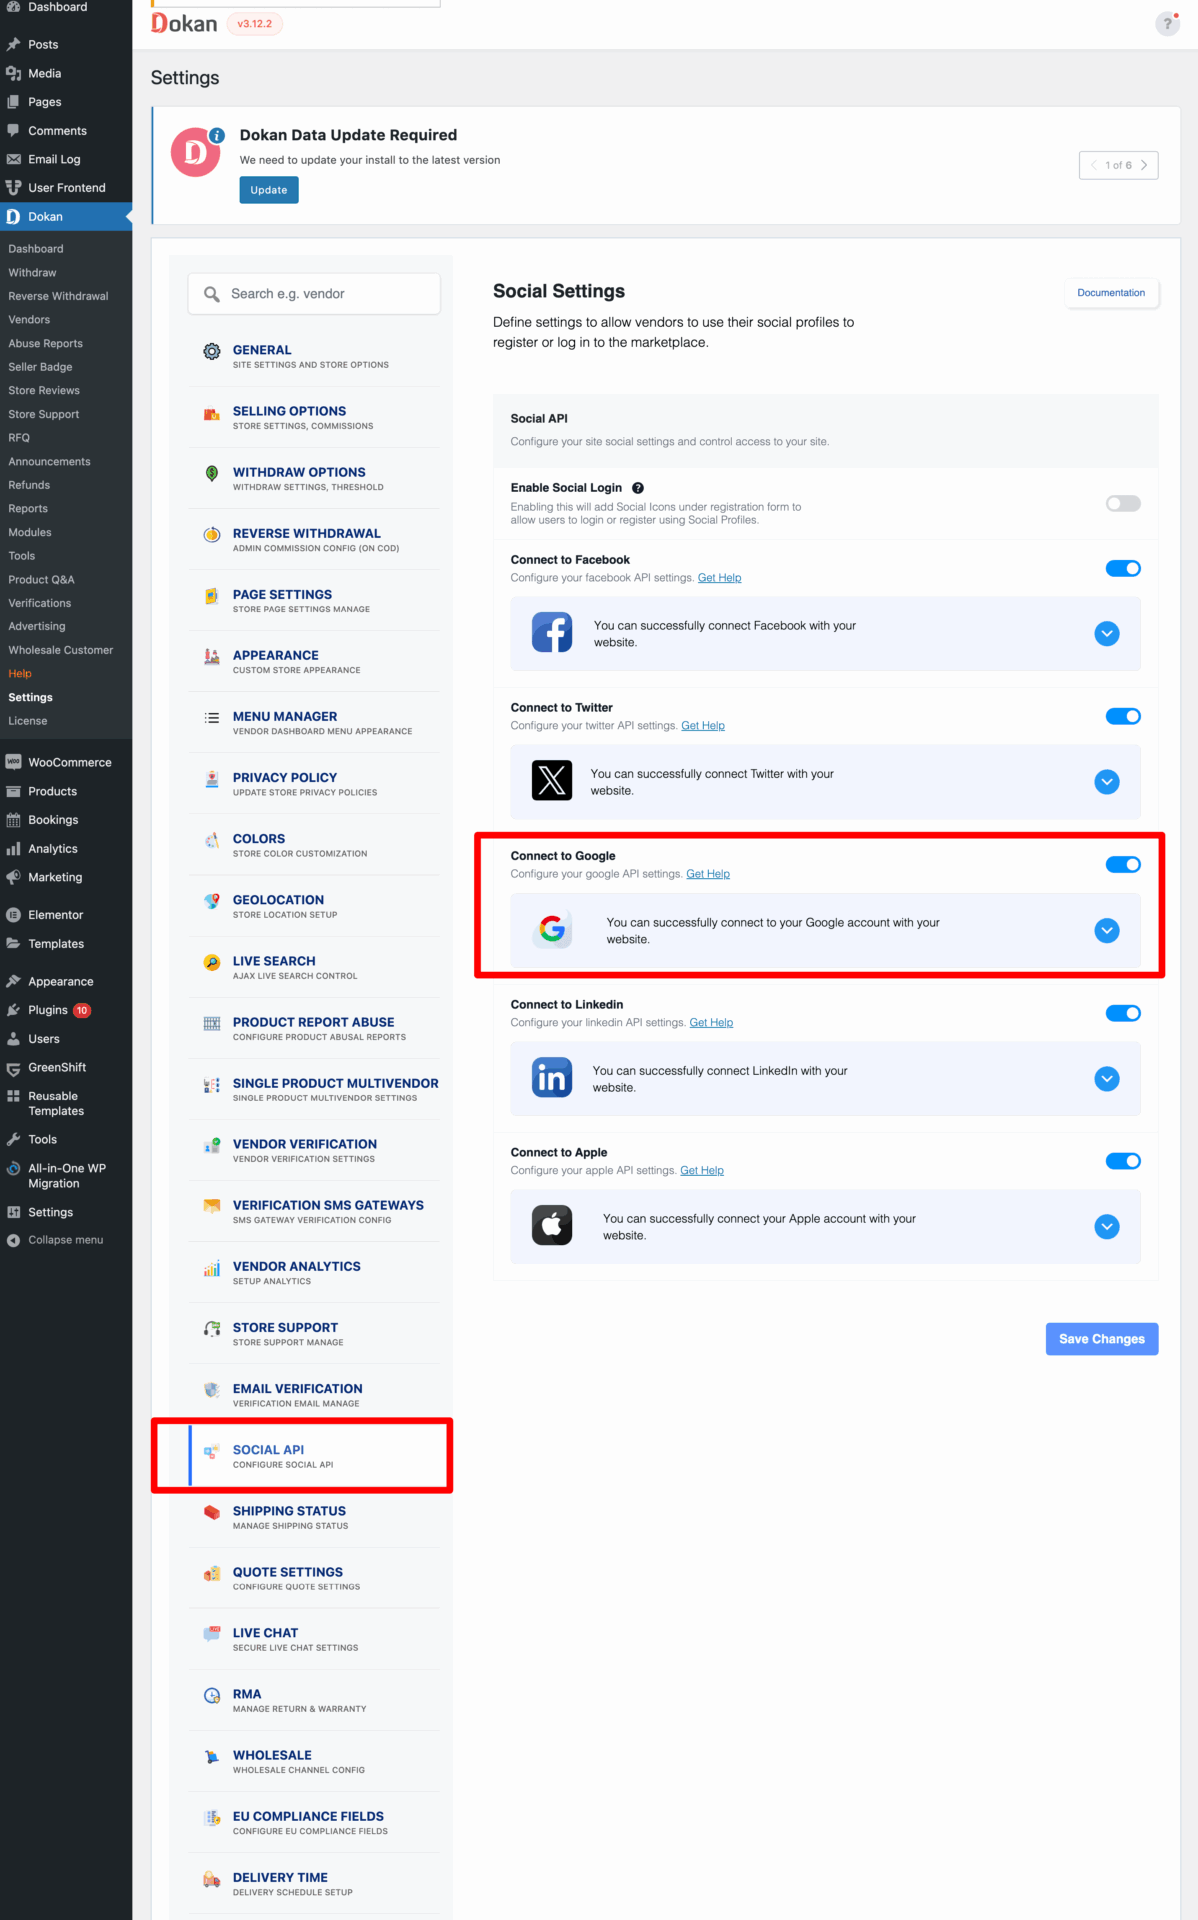
How to get Client ID and Client Secret from Google
You’ll need to get the Client ID and Client Secret from Google to configure it.
Click on the ‘Create An App’ link to go the google API page or click here.
Choose Google+ API and Enable it.
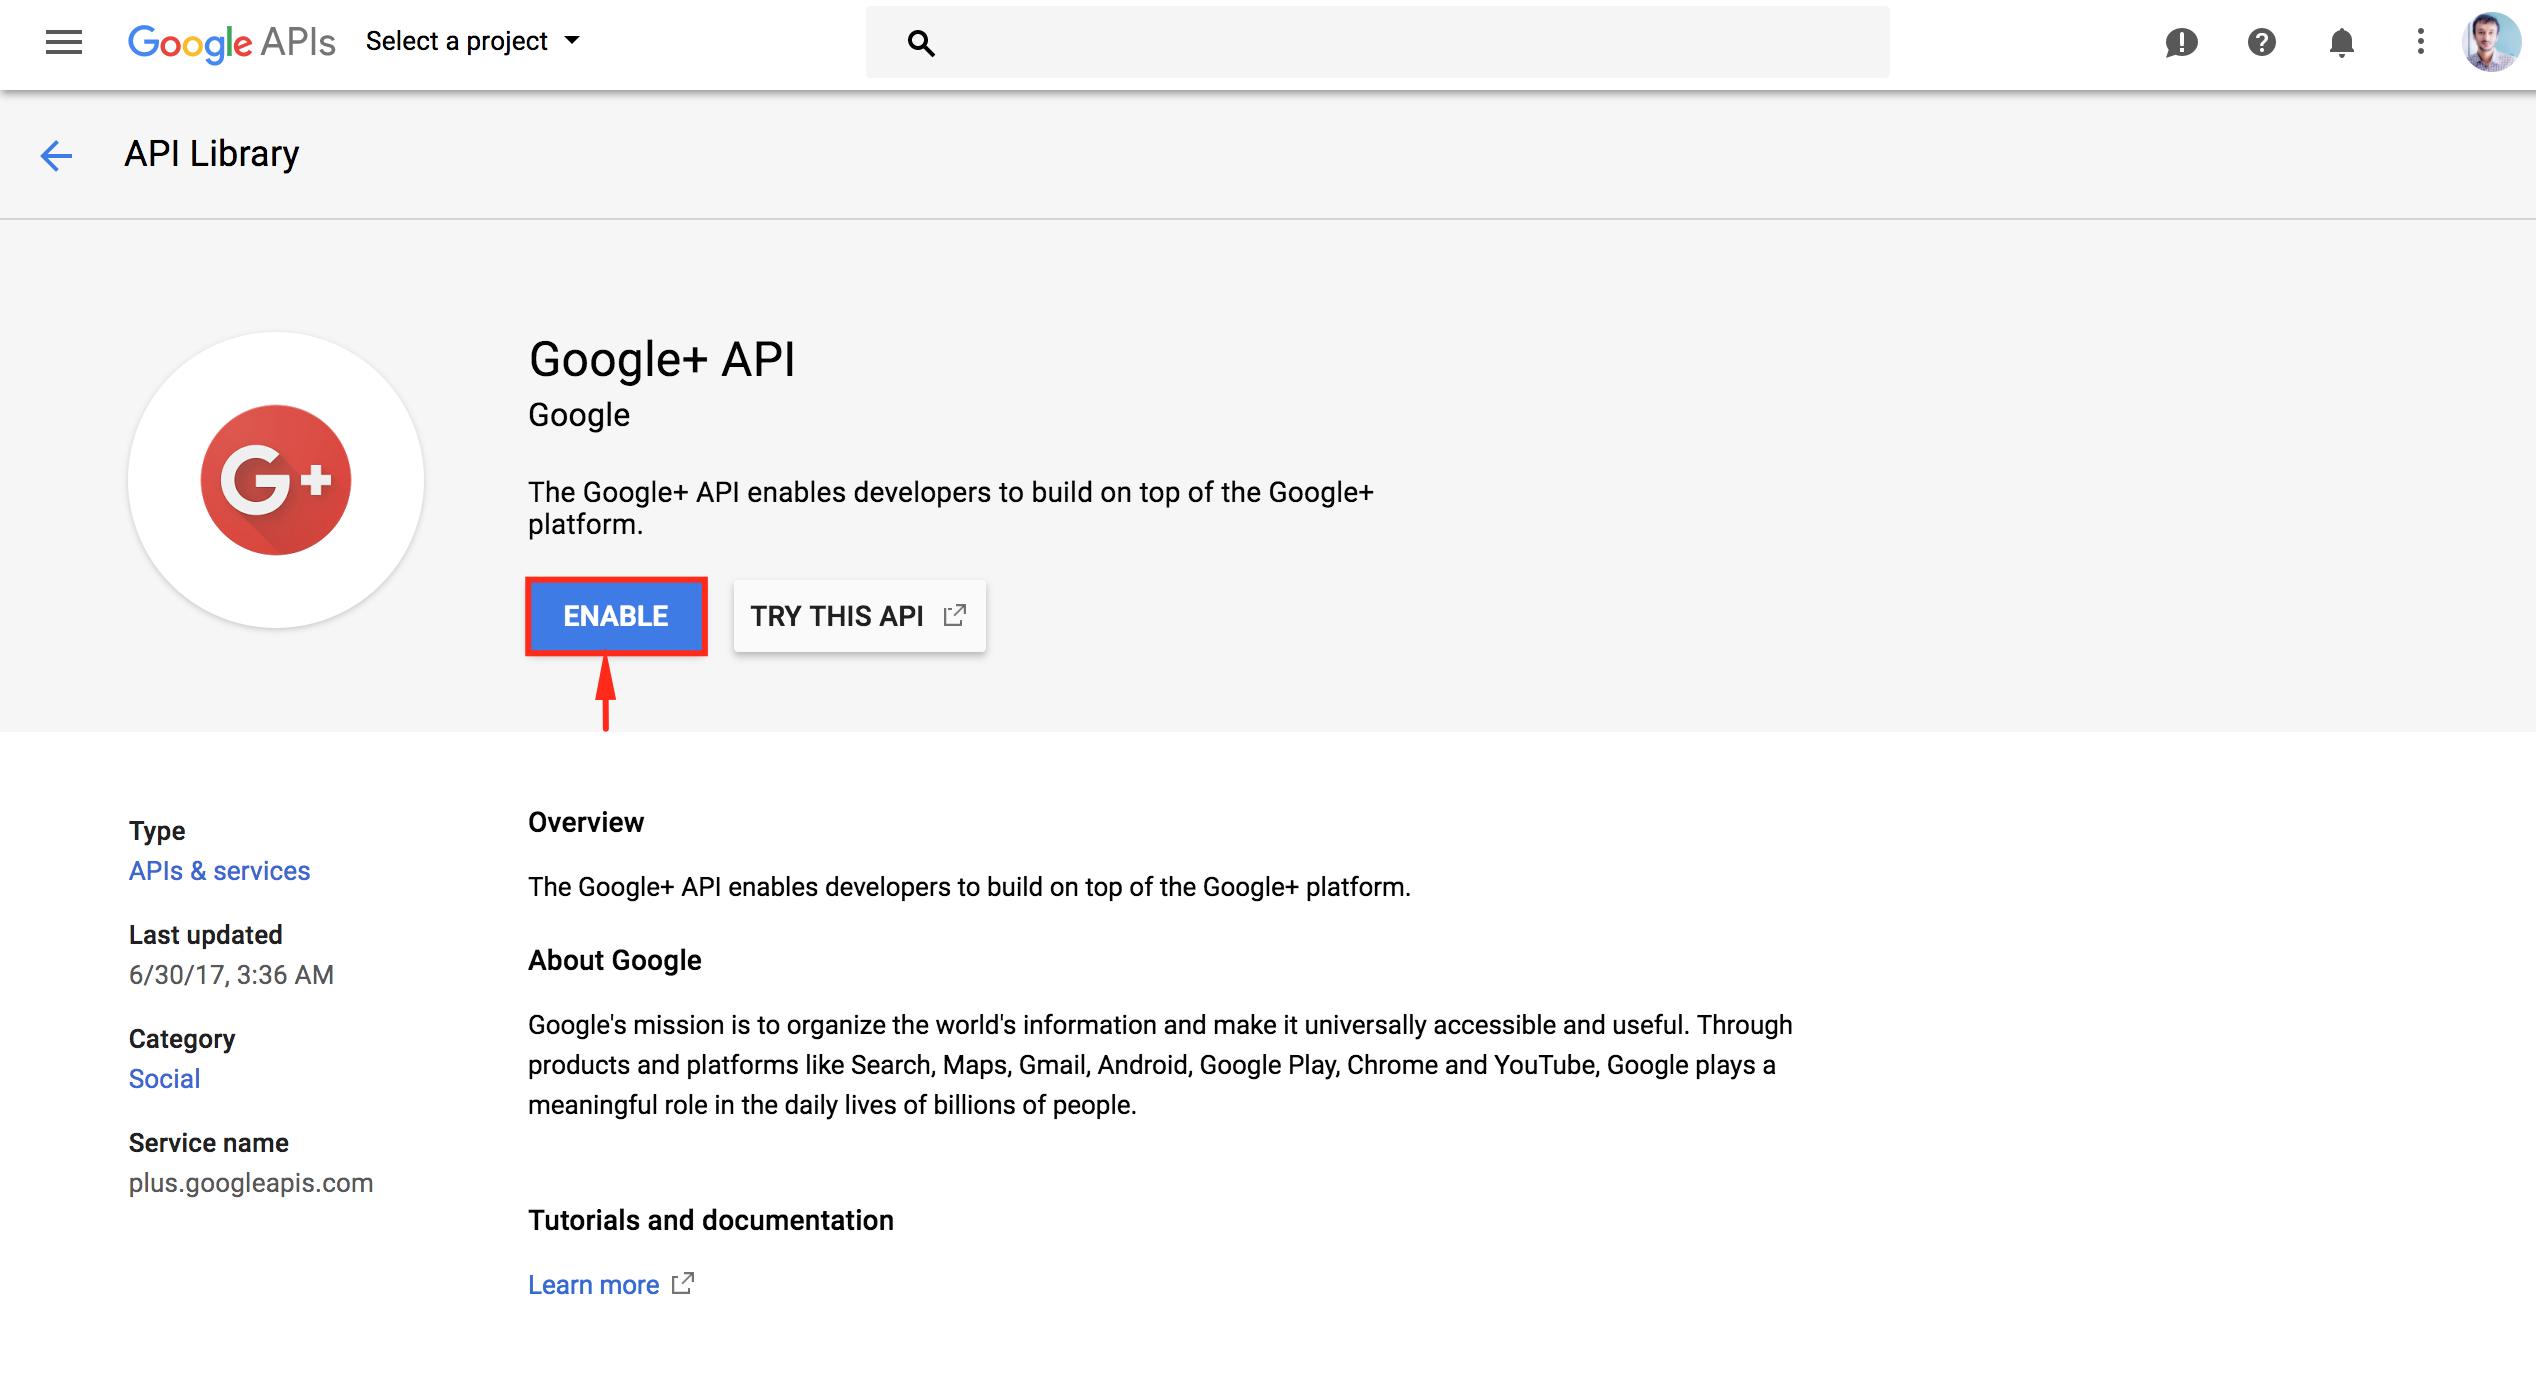
After enabling the Google+ API, Click on the ‘Manage’ button of the API. The ‘Manage’ button will appear replacing the ‘Enable’ button once if the API is enabled.
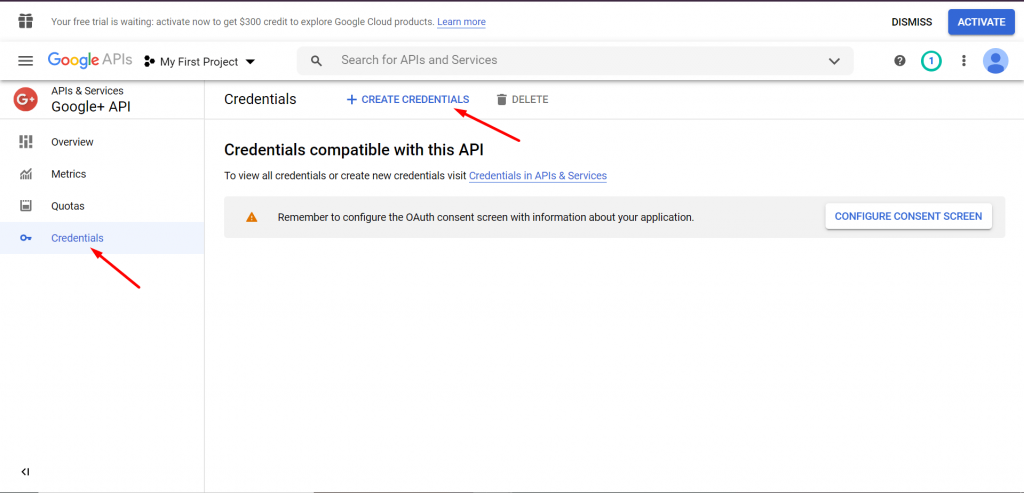
Select ‘OAuth client ID’ method to create credentials.

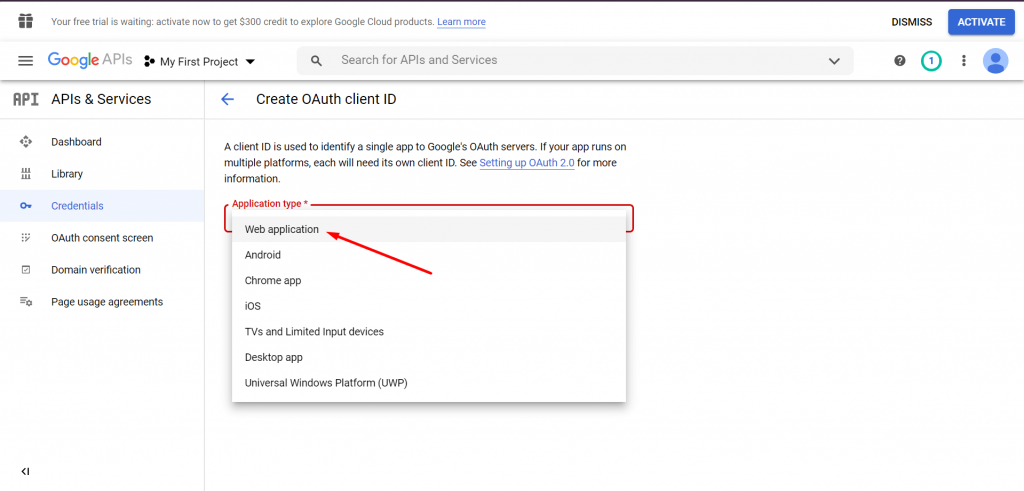
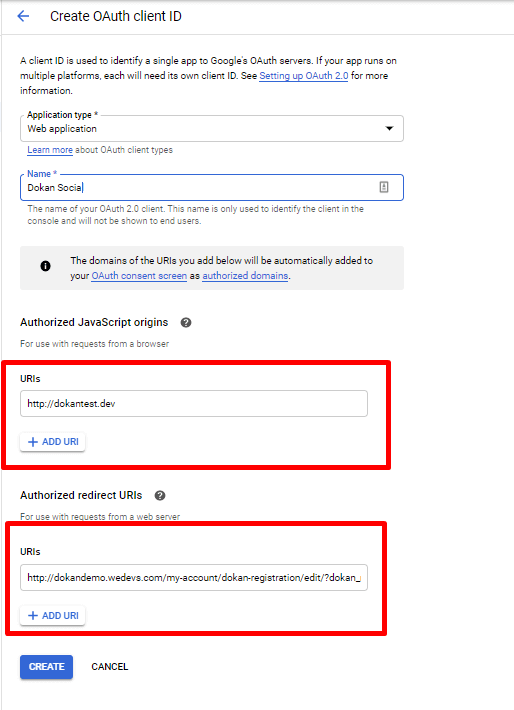
Select ‘Web Application’ as the application type.
Give a proper name of the API and insert your domain name on the Authorized JavaScript Origins field. Don’t forget to use http:// or https:// starting on the domain name.
Please note, in the authorized redirect URIs section, you need to add a backslash ( / ) after edit to make sure that it works.
Authorized redirect URIs: http://dokandemo.wedevs.com/my-account/dokan-registration/edit?dokan_reg=google&hauth.done=Google
Inserted Authorized redirect URIs: http://dokandemo.wedevs.com/my-account/dokan-registration/edit/?dokan_reg=google&hauth.done=Google
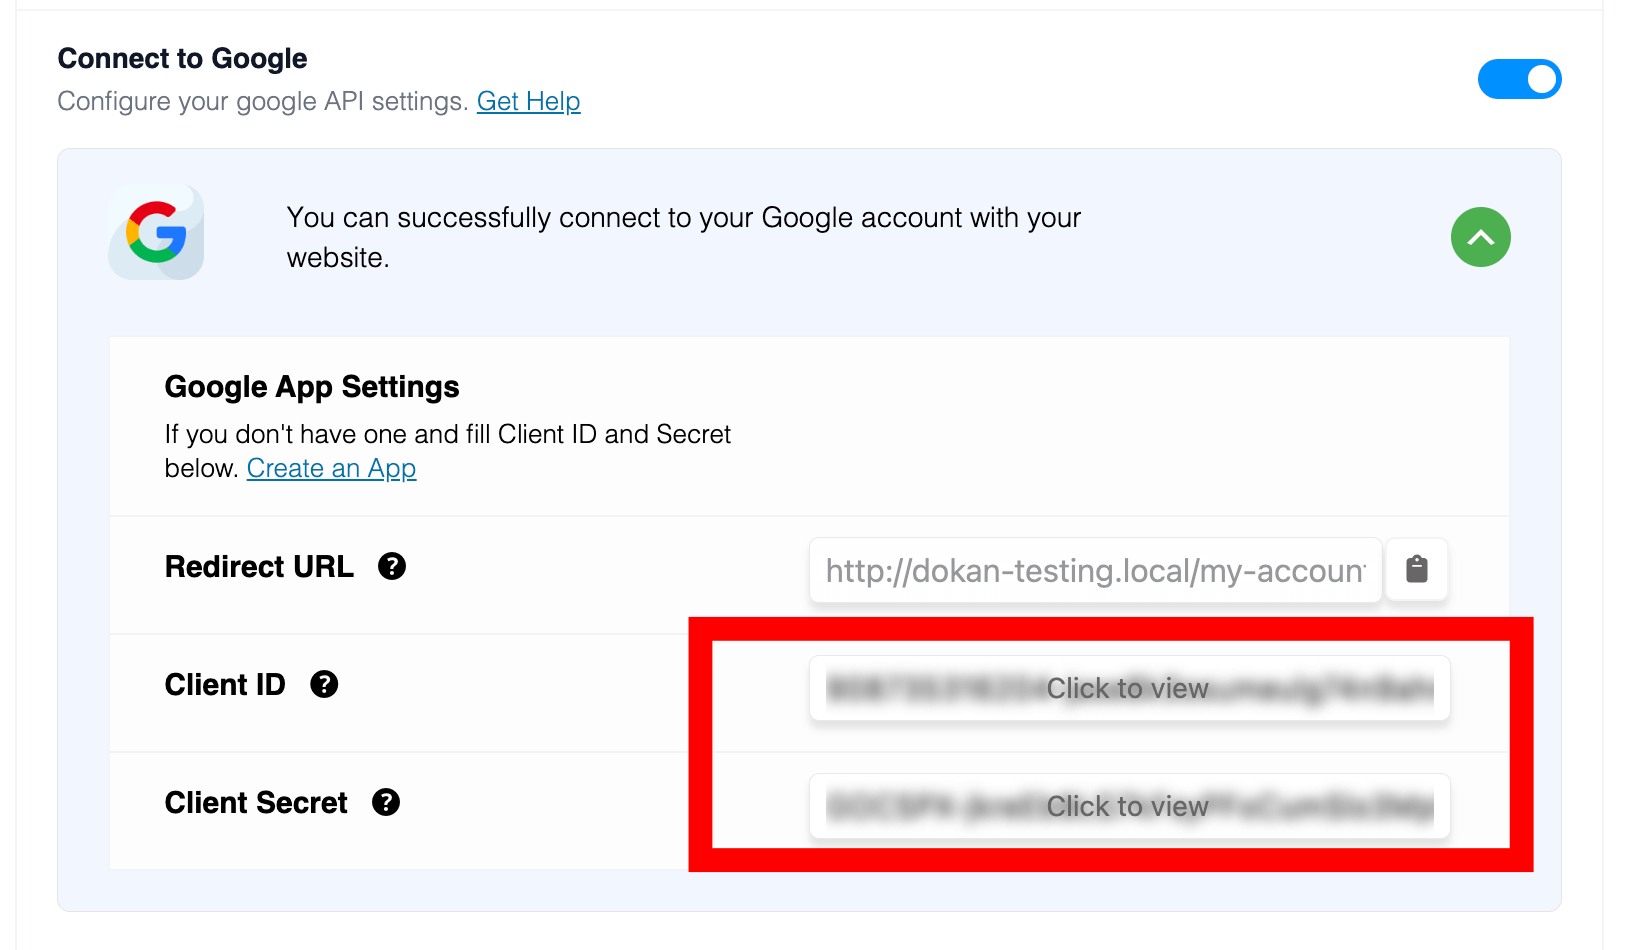
Copy the redirect URL from the setting page that has been generated already(see the screenshot below) and insert the URL of the ‘Authorized redirect URLs’ field.

Click on the ‘Create’ button and you’ll get a popup like a screenshot below.
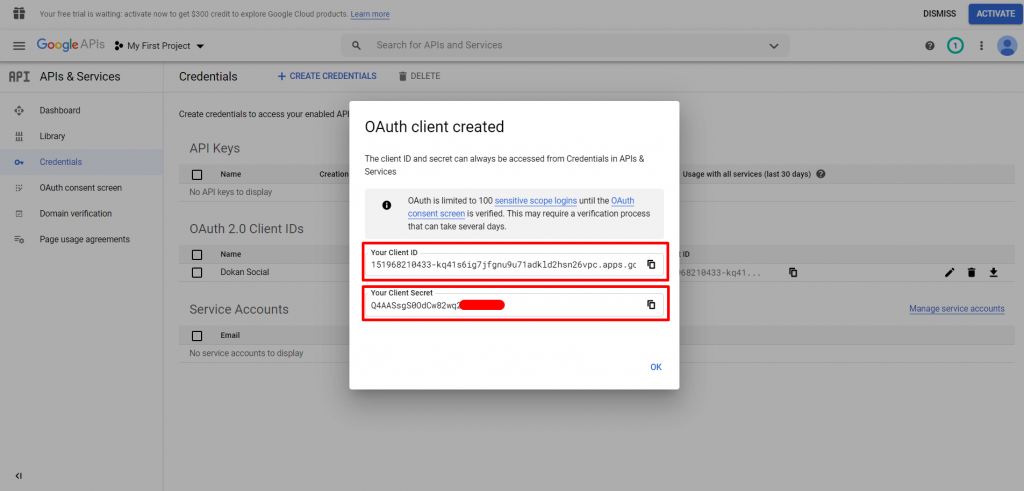
Copy and paste the Client ID and Client Secret and insert it into the setting page. Click on Save Changes.
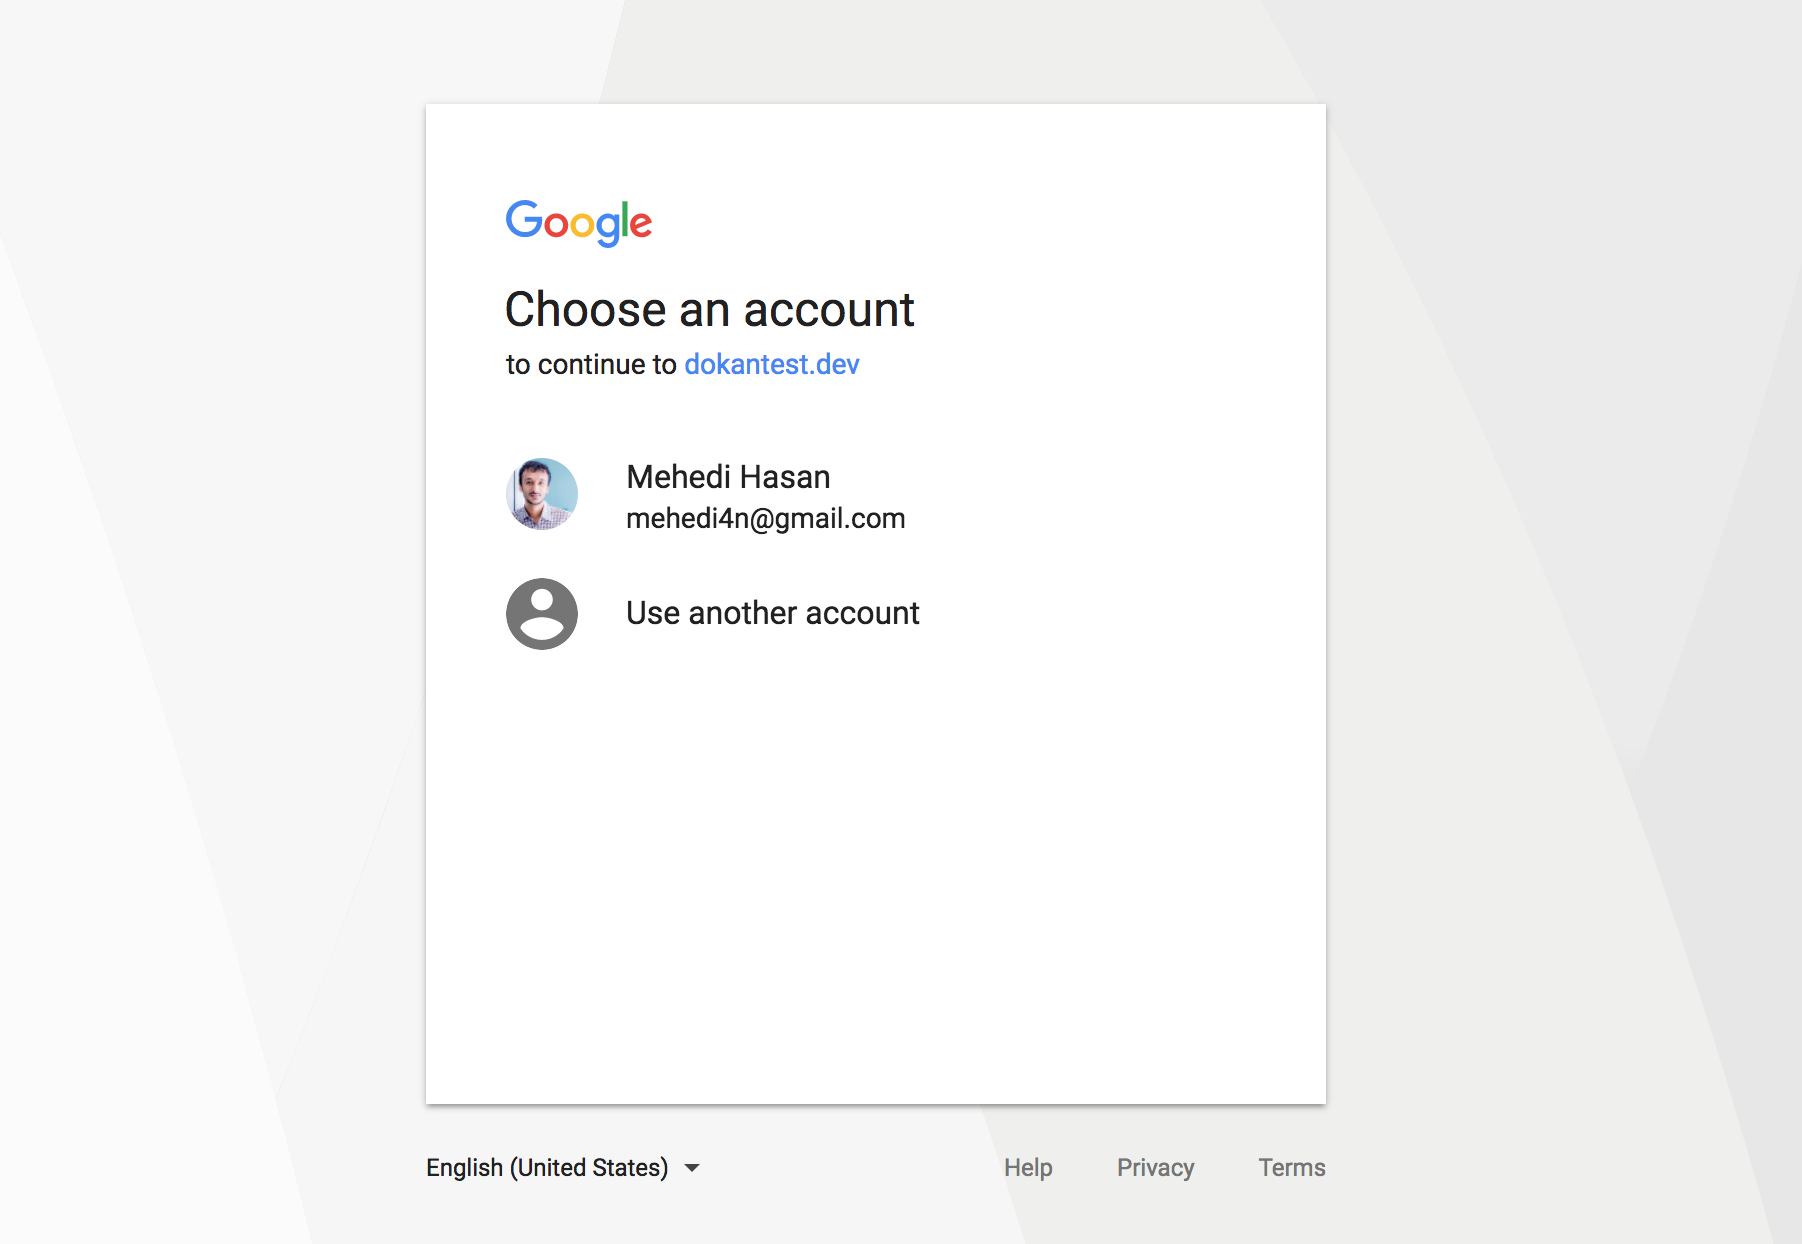
All done. Now check my account page and click on the google plus icon to register/login using your Google account.
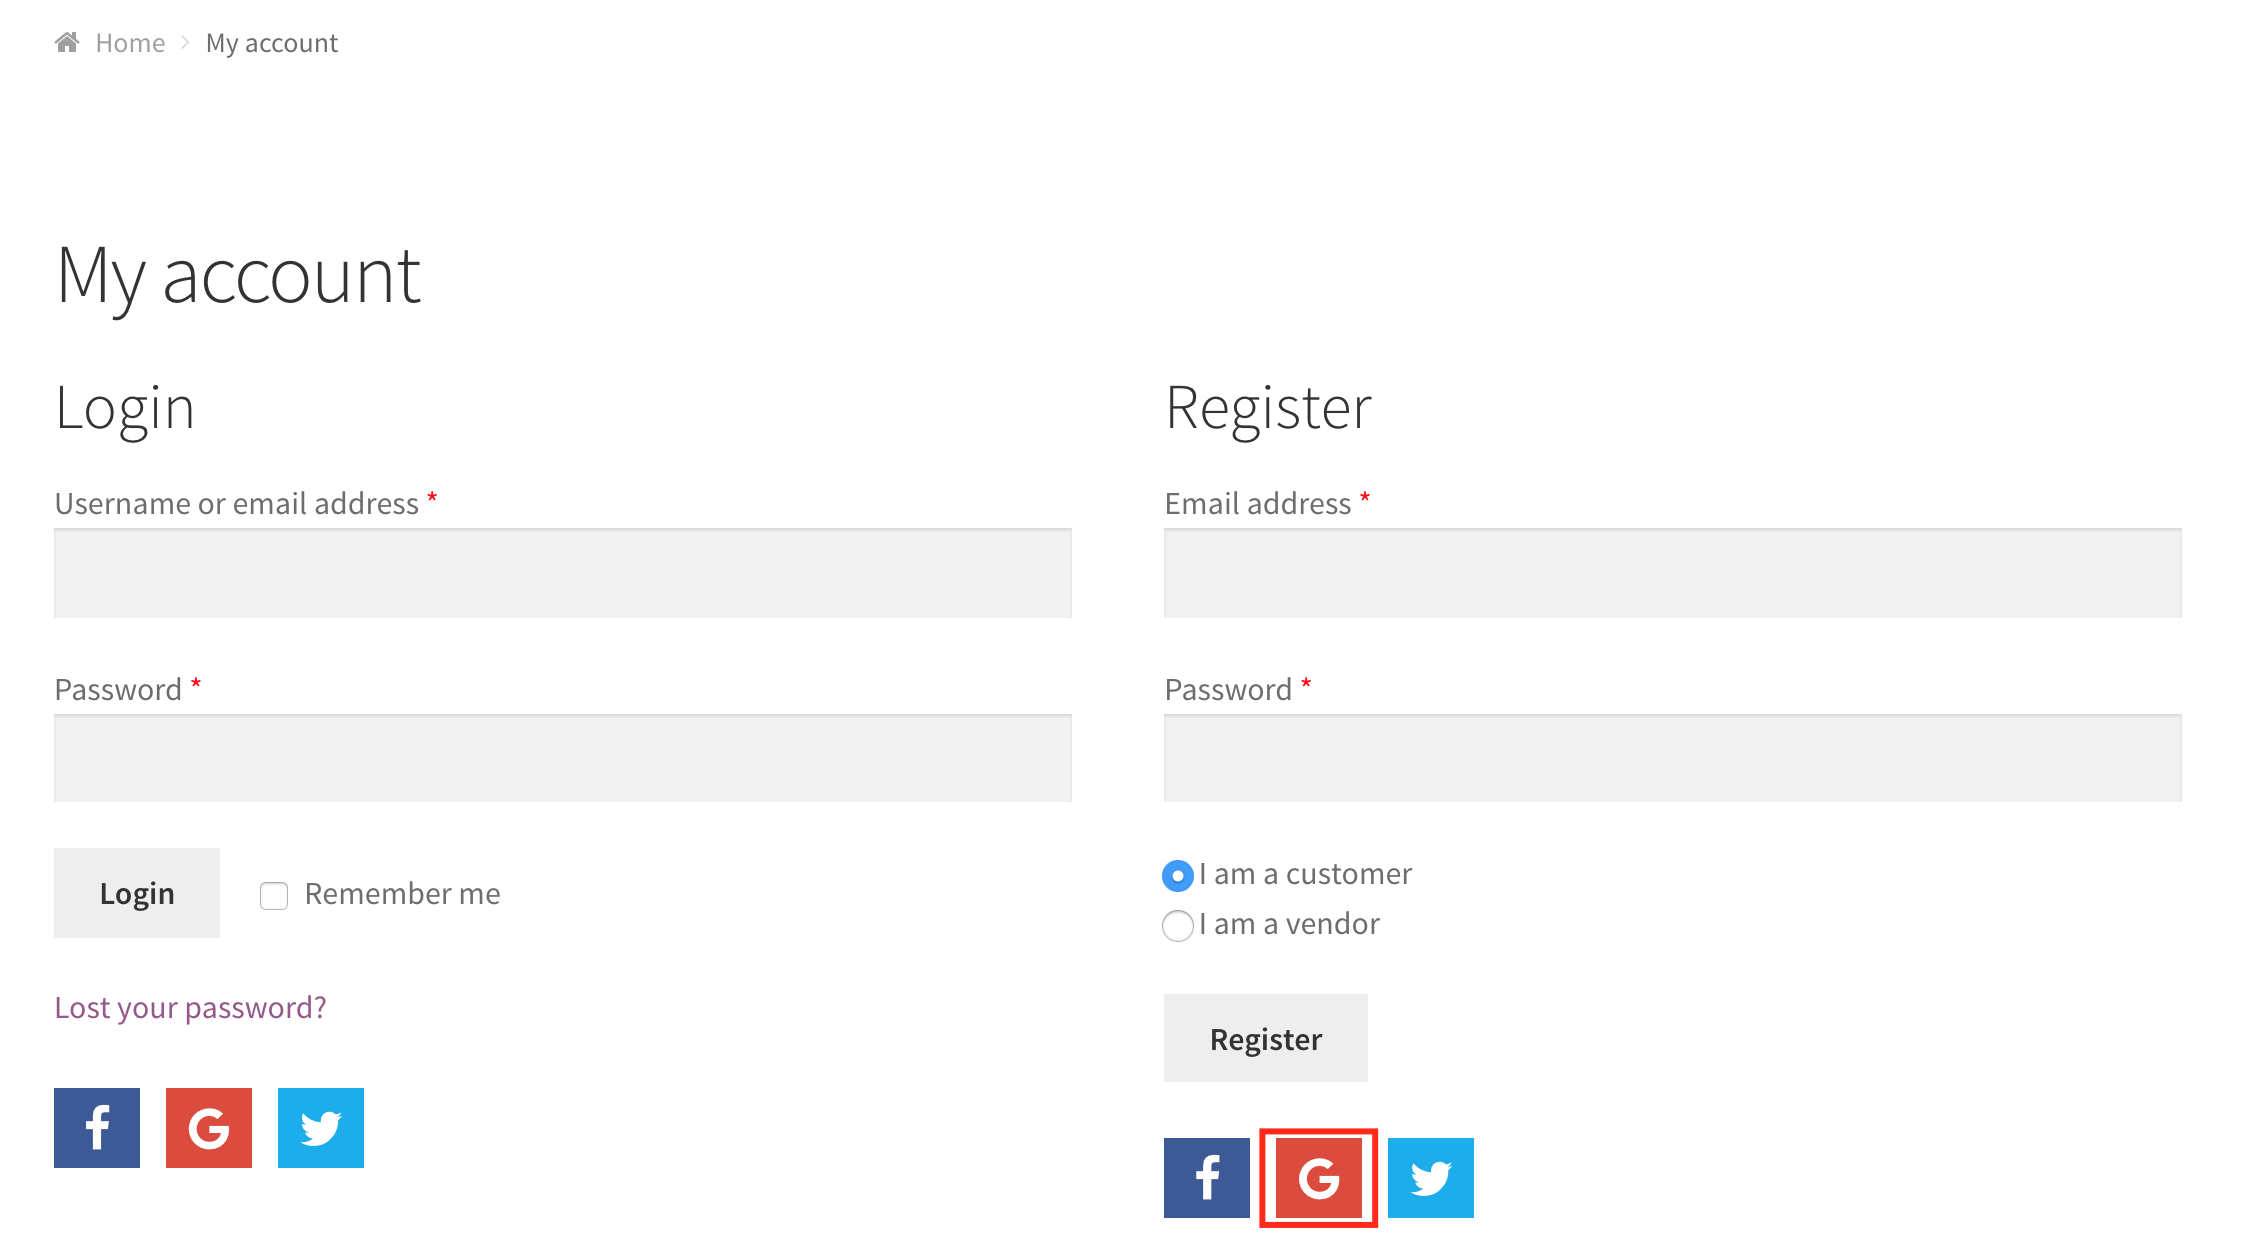
After clicking on the Google icon, you’ll be redirected to a page where you’ll be asked to log in to your Gmail account. Just log in and give access permission.
That’s it. Your Google API is now successfully configured.
Please note that, You need to go through the verification process before you launch your app, this new process came recently to protect user’s data. You can submit an application to google using this form to verify your apps but please go through this link before submitting the application.

Your apps will show an error like the above screenshot unless you verify it from google to make it accessible publicly.