Dokan Vendor Verification module allows the vendor to set their social profiles to their storefront so that they can earn their customers’ trust.
Configuration For Vendor
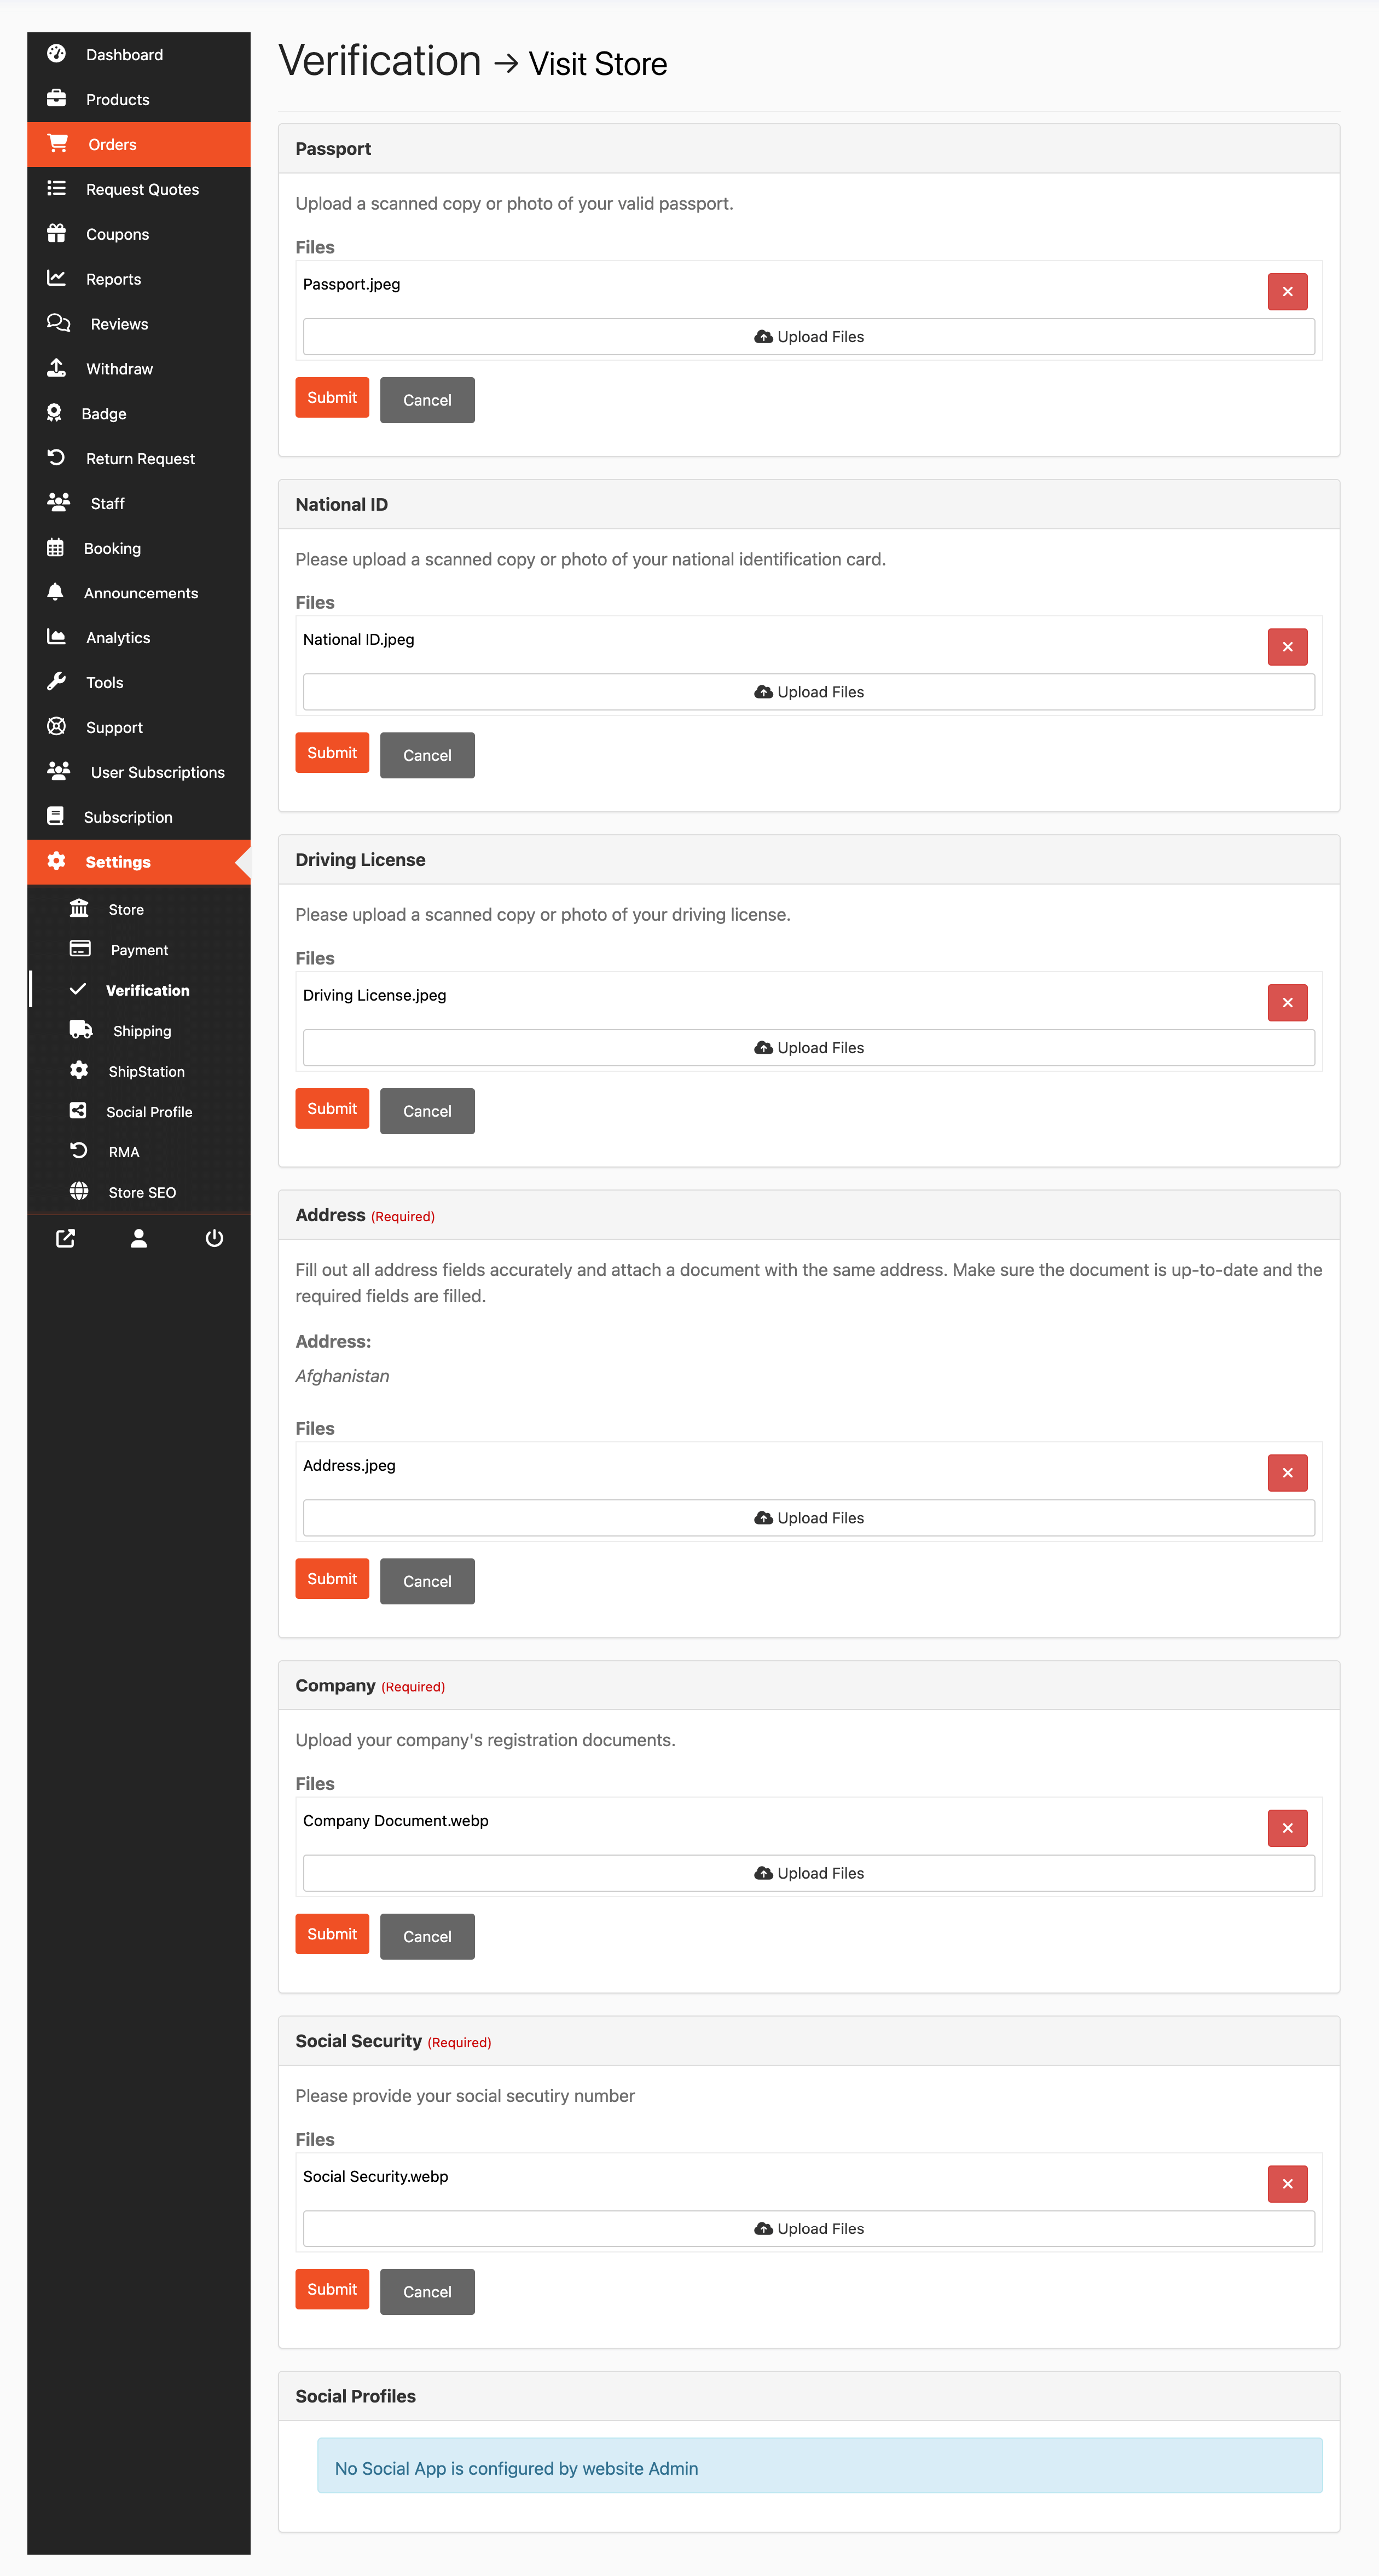
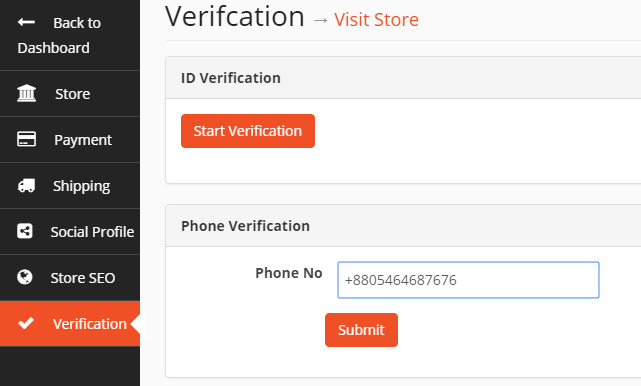
This is how the panel looks like by default. The seller has to go to Vendor Dashboard>Settings>Verification to meet this panel.
There the vendor can submit their documentation for verification-
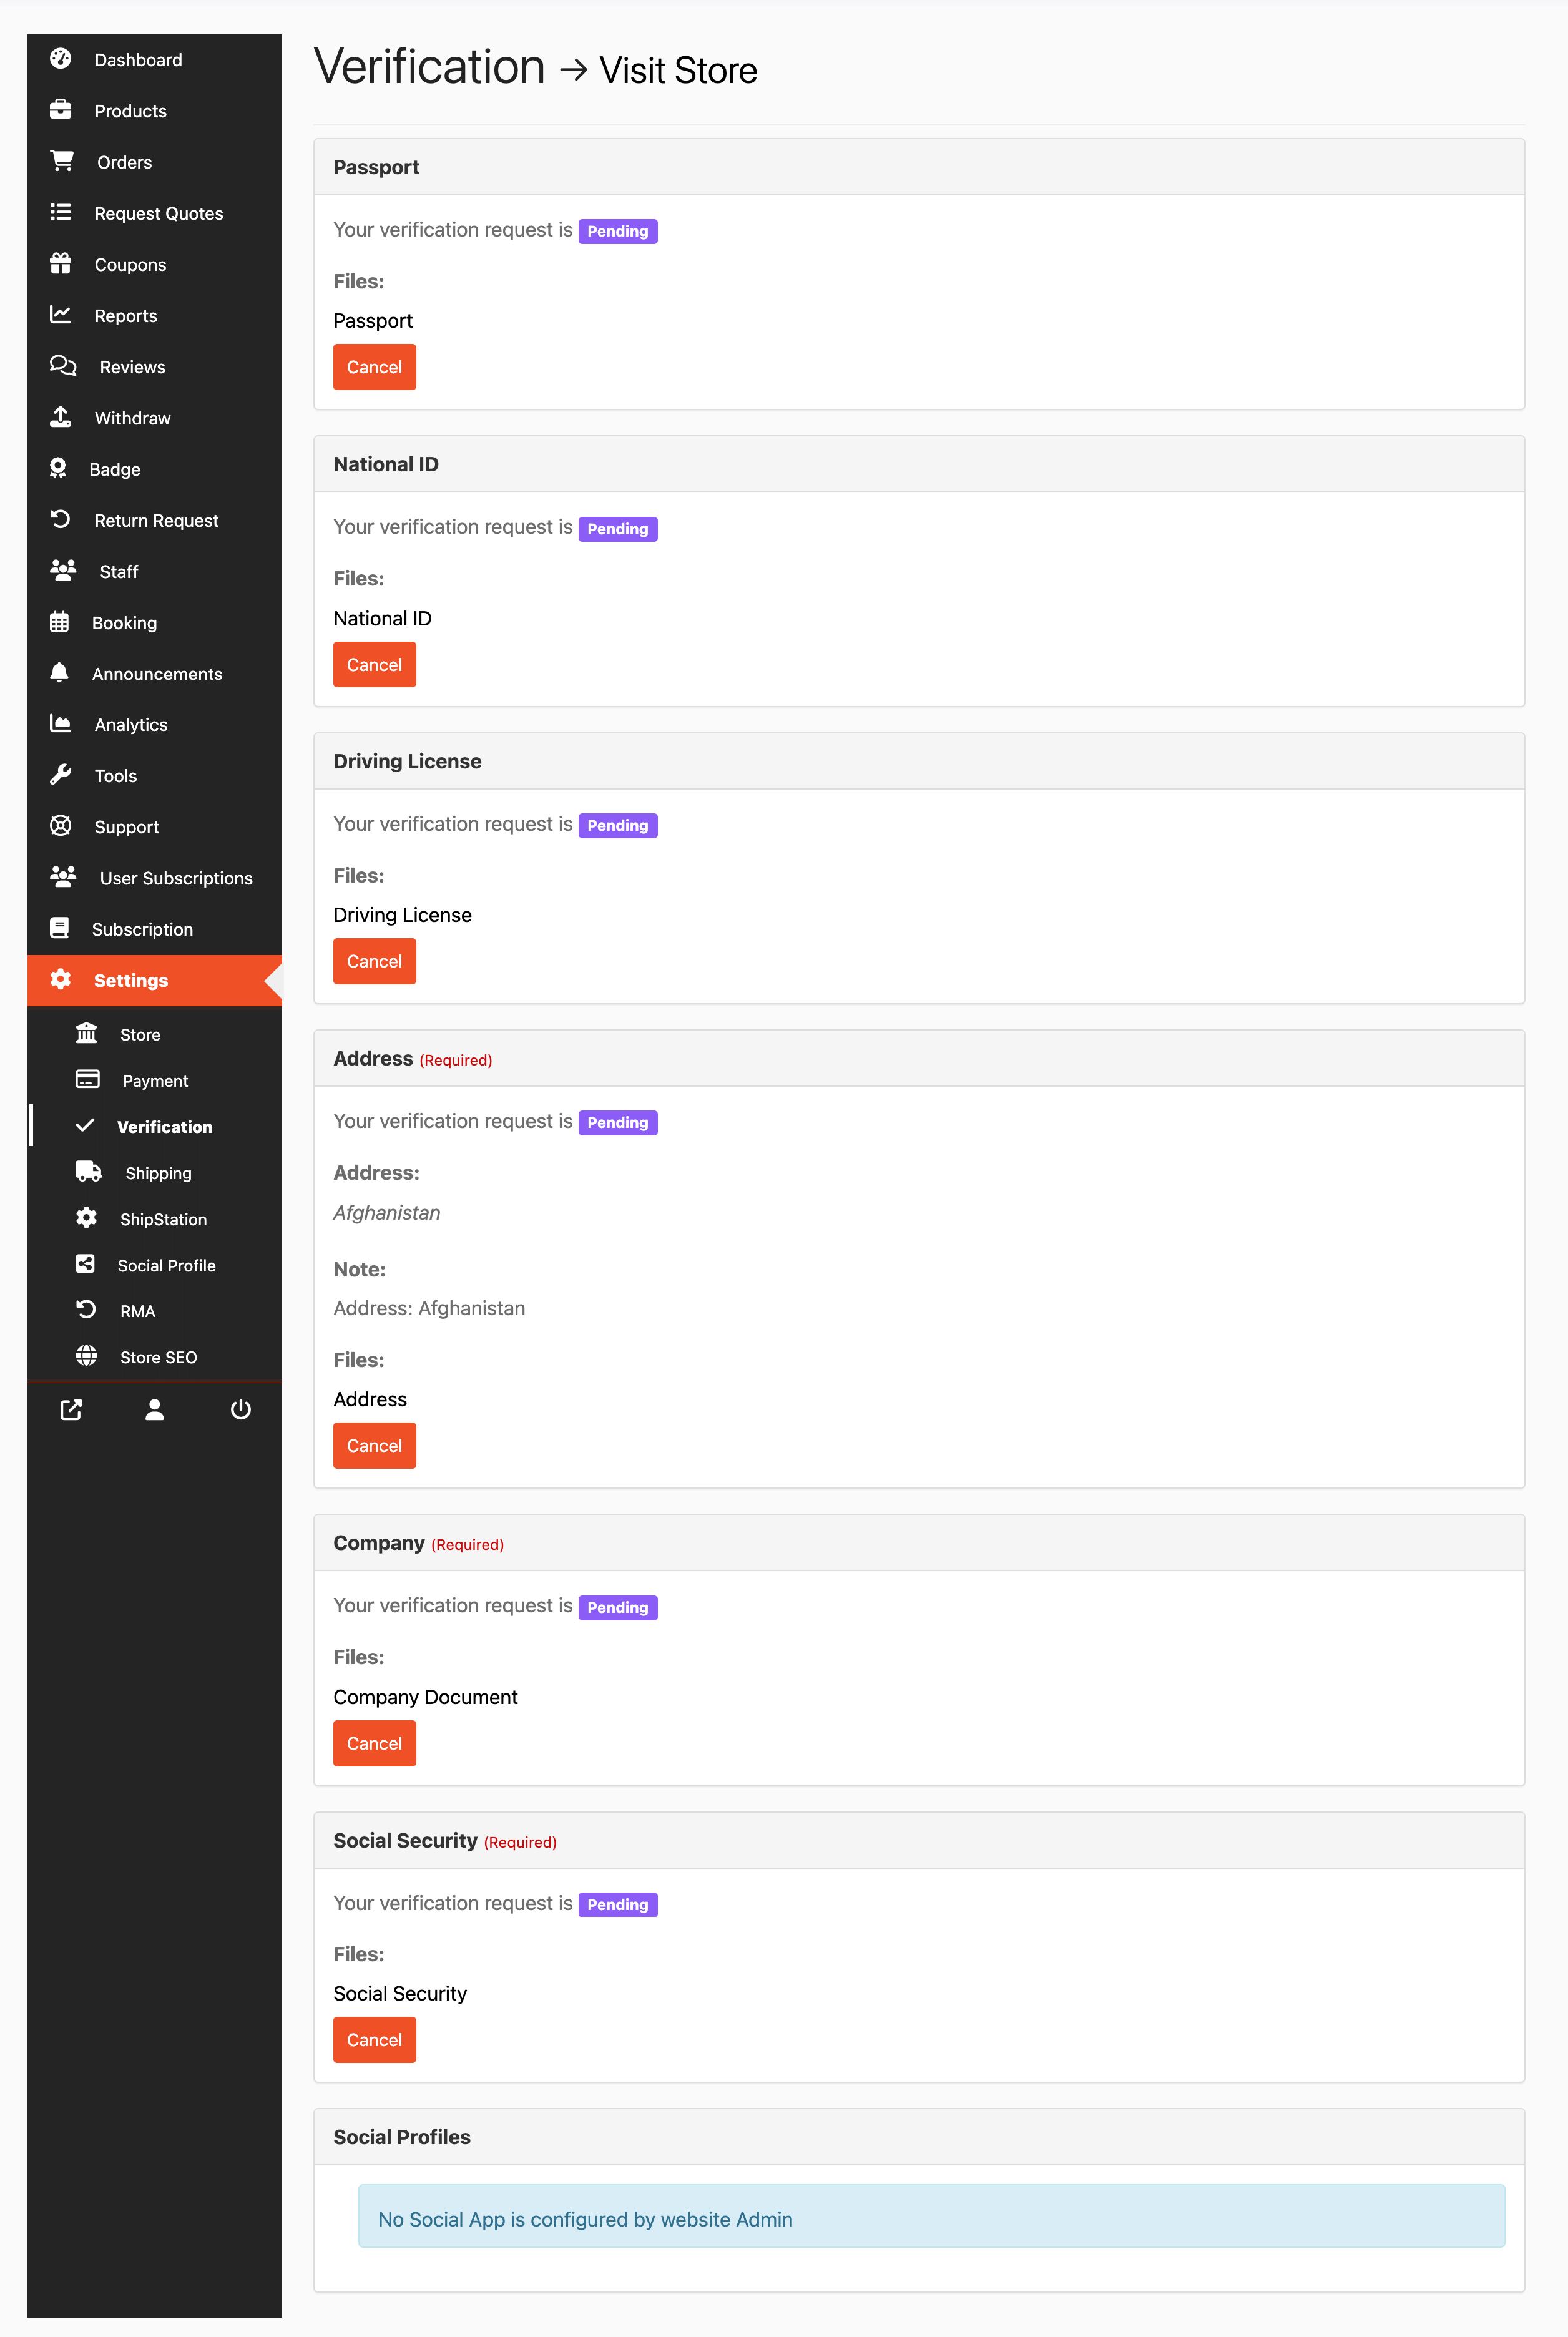
After submitting the documentation, the status will show pending–
When the documents have been approved, then the vendor will see the Approved status, and if the document is rejected, then it will show the Rejected status-

When the document is rejected, then the vendor needs to resubmit the documents again.
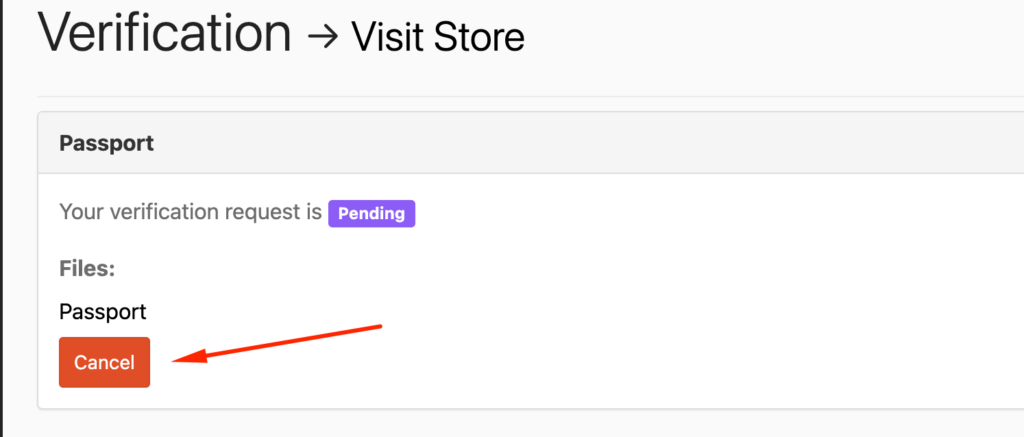
The vendor can also cancel the document-
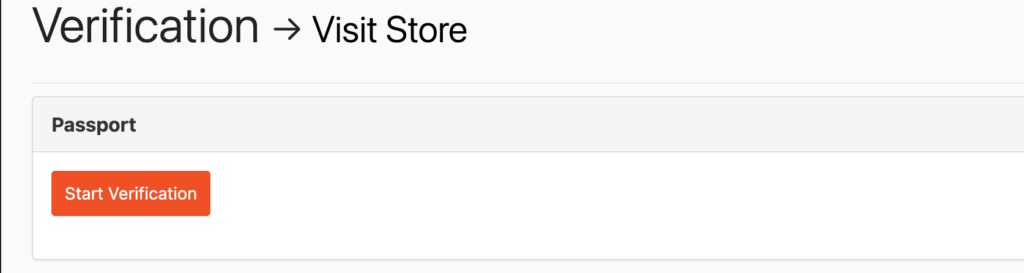
And start the verification again-
Cell Phone Verification
Note: Admin must configure Dokan>Settings>Verification SMS Gateways from wp-admin dashboard in order for this field to appear on Vendor Dashboard.
Phone Number is verified by sending a code to the vendor’s cell number. The vendor needs to enter that code on the screen and submit. If the code matches, the number will be verified instantly.
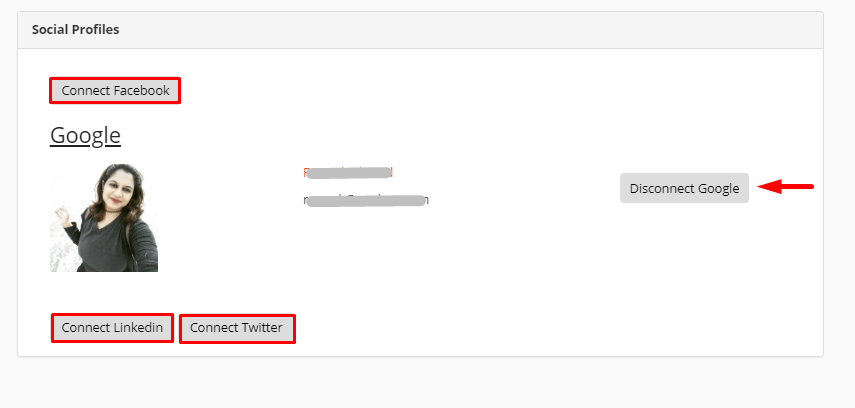
Connect Social Profiles
The vendor has to go to Vendor Dashboard>Settings>Verification and click the connect button of the relative social profile. Only those social buttons will appear which the store admin has added.
NOTE: Vendor social profile verification will not show in the storefront unless vendor has completed at least ID verification or address verification.
What the Customer Views
When all the verification are done, customers will be able to see them on the storefront like this:
Also, the customer can see the badge in the single store page-
Also, they can view the badge in the store list as well-
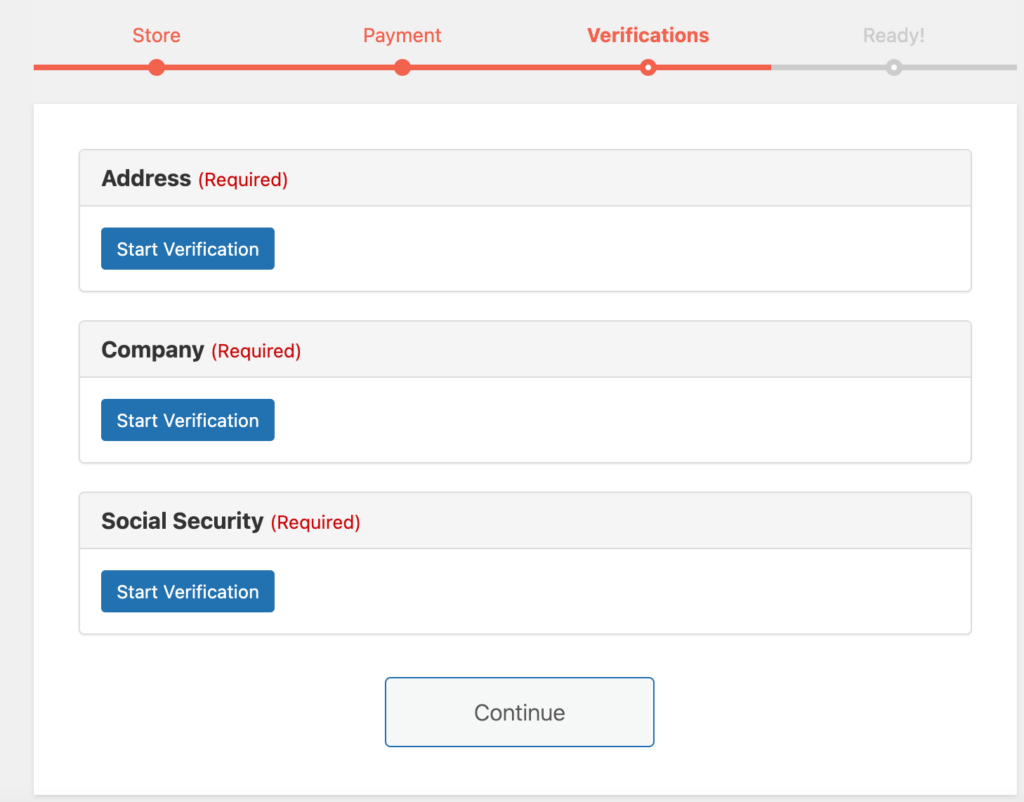
Setup Wizard Verification
The vendor needs to verify their documents while finishing the setup wizard.
Note:
- If the store address is enabled and set as the required field, then the vendor must provide store information and address information in order to continue forward.
- If the default address is changed then the vendor needs to verify their address again
- Only the required field will be visible in the setup wizard.
- But the vendors can skip this step by clicking Continue and verify their information later from the vendor dashboard settings.
This is how the vendor can configure the vendor verification.

