As part of the lucrative Live Chat module of Dokan, Admins and vendors can integrate their store with the amazing tawk.to platform. It is free software that lets their users monitor and chat with the visitors on their store.
You can easily give live support with one on conversation with the visitor.
Let’s explore the process of setting up the tawk.to integrate with your marketplace, empowering you to deliver exceptional live chat support to your customers.
| Note: This needs to be configured from every vendor’s end from their dashboard for their own store. |
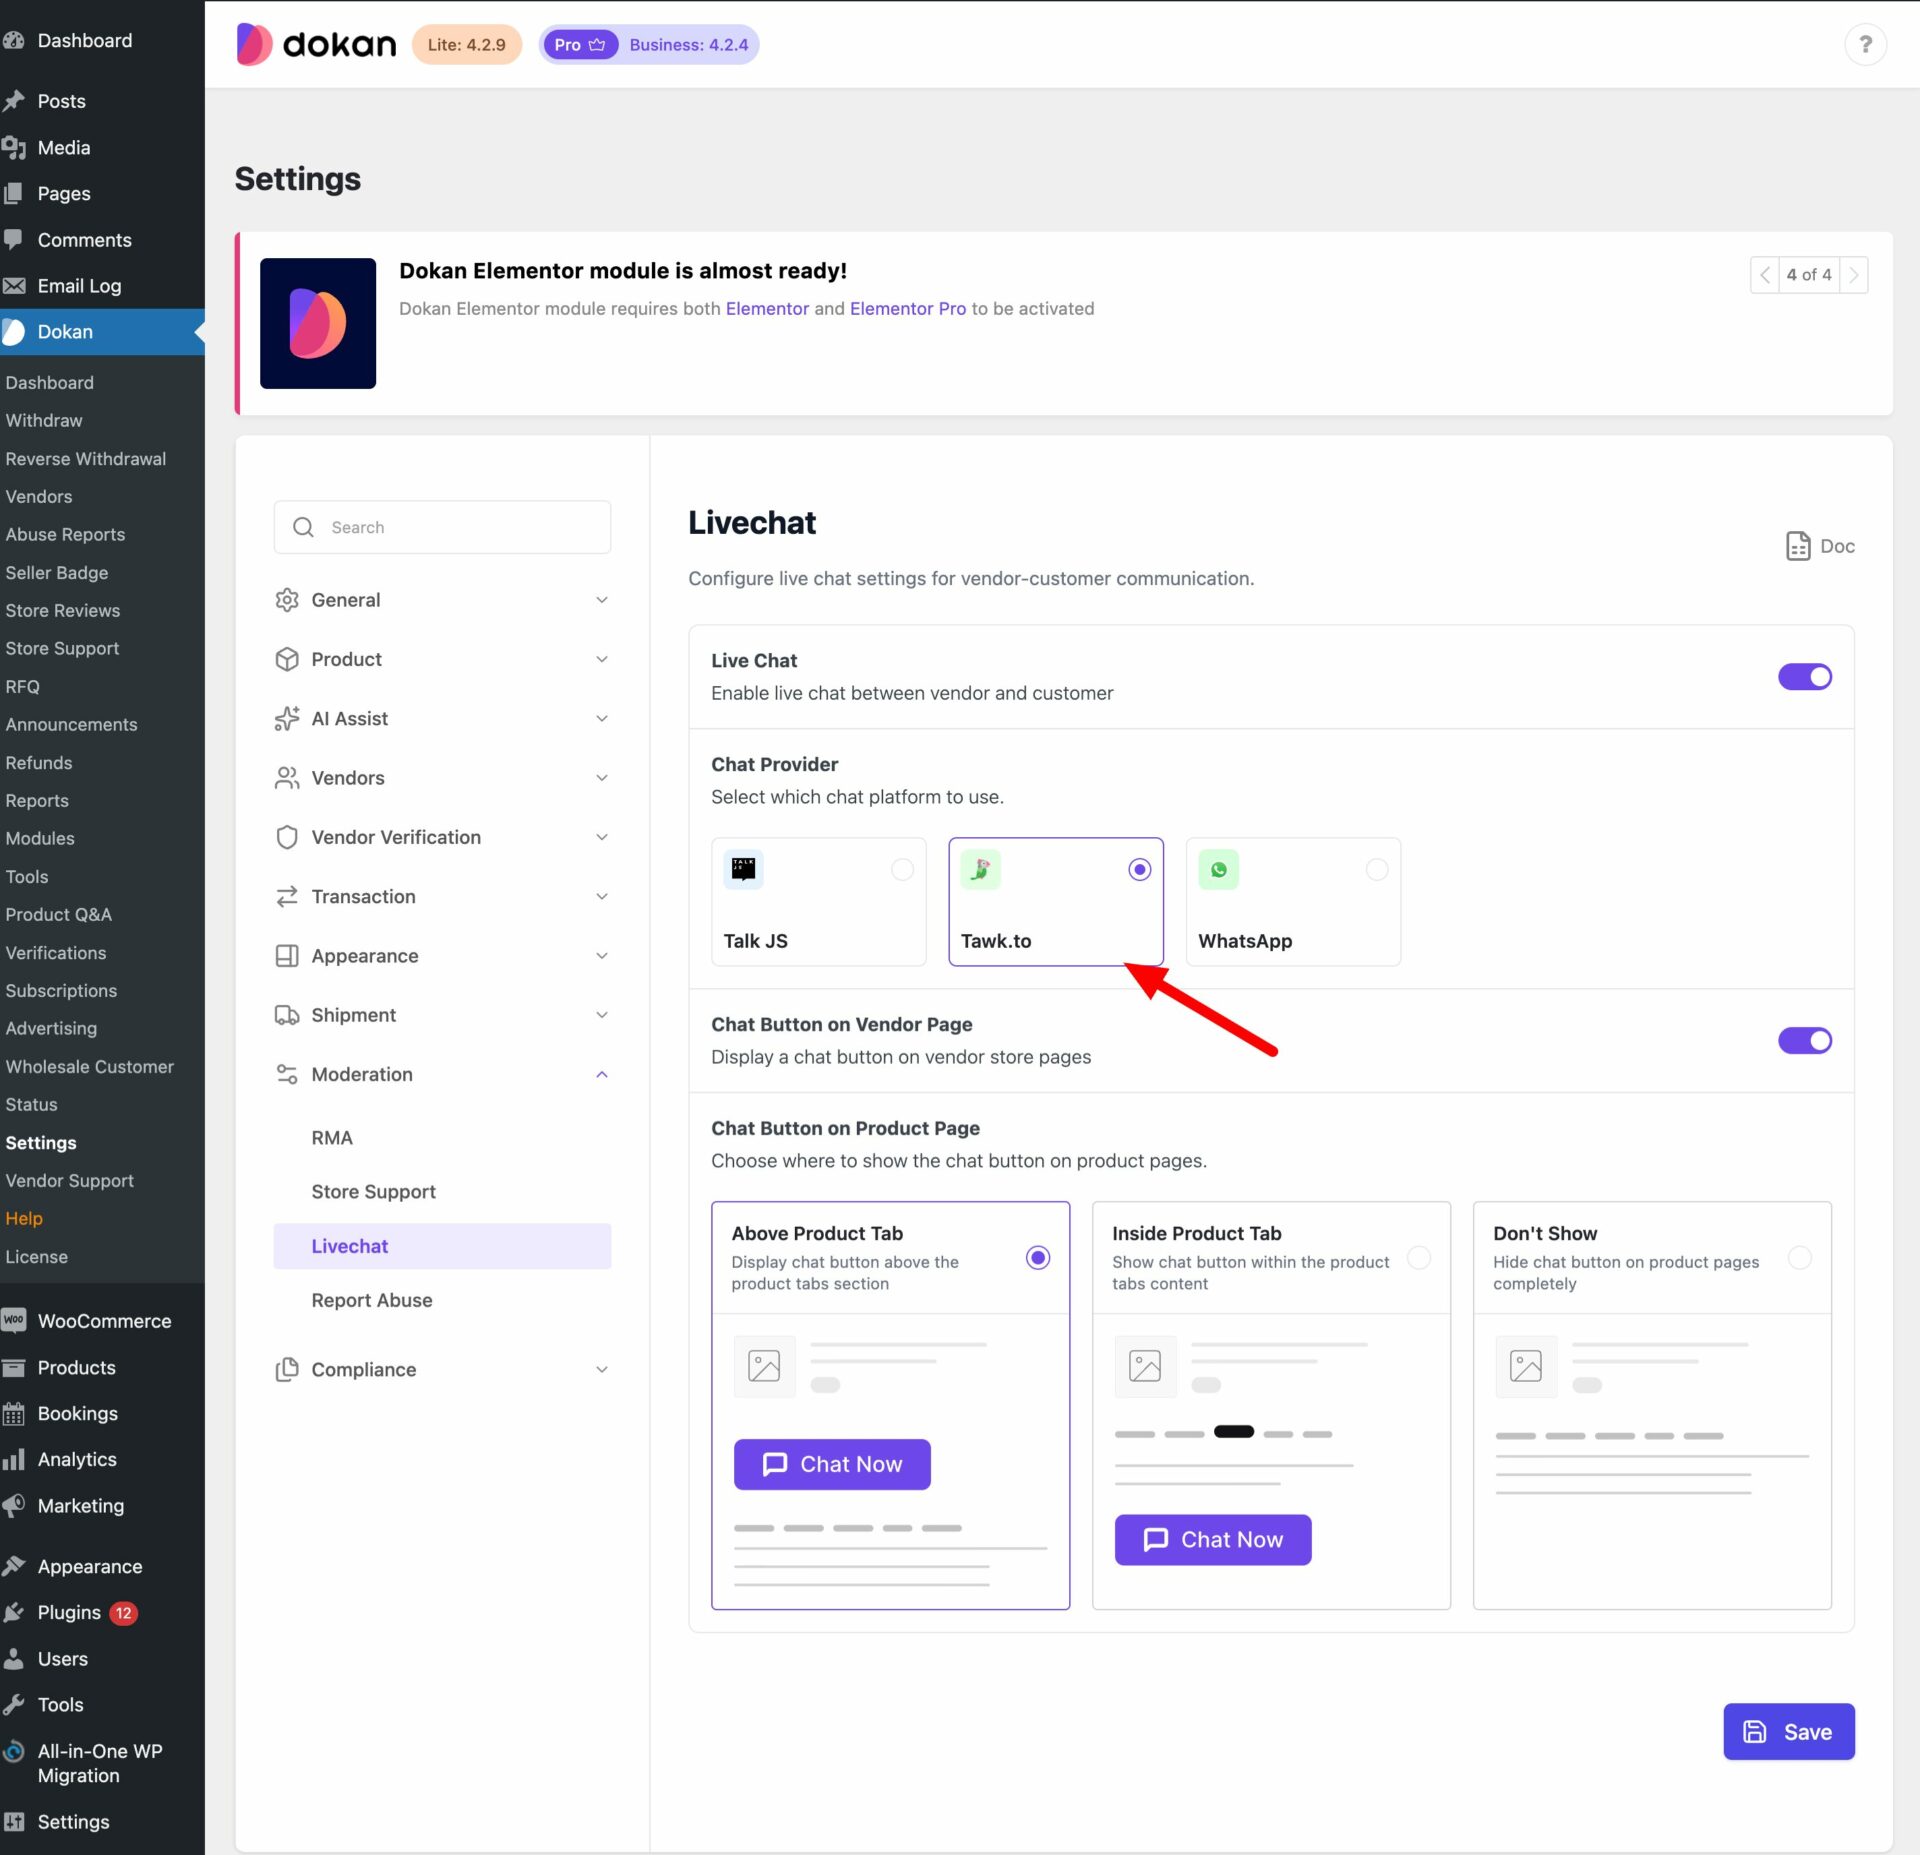
Settings for the Admin
To enable tawk.to integration, the admin or owner of the marketplace can simply navigate to WP admin -> Dokan -> Settings -> Live Chat in the dashboard. From there, enable tawk.to and click on the Save Changes button. That’s it for the admin side.
Settings for the Vendors
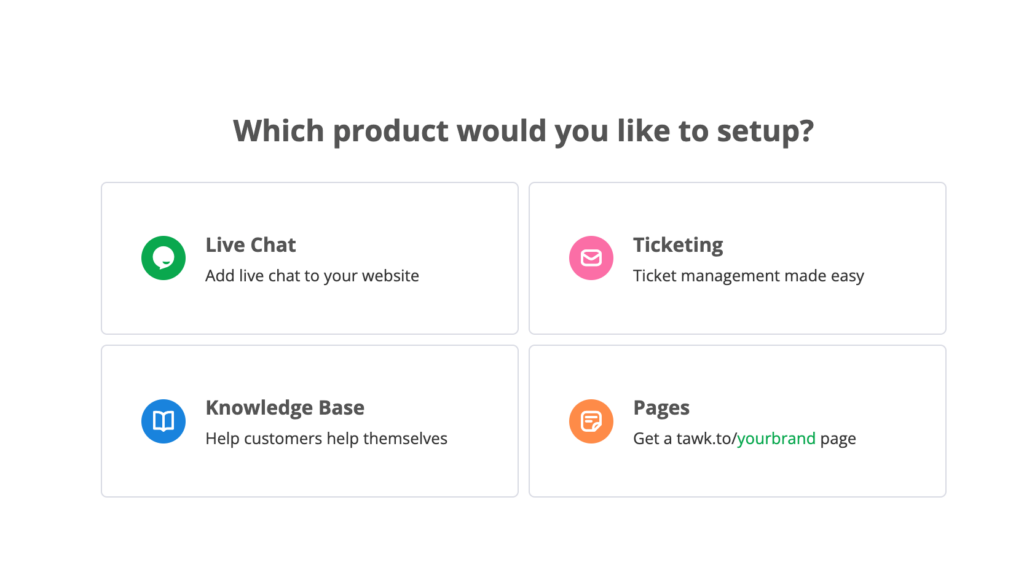
Step 1: Create a tawk.to account
To get started with tawk.to integration, vendors need to create their own tawk.to account. Rest assured, signing up for a tawk.to account is completely free, requiring no payment. Enjoy the benefits of this platform without any financial commitments.
Choose Live Chat while configuring the Setup wizard-
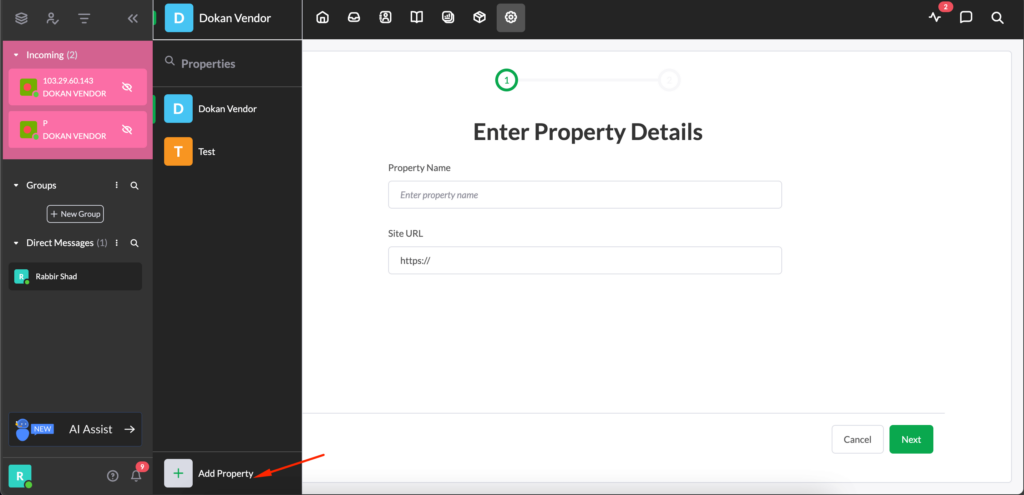
Step 2: Add property
To obtain the tawk.to property and widget ID, you need to create a property on your tawk.to account. Refer to the provided screenshot for guidance on creating the property within your account. This will generate the necessary details required for integration, enabling a smooth tawk.to integration experience.
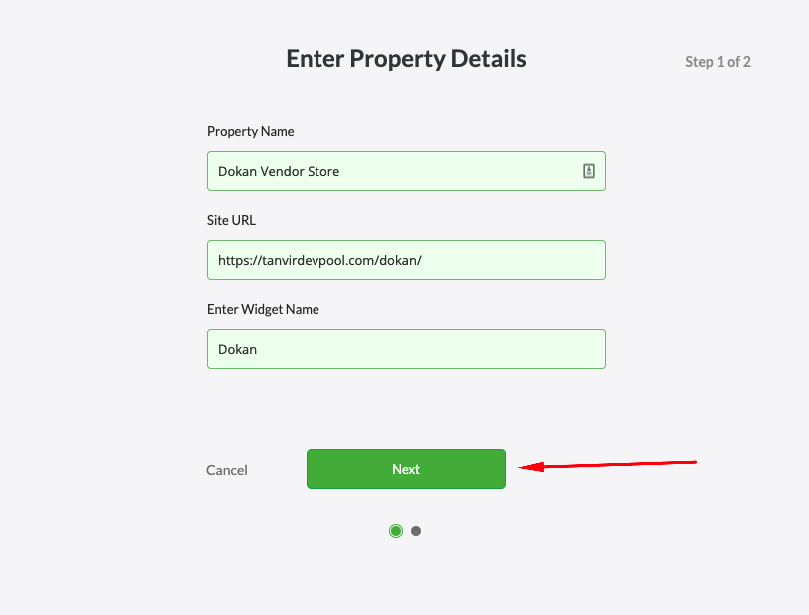
Step 3: Give the necessary credentials to finish creating the property
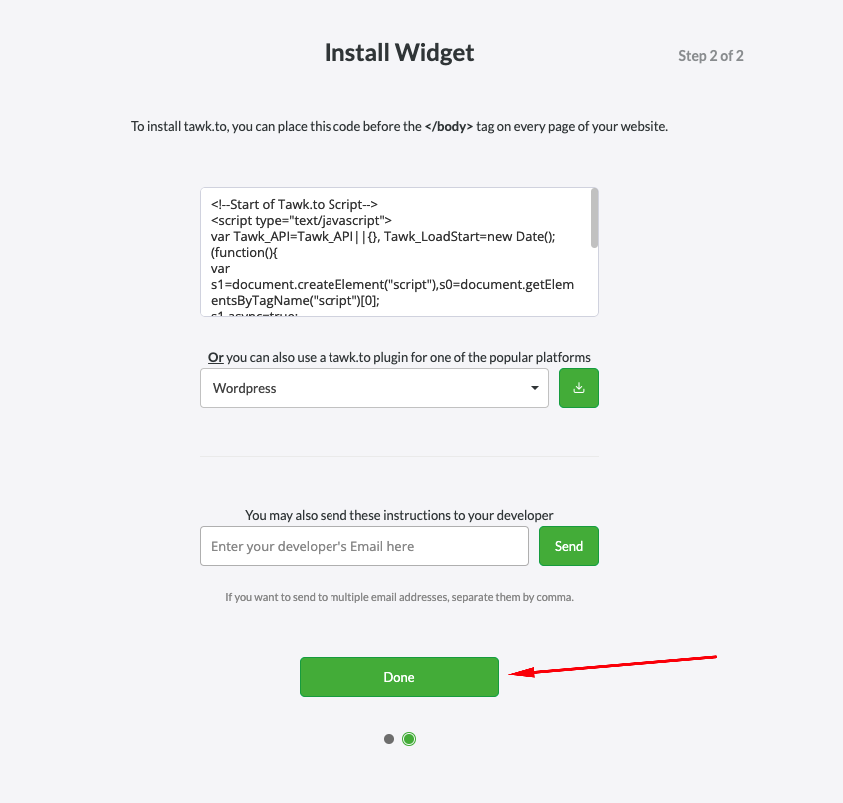
To finish creating your property in tawk.to, you need to add your Property name, URL, and Widget name. Then click the Next button.
Now, click on the Done button to finish.
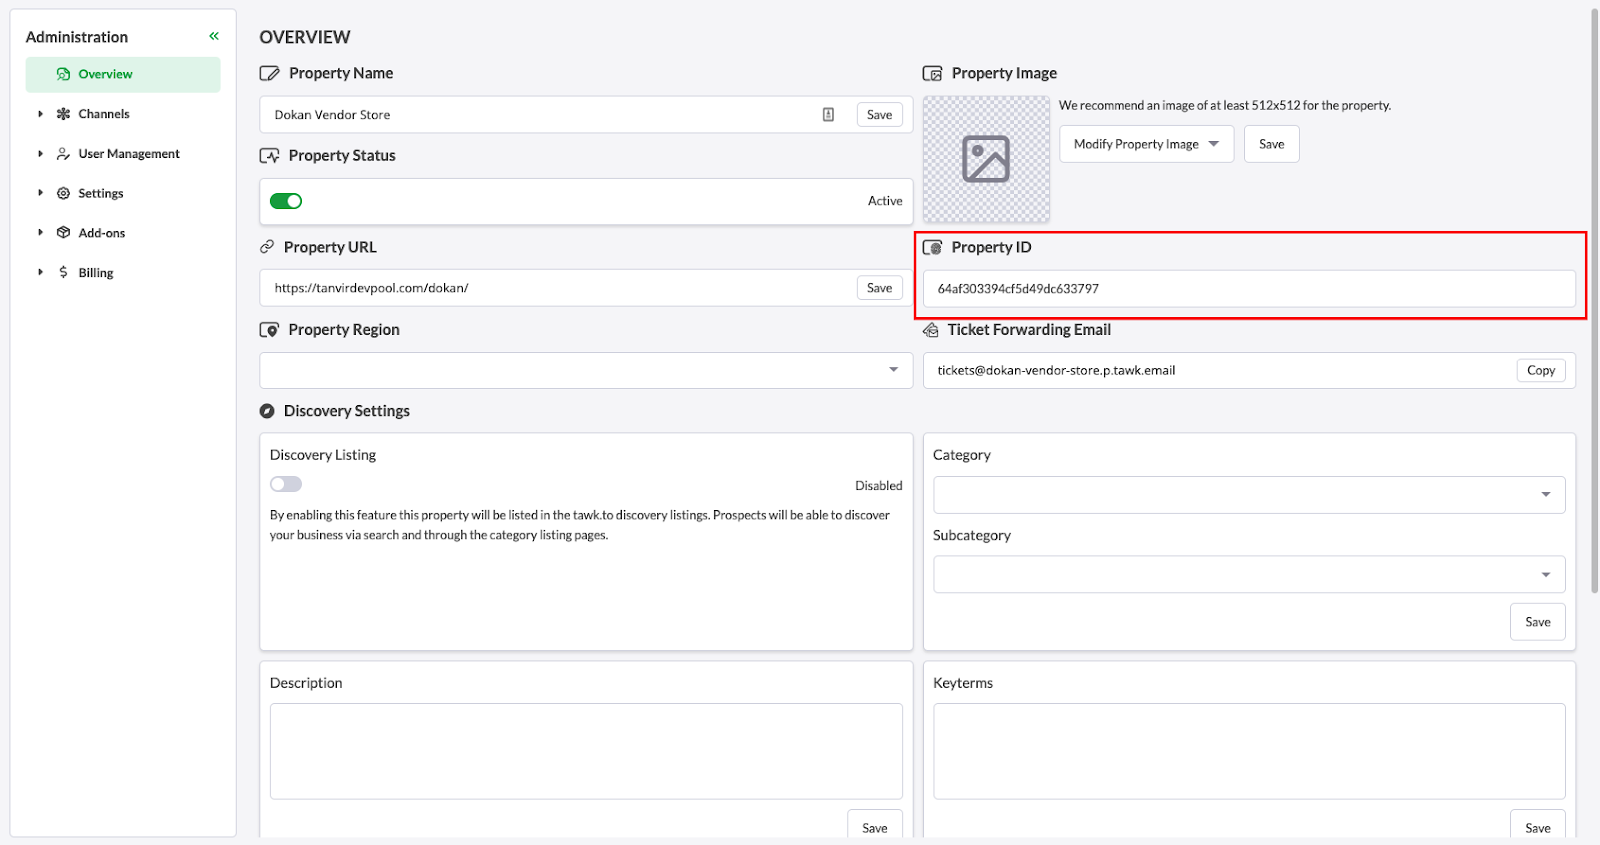
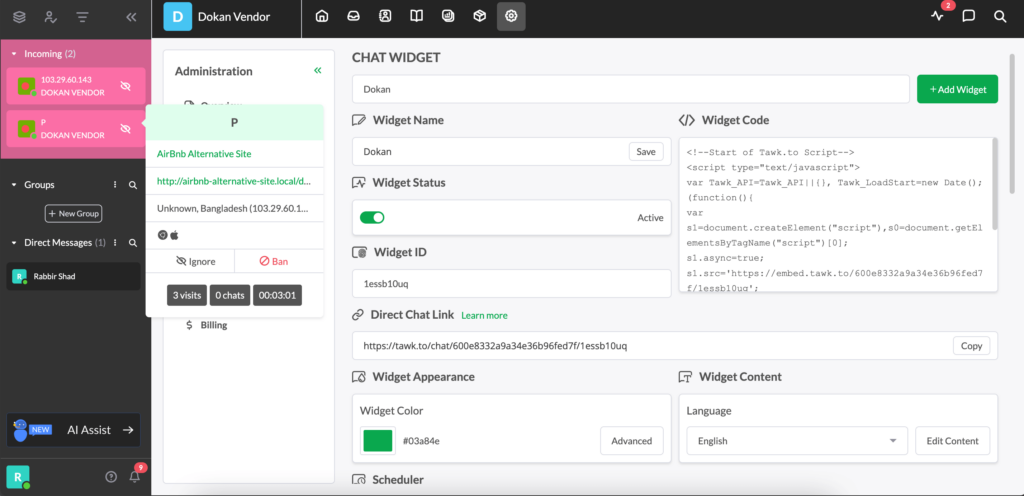
Step 4: Copy the Property ID and Widget ID
From the overview window, you can find the Property ID.
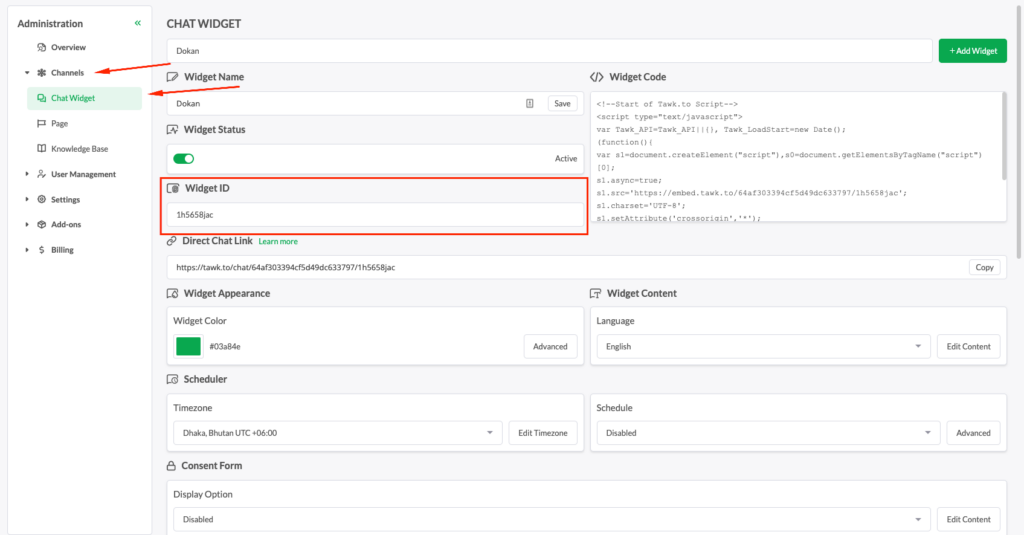
After that click on the Channel -> Chat Widget from the left side menu bar. You can find the Widget ID.
Step 5: Paste the Property ID and Widget ID
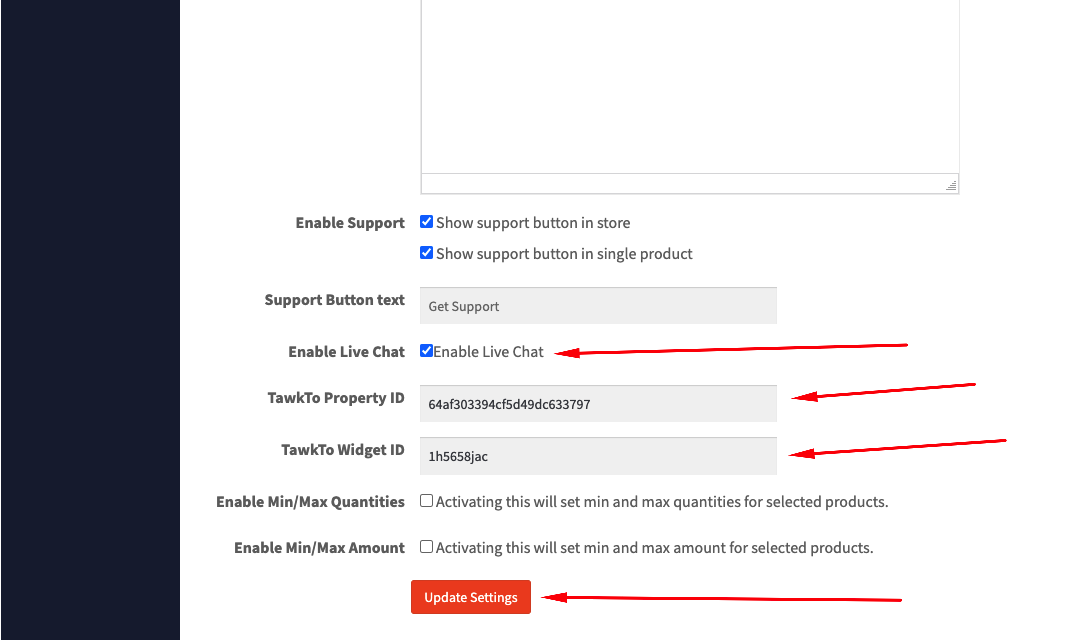
To integrate tawk.to with your store settings, go to your vendor dashboard and click on Settings -> Store. Scroll down to enable the Live Chat option. Then, in the provided textbox, paste the tawk.to property ID and widget ID. Finally, click on Update Settings to save the changes. With these steps, you are close to completing the integration and bringing tawk.to live chat functionality in your store.
Step 6: Test the integration
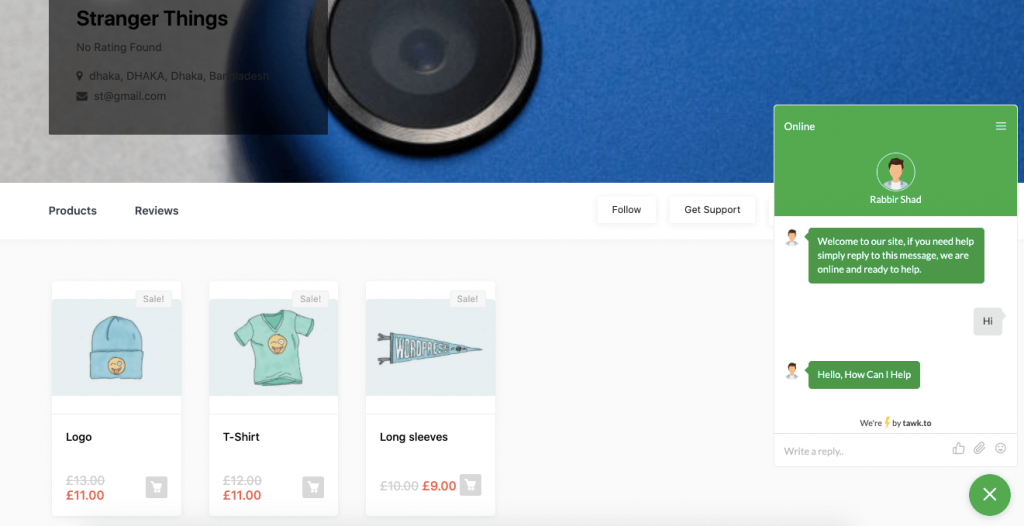
To test the integration of tawk.to, create an incognito or dummy user and visit your store. Once on the store, click on the Chat Now option to initiate a live chat conversation.
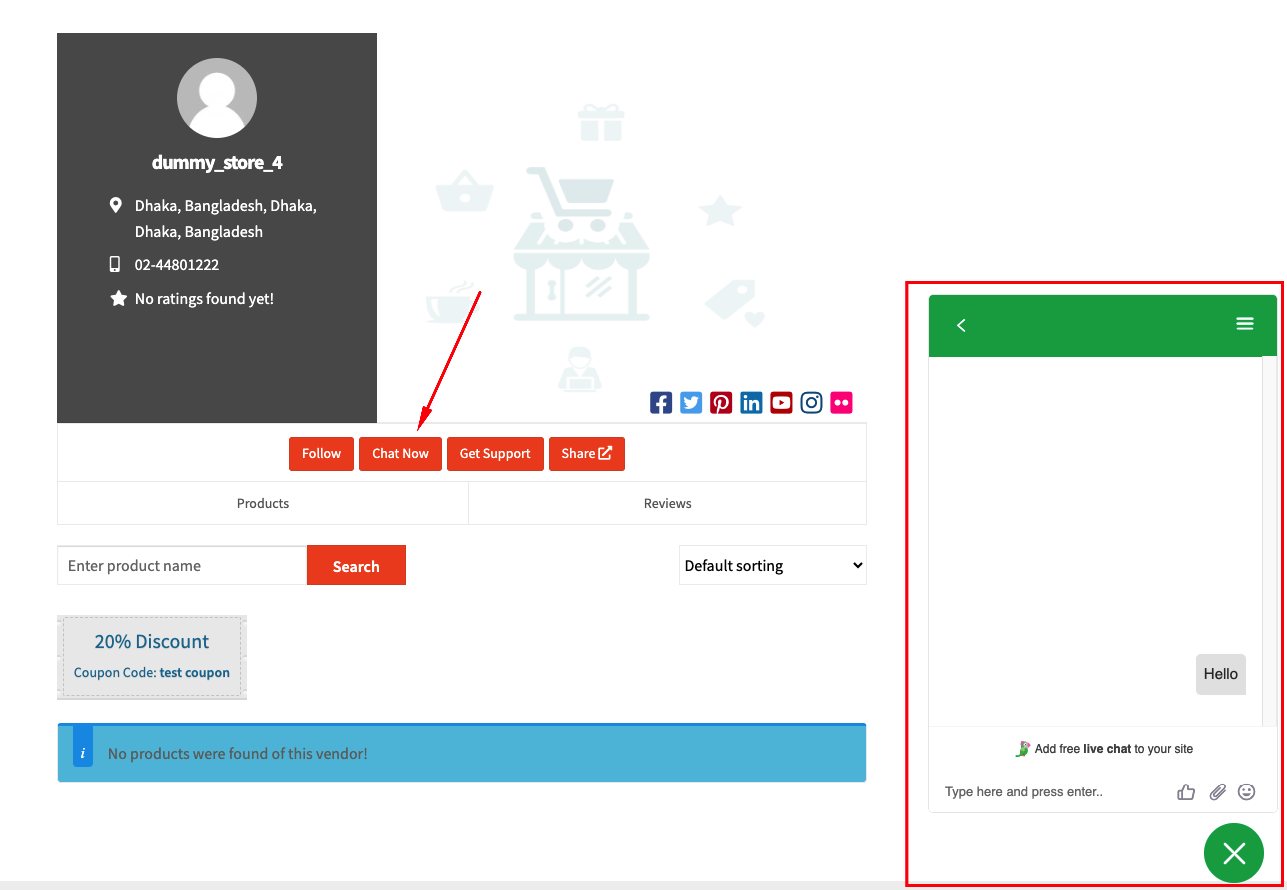
You can hover to see the messages-
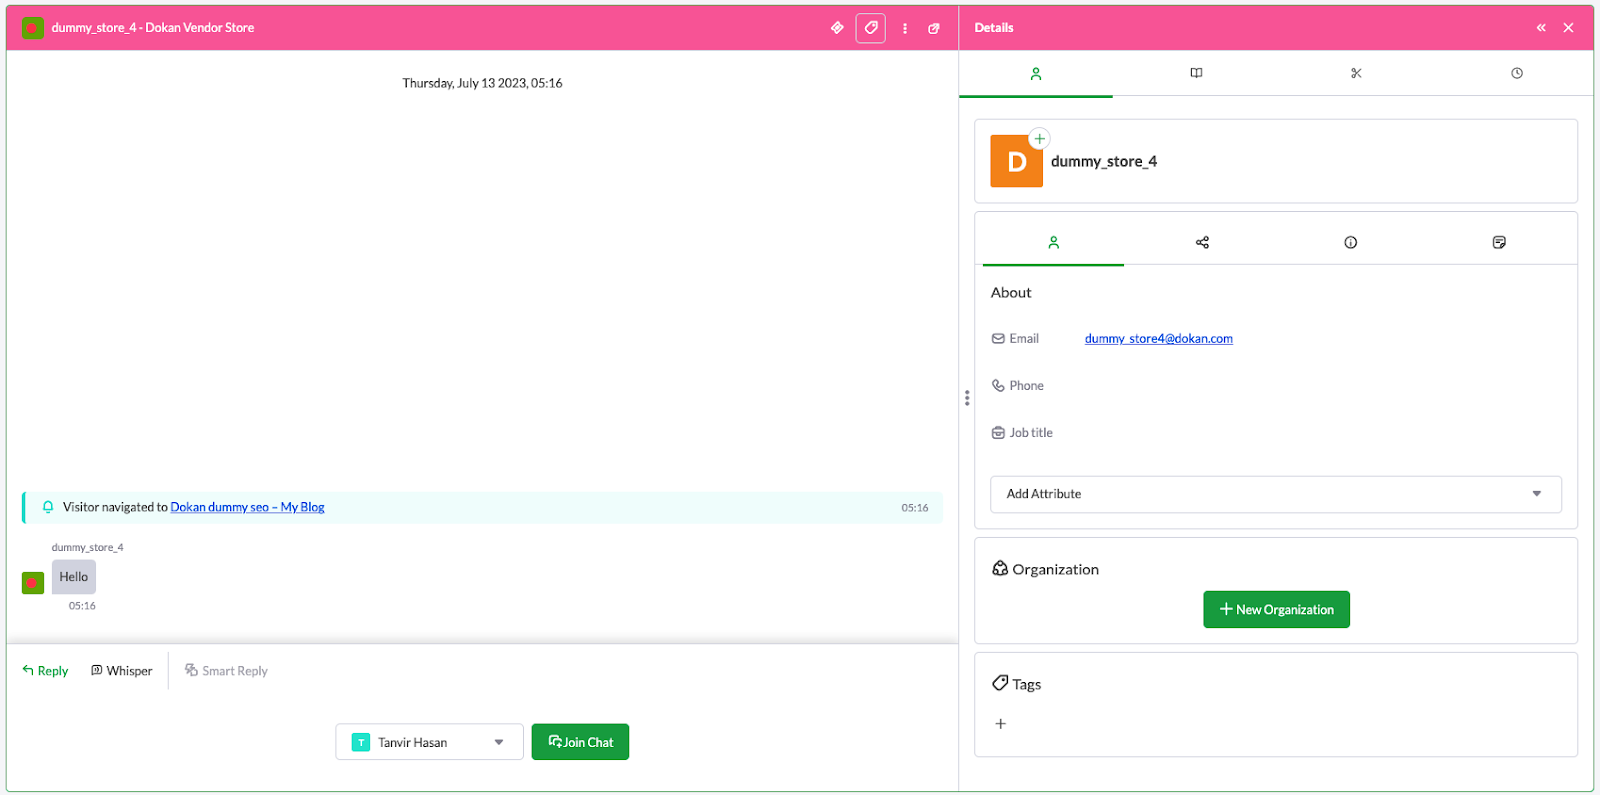
You will receive your messages in the tawk.to chatbox.
That’s how you can integrate tawk.to with your Dokan-powered multivendor marketplace!
See the whole conversation.
That’s how you can integrate tawk.to with your Dokan powered mutlivendor marketplace!

