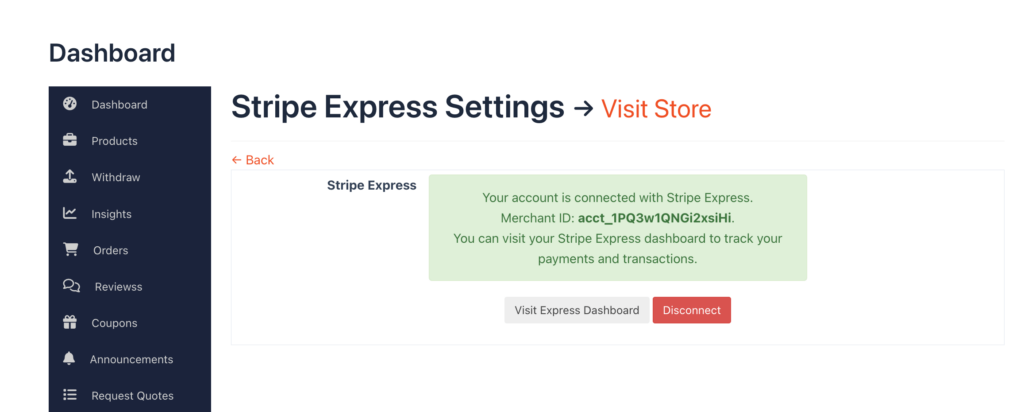
The Stripe Express payment module will help marketplace owners make the transaction process smooth. This module will help accept debit and credit cards in different currencies, methods such as iDEAL, and wallets like Google Pay or Apple Pay with one-touch checkout.
Let’s see how to set up the Stripe Express module.
Configure Your Stripe Account
At first you need to setup your Stripe Express account. To do that, login to your stripe account, Then add your business name and country of operation. Make sure to add the country of operation carefully. Because your currency, tax and language will be set accordingly.
Click on the Create Account to progress.
Now, click on the Activate Payments button,
Add your business information like address, business name and type. There are three types of business you can choose from,
- Natural
- Business
- Sole Trader
Add your personal details like email, legal name, etc.
Add your business industry, business website, vat number, product description.
You need to add your fulfilment details,
Fill in the customer support details as well,
Select your account for payouts, IBAN number, Bank Account number, currency,etc.
Select your product category,
If you want you can contribute to combat climate change,
Before submitting, review all your details again carefully,
Connect Your Stripe Account
Now you need to connect your stripe account. Select the Connect option from the More section from the dropdown menu.
Click on the Get Started option,
Select platform or marketplace from the pop-up and hit the Continue button.
Now click on the settings options and select the payments methods.
Turn on your preferred payment methods. Google Pay and Apple Pay will be turned on automatically. If you want you can choose all the payment methods.
Also, you need to select the Settlement Currencies so that anyone can buy from your marketplace,
Choose all or your preferred currencies,
Configure Branding
You need to have your branding configured. This is a very important part. Click on the Branding button,
Click on the Branding on the Connect Settings button,
Here you need to Enable your Express account.
Select where to onboard your accounts,
Add your business name, brand logo, color,
Next add your redirect URL from the dashboard,
Note: In payout settings, the payout schedule should be set to manual. The automatic payout generally payout the funds/balance daily or in a given time frame and because of that stripe balance from the admin account can be empty. So when we need to refund any order, there will be trouble as it is not certain that, during that moment, there will be enough balance in the admin’s stripe account. To prevent that inconvenience, the payout schedule should be set to “manual”.
URL: https://dashboard.stripe.com/settings/payouts
And you are done.
Setup Dokan Stripe Express Module
Now that your Stripe account configuration is done, you need to activate the module from the admin dashboard.
Go to Dokan–> Modules and enable the Stripe Express module,
Now go to WooCommerce–> Settings–> Payments,
Select the Dokan Stripe Express and hit the Manage button,
Configure all the options,
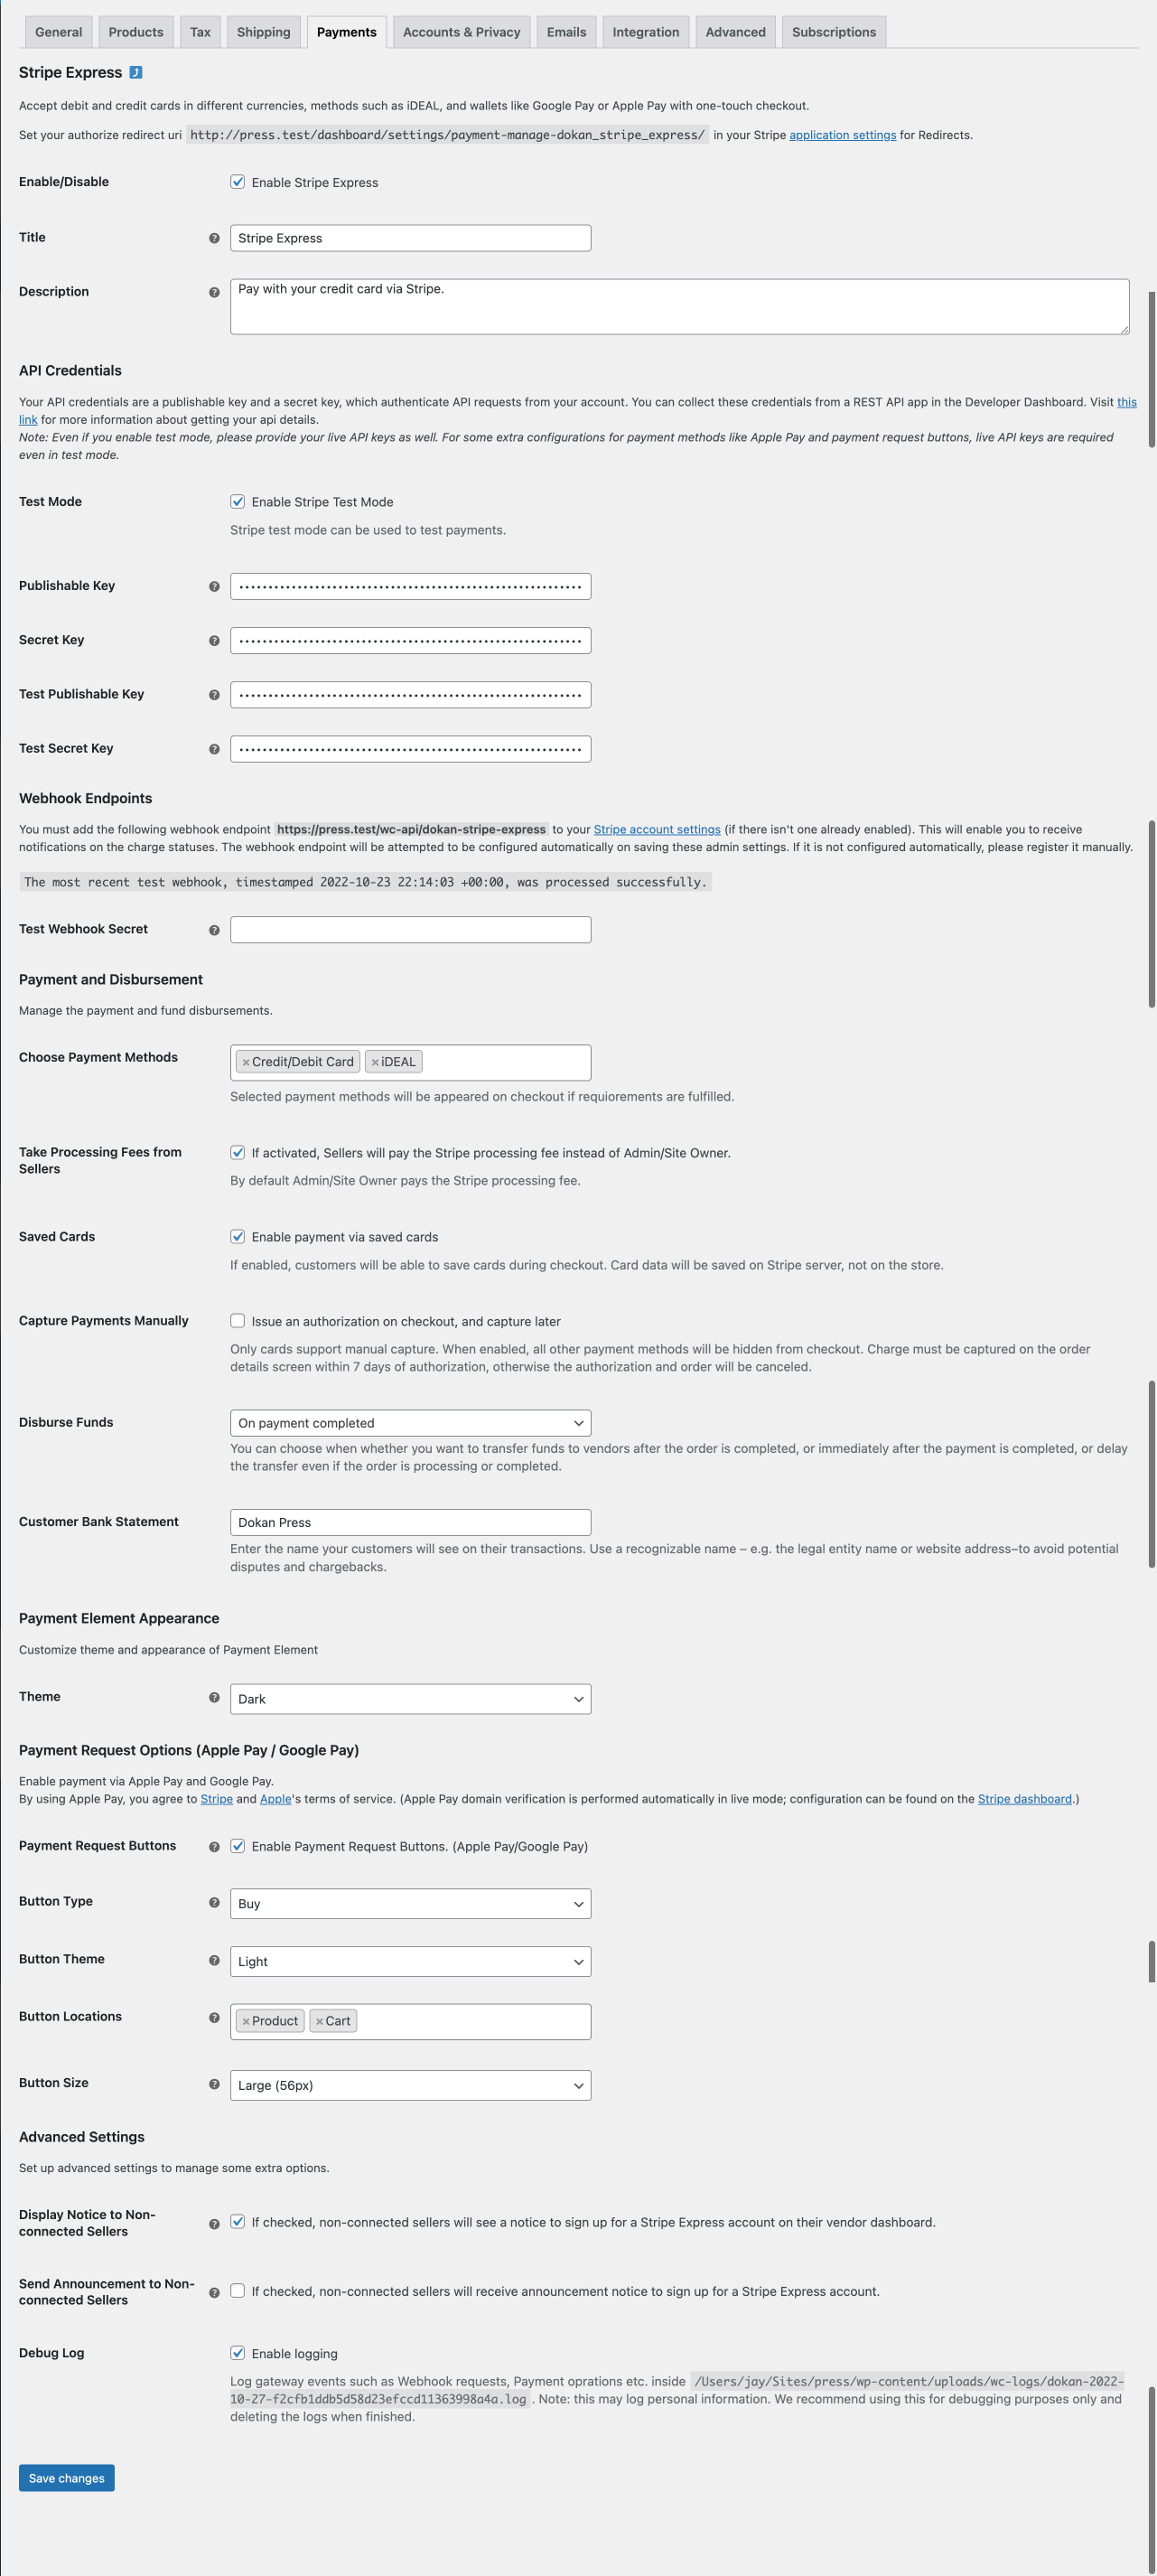
Enable/Disable: Check the option to enable Stripe Express.
Title: Add your title.
Description: Add your description.
API Credentials
Test Mode: Enable this if you want to test your stripe account in test mode.
Publishable Key: Add your live publishable key here.
Secret Key: Add your live secret key here.
Test Publishable Key: You need to add your test publishable key.
Test Secret Key: You need to add your test secret key.
Note: It doesn’t matter whether or not the ‘Test mode’ is enabled, the live keys should be always provided. Because the live keys are required for some internal configurations, such as payment request buttons, and also to configure Apple Pay.
Settings for Cross-border Onboarding & Transfers Inside EU and SEPA
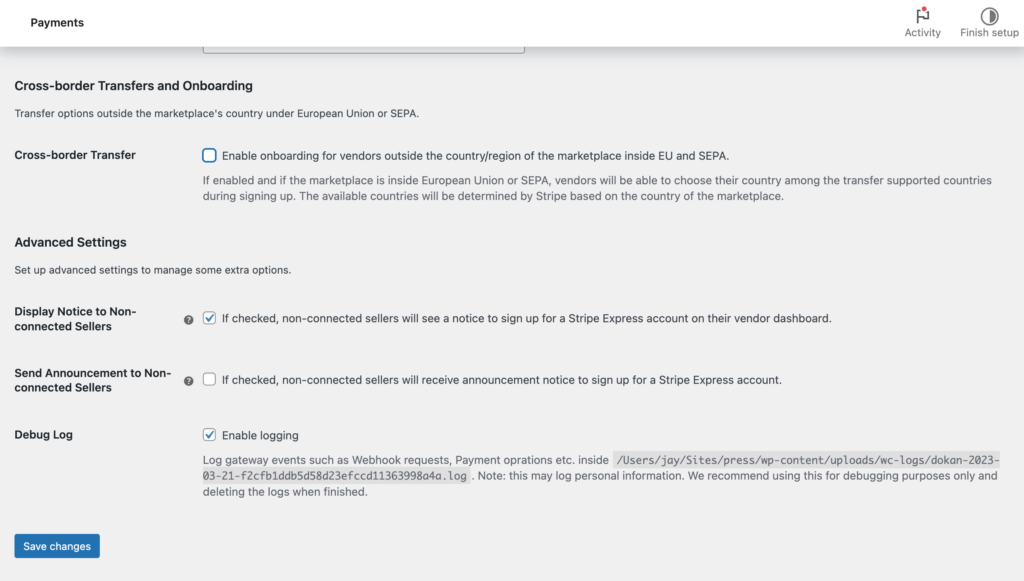
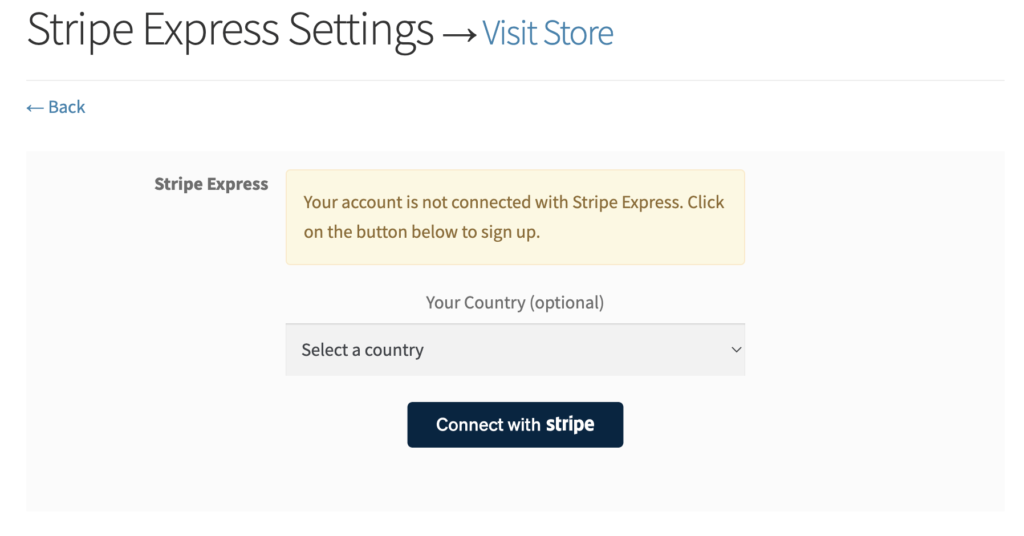
Now admin can allow vendors to signup outside the marketplace’s country inside EU region and SEPA. For that, the admin needs to enable the “Onboarding for vendors Outside Country/Region of the Marketplace”,
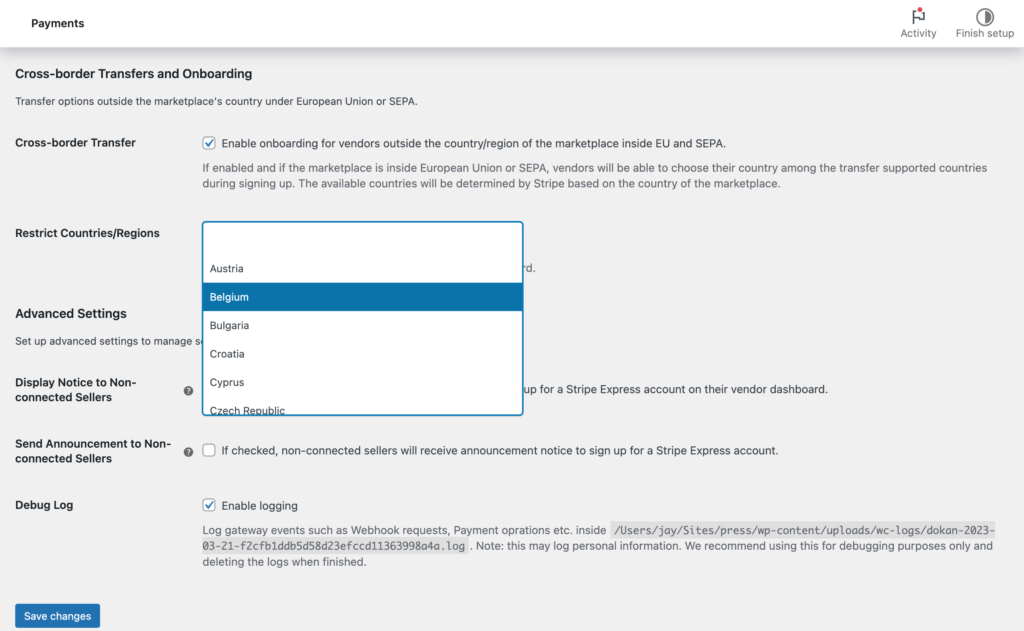
After enabling the option, admin will have the option to restrict countries from the dropdown menu. But if they leave it blank then none of the countries will be restricted.
Country Selection During Vendor Sign-up
It will only appear when the marketplace is in Europe (EU and SEPA) and the cross-border settings is enabled and there are more than one supported country available for cross-border feature.
Webhook Endpoint
Test Webhook Key: Add your webhook key. Here are the events you need to select at a minimum,
Note: This field needs to be filled out after the webhook is created in the stripe dashboard. Also, make sure the webhook is created. If not created after saving the settings here, there are more likely any error happened during the request to the stripe server. Hit the “Save Changes” button again to make the request again.
Note: If somehow the automatic endpoint is not created, then you can set up the endpoint manually. In that case, you have select these below events,
balance.available

charge.captured
charge.dispute.created
charge.dispute.closed
charge.failed
charge.succeeded

payment_intent.amount_capturable_updated
payment_intent.requires_action
payment_intent.succeeded

setup_intent.setup_failed
setup_intent.succeeded

review.closed
review.opened

customer.subscription.created
customer.subscription.deleted
customer.subscription.trial_will_end
customer.subscription.updated

invoice.payment_action_required
invoice.payment_failed
invoice.payment_succeeded
Payment and Disbursement
Choose Payment Methods: You need to choose your payment methods from the drop-down box like Credit/Debit card or IDEAL.
Take Processing Fees from Sellers: If activated, Sellers will pay the Stripe processing fee instead of Admin/Site Owner.
Saved Cards: If enabled, customers will be able to save cards during checkout. Card data will be saved on Stripe server, not on the store.
Capture Payments Manually: Only cards support manual capture. When enabled, all other payment methods will be hidden from checkout. Charge must be captured on the order details screen within 7 days of authorization, otherwise the authorization and order will be canceled.
Disbursement Mode: Choose whether you wish to disburse funds to the vendors immediately or hold the funds. Holding funds gives you time to conduct additional vetting or enforce other platform-specific business logic. As an admin, you can choose when to disburse the funds to the vendors. You will have 3 options,
- On Payment Complete: vendors will get their money immediately after the order.
- On order complete: vendors will get their money after the order is complete via site admin or vendors based on Settings (either vendor can change order status or not)
- Delayed: You can choose to hold the fund for a specific number of periods of an interval to disburse the funds. After the specified day’s funds will be automatically disbursed to the vendor’s PayPal account. The maximum delay period is of 29 days. If the fund is not disbursed within 29 days, Stripe will automatically release funds to the corresponding vendors.
Customer Bank Statement: Enter the name your customers will see on their transactions. Use a recognizable name – e.g. the legal entity name or website address–to avoid potential disputes and chargebacks.
Payment Element Appearance: You can customize the checkout UI using colorful themes.

Payment Request Options (Apple Pay / Google Pay)
Payment Request Buttons: Enable Payment Request Buttons. (Apple Pay/Google Pay).
Button Type: Choose the button type
Button Theme: Choose a button theme
Button Location: Choose where to show the button. You can show them the Product page, Cart page, and checkout page.
Button Size: Select button size.
Notice: Make sure the apple pay domain is registered in stripe payment method settings.
Note: Payment Request Buttons will be allowed to be shown on Product and Cart pages only. However, if multiple shipping packages exist for cart items, the payment request Button will not be shown and so the order will not be able to be placed using the Button. Also, note that any inconsistency between shipping options or packages and shipping address saved at Apple Pay / Google Pay wallet will eventually fail the order. In that case, customers will be able to order from checkout instead of Payment request Buttons. So, due to the above-mentioned circumstances, the Payment request button may not show up, or placing an order using the button may not be possible.
Advanced Settings
Display Notice to Connect Seller: If you enable this setting your non-connected vendors will see a notice to connect their Stripe account on their vendor dashboard.
Send Announcement to Connect Seller: If you enable this setting your non-connected sellers will receive an announcement notice to connect their stripe account.
Send Announcement Interval: You can choose a period of an interval to send the announcement.
Debug Log: You can enable debug log.
Hit the Save Changes button to finish.
Enable Dokan Stripe Express Withdraw Method
Now, you need to enable the withdrawal method from Dokan–> Settings–>Withdrawal.
How to Connect Stripe Express Account
Vendors need to connect their account to Stripe in order to add that method. To do that, go to Vendor Dashboard–> Settings–> Payments. Click on the “Connect with Stripe” button.
Next, vendors need to ad their mobile number, emails,
Choose the type of business,
Add personal details,
However, if any vendor leave the setup halfway, then he/she will be redirected to the dashboard,
Then you need to click on the Complete Onboarding button then he/she will start from where they left off,
Add the business details,
Select an account for payouts,
Review the details carefully,
Then the vendors account will be connected,
And vendors will have their own Stripe dashboard when they click on the Visit Express dashboard,
That’s it.
Now, users will see the Google Pay and Apple Pay on the,
Product Page,
Or,
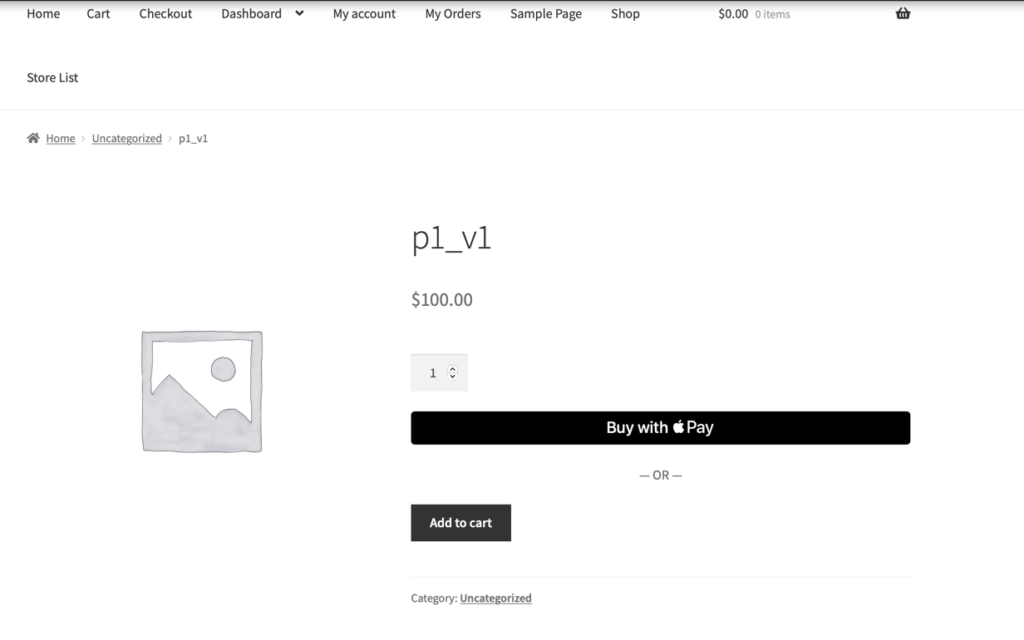
Cart Page,
And the checkout page,
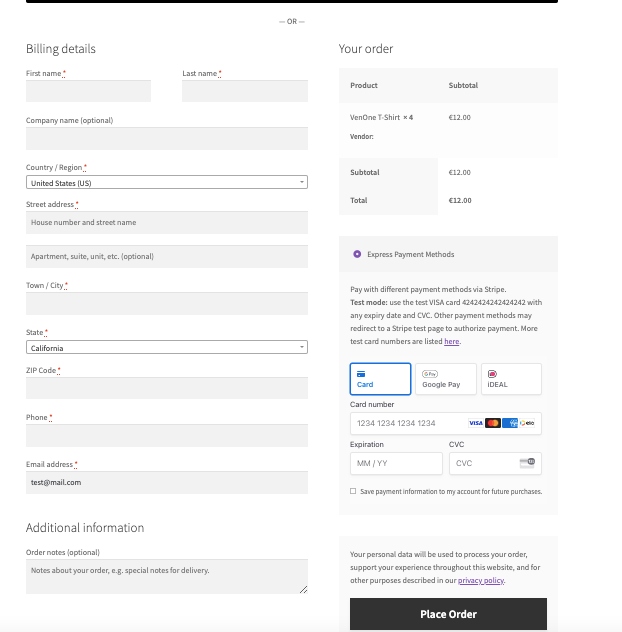
Note: You need to configure your Google Wallet and Apple Pay on your device to be able to use them. Google Pay will work for the Chrome Browser and Apple Pay will work for the Safari Browser.
Stripe Express also supports adding payment method from My Account page. Customers will be able to add and manage their payment method.
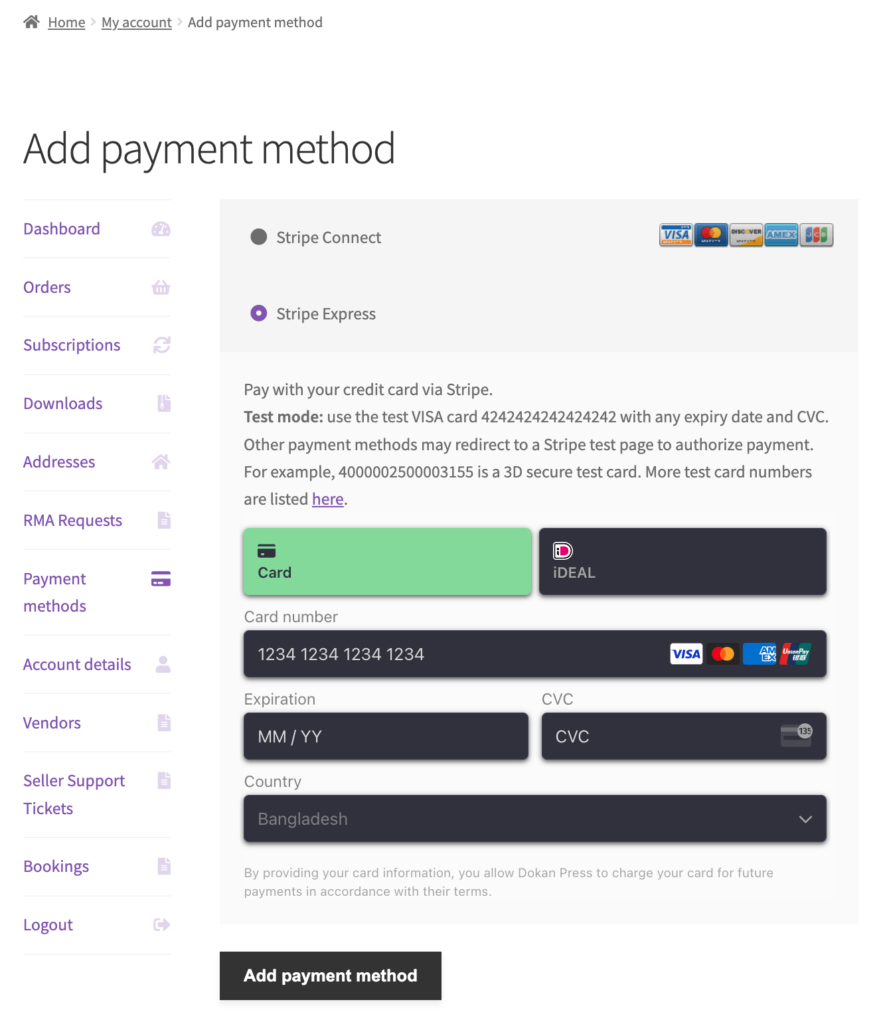
Note: Dokan Stripe Express now has support for WooCommerce Product Subscription.
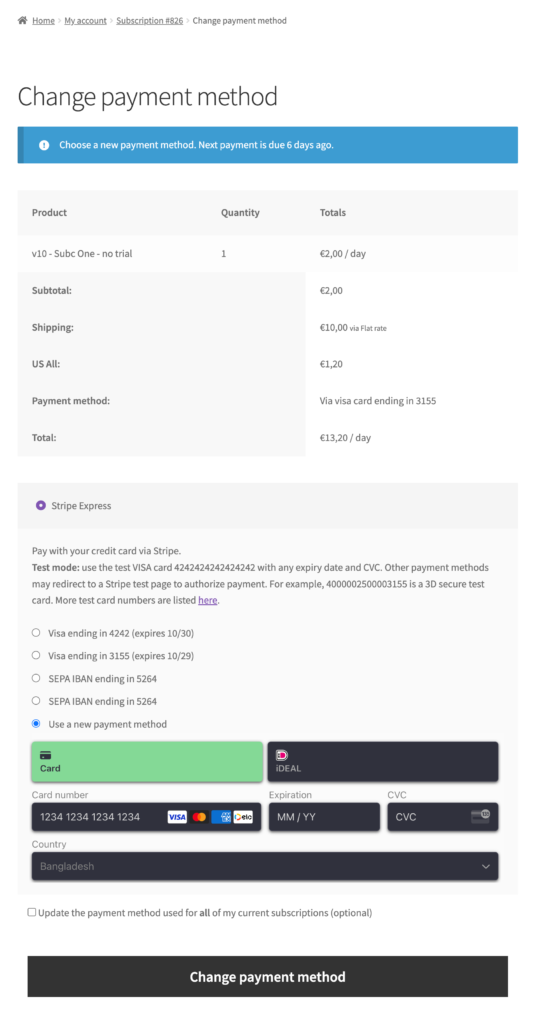
Customers will be able to buy WooCommerce product subscription using Stripe Express. Also, they will be able to change payment method after purchasing the subscription. Payment method can be changed to both Card and iDeal.
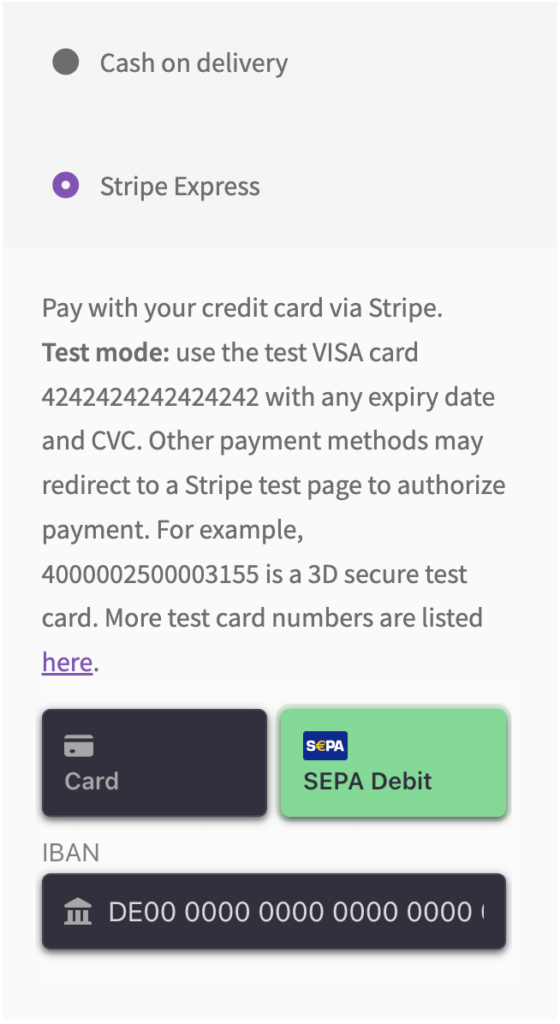
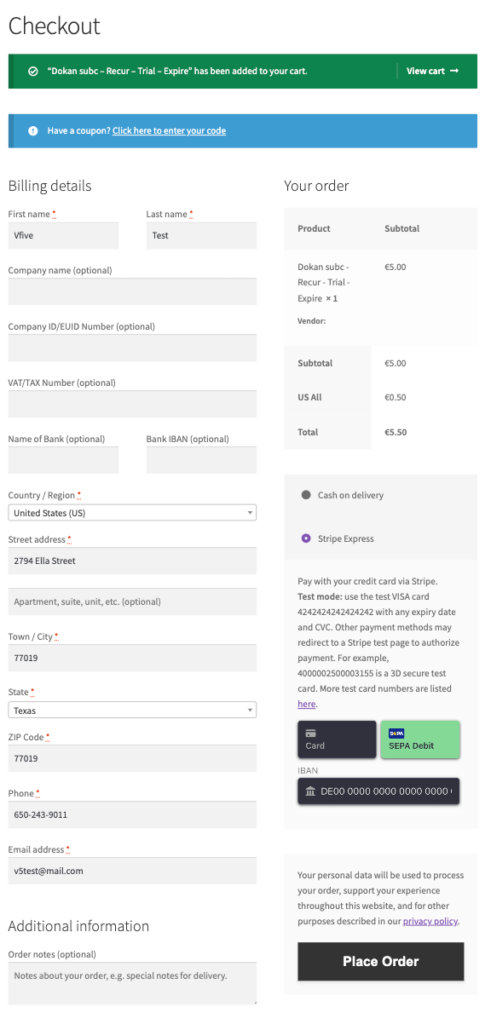
Also, it has support for Dokan Vendor Subscription. In case of recurring payments, the payment element will be shown as SEPA Direct Debit.
If someone saves IDEAL as the payment method, then it will be shown as SEPA IBAN,
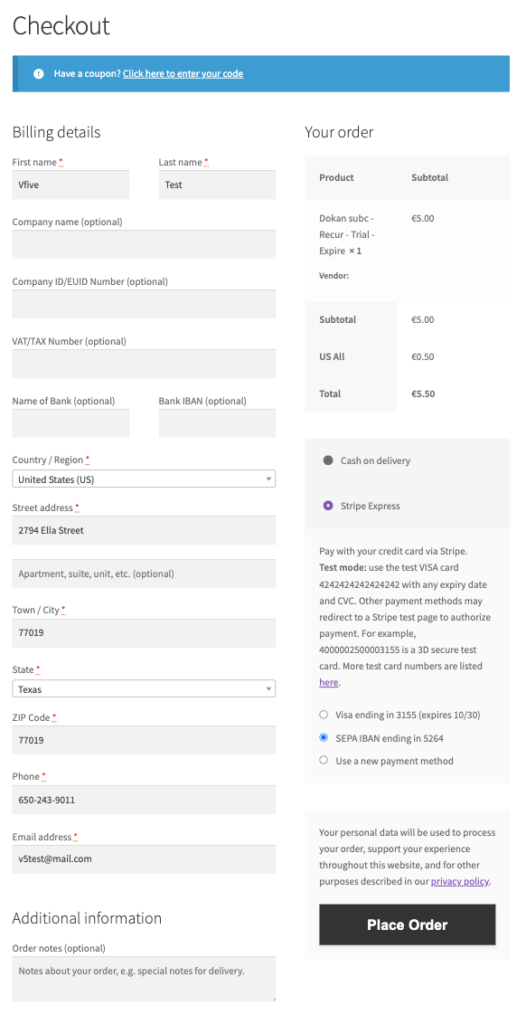
For both iDEAL and SEPA Direct Debit, the saved payment method will be SEPA IBAN,
This is how you can set up and use the Dokan Stripe Express module.
Follow this article for the rest of the refund/transfers implementation.
Cross Border Payout Feature: Recipient Account
With the Cross Border Payout feature, now users from 131+ countries will be able to connect Stripe Express payment method.
But this feature is only for the USA-based marketplaces as per Stripe recipient account agreement requirements.
To enable the Cross-Border Payout feature, just check the Cross-border Transfer option from Cross-border Transfers and Onboarding section.

Here you will find different options-
Cross-border Transfer: Enable this to allow vendors from the EU, SEPA, or US to select their country during signup, based on the countries supported for transfers by Stripe.
Disconnect Vendors: When Cross-border Transfer is not enabled, then this option will be visible. It will disconnect all Cross-Border vendors with existing payment connections. This will disconnect their payment integration, regardless of prior approval or onboarding.

Restrict Countries/Regions: Select the countries where you will not be able to onboard connected accounts.
Disconnect Vendors: This feature allows administrators to automatically disconnect vendor accounts from restricted countries or regions. By specifying a list of restricted locations, the system will identify and bulk disconnect any existing vendor accounts associated with those areas.
There are a few conditions where the vendors will be disconnected-
- Vendors from the restricted countries will not be able to onboard

- If the vendor changes their address to one of the restricted countries, then they will be automatically disconnected.
- When the admin selects restricted countries and also enable the Disconnect Vendors option , then the old vendors who are from those restricted countries will be disconnected. Only choosing a restricted country or countries, will restrict vendors from those countries to onboard, old vendors from those restricted countries will stay connected.
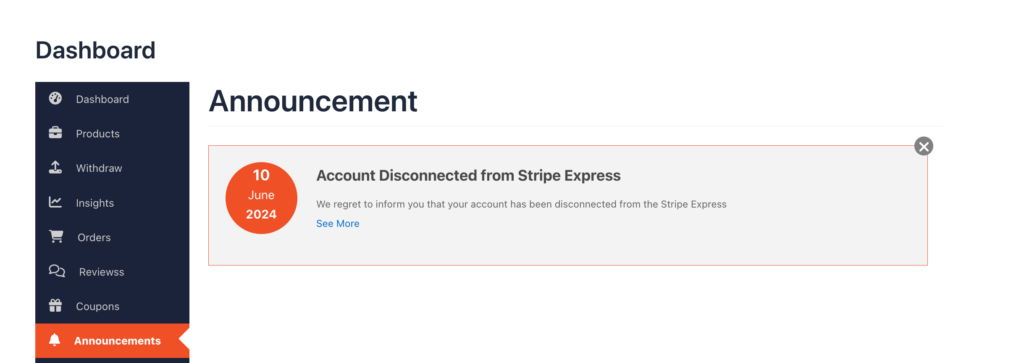
- Disconnected vendors will get a message in the Announcement section of the vendor dashboard-
- If the admin only disables the Cross-border Payout feature, then the old connected vendors will stay connected.
- But if the admin disables the Cross-Border Payout feature and enables the Disconnect Vendors option, then all the vendors under the Cross border feature will be disconnected, and the regional vendors will stay connected.
- If an existing vendor changes their country to a non-restricted one, then they need to onboard again.
Now, vendors from 131+ countries can use Stripe Express-
