You can easily configure Apple login with Dokan following the steps below.
How to Get Necessary Credentials for Configuring Apple?
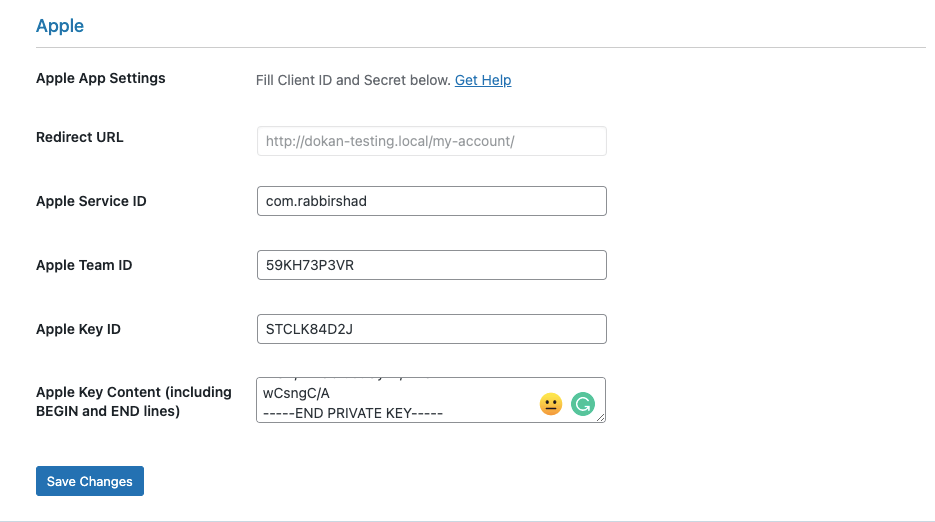
You need to collect and add Apple Service ID, Apple Team ID, Apple Key ID, Apple Key Content in the selected area in order to add Apple ID login to your marketplace.
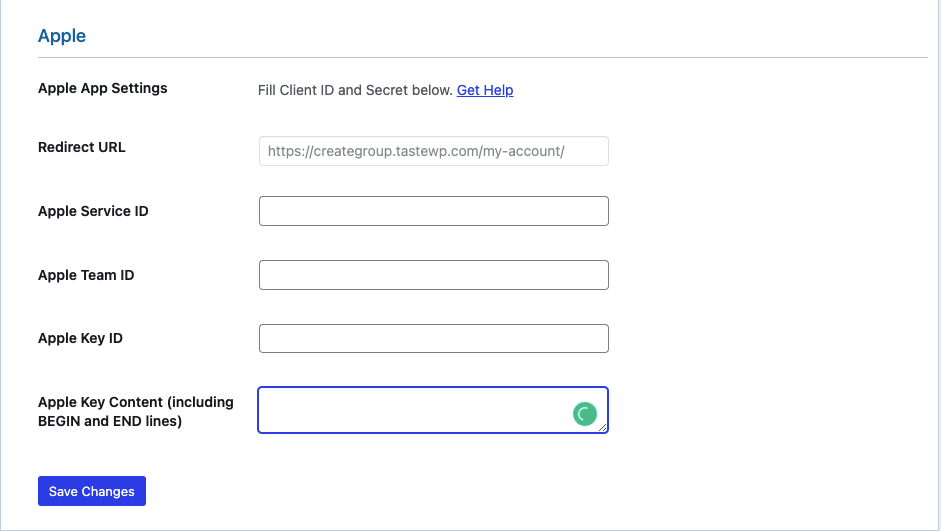
To collect those credentials go to this link and create a developer id. After login, go to the Certificates, IDs & Profiles option from the side menu bar.
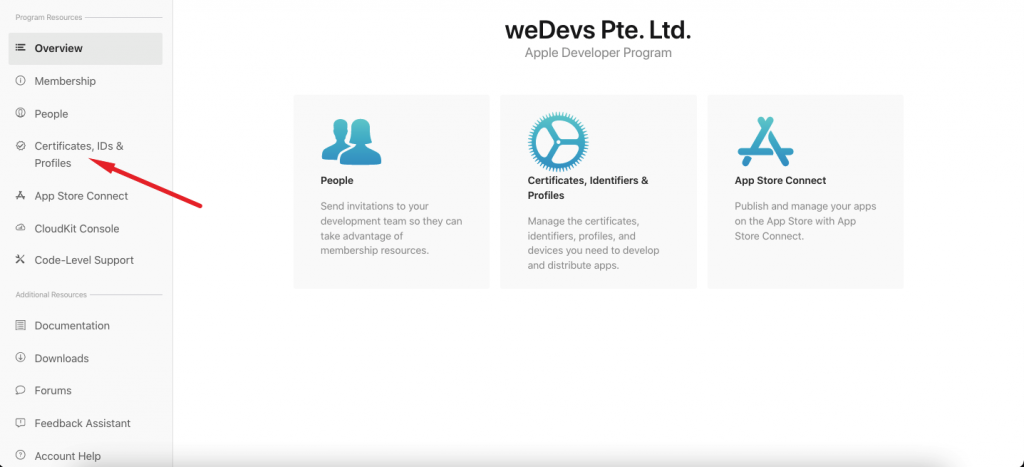
Select the Identifiers option from the left side menubar,
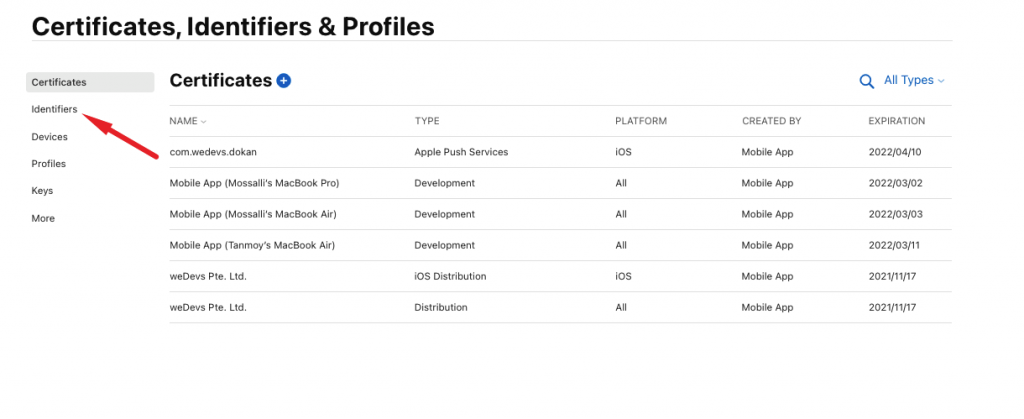
Collect Apple Team ID
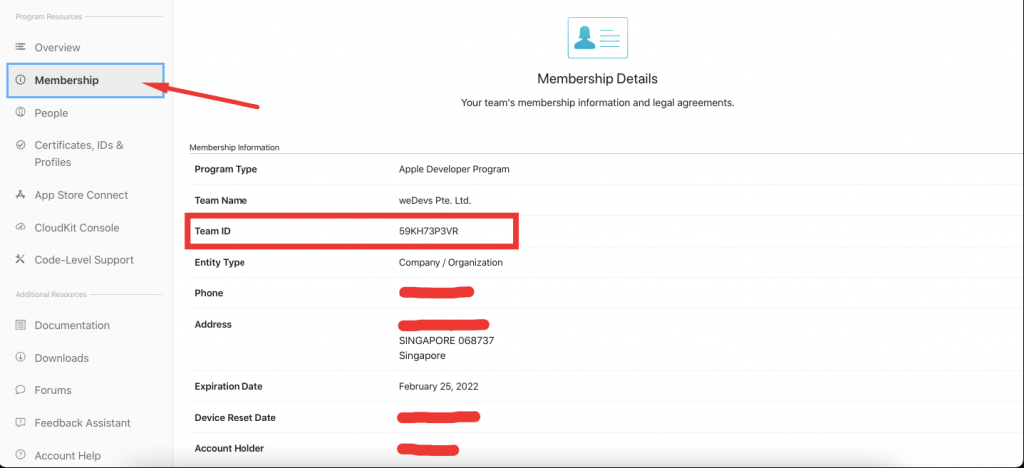
You can collect your Apple Team ID from the Membership area. Click on the Membership option from the sidebar menu and collect your Team ID from there.
Or, you can create an App in order to collect Apple Team ID. Select App ID from the dropdown box and click on the “+’ icon to create a new App.
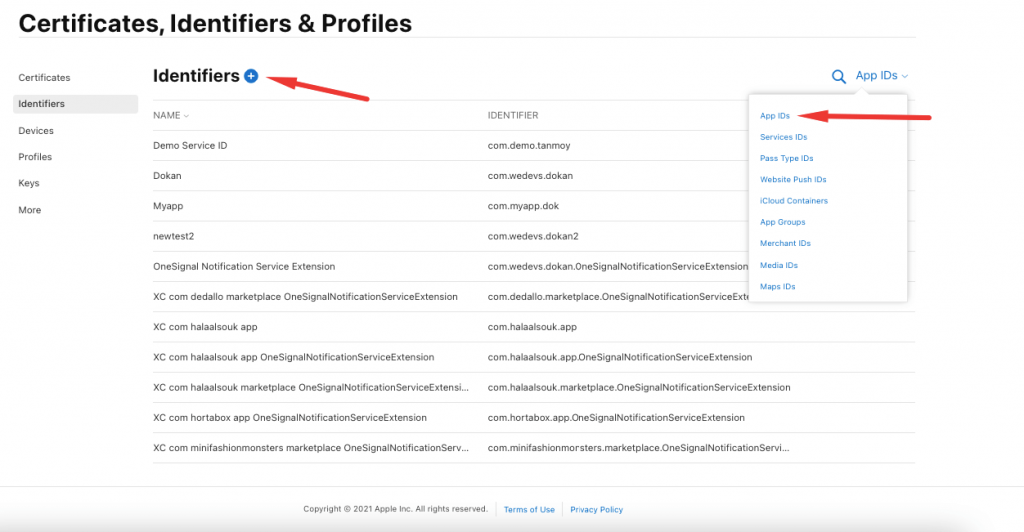
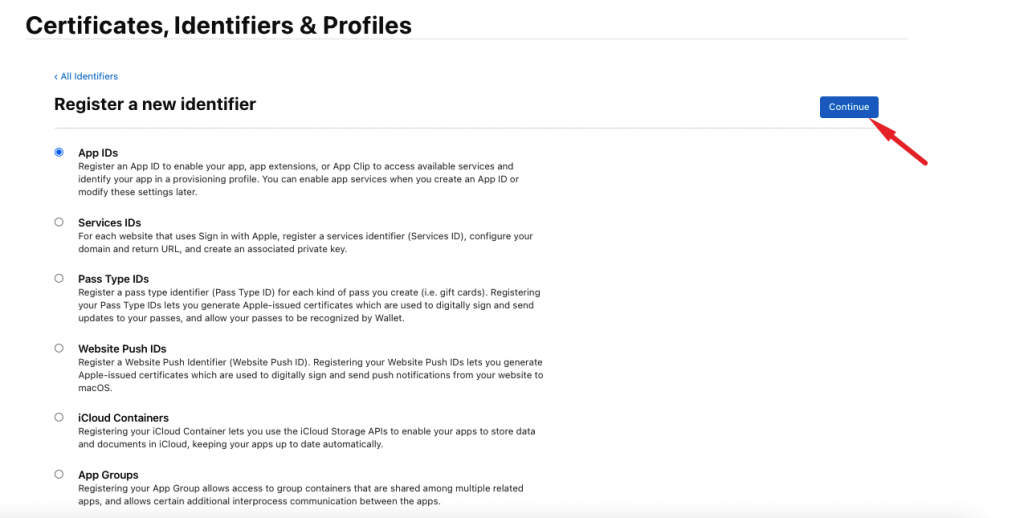
Select App IDs and press continue.
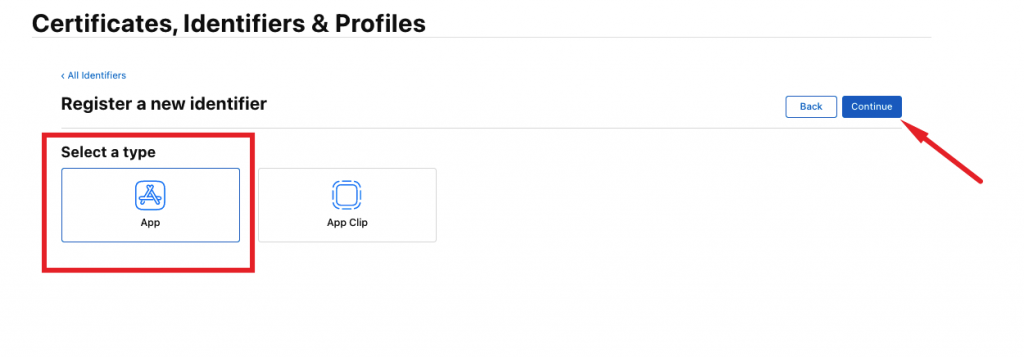
Choose App as an App type and press continue.
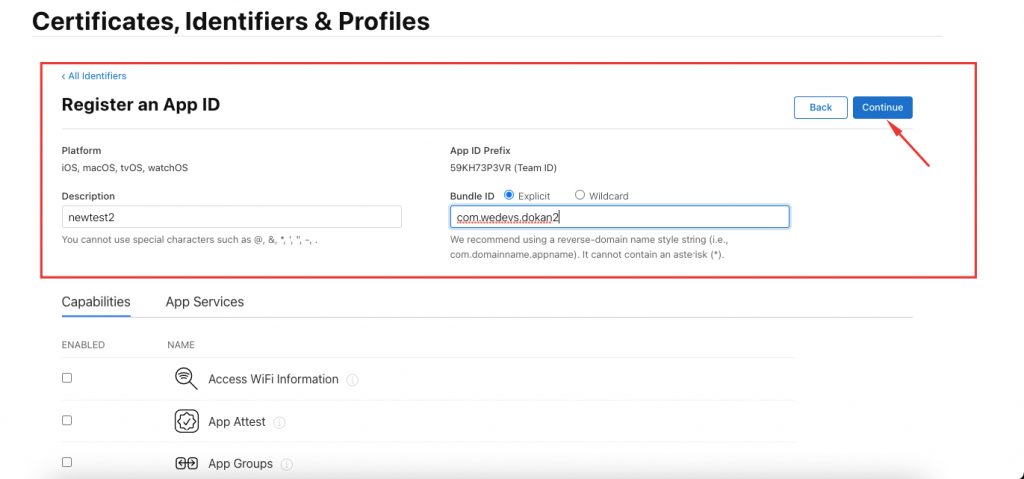
Add a description and bundle id. For bundle id, add your domain name backward. For example, if your domain name is joy. demo.com, then you need to write com.demo.joy.
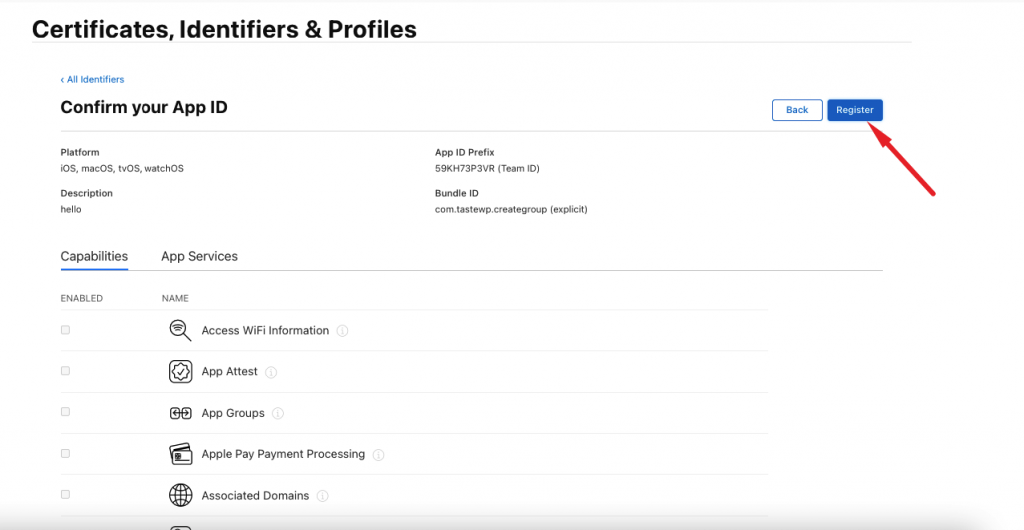
If you take a closer look, you will find the Apple Team ID on top of the Bundle ID. Copy that for later. Press Continue.
Scroll down and Enable the Sign in with Apple option.
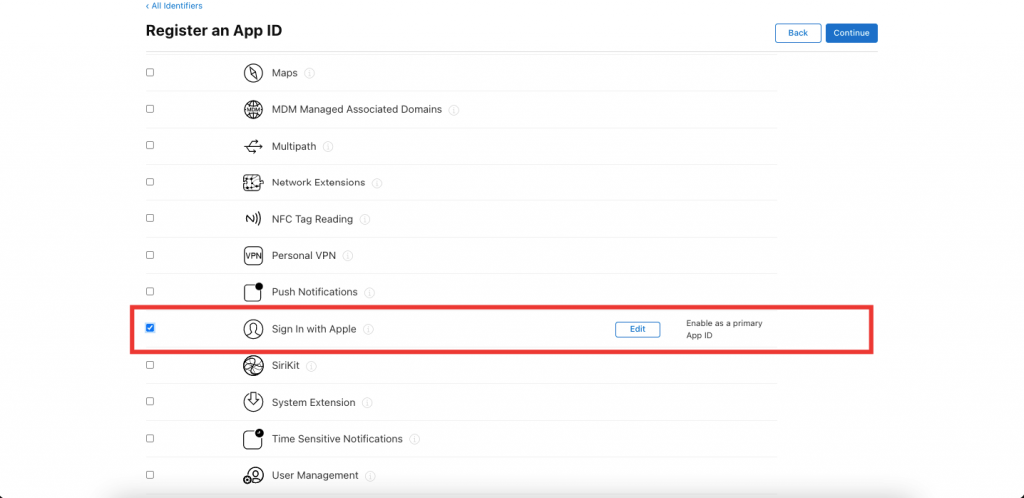
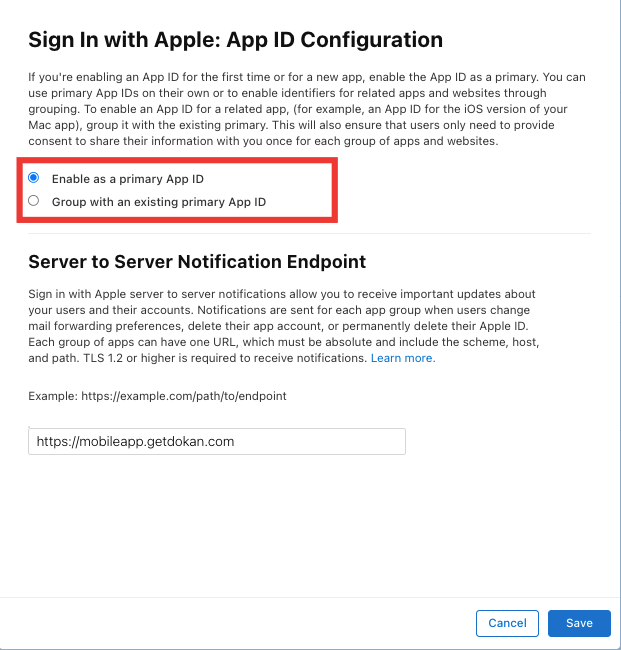
Select Primary App ID and add URL. Click the Save button.
Click on Register to finish.
Collect Service ID
Now you need to create a Service ID in order to collect Apple Service ID. Click on the Service IDs option from the dropdown menu and click on the “+’ icon to create a new Service ID.
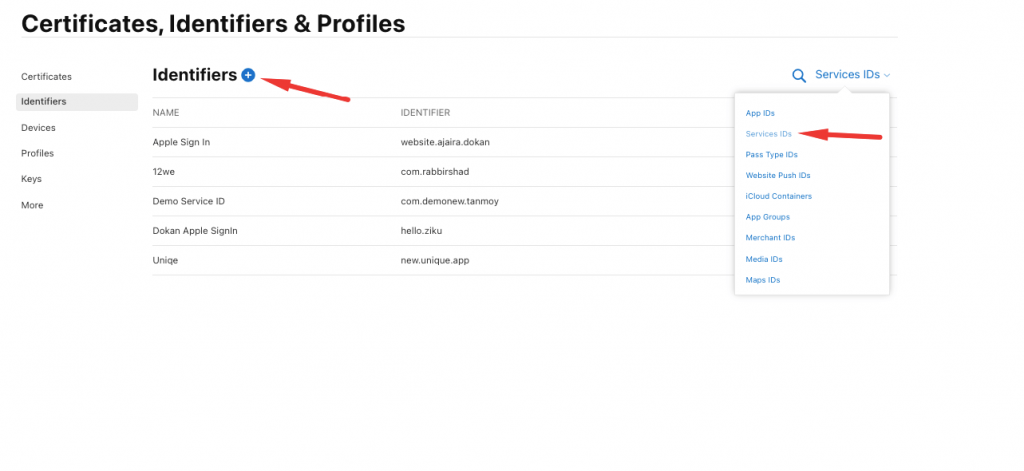
Select Service IDs and press continue.
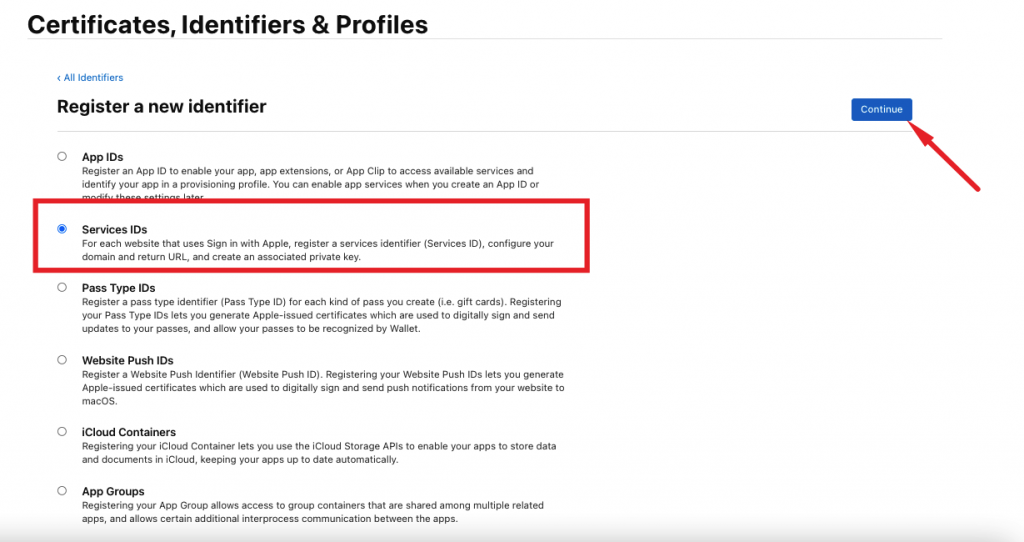
Add a description and identifier. You need to add the domain name backward. Press Continue.

Now, click on the Register button to finish.

You need to add a domain and redirect URLs on your Service ID. Click on your Service ID, Enable Sign in with Apple Then click Configure.
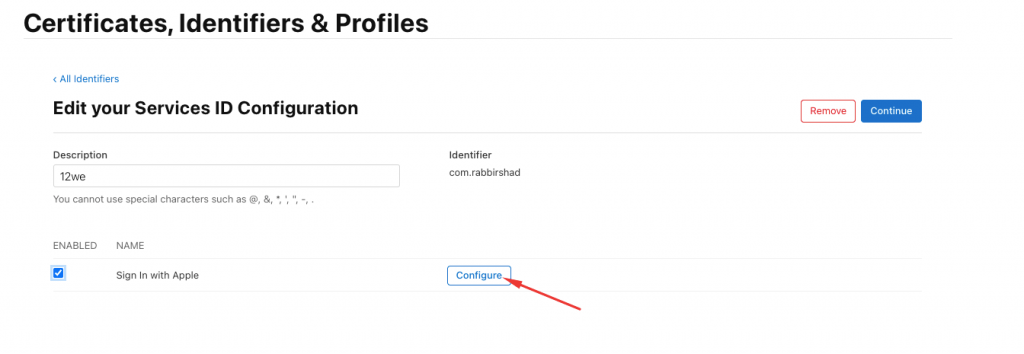
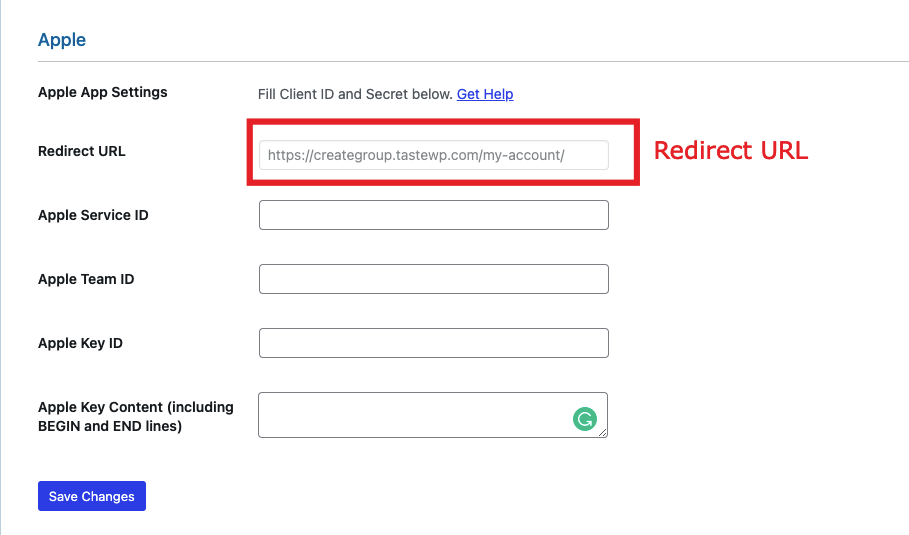
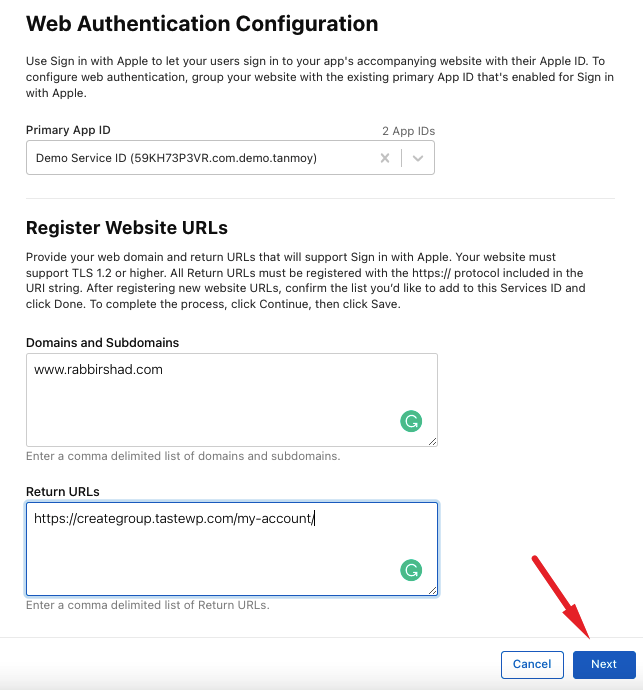
Select Primary App ID, add domain URL (use “www”) and Redirect URL. Copy Redirect URL from the Dokan settings. See the image below.
Now, copy and paste it into the pop-up window and hit the Next button to finish.
Now, to get the Apple Service ID, copy the Identifier (com.rabbirshad) and click Save.
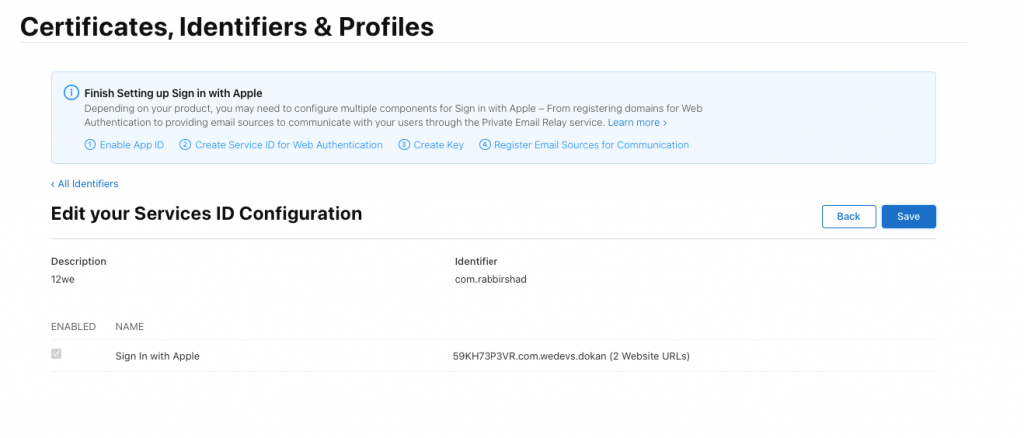
Collect Apple Key
To get the Apple Key Id and Apple Key Content, click on the Key option. Then click on the “+’ icon to create a new Key.

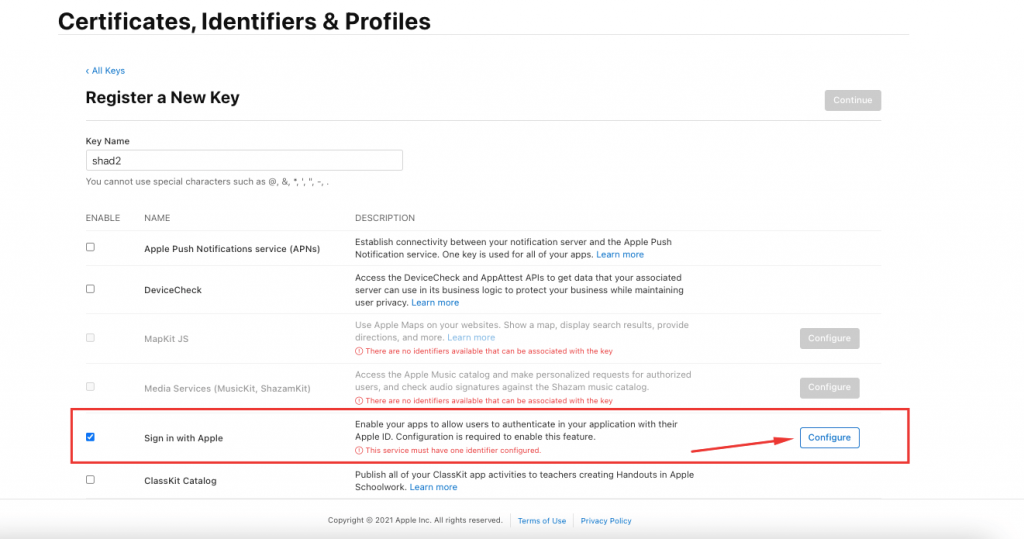
Add a key name and choose the Sign in with Apple option. Click the Configure button.
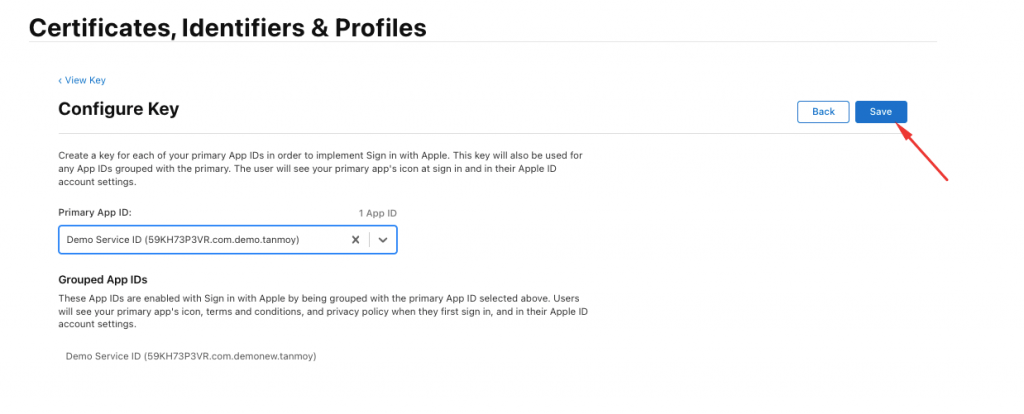
Choose the Primary App ID and hit the Save button.
Now, click on the Continue button to finish.
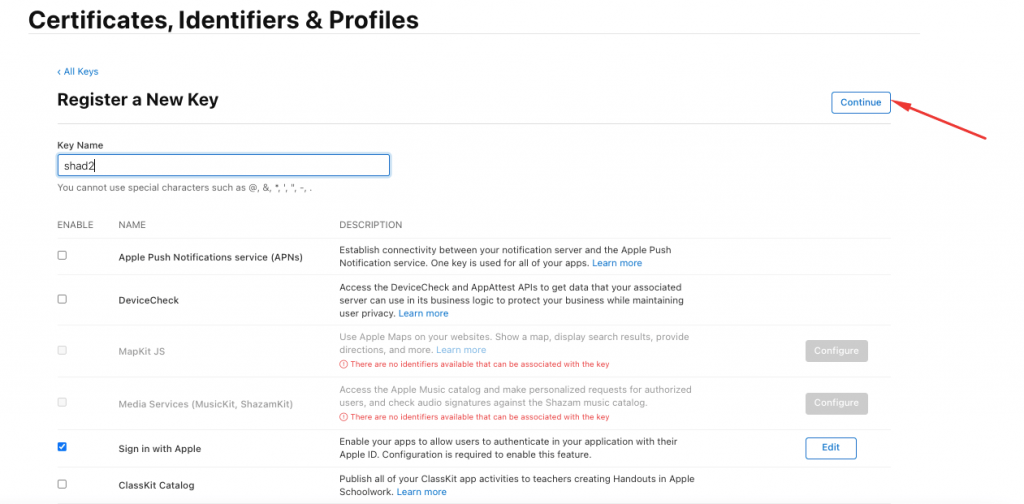
Hit the Register button to finish saving the Key.
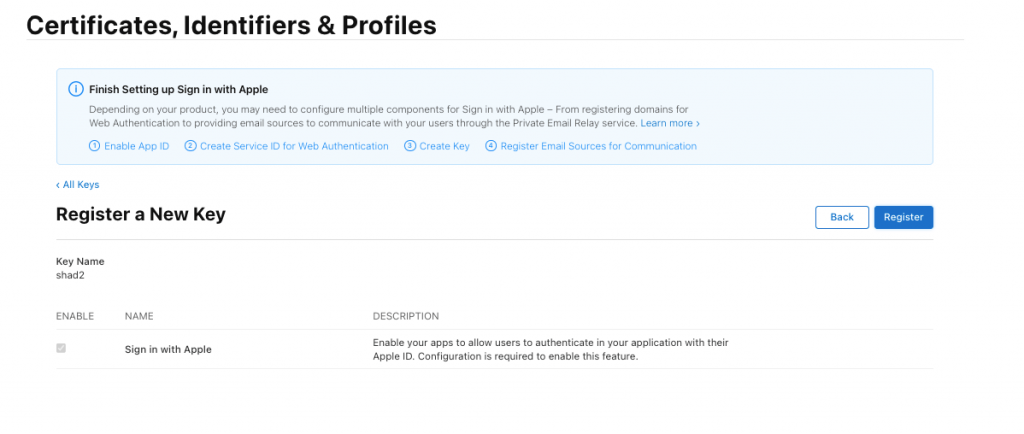
Download the file that contains the Apple Key Content, and copy the Key ID.

Add Credentials
Now, add all the credentials in the selected area and Save settings. Copy all the content from the Downloaded file and paste it into the Apple Key Content area.
You will see the Apple login icon below the login and registration form.
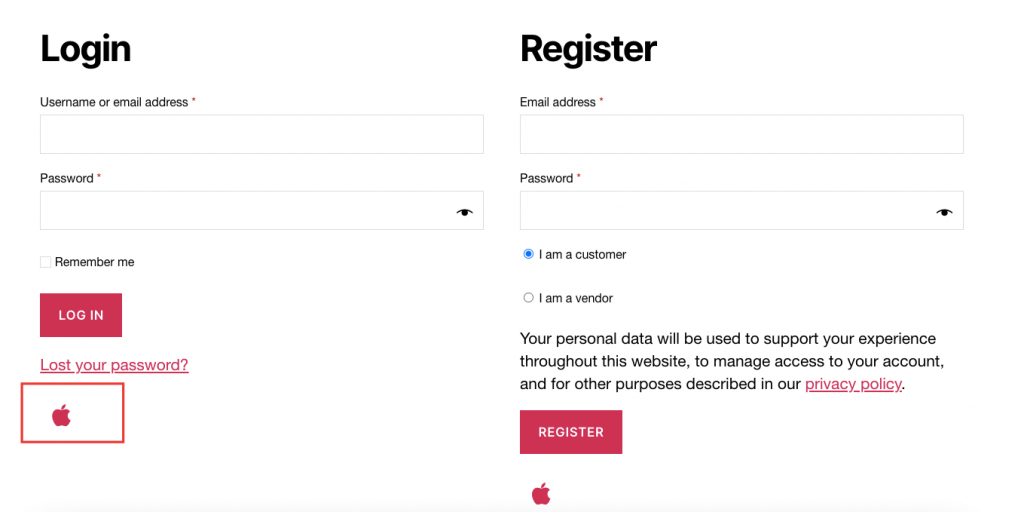
This is how you can configure Apple ID login for your multivendor marketplace.