Vendors are an essential part of an online marketplace. Because they do trades by selling their products and admin gets the commission for each sale. So Dokan has the features to create, add, and customize vendor profiles easily only using the Dokan backend.
So let’s check out the documentation below and follow the steps carefully.
Creating a Vendor Profile
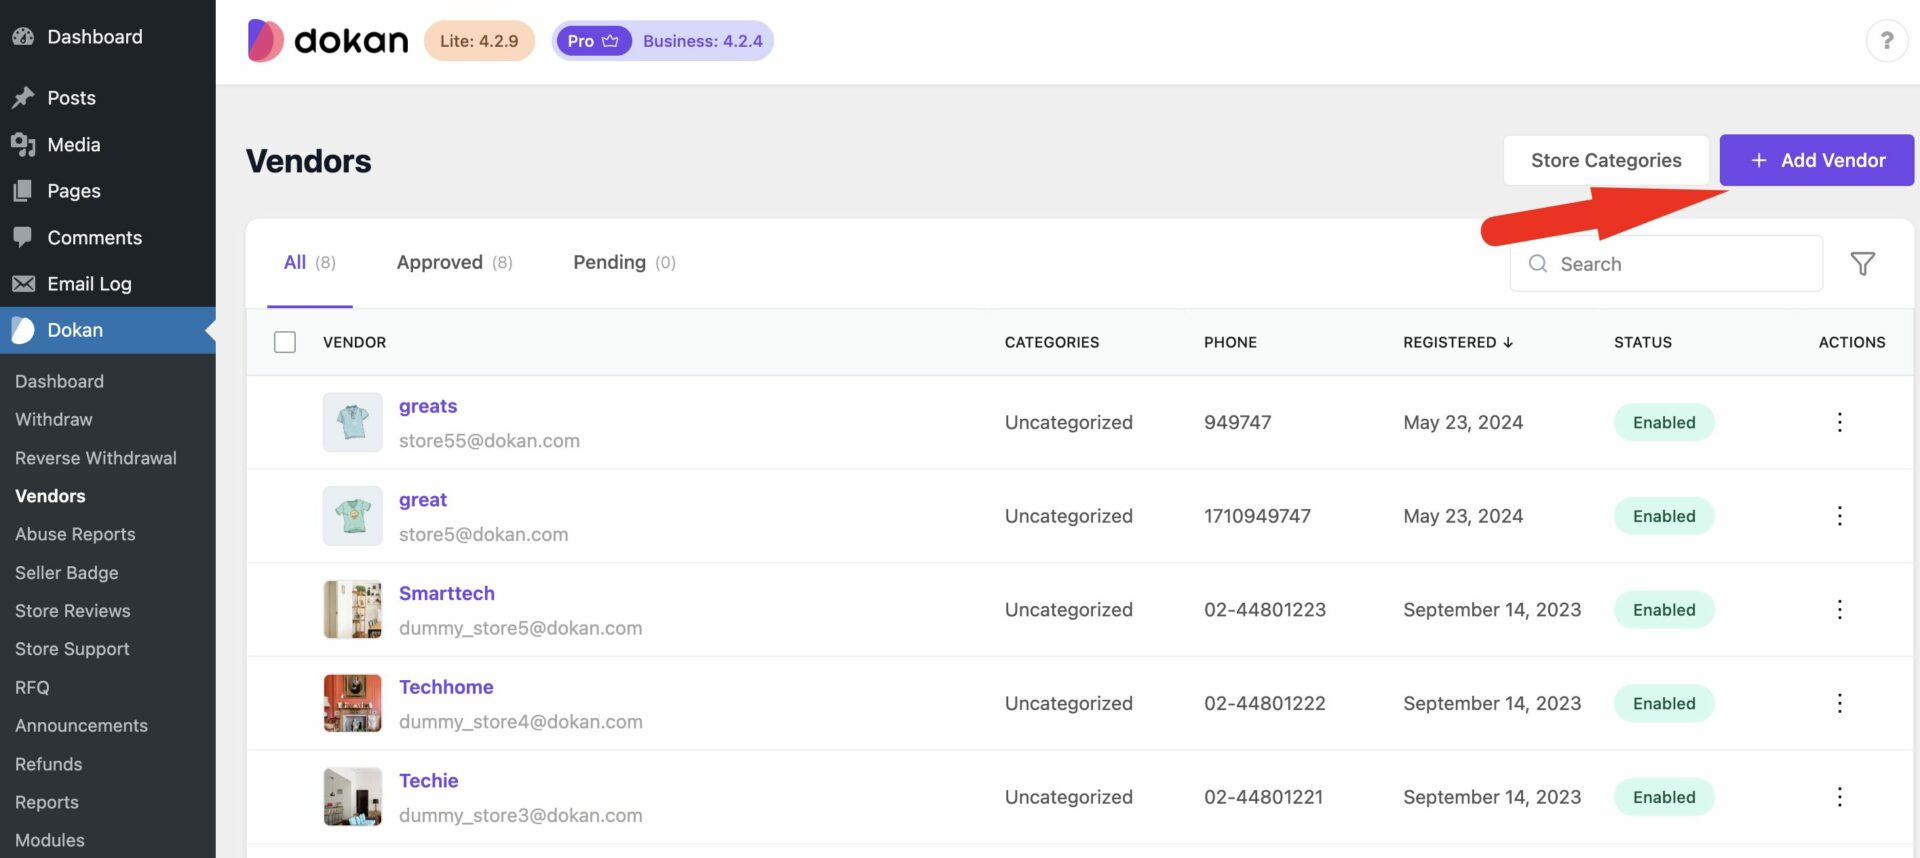
To create vendor profile, navigate to the Admin Dashboard > Dokan > Vendors > Add Vendor.
Once, the admin hits the “Add New” button, he or she will get a form containing the necessary fields to add vendors.
You can enable selling, Publish product directly, Make vendor featured, Enable order creation.
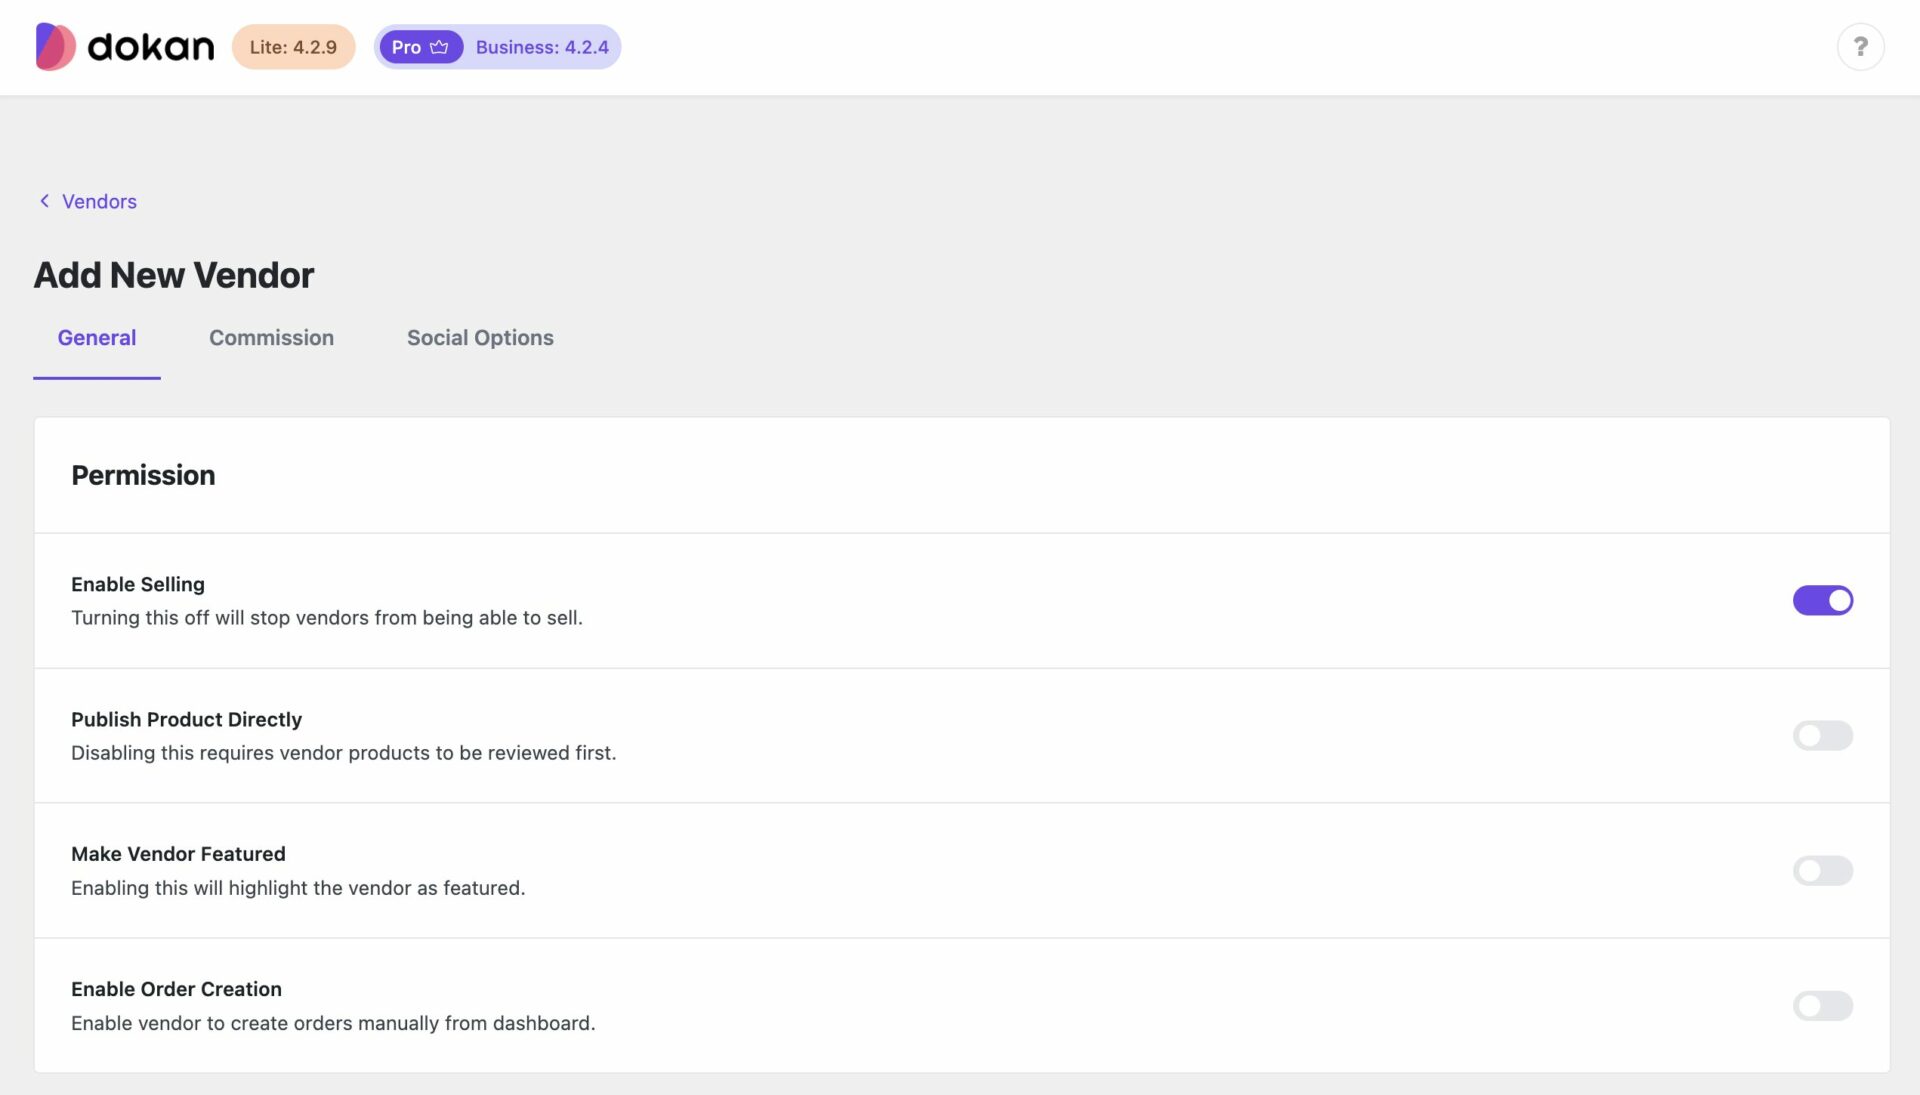
The admin has to fill out the fields in three steps. In the first step, the admin will set the account information of the vendors. In the second step, the admin will fill out the Address. Finally, the admin will set the Payment Options.
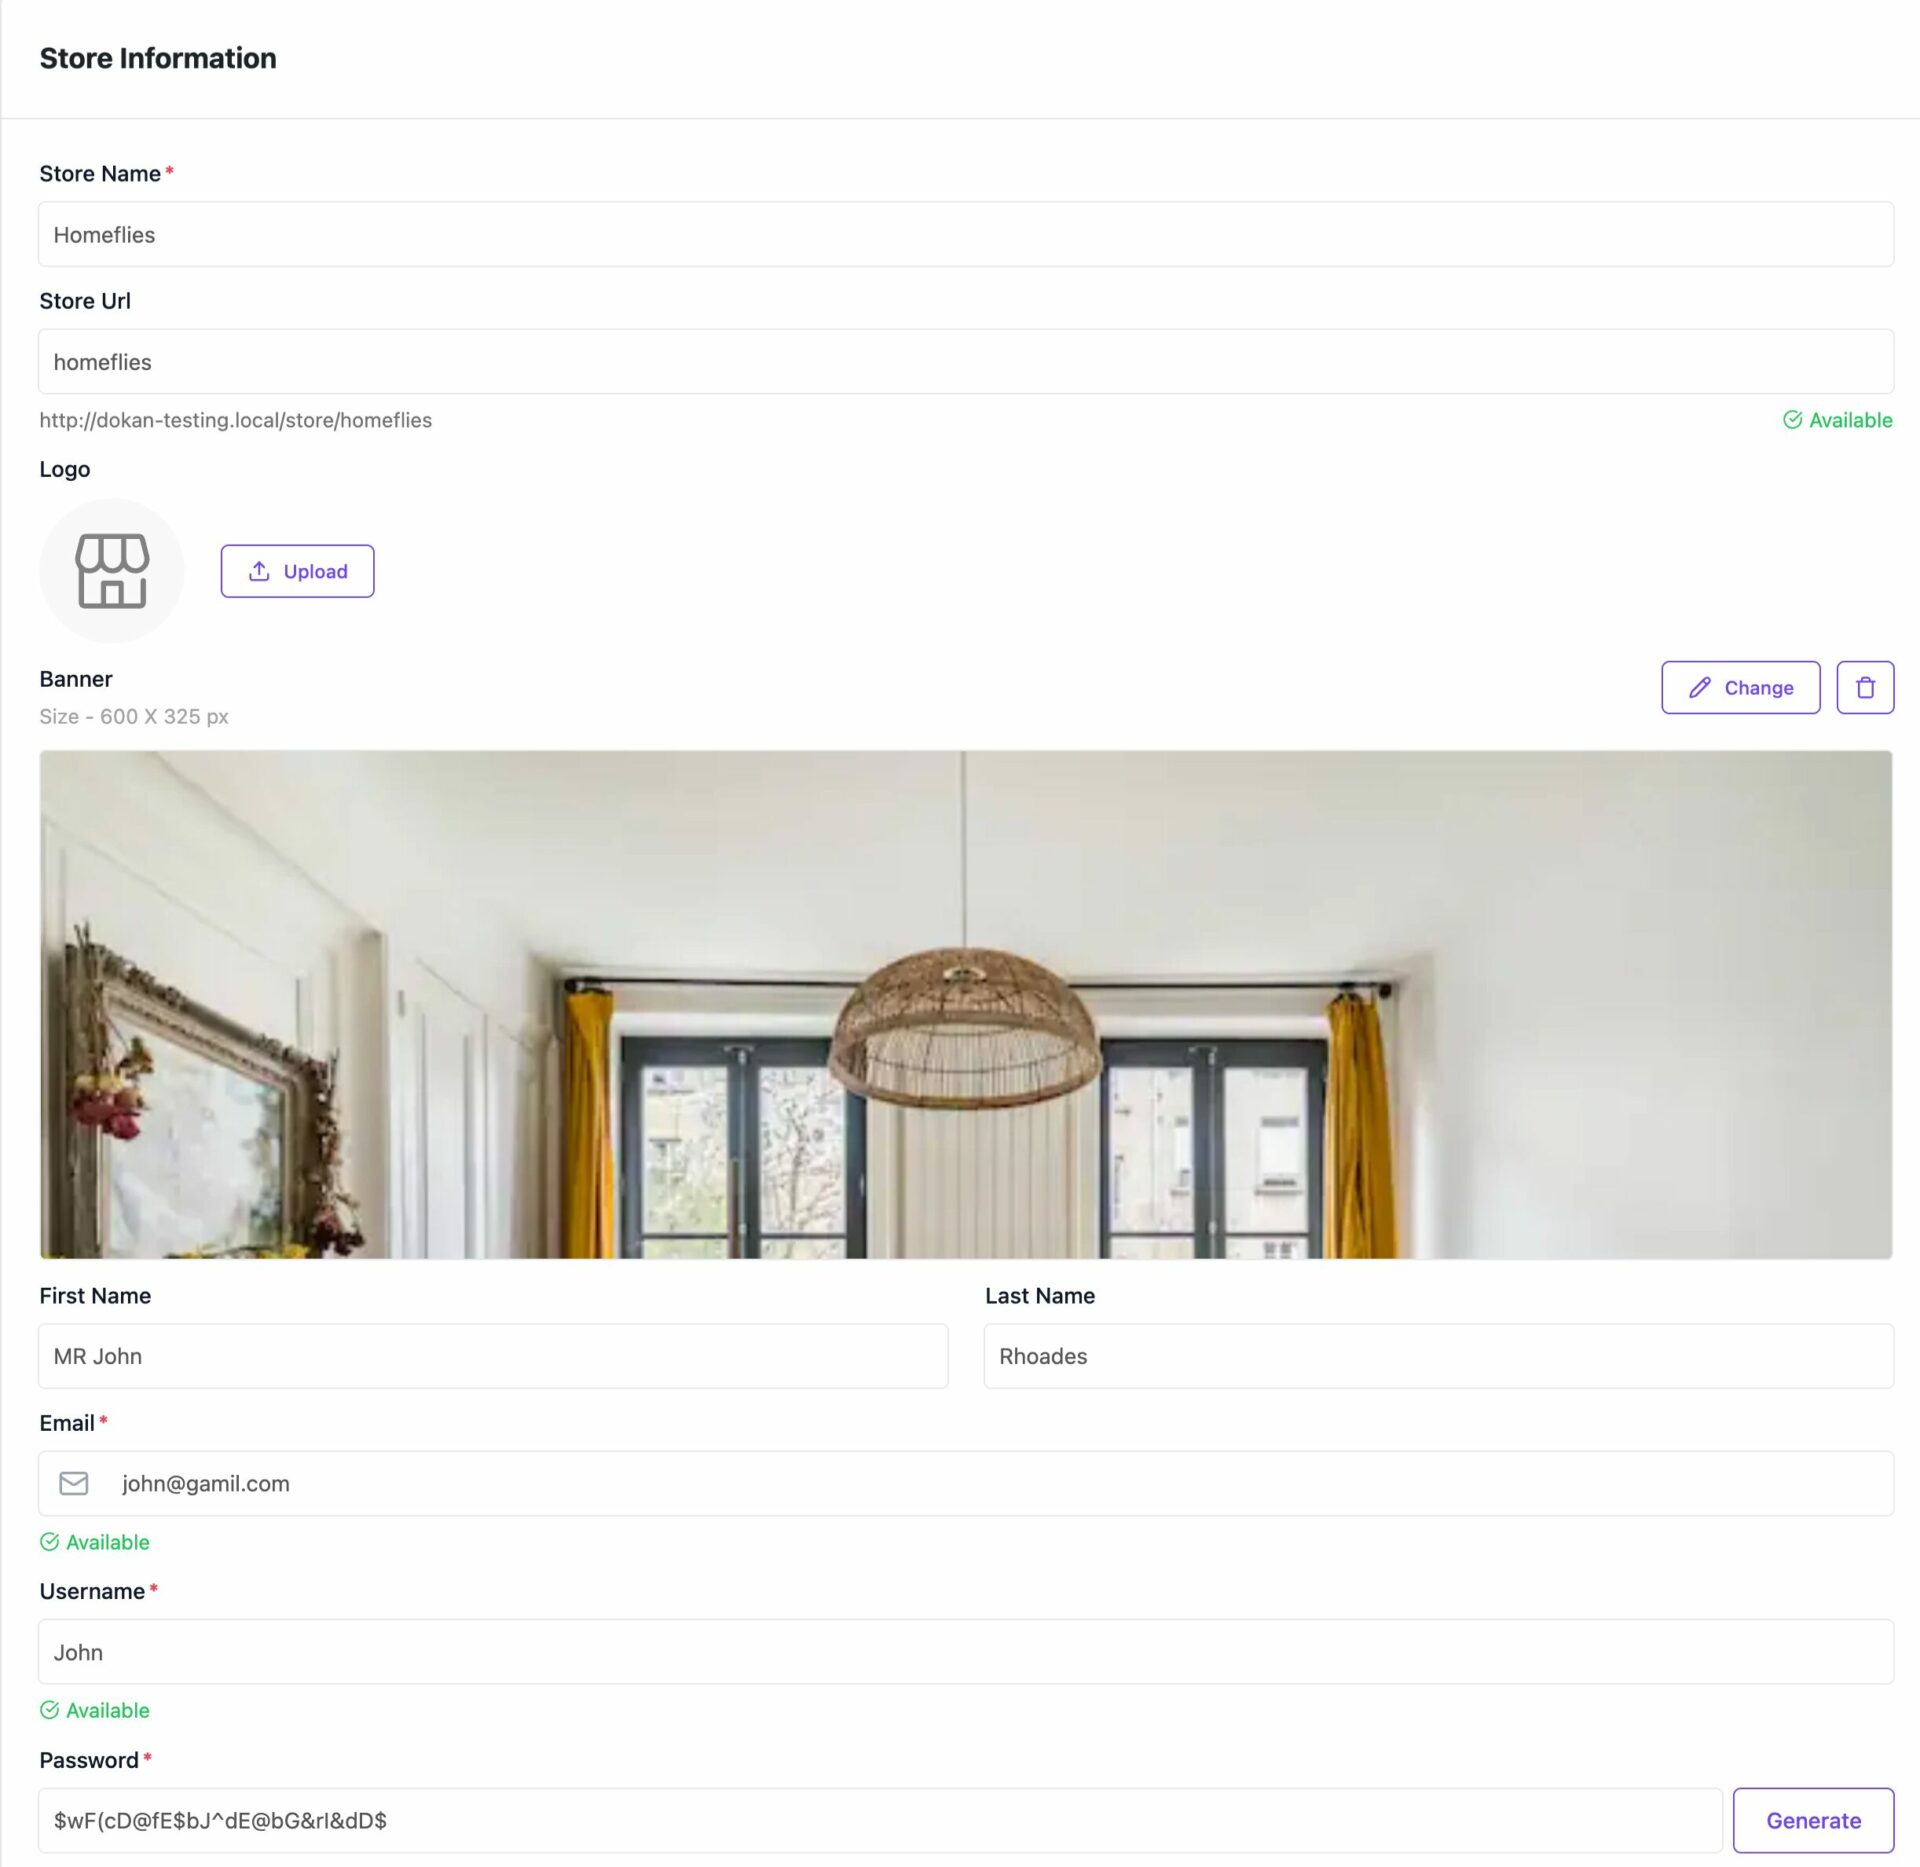
Step 1: Adding Store Info
The admin will have to add photos, upload a banner image, fill out the vendor’s name, email, phone number, username and he can also set a password for the particular vendor that the admin wants to create.
(Please note that, if you do not fill out any required fields then you won’t be able to go to the next steps.)
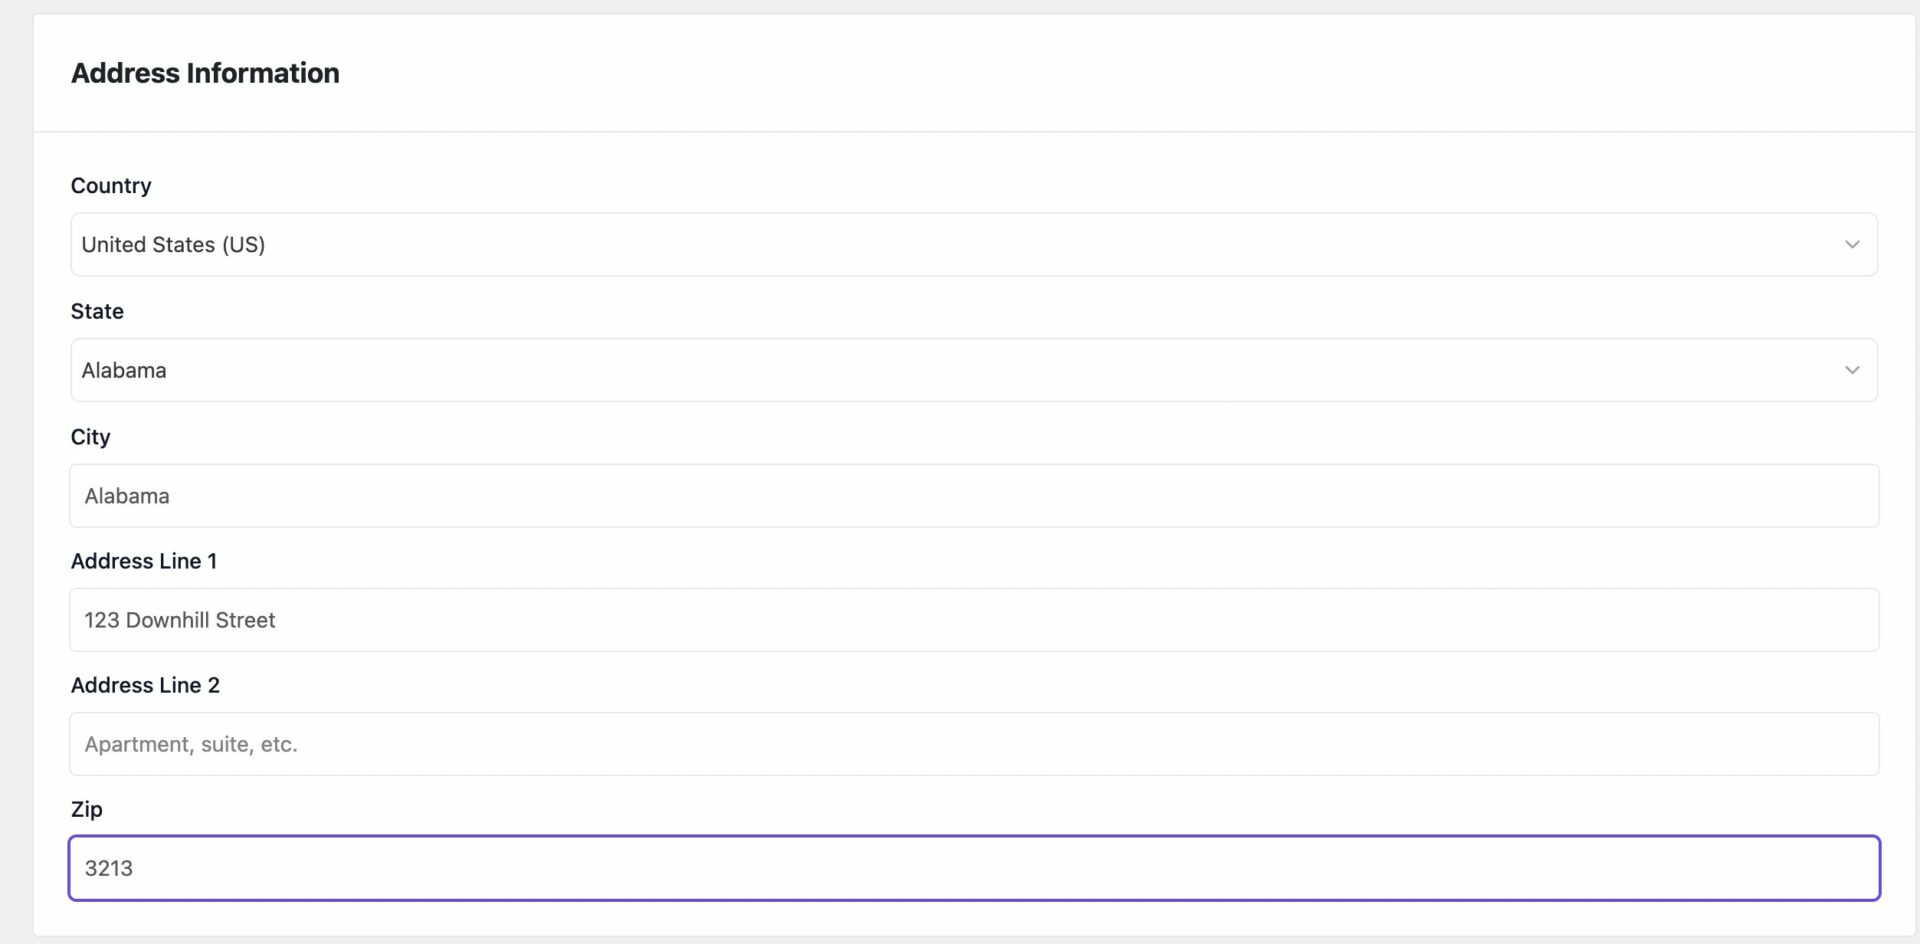
Step 2: Address
The admin will input the address of the vendor and click on the next button to proceed.
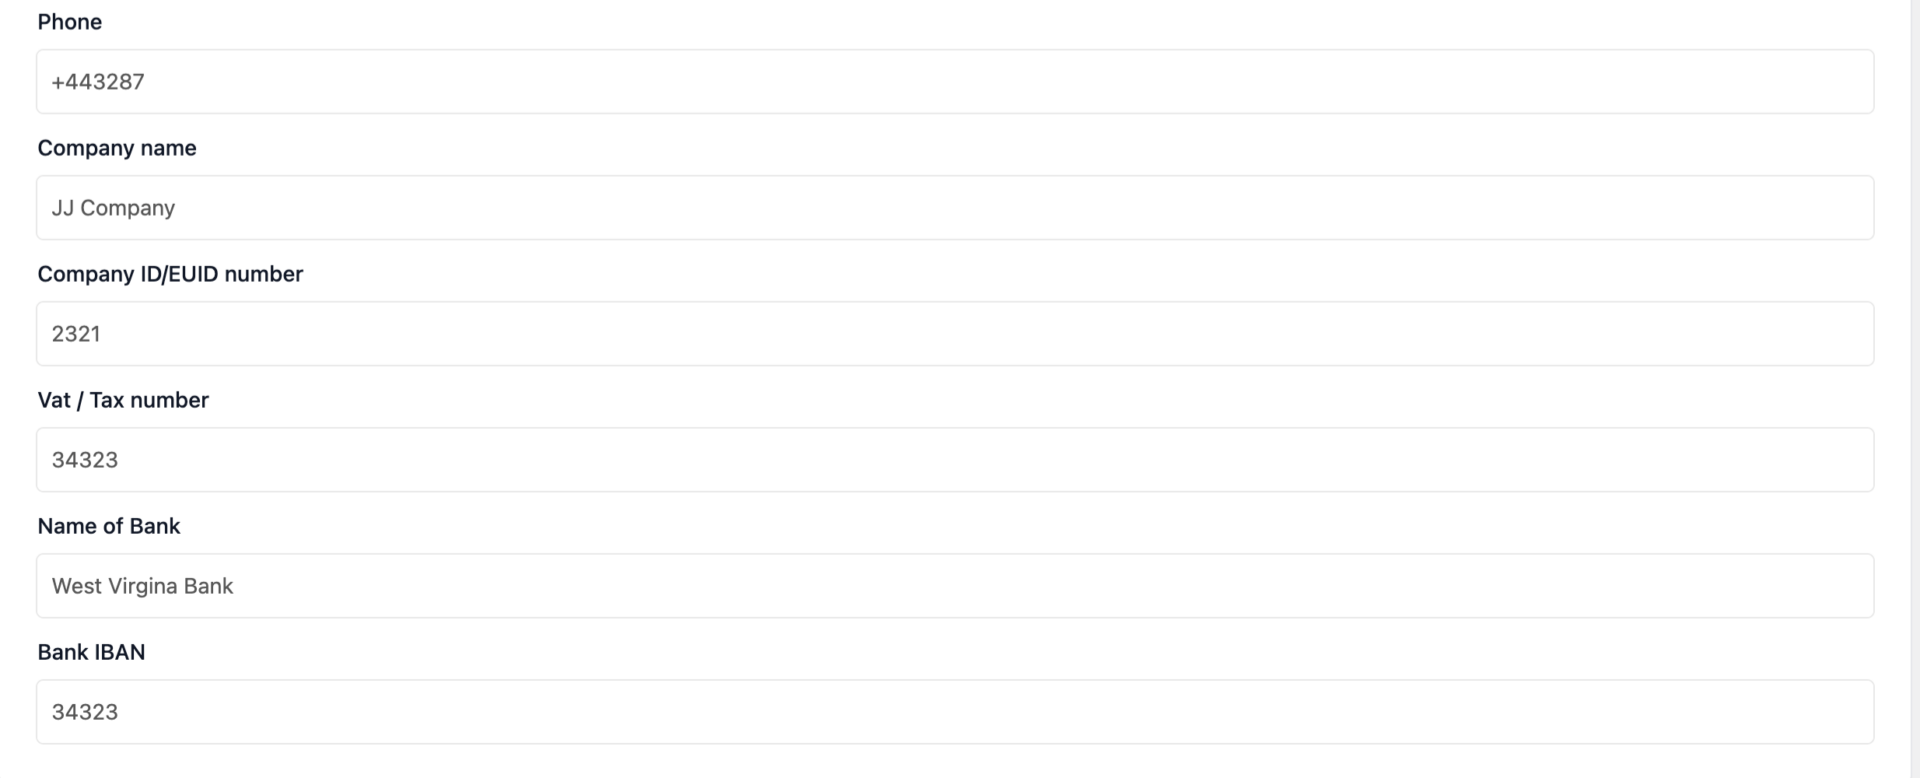
Step 3: Payment Options
Finally, the admin will enter the bank account credentials and the PayPal email of the vendor:
The admin can also enable their vendors to sell their products, publish product directly and make a vendor featured. Finally, the admin needs to hit the “Create Vendor” button to create the vendor.
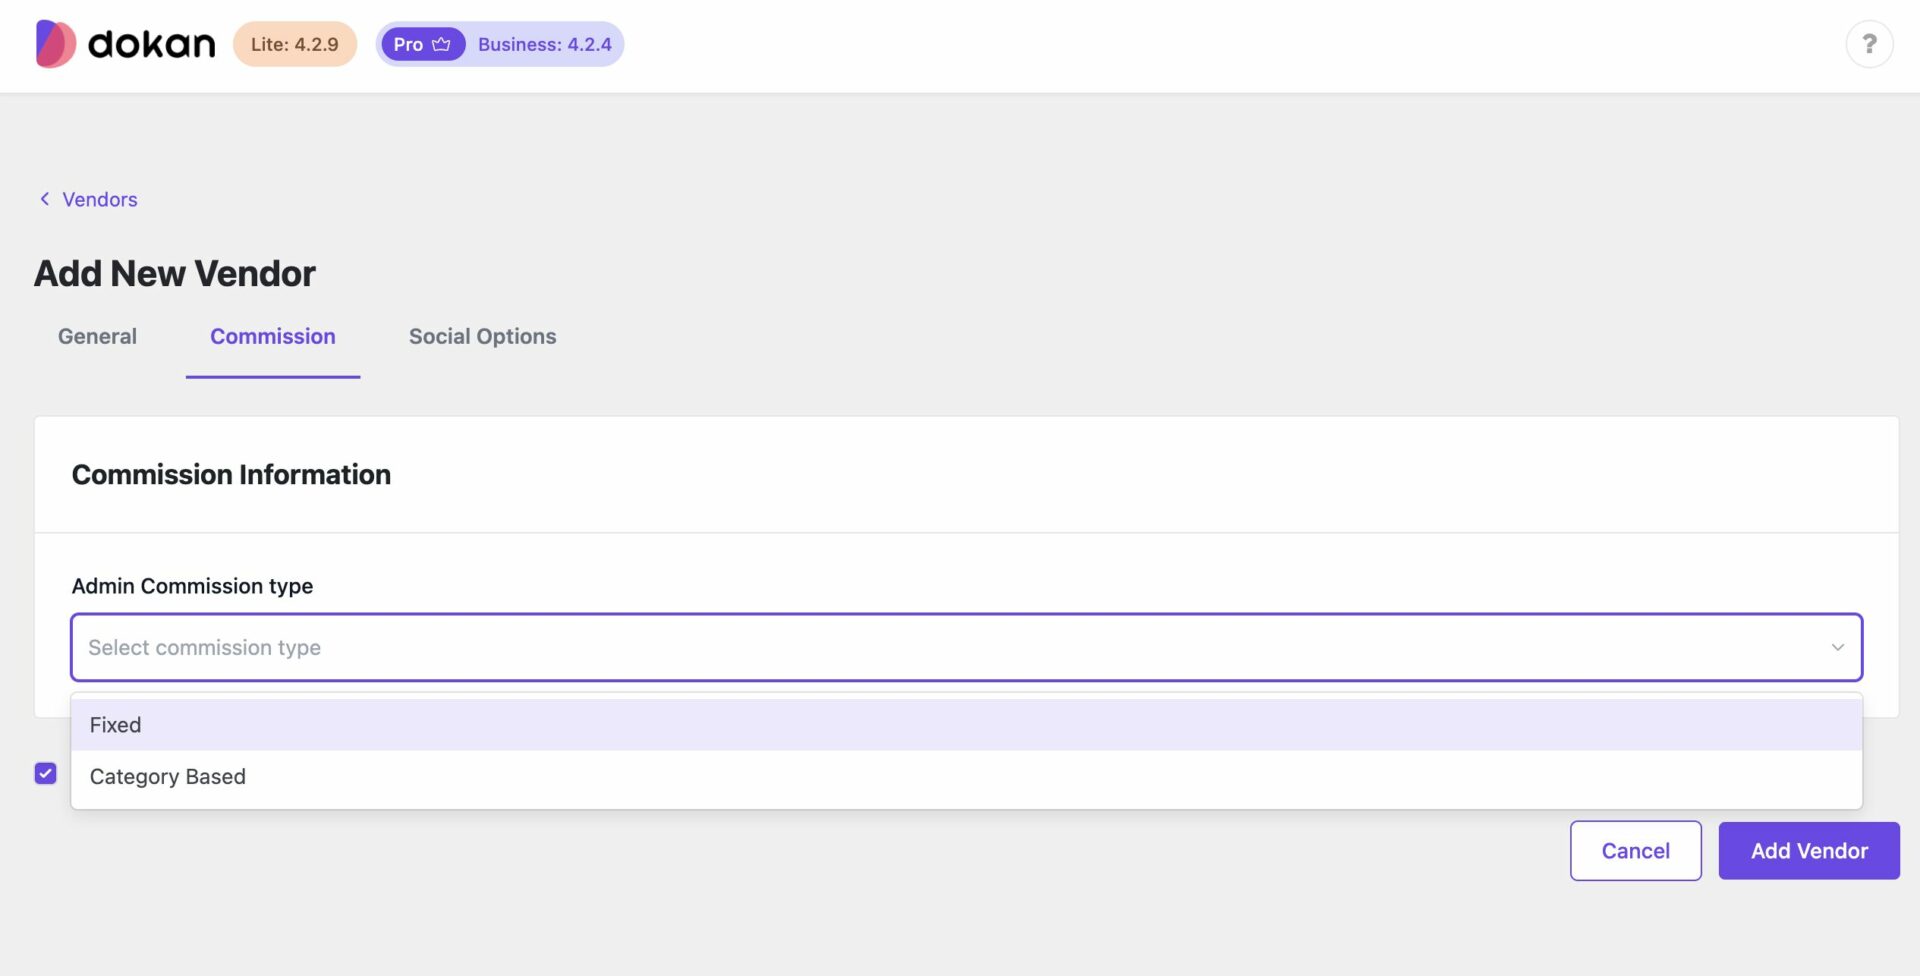
Step 4: Choose the commission type for the vendor-
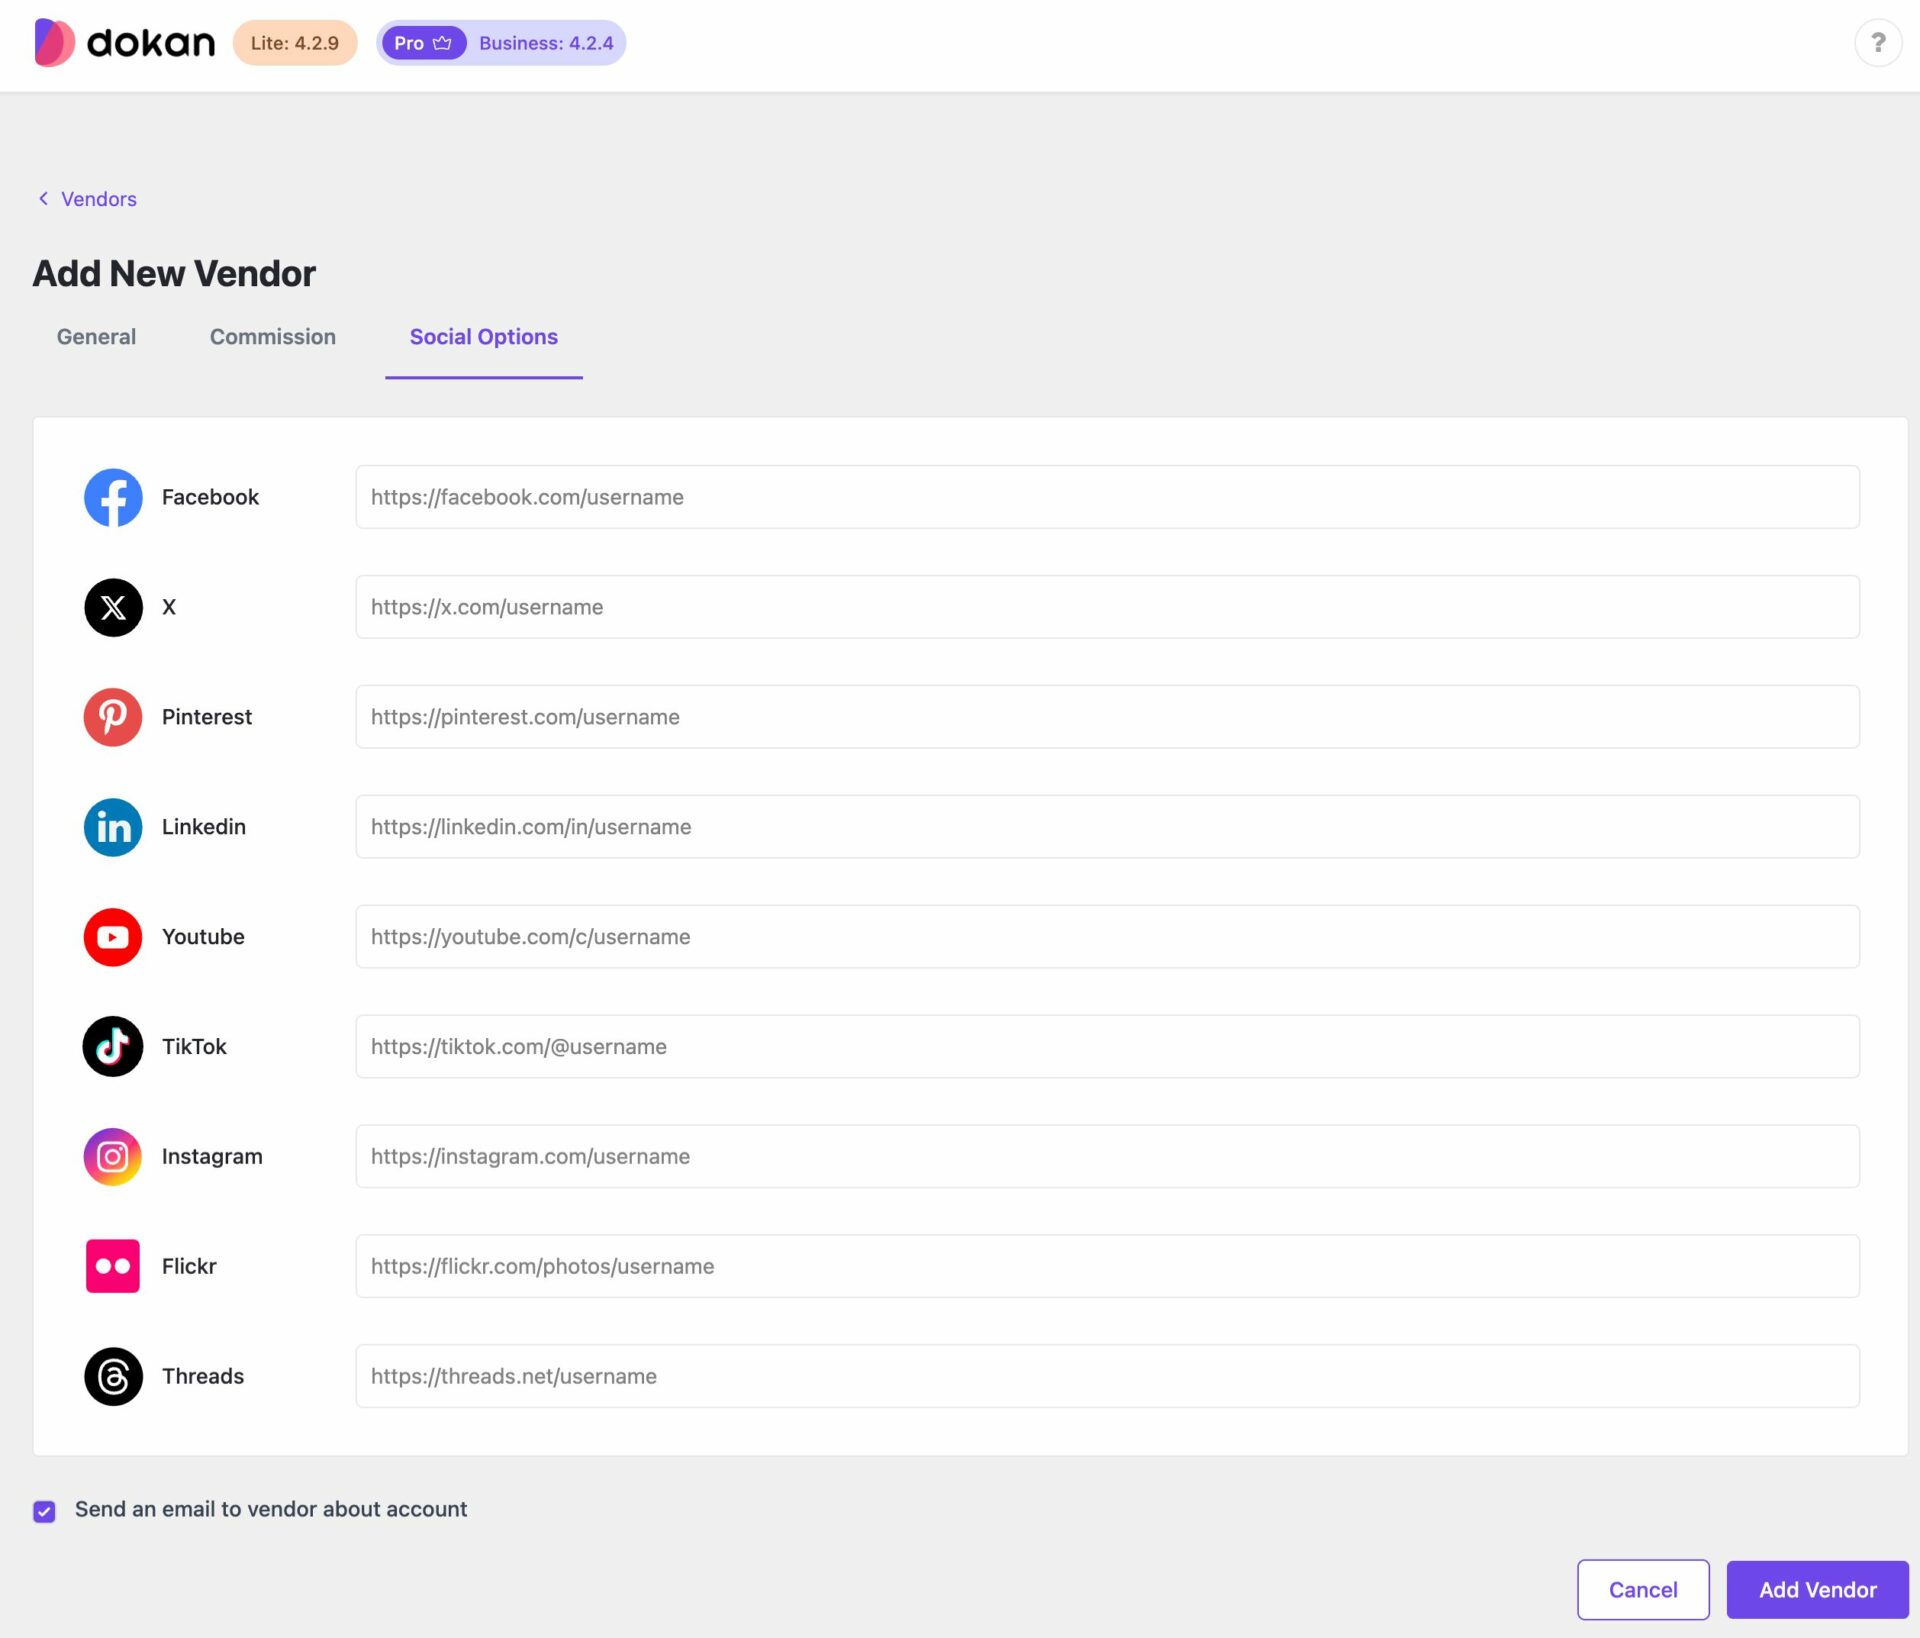
Step 5: You can add social options for vendors as well-
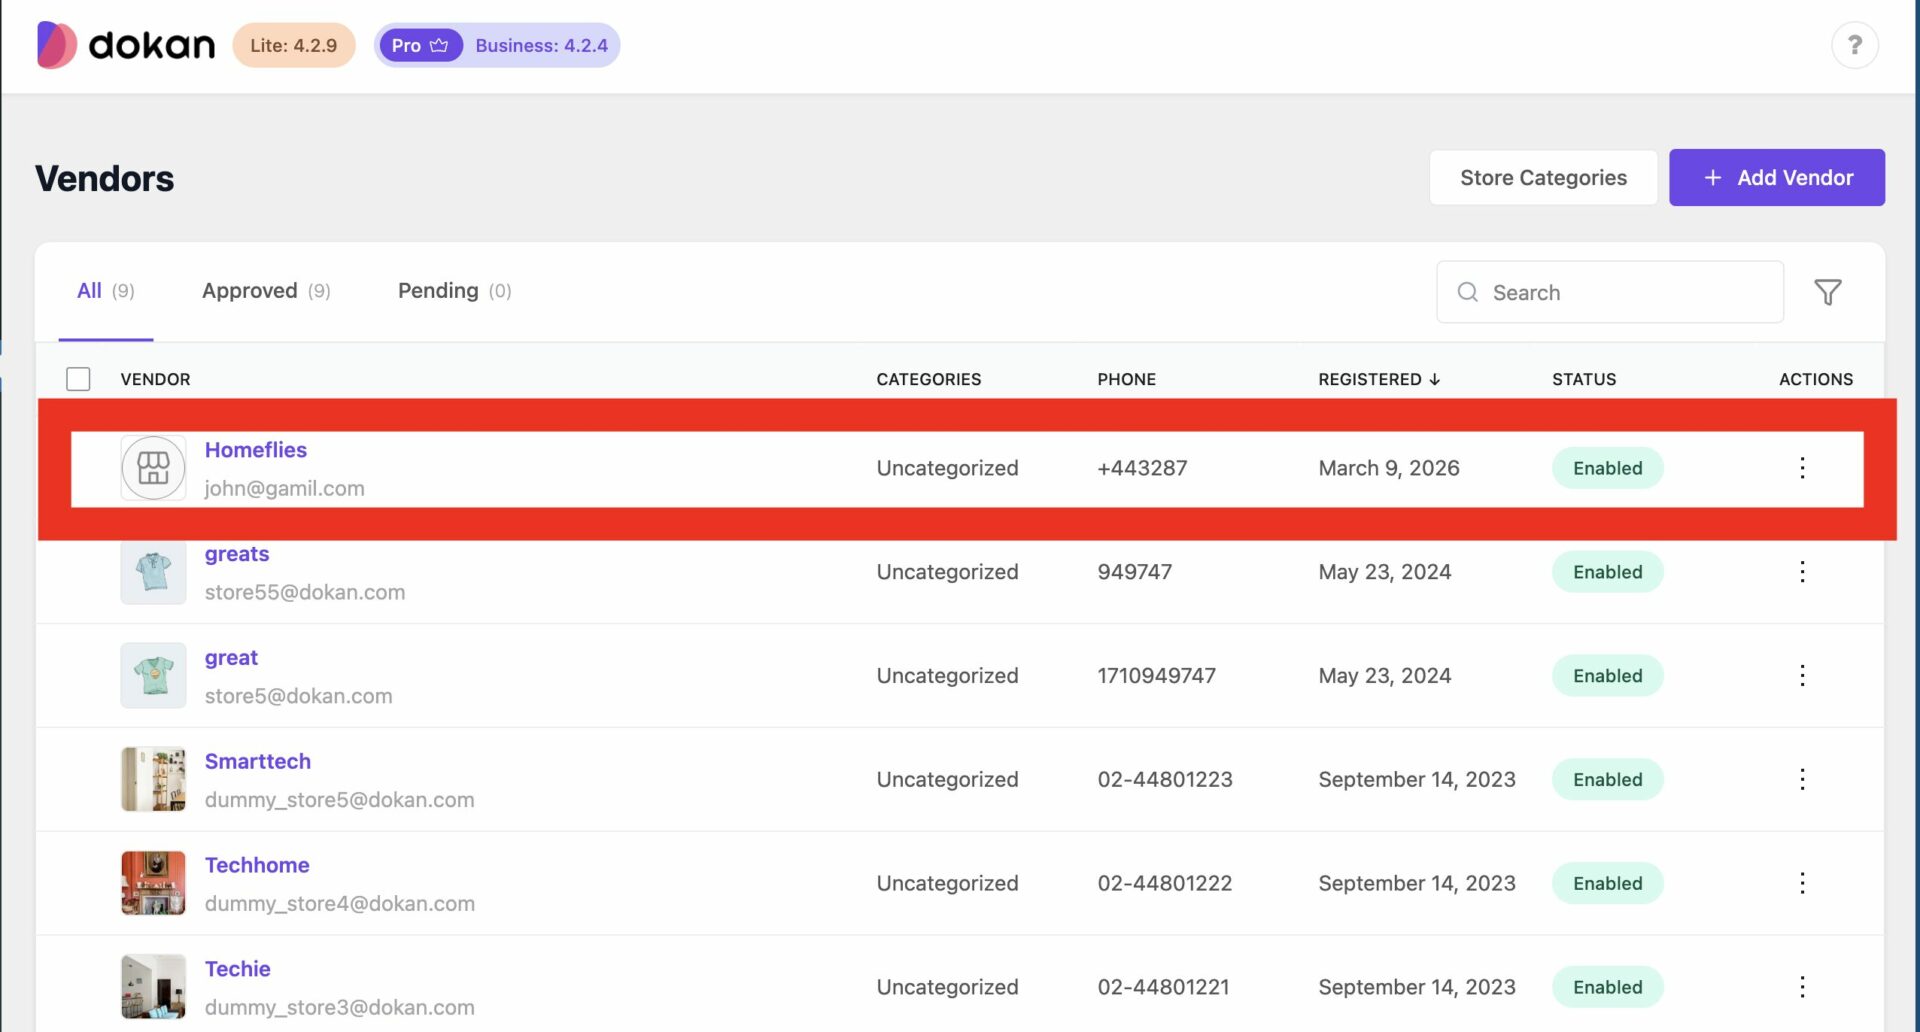
Here is how the vendor will be visible in the vendors’ list:
This is how the admin can add vendors from the Vendors option of Dokan. However, the admin can also add vendors from the WP Admin Dashboard > Users > Add New User > Change the role to vendor.

