Using the Dokan Vendor Dashboard Menu Manager feature, the admin can now control what vendors see in their dashboard. This feature will allow the admin to reorder, rename, enable, and disable vendor dashboard menu items.
We will show you how to use this feature.
Login to your WordPress dashboard backend and go to Dokan–> Settings–> Menu Manager.
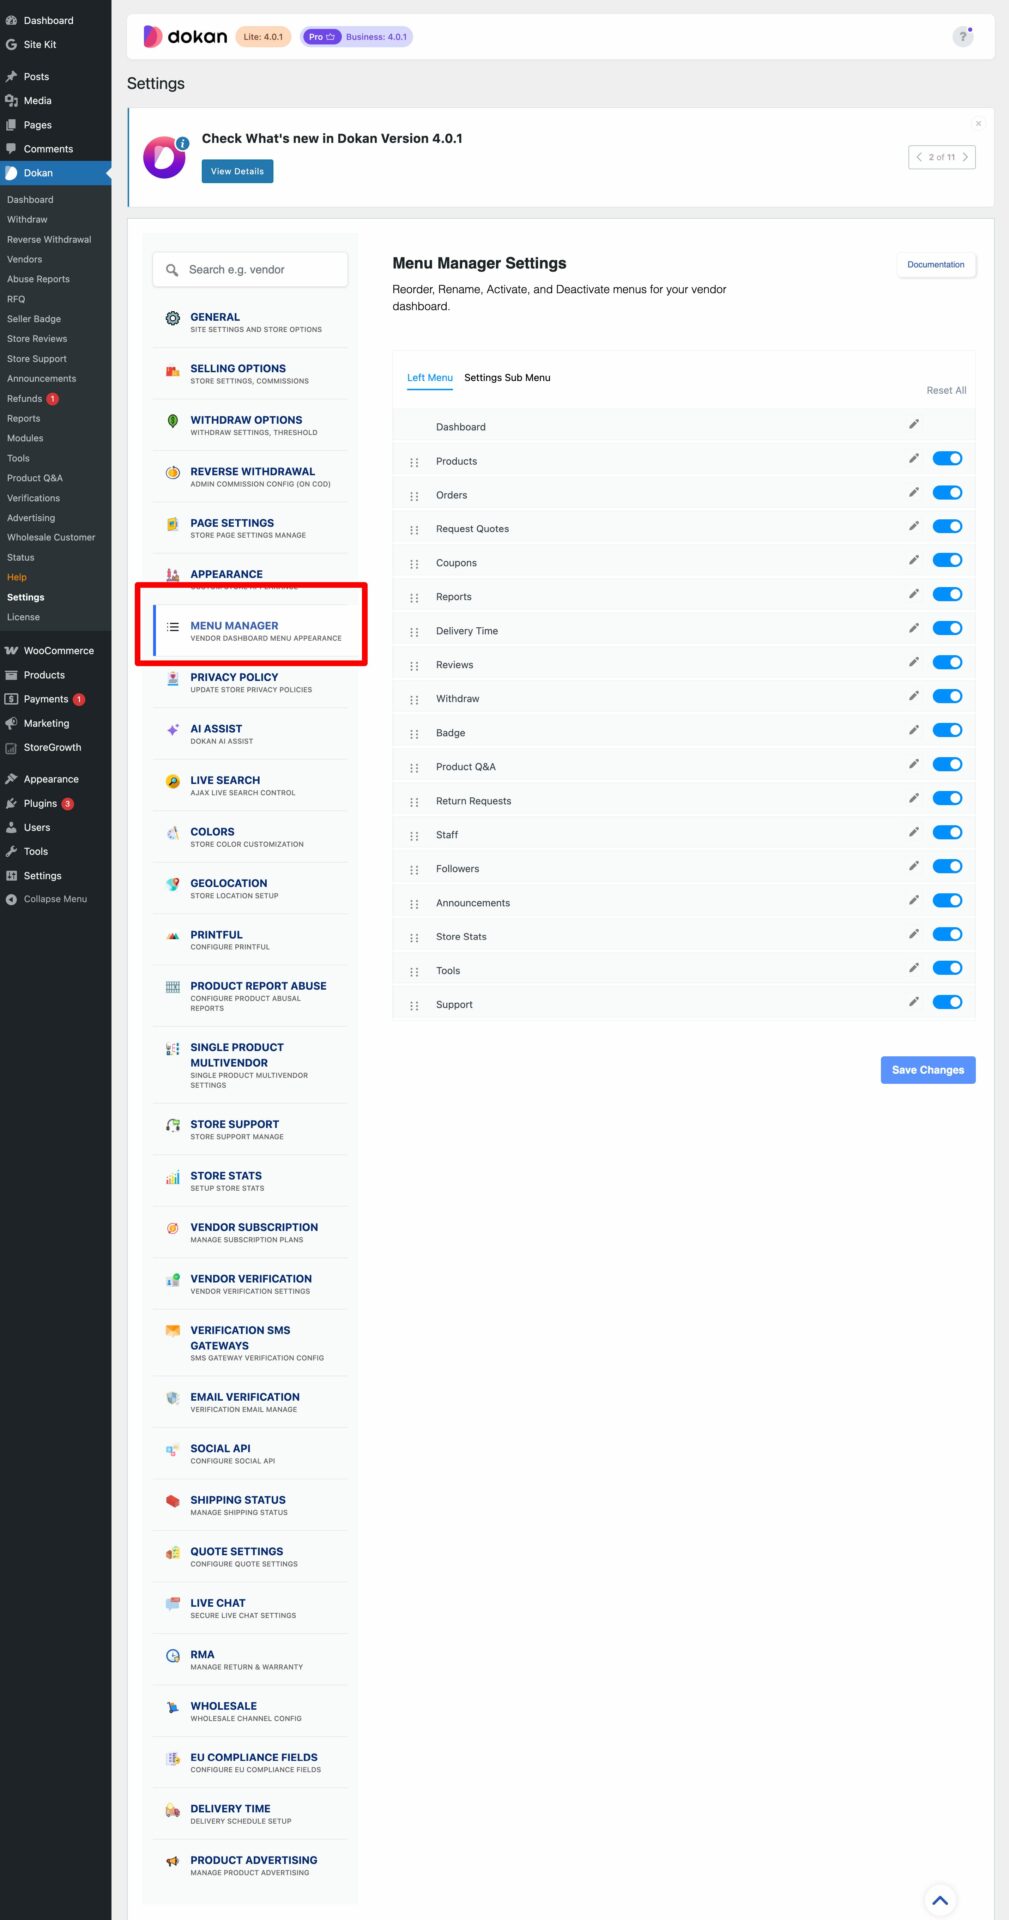
There you will be able to view all the vendor dashboard menu names. Remember, you will only see menu items according to your package and the modules you have enabled.
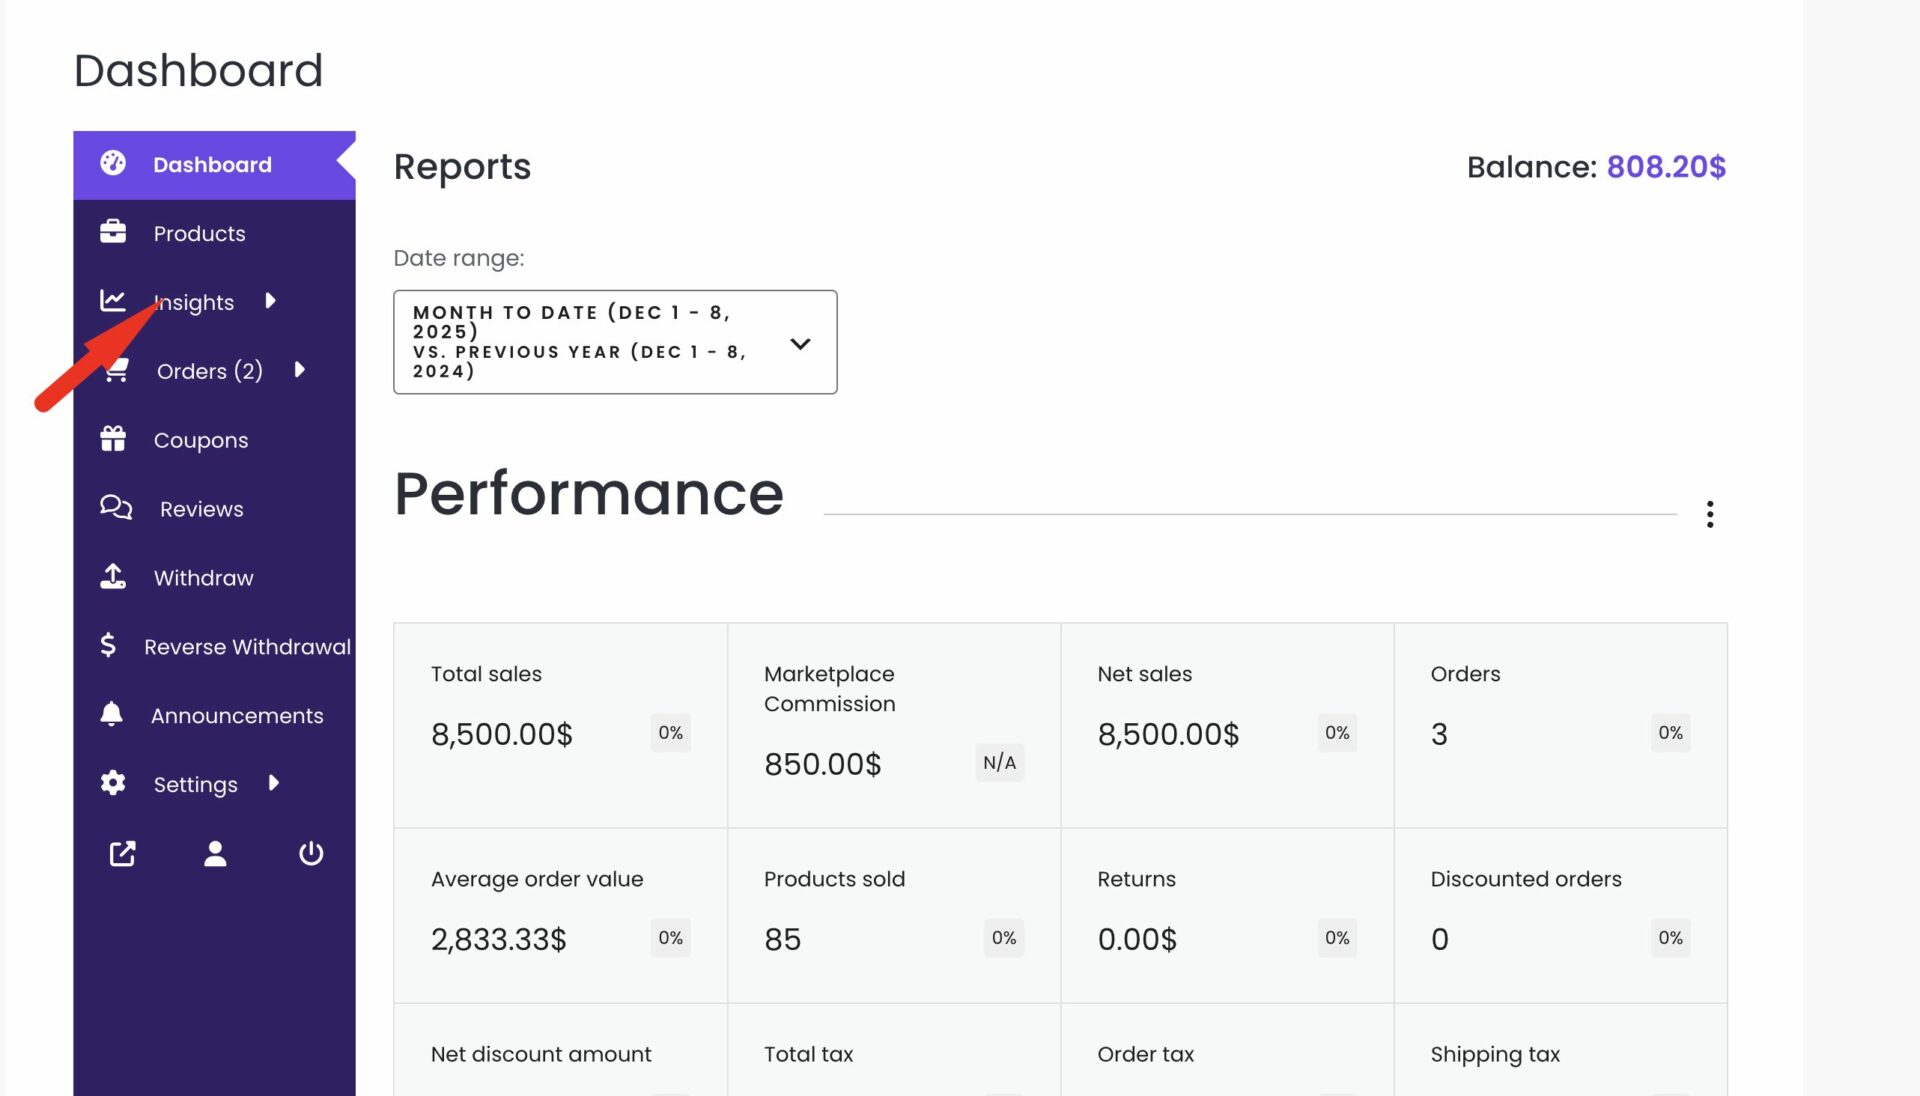
You can drag and drop menu items. For example, you can see that we have dragged the Report section over the Order section-
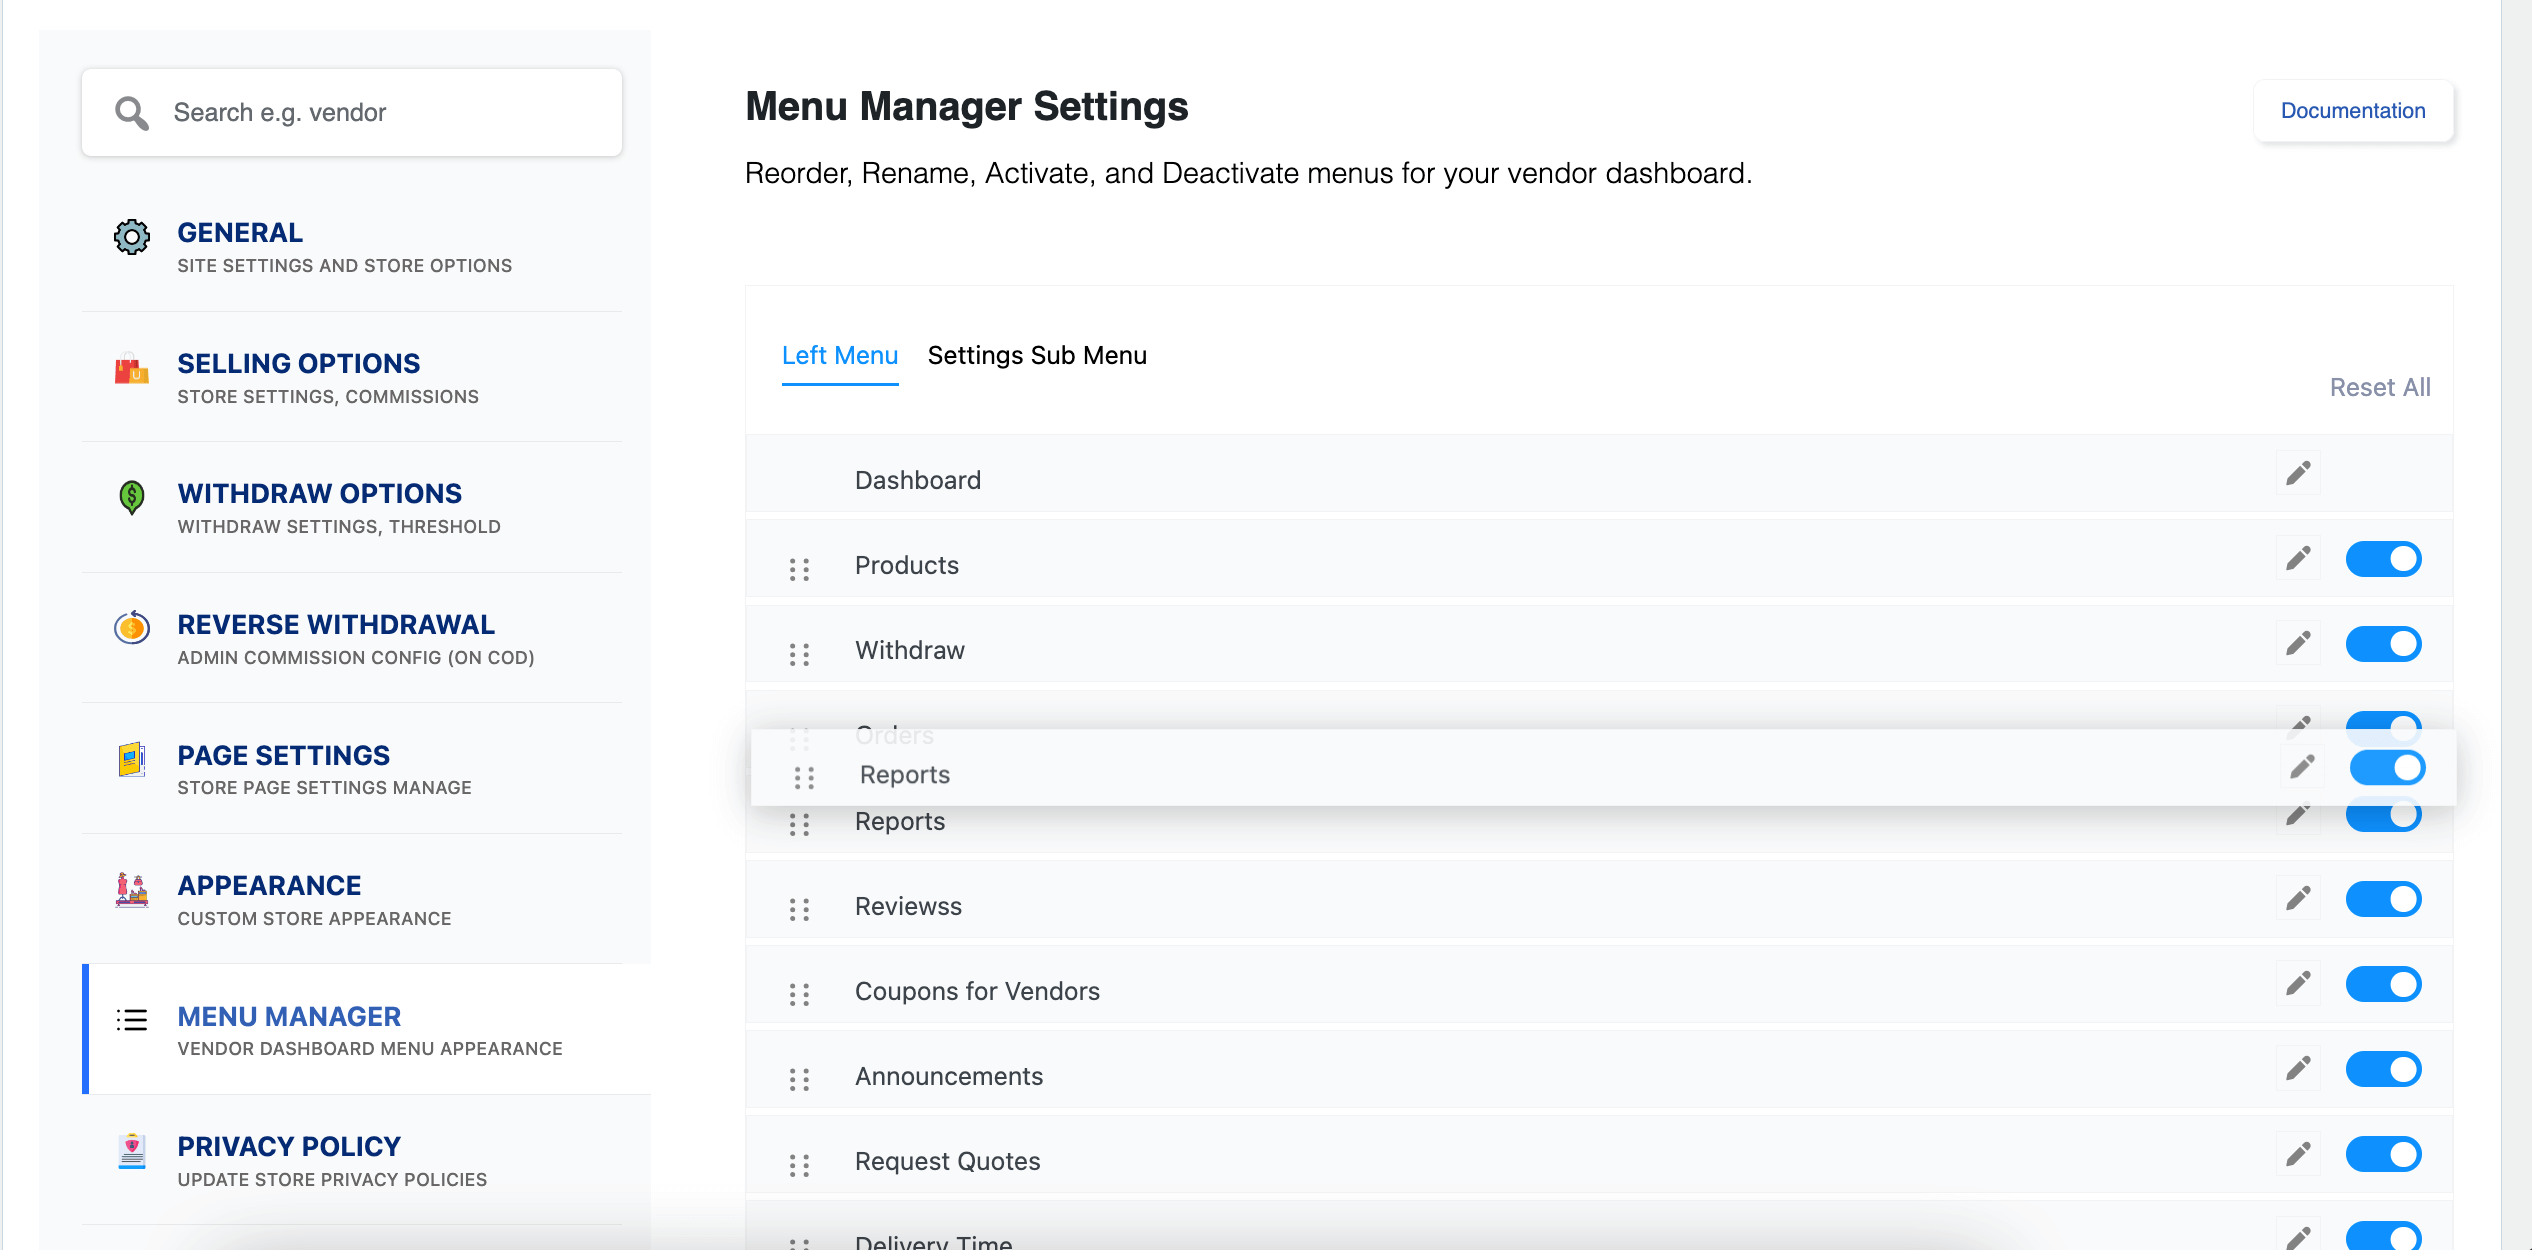
You can see the changes in the vendor dashboard section-

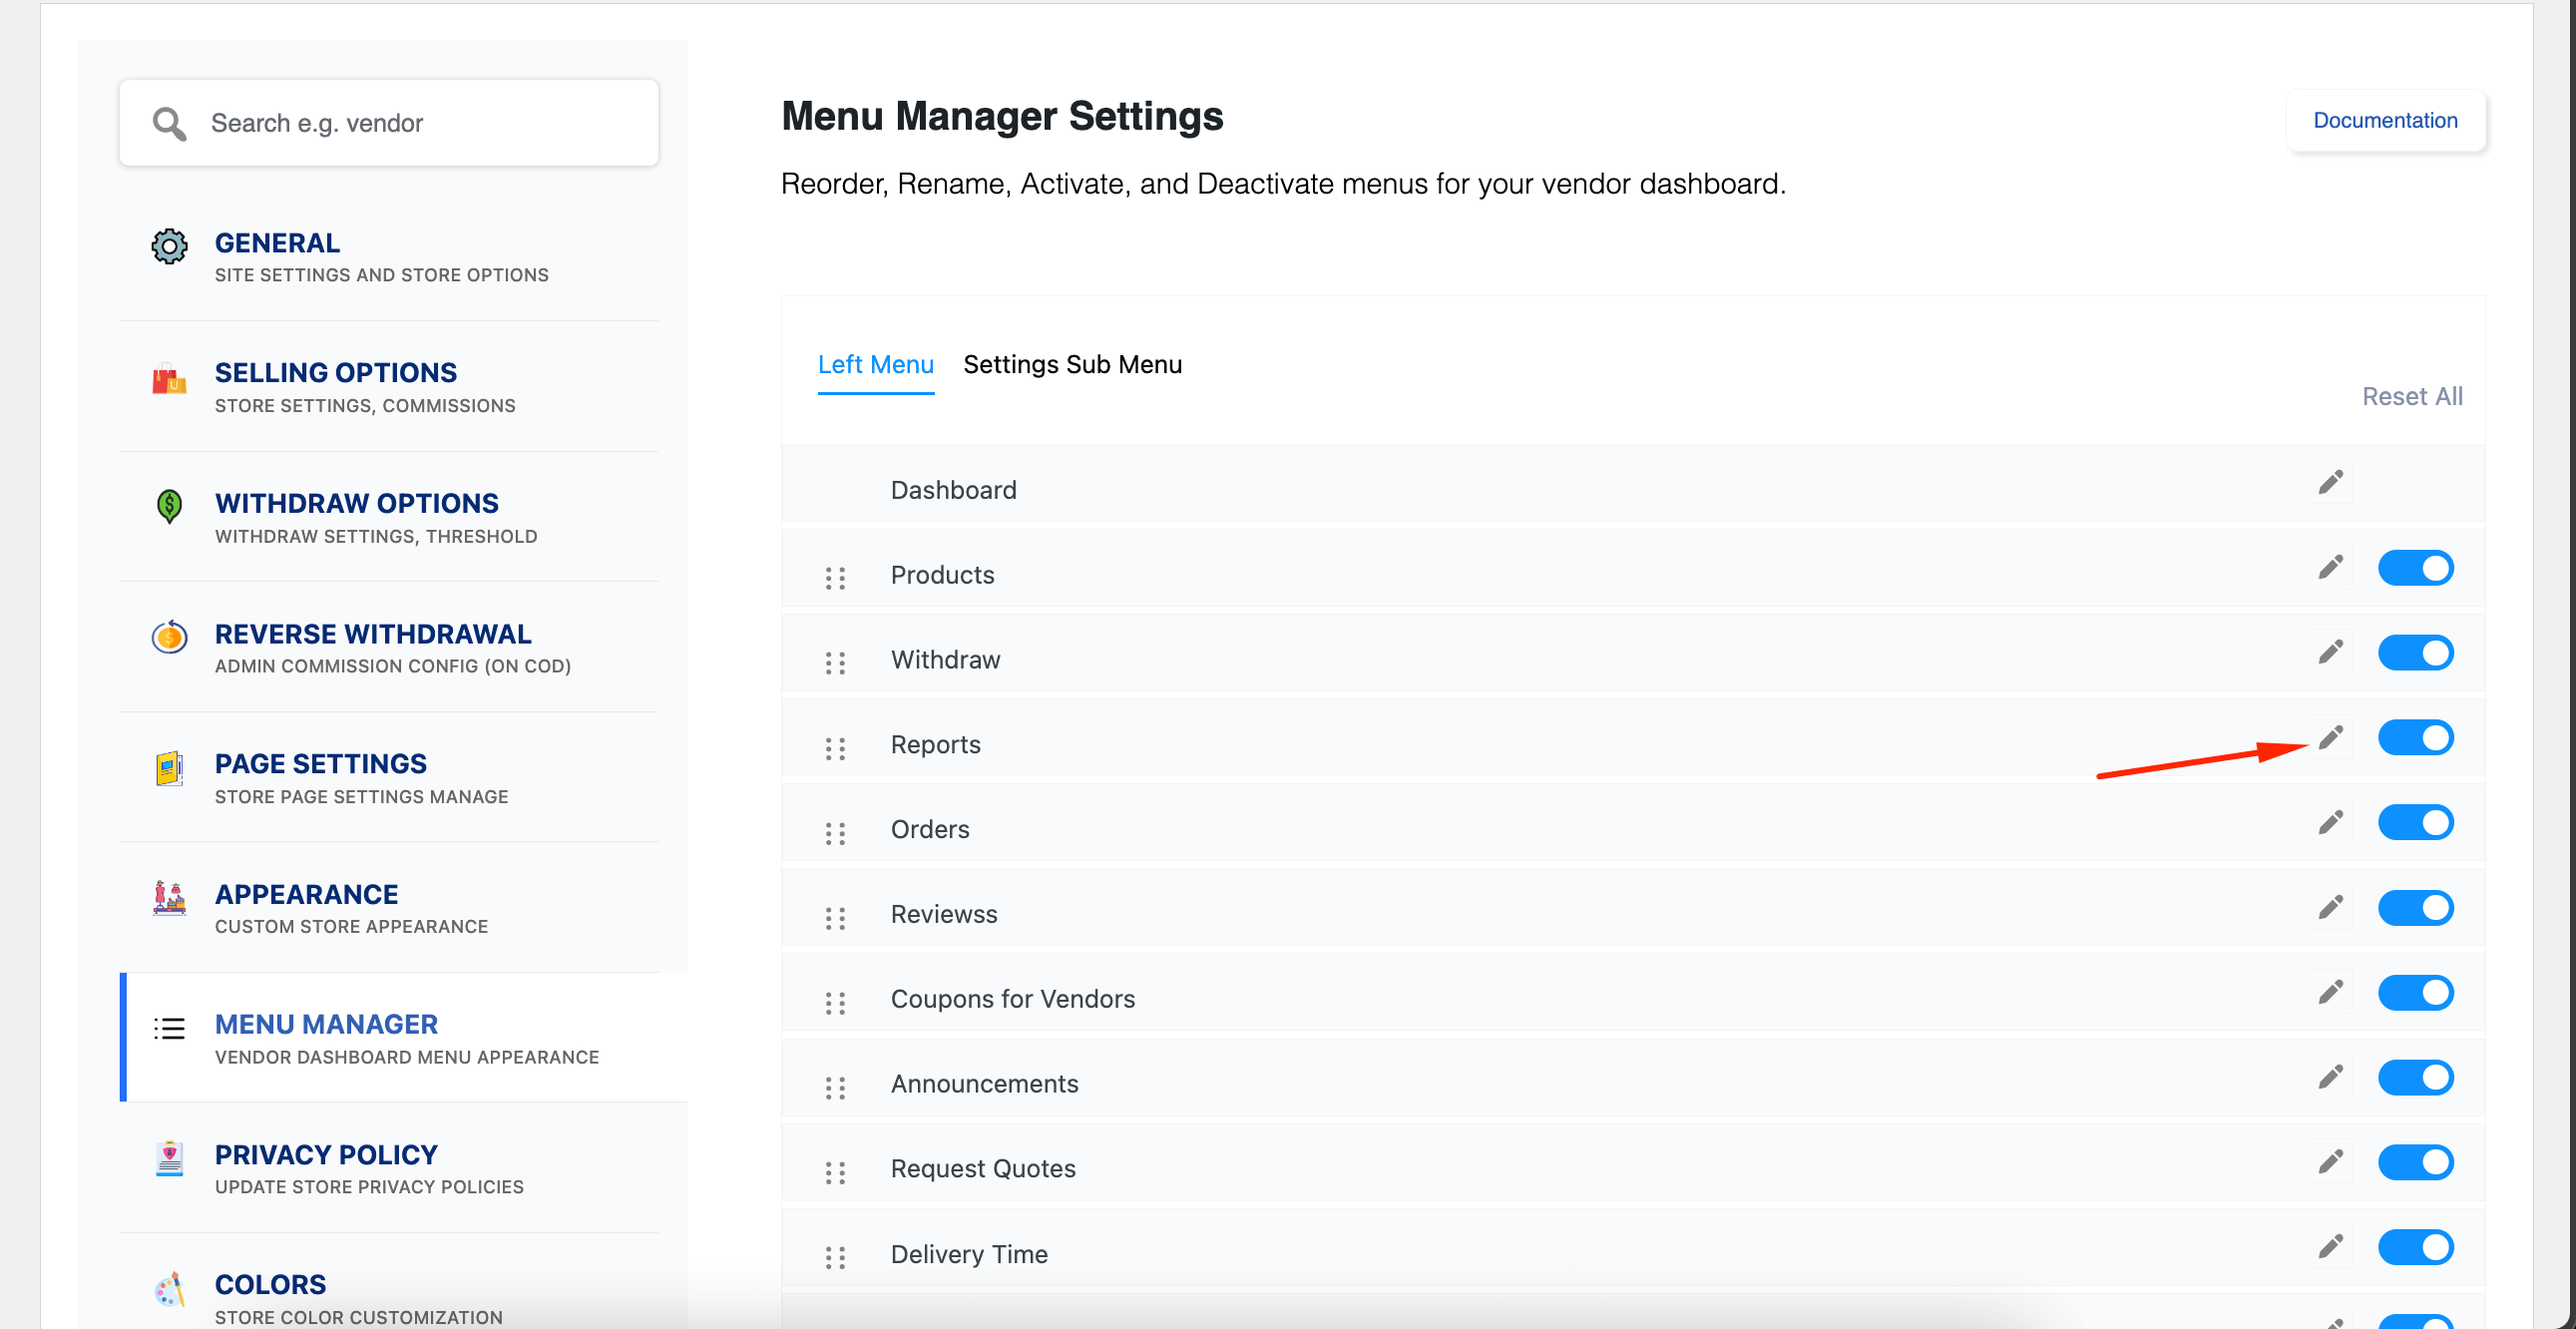
You can also rename the menu items. Just click on the edit button like the screenshot-
Here, we have renamed the report menu to Insights-
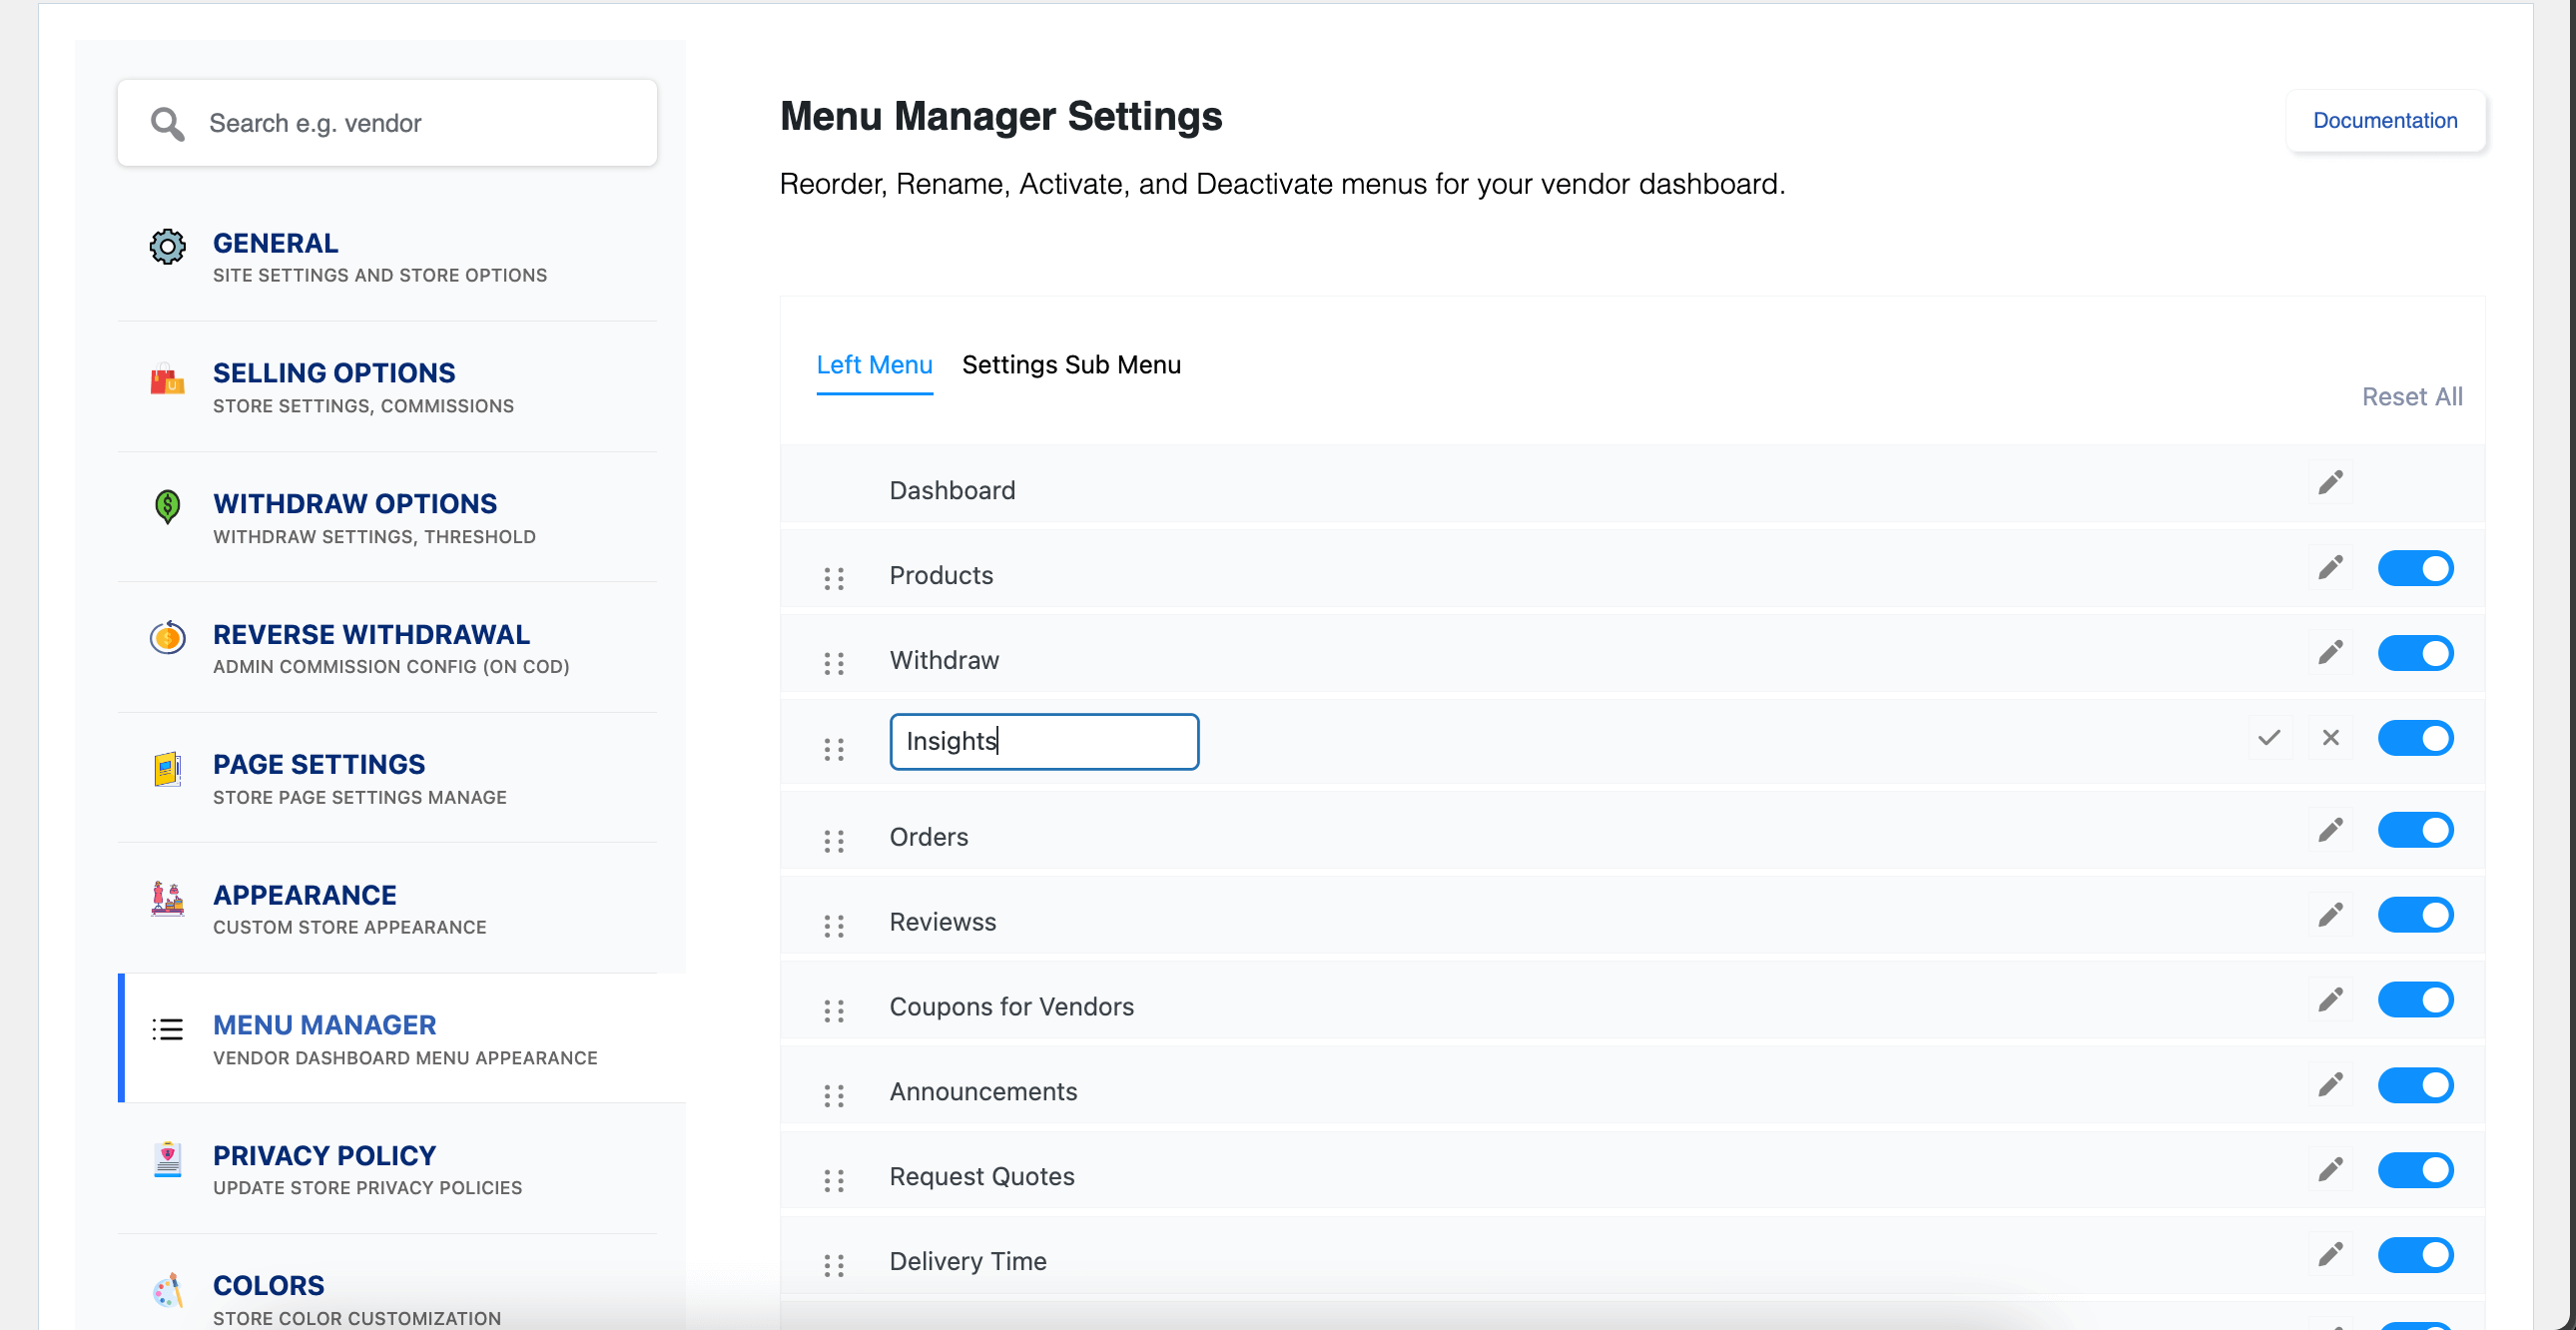
Here you can see that the name has changed in the vendor dashboard-
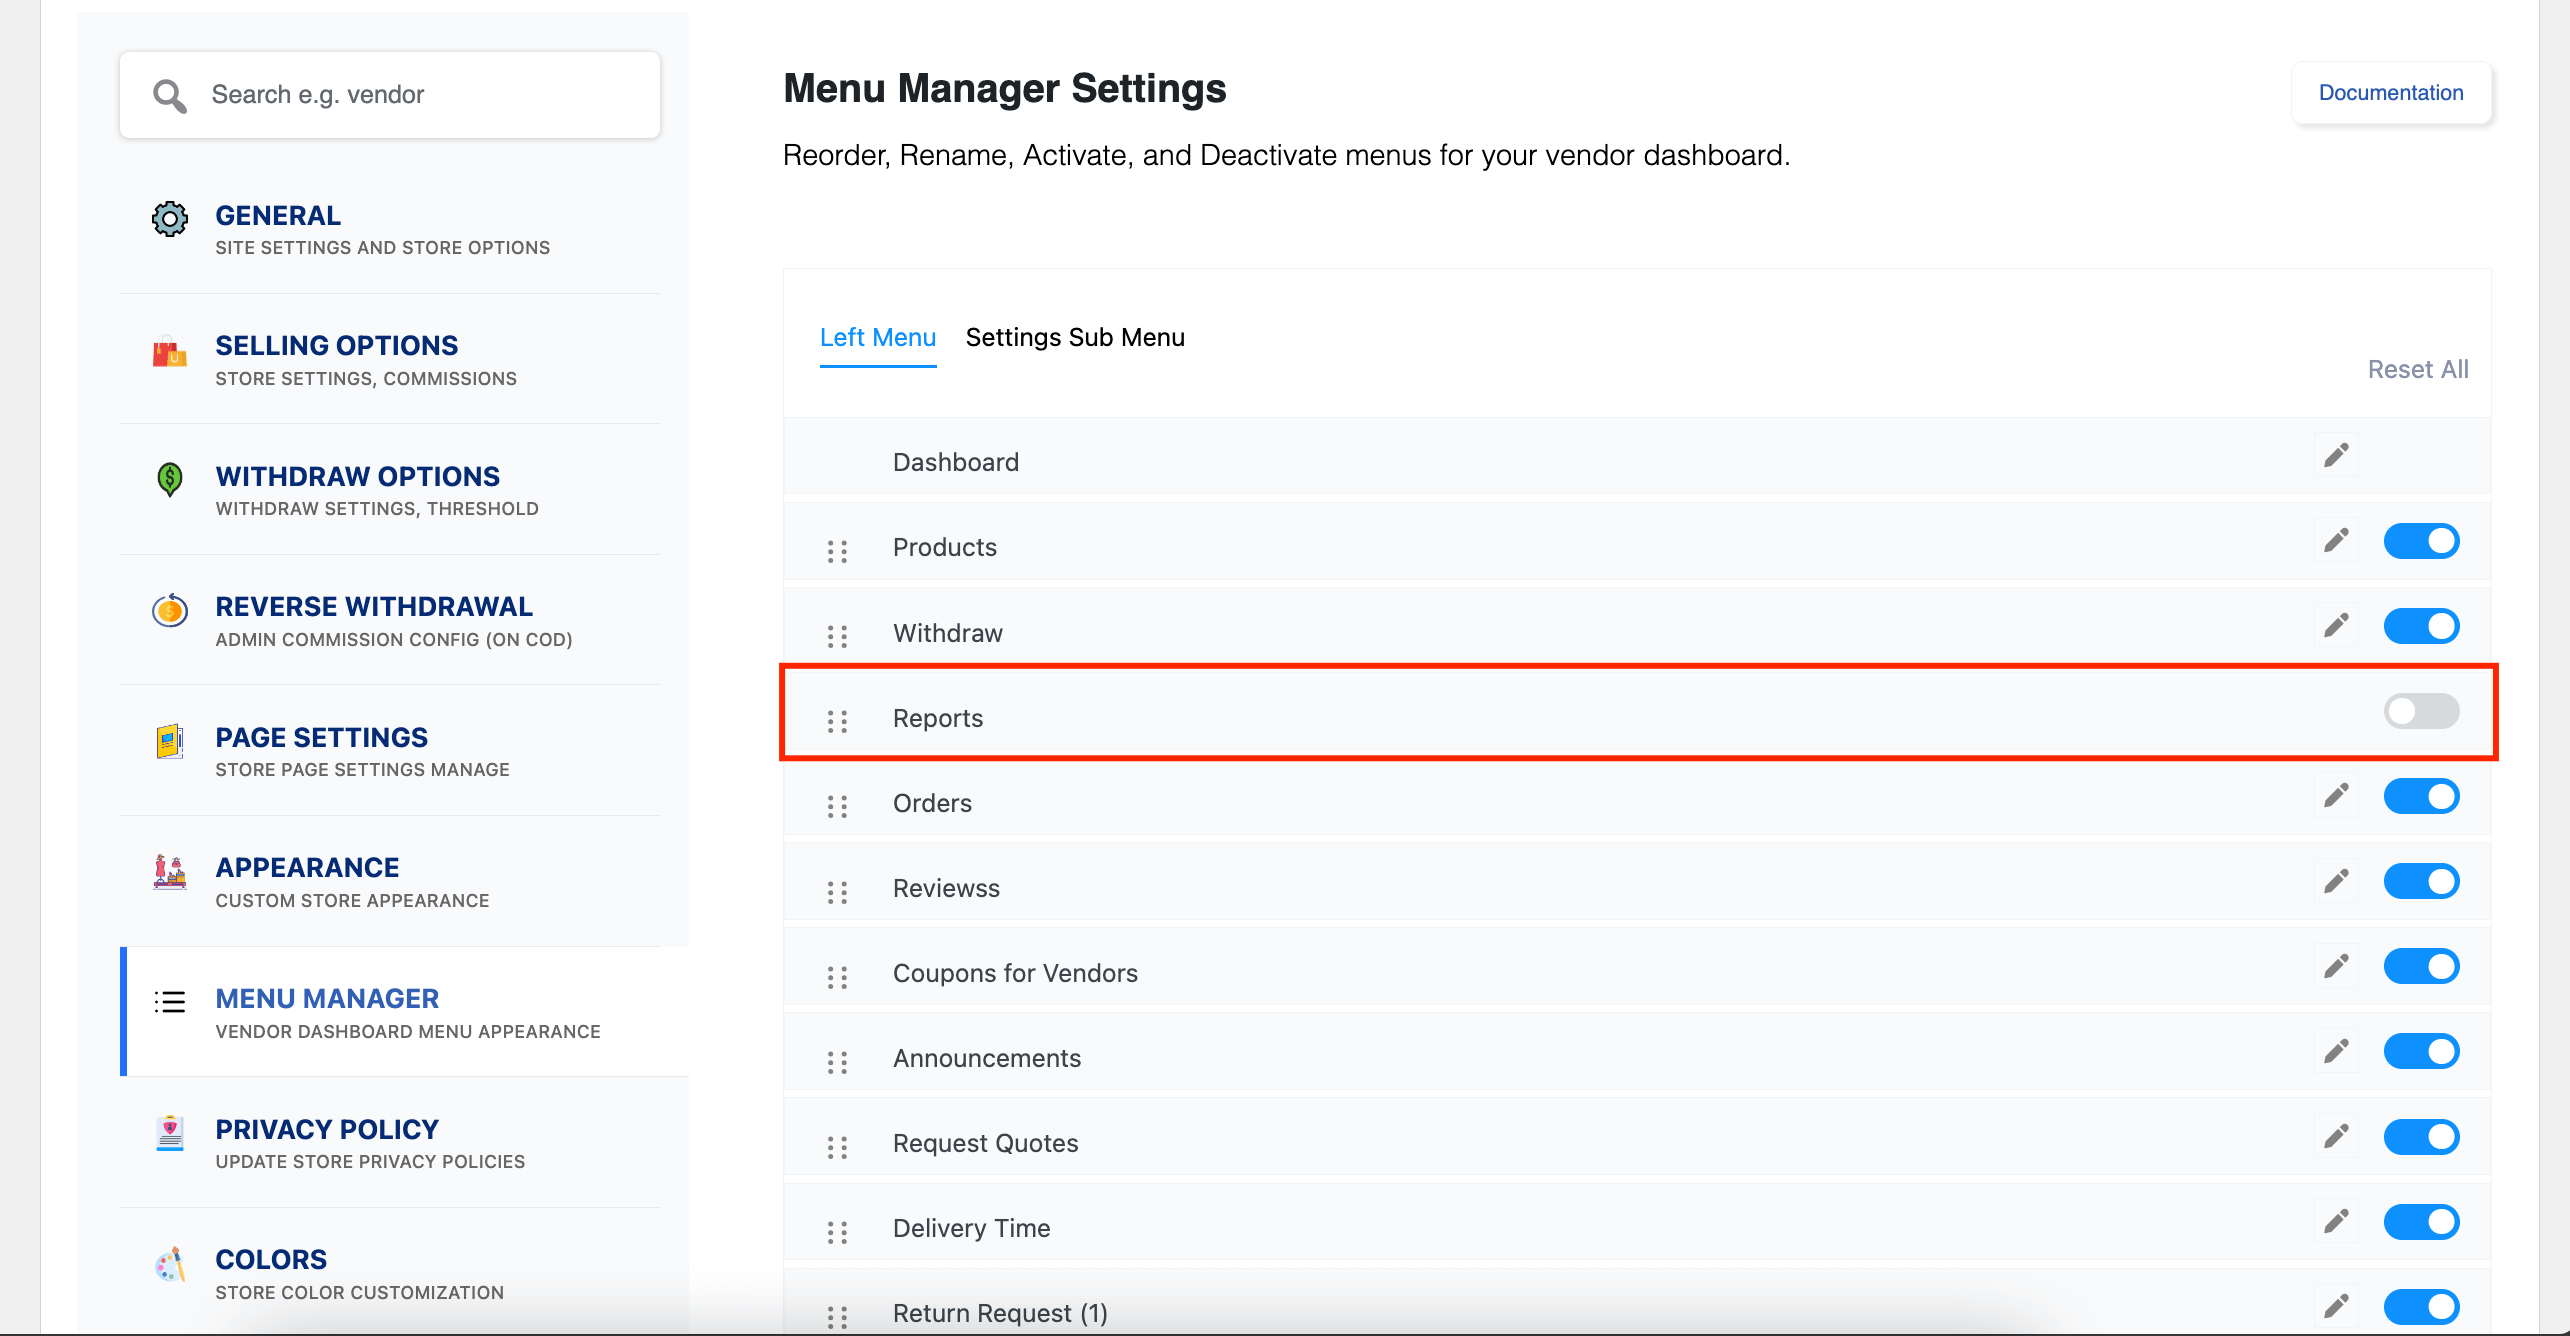
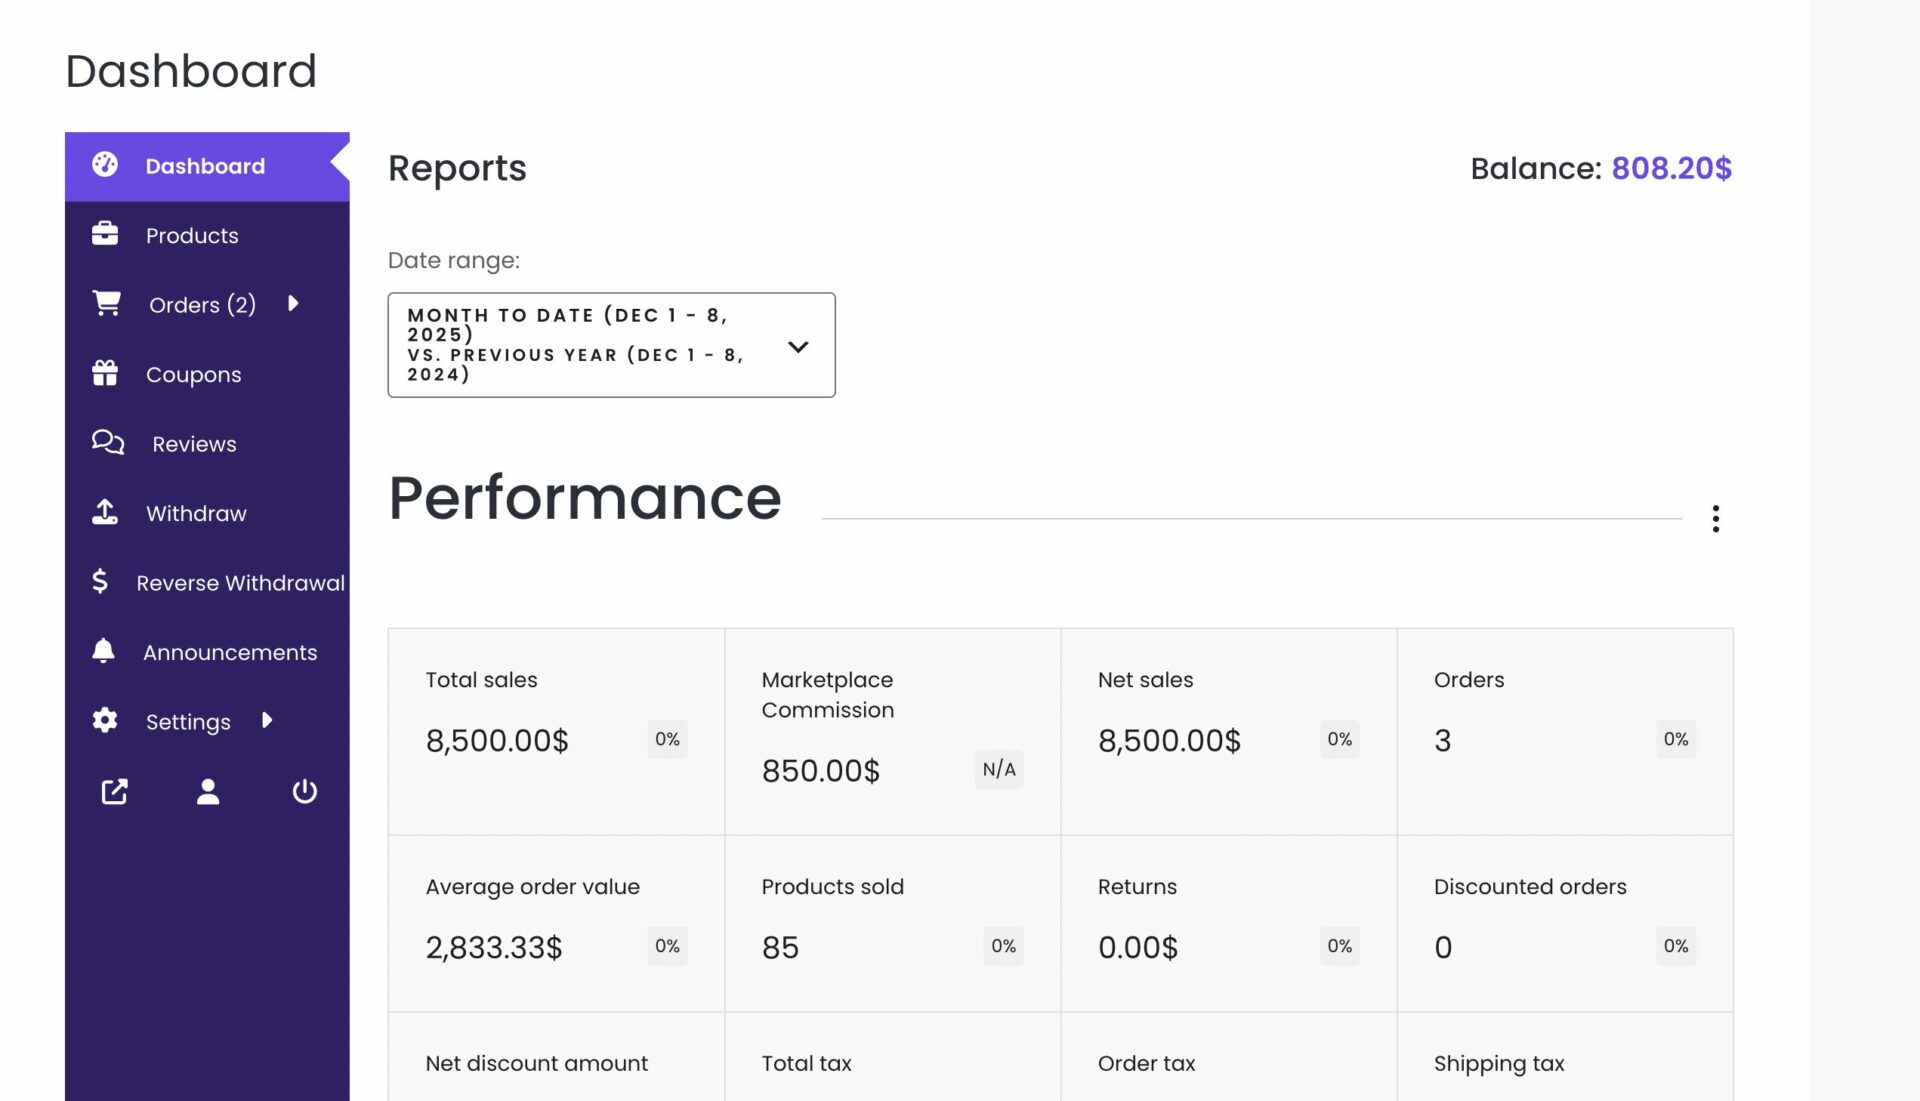
You can also disable any menu item. Just toggle the button beside the menu item. We have disabled the report menu-
As you can see, the report menu has been disabled from the vendor dashboard-
Also, you can do the same for the Settings menu as well. You get an option in the Settings Sub menu section-
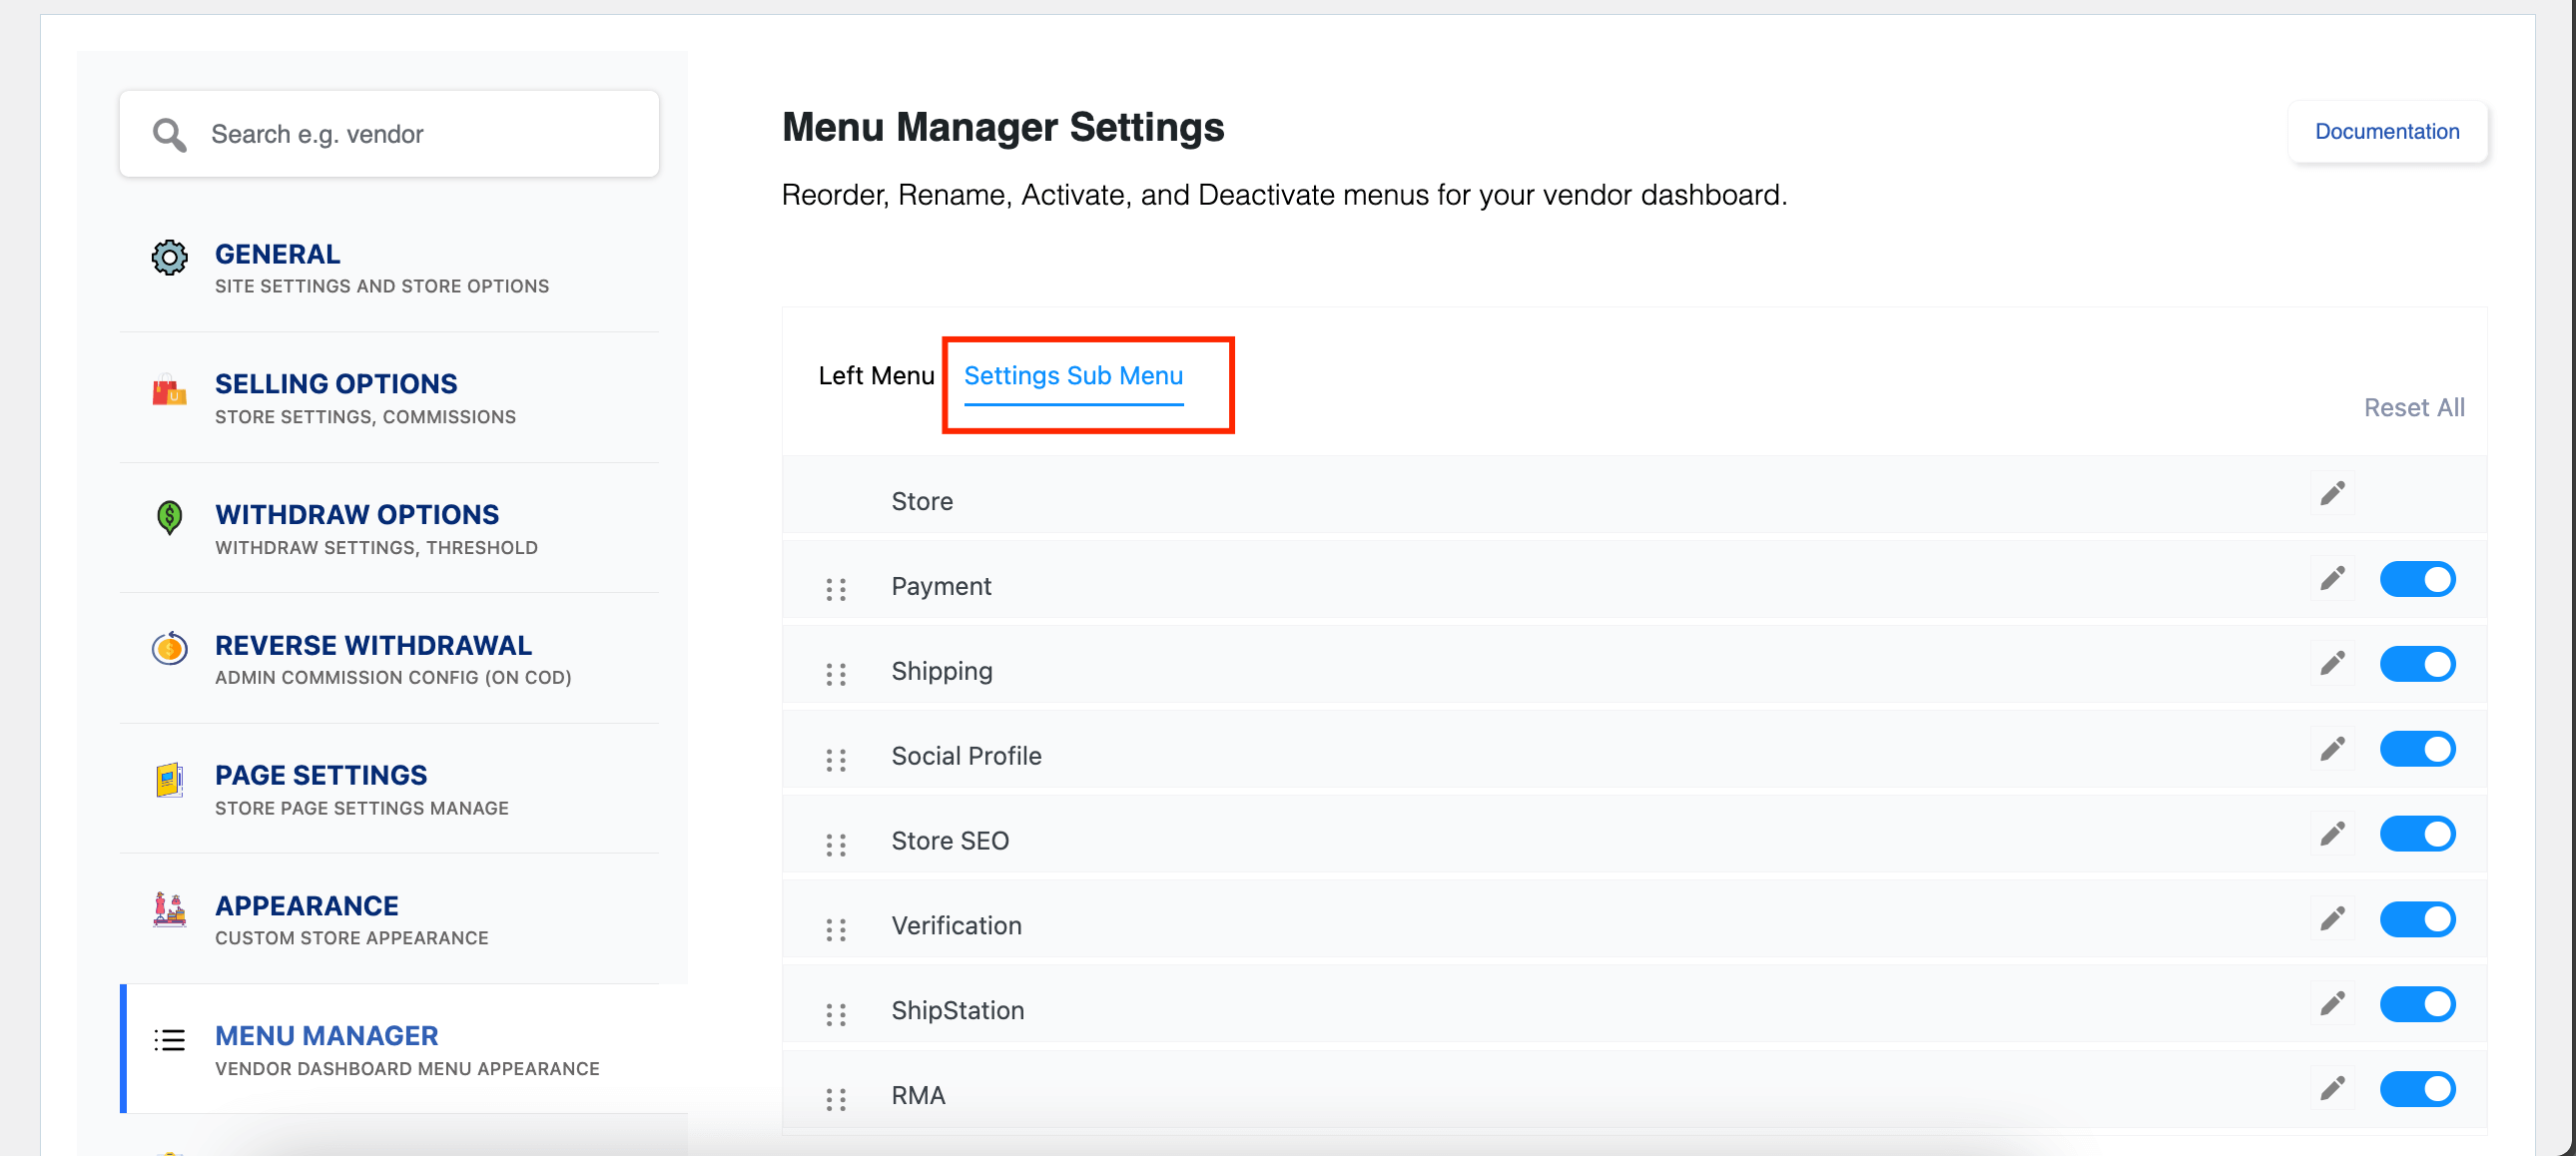
You can reorder, rename, enable, and disable sub-menu items from here as well.
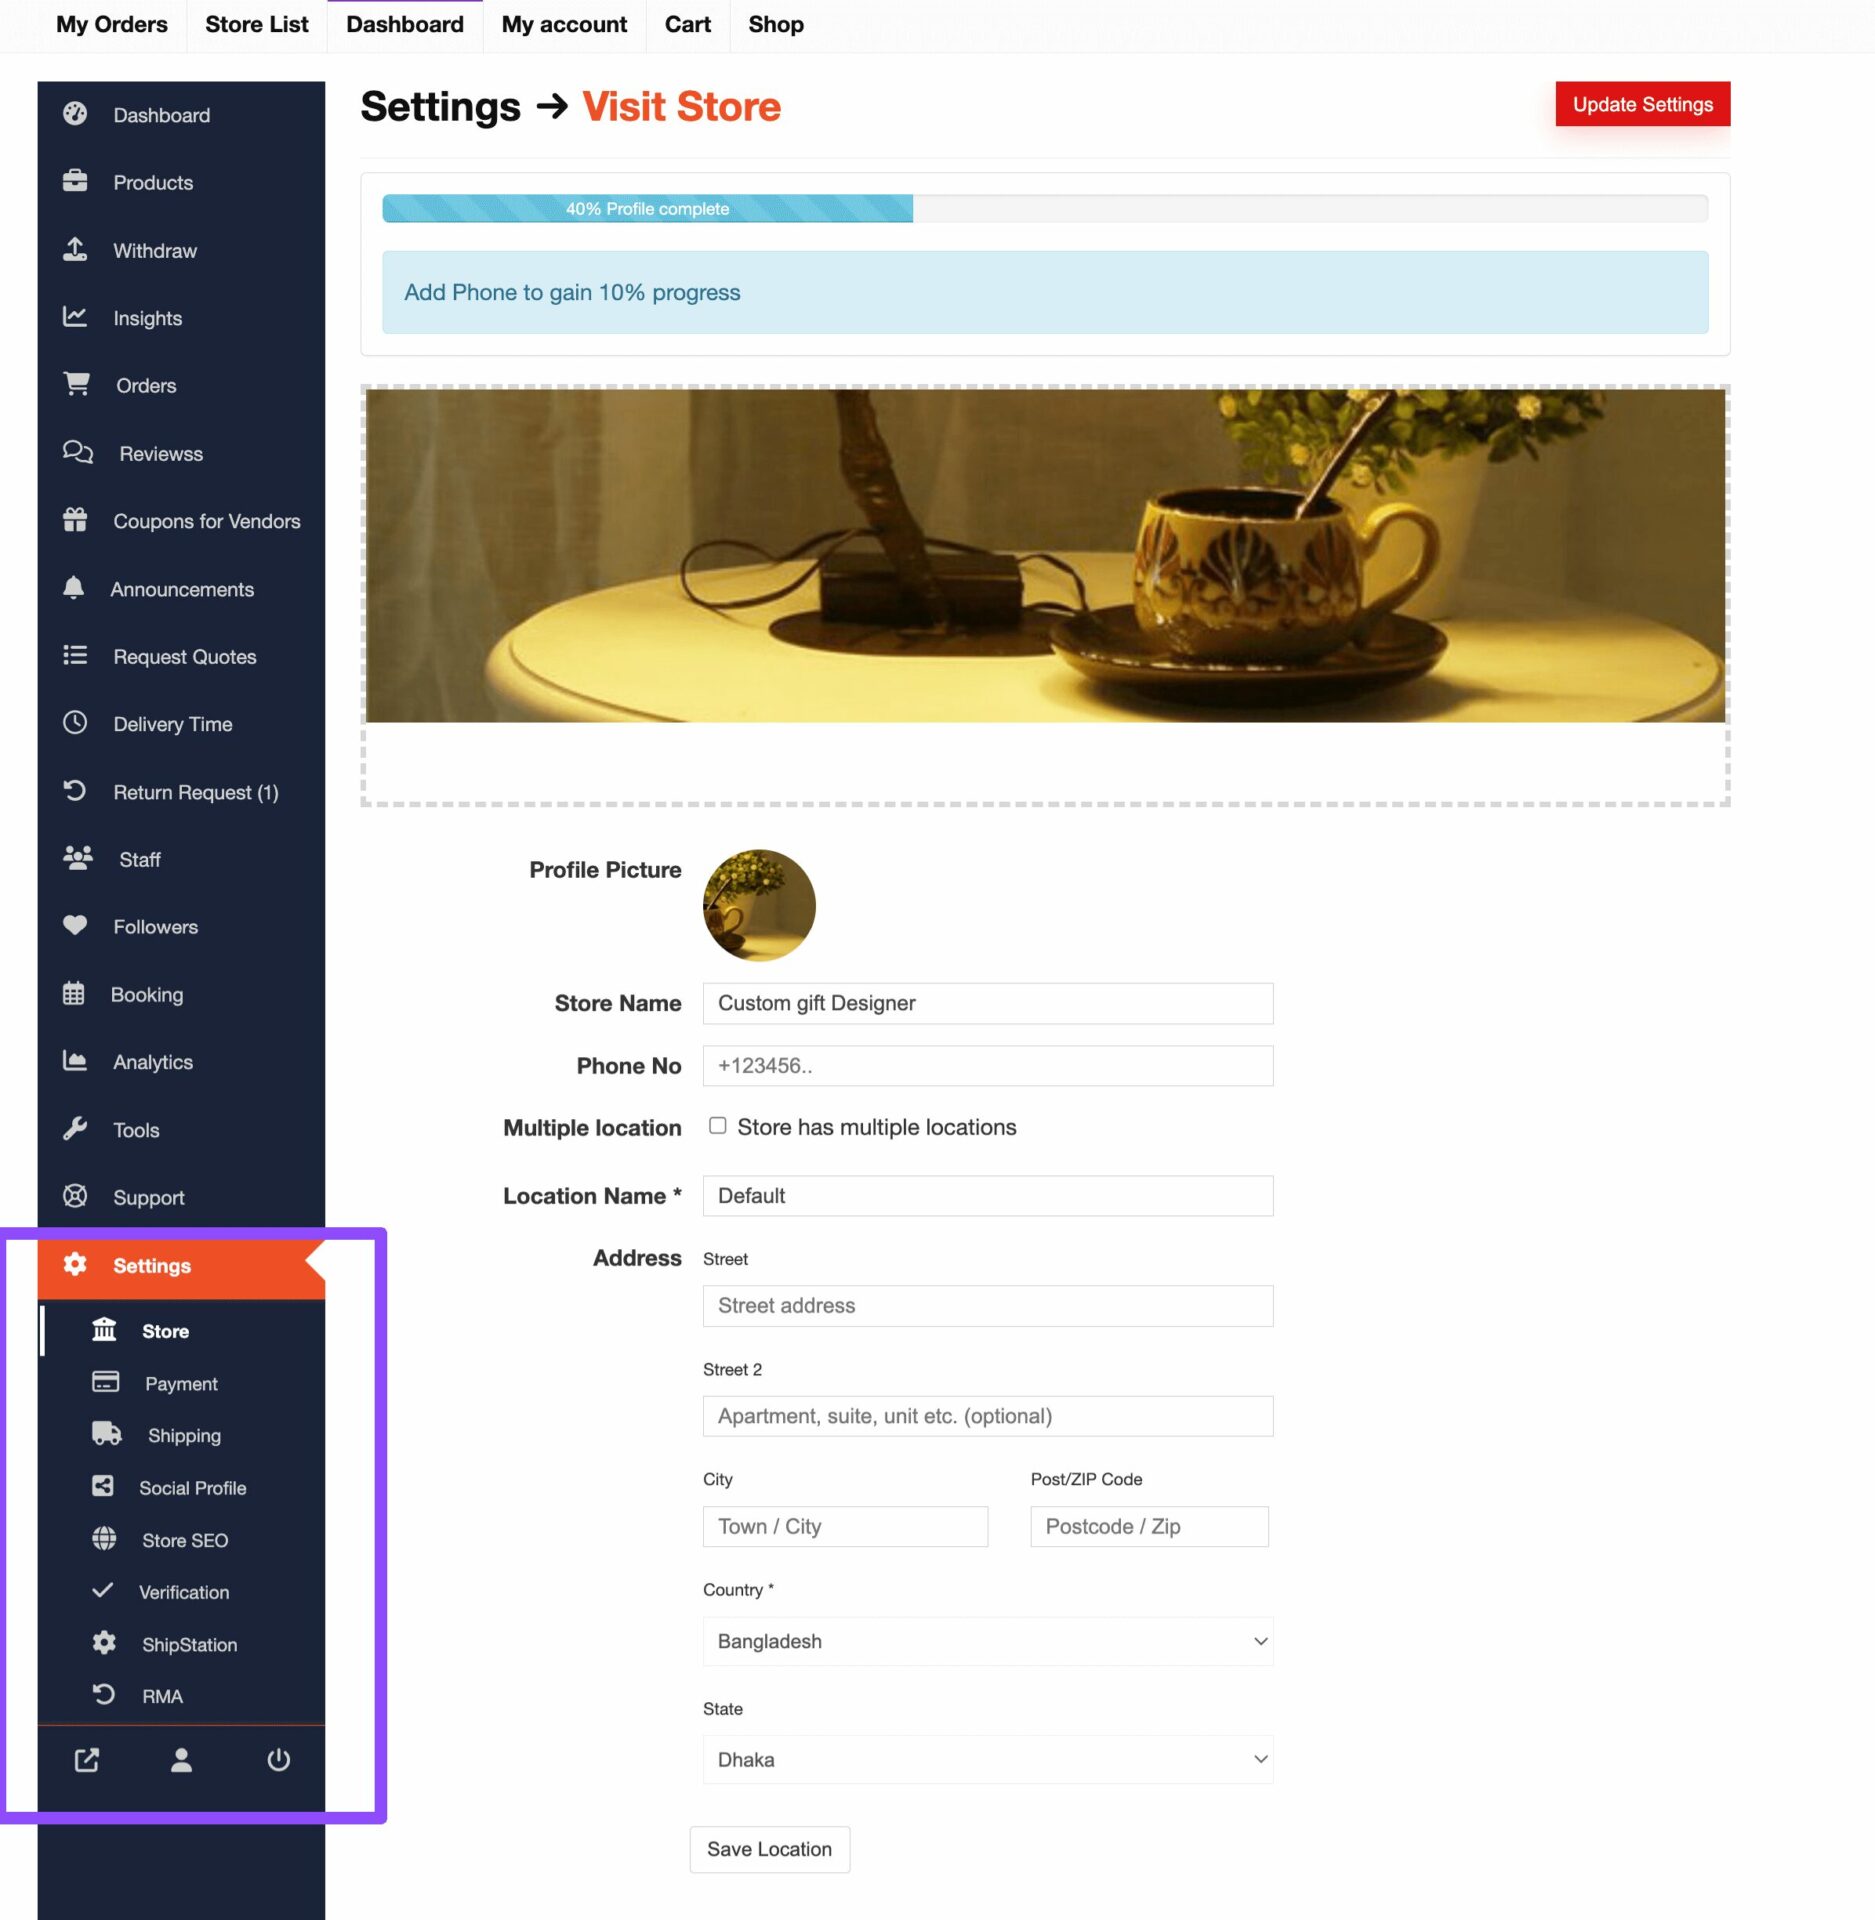
As you can see we have customized some sub menu items-
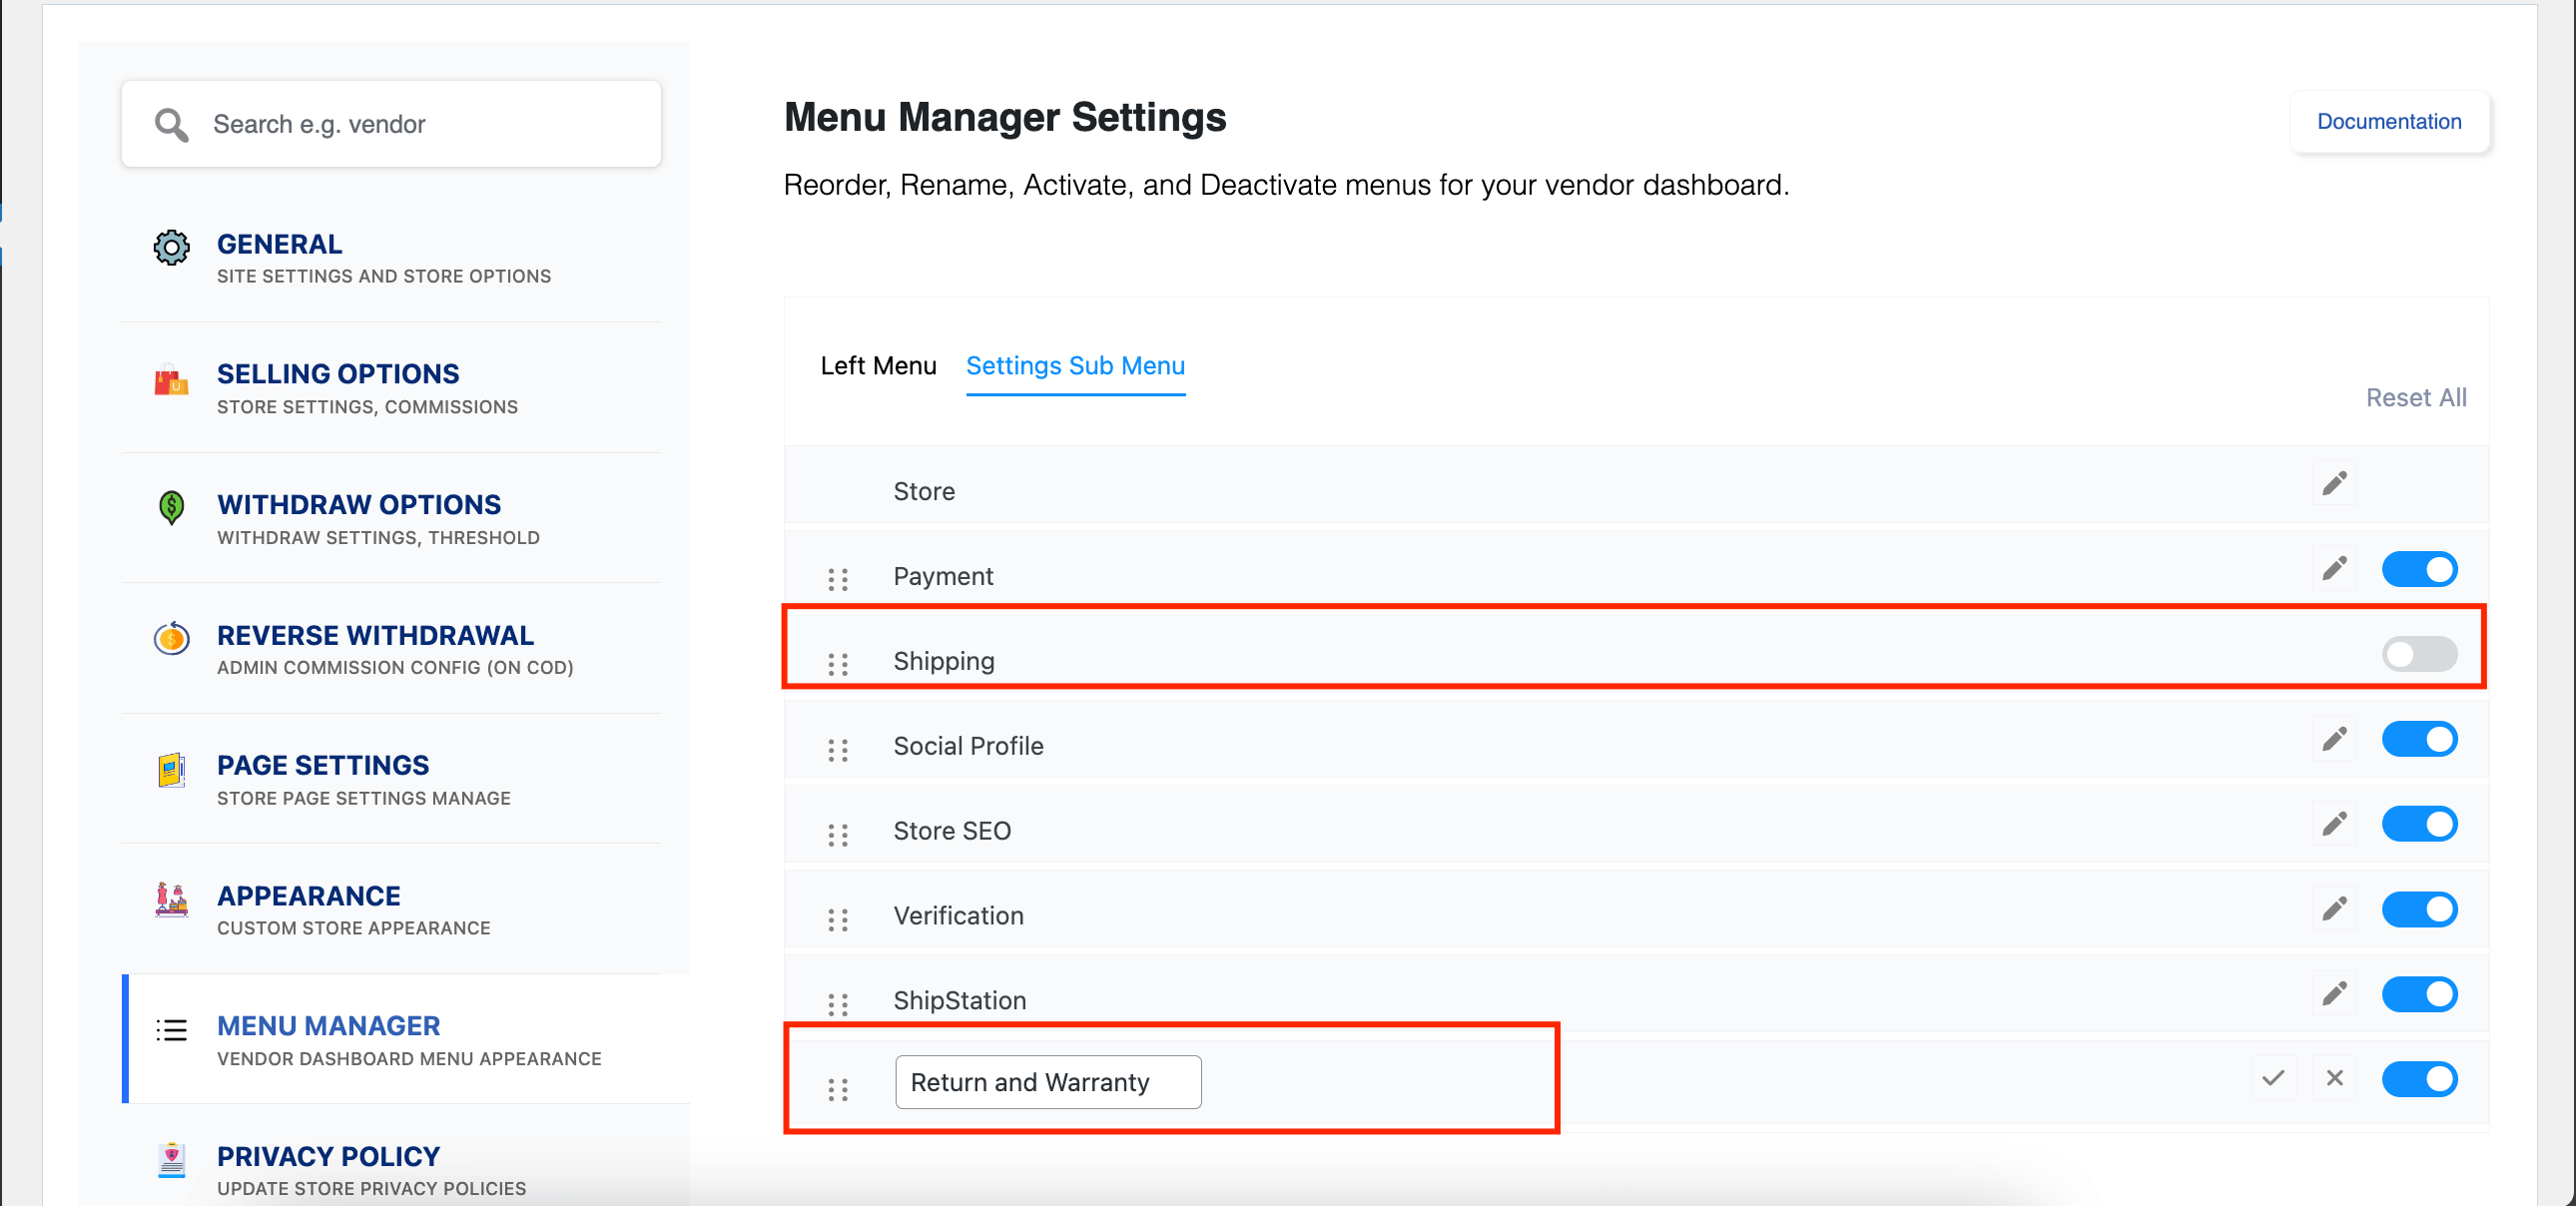
You can that the Settings sub menu has been customized-
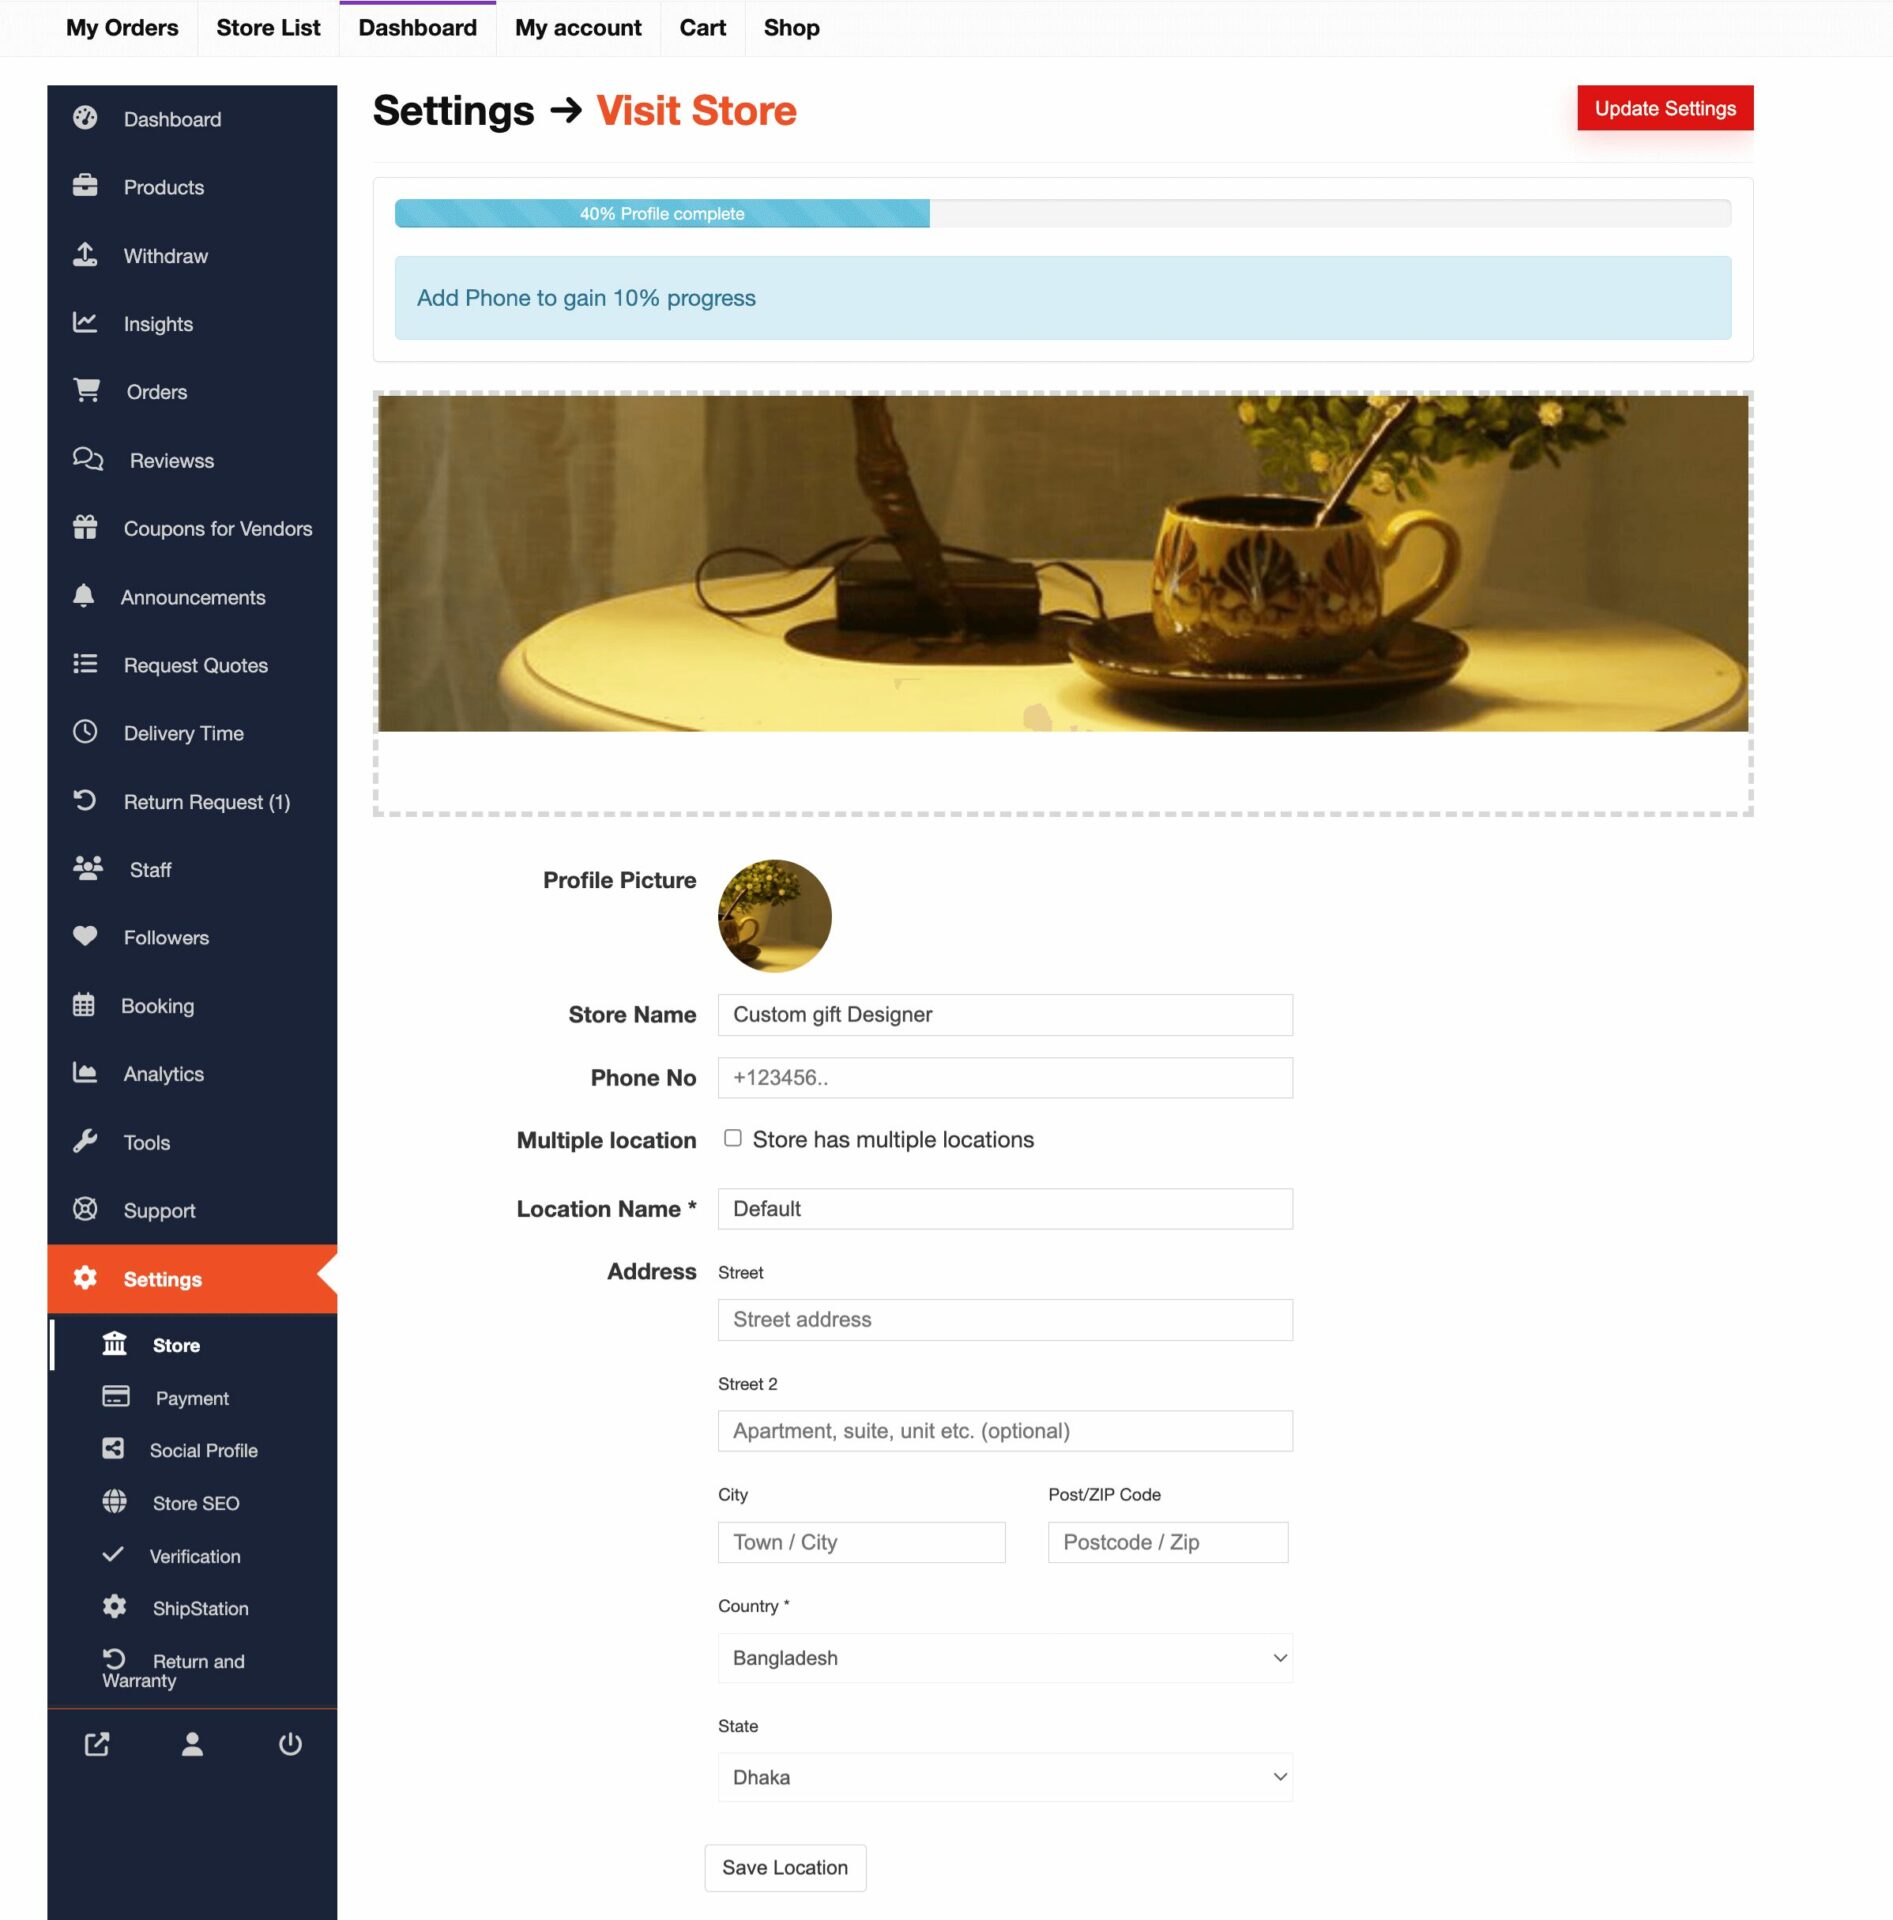
This is how you can use the Vendor Dashboard Menu Manager feature.
Remember, you can’t change the order or disable the Dashboard and Settings menu items. You can only change the name of these menu items.