The Dokan Admin Setup Wizard is a feature that guides users through the initial setup process of the plugin, which is a multi-vendor marketplace plugin for WordPress. The wizard is designed to help admins configure and customize their marketplace quickly and easily.
When you activate the Dokan plugin, you will be prompted to start the setup wizard. Here’s an overview of the steps involved in the Admin Setup Wizard:
Guide to Dokan Admin Setup Wizard
When you install the Dokan plugin for the first time on your WordPress-powered website, you get the opportunity of using this setup wizard. It gives you a step-by-step guideline to set up the Dokan plugin easily.
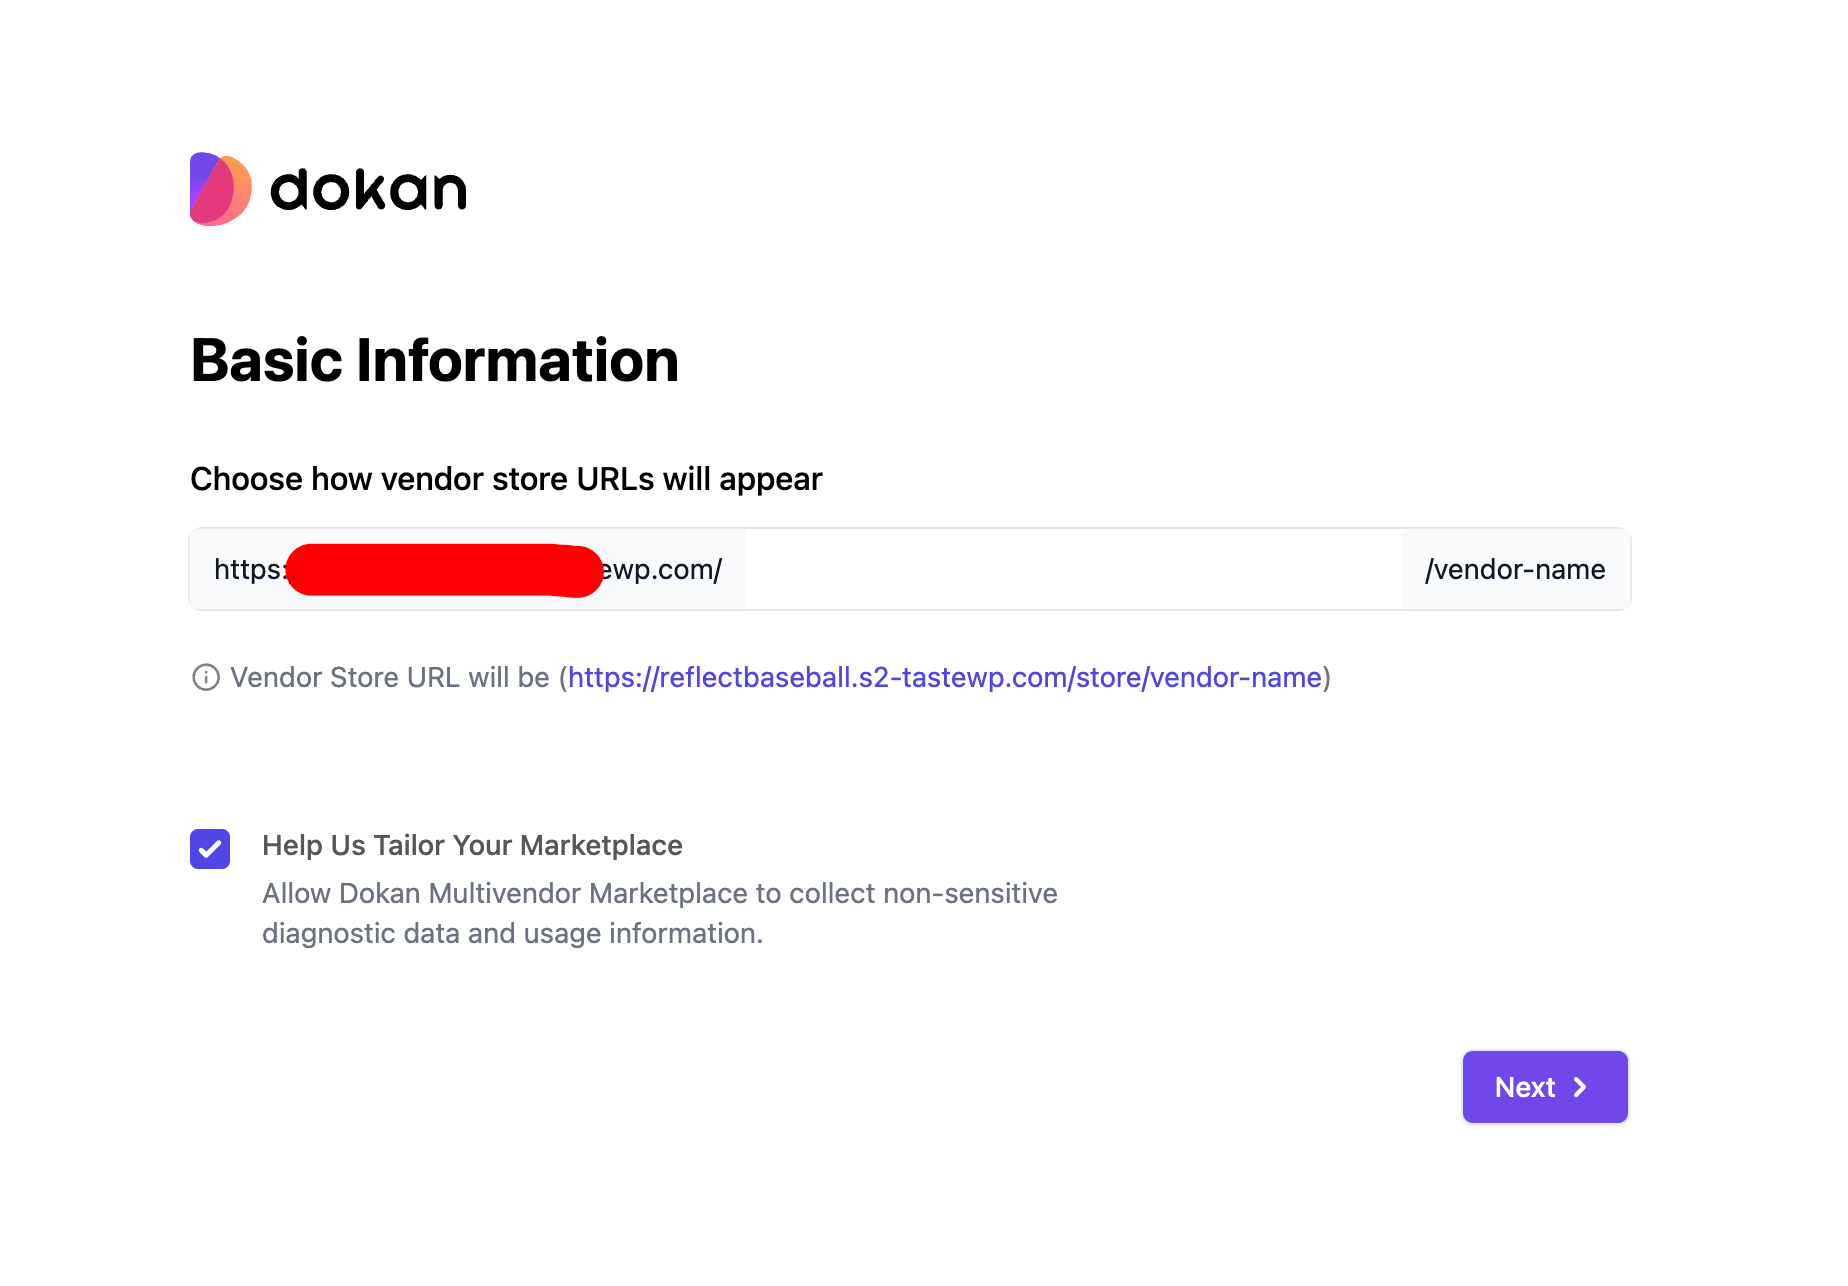
After clicking the ‘Start Journey!’ button, the wizard takes you to the store setup page where you have to provide details about your sellers’ store.

You have to provide the seller store URL.
Adding a single text is recommended, but multiple text can be input with hyphen (-). However, do not add any URL like (https://example.com). If added, Dokan cannot be redirected to the proper storefront/single store page correctly. Do not input any string or character that is used by WordPress by default. For example, “s”. This is used by WordPress to show search results.
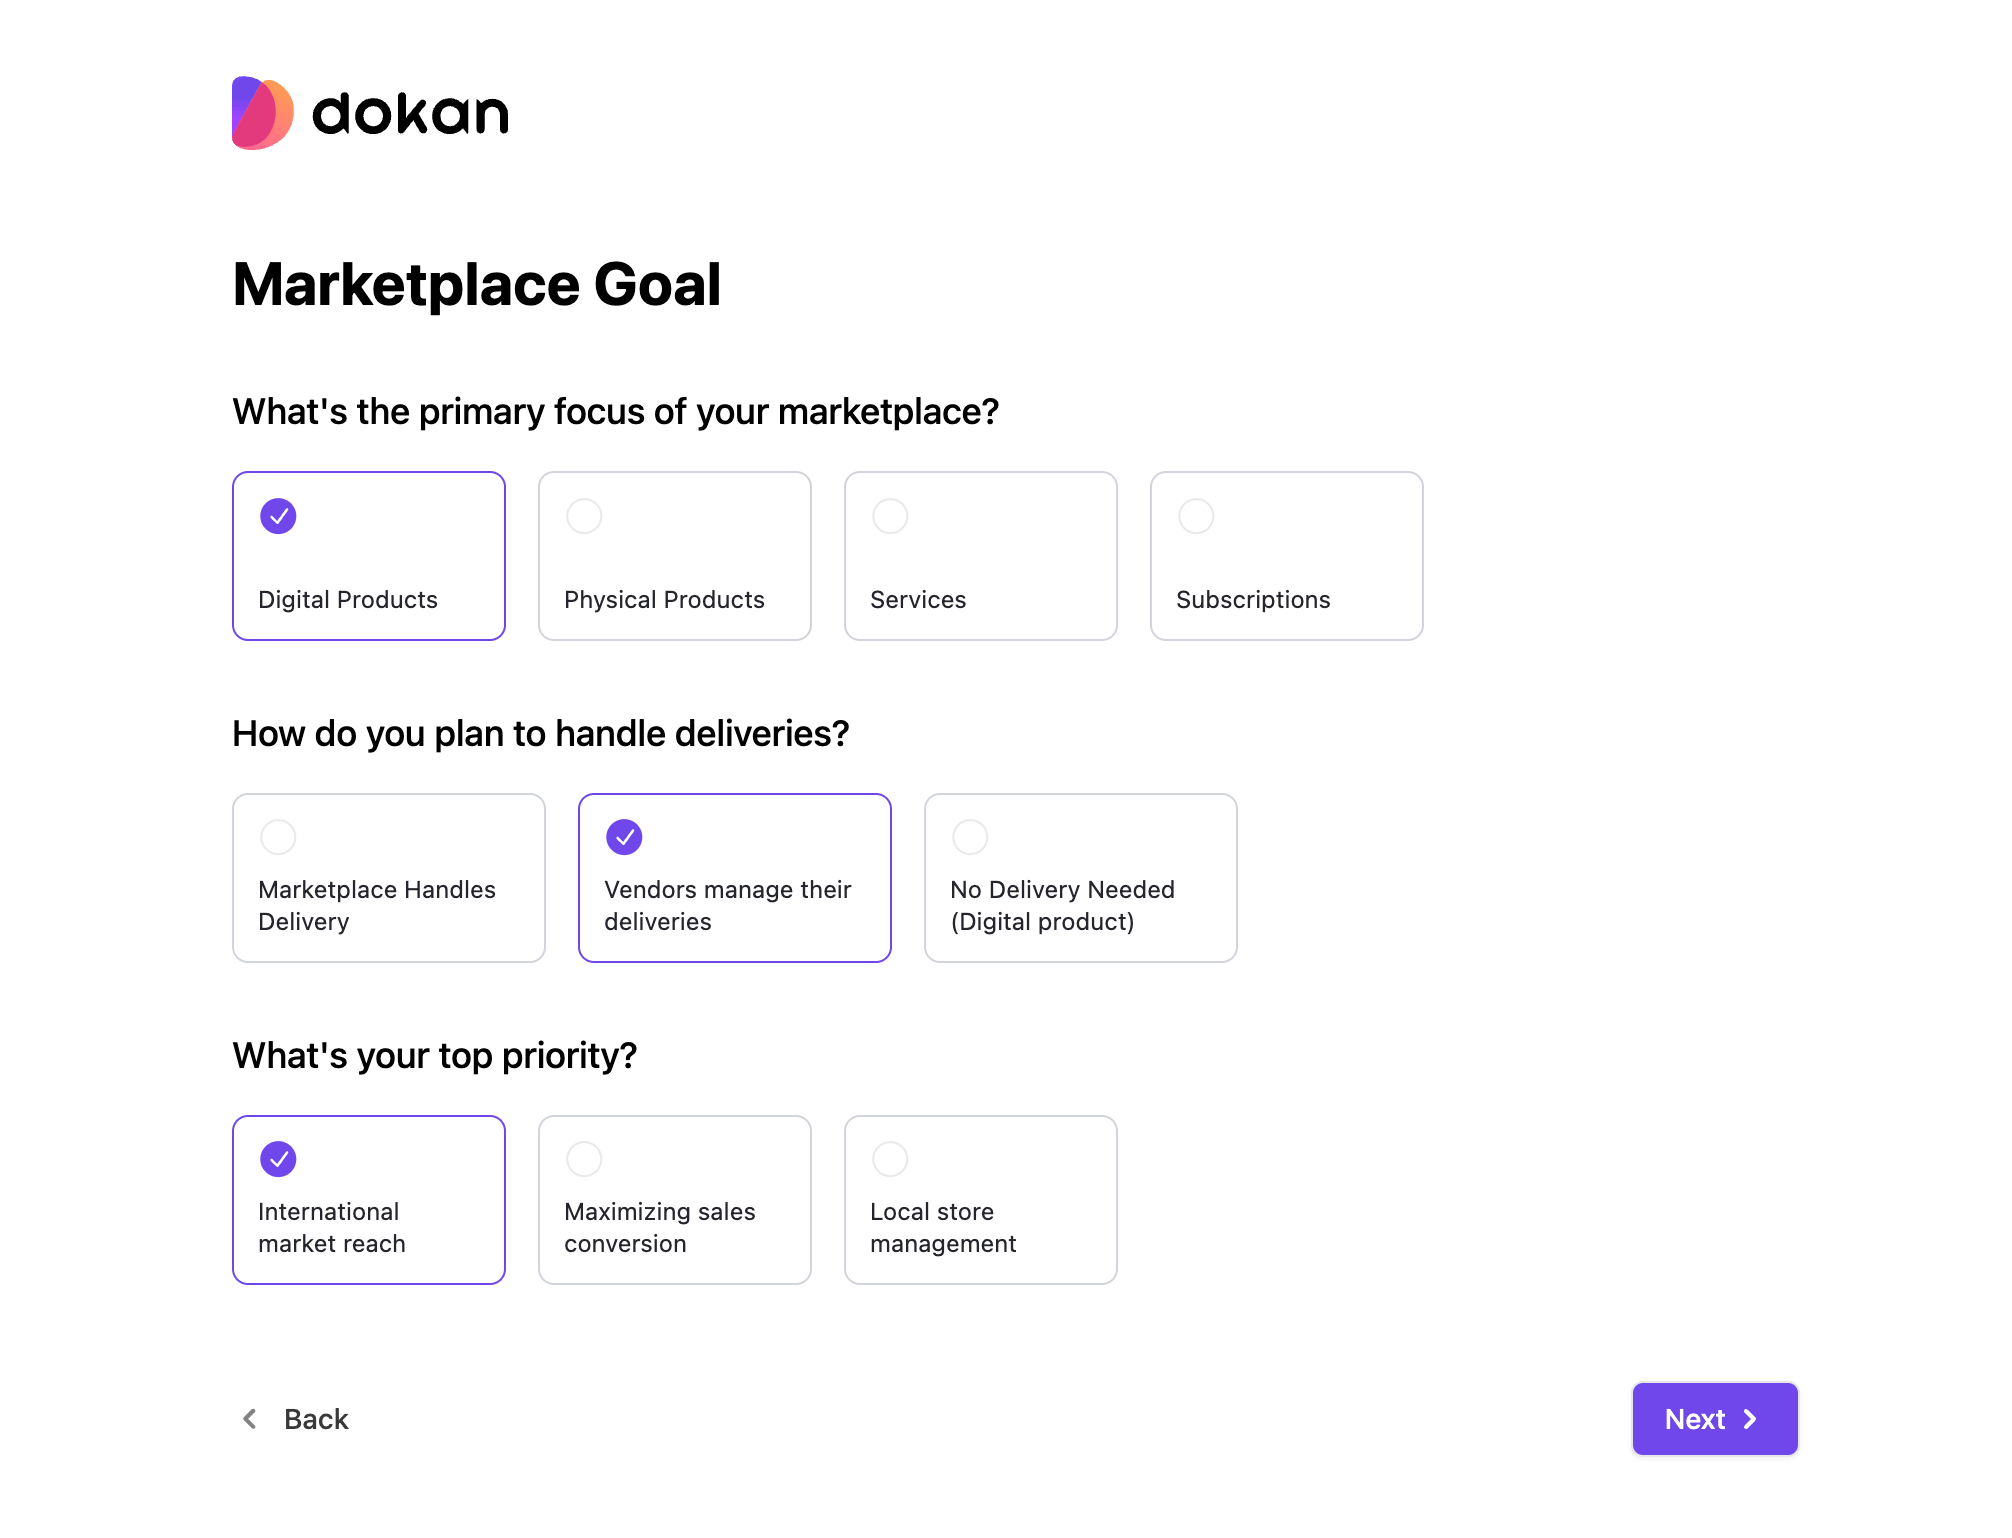
Next, you need to choose the Marketplace Goal, including-
- The primary focus of your marketplace
- How do you plan to handle deliveries
- Your top priority
You can add the recommended plugins to increase your marketplace efficiency-

You are done-

Please Note: You can skip this step, but you have to include this information later from your Store Setting page.
Now, you need to complete the setup option. Click on the Start Setup on top of the dashboard-

You first need to select-
- Shipping Fee Recipient: Use this option to set the recipient (Admin or Vendor) who will be receiving the shipping fee. This will decide the shipping fee will be added to who’s earnings.
- Tax Fee Recipient: Use this option to set the recipient (Admin or Vendor) who will be receiving the Tax fee. This will decide the tax fee will be added to who’s earnings.
- Shipping Tax Fee: Select who receives shipping tax – Admin centralizes all shipping tax or Vendors collect shipping tax for their orders.
- Order Status Change: Enabling this option will allow vendors to change order status from their dashboard.
- New Vendor Enable Selling: Enabling this option will enable newly registered vendors’ selling capability.
You can see here what we will collect.
Next, you need to configure the commission system-

- Commission Type: Choose an option. This will allow the admin to decide whether the commission will be charged as a fixed rate or category-based.
- Admin Commission: Input a value to define how much you want to take from each sale of vendors as an admin.
On the third step, you have to set up withdrawal options for your sellers. There are three withdrawal methods including,
- Paypal
- Bank Transfer
- Skrill
You can choose your suitable withdrawal method. You can also set the minimum withdrawal amount and order status for withdrawing.

- Withdraw Method: Enable methods for vendors to choose how they want to send withdrawal request for their earnings.
- Minimum Withdraw Limit: Input a value to set a minimum balance that will define when vendors can send withdrawal requests to withdraw their earnings (this option is only applicable for non-adaptive withdrawal/payment methods).
- Order Status for Withdraw: Enable options to decide the order status to add earnings to vendor balance
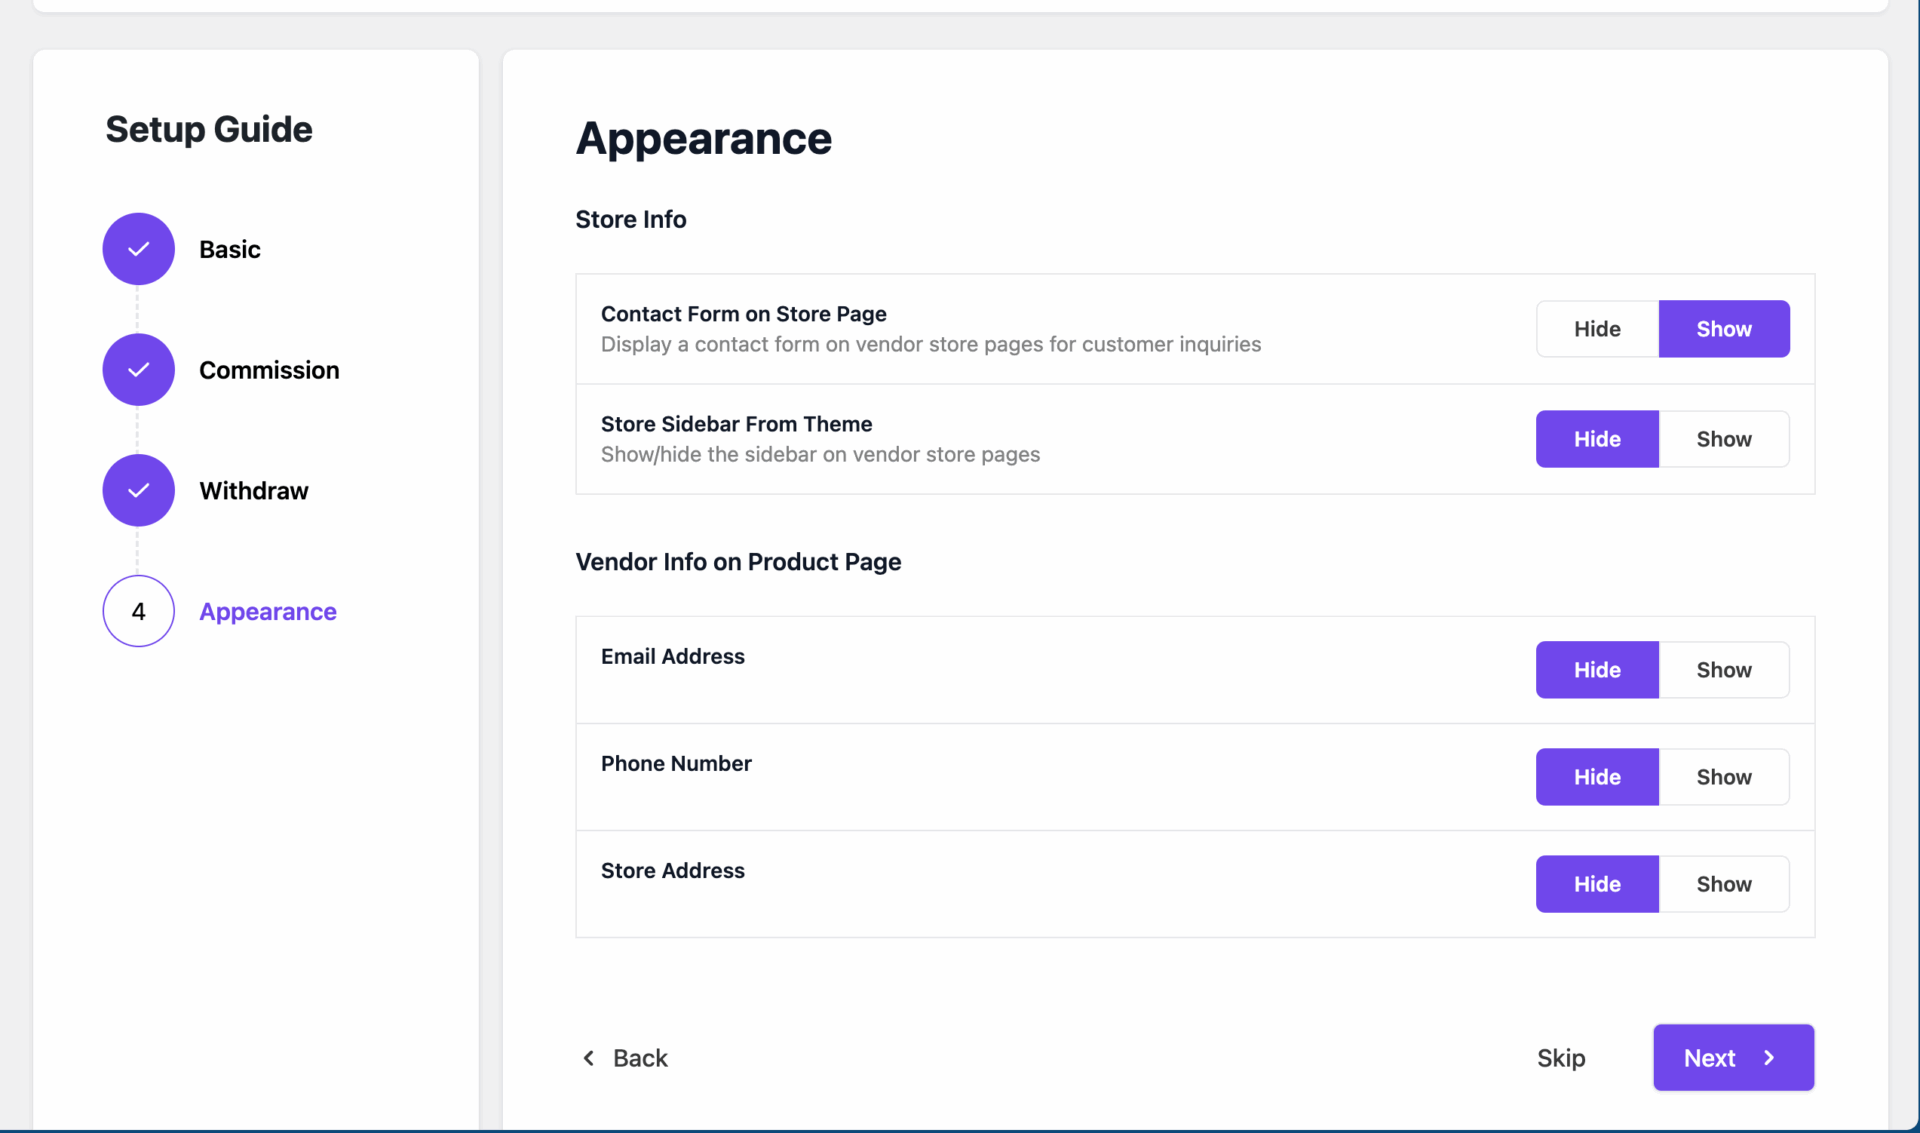
In 4th and last step, you can configure the appearance. You can select-
- Contact Form on Store Page: Decide whether to show or hide the contact form.
- Store Sidebar From Theme: Show/hide the sidebar on vendor store pages
- Vendor Info on Product Page: You can Show/hide email address, phone number, store address.
After providing all the information, click on the Continue button. It will show you a confirmation message and ask you to go to your Dokan settings page. You can also return to the WordPress Dashboard by clicking on the link at the bottom of the wizard.


