Dokan has introduced Live Chat Support as a premium module with v2.8.2.
This module will let registered and customers chat in real-time with vendors. The live chat button displays on vendor store pages and product pages.
Requirements
- WordPress 4.5 or above
- WooCommerce 3.3 or above
- Dokan Lite 2.8.2 minimum
- Dokan PRO 2.8.2 minimum
- TalkJS Account (Premium)
Installation & Admin Configuration
1. Turn on the module Live Chat.
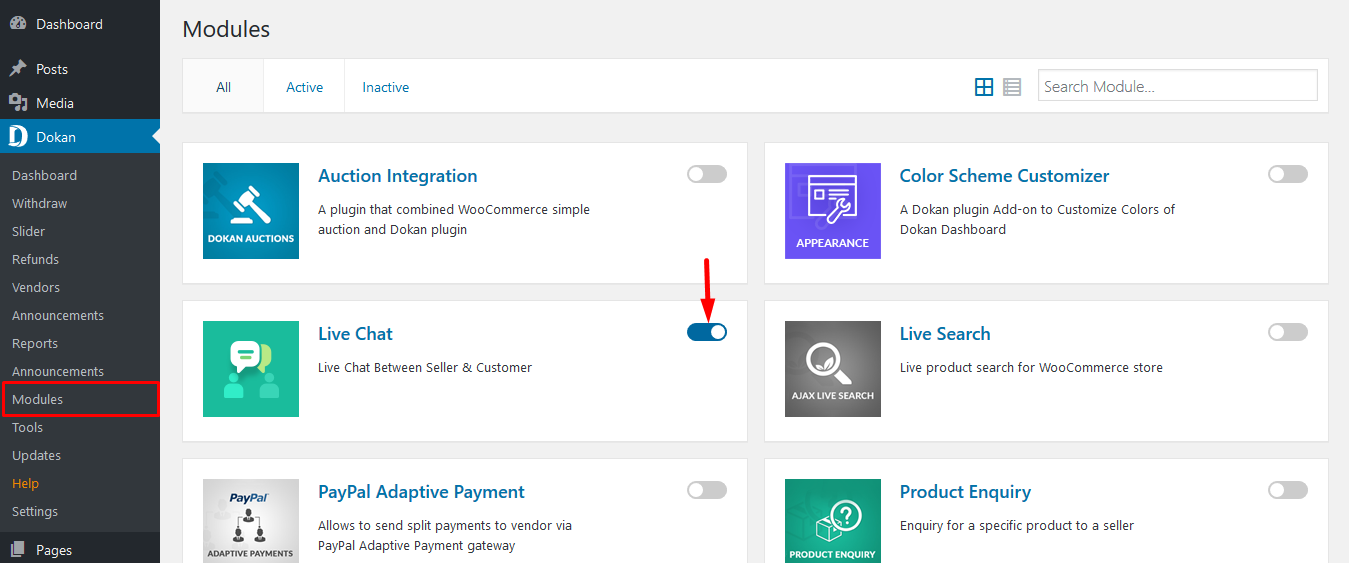
2. Navigate to Dokan>Settings>Live Chat.
3. Activate the checkbox Enable Live Chat between seller and customer to allow vendors and customers to access this feature from the frontend.
TalkJS
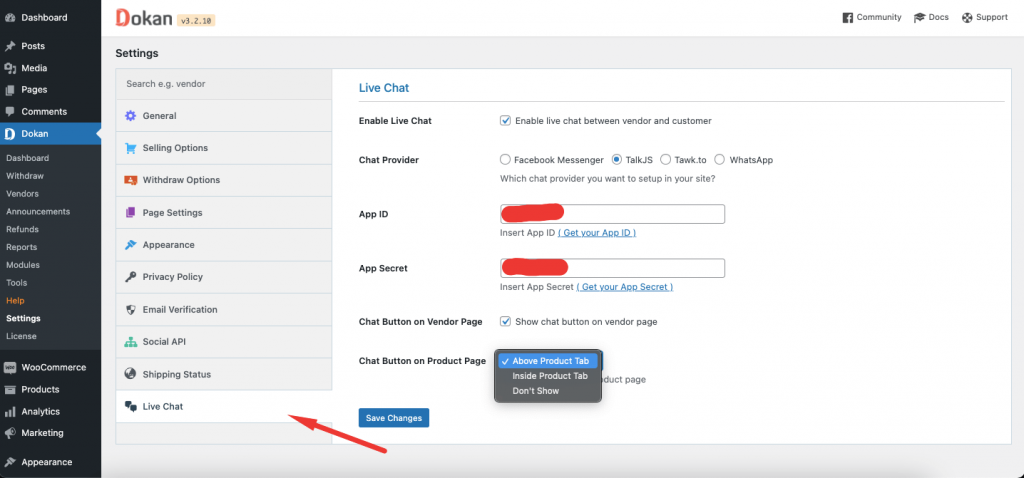
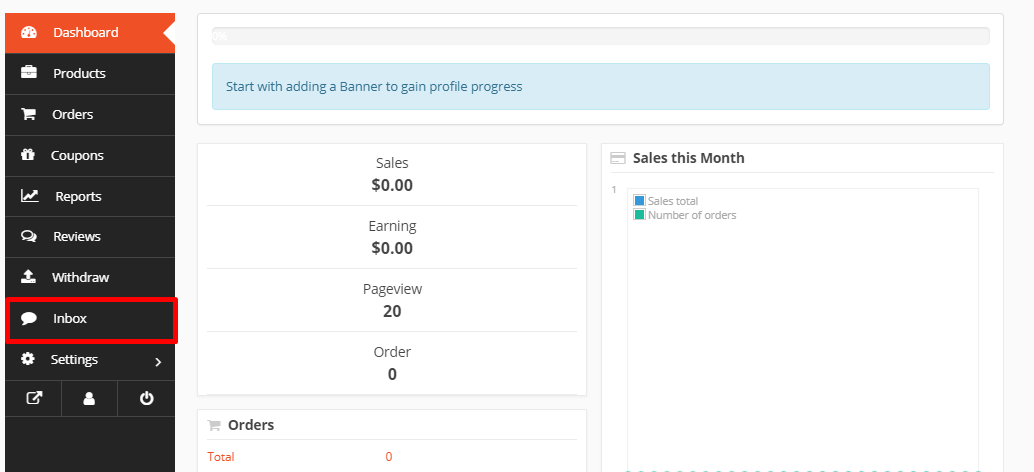
Now when you choose TalkJS a new menu called Inbox will appear in the Vendor Dashboard where all the incoming messages online and offline from live chats from all registered users will be stored.
4. Next, you need to get the App ID and App Secret from TalkJS.
To obtain the App ID and Secret, you need to signup and open an account in TalkJS, if you haven’t already. It’s completely free.
The link to signup is already provided in the global settings page: Get your App ID and App Secret.
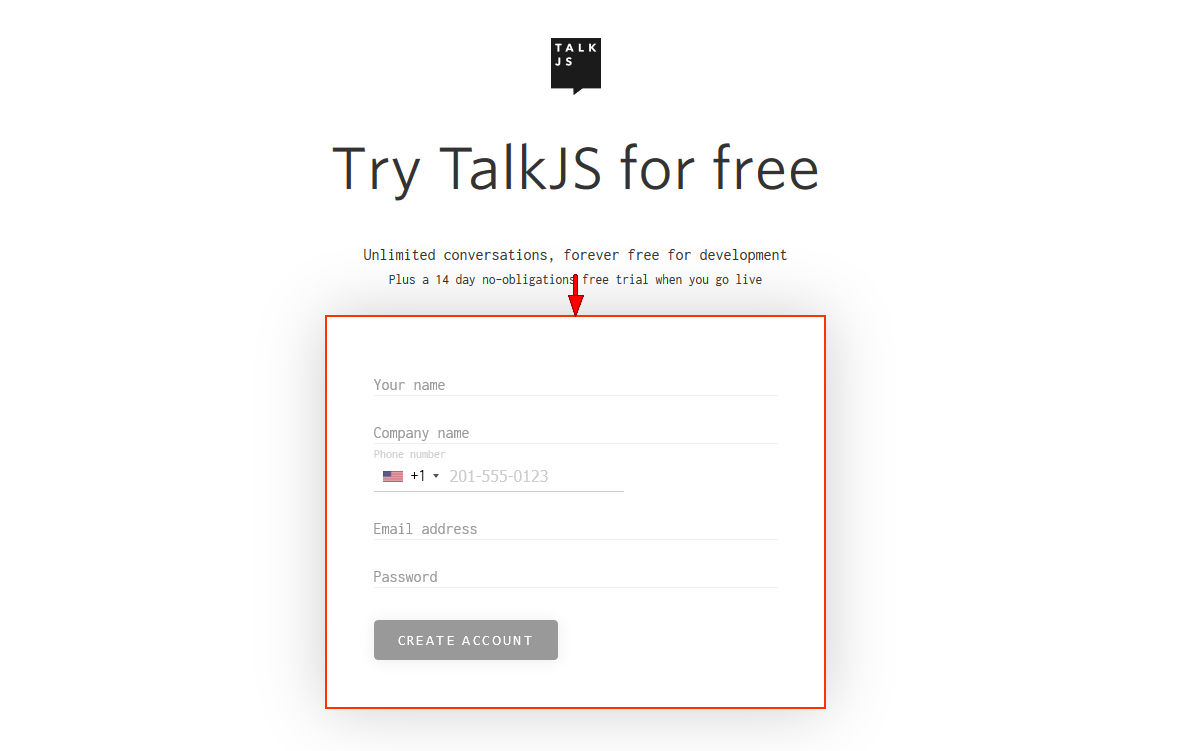
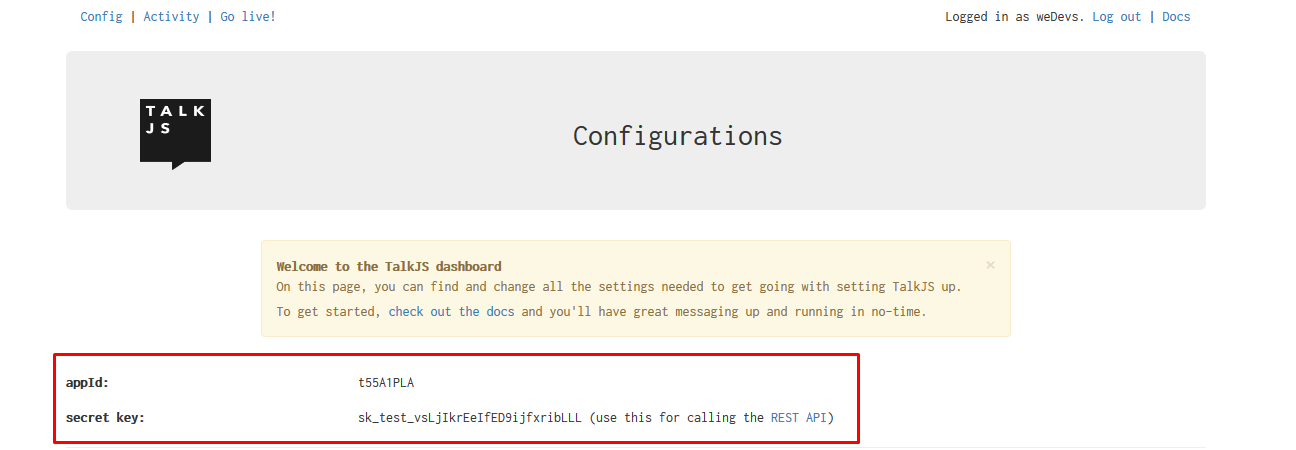
5. When you signup you will find the app ID and secret key immediately at the top.
Copy the App ID and Secret Key from here.
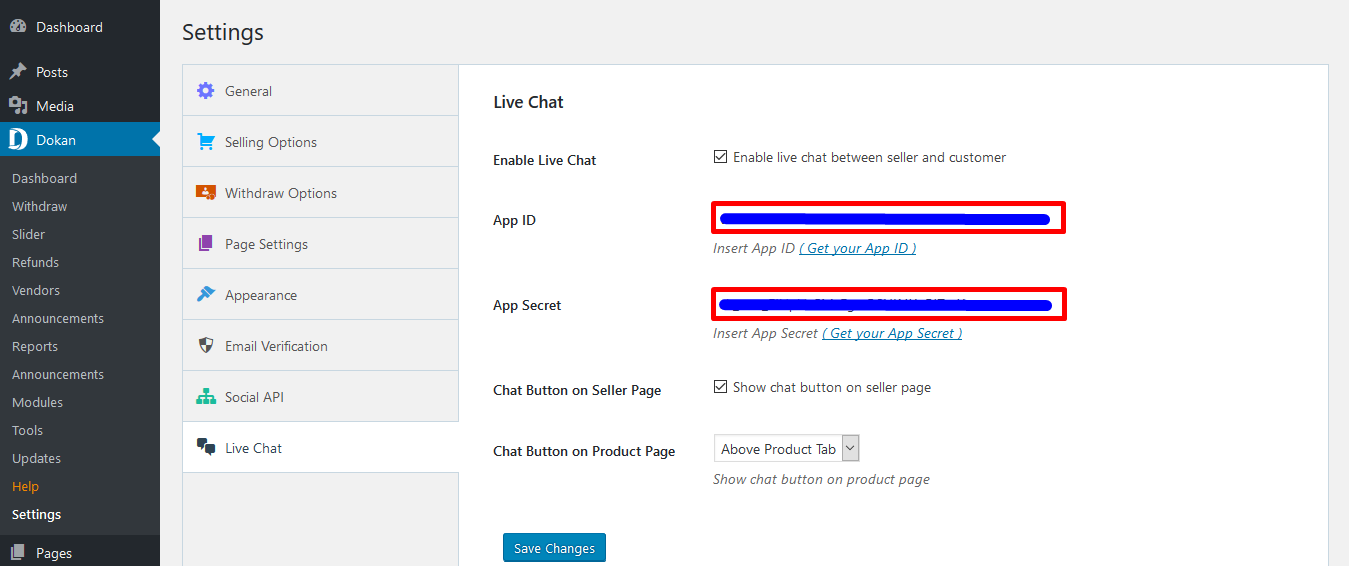
6. Paste it on your Dokan Live Chat global settings page in the relevant fields.
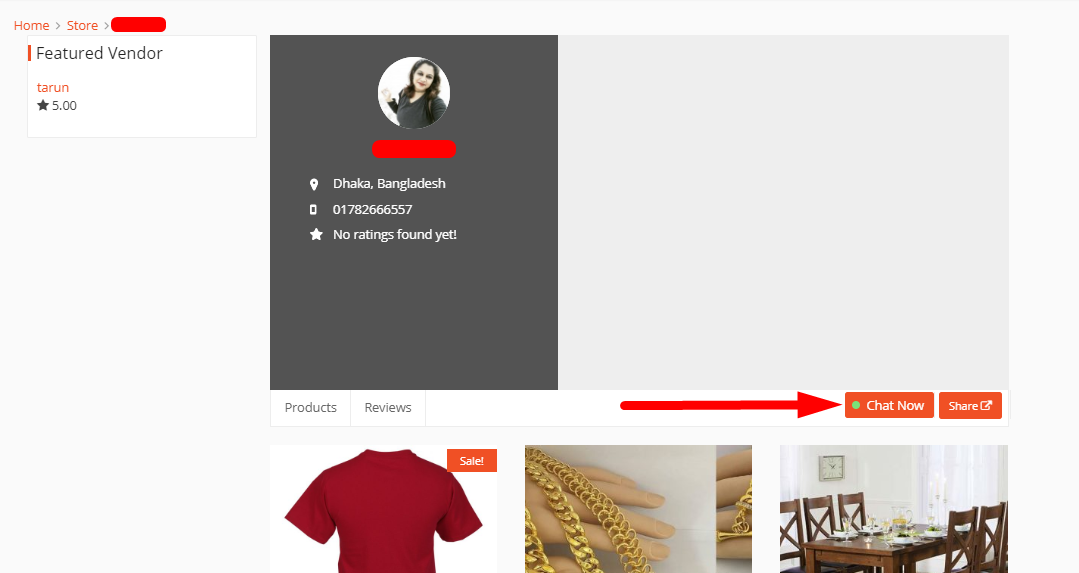
7. Next, enable the checkbox Show chat button on seller page if you want the chat option to appear in the vendor store pages.
When you activate this, store pages will display a Chat Now button, that’s easily visible to customers.
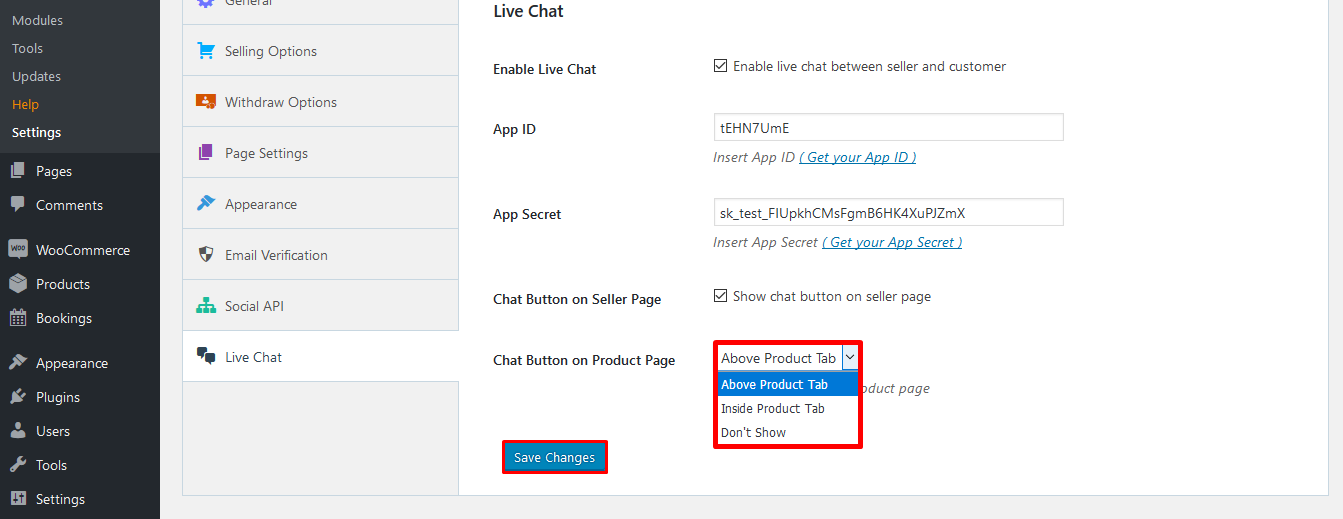
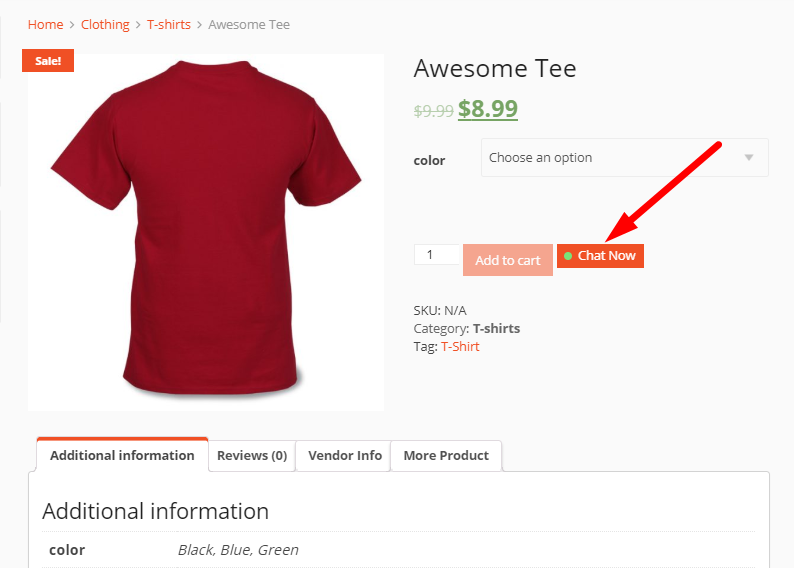
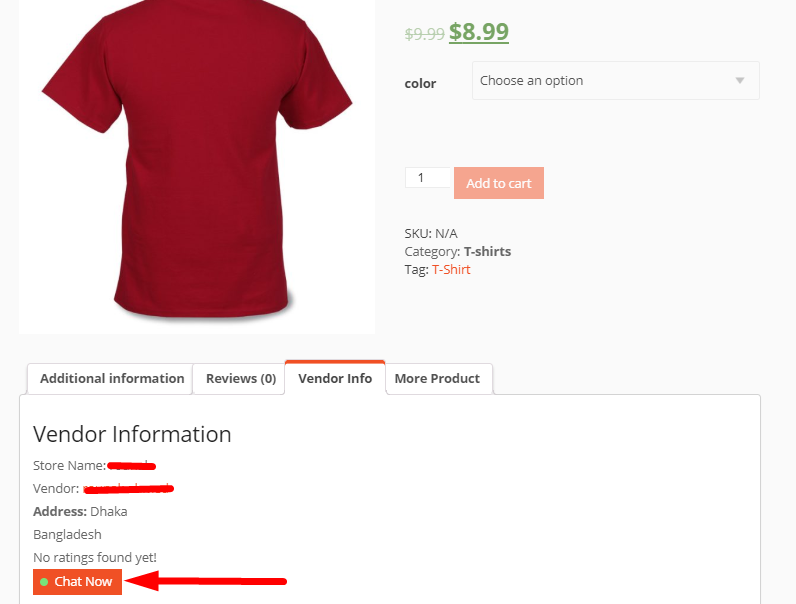
8. Now select how you want the chat button to show on a product page.
You can place it Above Product Tab, Inside Product Tab, or choose not to show.
Above Product Tab View
Inside Product Tab View
9. Finally, click on Save Changes.
Vendor Configuration
1. From the vendor’s end, vendors need to navigate to Vendor Dashboard>Settings>Store.
2. Select the country from the drop-down which is a required field, if you haven’t already.
3. Now activate Enable Live Chat checkbox at the end of the page.
Note: Vendor must activate the Enable Live Chat checkbox for the chat option to appear on his store page and product page.
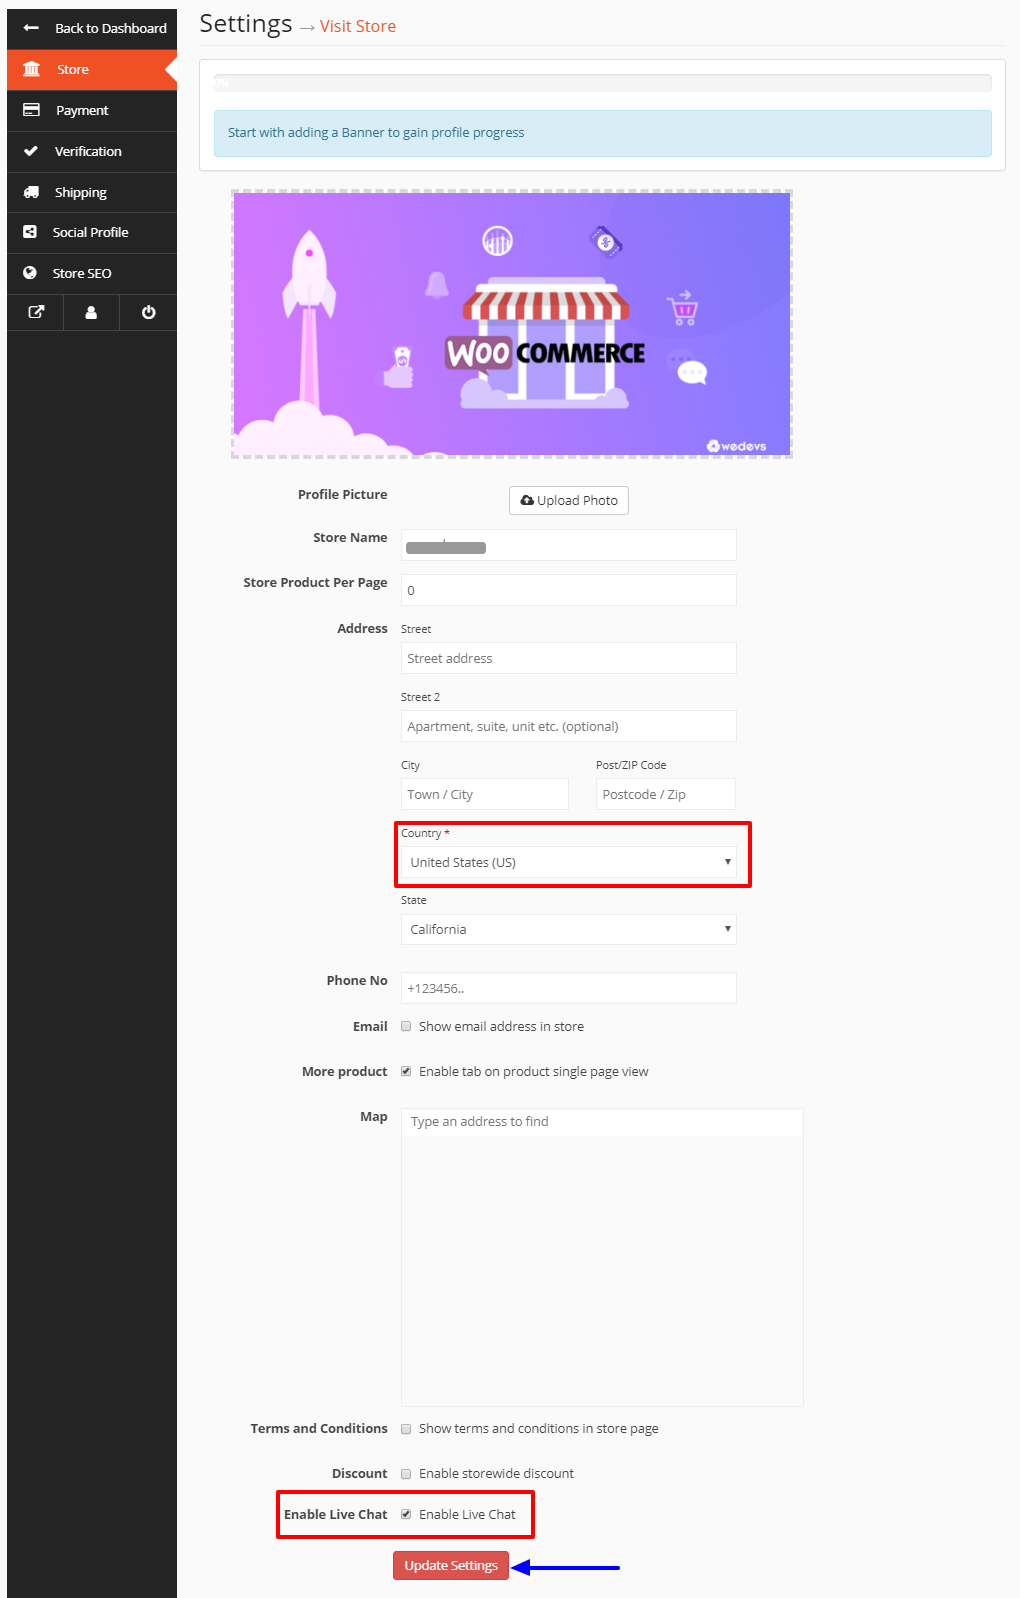
4. Then click on Update Settings.
Customer View
Note: Only registered users/customers can use live chat.
Customers have to initiate a live chat either from the Vendor Store Page or a Product Page.
When a customer clicks the Chat Now button from a product or store page, a modal window box will pop-up that will allow the customer to talk directly with the vendor.
In this pop-up window the customer can write queries, concerns, or problems to the vendor about a product or service or other issues he is facing in the marketplace.
When a new message comes from the vendor, it will instantly show in the window.
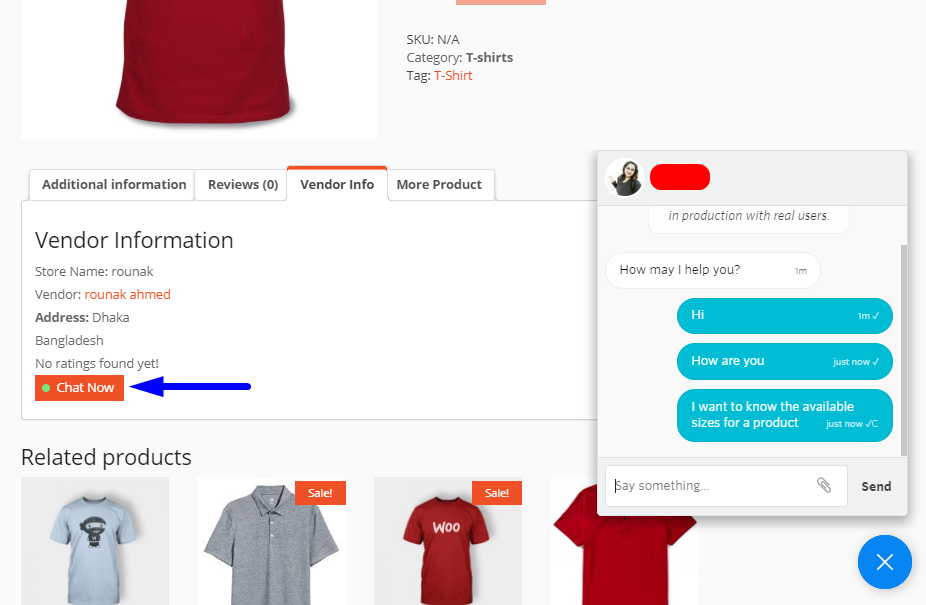
For the convenience of customers, the pop-up window will load in all pages around the web store.
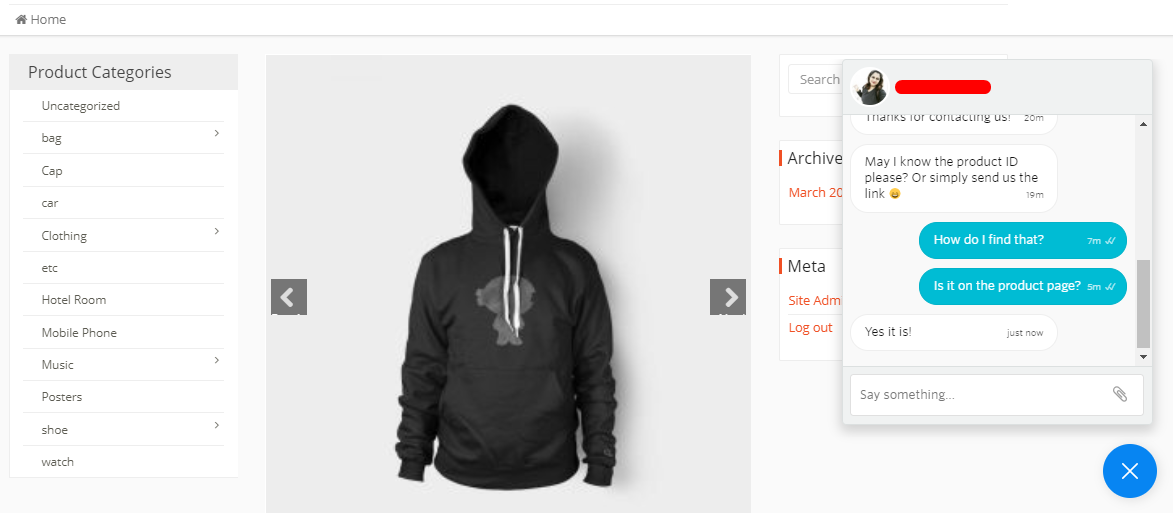
So that customers can browse around other pages or screens unhesitatingly during an open live chat conversation. And messages will still be received and delivered between the vendor and customer in the same way.
Vendor View
The vendor will instantly receive the messages customer sends. If he is in his dashboard, he can view the messages right from his Inbox. And if the vendor is on another page in the webstore, he will be able to view and reply messages using the same modal pop-up window.
The Inbox will show the number of new customers who have messaged the vendor. The vendor will be able to reply directly from Inbox. And also include documents, files, or images if he desires.
The double ticks beside each message indicate that the message has been delivered.
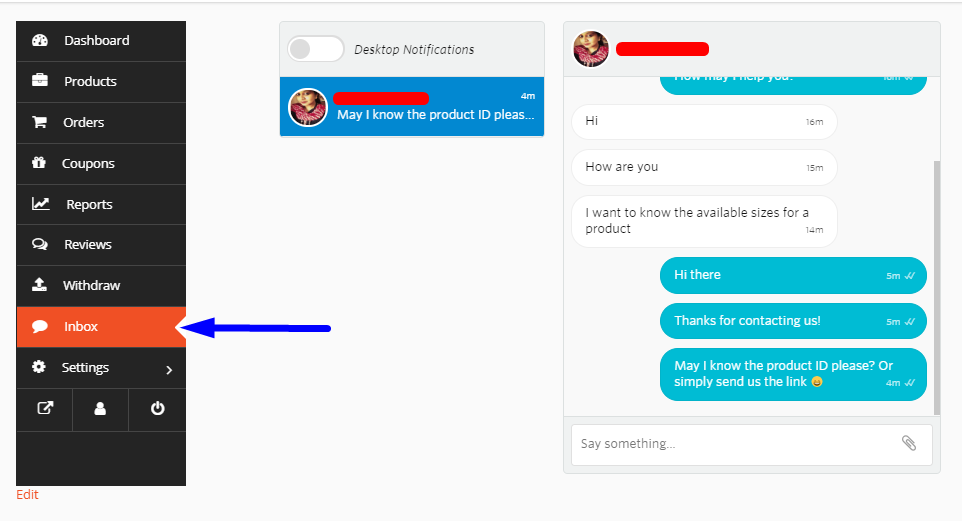
Desktop Notifications
The vendor can also activate Desktop Notifications for convenience, so that if he is on another tab, he will still be notified of incoming messages.
For this to work, the vendor has to keep his browser tab open, and he will see a pop up when someone talks to him.
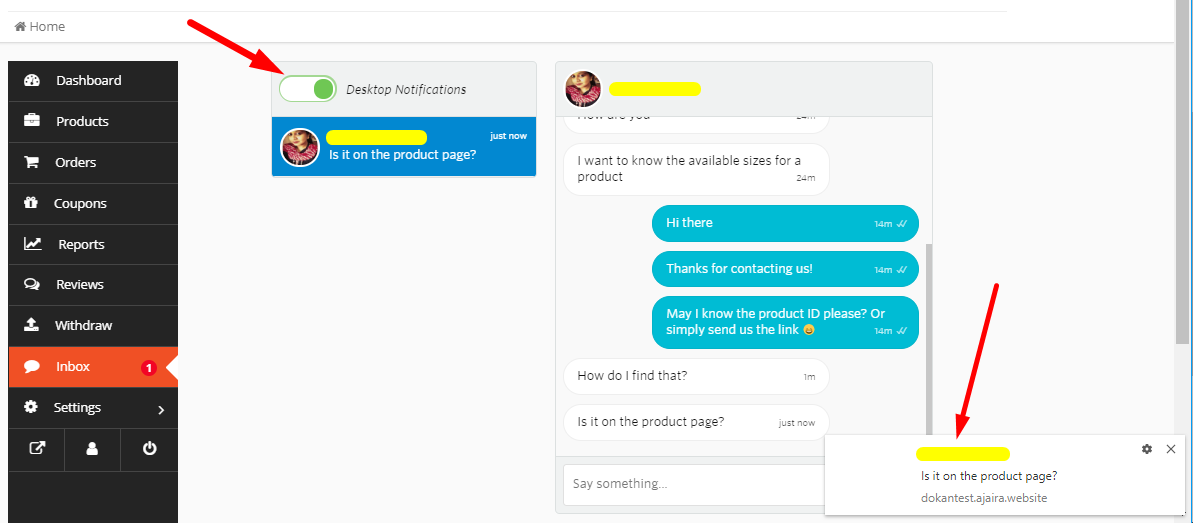
Vendors can also access and reply to live chats from any page through the pop-up window. Vendors are not obliged to reply from dashboard only.
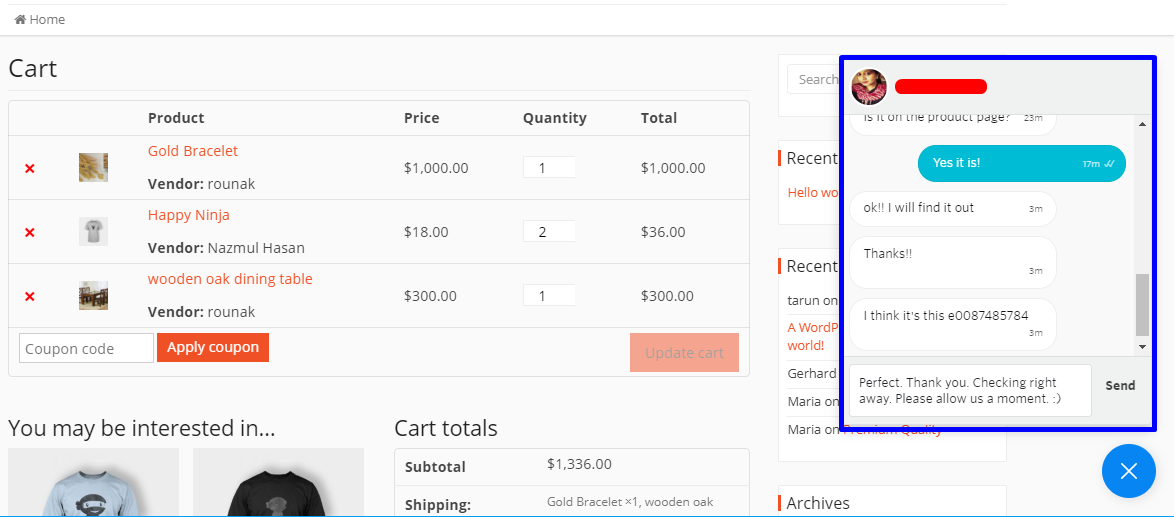
Add attachments to live chat conversation
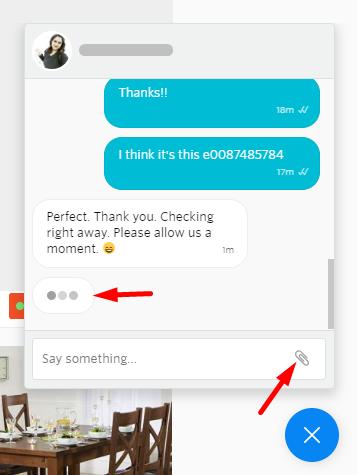
The chat box shows when the other end is typing a message.
Customers and vendors can also add attachments like screenshots and files with their messages.
The attachments can be opened right from the live chat window. When the attachment is clicked, it will open in a pop-up modal window instantly in the same screen, which can be quickly closed as well.
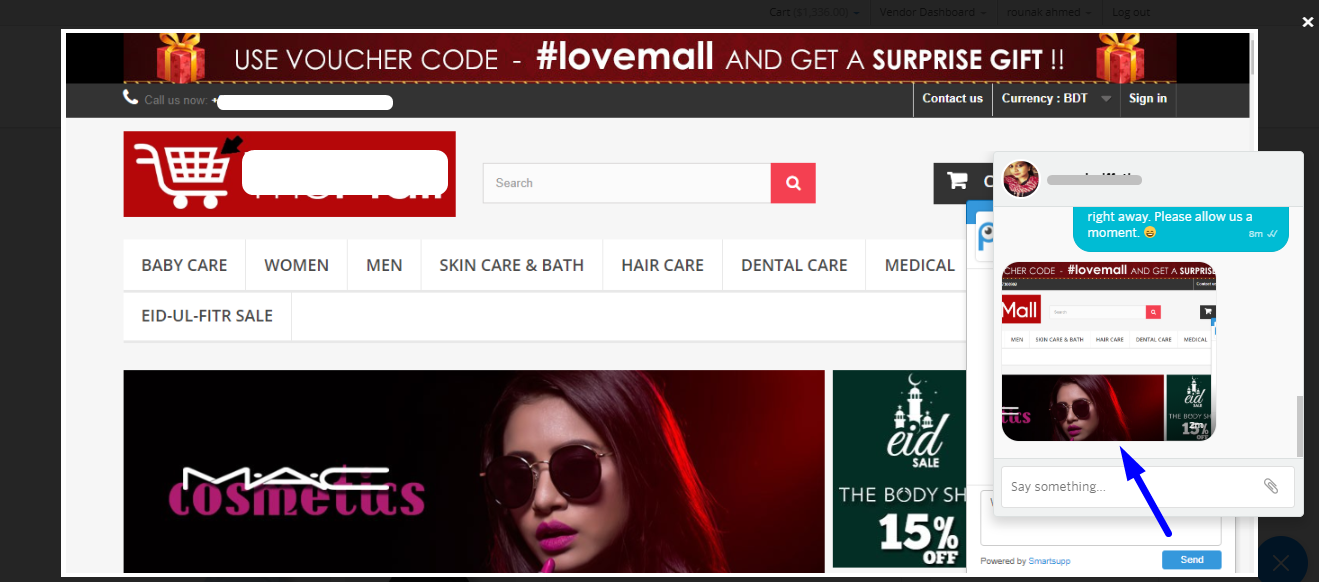
Vendors can open attachments from Inbox also.
Enable email notifications for vendors & customers
Vendors and customers can be notified by email about live chat messages.
1. To enable email notifications for live chats, Admins need to go back to the TalkJS Dashboard. Scroll down to Configurations and click on the + button.
2. Under Configuration Name, type vendor, then click on Create and Save configuration, as shown below.
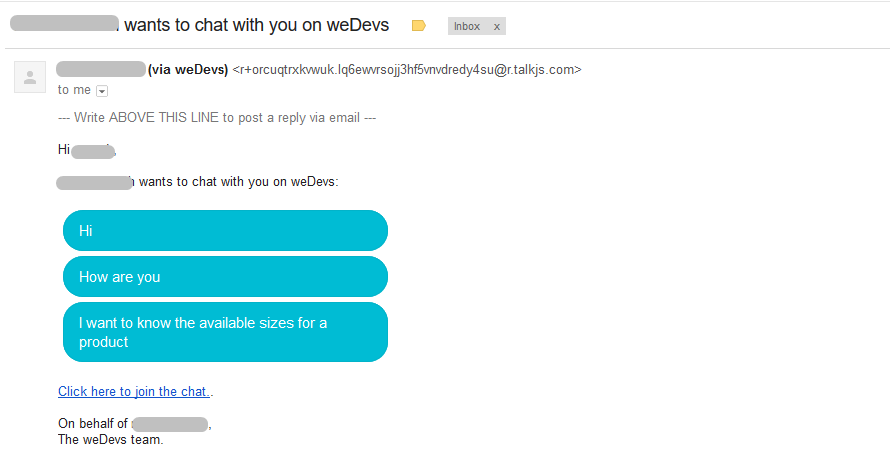
This setting will allow your vendors and customers to be notified via email when they receive messages on live chat while they are away or offline.

Now both vendors and customers will receive email notifications if they have been offline or away for sometime.
This completes configuration of Dokan Live Chat module.