You can easily manage your marketplace transaction using the Dokan Mangopay payment getaway module. It is easy to set up and you can make the transaction process smooth. It handles the split payment quite easily so you don’t have to worry about manually transferring the vendor earnings.
Notice: Due to policy changes by Mangopay, we are unable to provide any technical support for Mangopay
Let’s see how to set up this module.
Enable Dokan Mangopay Module
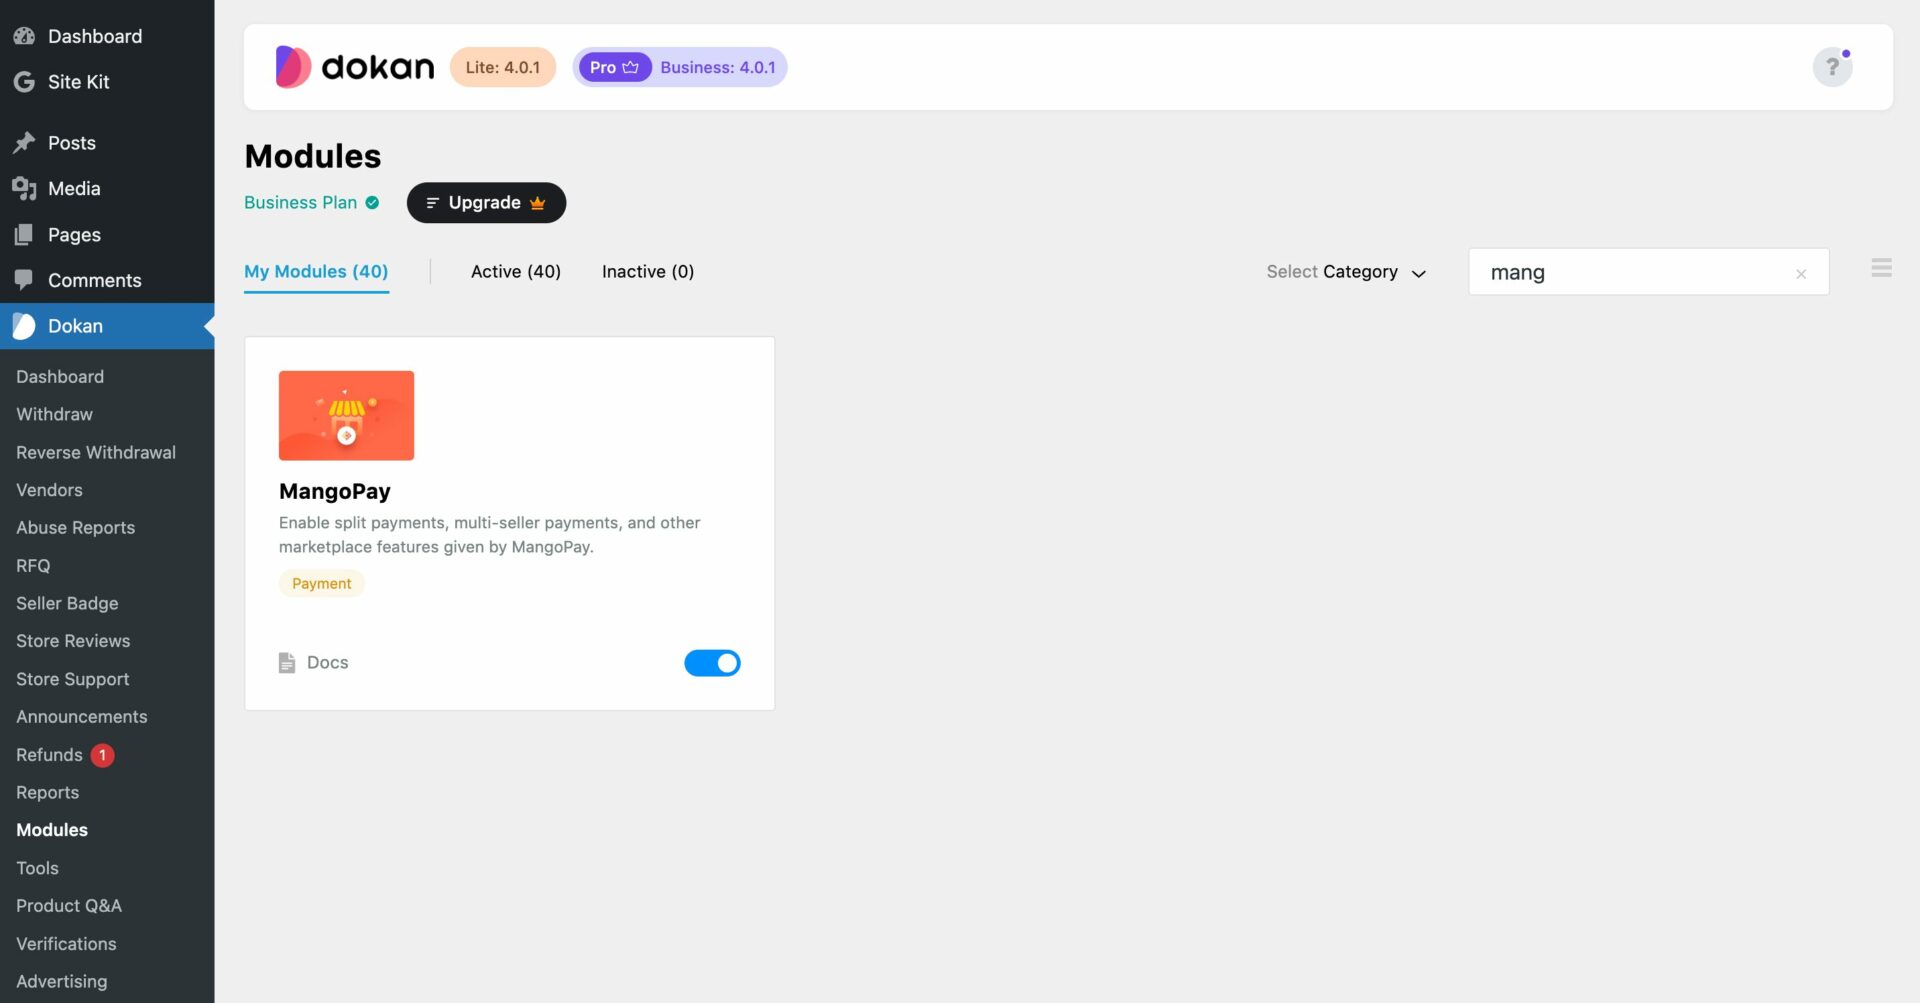
At first, you need to enable the Dokan Mangopay module from WP-Admin–> Dokan–> Modules.
Now, you need to enable the payment gateway from WooCommerce–>Settings–>Payments.
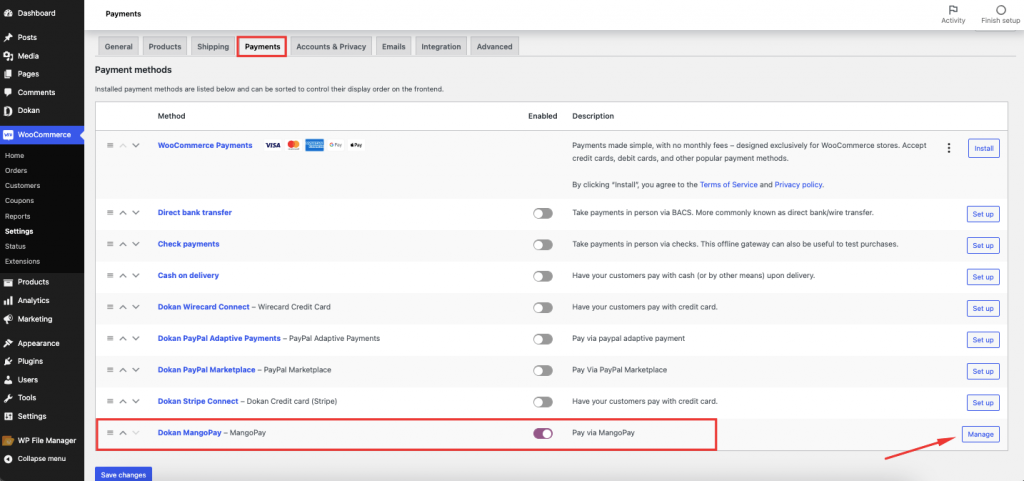
Click on the Manage button, there you will find all the settings regarding the Dokan Mangopay payment gateway.
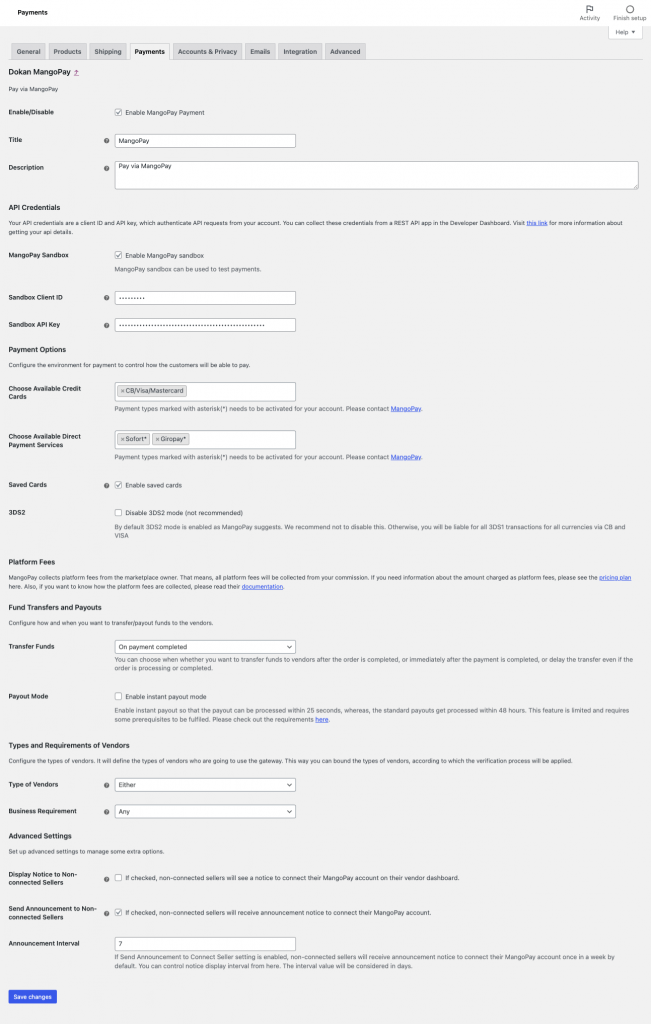
Enable/Disable: Check the box to enable (or disable) the Dokan Mangopay payment gateway.
Title: Give a title or use the default one that the customers will see during the checkout.
Description: Add a description or use the default one, customers will see this on the checkout page.
API Credentials
Mangopay Sandbox: If you want to test the integration in Sandbox mode, check this setting.
If you have checked Mangopay sandbox mode, you’ve to provide Test Key ID and Test Key Secret. Otherwise, you’ve to provide Key ID and Test Secret ID for live account API Credentials.
Payment Options
Choose Available Credit Cards: You can select multiple cards that users can use to complete the payment. You will find many options in the drop-down menu.
Choose Available Direct Payment Services: You can select multiple payment services that users can use to complete the payment. You will find many options in the drop-down menu.
Saved Cards: If enabled, customers, will be able to save cards during checkout. Card data will be saved on the MangoPay server, not on the store.
3DS2: By default 3DS2 mode is enabled as MangoPay suggests. We recommend not disabling this. Otherwise, you will be liable for all 3DS1 transactions for all currencies via CB and VISA. This option is mandatory.
3DS1 supports VISA, Mastercard, American Express.

Fund Transfers and Payouts
Transfer Funds: Choose whether you wish to disburse funds to the vendors immediately or hold the funds. Holding funds gives you time to conduct additional vetting or enforce other platform-specific business logic. As an admin, you can choose when to disburse the funds to the vendors. You will have 3 options,
- On Payment Complete: vendors will get their money immediately after the order.
- On order completed: vendors will get their money after the order is complete via site admin or vendors based on Settings (either vendor can change order status or not)
- Delayed: You can choose to hold the fund for a specific number of periods of an interval to disburse the funds. After the specified day’s funds will be automatically disbursed to the vendor’s Mangopay account.
Payout Mode: Enable instant payout so that the payout can be processed within 25 seconds, whereas, the standard payouts get processed within 48 hours. This feature is limited and requires some prerequisites to be fulfilled. You can check out the requirements here.

Types and Requirements of Vendors
Type of Vendors: All the vendors are bound to this type and they will be verified according to this. Choose ‘Either’ if no restriction is needed. You will find 3 types of options,
- Individual
- Business
- Either
Business Requirement: All business is bound to this type and the verification process will be applied accordingly. Choose ‘Any’ if no restriction is needed.
There are 4 options to choose from,
- Organizations
- Soletraders
- Businesses
- Any
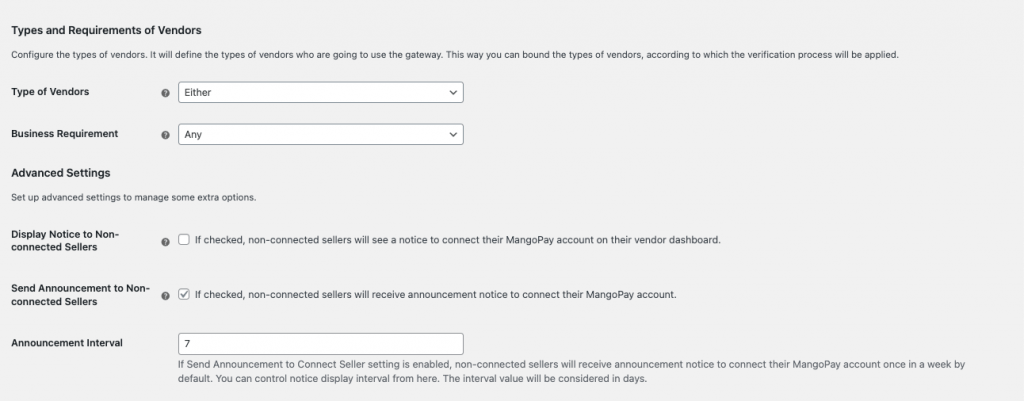
Advanced Settings
Display Notice to Connect Seller: If you enable this setting your non-connected vendors will see a notice to connect their Mangopay account on their vendor dashboard.
Send Announcement to Connect Seller: If you enable this setting your non-connected sellers will receive an announcement notice to connect their Mangopay account.
Announcement Interval: You can choose a period of an interval to send the announcement.
After finishing the settings hit the Save Changes button to finish.
Collect Mangopay API Credentials
To collect the Client ID and API key, log into your Mangopay client hub and collect your IDs. However, as we are using the Sandbox environment, you will find the IDs under the live account. But if you wish to use the Live Client ID and API key,then you need to activate your production account.
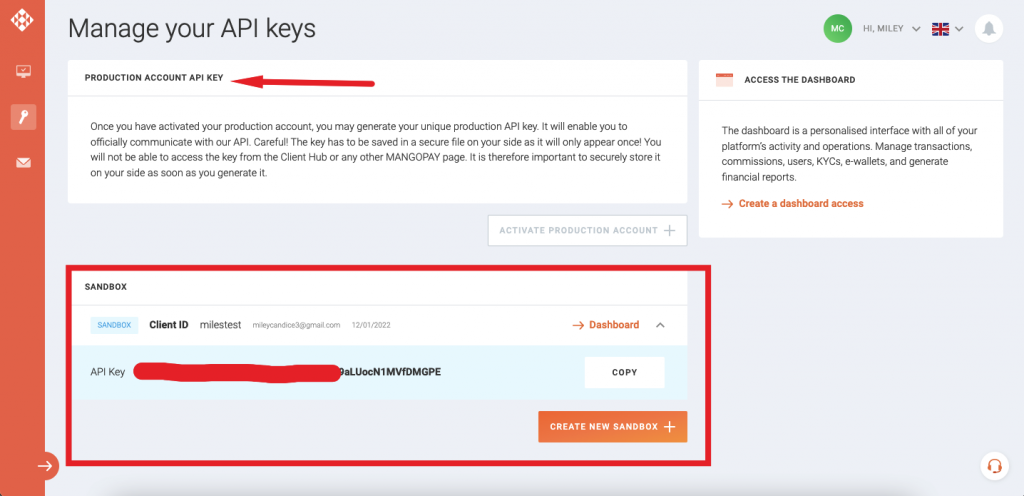
Now copy the keys, go back to WooCommerce–>Settings–>Payments, and add the credentials. Then hit the Save changes button to finish.
Connect Dokan Mangopay with Vendors Account
Now that you have integrated Mangopay with your Dokan powered marketplace, now it is time to connect the vendor’s account to the Mangopay payment gateway.
At first, the admin needs to enable the Dokan Mangopay gateway from Dokan–> Settings–> Withdraw,
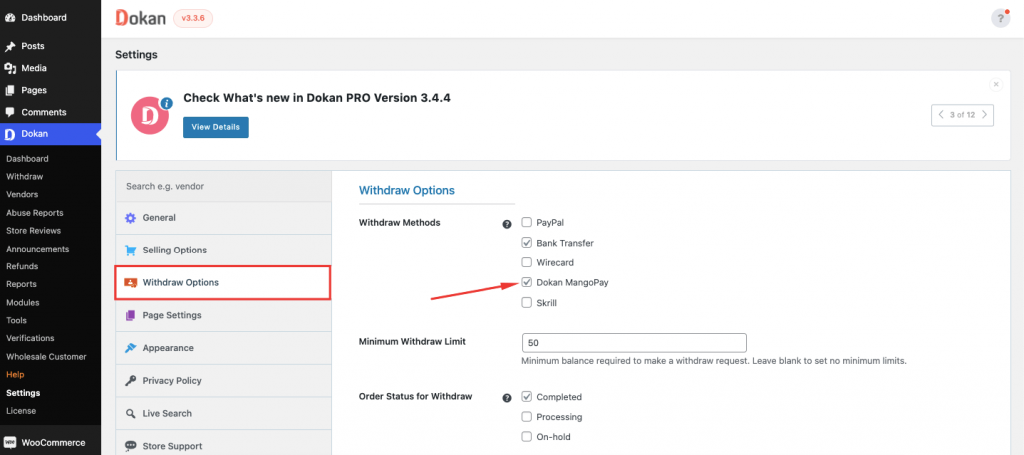
Now, the vendors will see the option to “Connect to Dokan Mangopay” account when they navigate to Vendor Dashboard–> Settings–> Payments. They need to hit the Sign Up button to create an account in the Mangopay payment gateway.
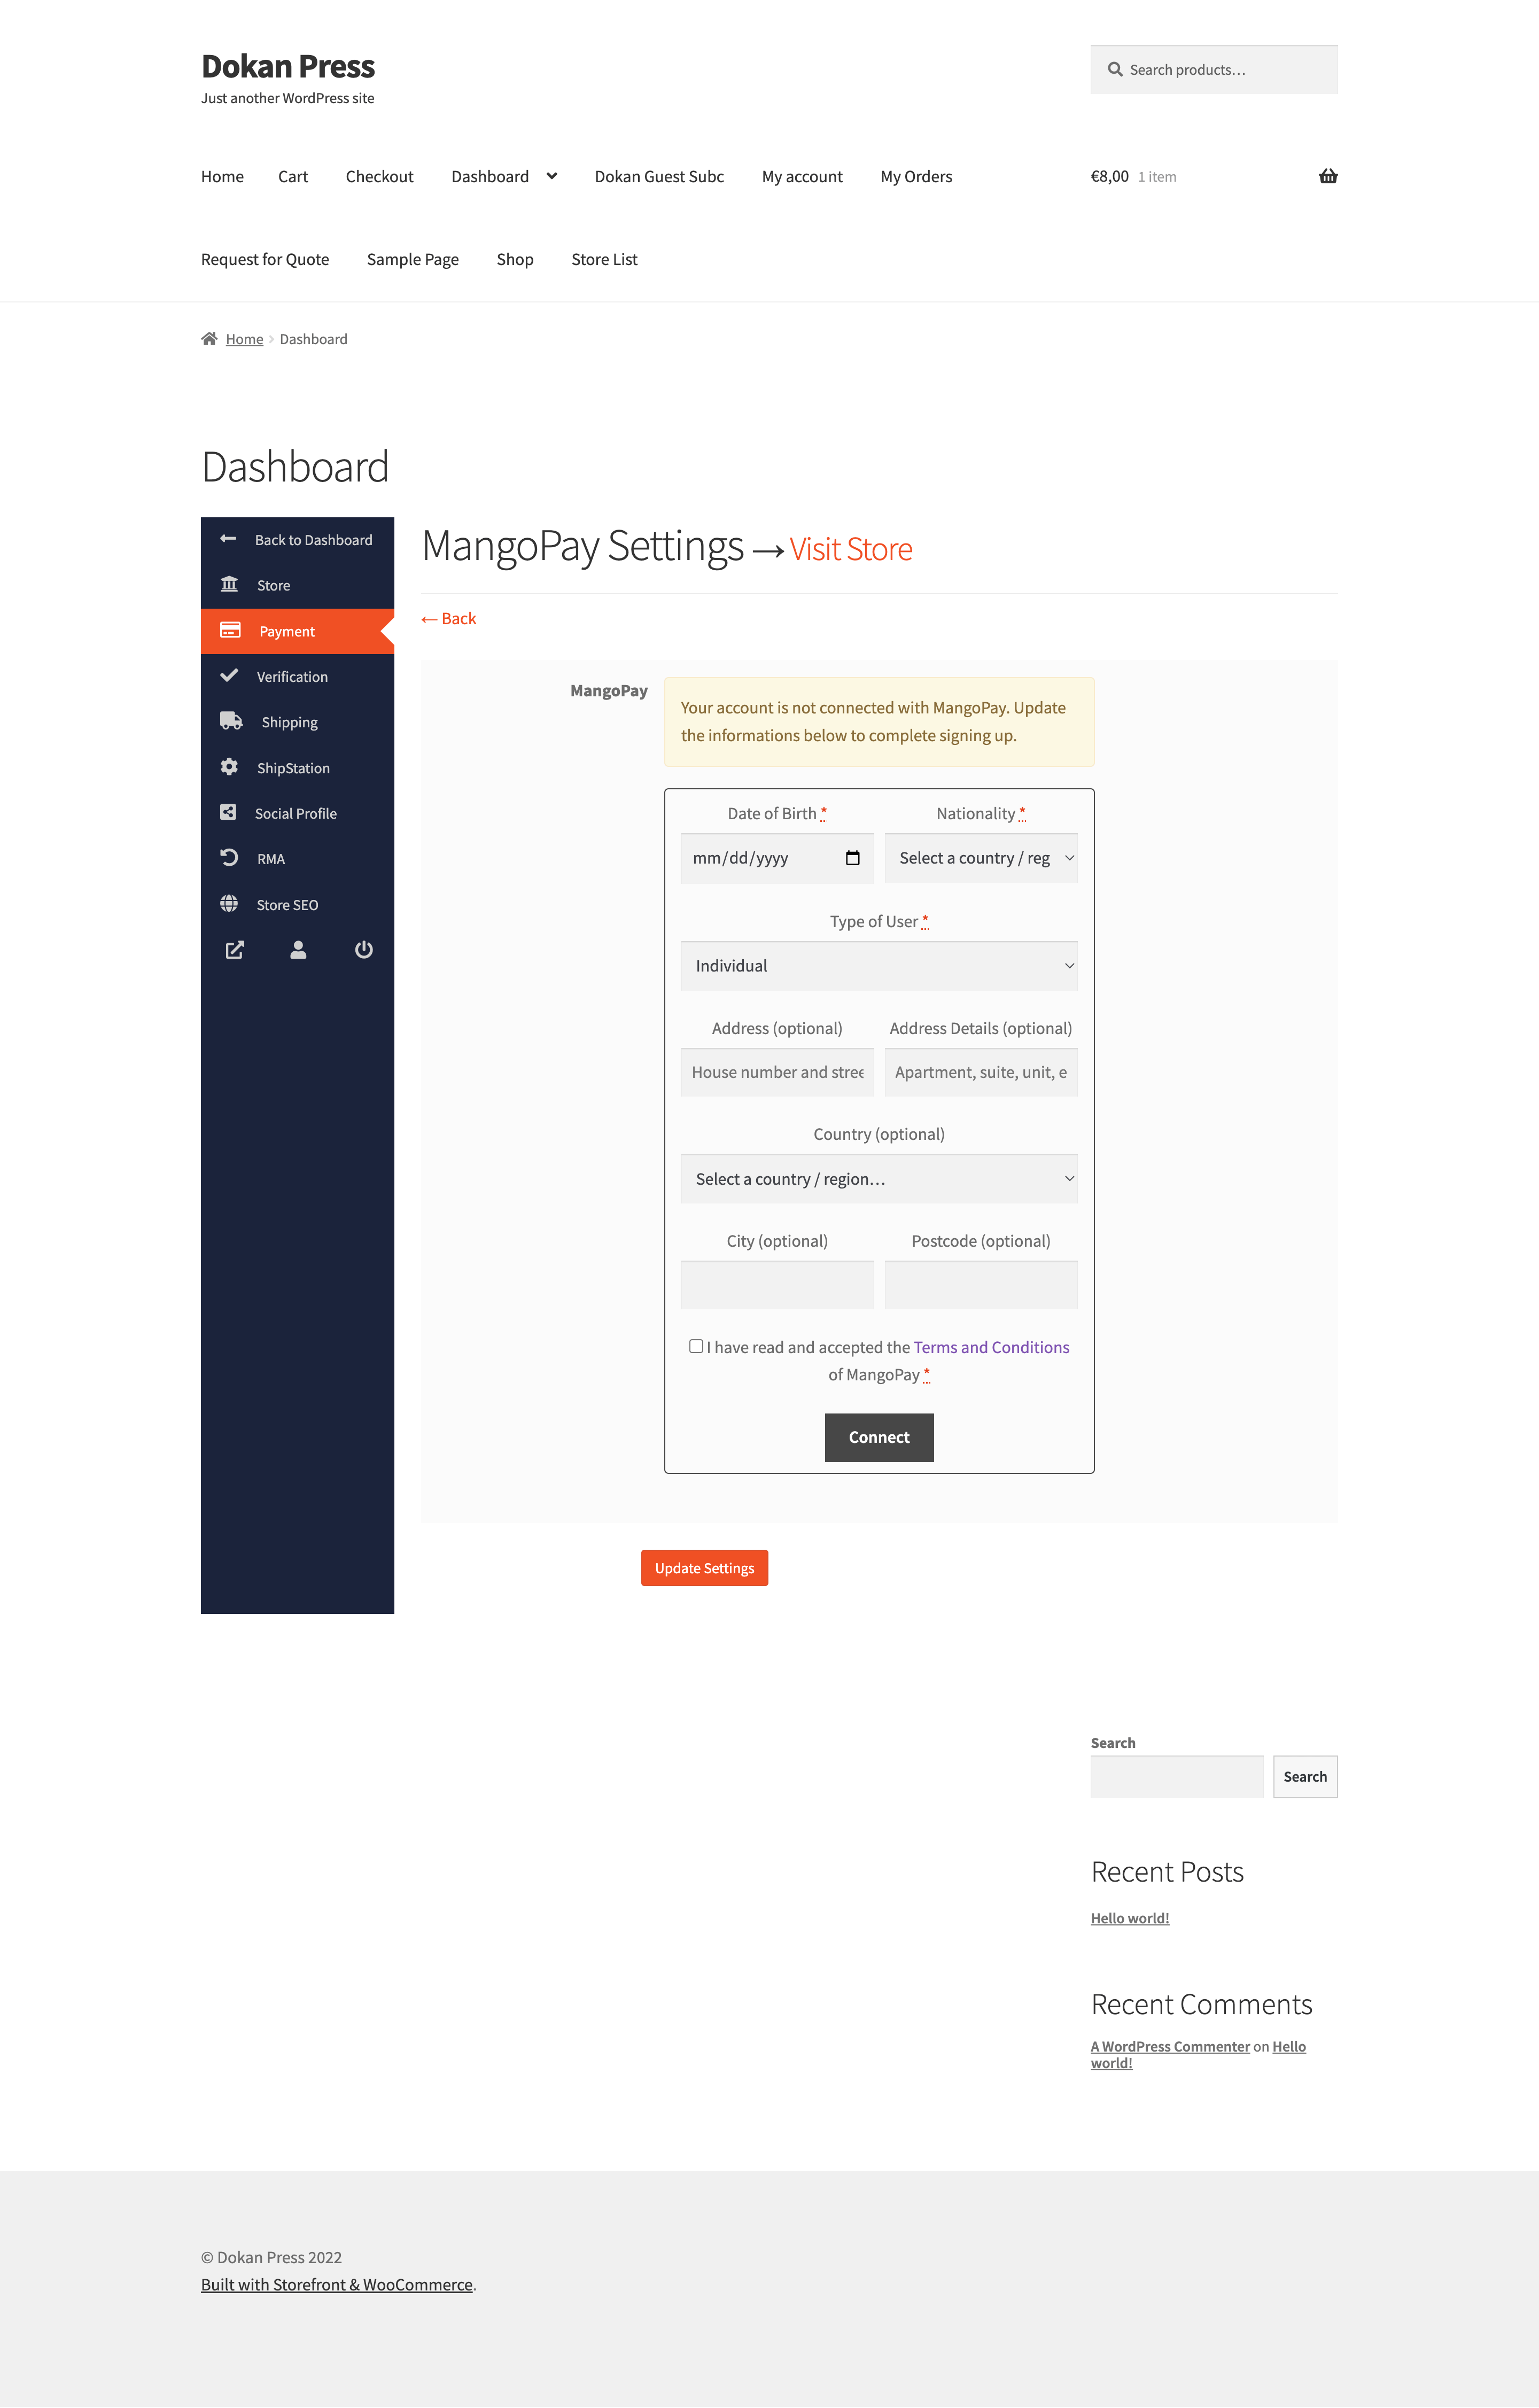
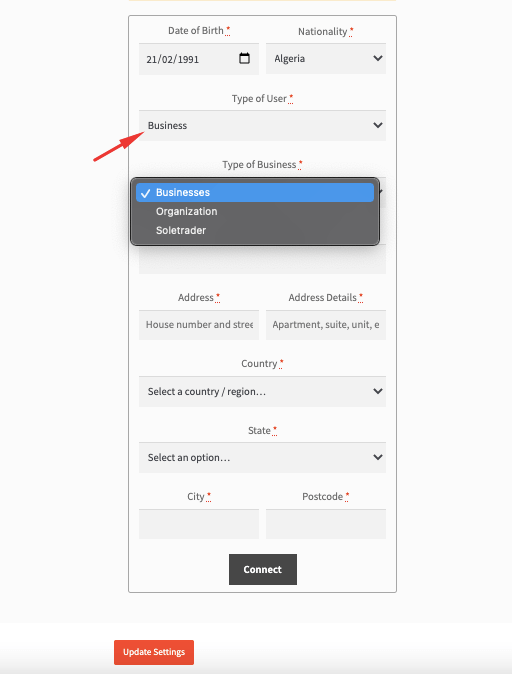
Vendors need to add the necessary information in order to connect to their Mangopay account.
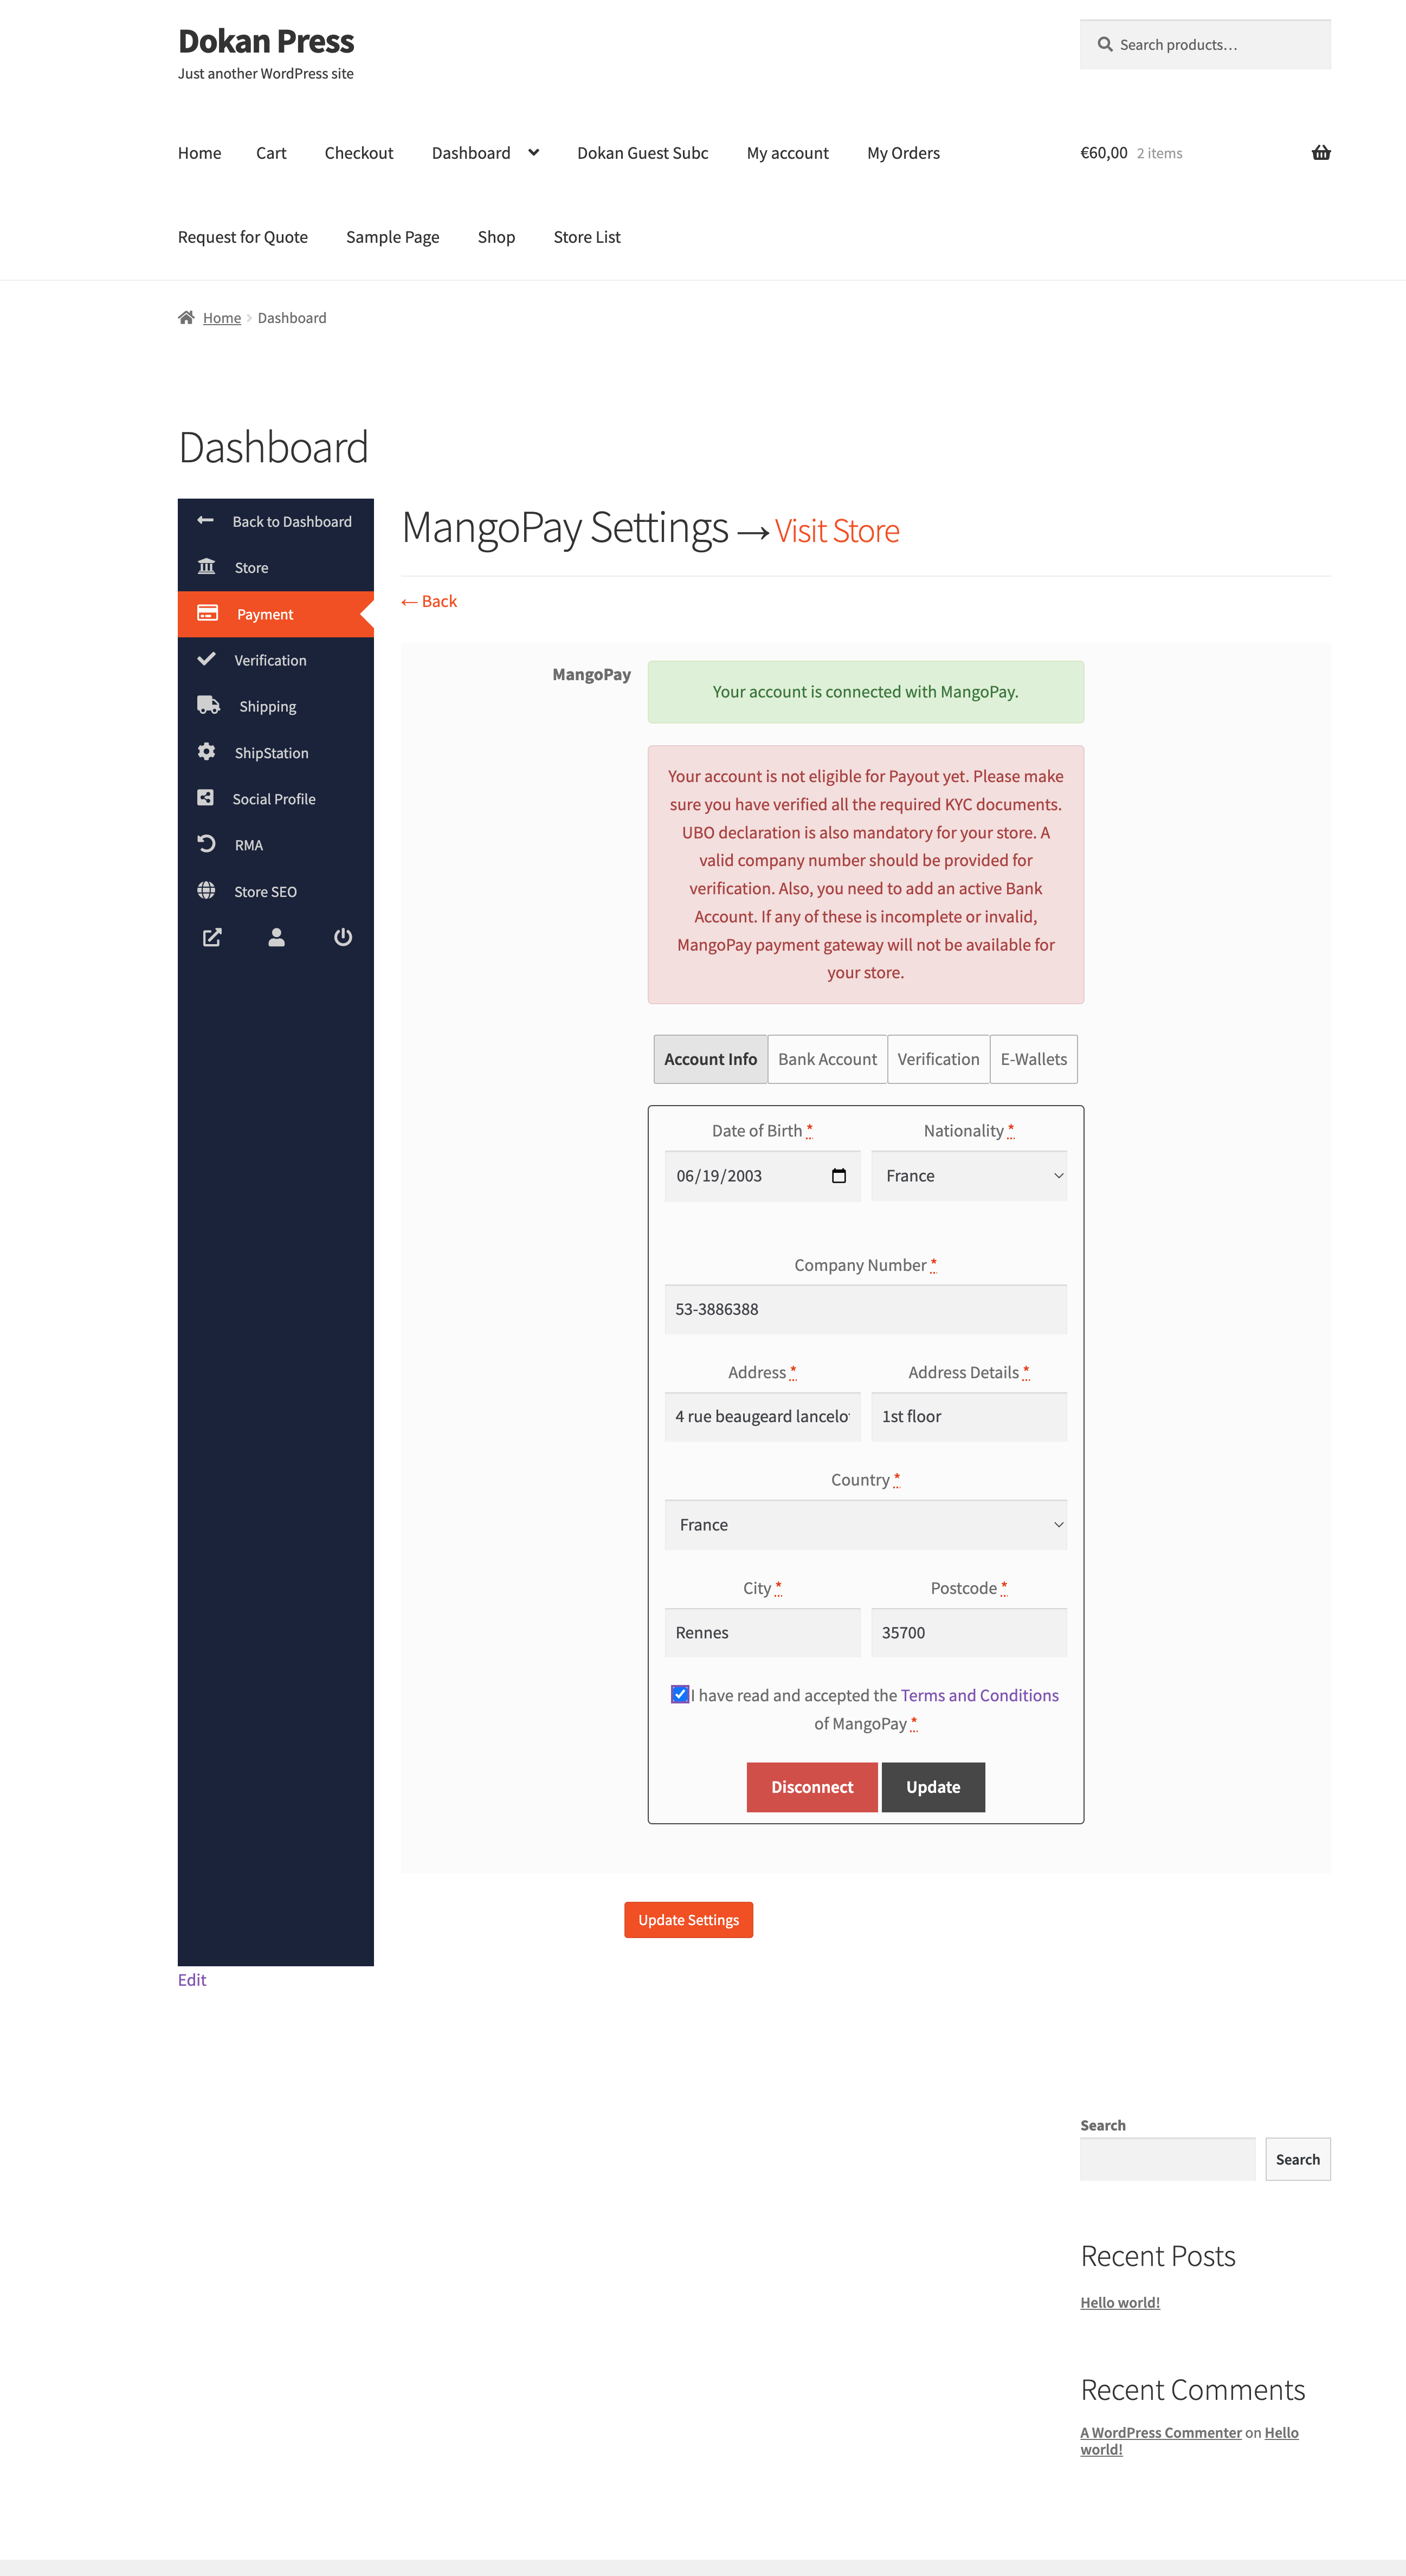
Note: If the vendors choose a Business account, they need to add their Type of business, company number. Also, their business address needs to match the profile address.
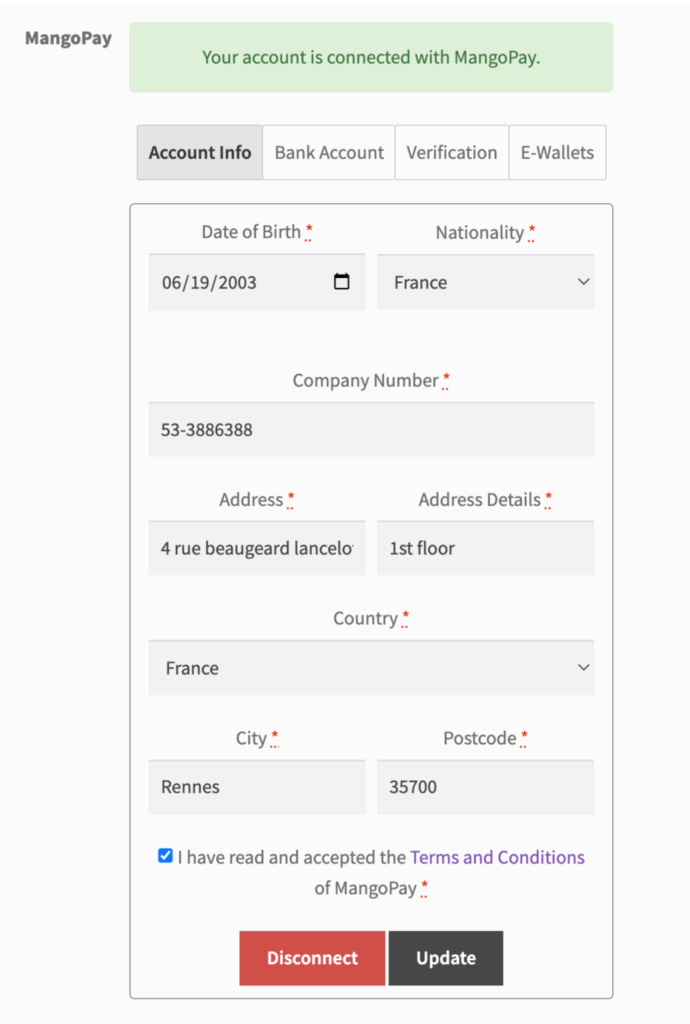
After successfully connecting their account vendors will be able to see their account info,
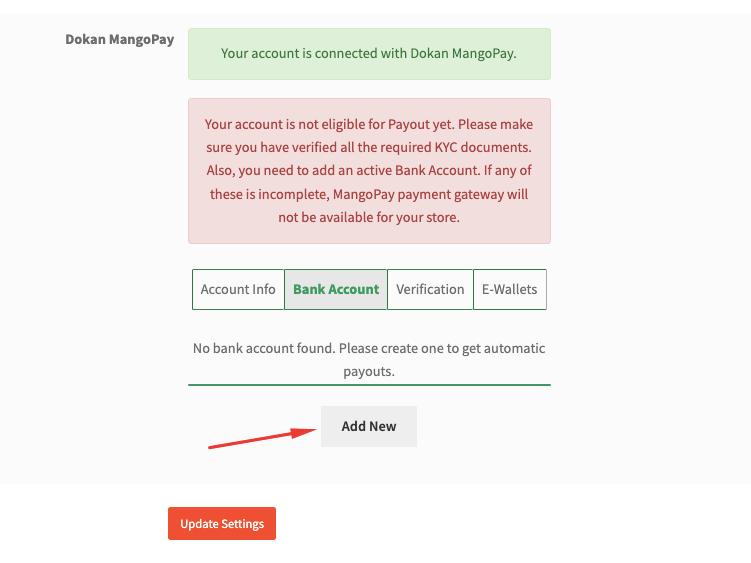
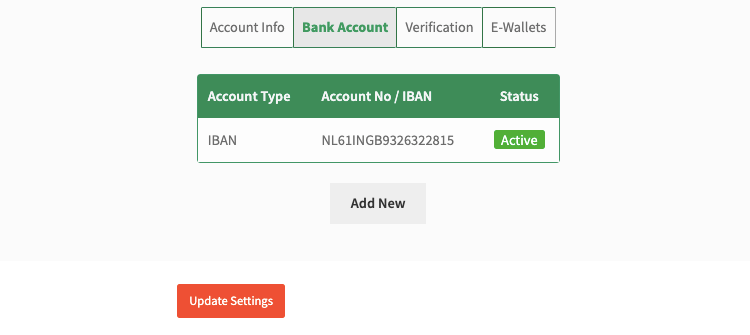
Vendors can update their bank account info, but first, they need to add the bank account to verify.
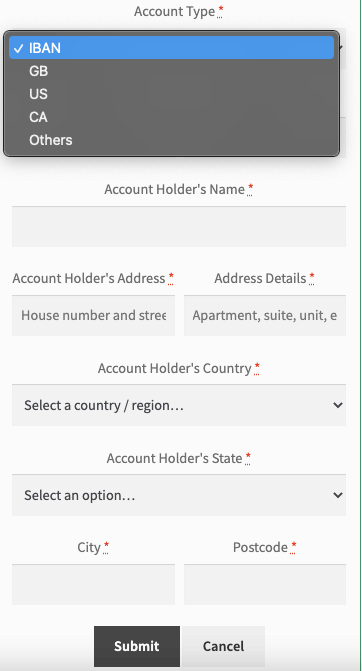
There are 5 types of Bank accounts,
- IBAN
- GB
- US
- CA
- Others
And they can only create one of each type of bank account.
Also, they can only have one bank account active at a time.
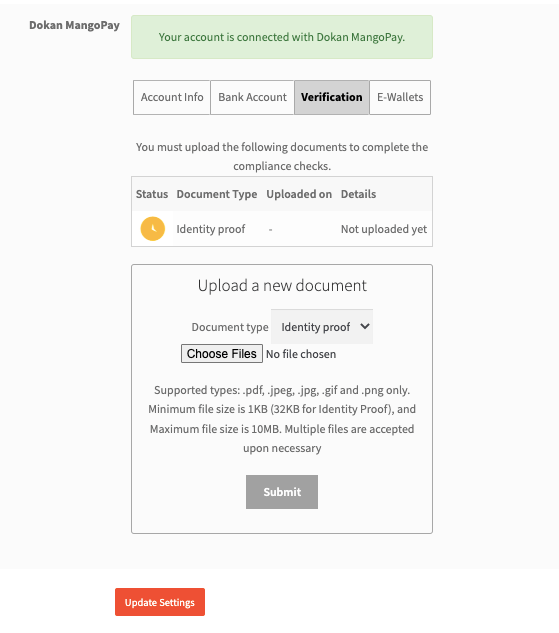
They can verify their identity proof by uploading relevant documents,
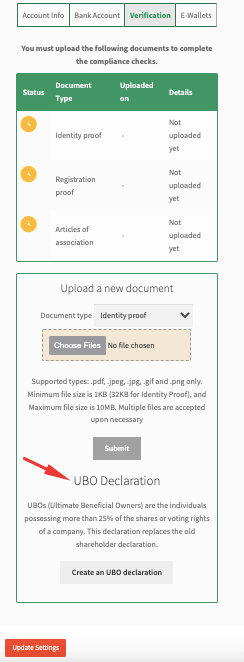
However, if you choose the type of user “Business” and business type ” Business” then you have to upload a UBO declaration file.
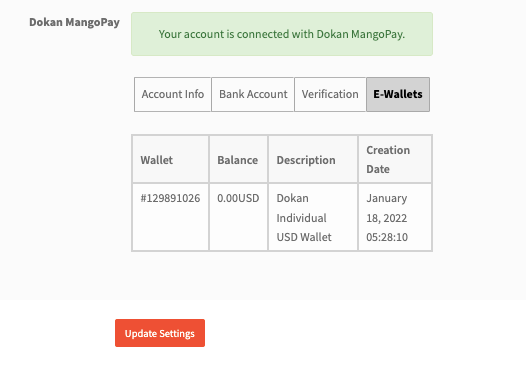
Vendors can also check their E-Wallets,
How to Complete Payment Using Mangopay
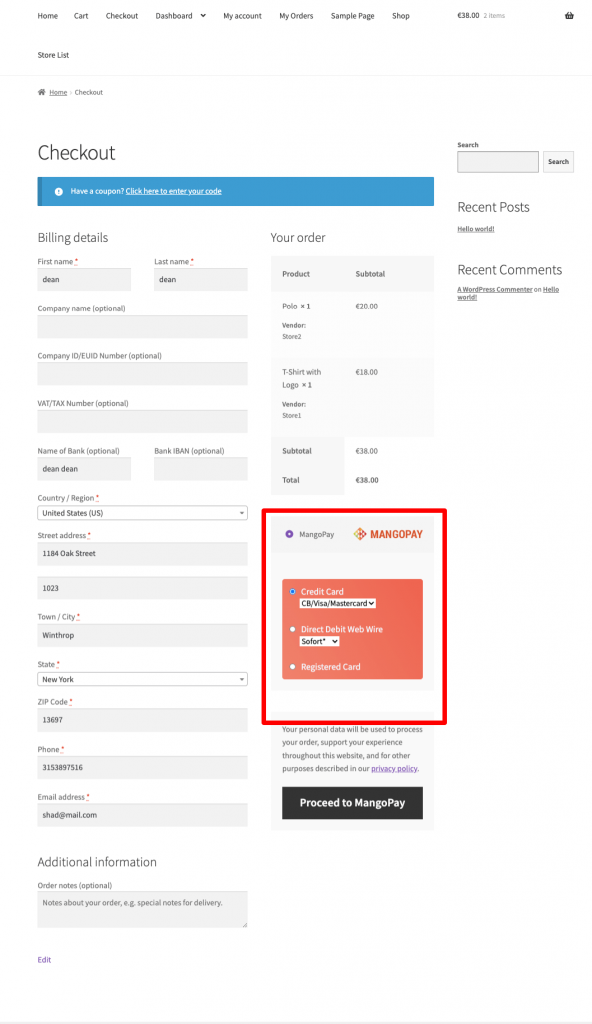
When a customer completes a purchase and moves to the checkout page, he/she will the option to pay with Mangoapay. Either they can use Credit Cards, Direct Debit Web Wire, or Registered Cards to pay. They need to click on Proceed to Mangopay for the next step.
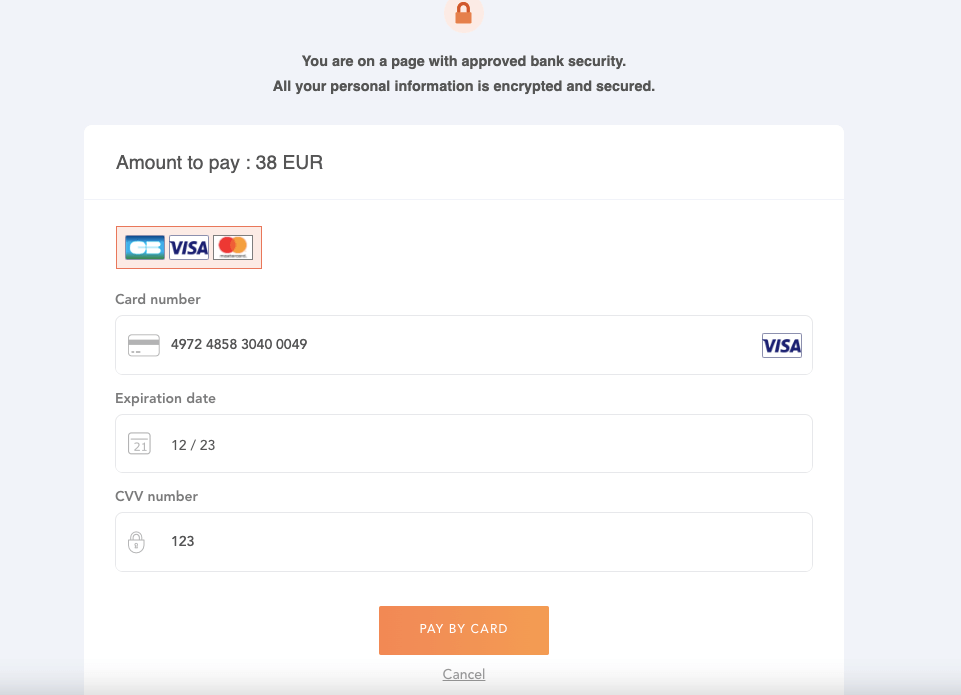
Then, they need to ad their card or relevant information to finish payment,
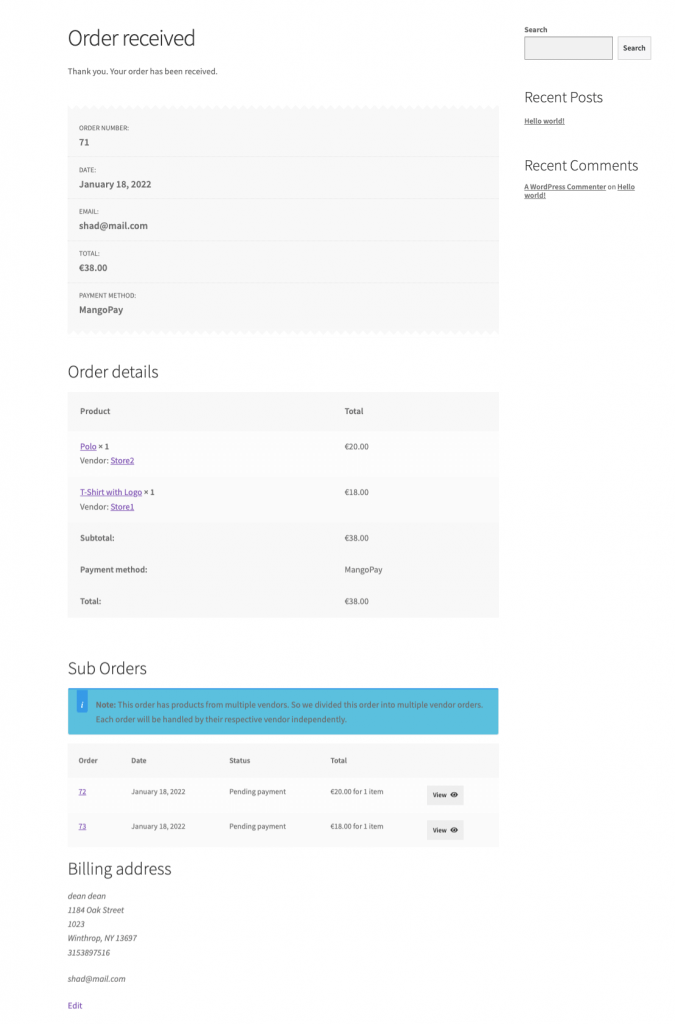
The customers will get their order details like this,
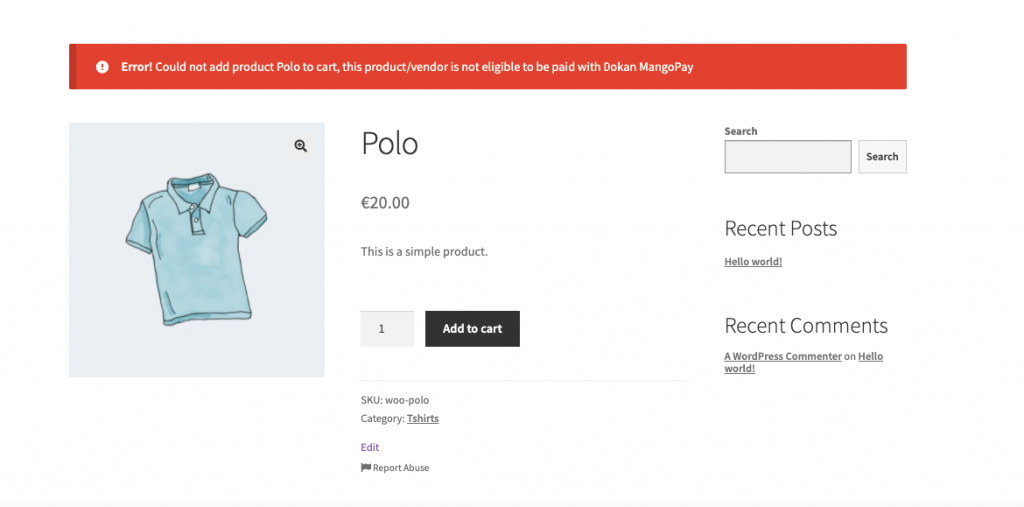
Note: If any of the vendors is not connected with Mangopay, then the customer will get a notice like this.
Mangopay handles the split payment system of a multivendor marketplace efficiently. If the customer buys products from two vendors at a time, the money will be automatically split between the vendors minus the admin commission.
If you look at the orders after a transaction, you will find all the details in the note section of a sub-order. Here are the order notes,

Refund Order
You can’t use Mangopay to refund order from the main order, which means when there are sub-order you have to refund them individually.
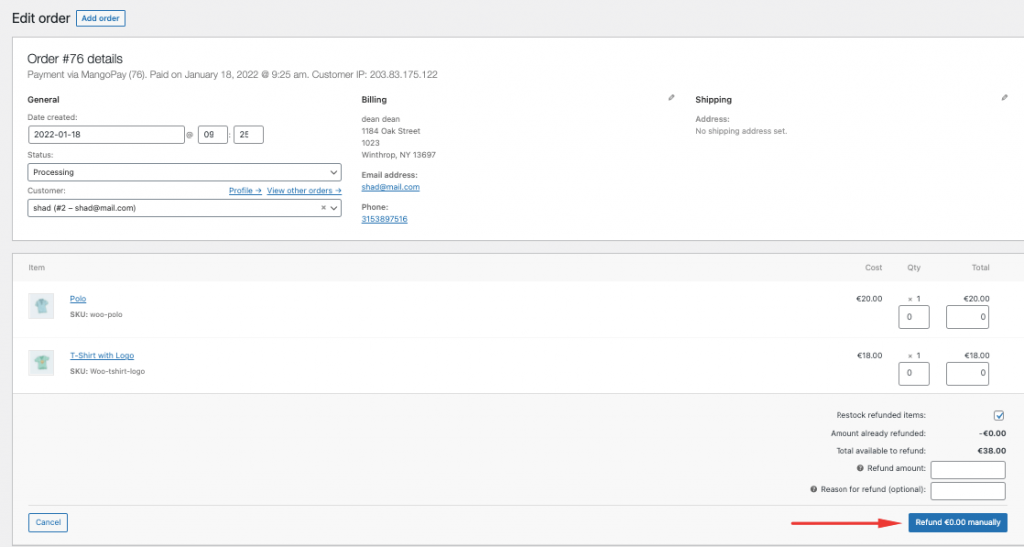
You can use the Sub-orders to refund the orders.
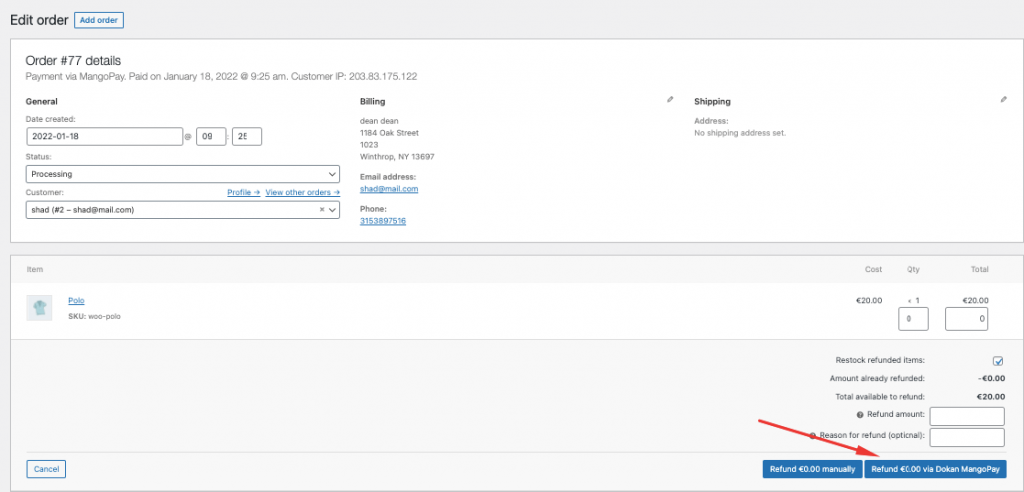
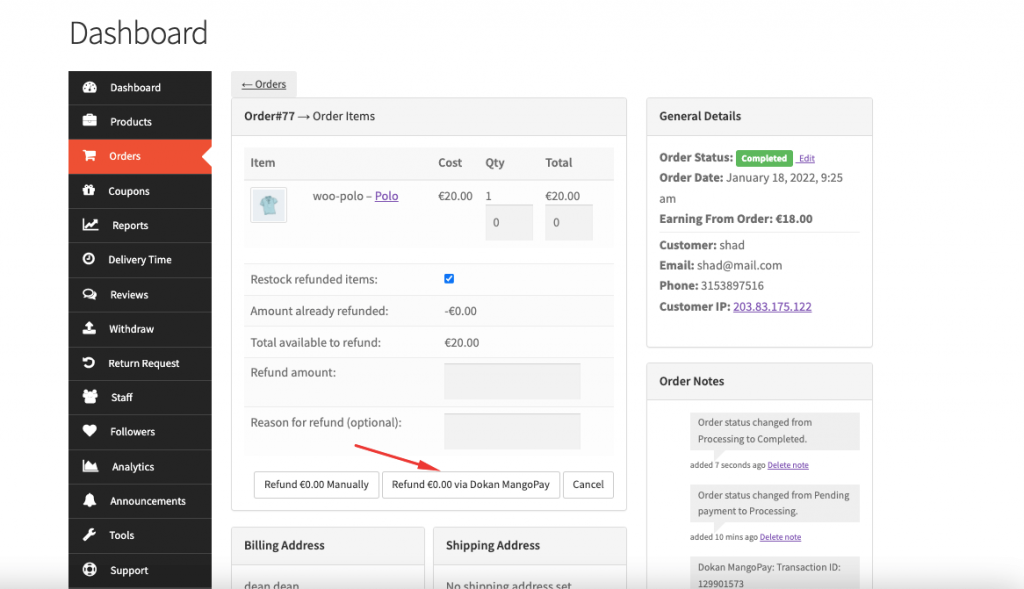
For vendors navigate to Vendor Dashboard–> Orders and select any order. Click on the Refund $X via the Dokan Mangopay button to refund an order.
Note: The order has to be complete in order to refund.
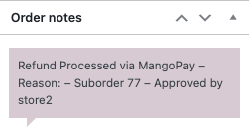
Admin will be able to view the refund order in the order notes,
Admin can view the refunded order details in the Mangopay dashboard as well,
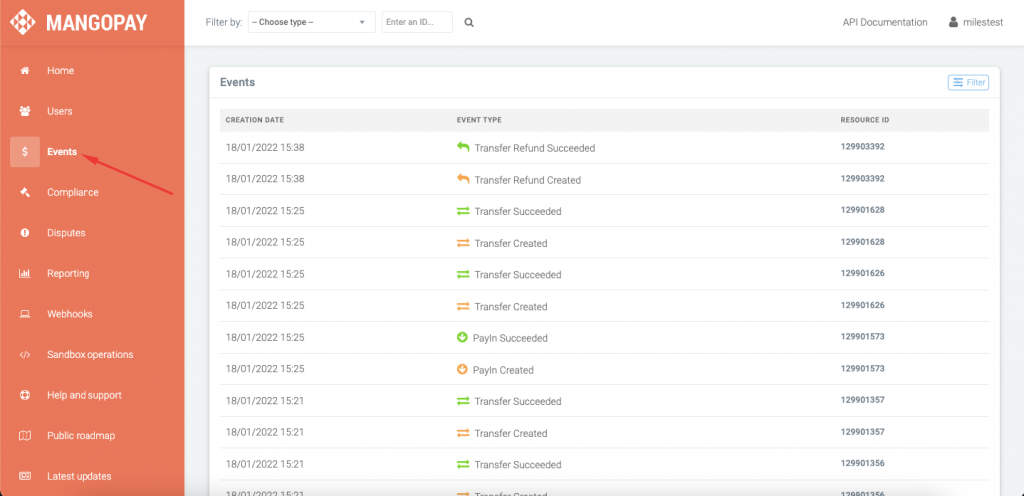
Refund Using Mangopay
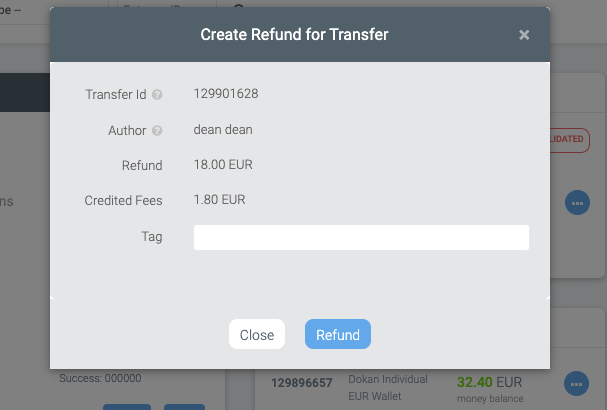
Mangopay doesn’t support partial refunds for the Transfer refunds option.
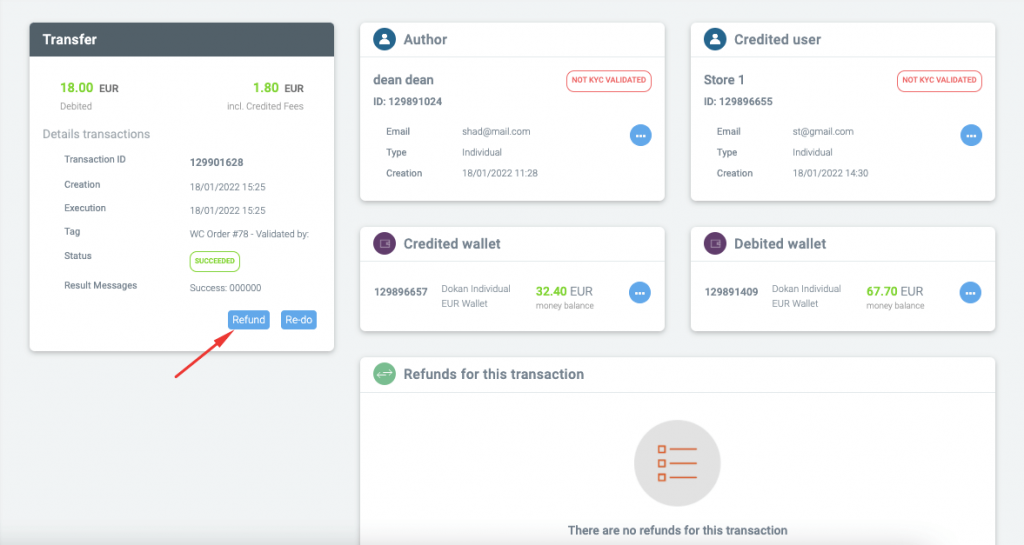
In that case, you have to do a full refund
However, for Pay-ins you can do a partial refund,
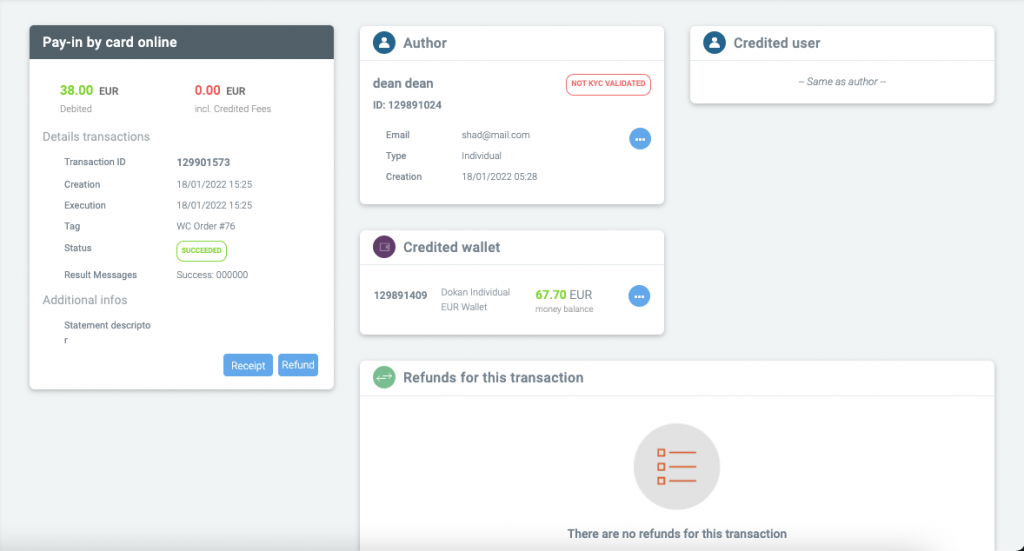
Choose the partial refund option,
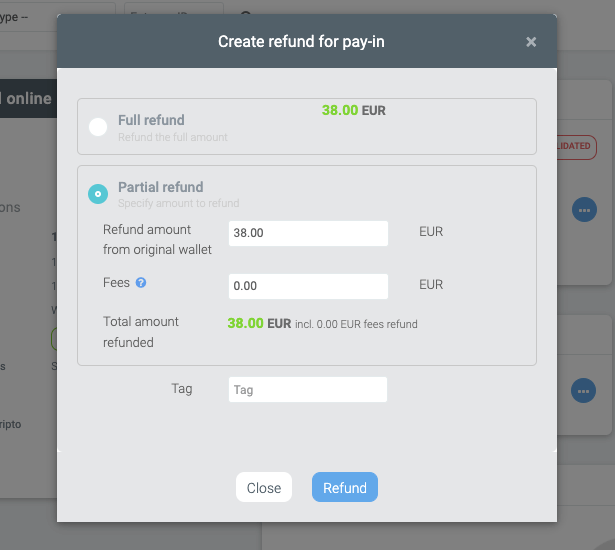
Note: If there are multiple vendors involved, In the case of partial payments, you need to use the Tag option to verify the amount of money you are going to transfer to each vendor. You can use the below format,
Vendor #{ID}:{Amount}, ...Suppose, for an order of $50 you are going to refund $35. However, One vendor has earned $30 and another vendor has earned $20. So how are you going to divide $35? By using the Tag option. So you can use the format like this in the Tag,
Dokan Vendor #3:25, Vendor #2:10
If you navigate to Dokan–> Reports–> All Logs, you will be able to see all the details of every order.
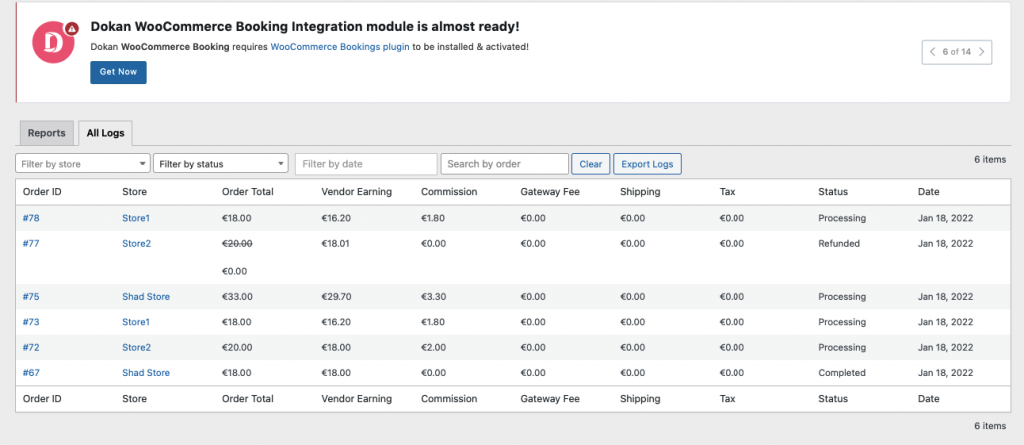
This is how you can use the Dokan Mangopay payment gateway module to manage your marketplace transactions.
Note: For a failed payout, you can only 5 times to transfer the funds. The payout process will be rescheduled and handled after 24 hours.
Also, if someone initializes a payout then he/she has to write the order id in the Tag like WC Order #<order_id>. For example, WC Order #23.