With the new Request for Quotation module, customers can now send customized quotes on the selected products. This module will create more transparency in the marketplace and help vendors increase the conversion rate.
Let’s see how to set up and use this module on your marketplace.
Activate Module
First and foremost, you need to activate the module. For that, navigate to WP-Admin–> Dokan–> Modules.
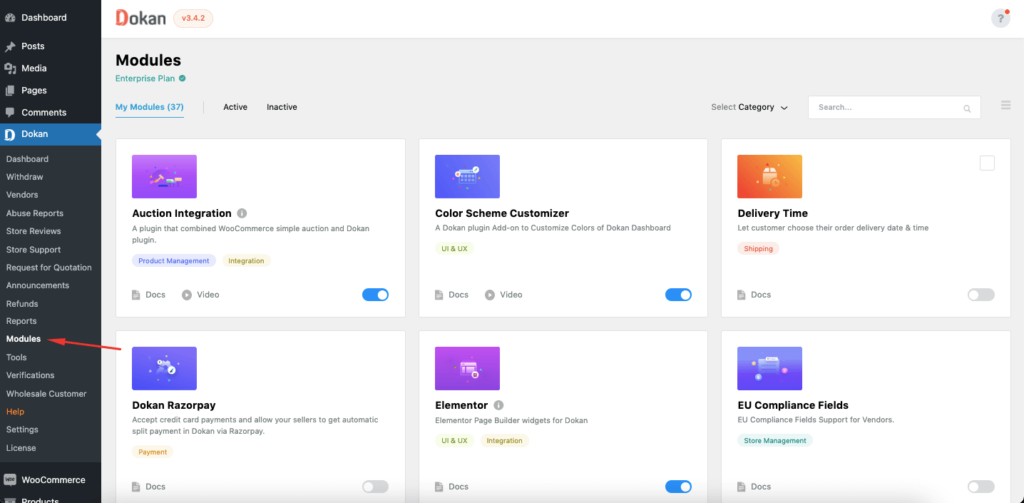
Next, find the Request for Quotation module and activate it.
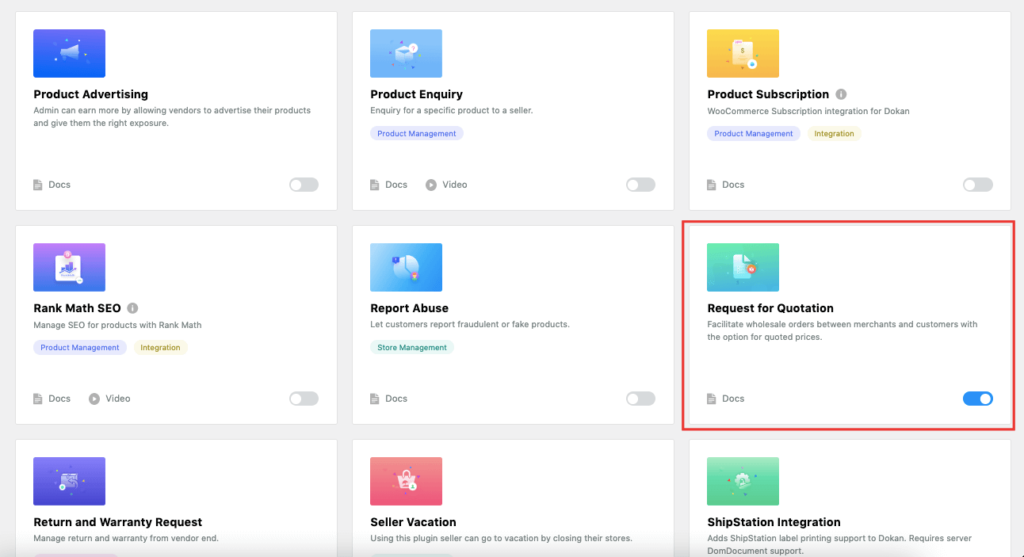
Configure Settings
After you activate the module, you will find the settings for quote features in Dokan–> Settings–> Quote Settings.
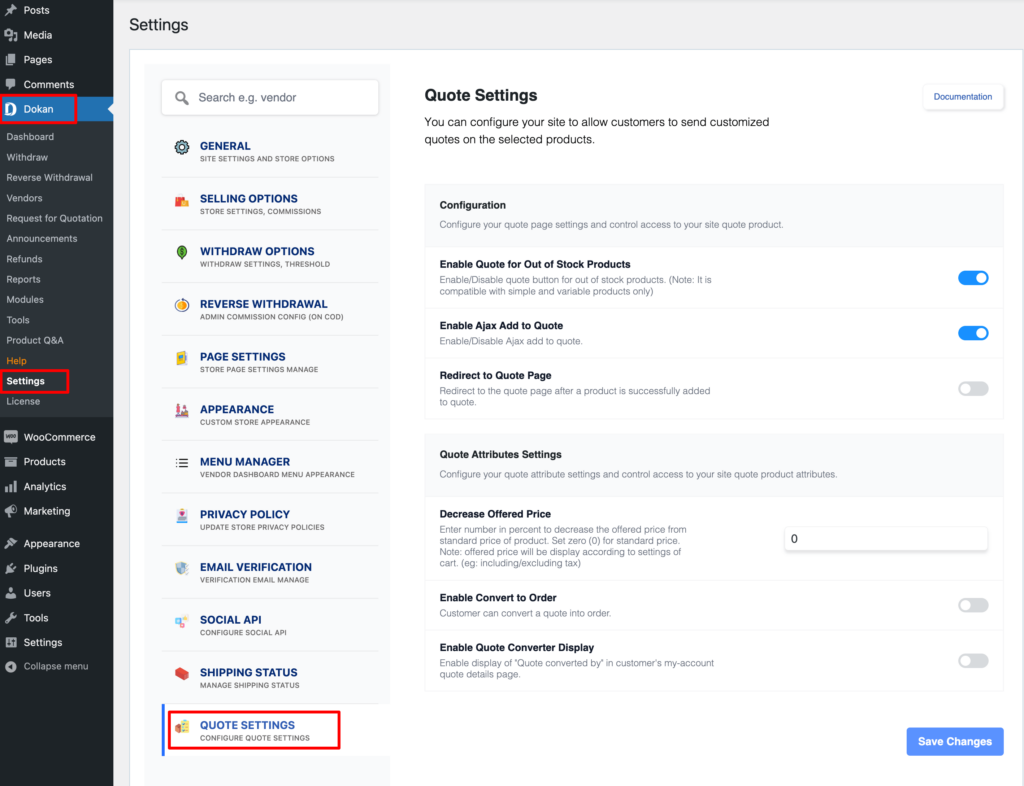
There you will find all the necessary settings like,
Enable quote for Out of Stock Products: Activate this option to enable quotes for out-of-stock products.
Enable Ajax Add to Quote: This will enable Ajax to add to quote feature.
Redirect to Quote Page: This will redirect users to the quote page after the quotes have been added successfully.
Decrease offered price: Add the number in percent to decrease the offered price from the standard price of the product. Leave empty for the standard price.
Enable convert to order: This will give the customer the power to convert the quote to order after getting approved.
Enable quote converter display: This will enable the display of “Quote converted by” in the customer’s my-account quote details page.
Save the changes after configuring the settings. Enable all the options to get the full experience of the Quotation Module.
How to Create a New Quote for a Customer – Admin?
If admins want, they can create a quote for the customers and the customers will receive the quote request via email.
Go to Dokan–> Request for Quotation–> New Quote.
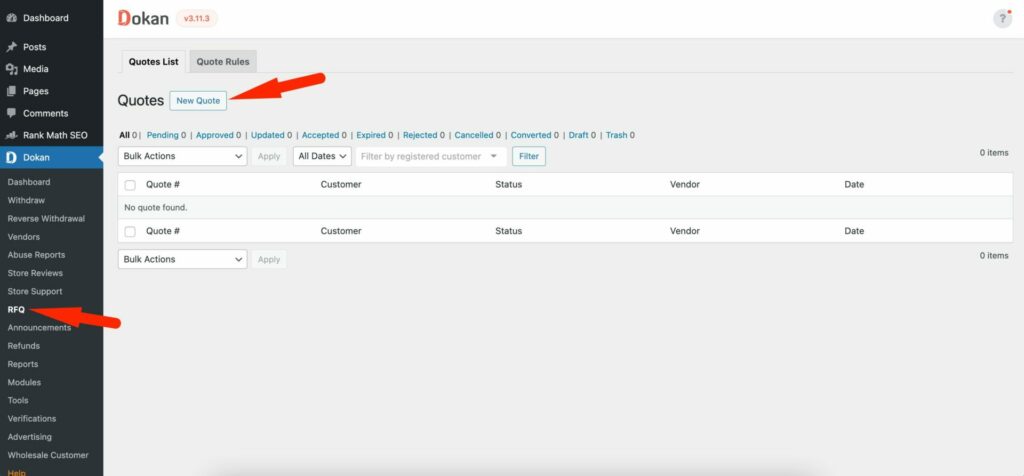
There, they will get a form where they need to add the customer’s name, address, and selected products.
Also, admin needs to add the shipping details and shipping cost as well.
Then hit the Create button to finish.

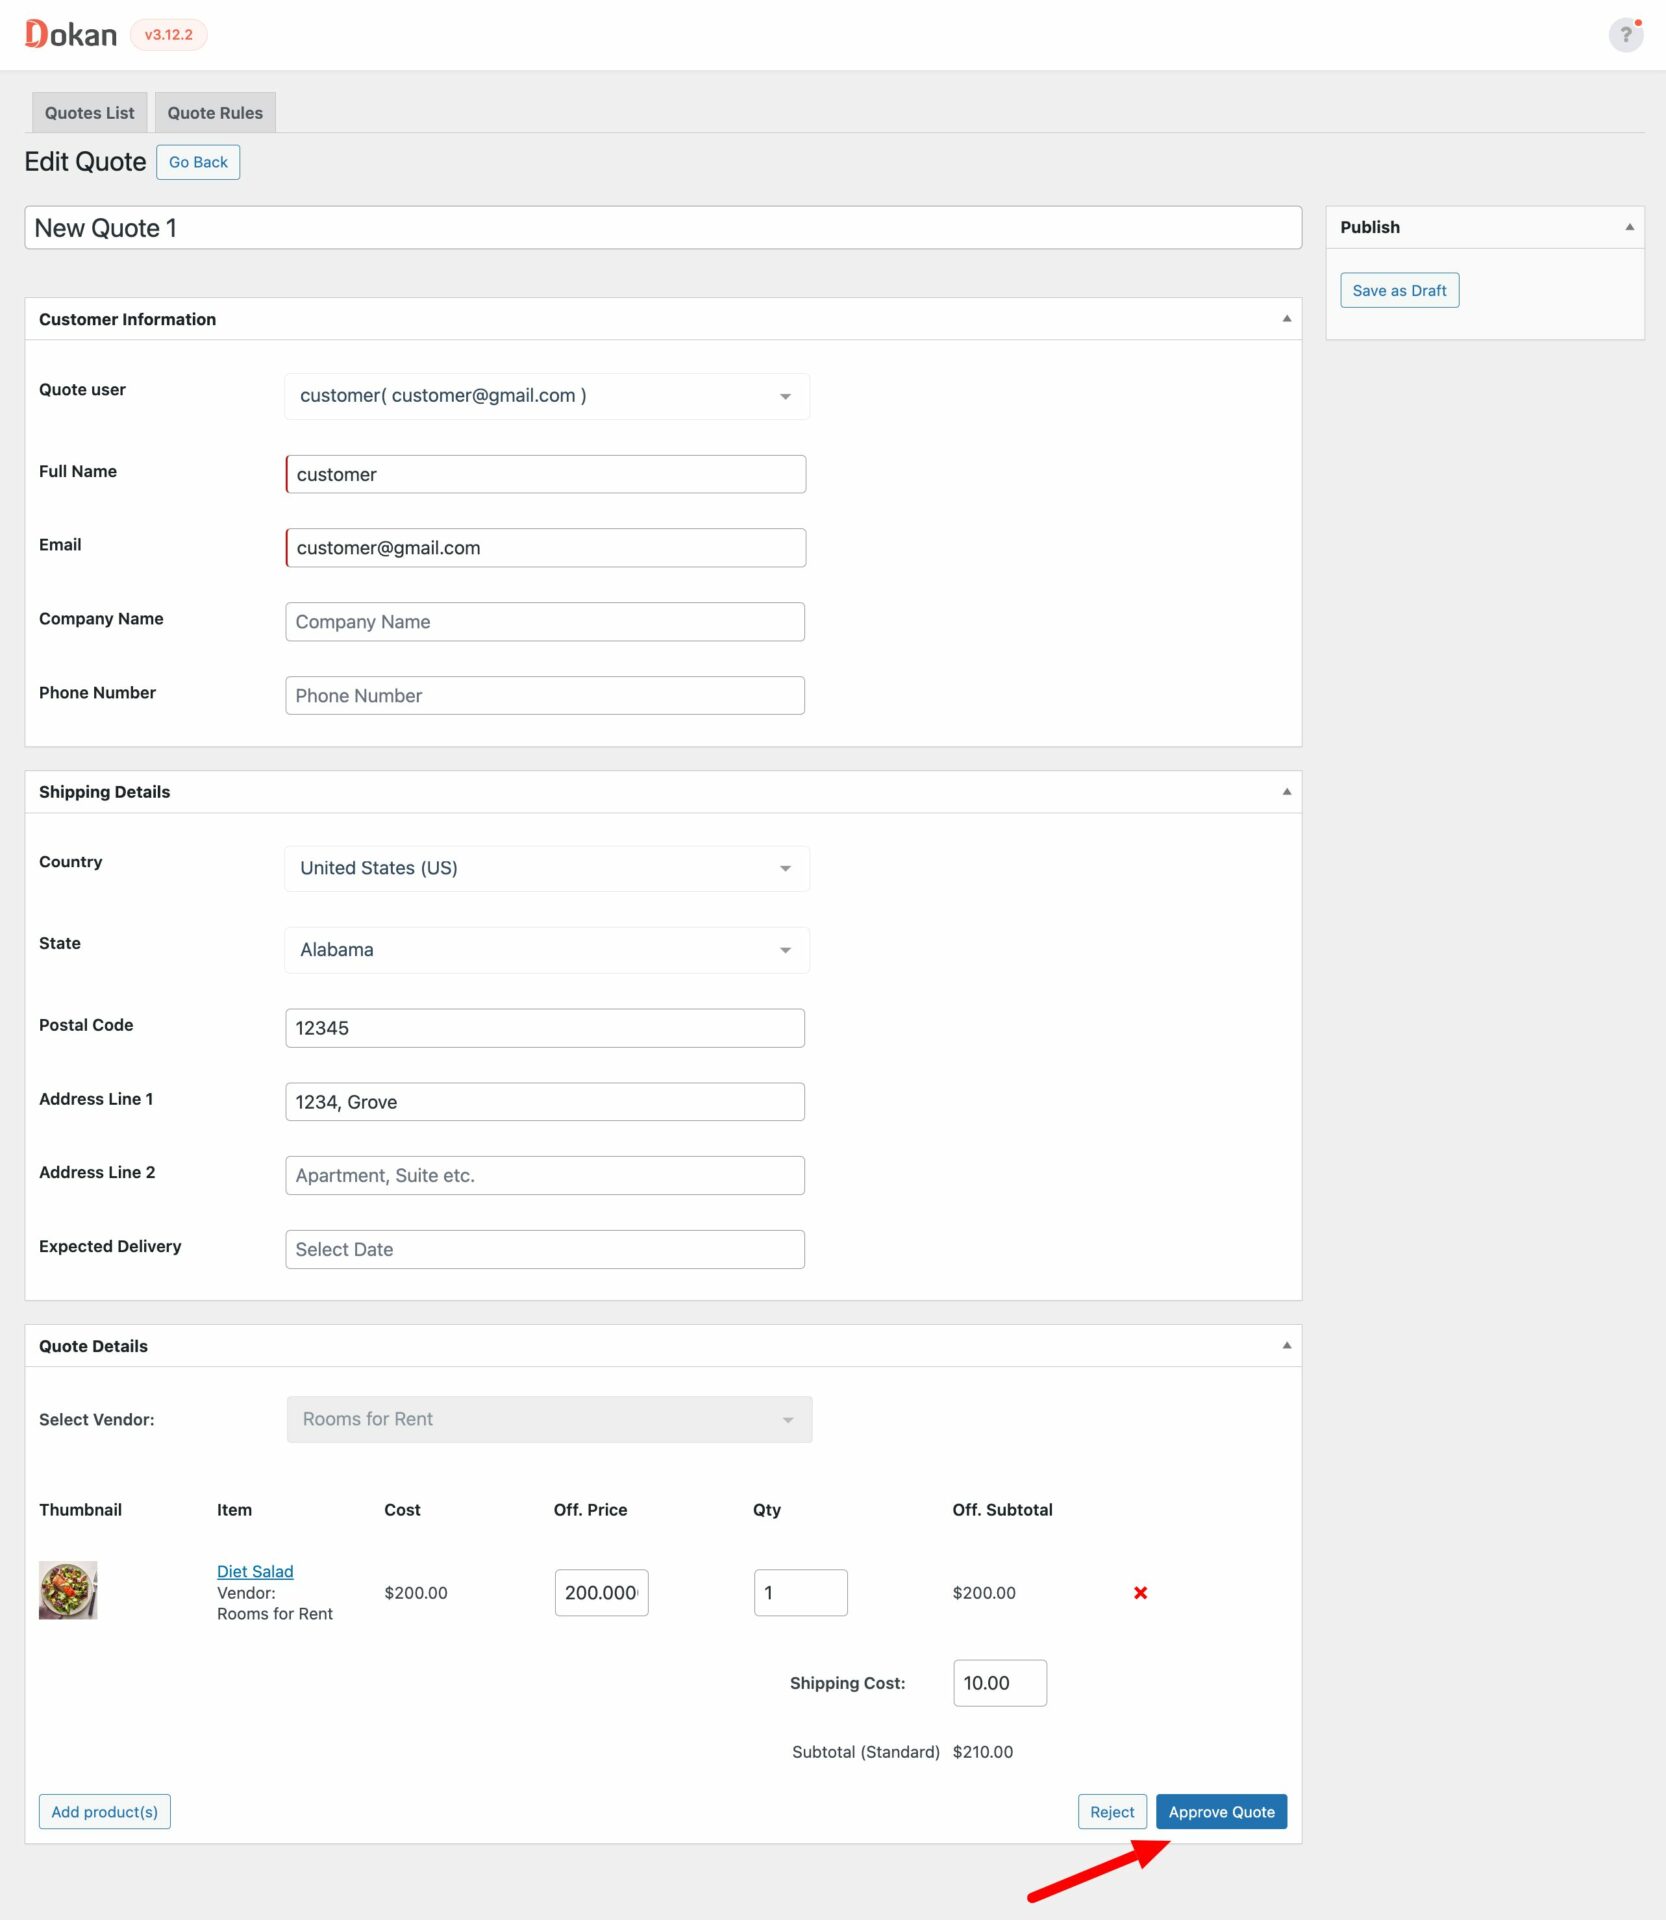
Also, Admin can approve/reject the quote along with filtering quotes by customer, by date-
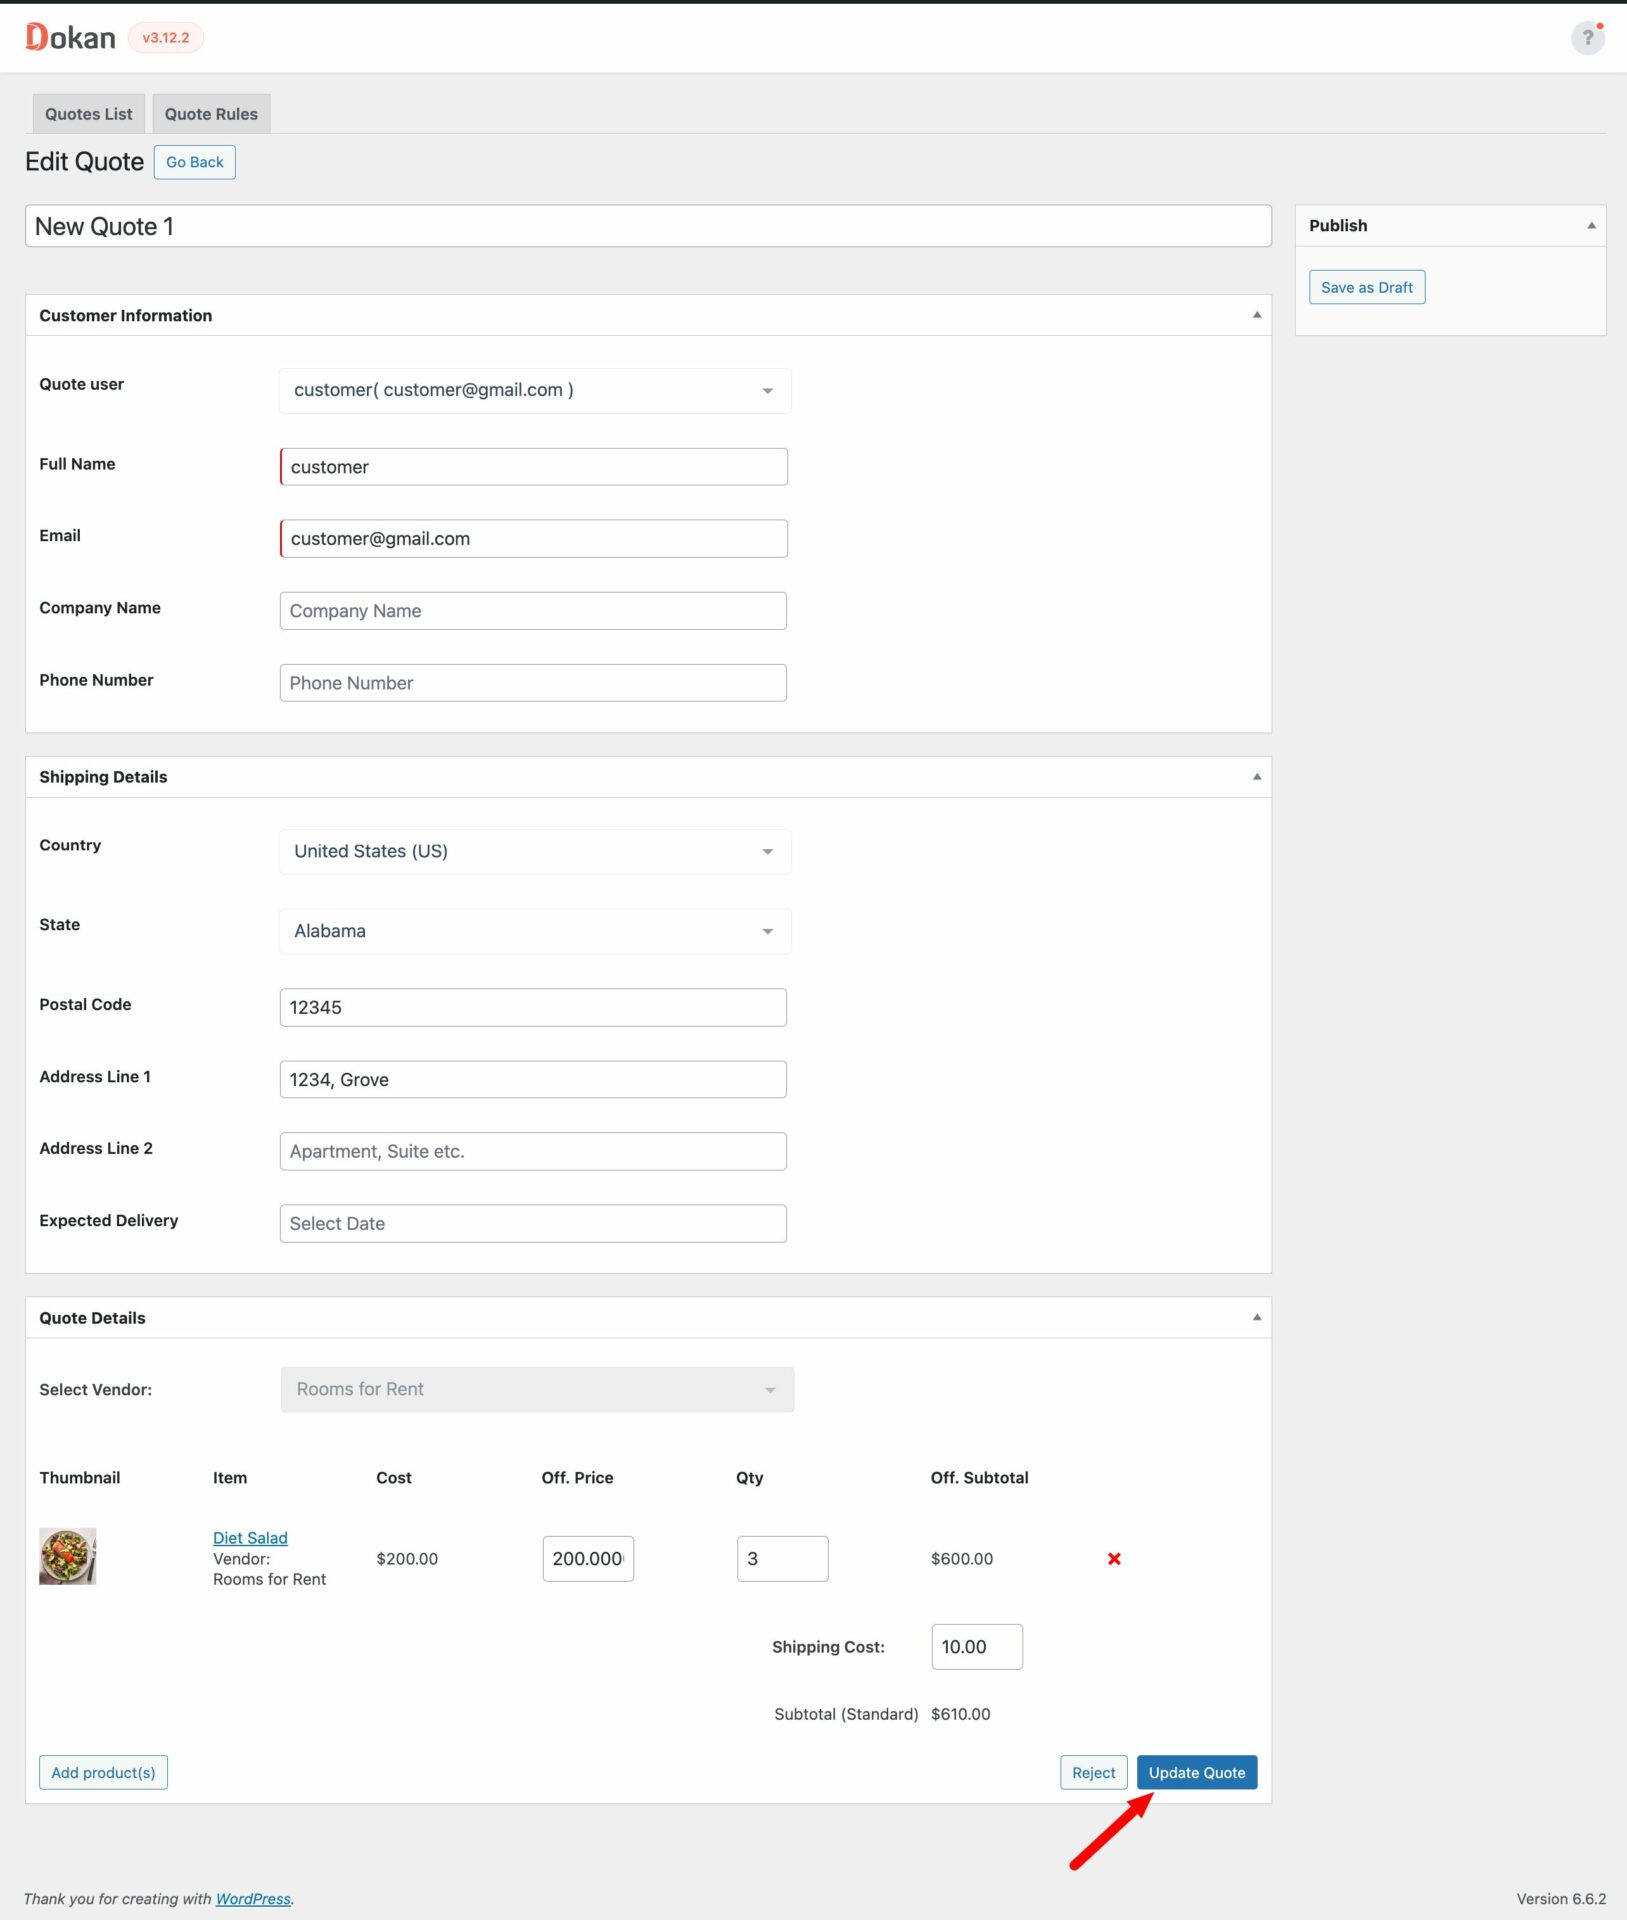
Admin can also update the quote rule as well-
That’s it.
How to Create a New Quotation Rule- Admin
Admins need to create quotation rules for selected users’ roles. You can create multiple quotation rules.
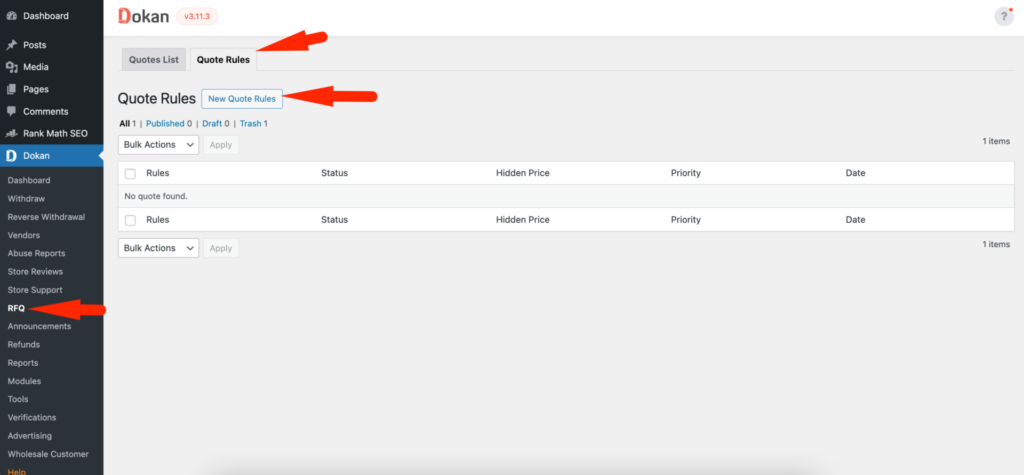
Go to Dokan–> Request for Quotation–> Quote Rules. There click on the New Quote Rules button.
There you will find a form to add the necessary details,
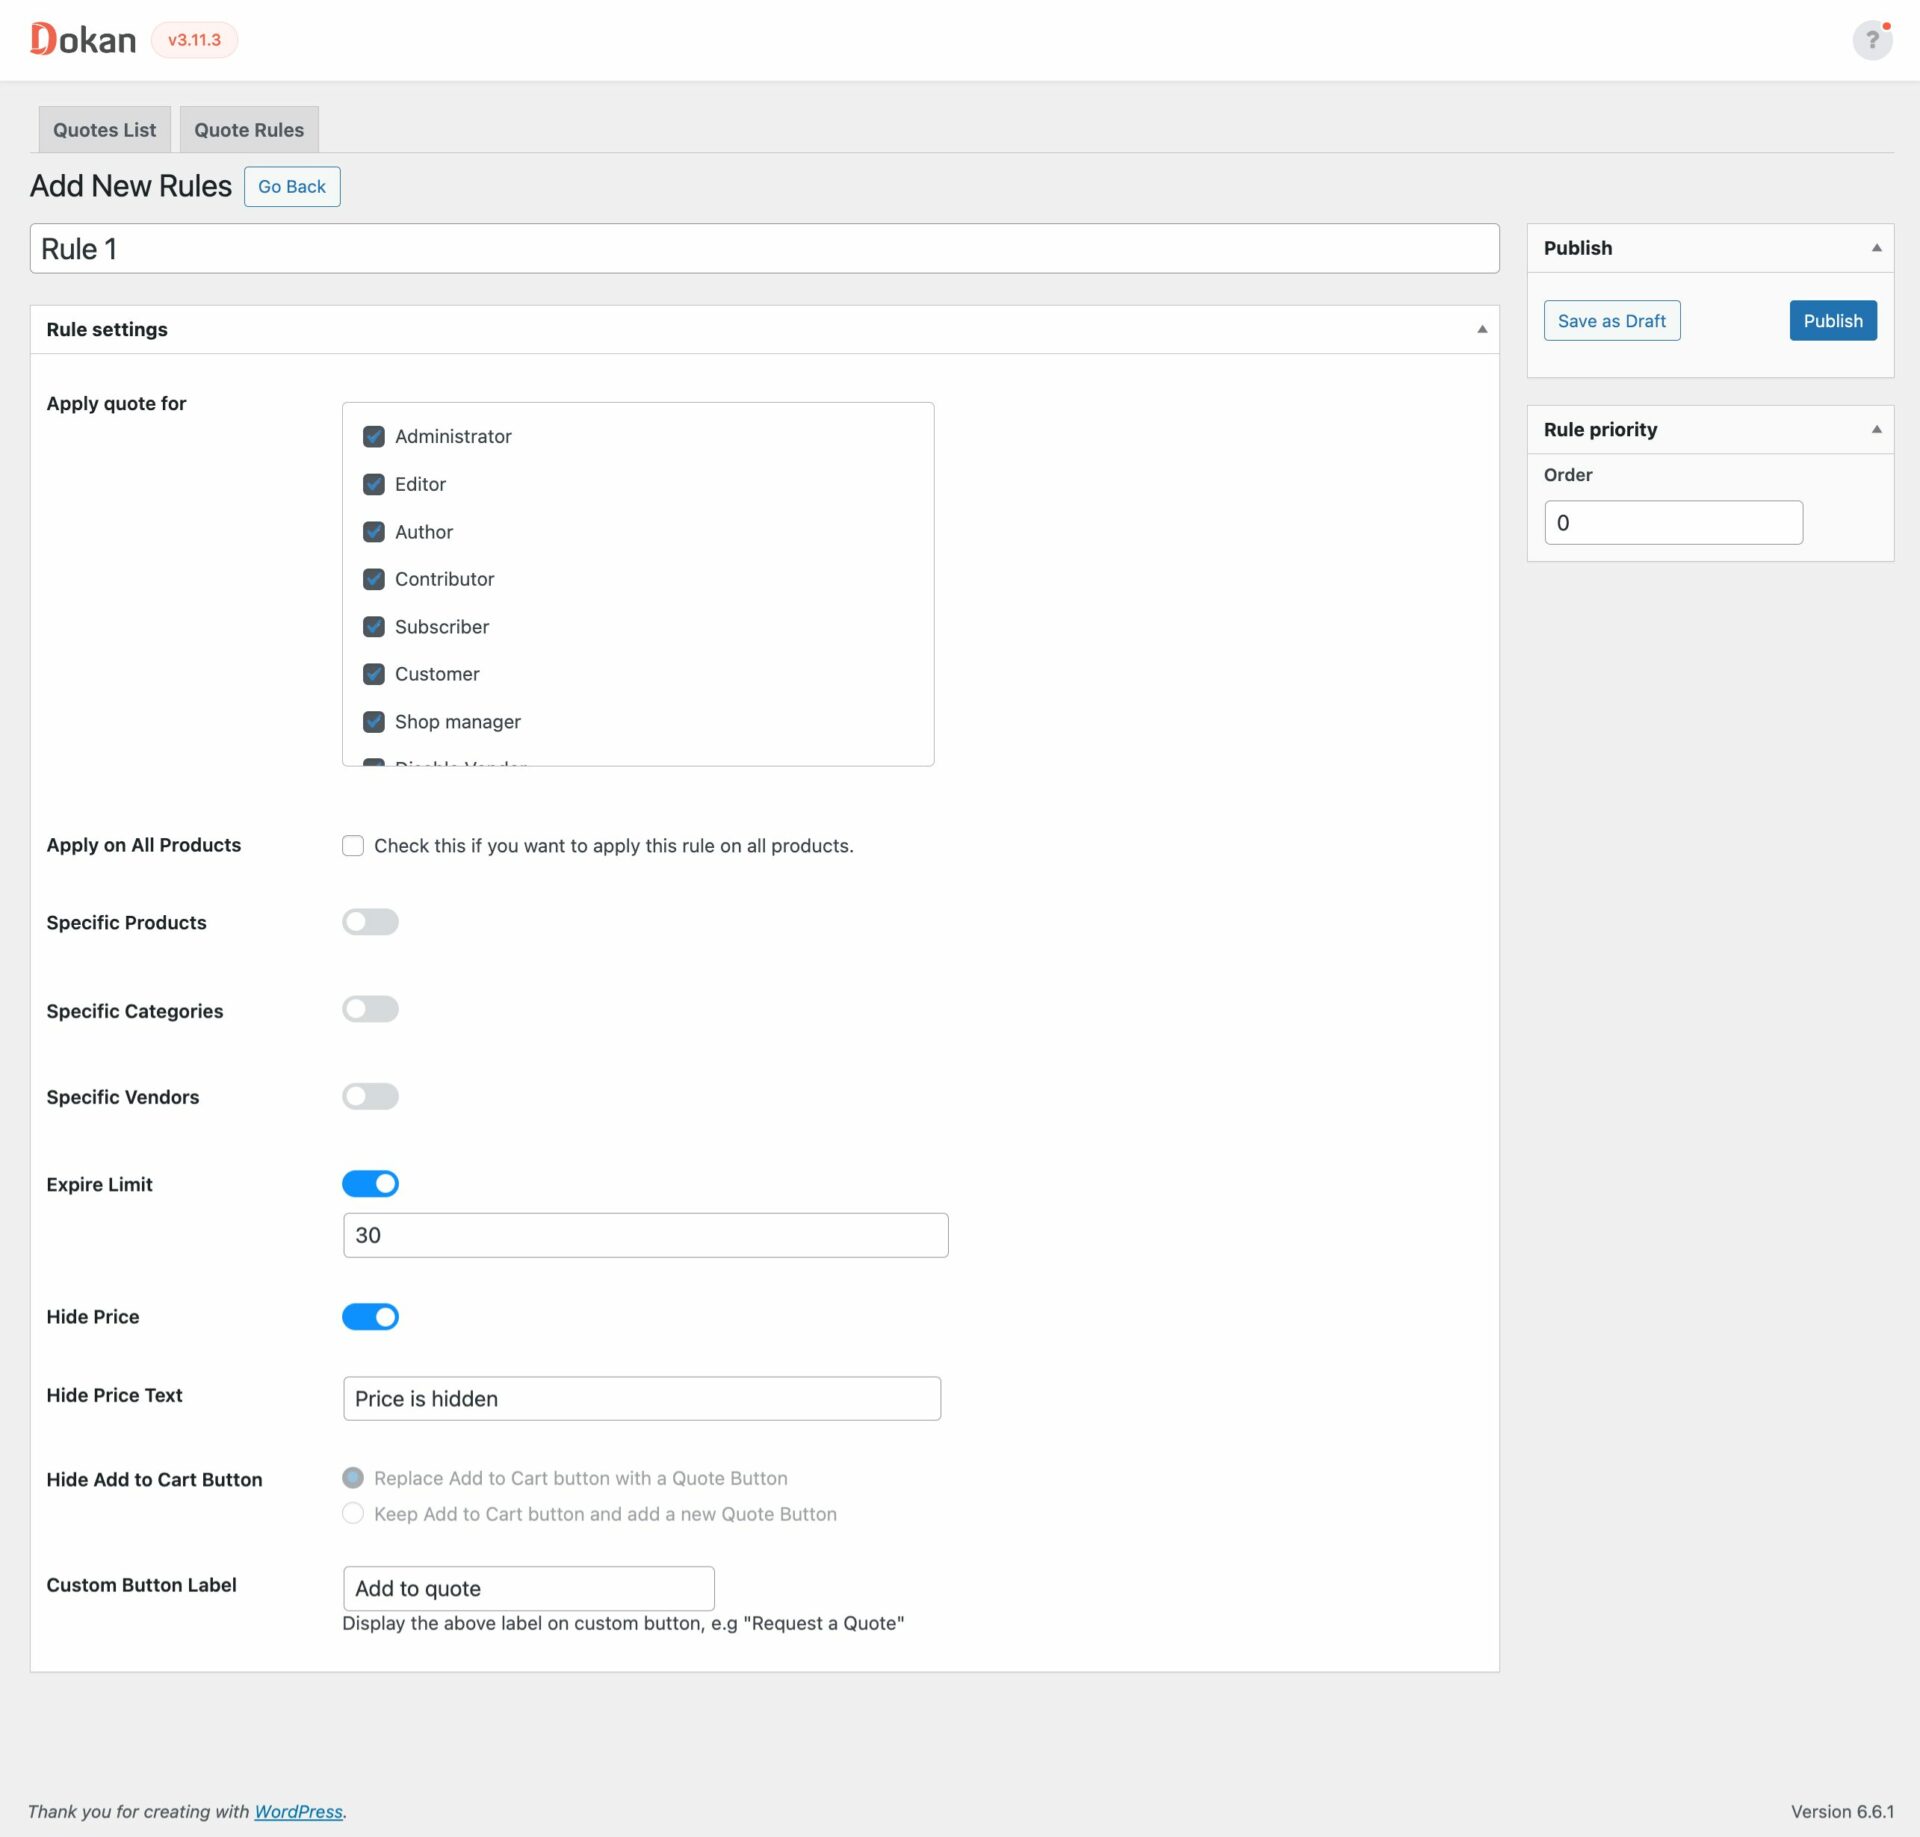
Note: The Expire limit option depends totally on the admin. This will decide how many days the vendor and customer have to convert the quote to order after the quote is approved or accepted. If somehow the vendor and the customer misses the expiry date, then they can reopen the quote by clicking the Reopen button and it will go back to pending status.
Admins need to select the user role to apply quote for,

If you want to you can add quotations for all the products,
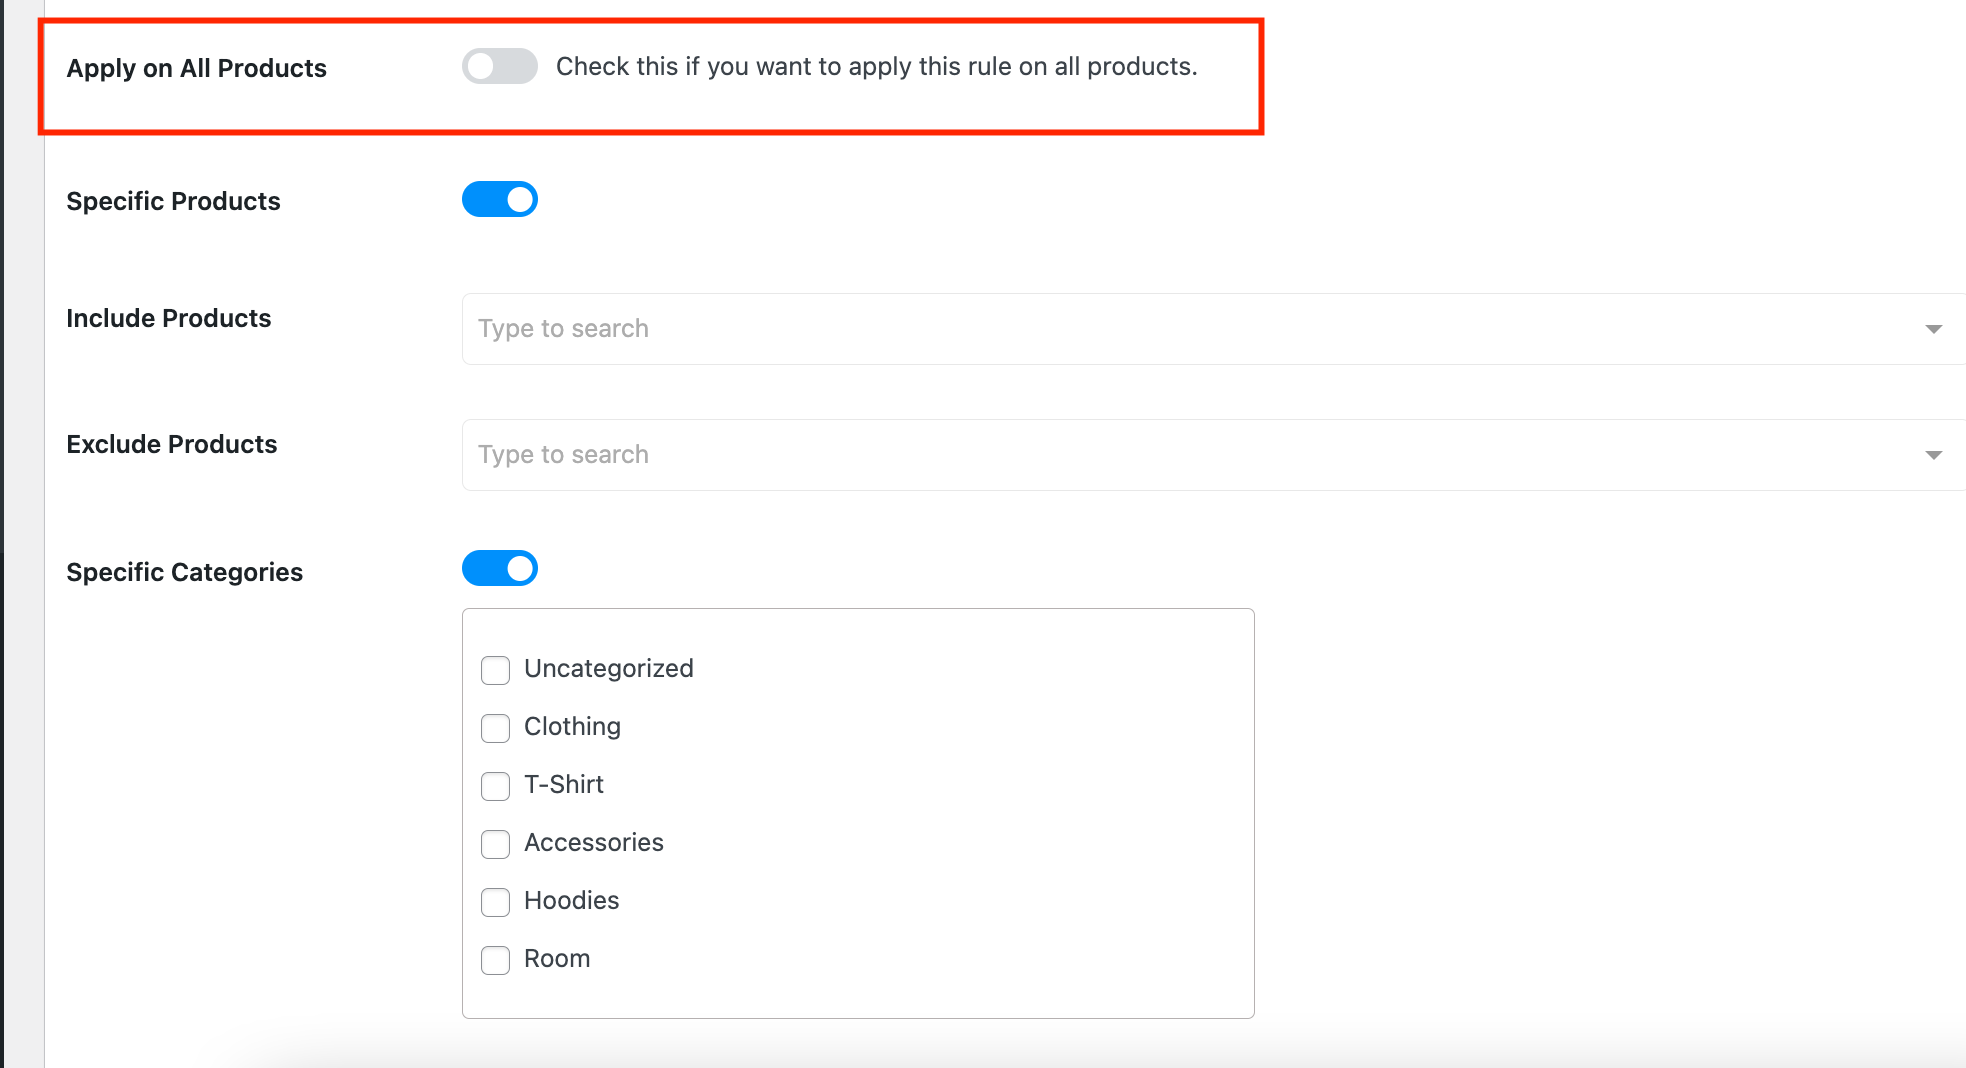
Or, you can include and exclude products and categories,

hide price texts, hide the cart button, and select the button label.

Or you can include and exclude specific vendors-

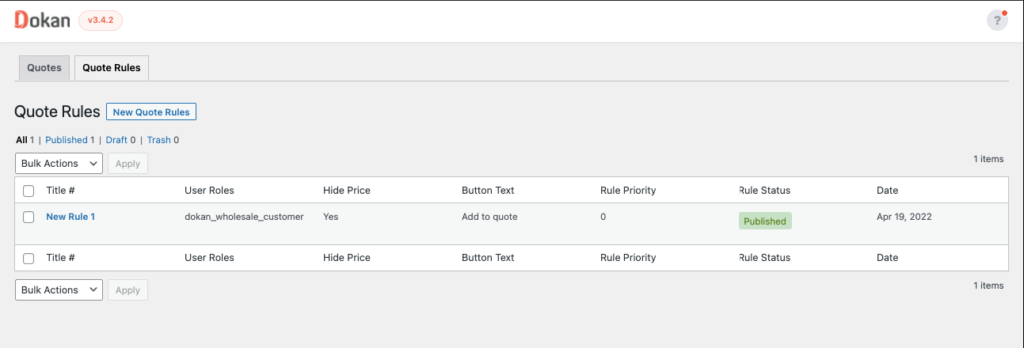
Hit the Save button to finish. You can see the rules on the Quote Rules page.
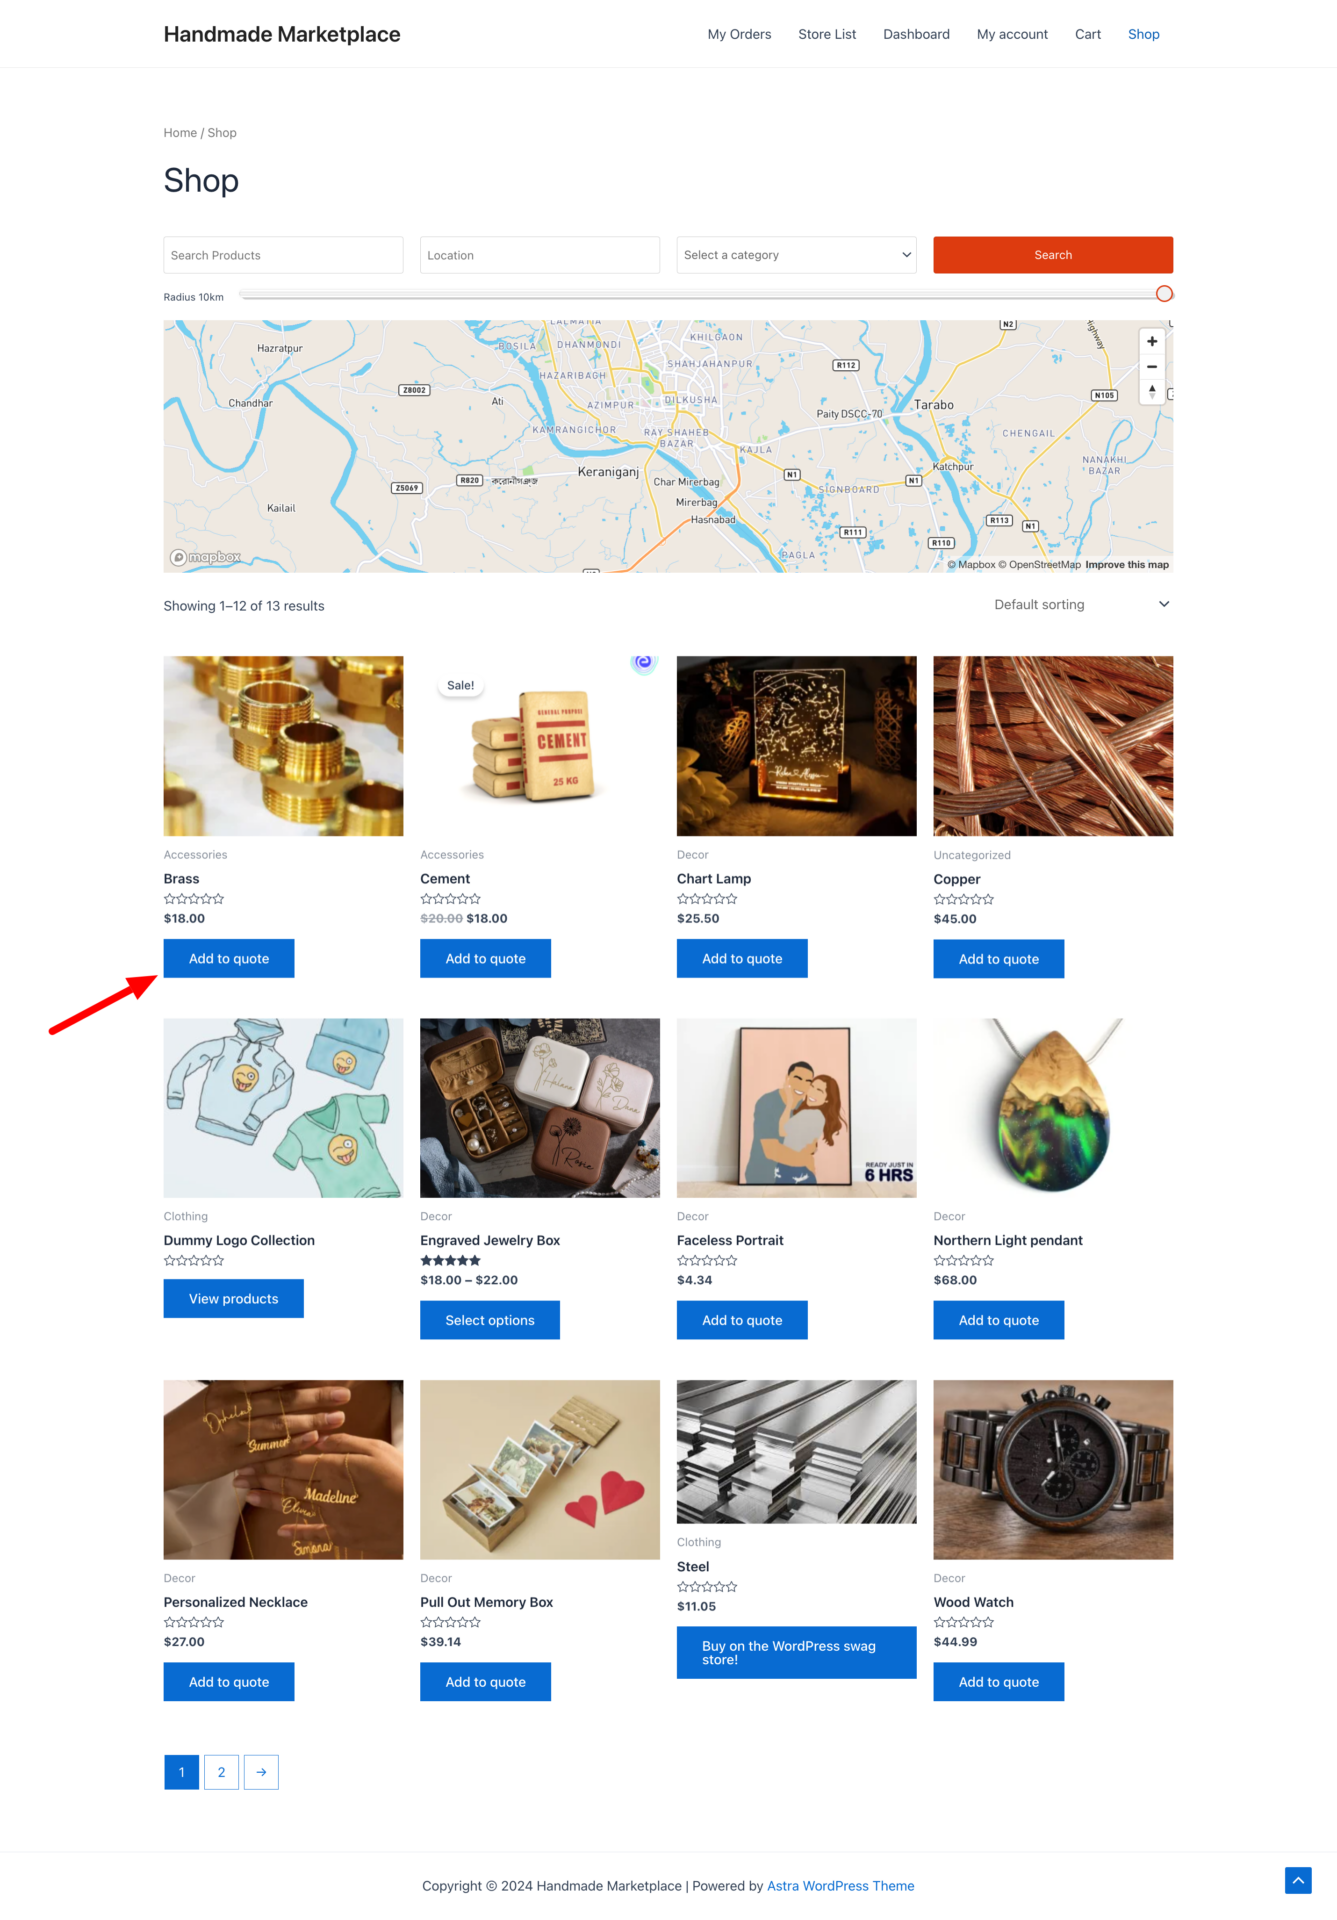
You can see in the Shop Page that selected products prices are now hidden,
How to Apply for a Quotation by Customers?
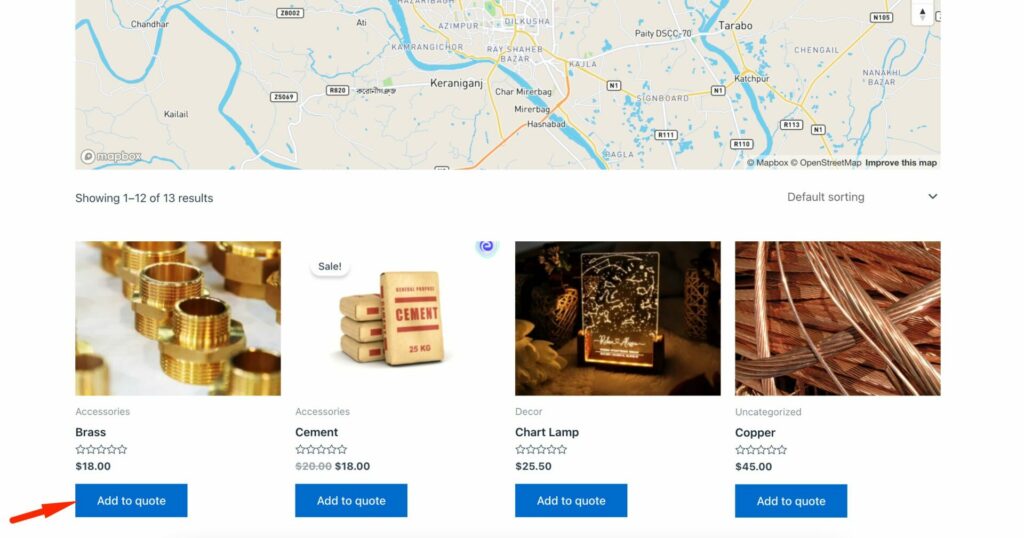
If the customer wants to apply for a quotation, first he/she needs to choose a product and click on the Add button.
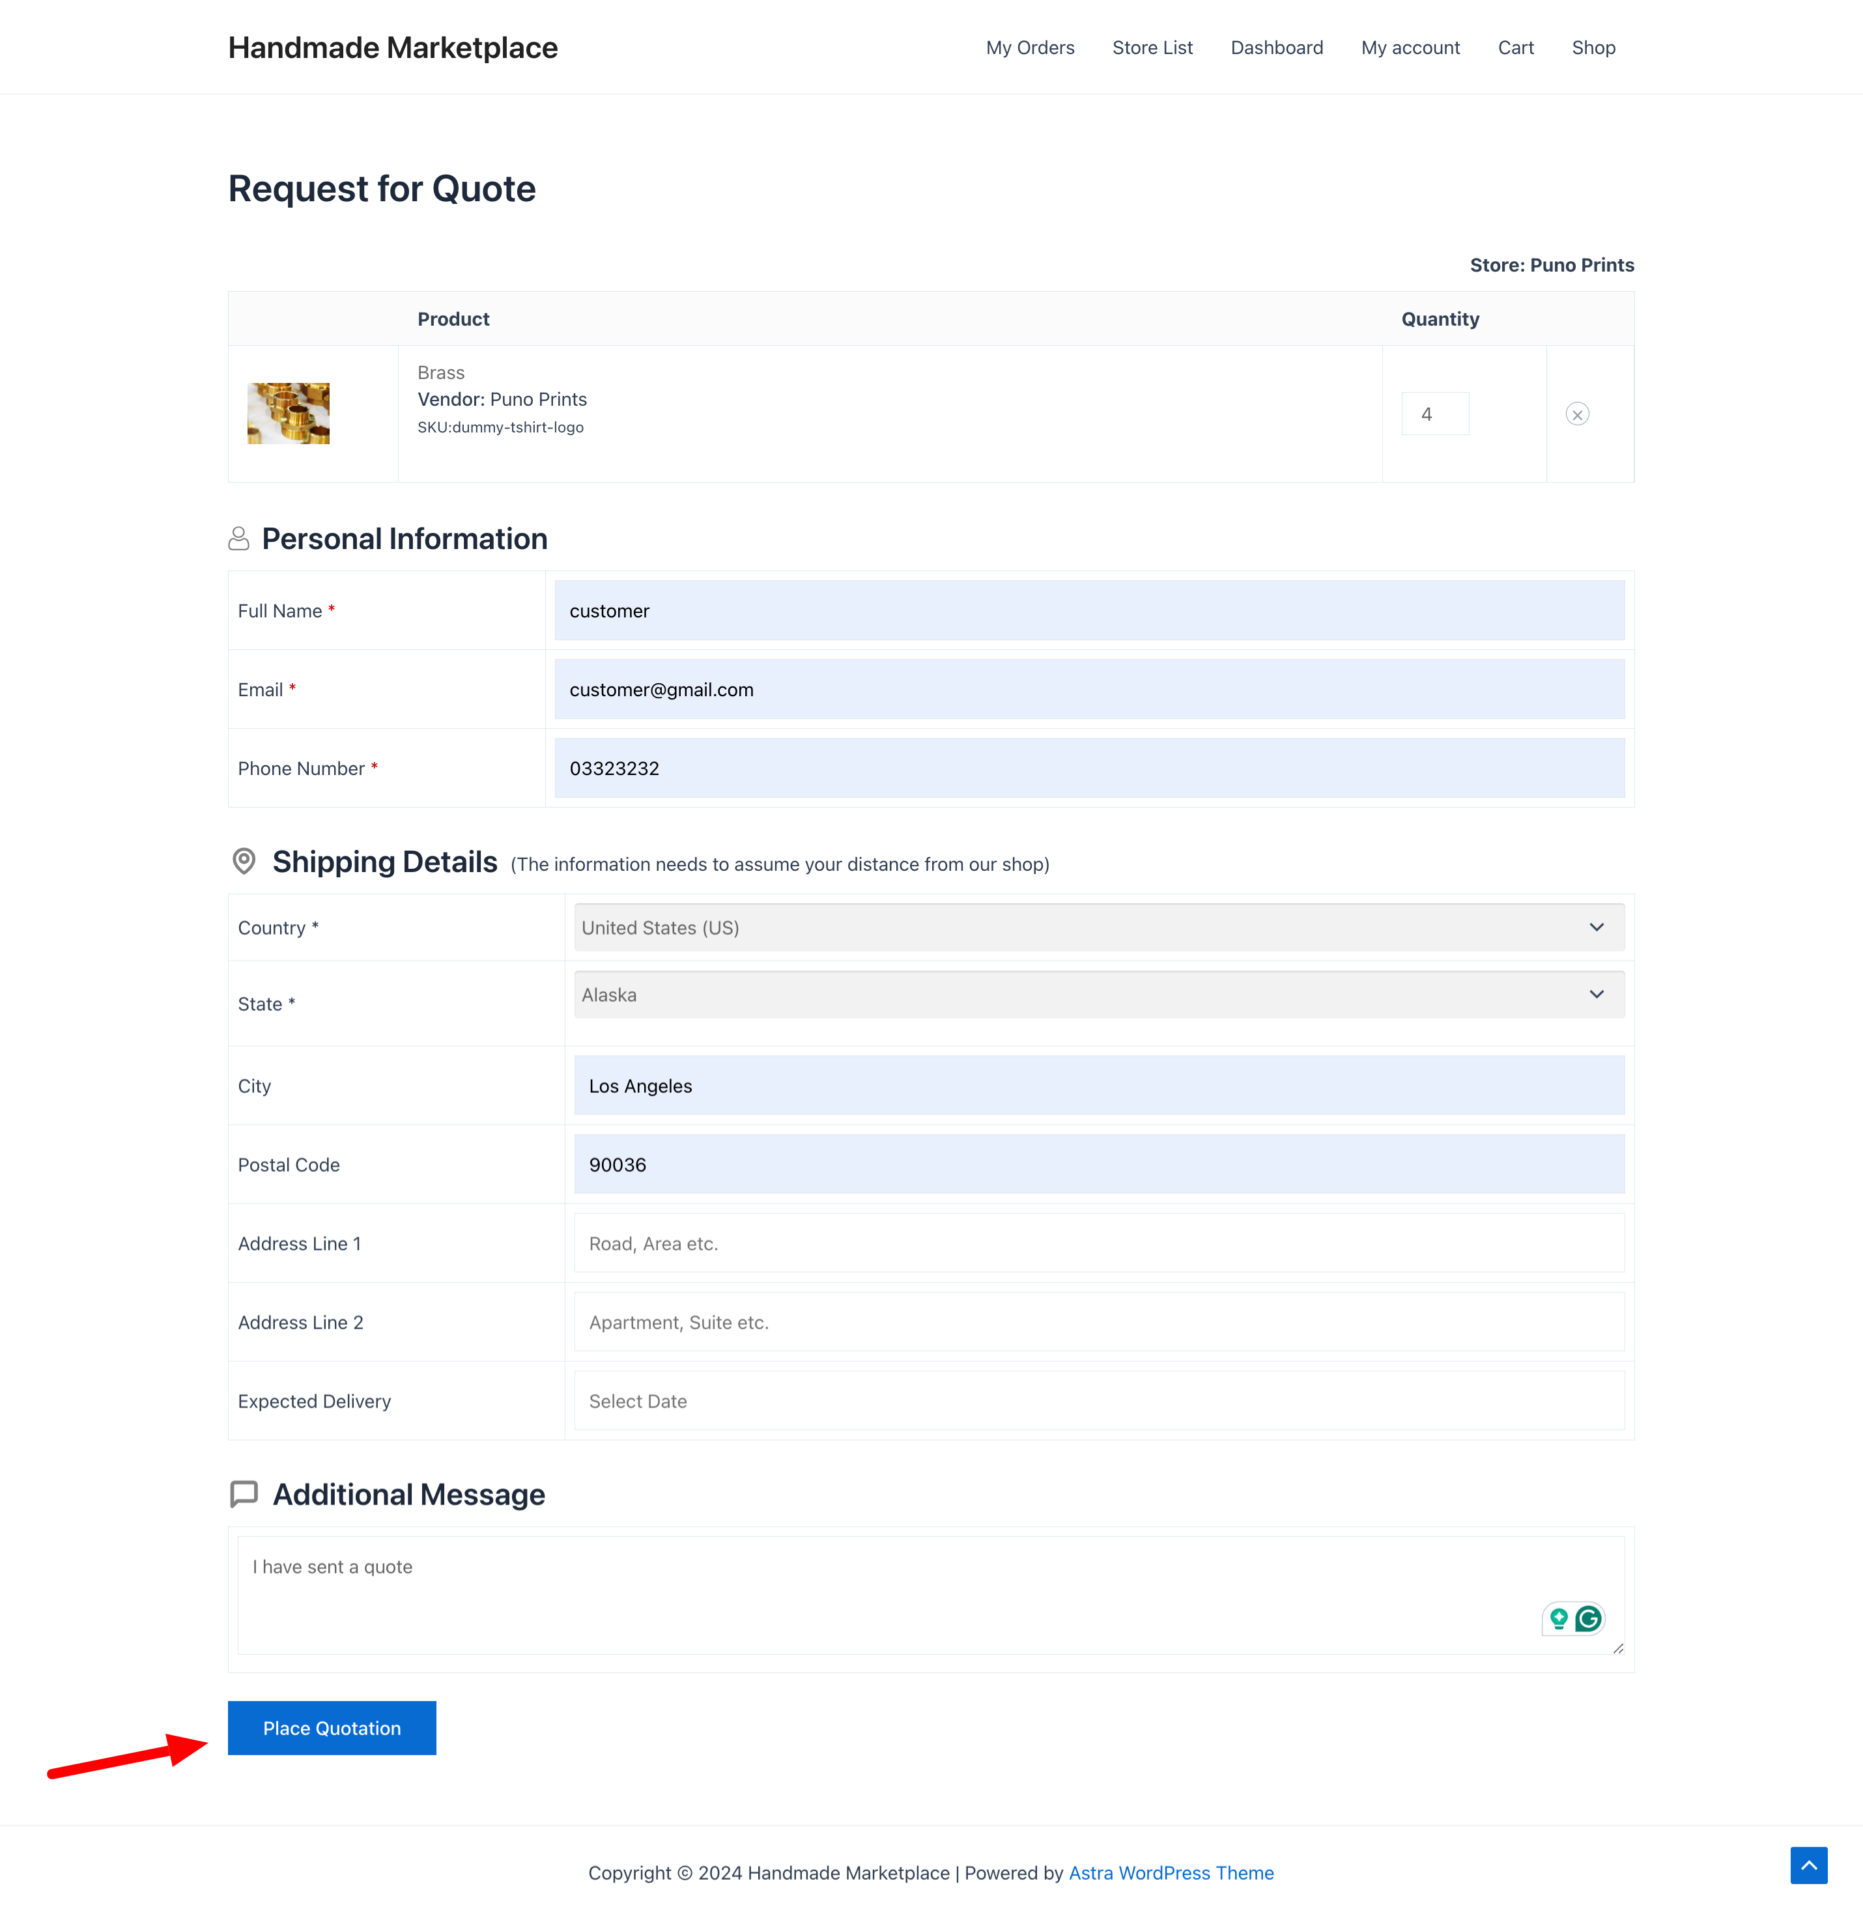
Customer can offer a quote without price (If the admin enables the Hide Price option from the dashboard)
Or, place the quote with price (If the admin disables the Hide Price option from the dashboard)
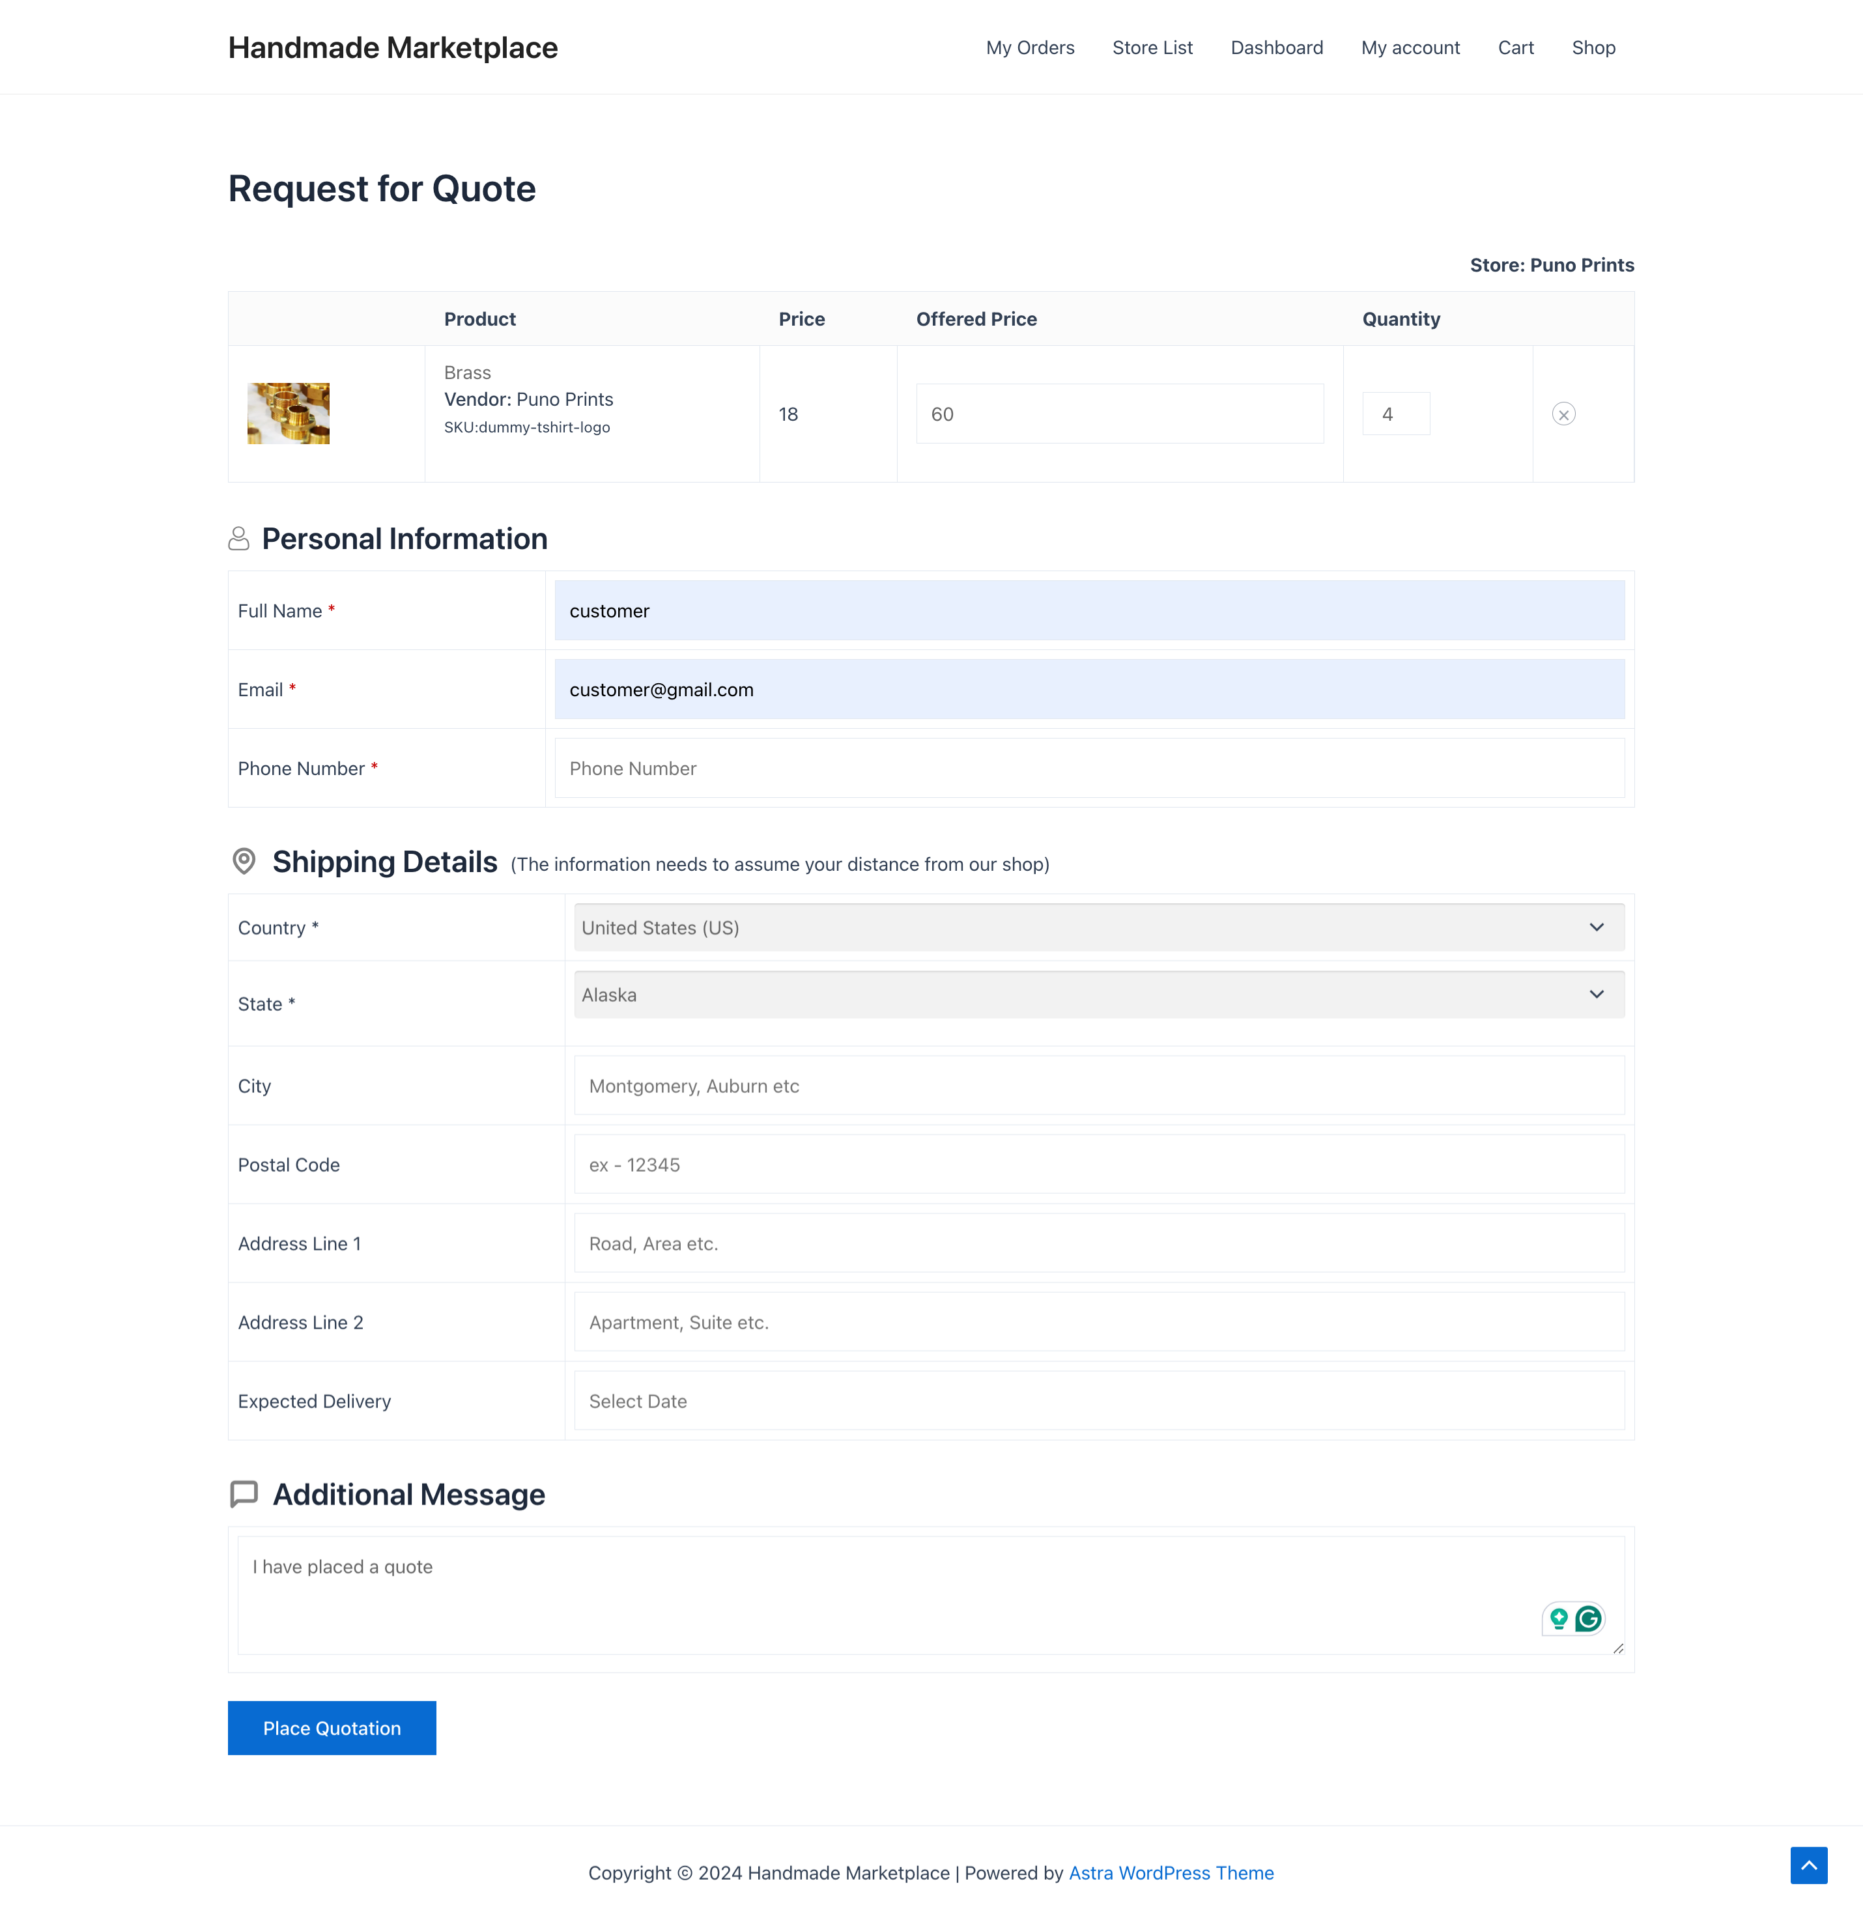
Then click on the Place Quote button.
Then, the customer can see their quote details in My Account–> Request Quotes, click on the View button to see the details.
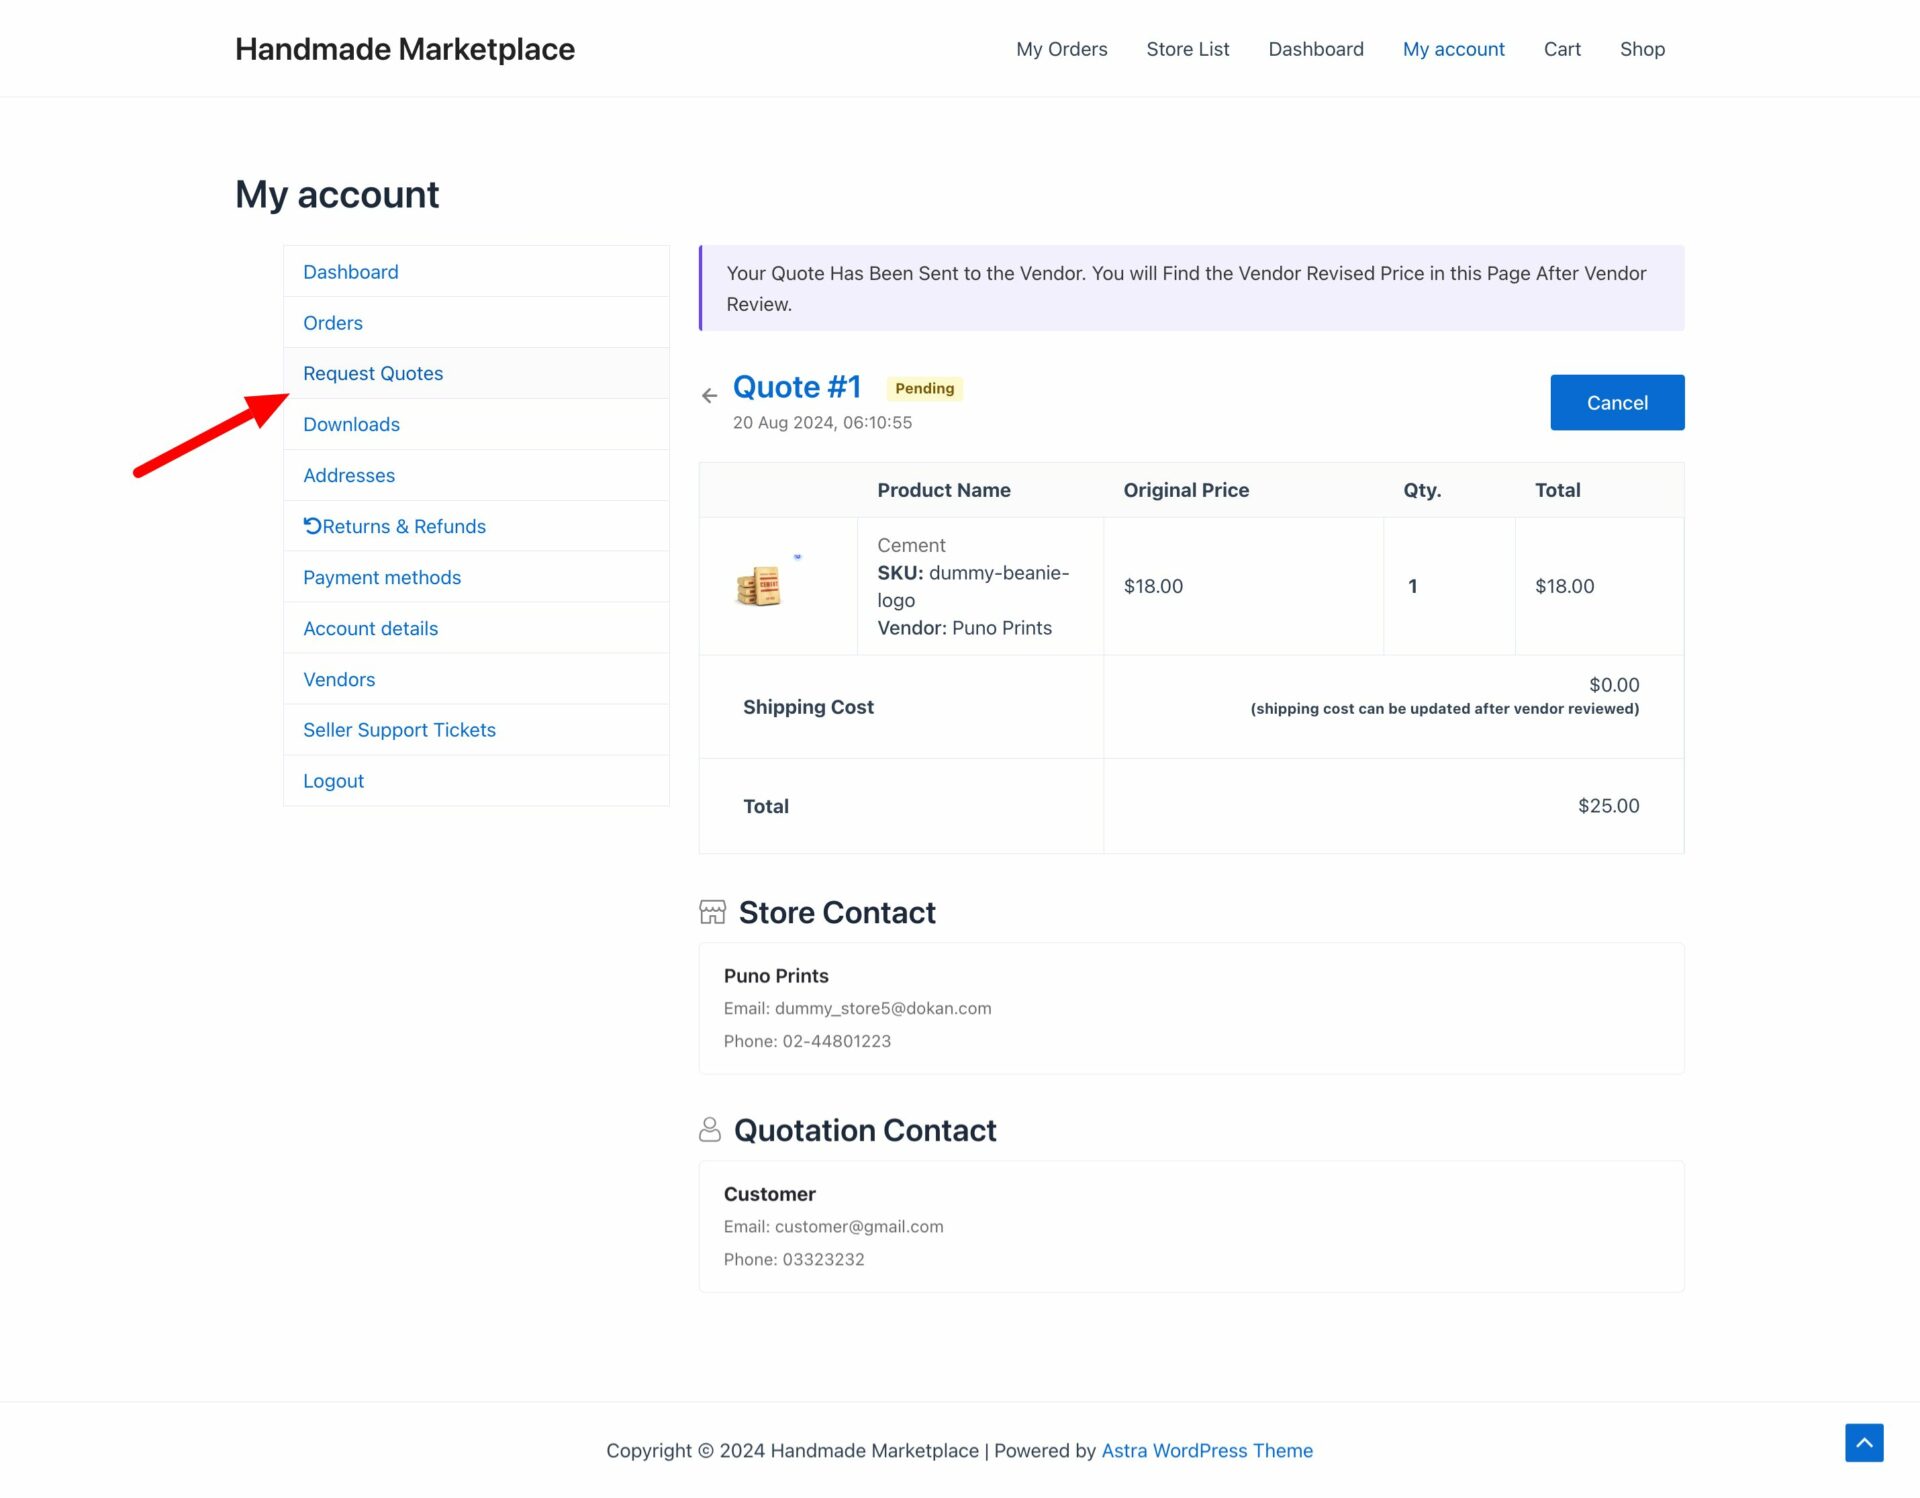
If the vendor updates the quote, then the customer will see the updated quote-
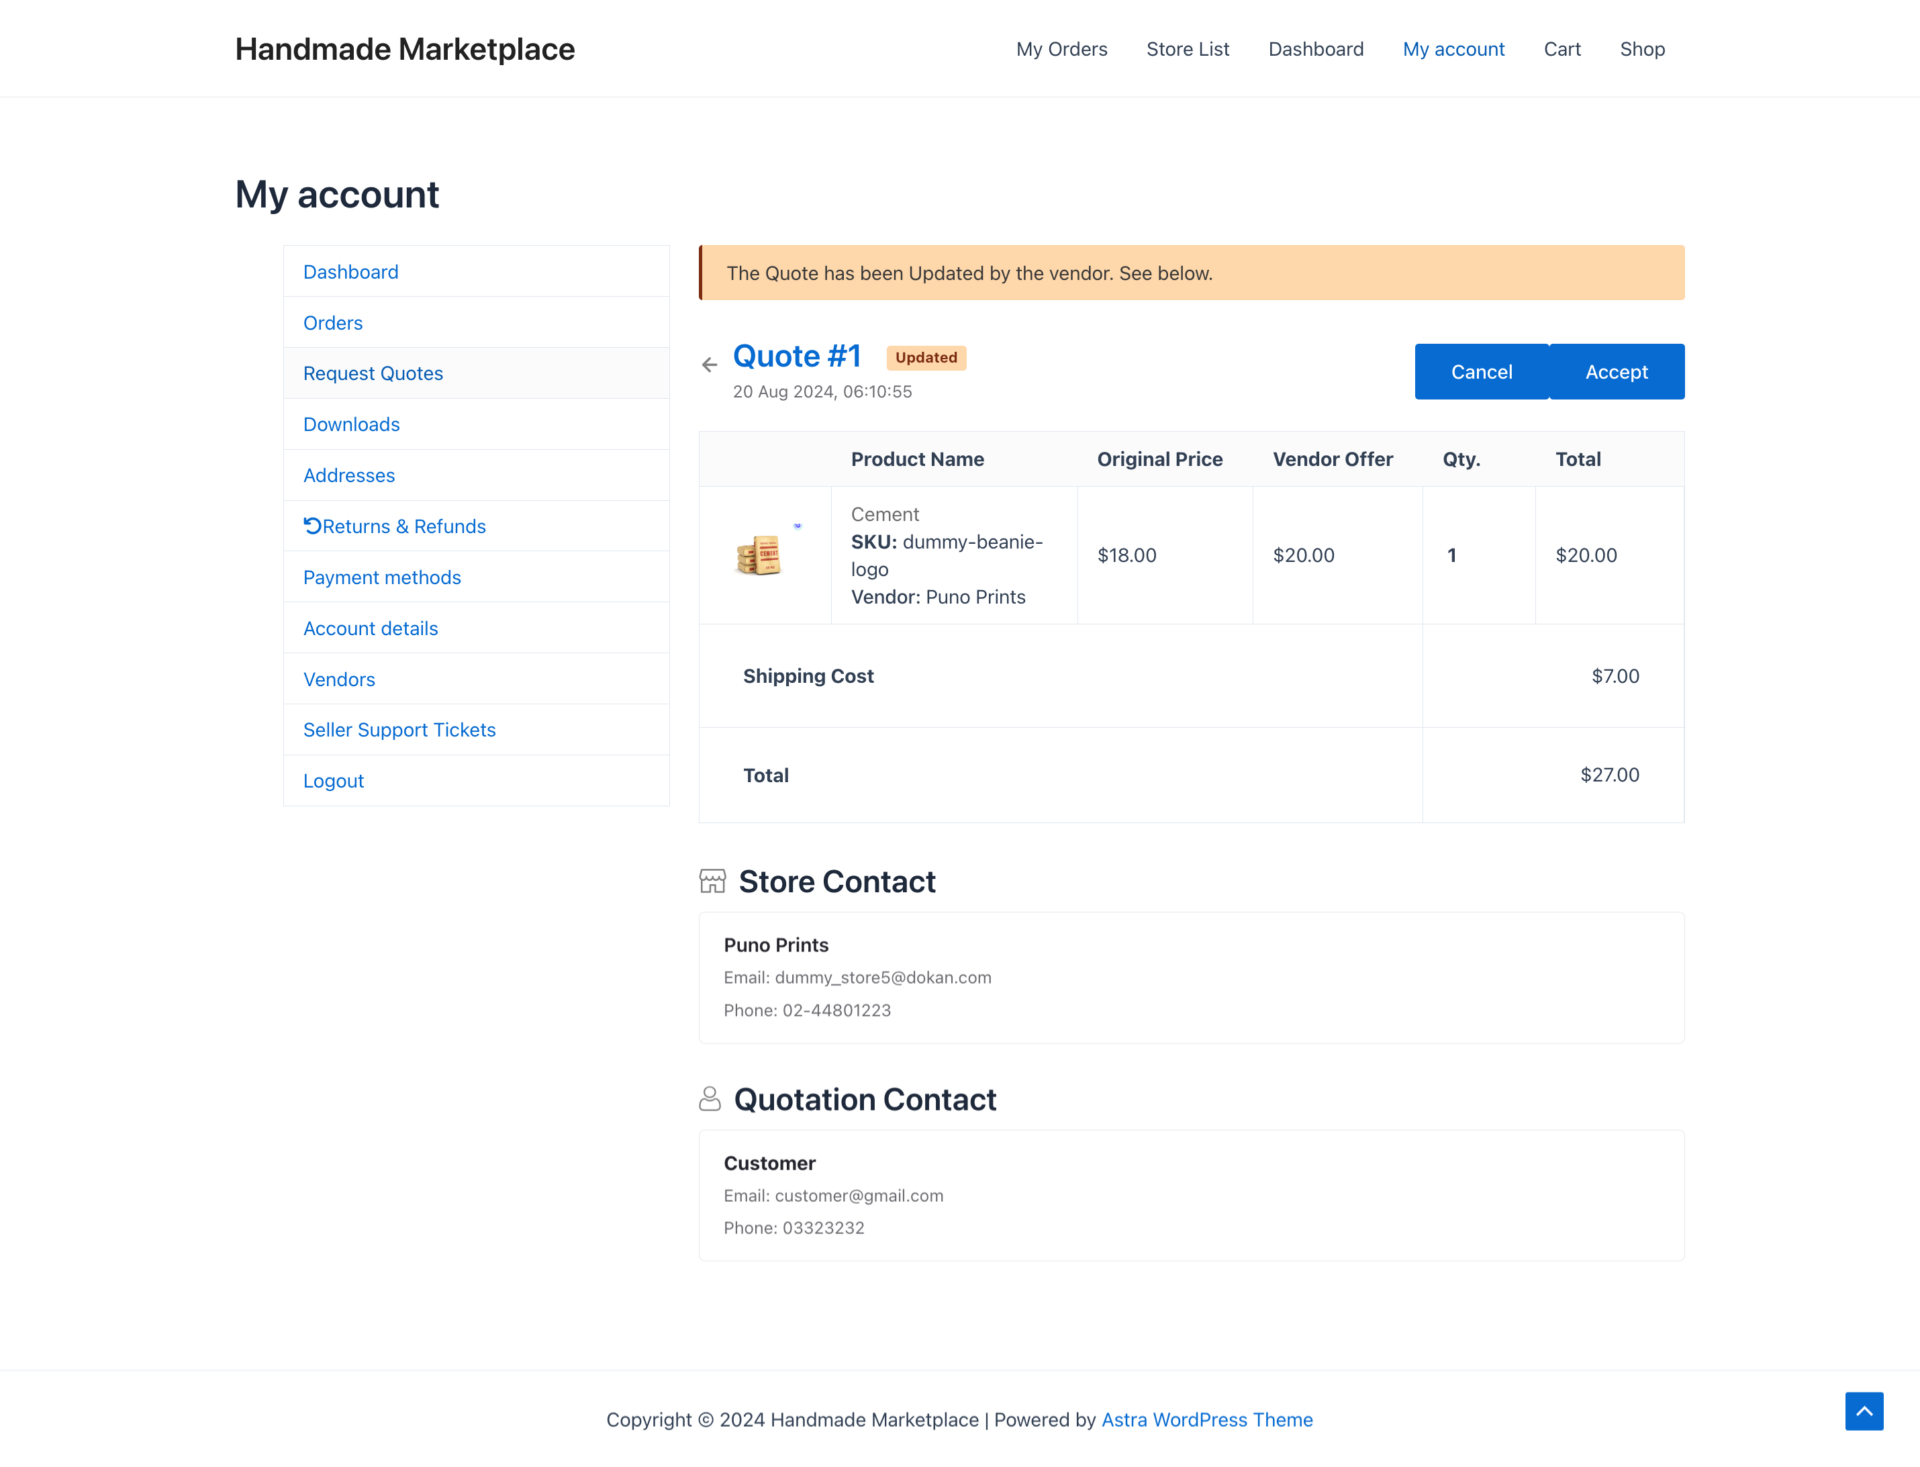
When the customer accepts the order, they can convert the quote to an order if the admin enables the Convert to Order from the admin settings–
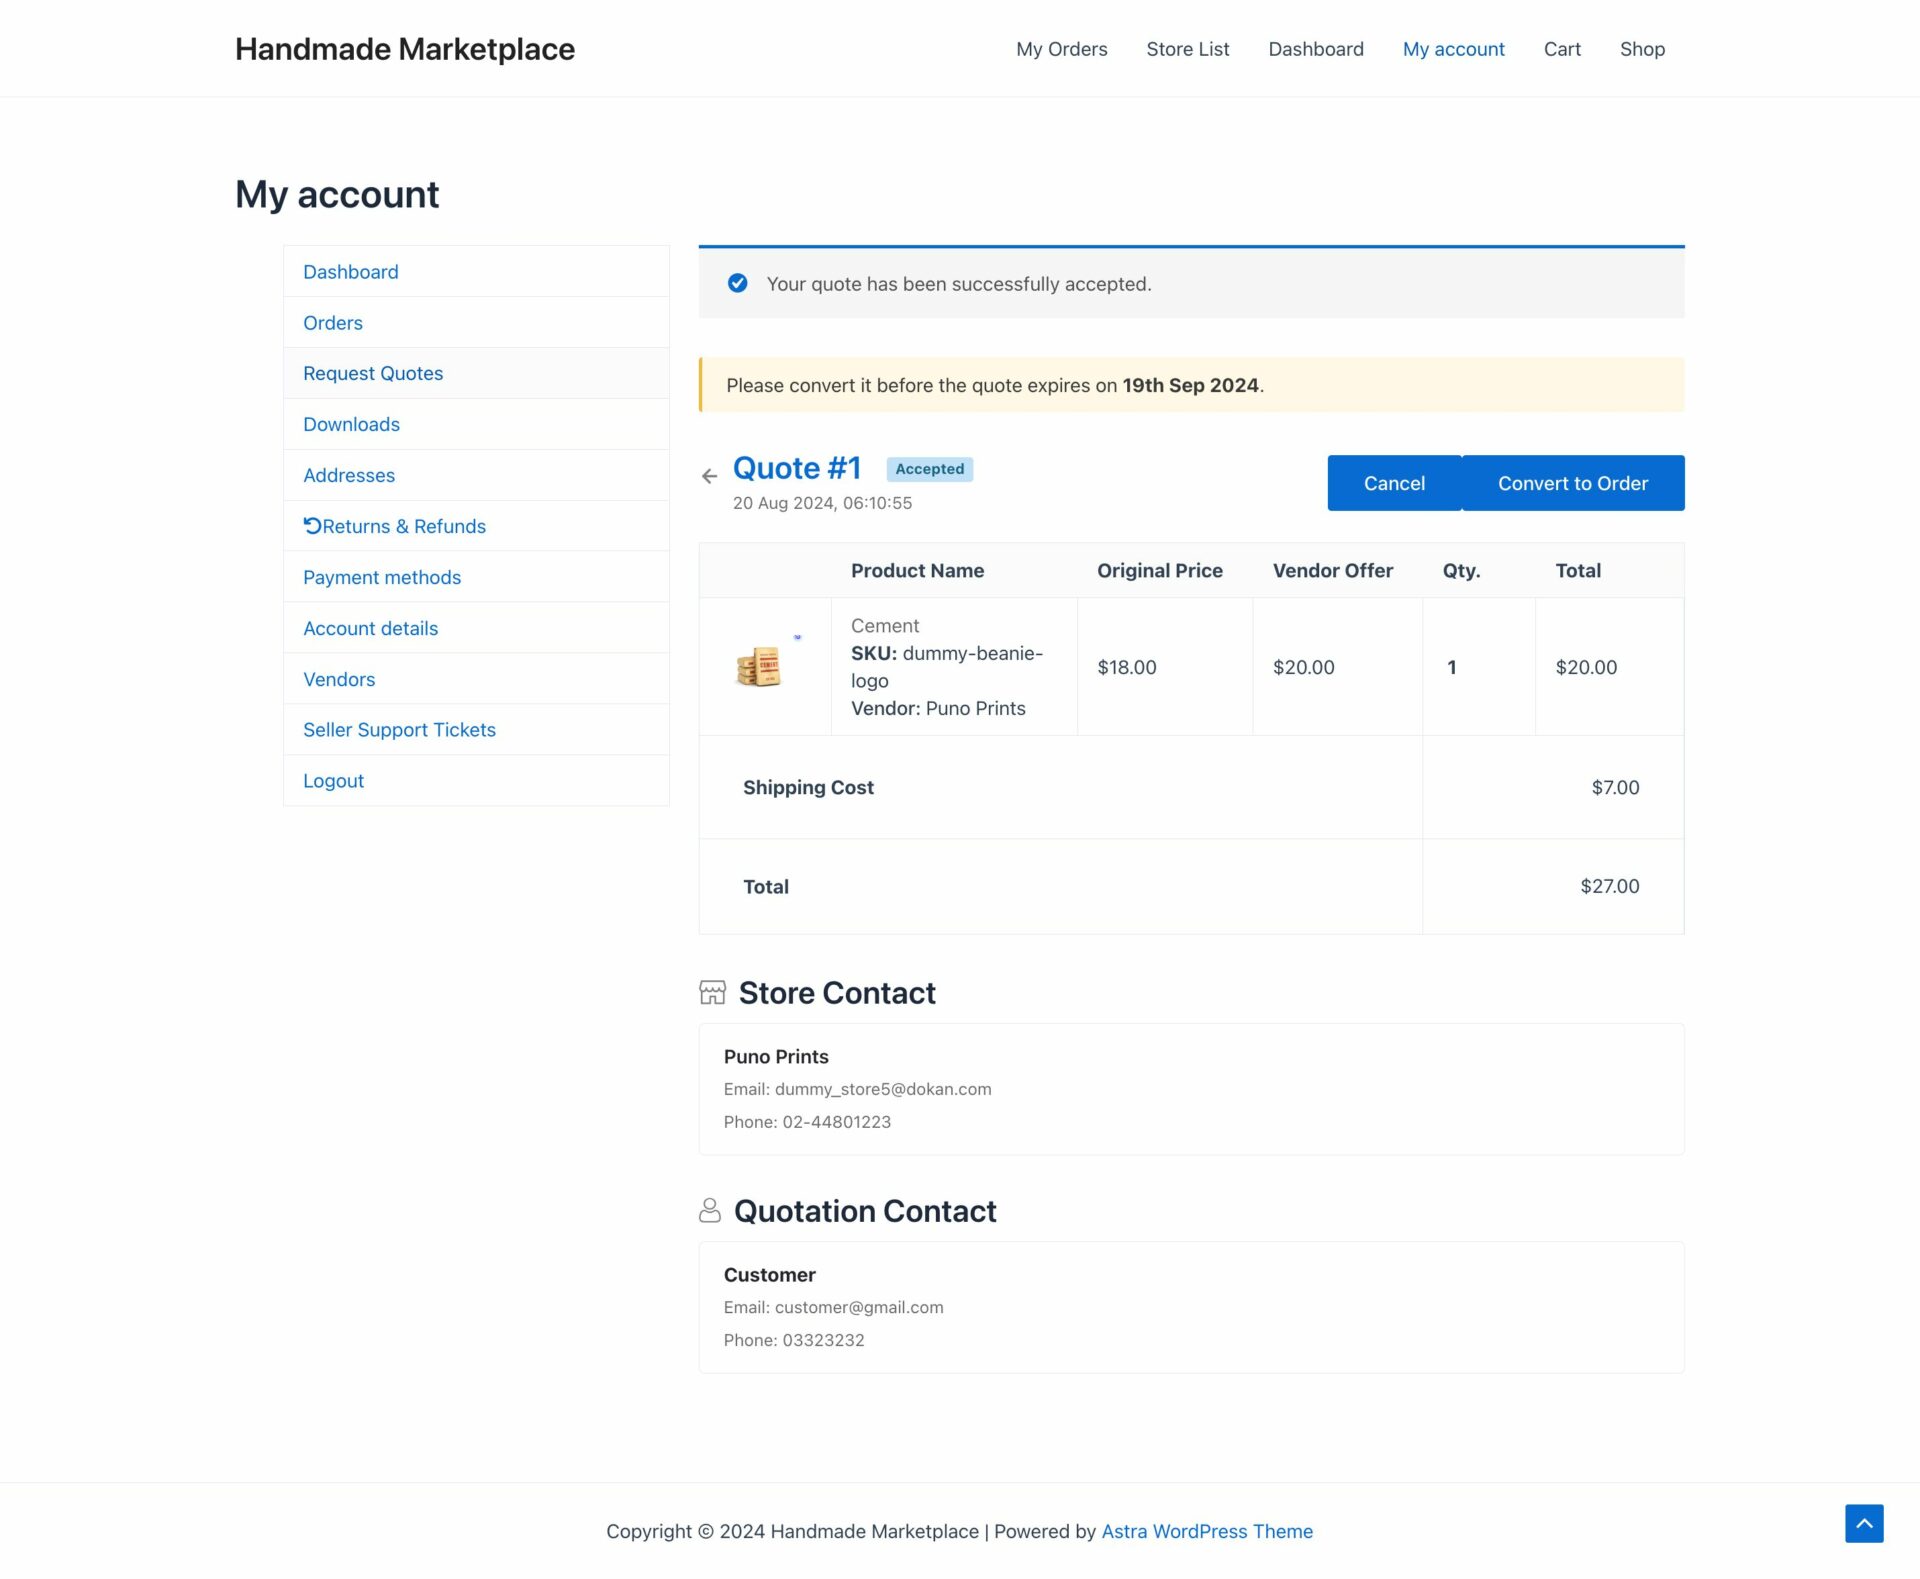
But, if the option is not enabled, then the customer won’t get the Convert to Order option-
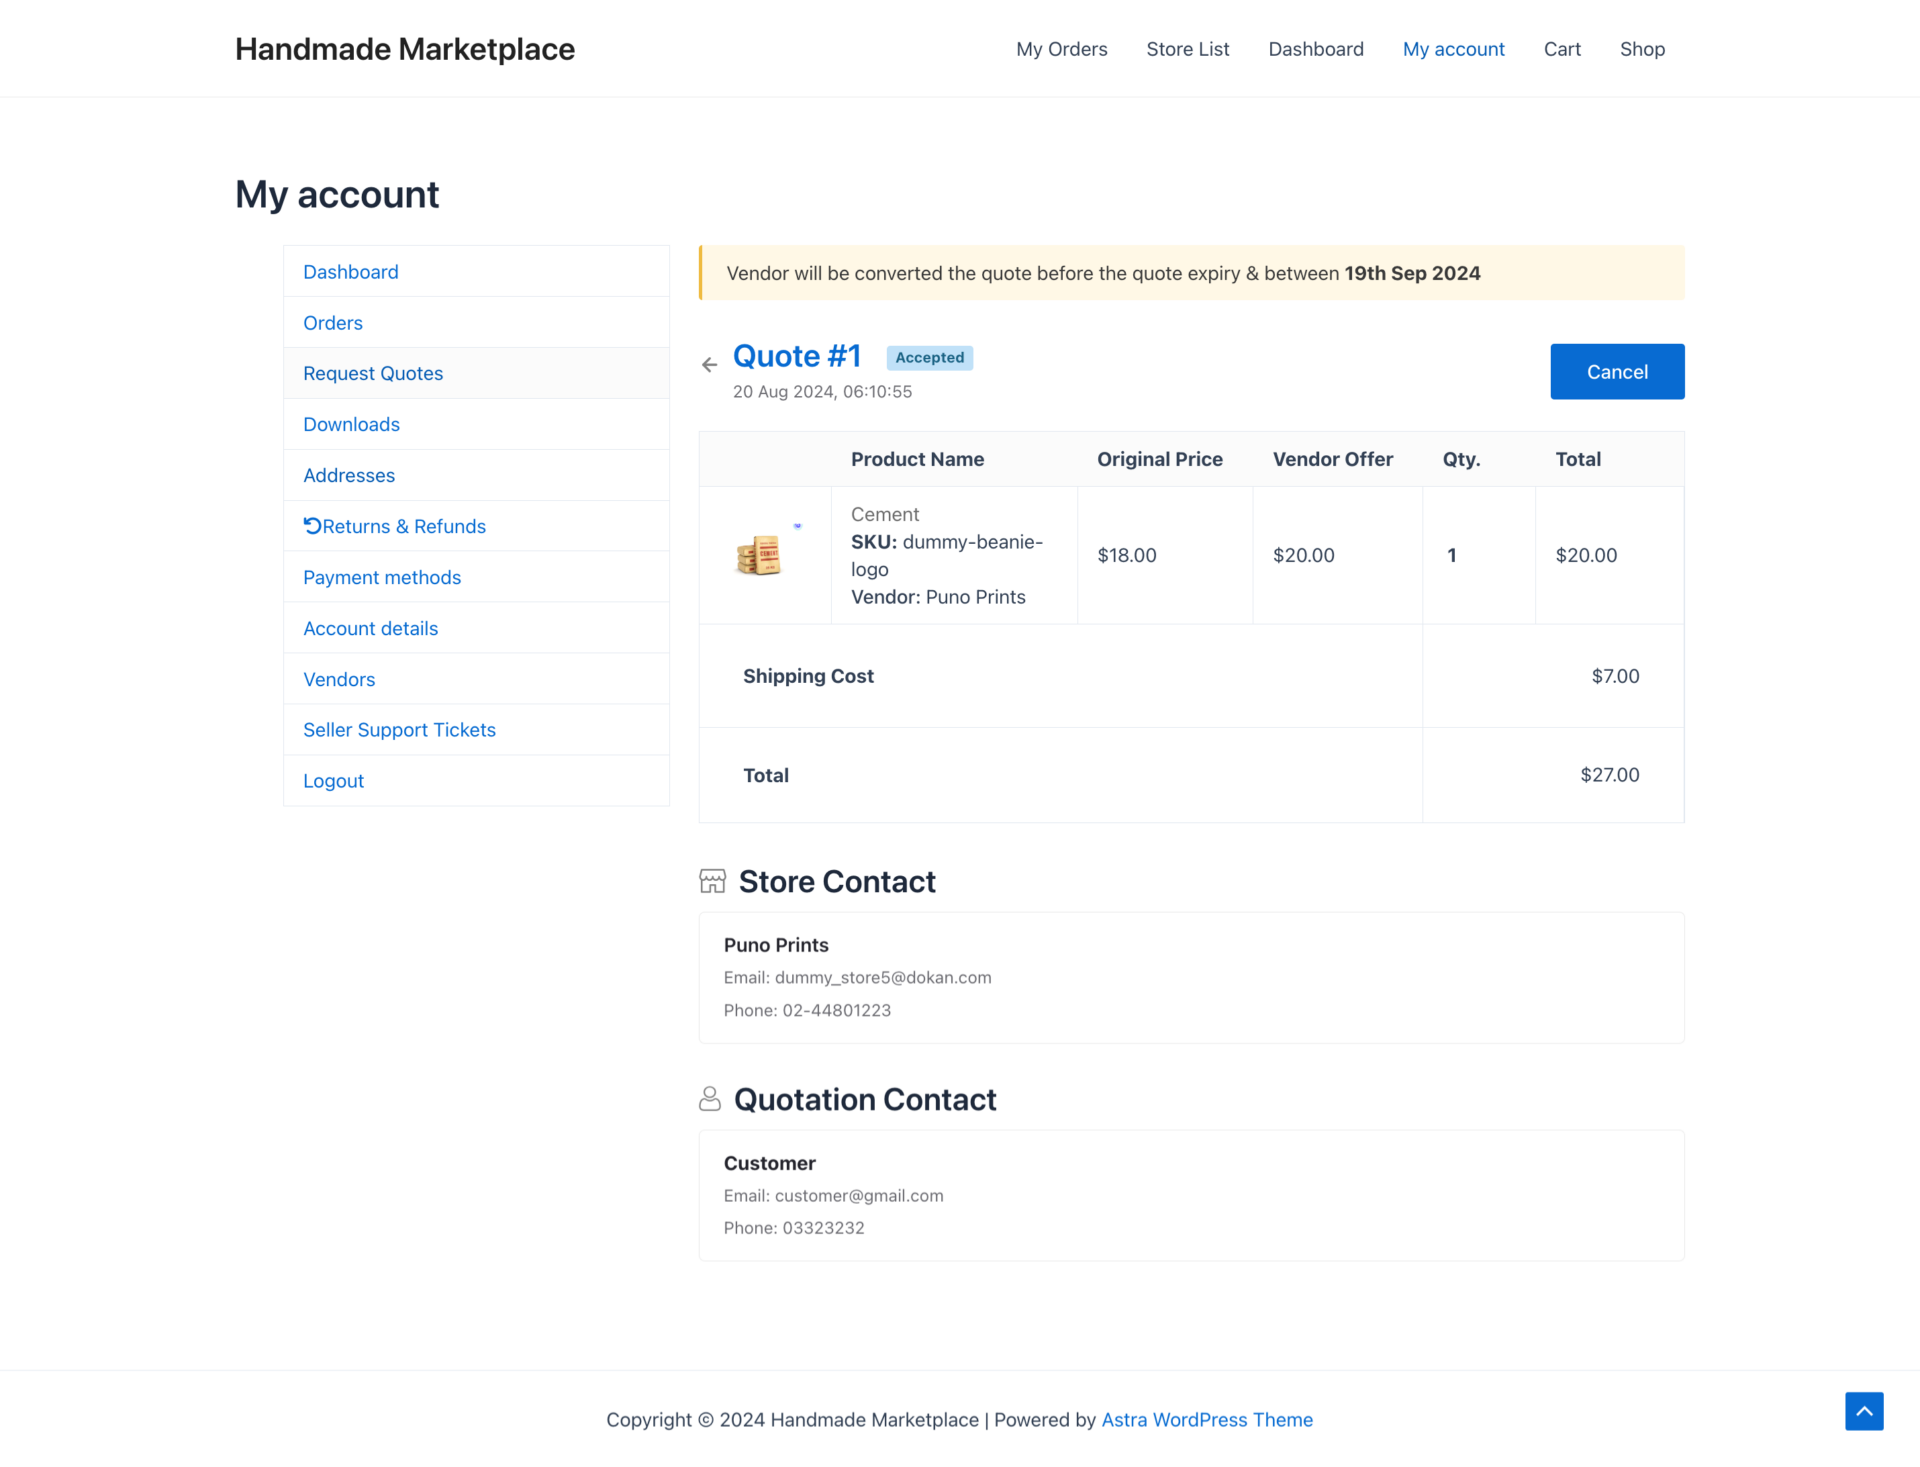
But the customer can cancel the quote anytime.
Note: To see Quote converted by option, the “Enable Quote Converter Display” option needs to be enabled from the admin dashboard.
How Vendors Will Handle Quotations Requests?
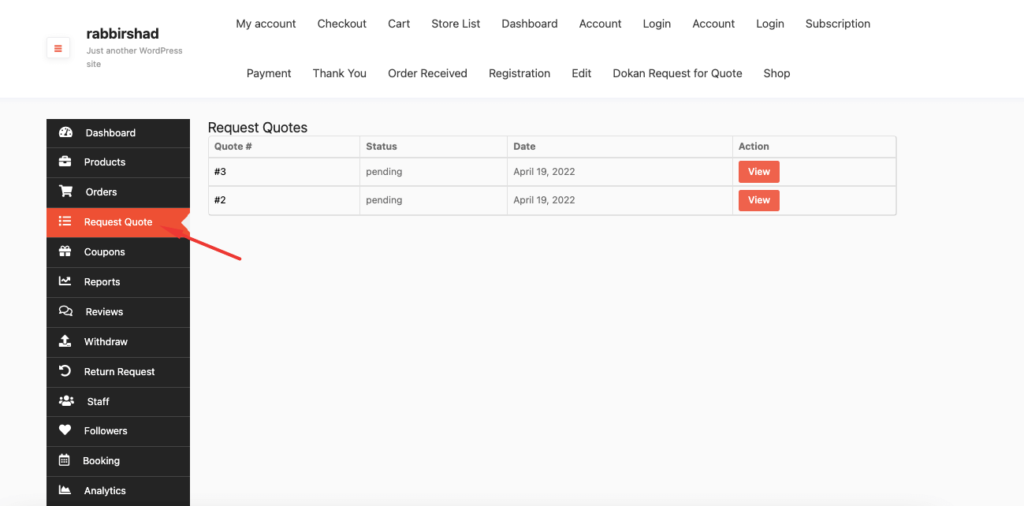
Now, the vendor will receive the quotes on their dashboard. They can see the quotes in Vendor Dashboard–> Request Quote. Click on the View button to see the quote details.
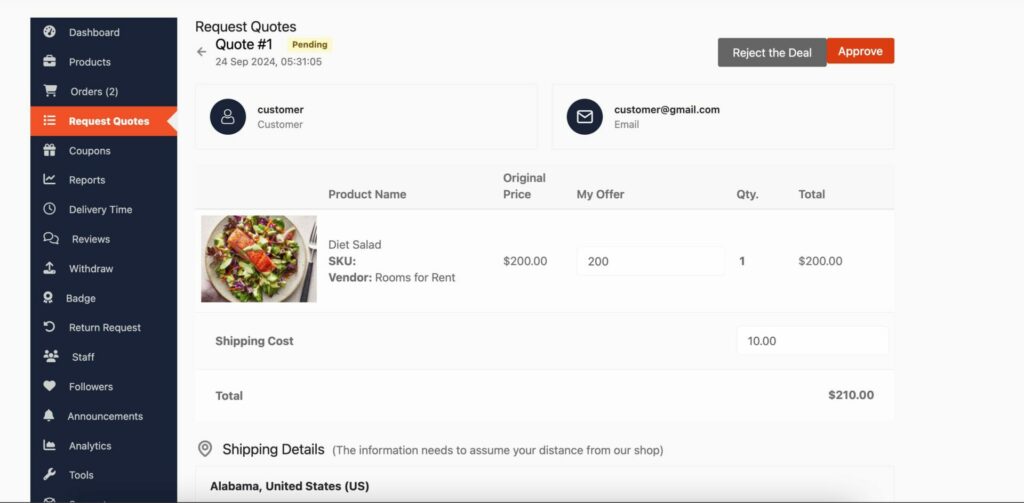
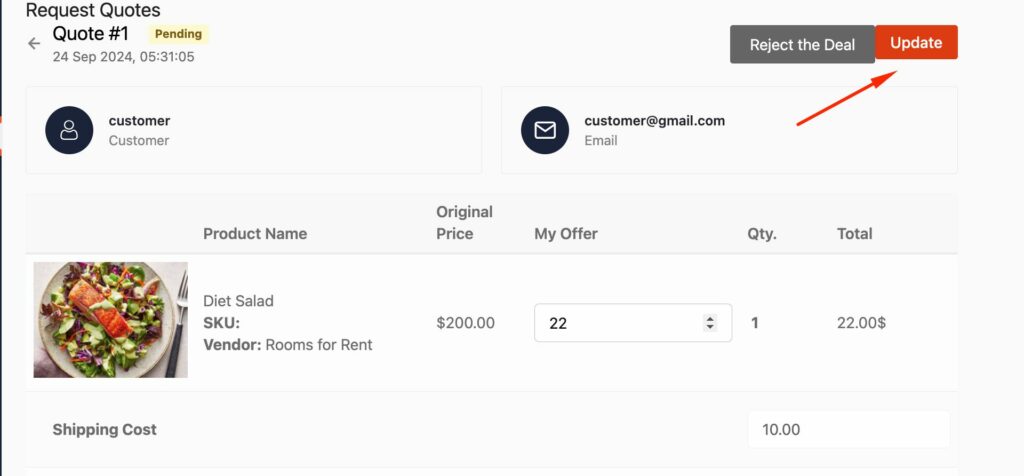
Vendors will be able to see what the customers have quoted. Either they can approve the quote or they can give a counteroffer and click on the Update Quote button.
If there is a Expire limit, it will show on the top-
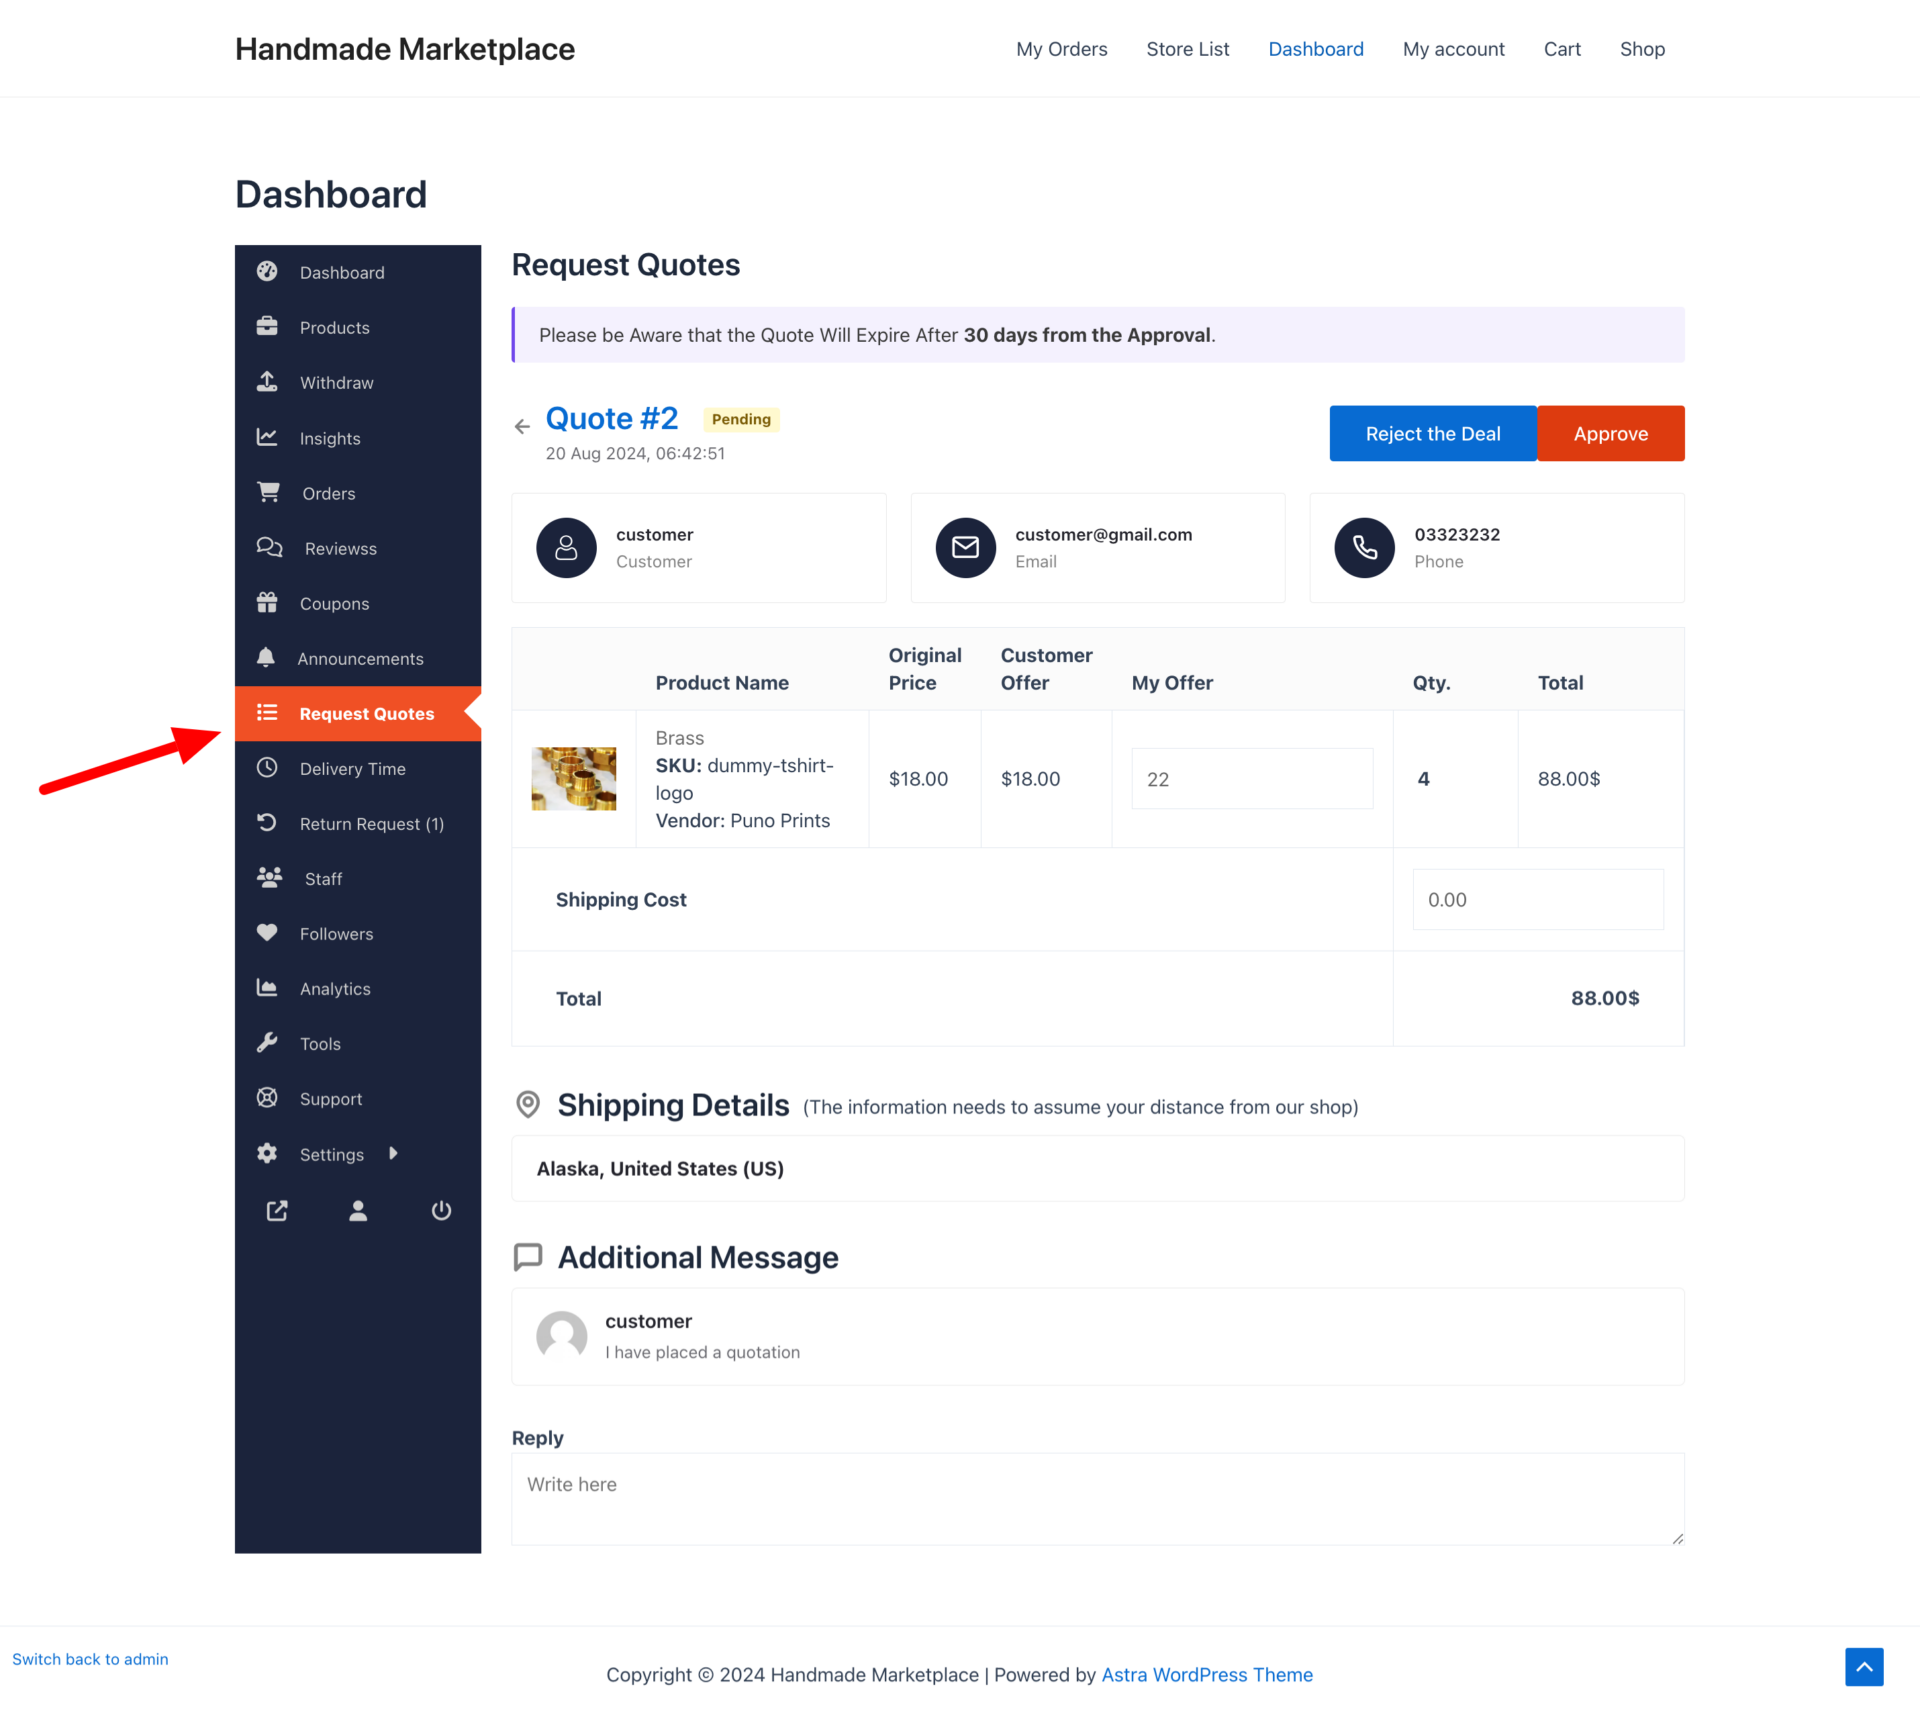
So, when the vendors give a counter offer they need to click on the Update button. Otherwise, they need to click on the Approve button.
The quote will be sent to the customer-
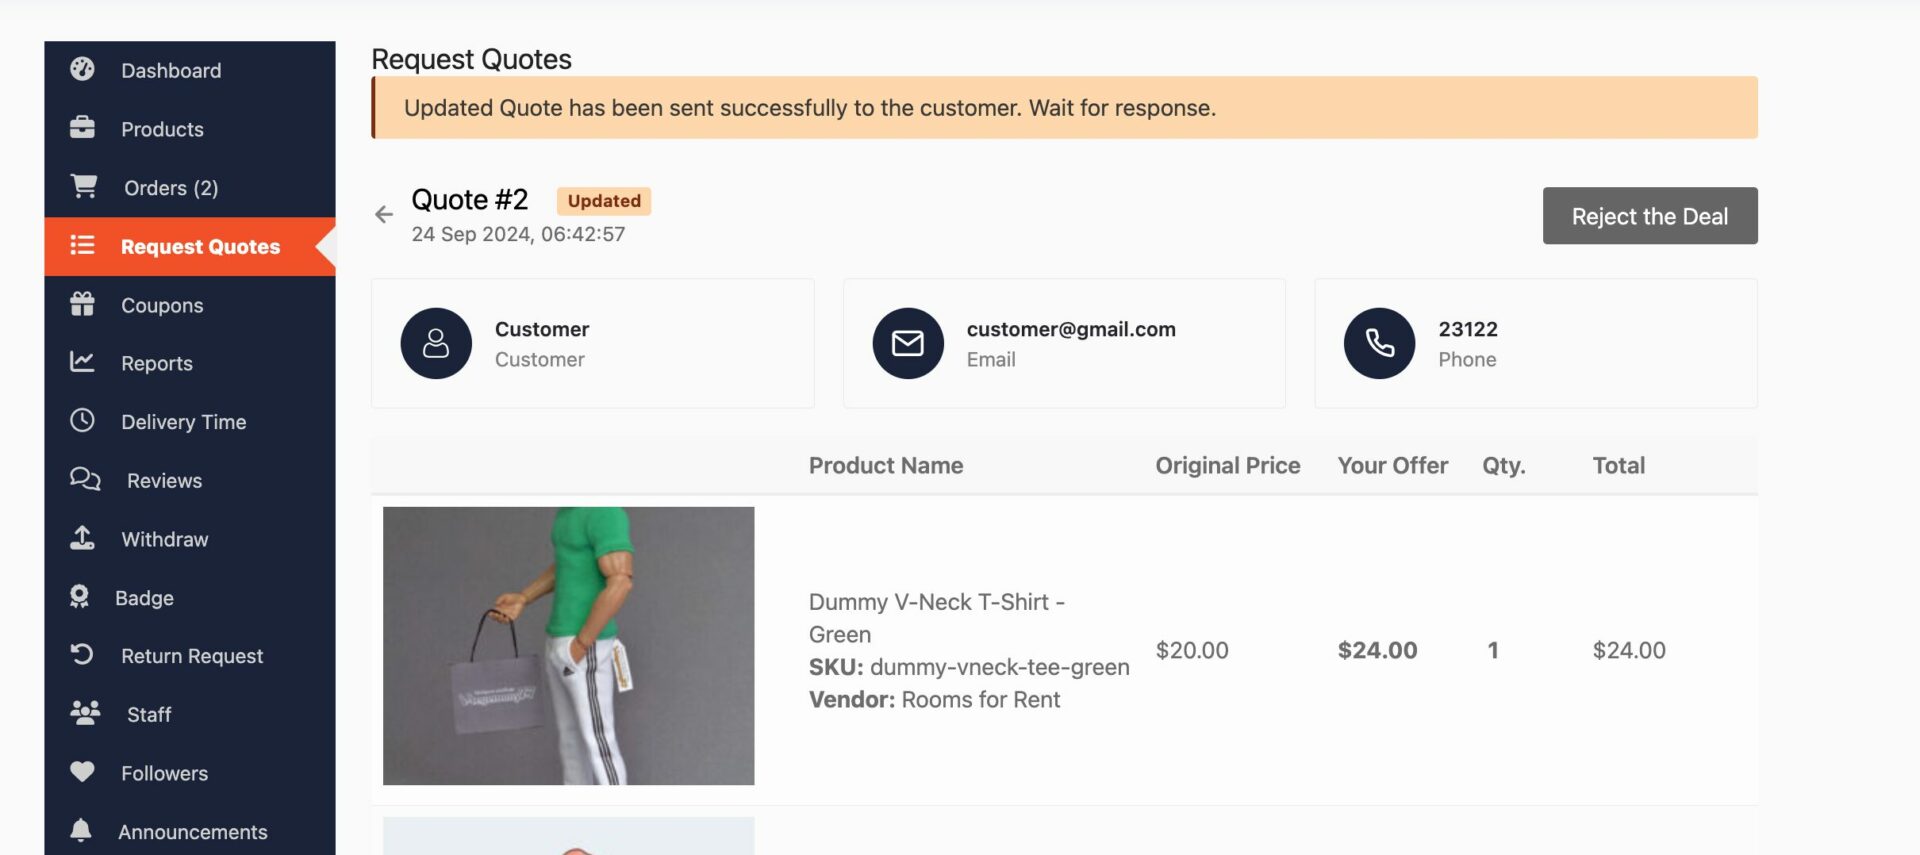
Then the customers will receive an email about the updated quote and also they can view the new quotes in their account.
If the customer accepts the quote, then they have to click the Convert to Order button.
Note: The vendor will get the Convert to Order button directly if the price isn’t updated.
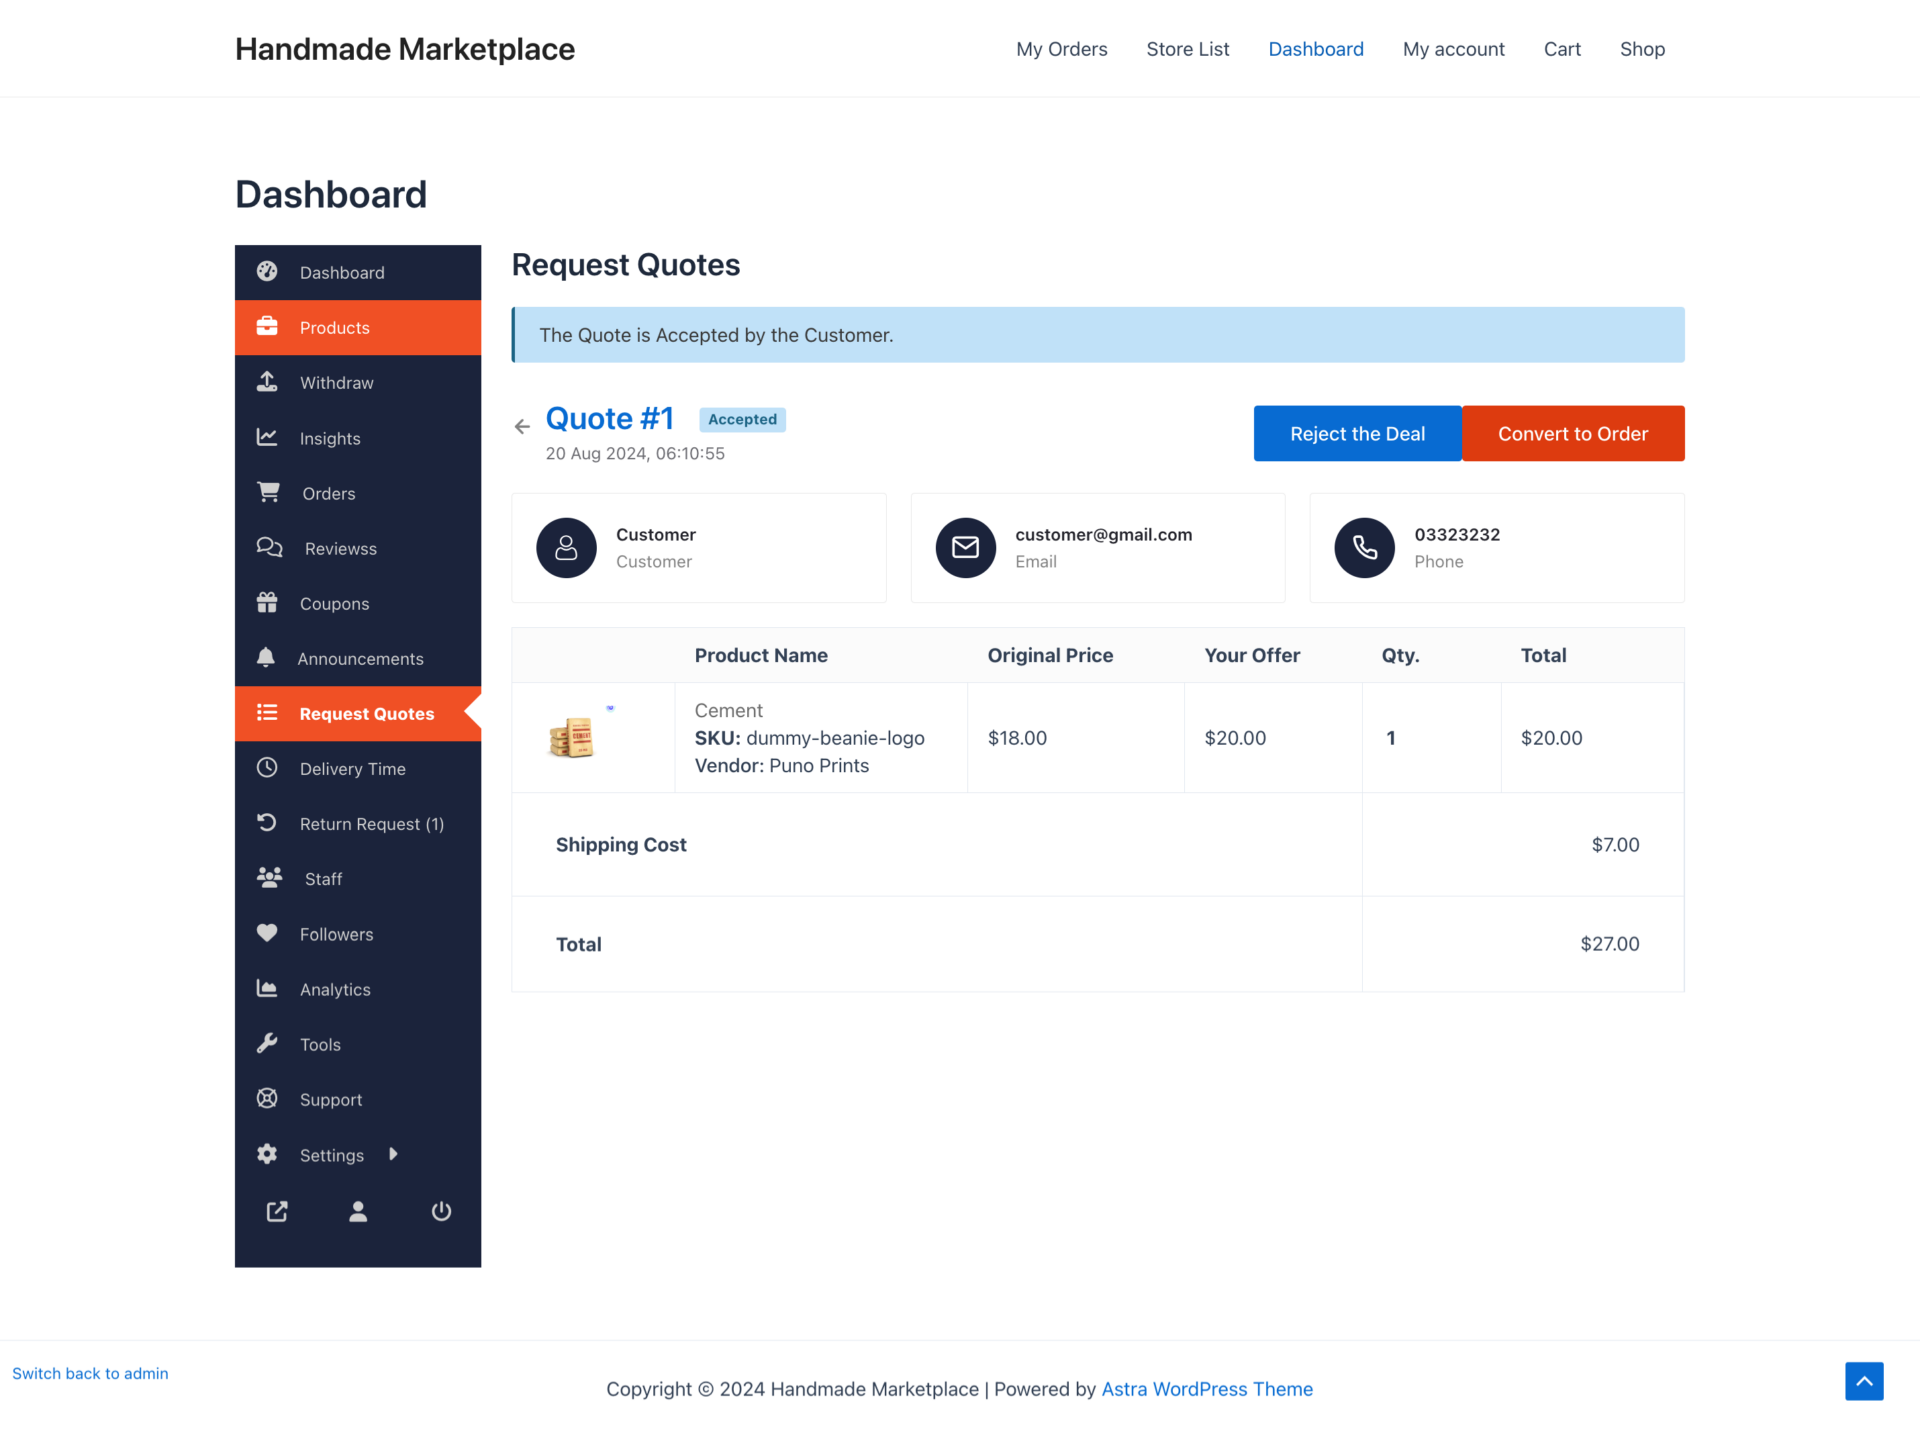
However, if the admin has enabled the convert to order option,
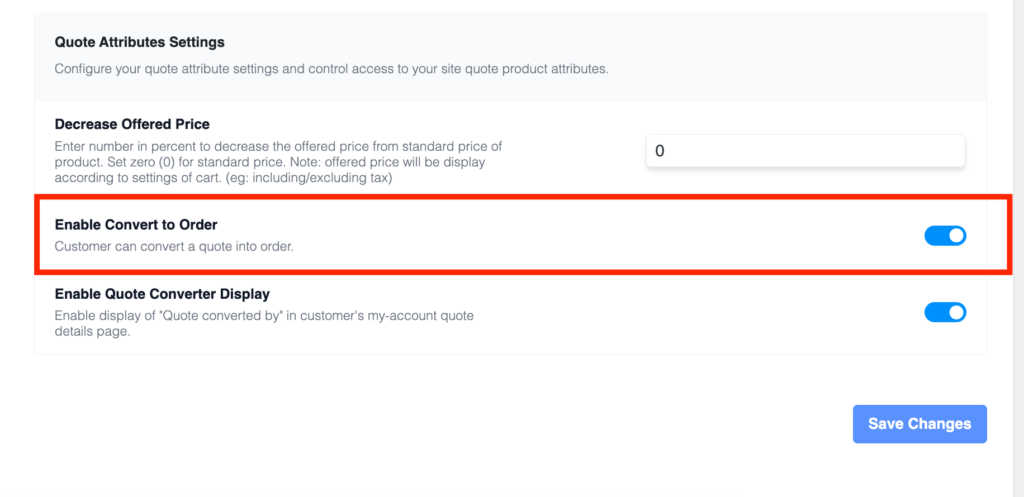
Then, customers can also convert the quote to order after the vendor’s approval.
Vendors can view the order details in the dashboard,
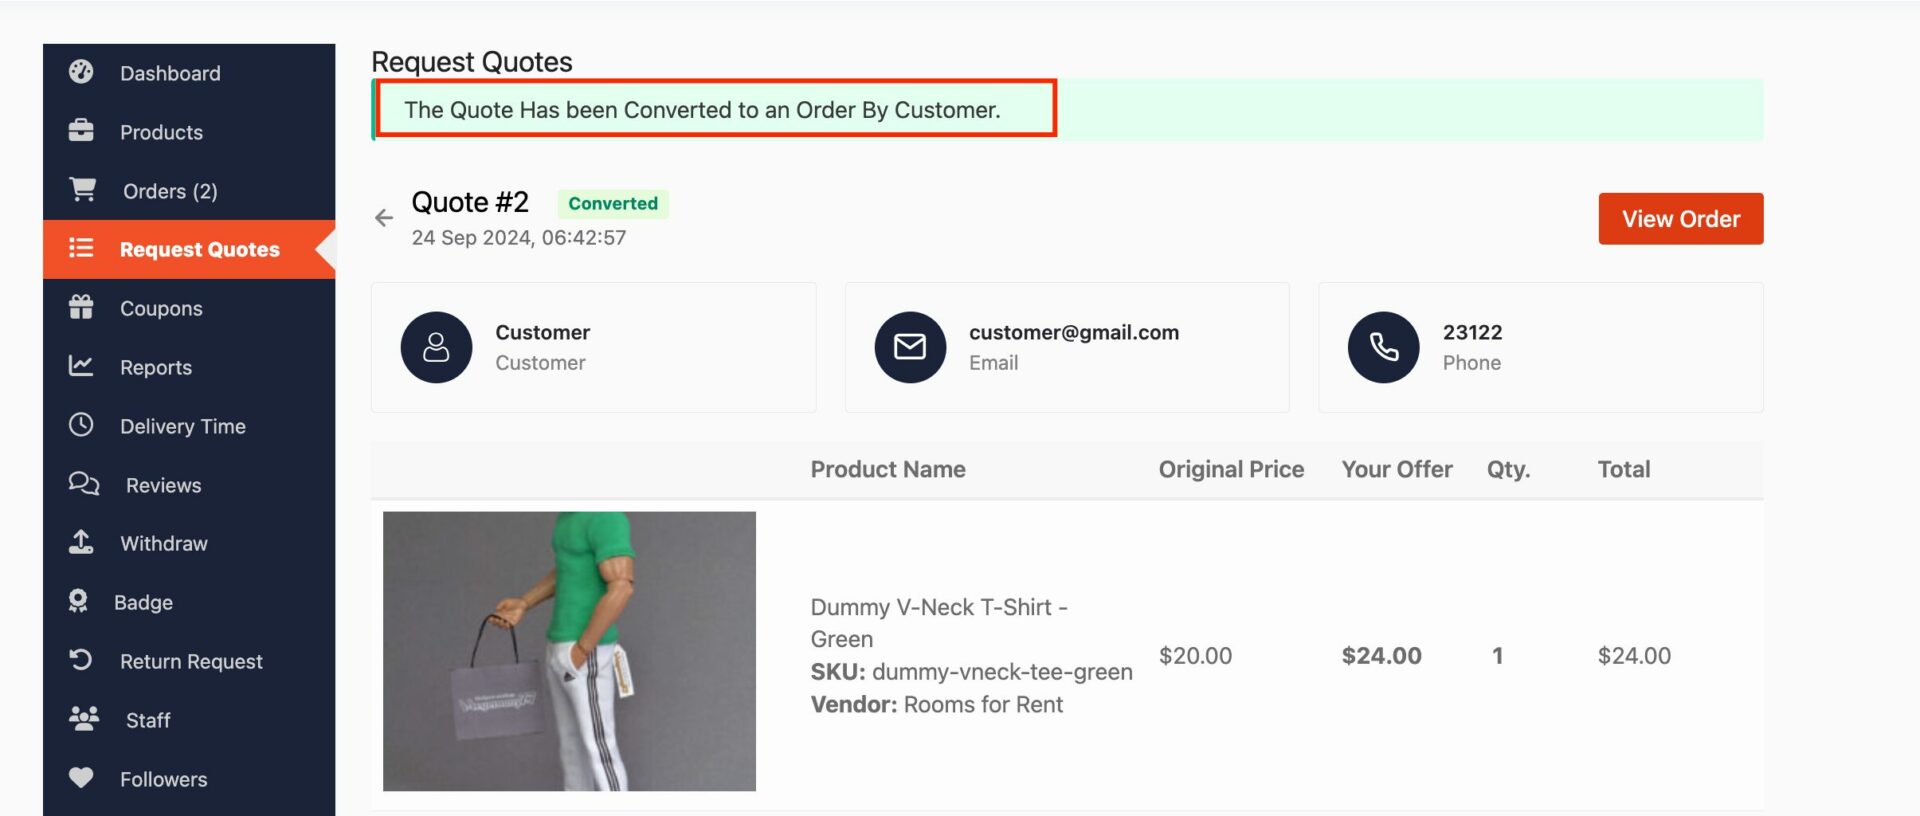
And in the Request Quote section in the dashboard vendors will see that the status of the quotes has changed to converted after it has been converted to order.
The status Approve will appear until the customer has converted the quote to order.
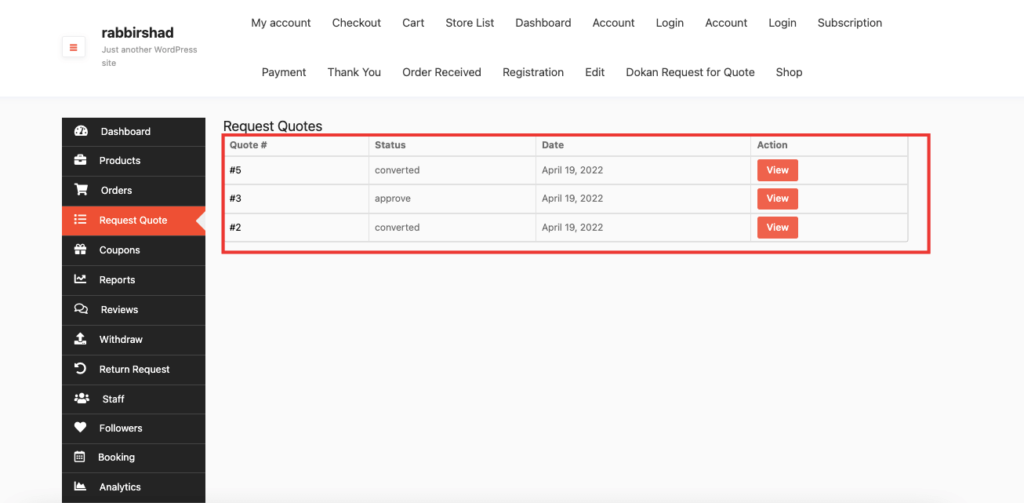
How to Complete Payments for the Quotations
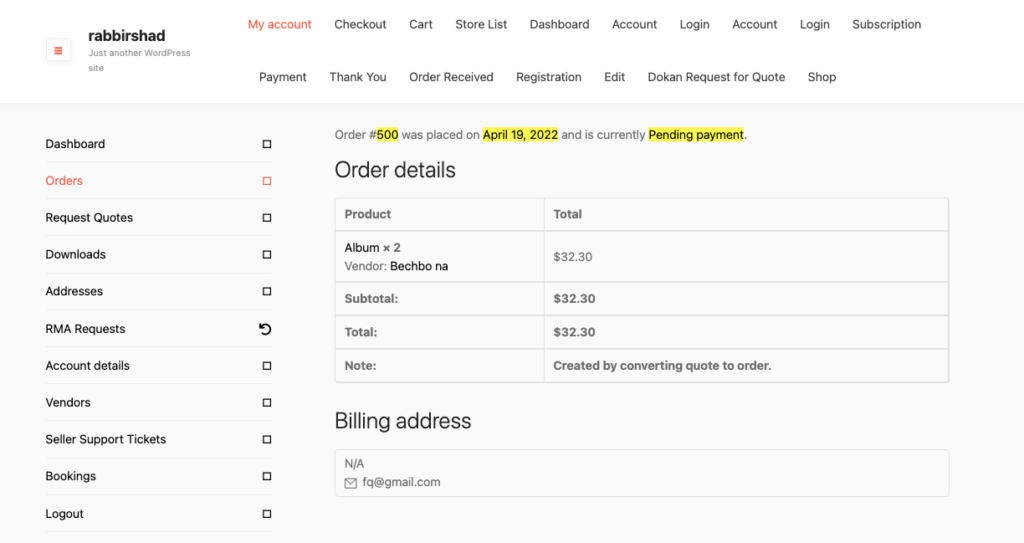
After the quote has been converted, customers can see the order details by clicking on the View Order button,
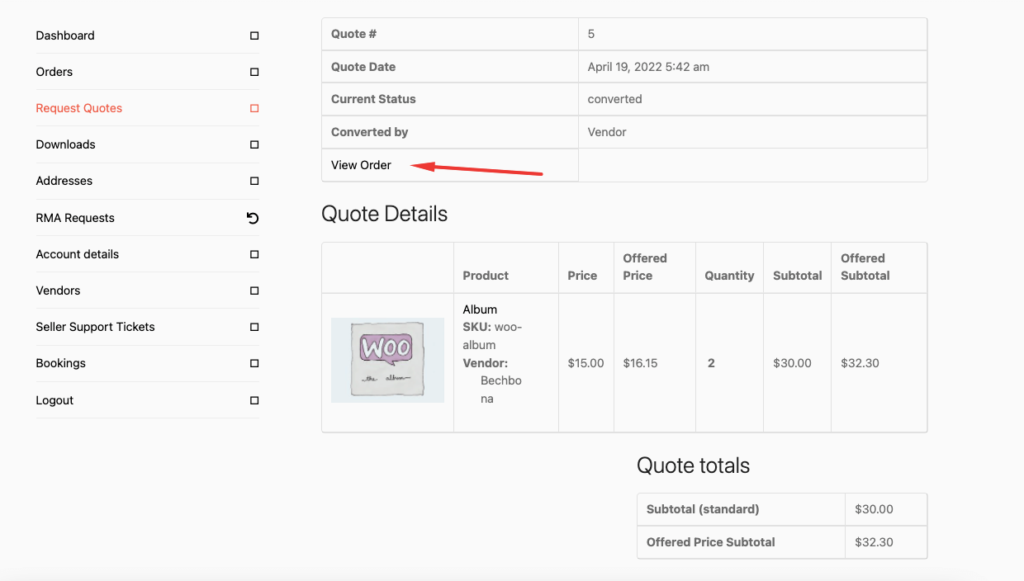
Here are the order details. As you can see the Quote number has been turned into the Order number. The quote number was 5 but order number is 500.
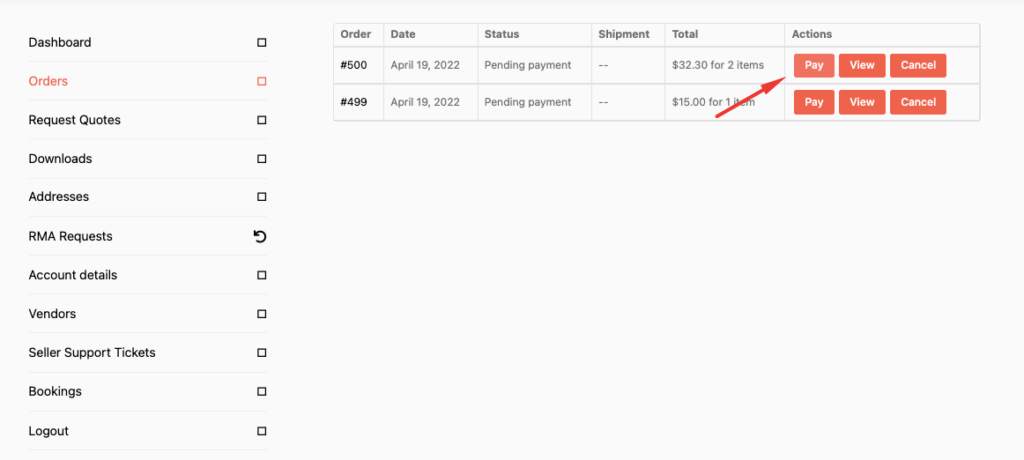
To pay for the quote, customers need to go to the order section from Their (My) Account and click on the Pay button.
They will be taken to the checkout page. There they need to use any payment method to pay for the order.
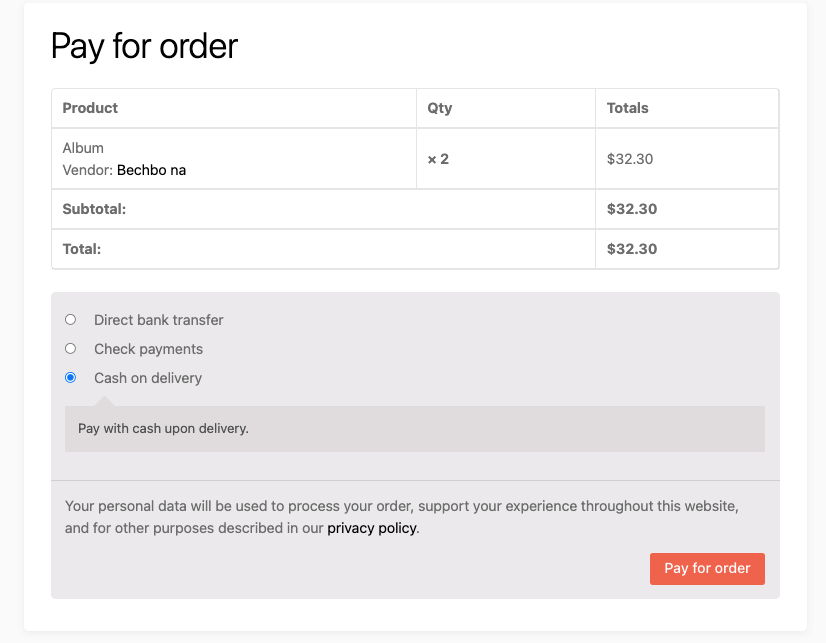
This is how customers can pay for the quotations.
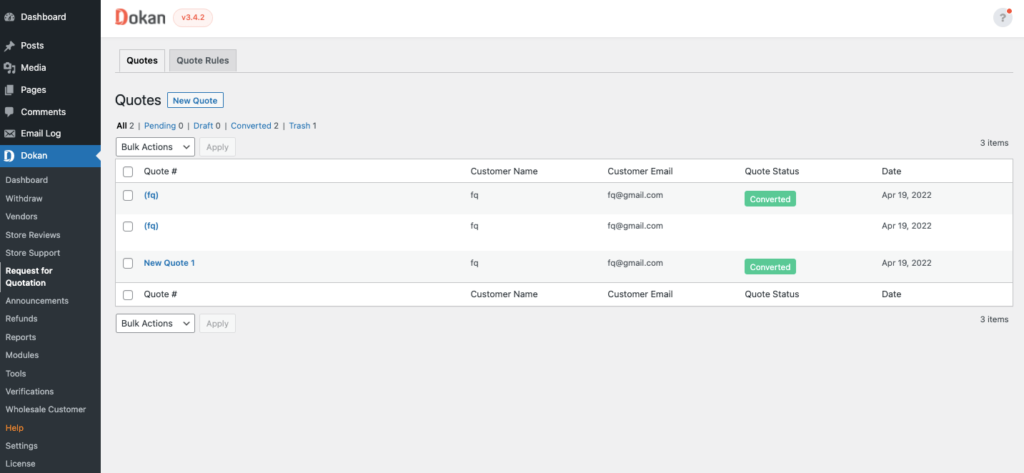
The admins will see the quotes in the backend,
How to Customize the Email Templates
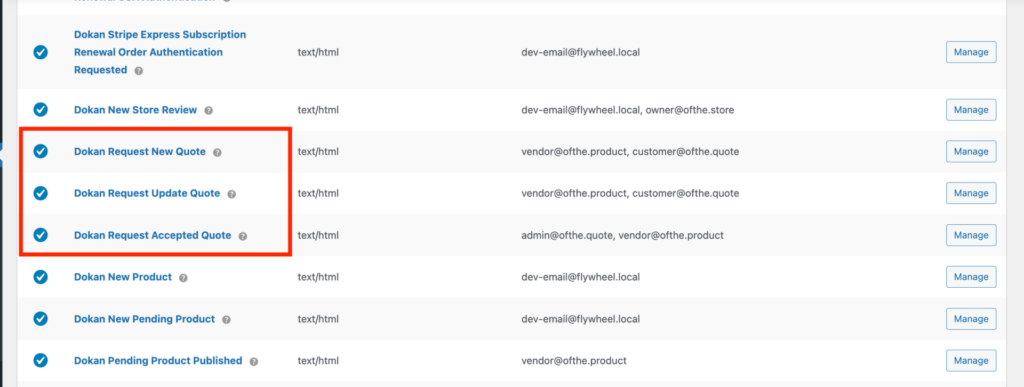
Vendors and customers get 3 types of emails,
- For Request New quote
- For Request Update Quote
- Dokan Request Accepted Quote
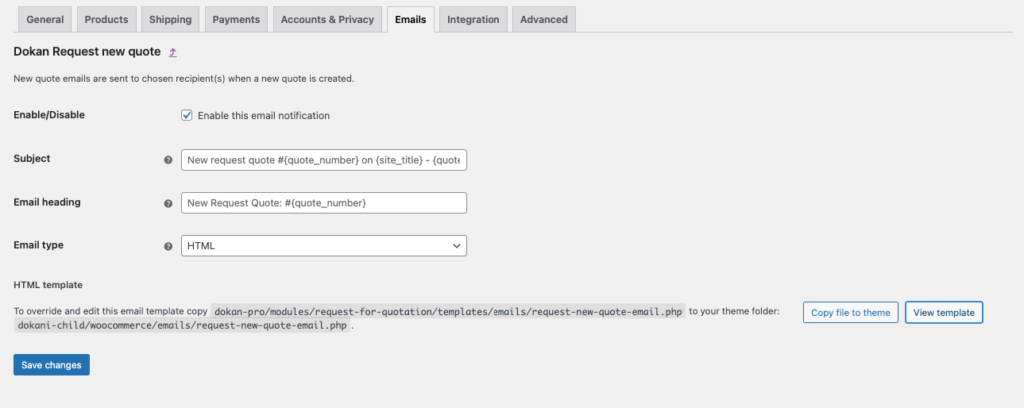
To customize the email go to WooCommerce–> Settings–> Email. There find the above two emails.
Admins can customize their templates from here,
So this is how users can use the Request for Quotation module on Dokan marketplace.
Note: If vendors enable Request Quote Support, then the settings of Request Quote will take priority over Catalog Mode settings. Or else Catalog Mode settings will get priority.