Using the vendor verification feature of Dokan, vendors can verify their company. To enable this feature the admins need to enable,
How to Verify Vendors Company
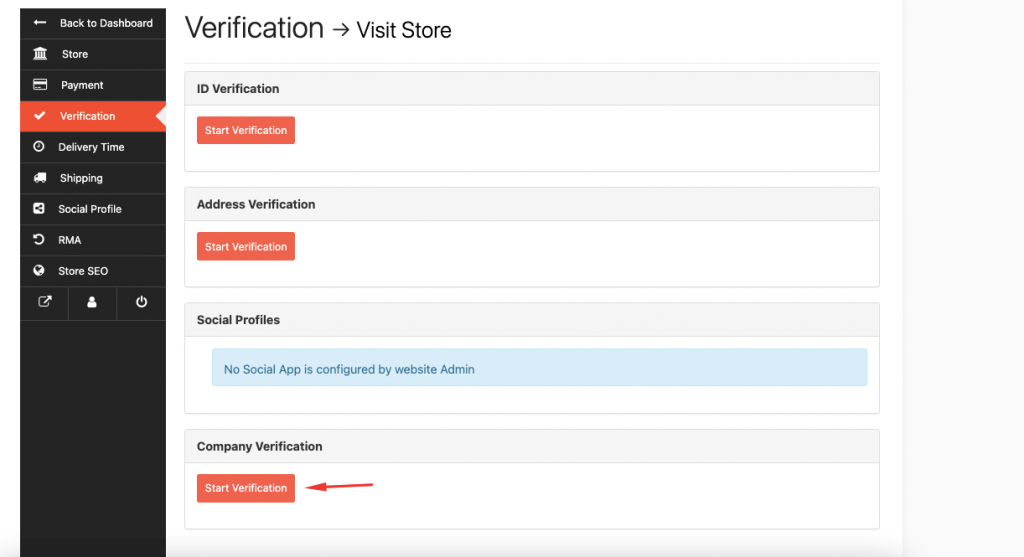
At first, vendors need to submit their company information from Vendor Dashboard–> Settings–> Verification. There, they will find the Company Verification option. Click on the Start Verification option.

When the vendors click on the Start Verification button, they will see a option to upload files,

Now, they can upload multiple files or they can upload only one file that contains their company’s information. After uploading the file click on the Submit button.

After submitting, they will see a message that the verification is awaiting approval.

How to Approve Company Verification Request
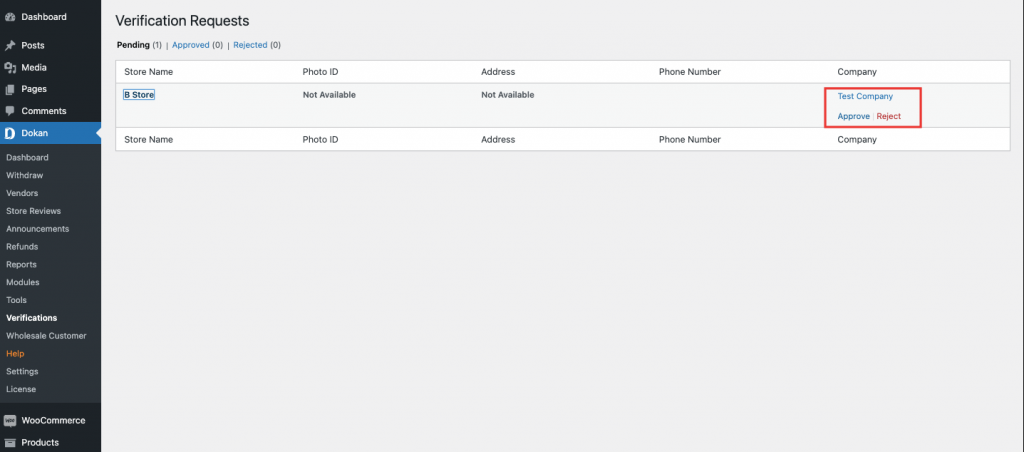
After the vendor has submitted the files, the admin needs to approve the verification. The admin will find the verification request in Dokan–> Verifications–> Pending. He/she can download the file uploaded by the vendor by clicking on the file name.
After verifying the file, he/she can click on the approve/reject button to finish.

After approval, the admin will be able to see the list in the Approved/Rejected section.

Vendors will be able to see that the request is approved in the Verification section.

Note:
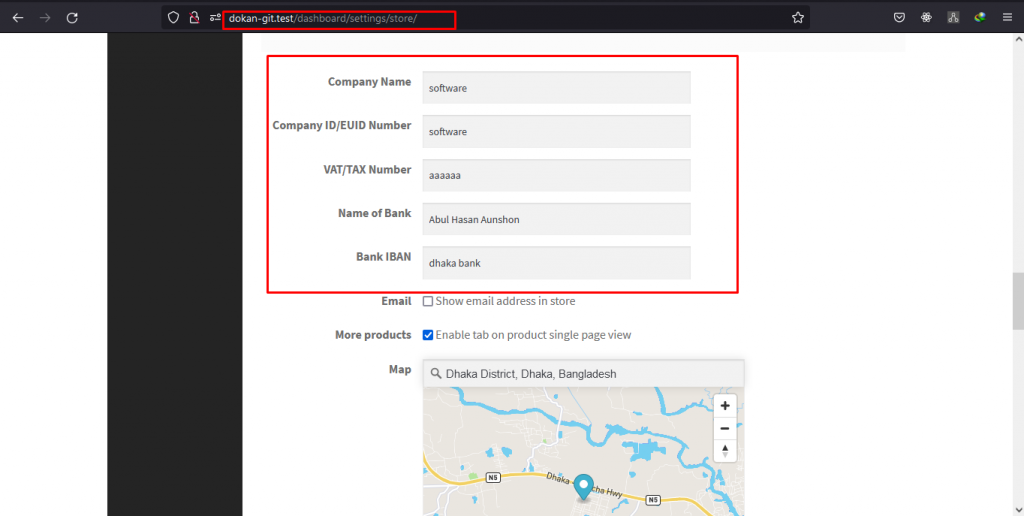
Vendors cannot update their company information at Vendor Dashboard–> Settings after the admin has approved the company verification request.

The information field will be disabled if the admin approves the company verification request. But if the request is rejected then the field will not be disabled.
So, they can update the information if the request is rejected.