Printful is an on-demand printing and fulfillment service that allows businesses and individuals to create and sell custom products without needing inventory. It integrates with various eCommerce platforms, offering products like apparel, accessories, and home decor, which are printed, packed, and shipped directly to customers upon order.
Printful is popular for its ease of use, automated processes, and global fulfillment network. It is an ideal solution for small businesses, online retailers, and creators looking to offer customized merchandise.
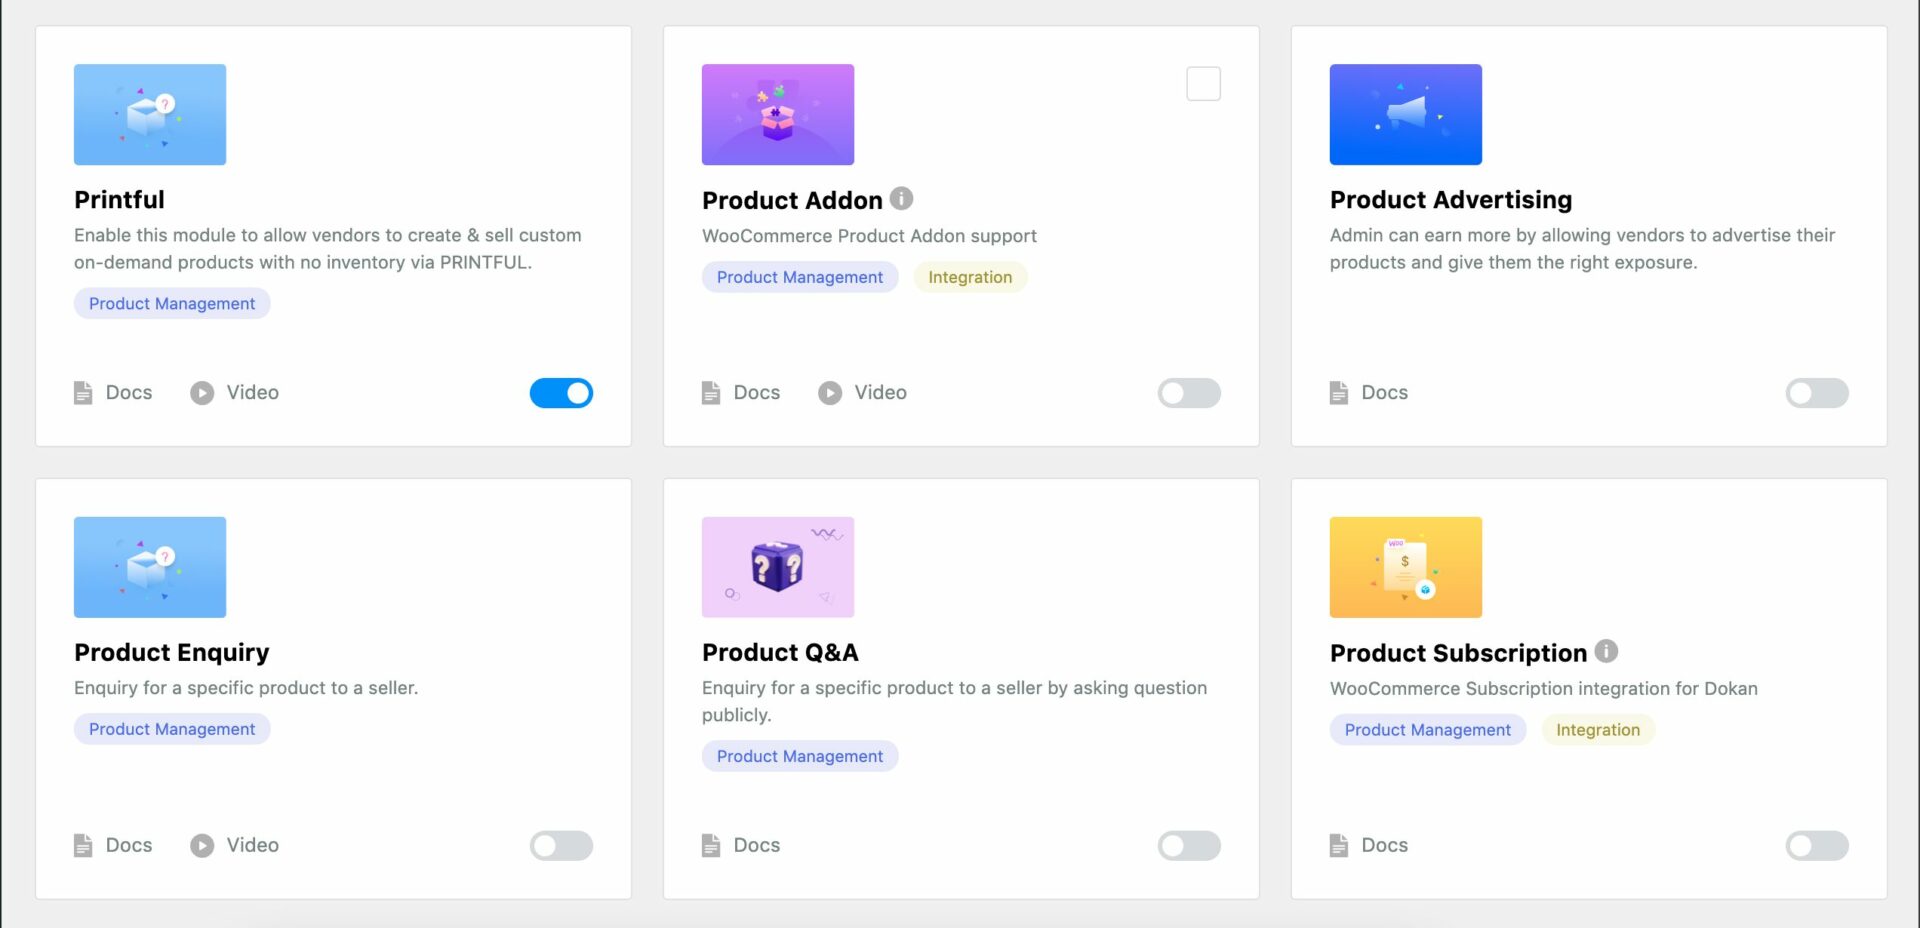
Now, the Dokan multivendor marketplace plugin has a module that integrates with Printful. It allows marketplace owners to start their own print-on-demand marketplace.
Note: This is the first ever dropshipping integration with any multivendor marketplace solution
We are going to show you how to configure this module.
- Activate the Printful Module
- Configuring Printful- Admin
- Configure Printful- Vendor
- How to Add Product
- Order & Shipping
- Delivery Workflow for Printful
Activate the Printful Module from the WordPress Dashboard
First, you need to enable the Printful module from the WordPress dashboard. Go to Dokan–> Modules and activate the Printful module-
Configuring Printful- Admin
Now, from the backend you as an admin need to configure the Printful module.
Go to Dokan–> Settings–> Printful.
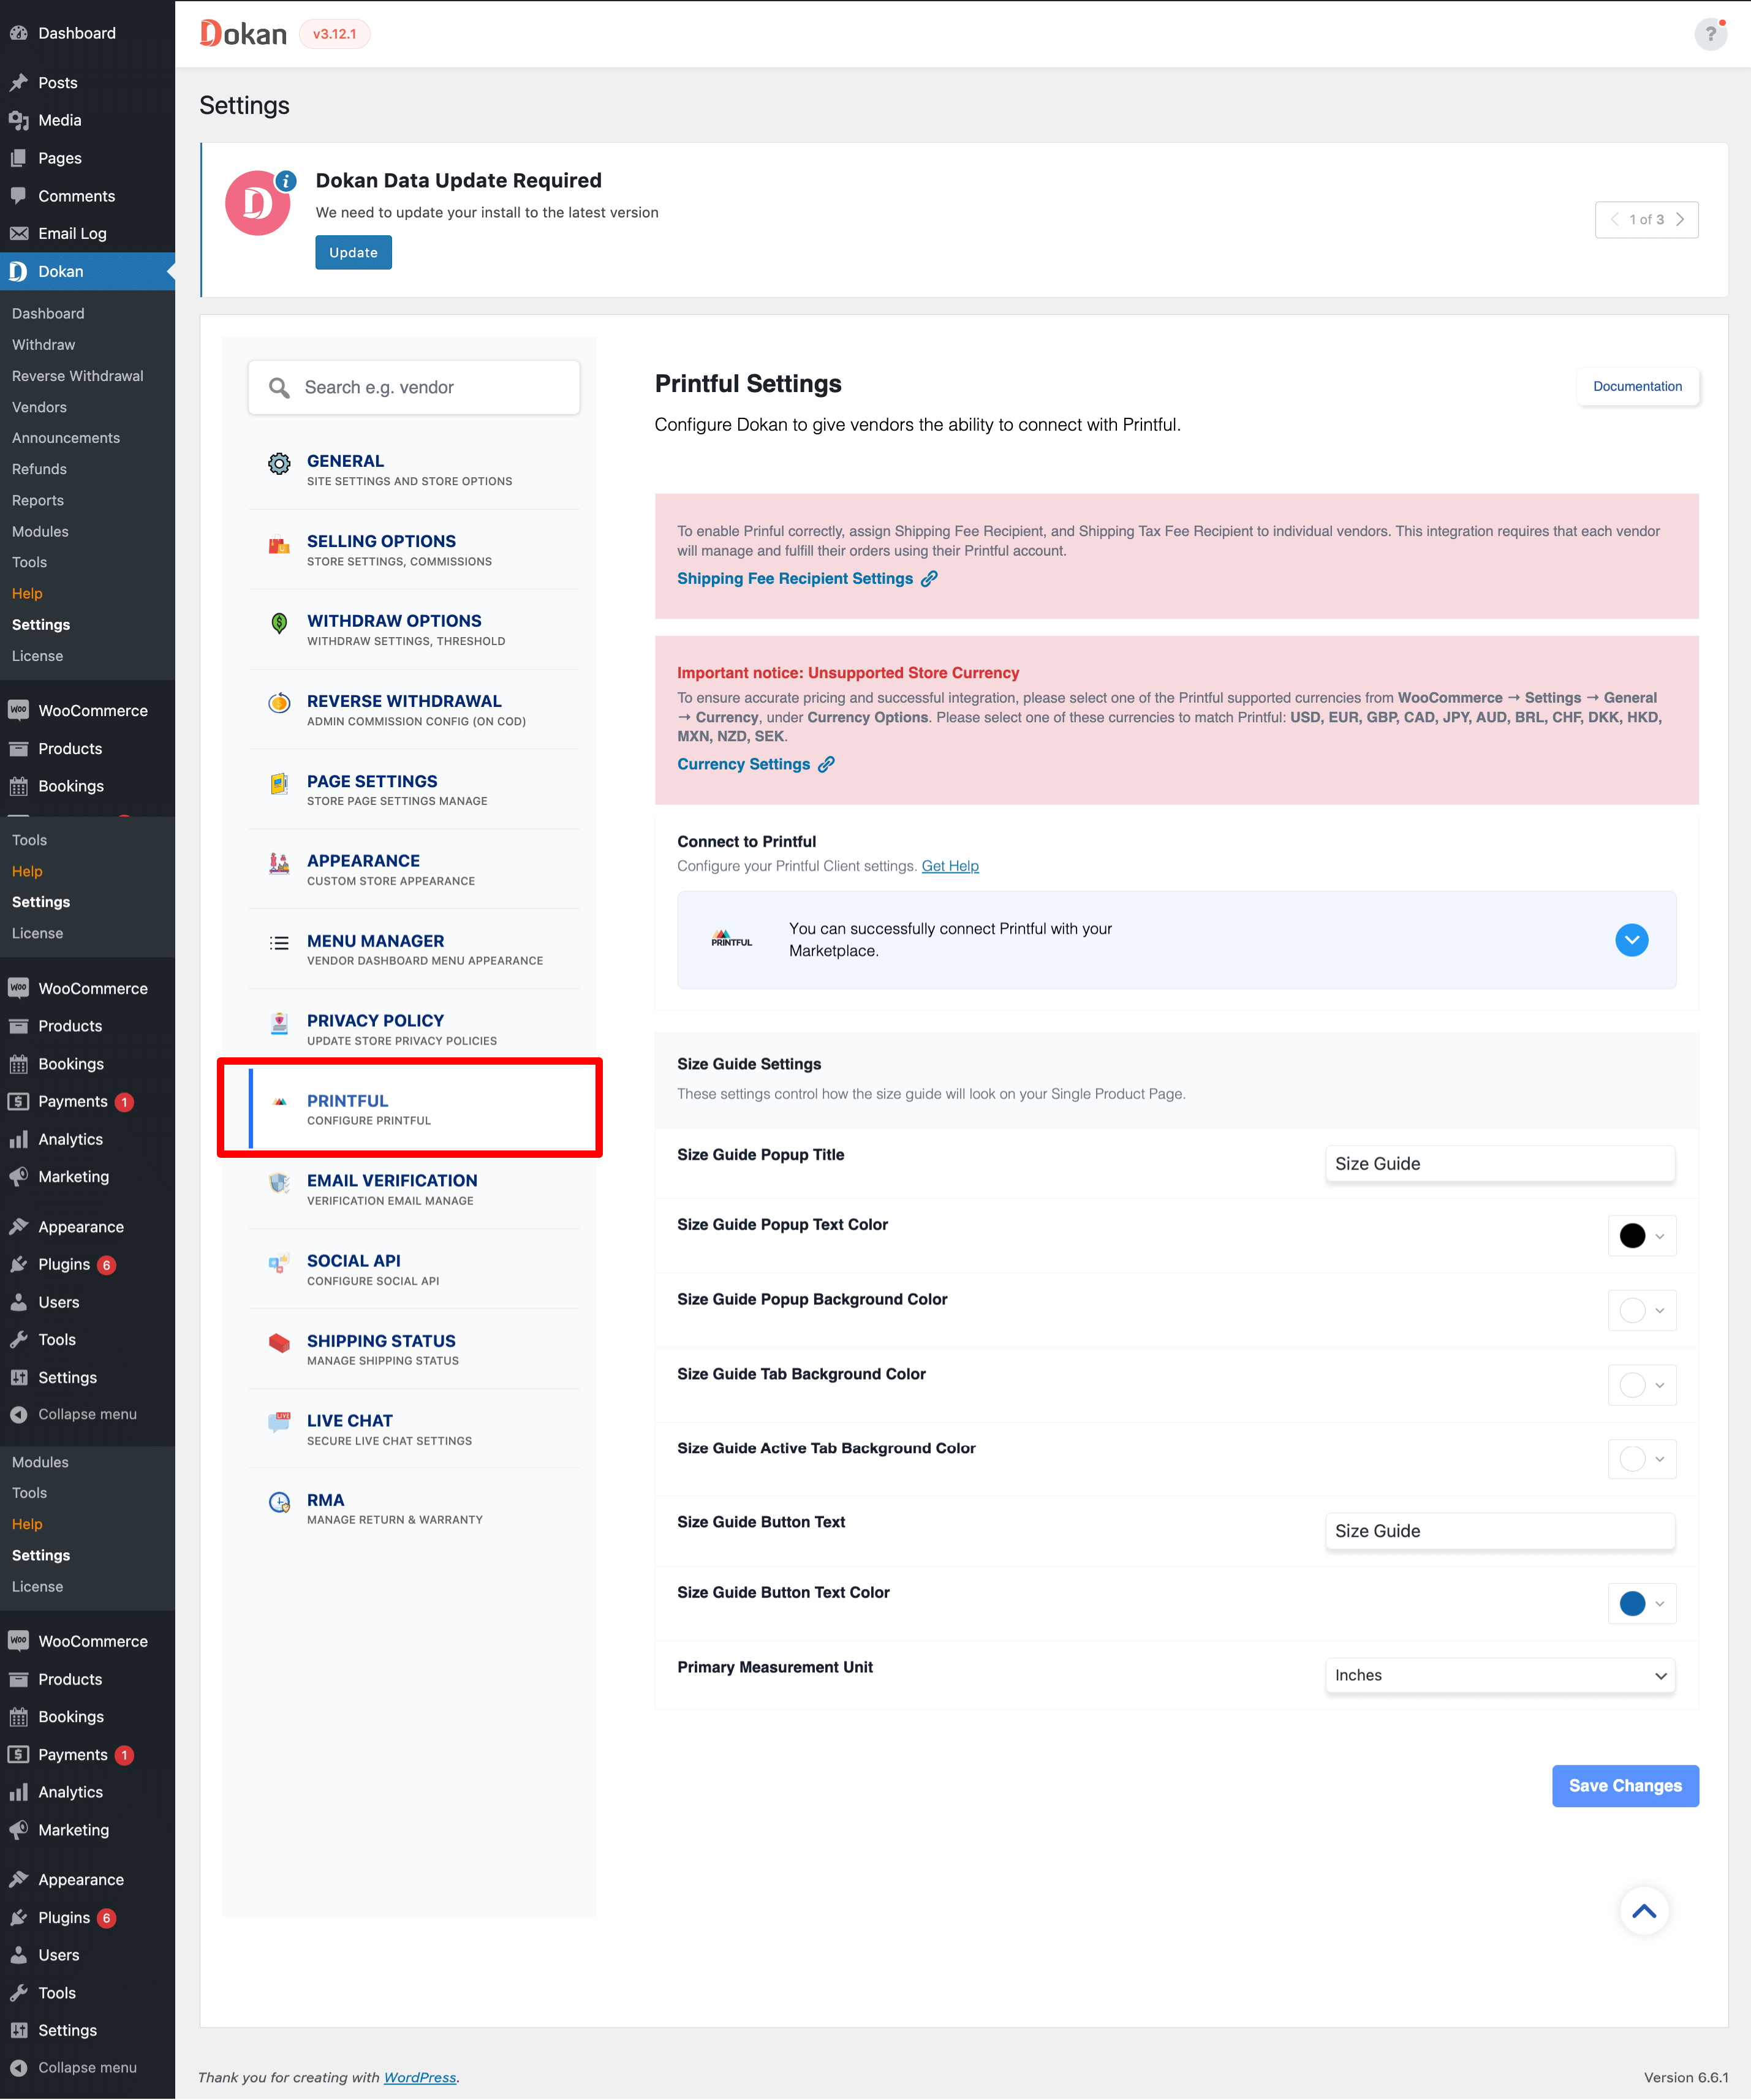
As you can see there are two notices on top of the settings page.
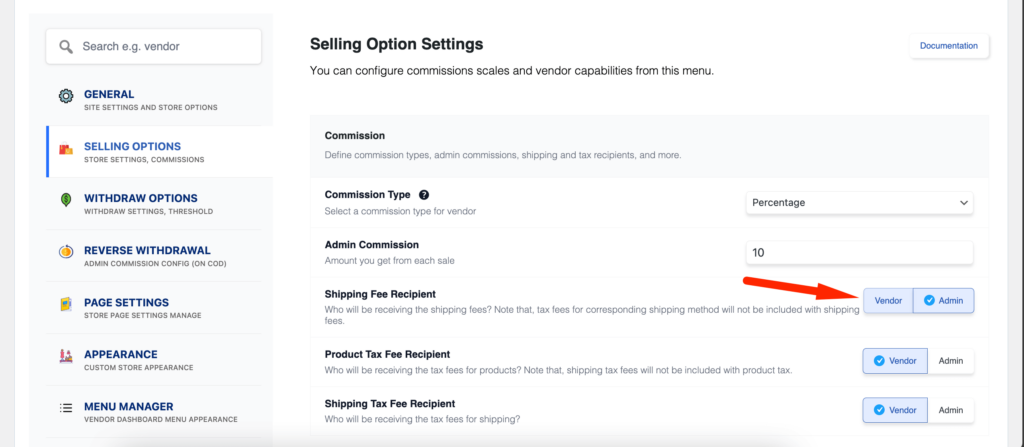
- You need to assign vendors as shipping fee and shipping tax fee recipients from Dokan–> Selling Options.
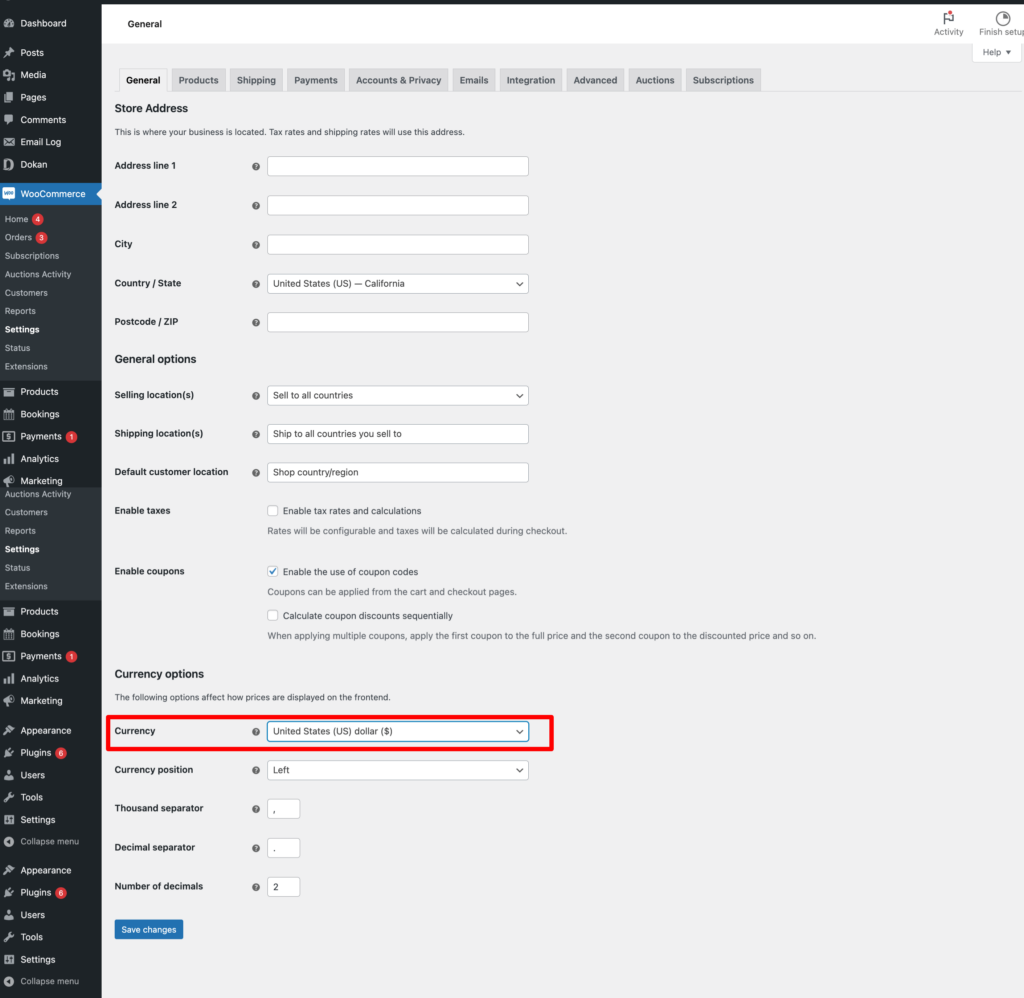
- Match the currency options like your Printful account from the WooCommerce–>Settings–> General–> Currency settings-
Then you will see that the notices are gone-
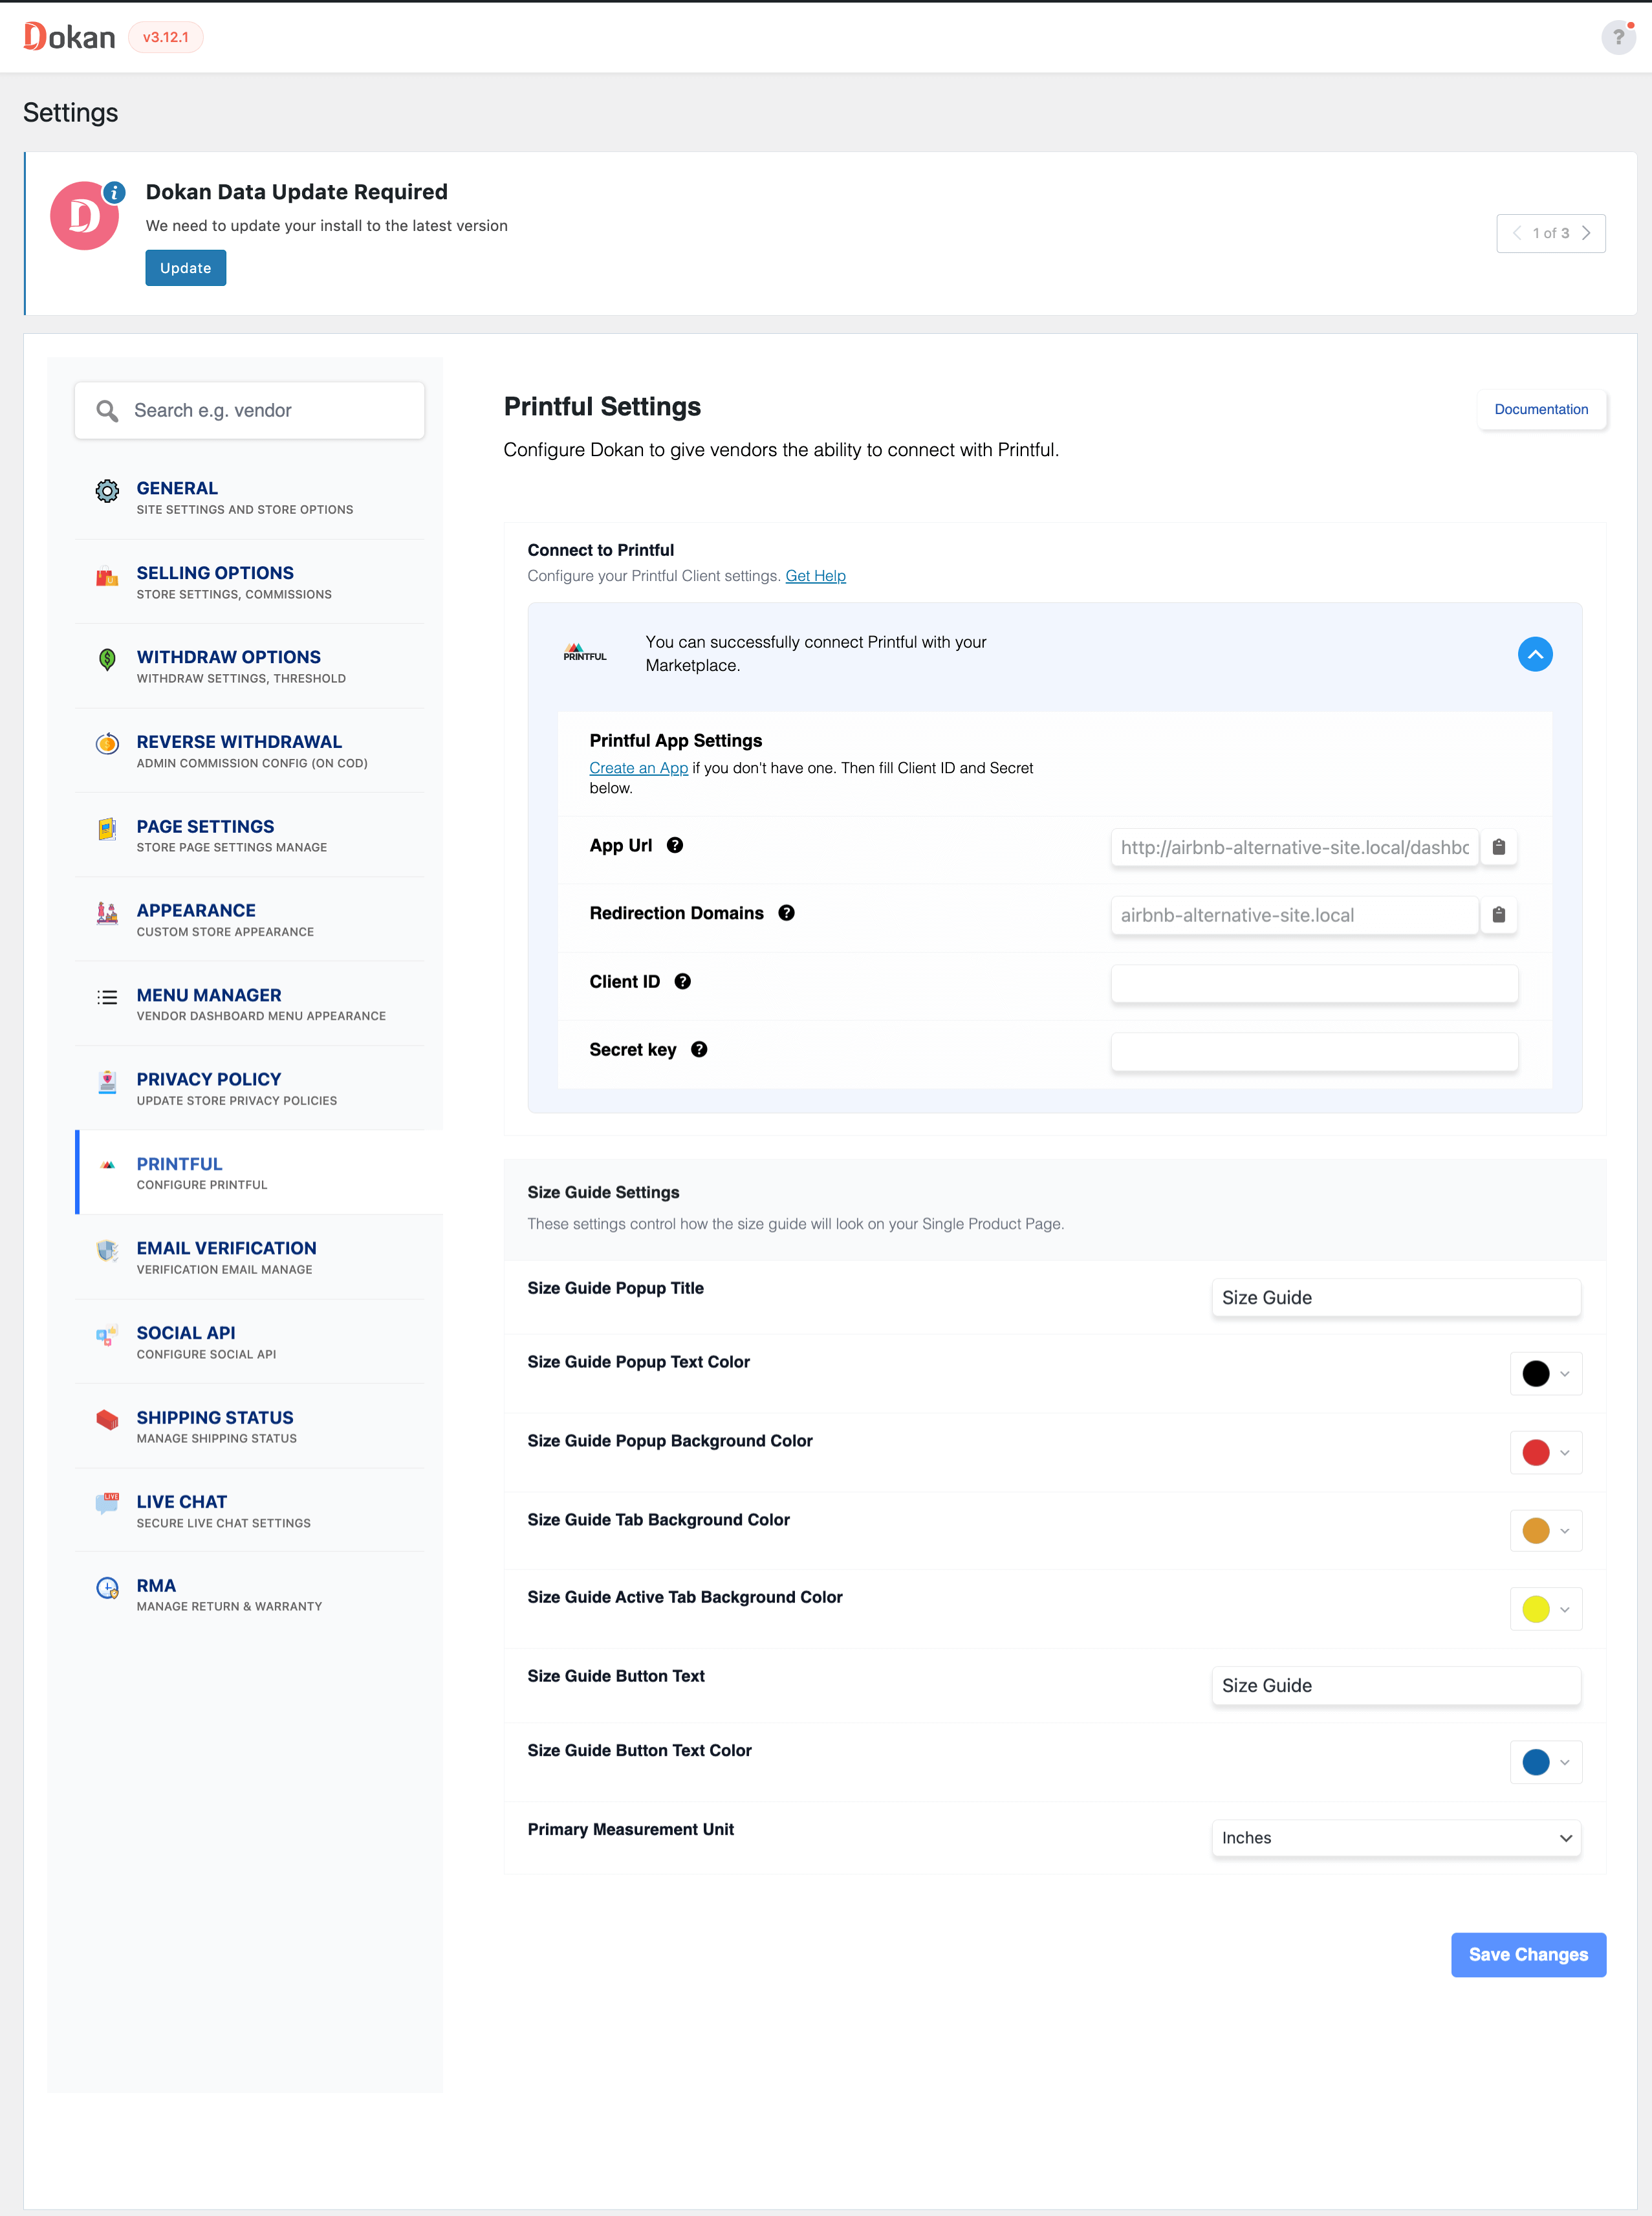
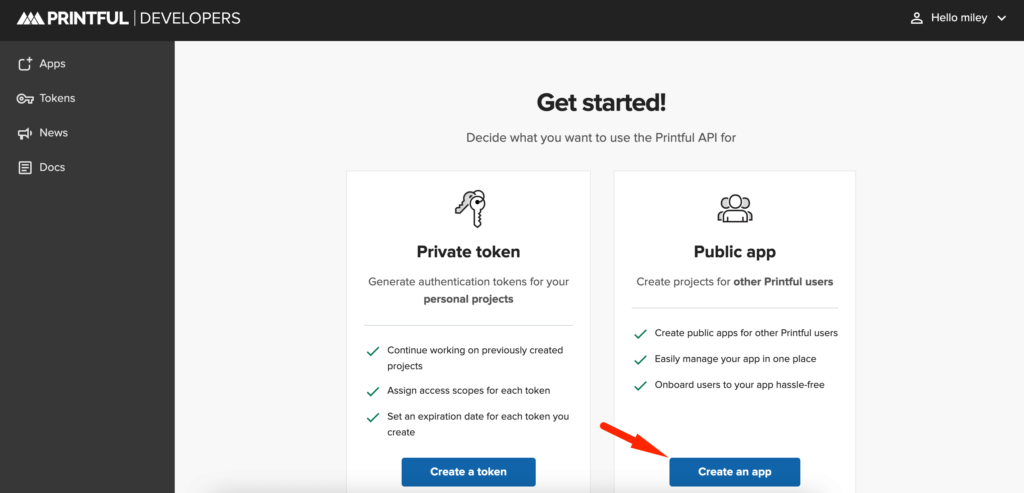
Now you need to create an app to connect to Printful.
Click on the link to go to the developer’s platform of Printful, signup or login. Then click on the Create an app button-
Then you need add the App URL and Redirect Domain that you will find in the Dokan–> Settings–> Printful.
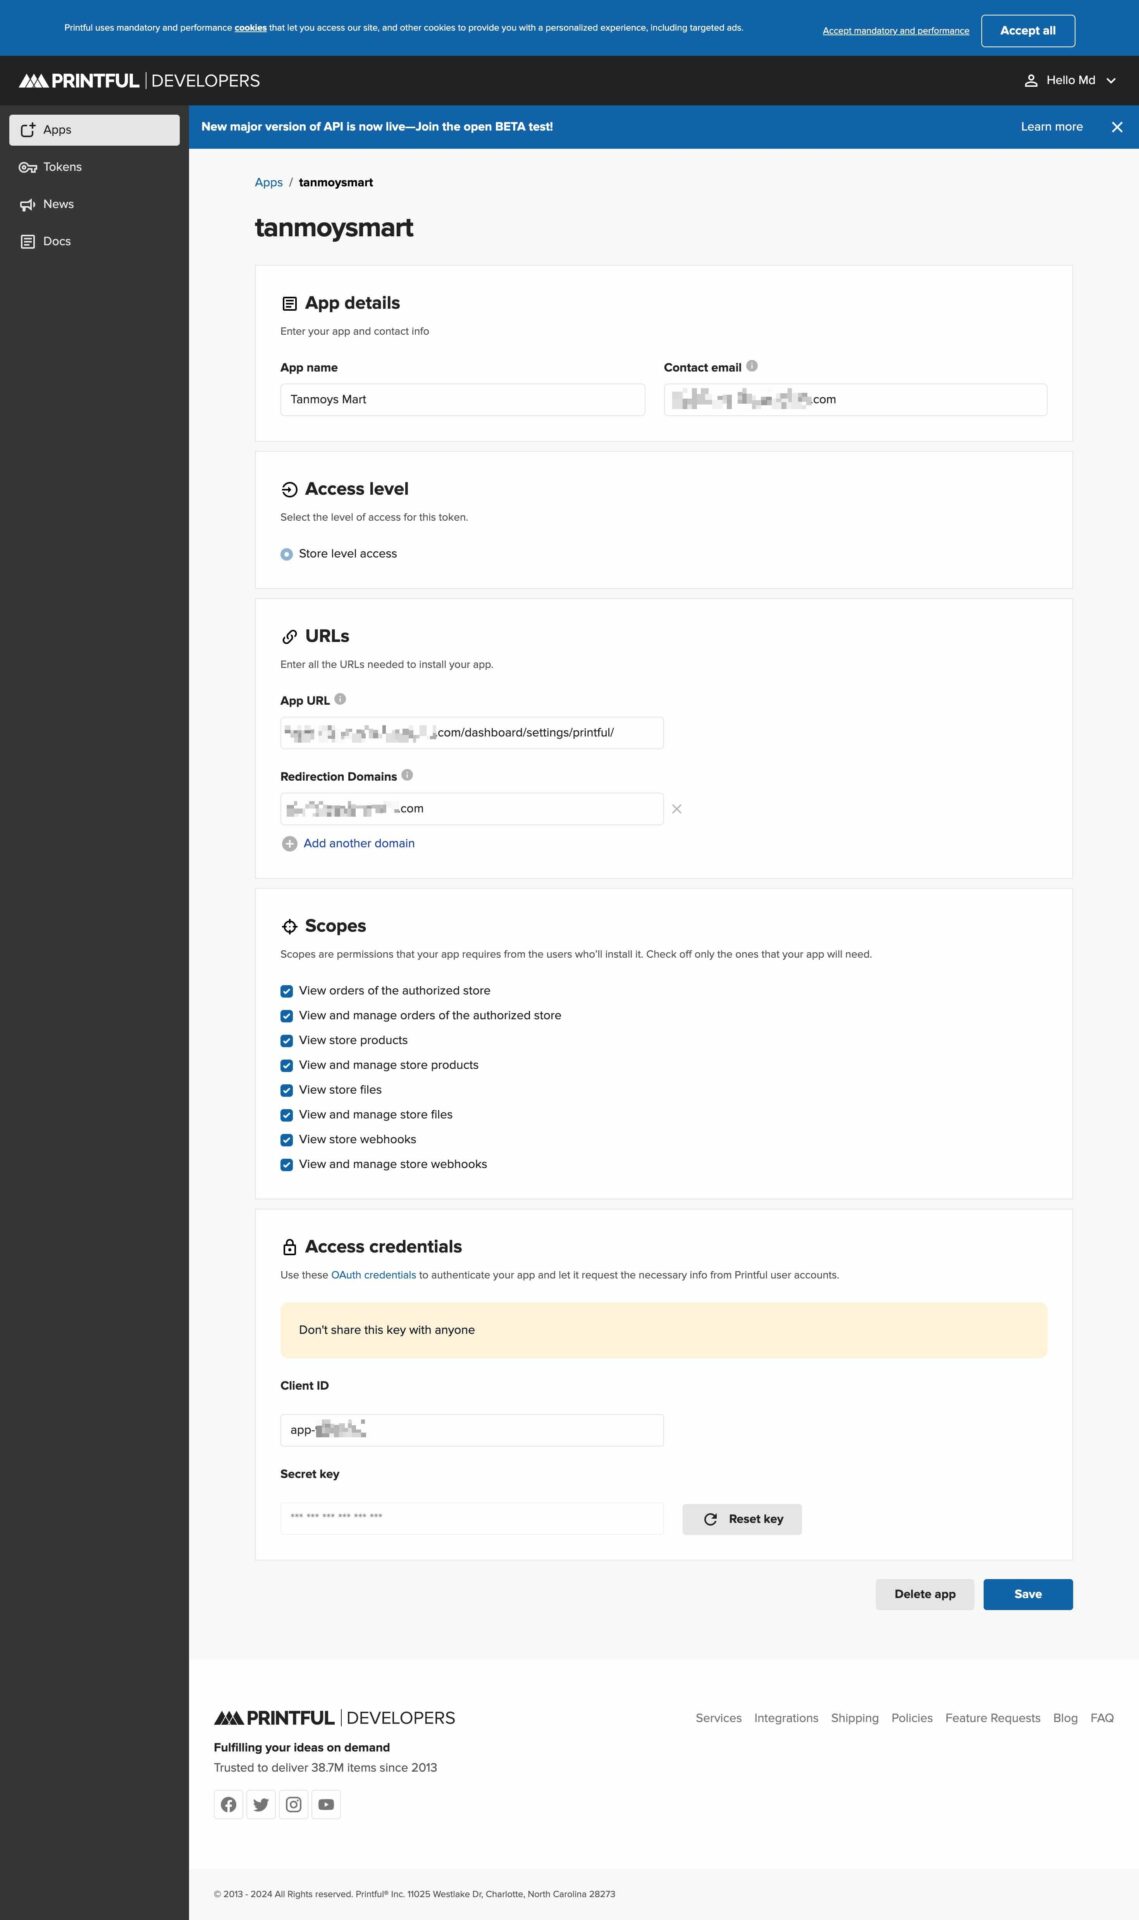
Note: Choose all the scopes while creating app. Avoid writing Printful in the App Name.
When you click on the Create App button, you will see the Client ID and Secret Key. Copy them and paste them on the Dokan settings page-
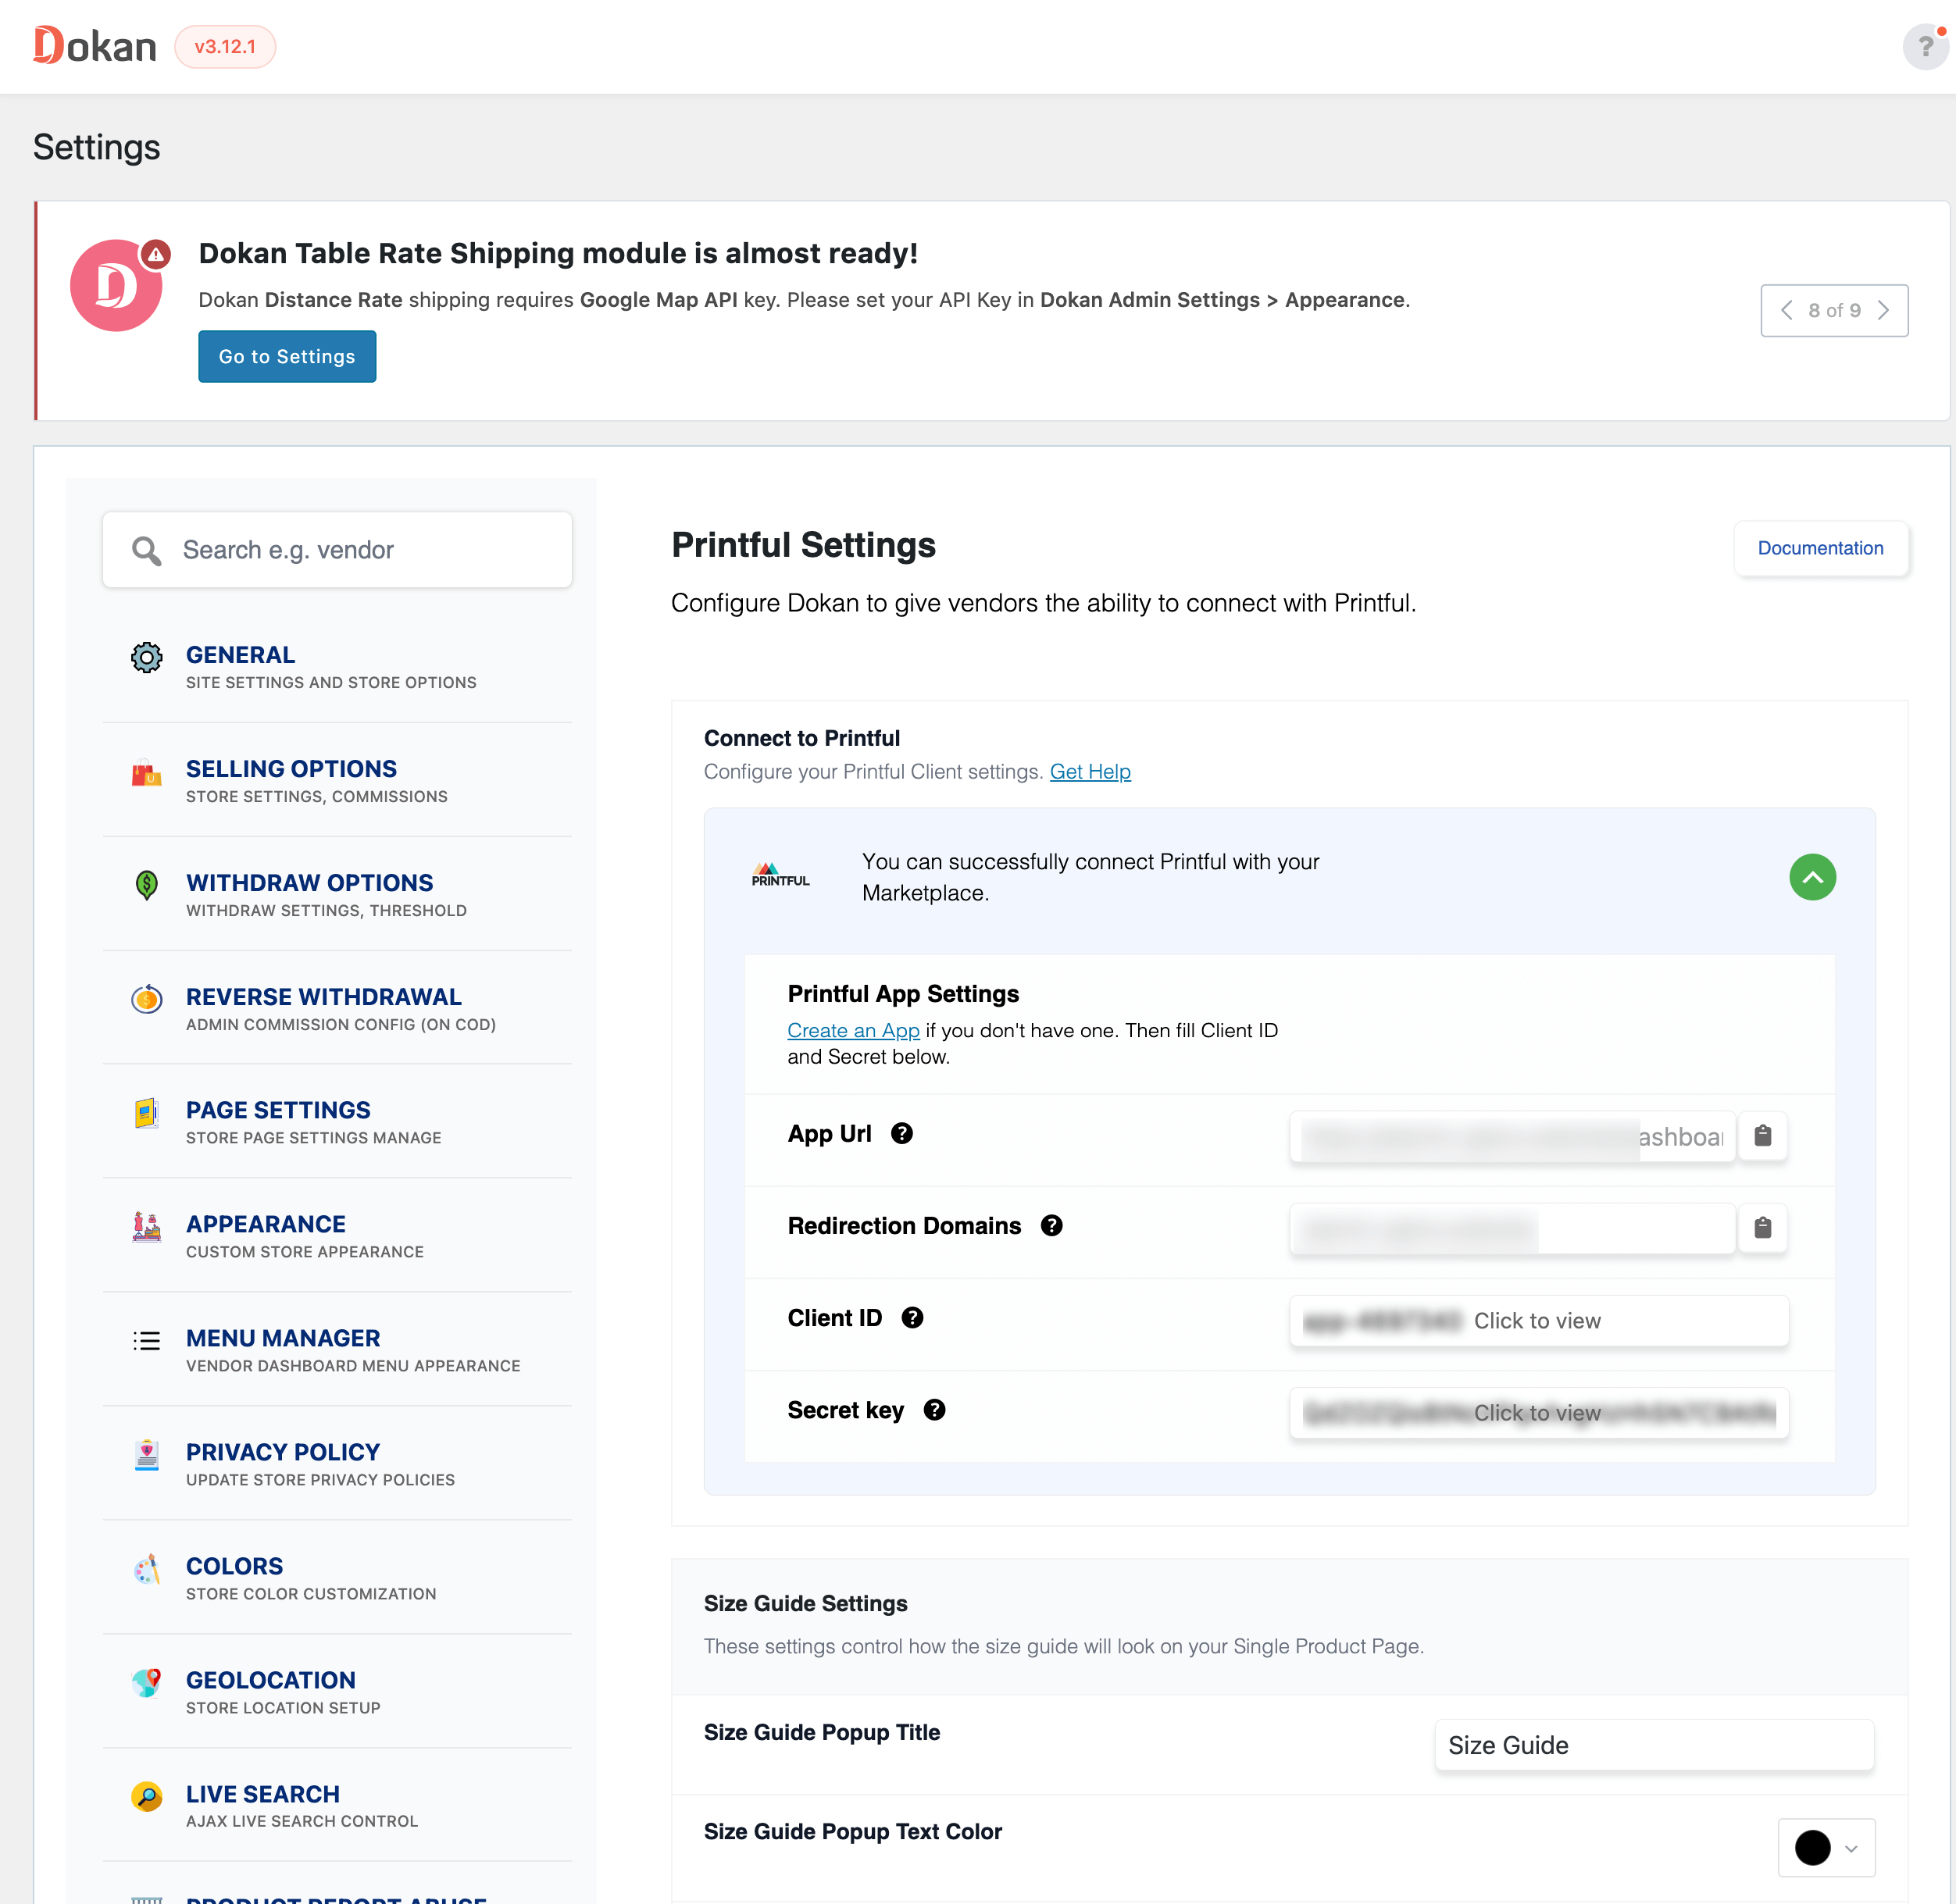
Also, you can configure the Size Guide settings from here as well. Don’t forget to click on the Save Changes button to finish.
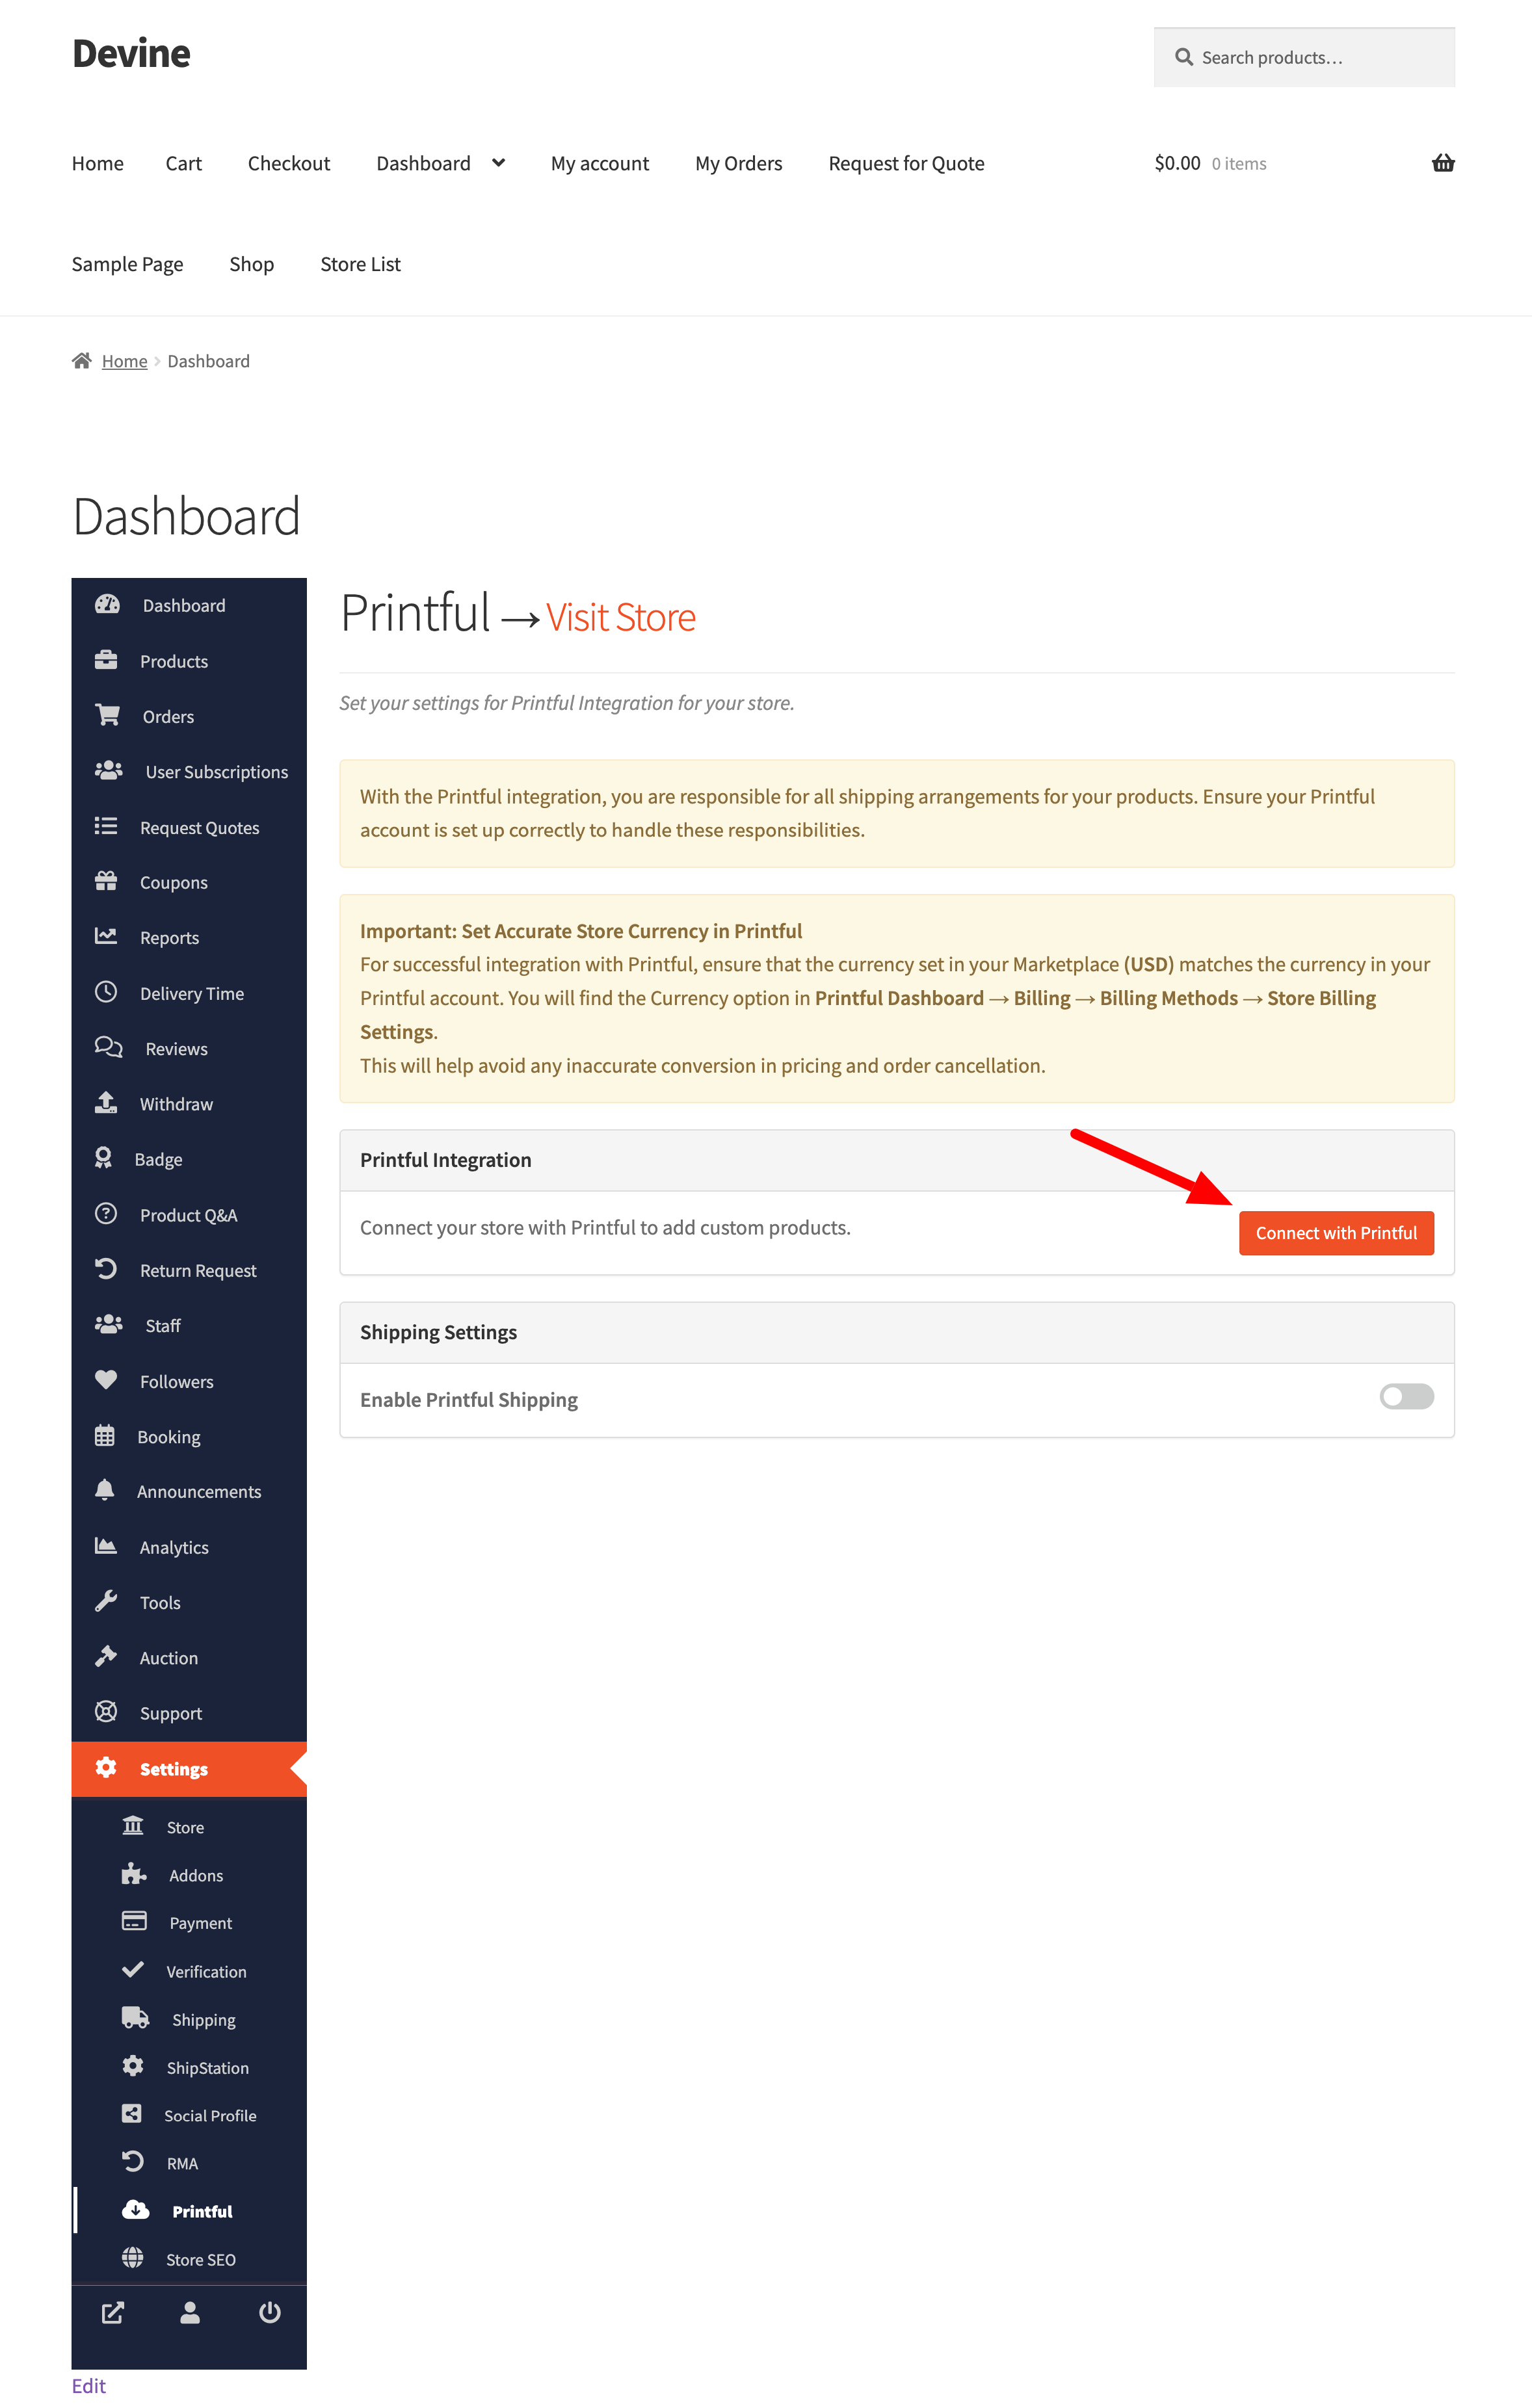
Configure Printful- Vendor
Now, for vendors to connect their store to Printful, they need to go to their Vendor dashboard–> Settings–> Printful. There click on the Connect with Printful button-
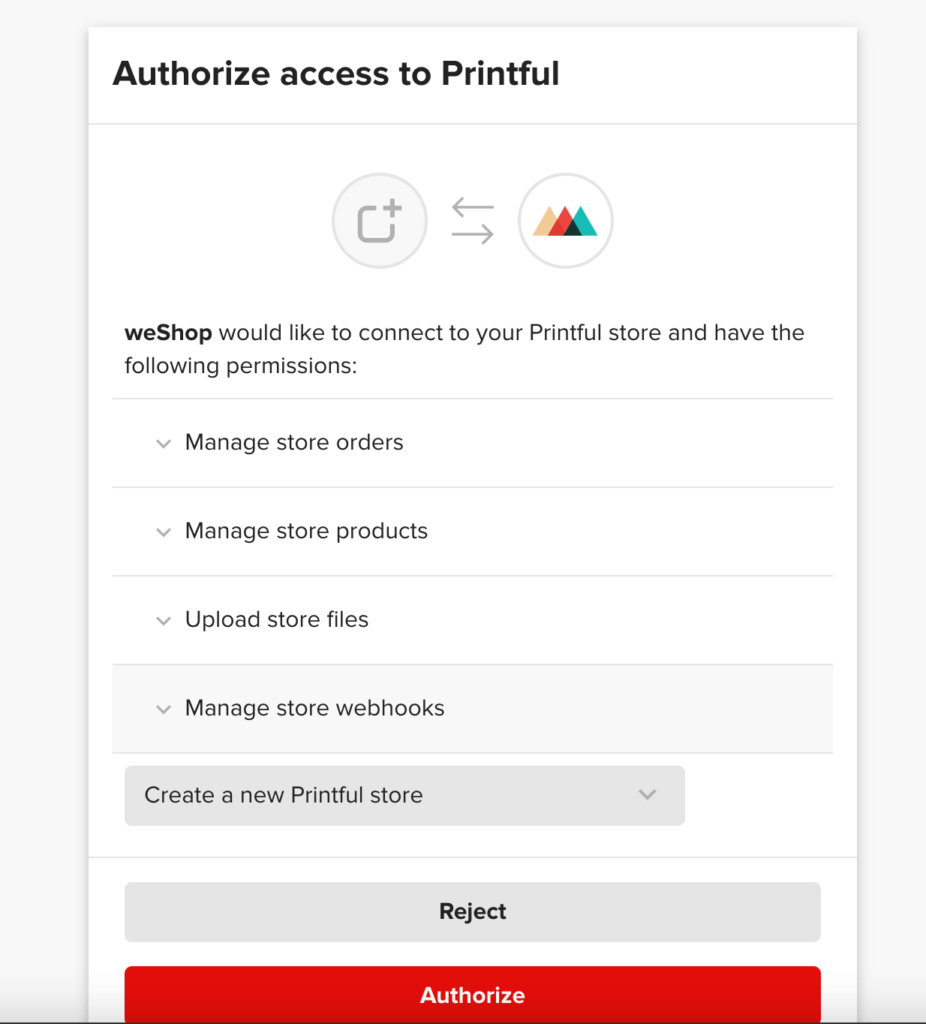
Note: Read the notices carefully before proceeding to configure the Printful account.
You will need to authorize the Printful app to access your store-
You will see that your store is connected to Printful-
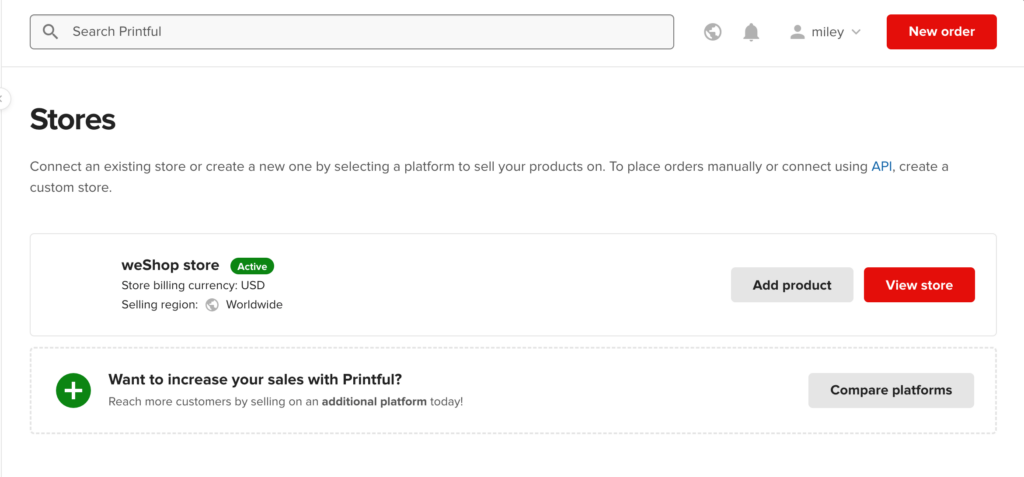
Note: It is better to create a new store in Printful rather than connecting an old one. Otherwise, it may create conflicts.It can result in inaccurate order sync and reporting errors.
How to Add Product
After successfully connecting to Printful, you can create a product in Printful, and it will show up in the vendor dashboard.
You can see this guide on how to create a product in Printful and create your products. Don’t forget to save the product after finishing.
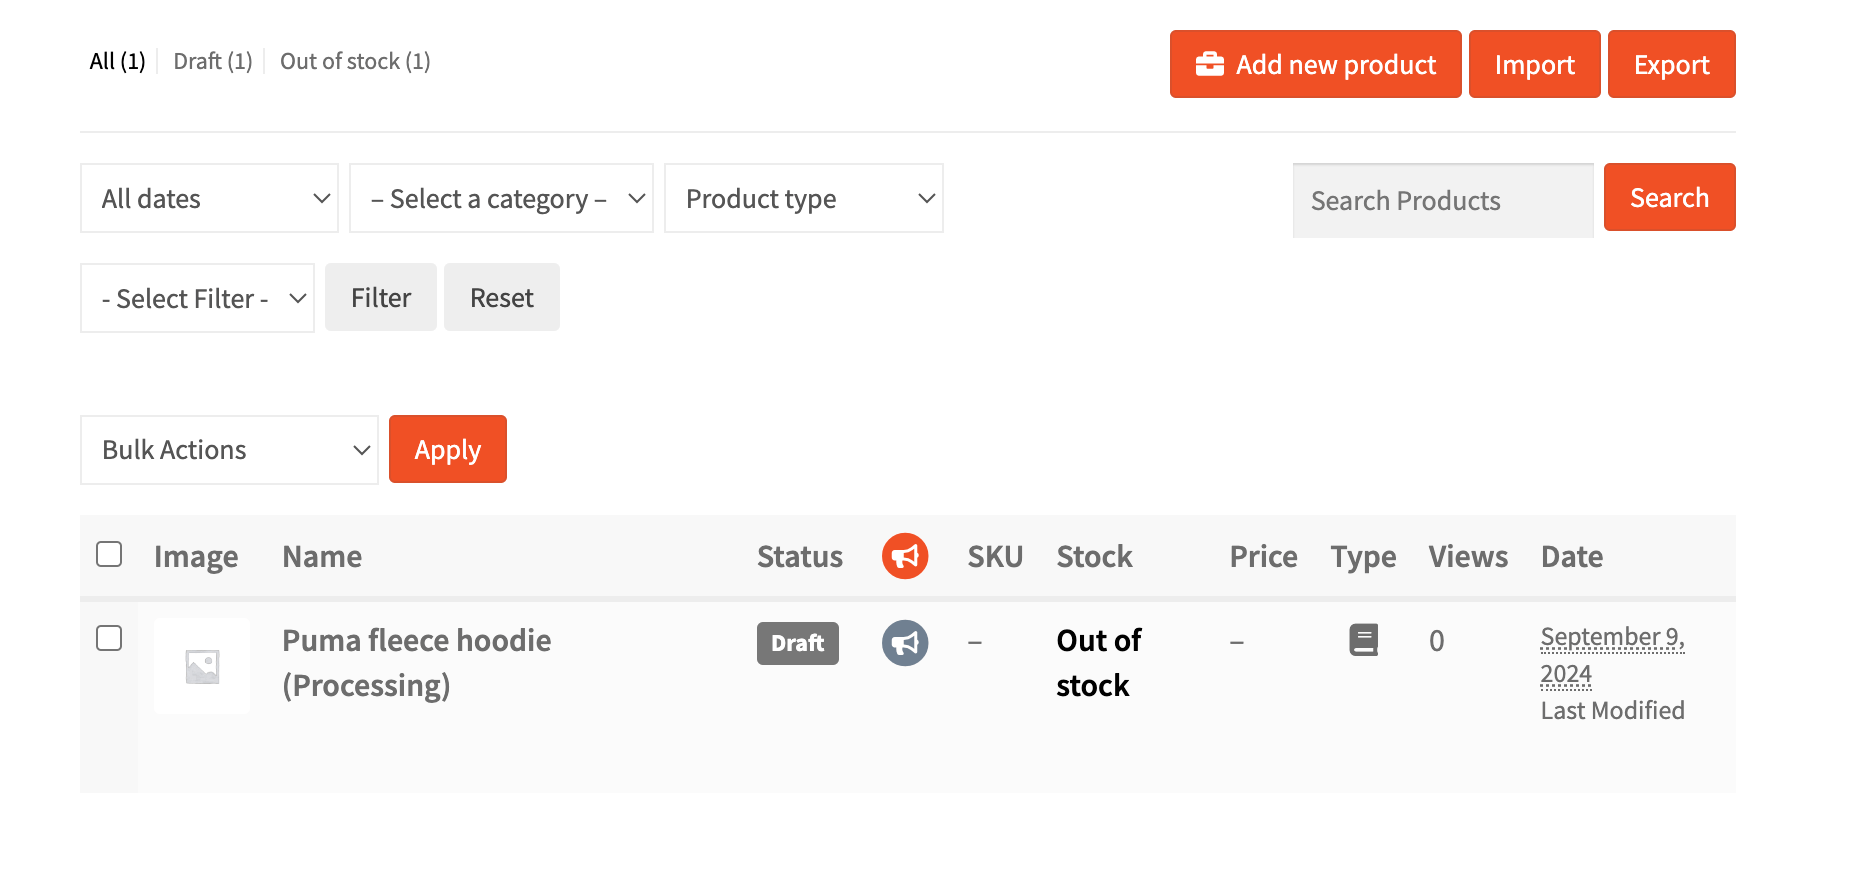
You will see the product in the vendor dashboard product section. First, you will see the draft and out of stock status-
After a few minutes, you will see that the product is online and also see the Printful badge beside the product-
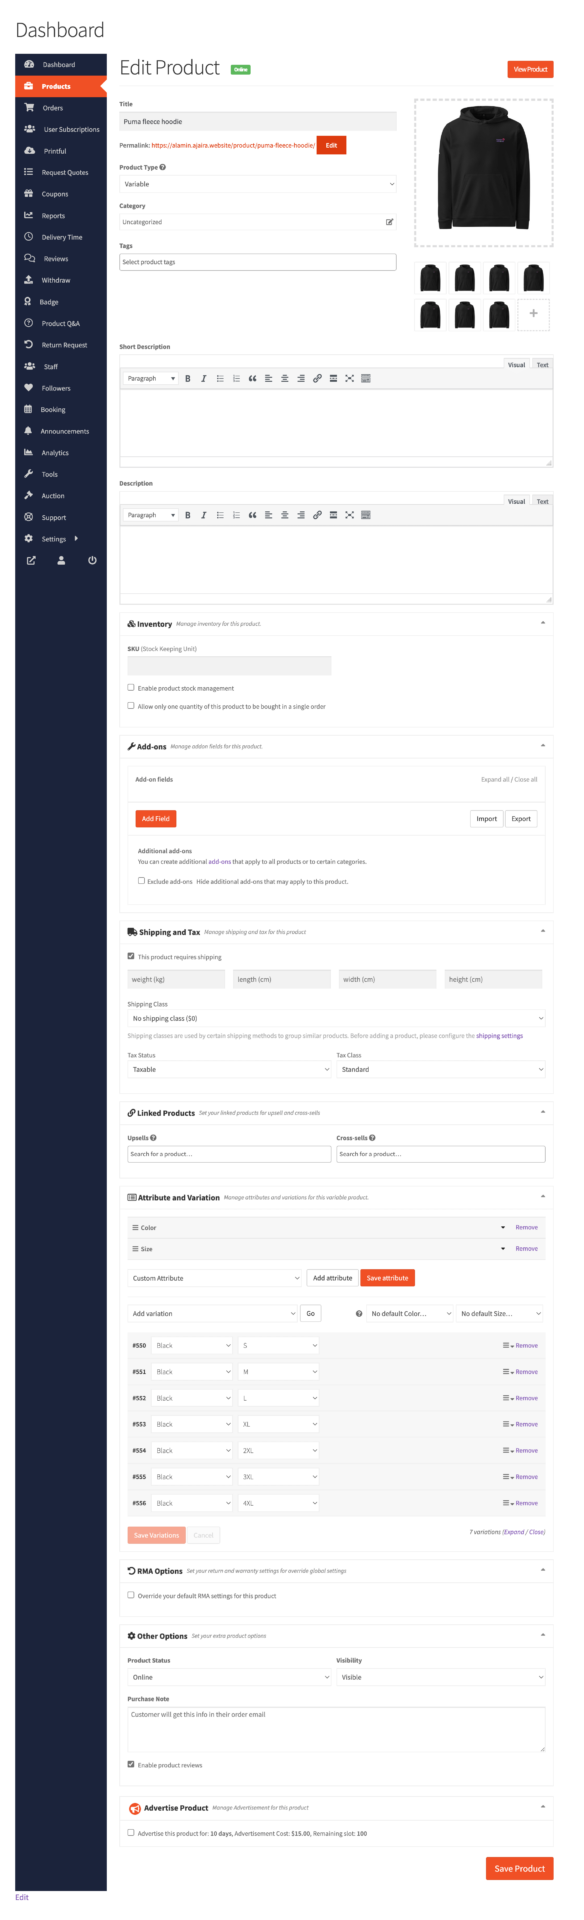
If somehow the size guide is not imported, you can click on the Size Guide button to import the size guides-
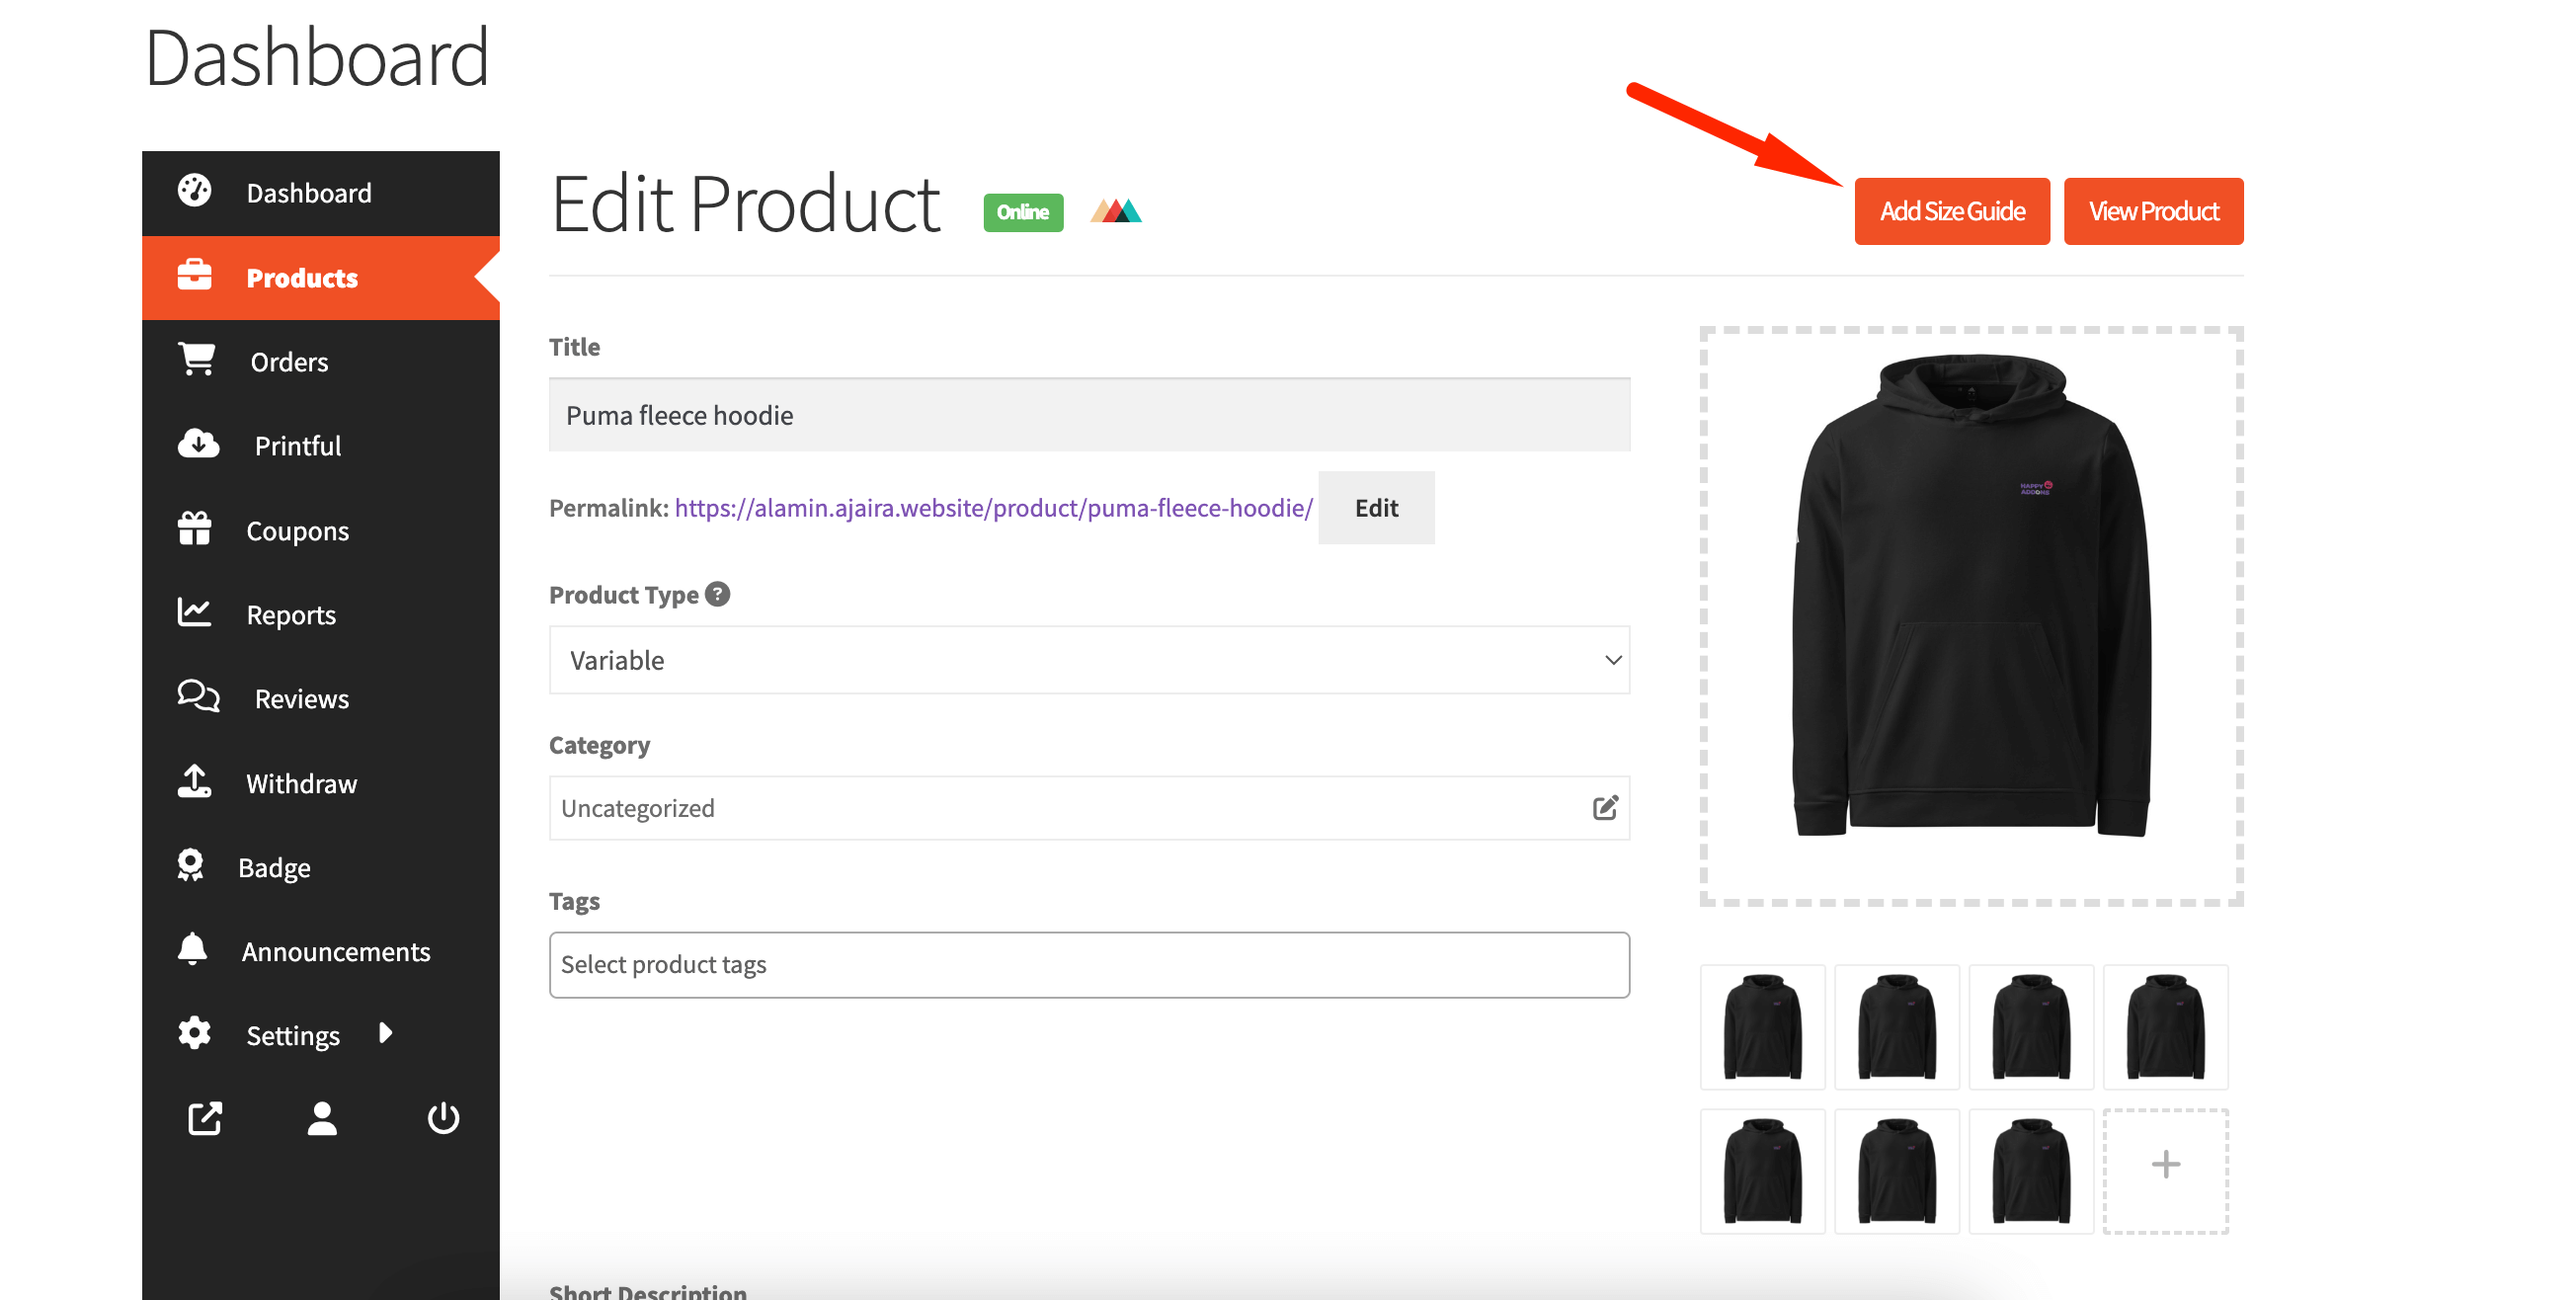
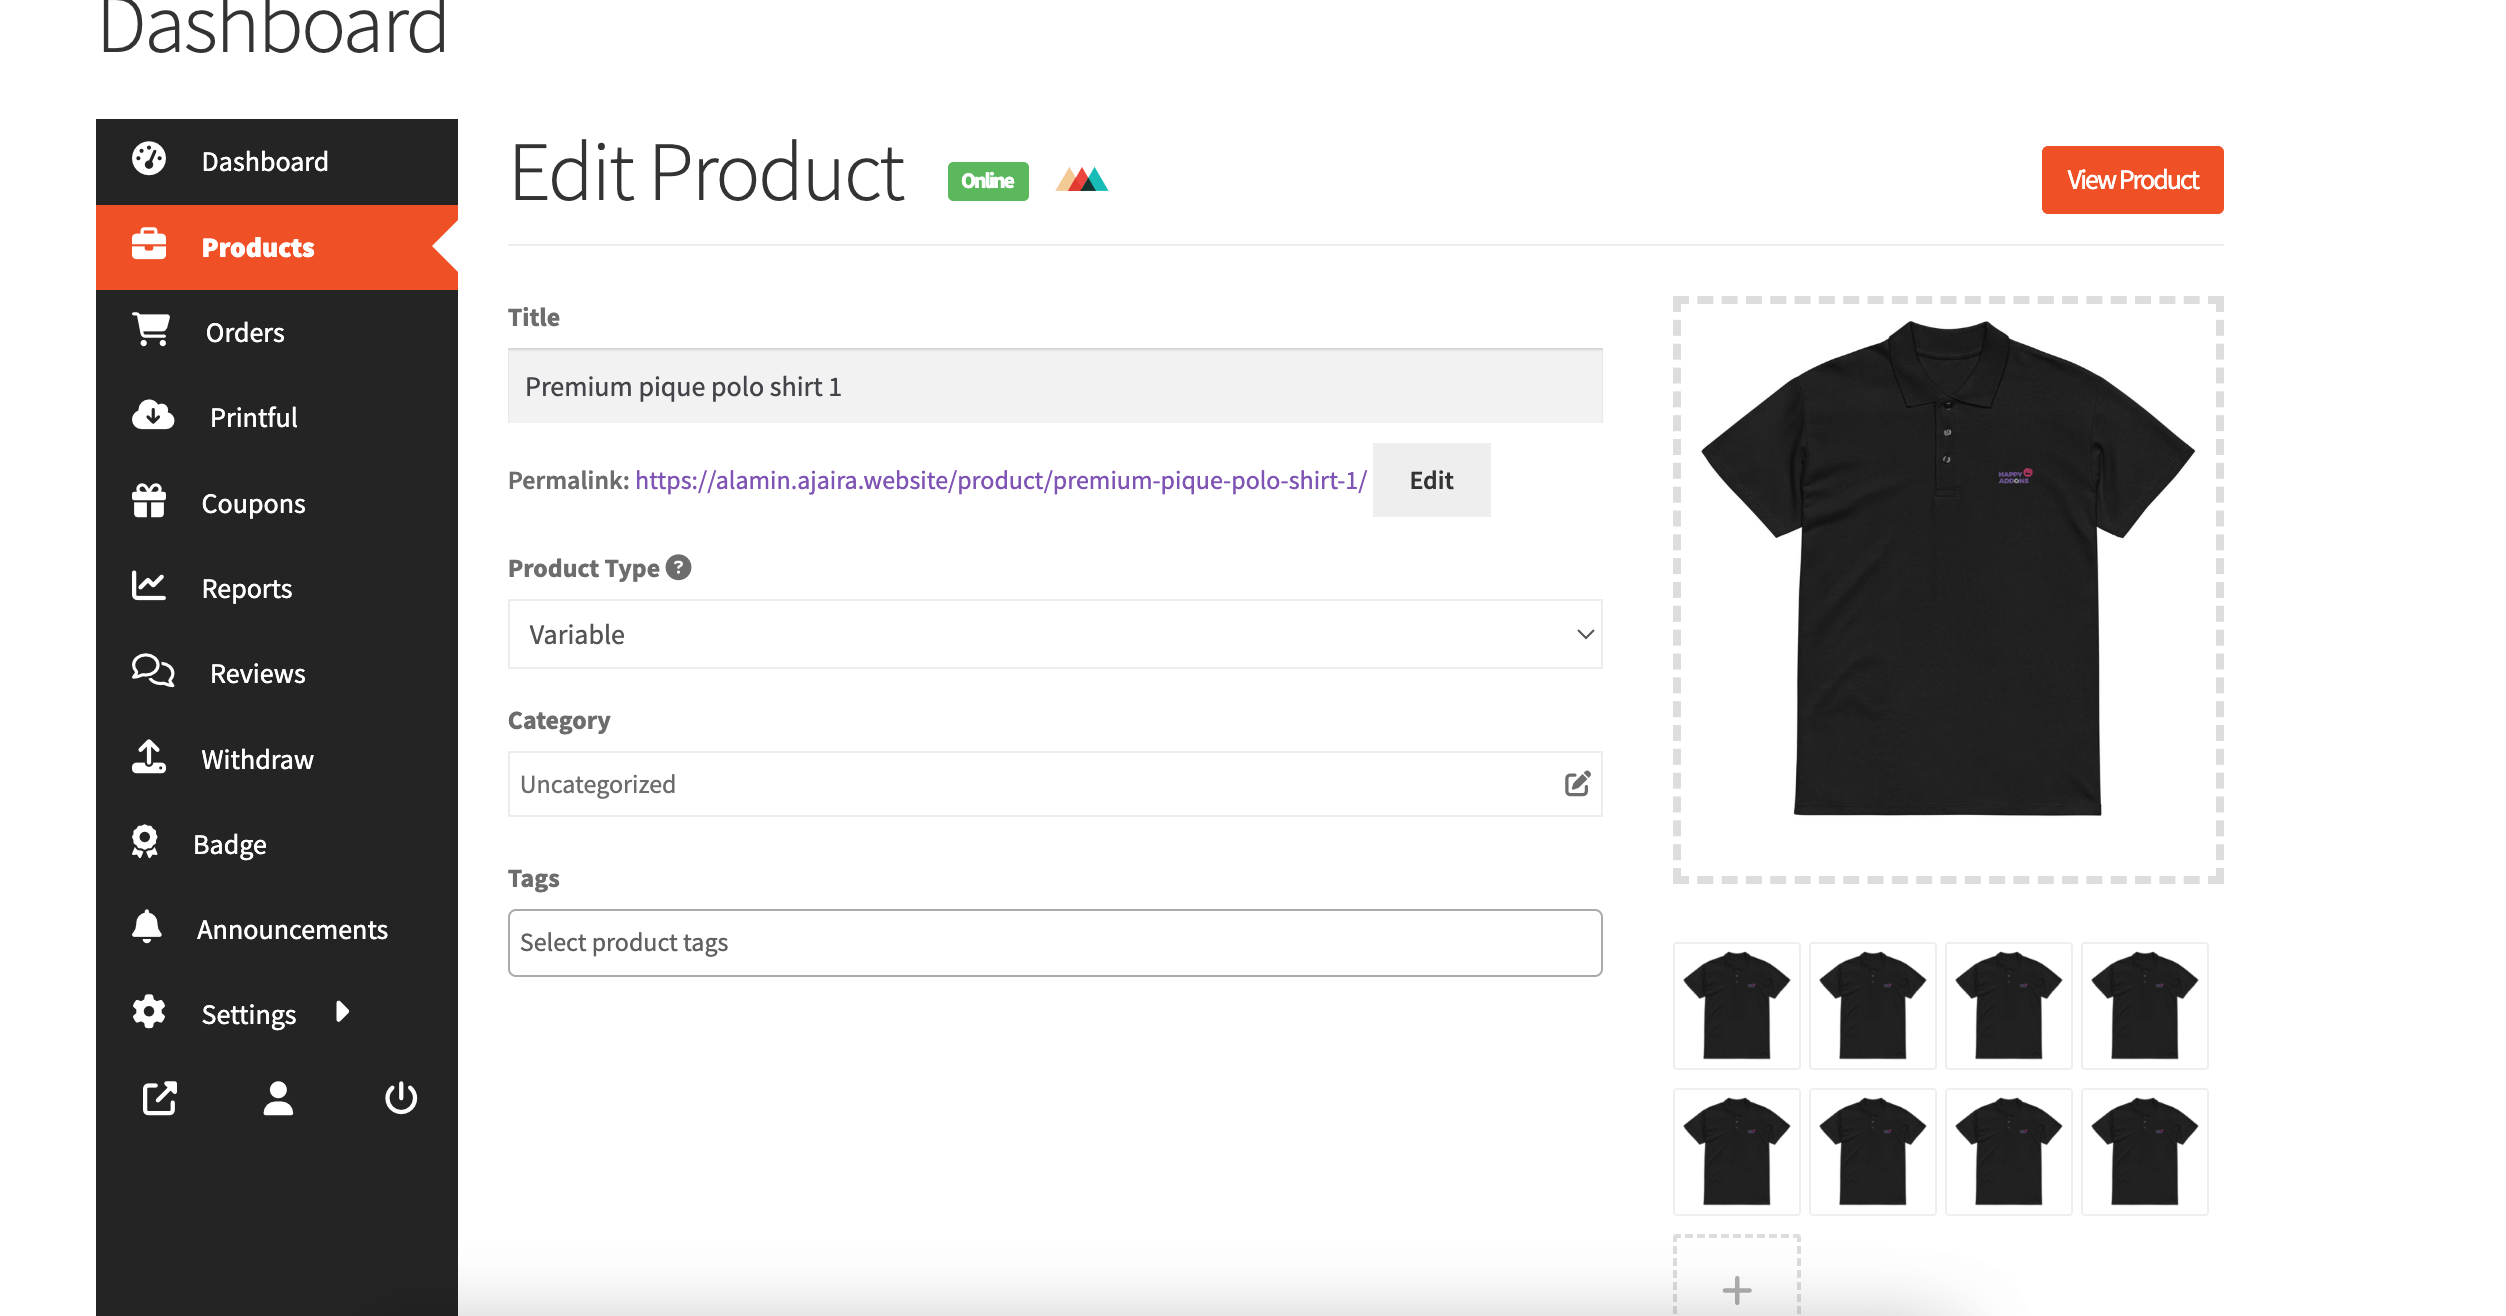
If the size guides have successfully imported, then you won’t see the size guide option-
The size guide option will be visible on the single product page-
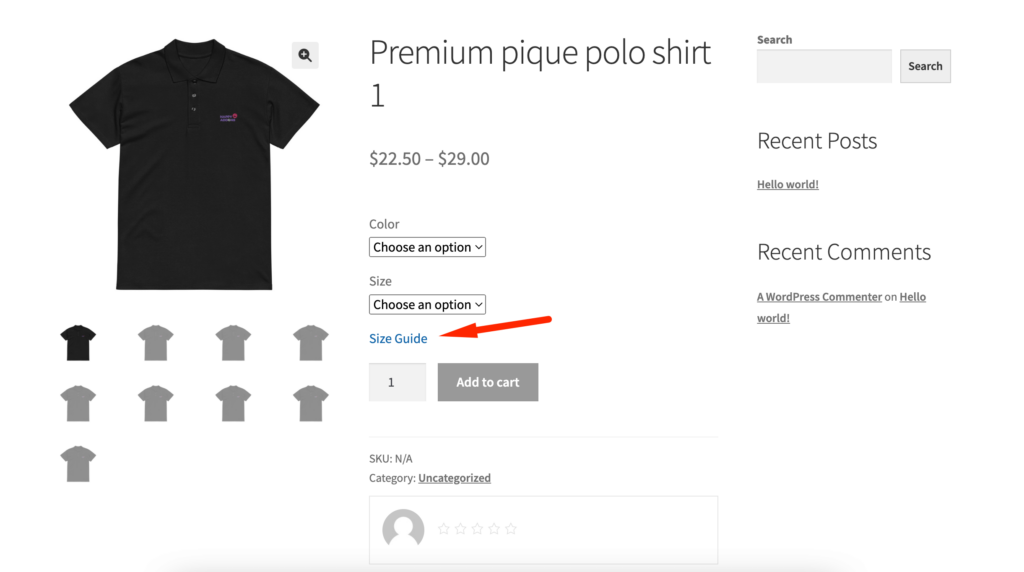
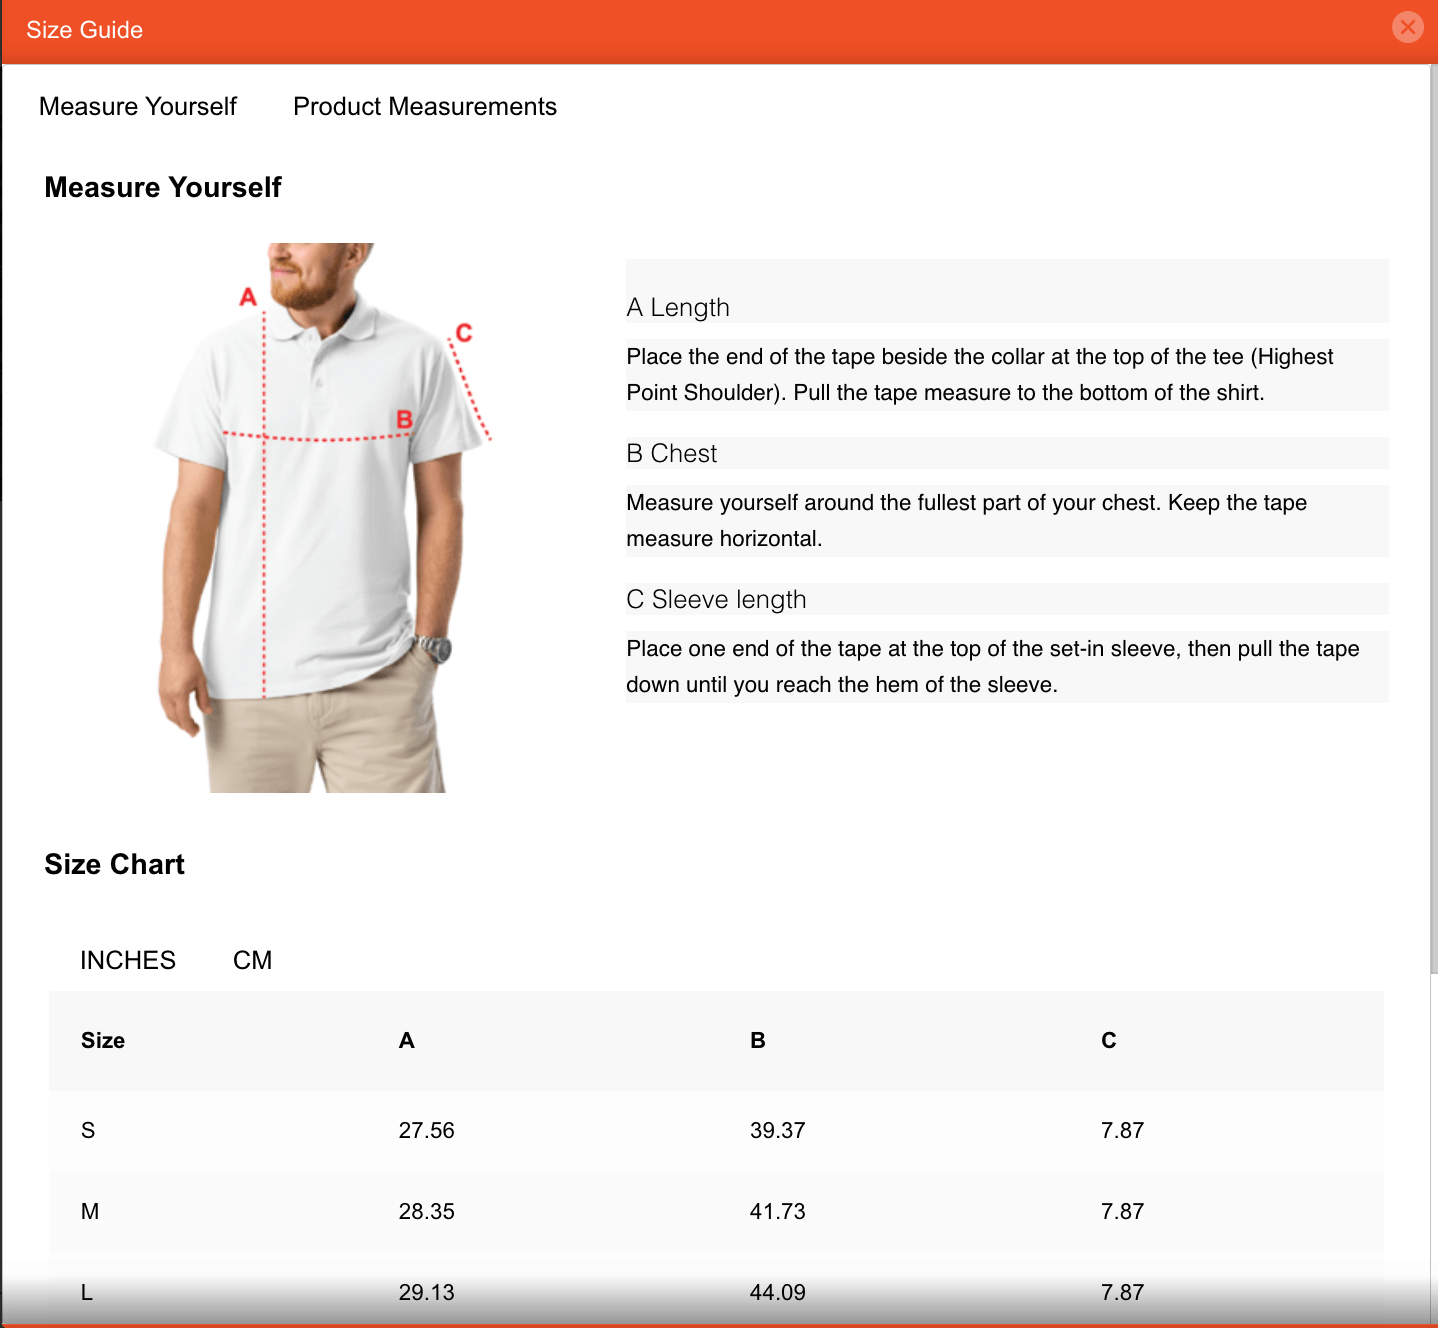
When the customer clicks on the size guide option, then they will see a popup-
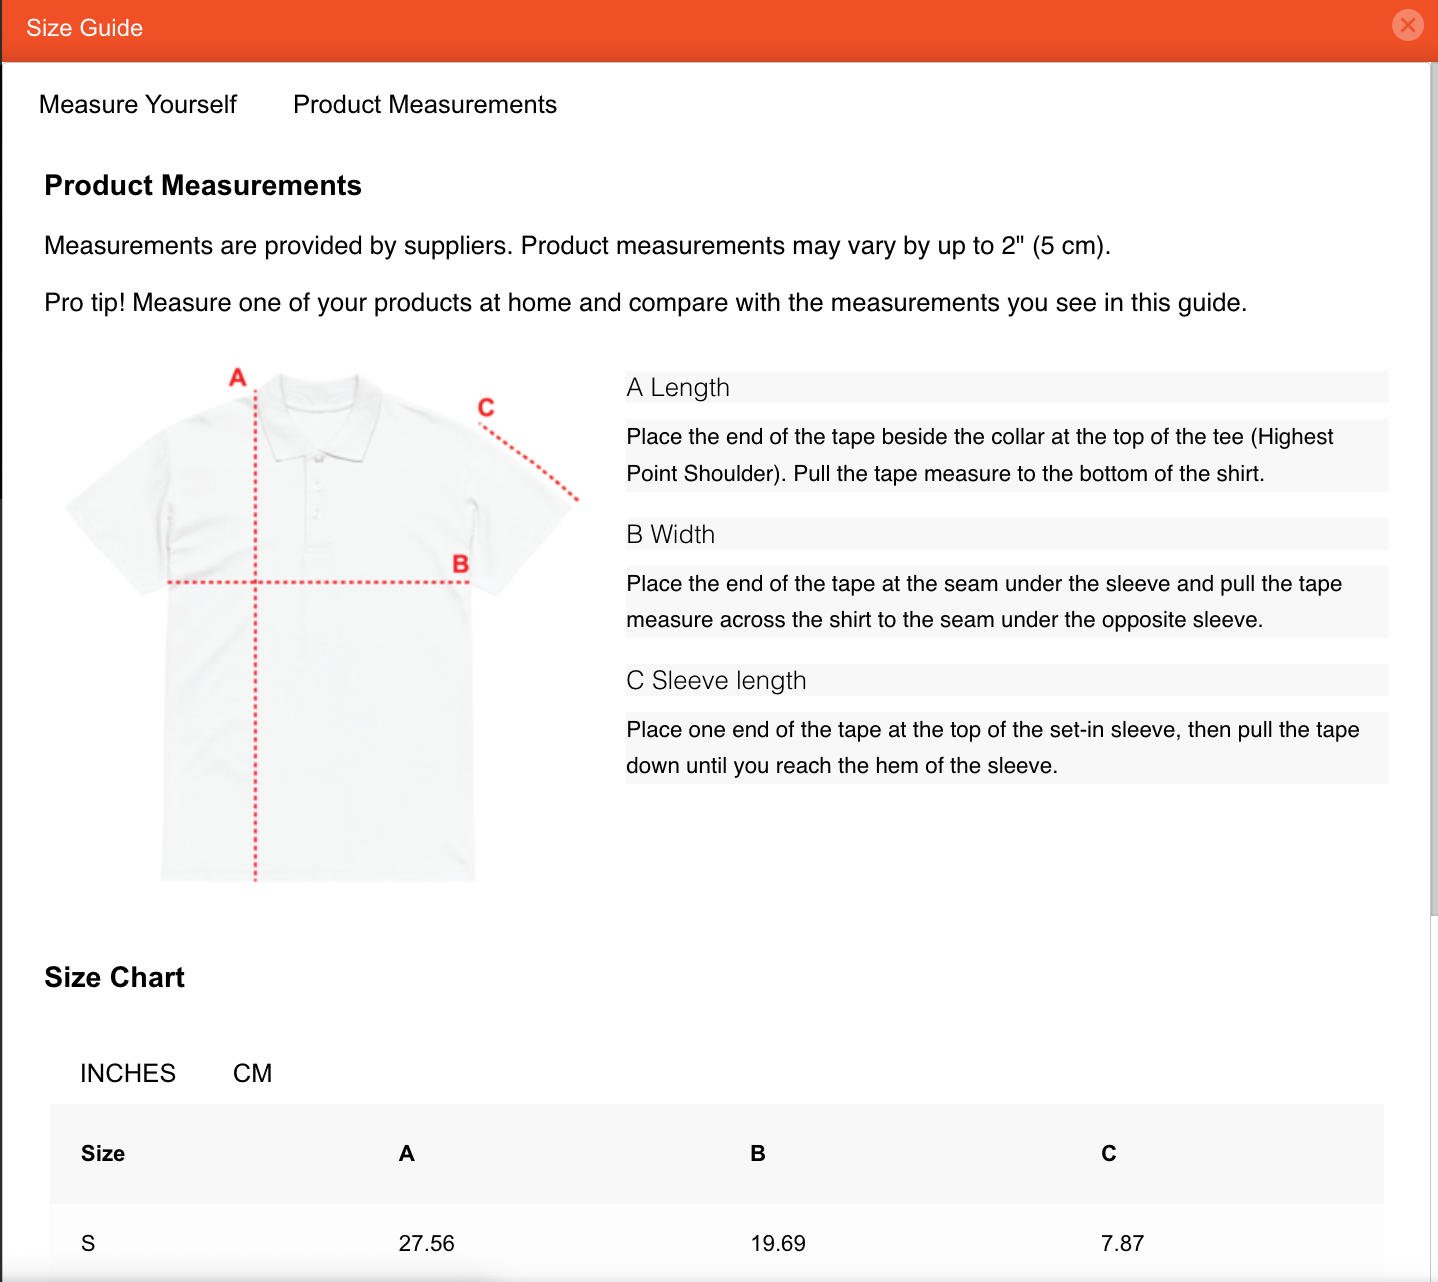
You may see the product measurements as well-
Note: The size guide is provided by Printful and is not translatable.
Also, if you make any changes to the product in Printful, it will update in the Dokan vendor dashboard section as well.
Click on the Edit button on Printful of any product of your store connected with Dokan-
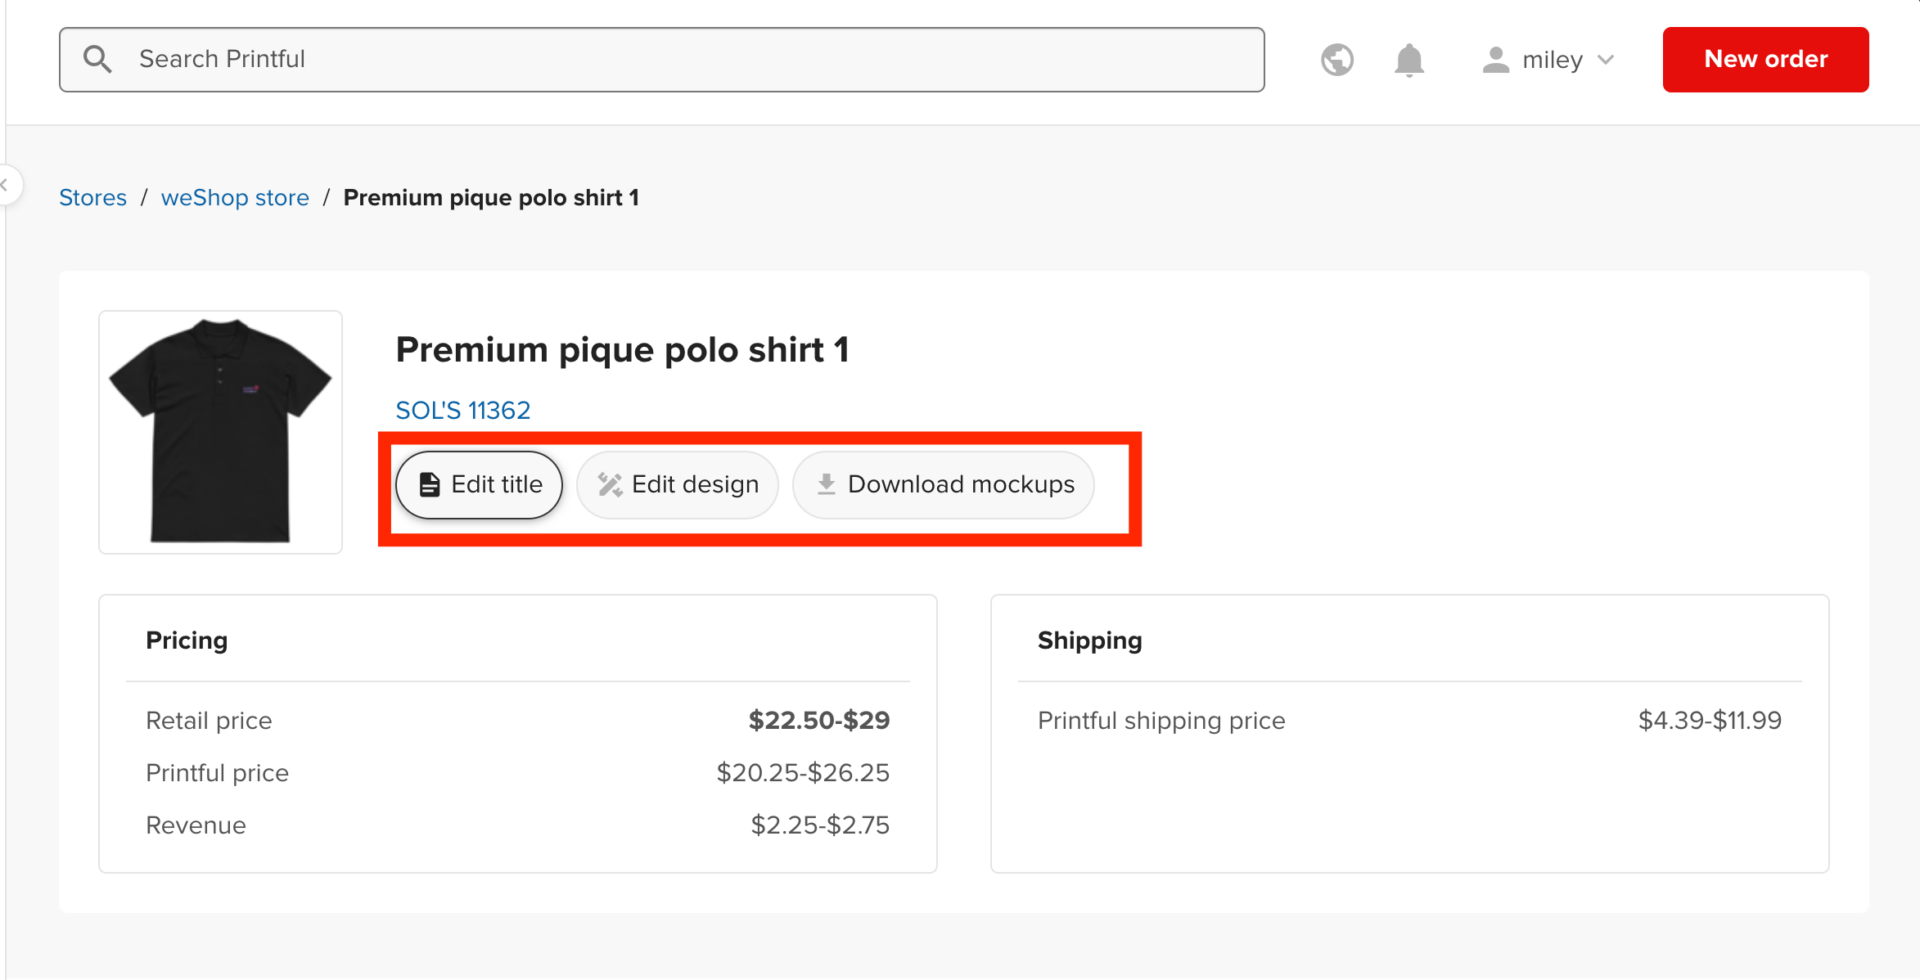
For example, change the title of the product-
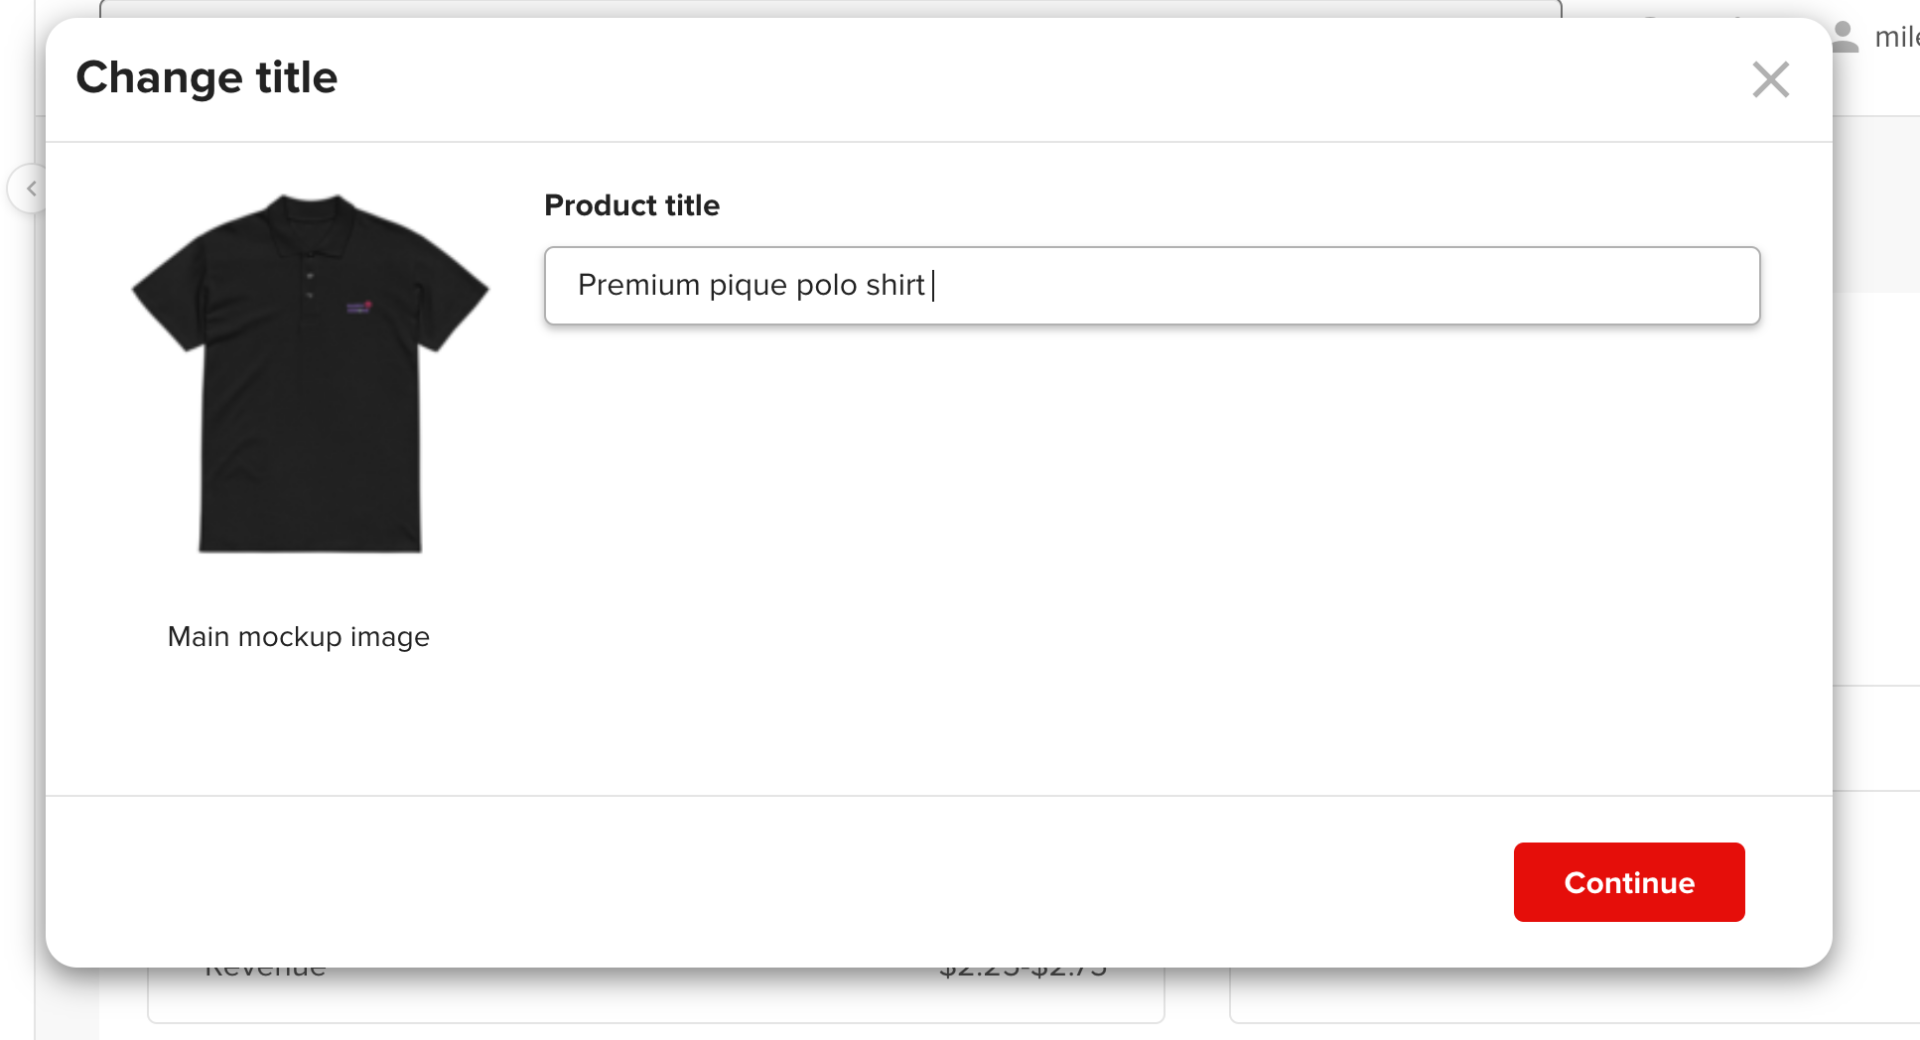
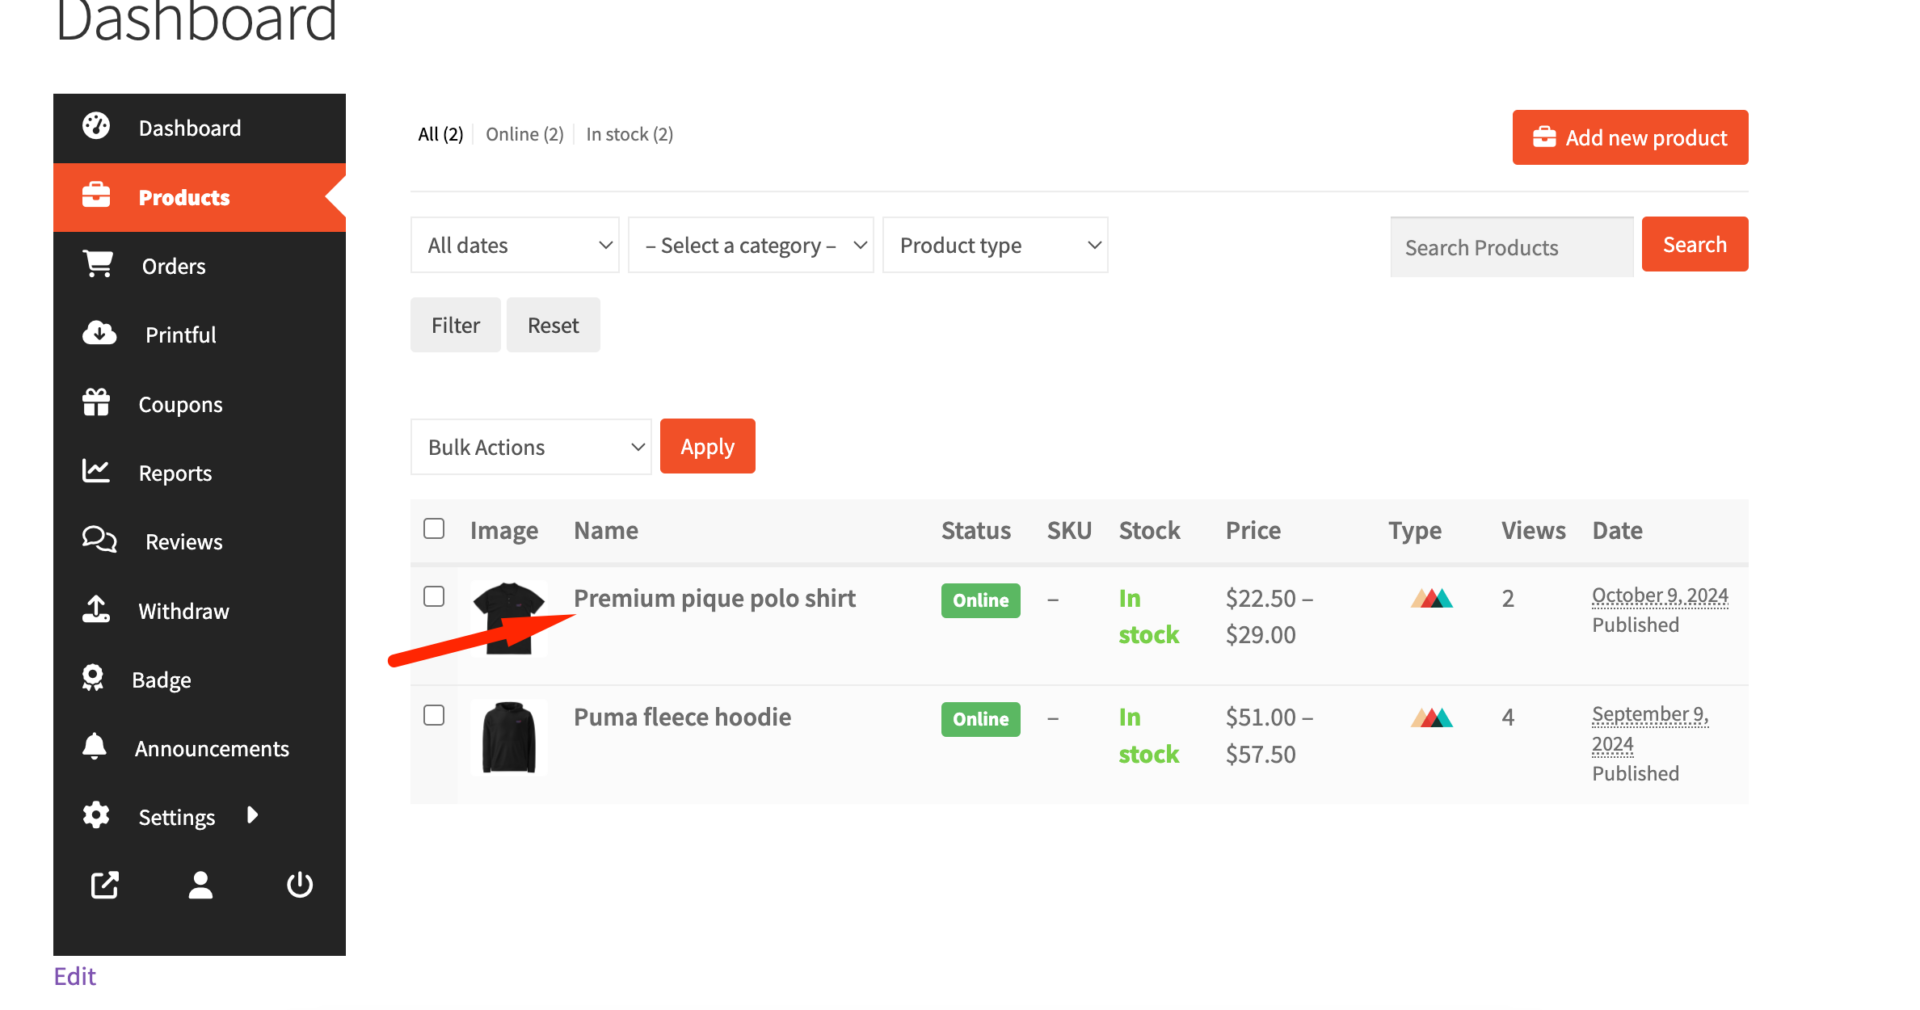
You will see that the changes have taken place in the Dokan vendor dashboard as well-
However, if you make changes in the Dokan dashboard, it will not affect Printful, but Printful can override Dokan settings. If you delete any product or variation of a product from Printful, it will be deleted from Dokan as well.
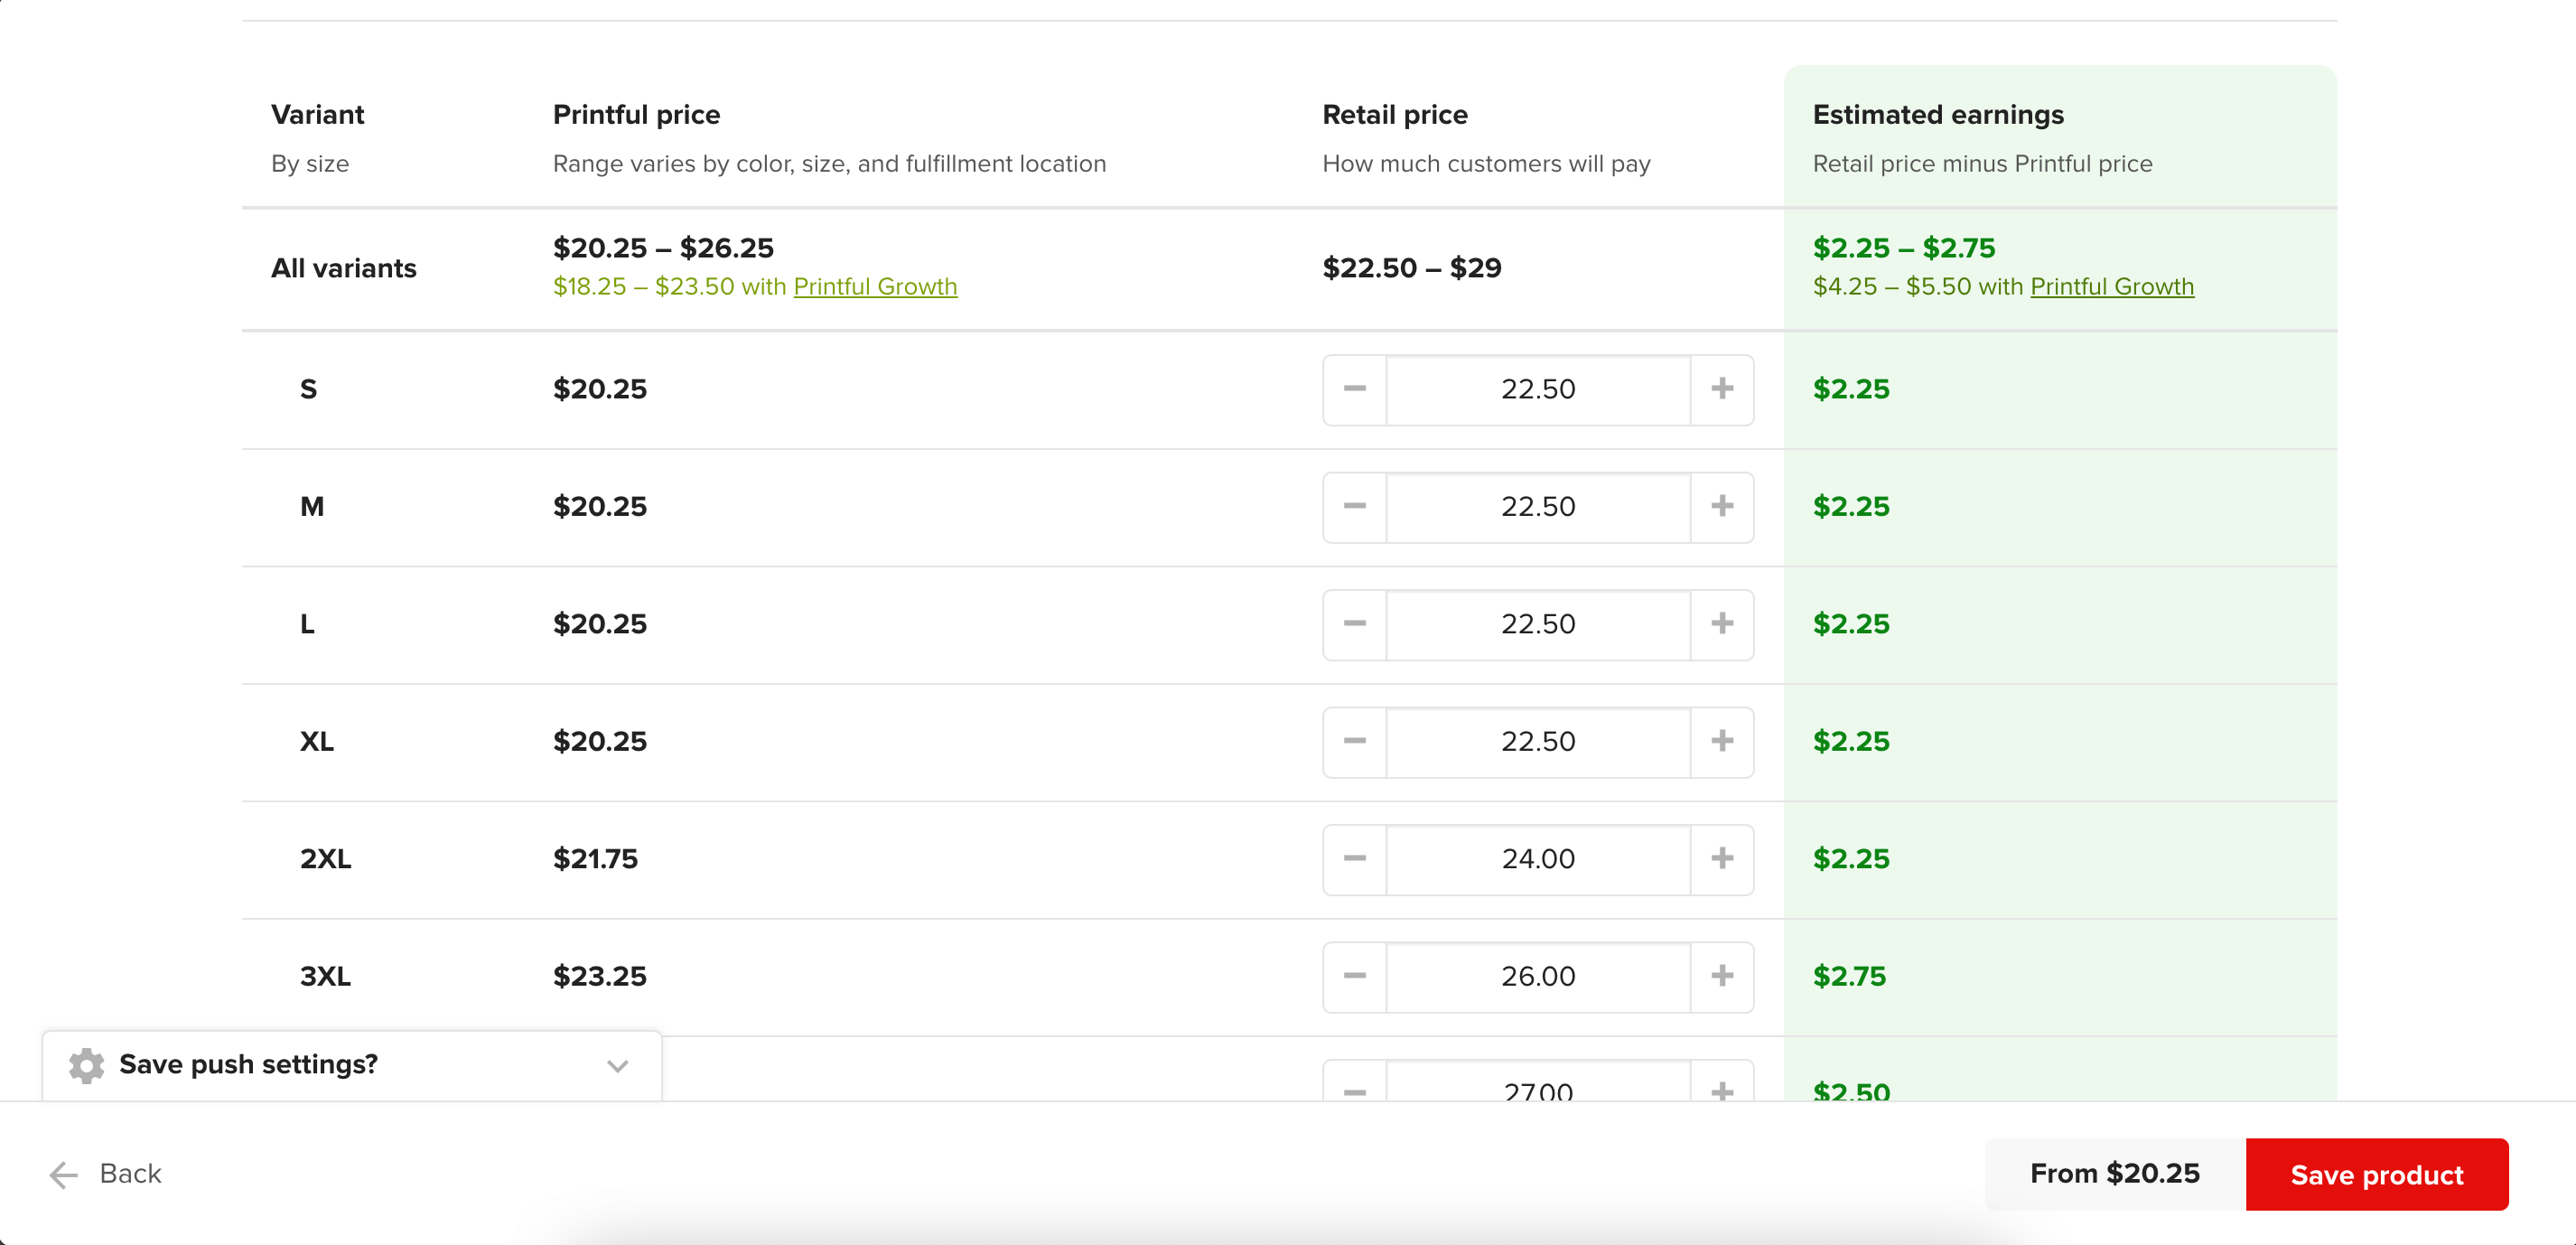
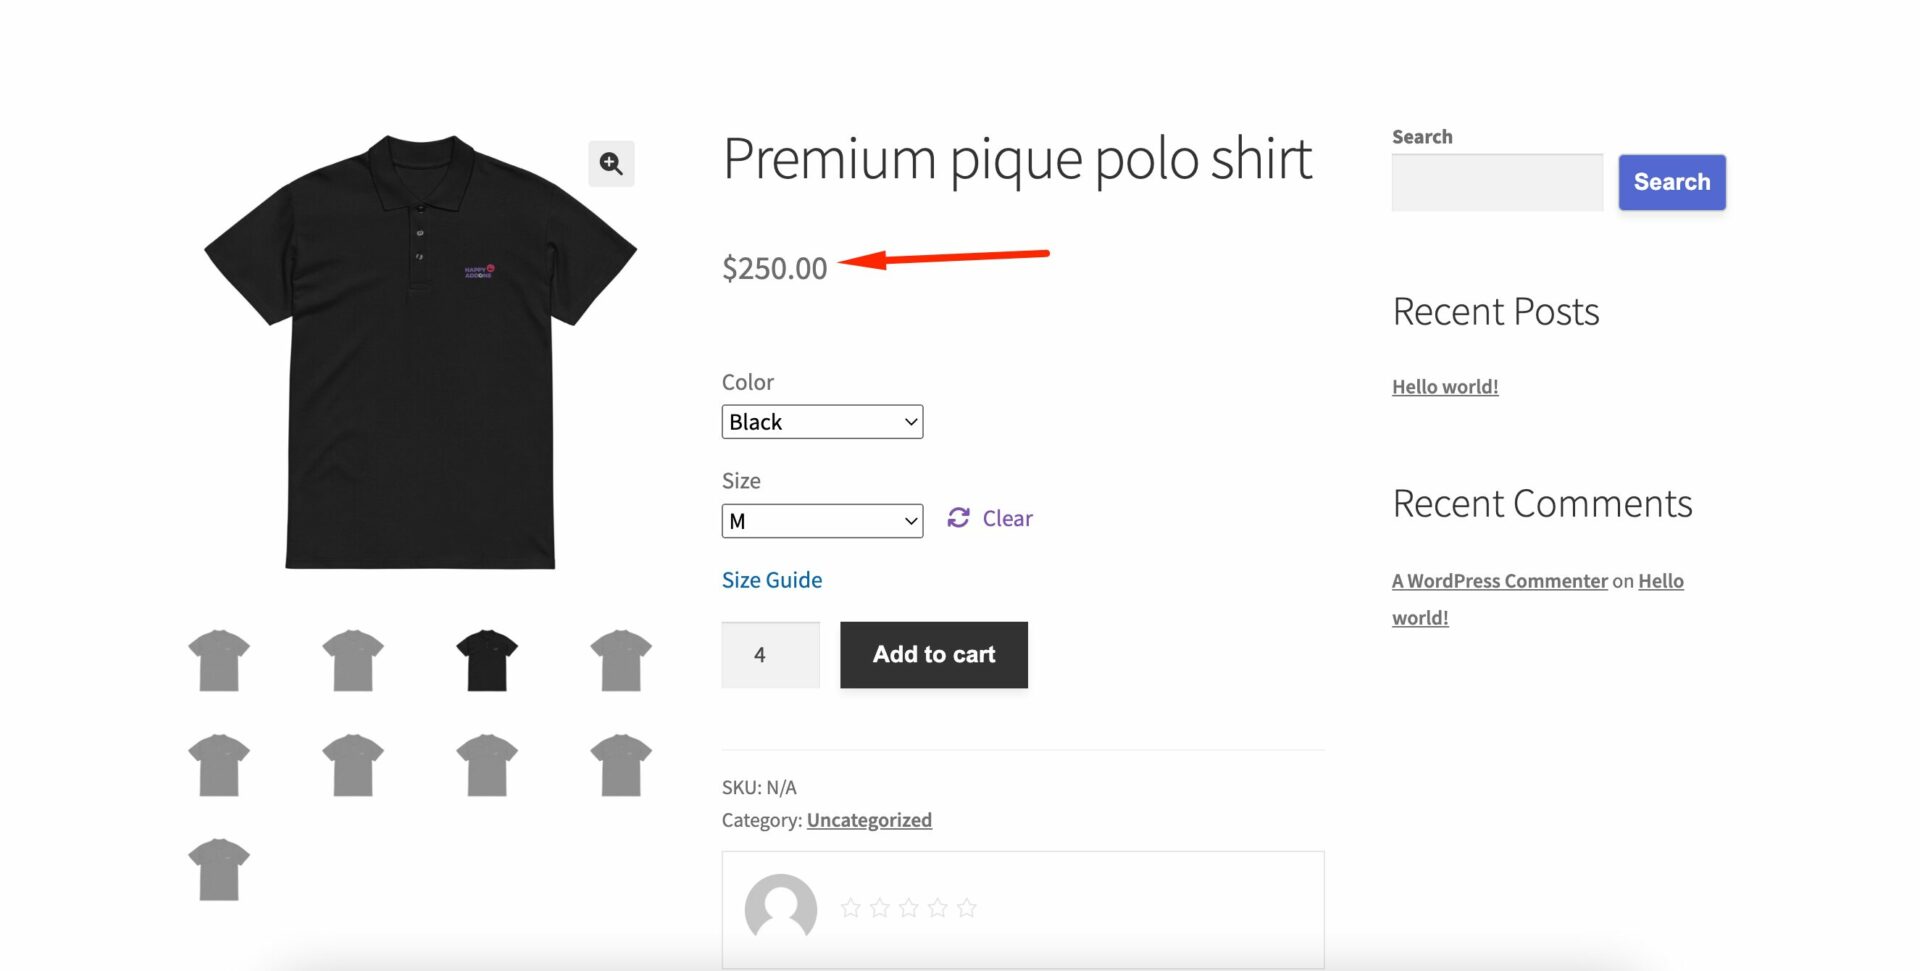
This is intentional to differentiate store prices from the original prices by Printful. this is where vendors will get flexibility for their profit
Here you can see we have changed the pricing in the marketplace side. But it hasn’t changed in the Printful dashboard.
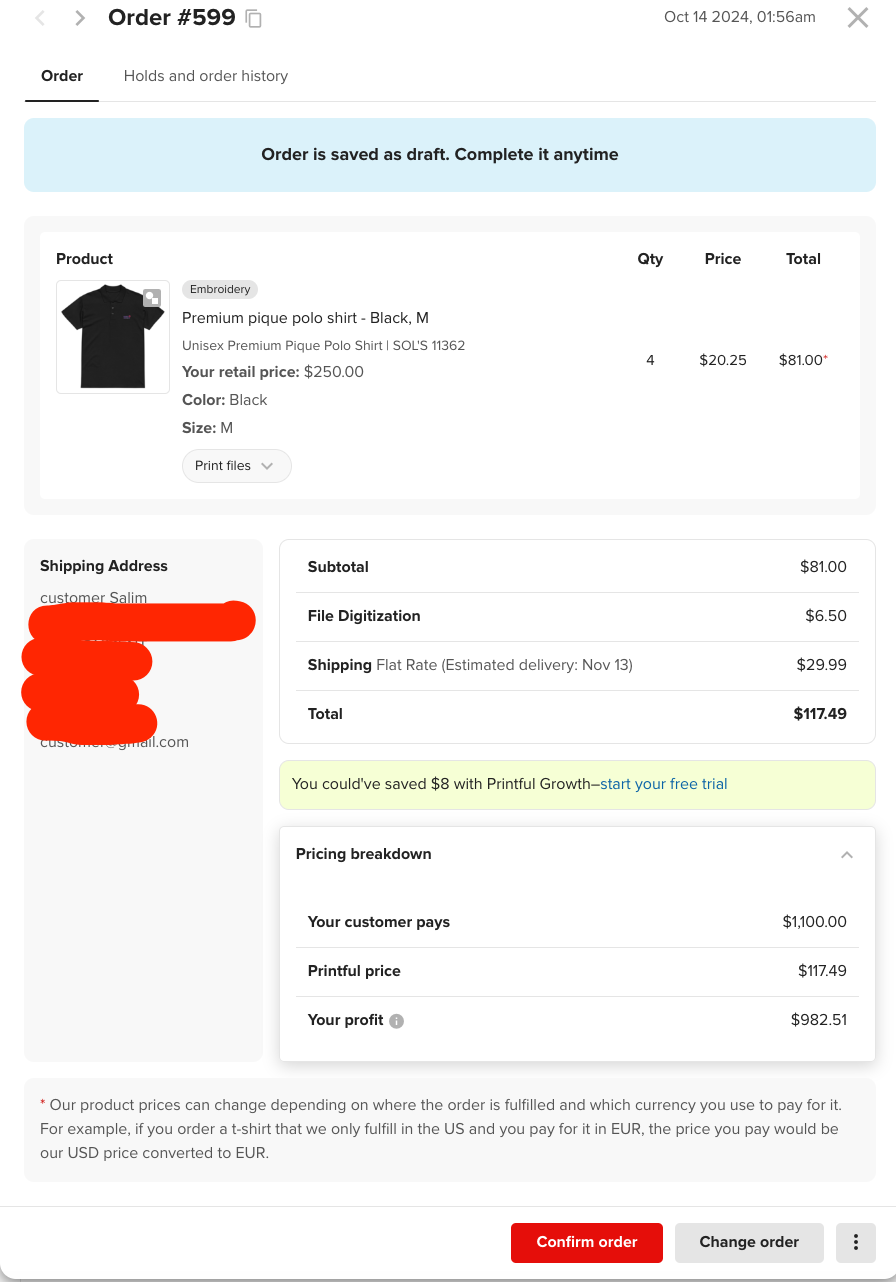
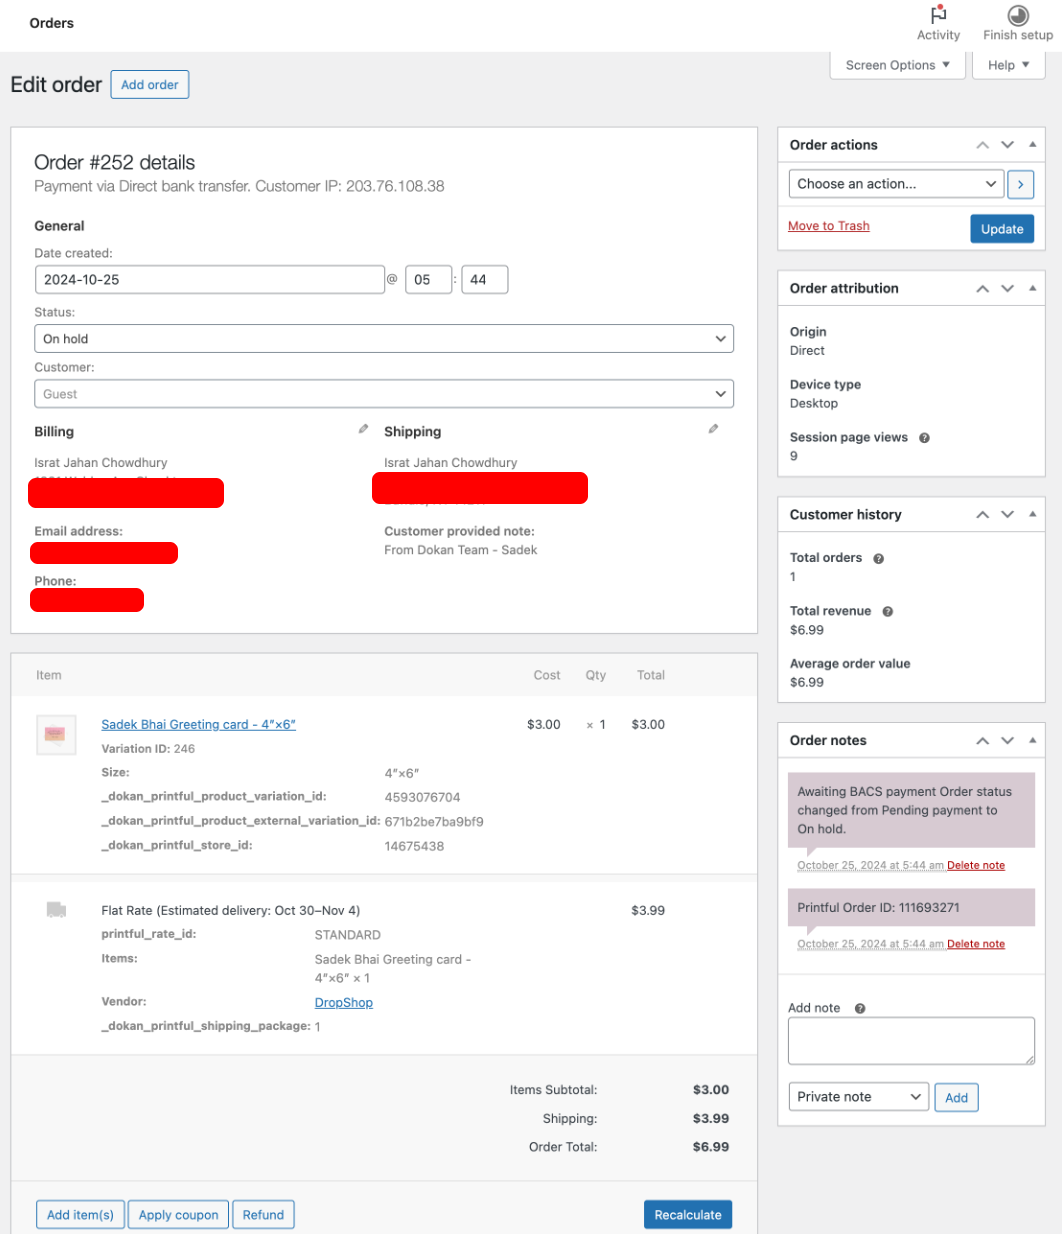
After placing the order, you can see below the order breakdown of Printful. You can see what the customer will pay, what Printful price is, and what your profit is-
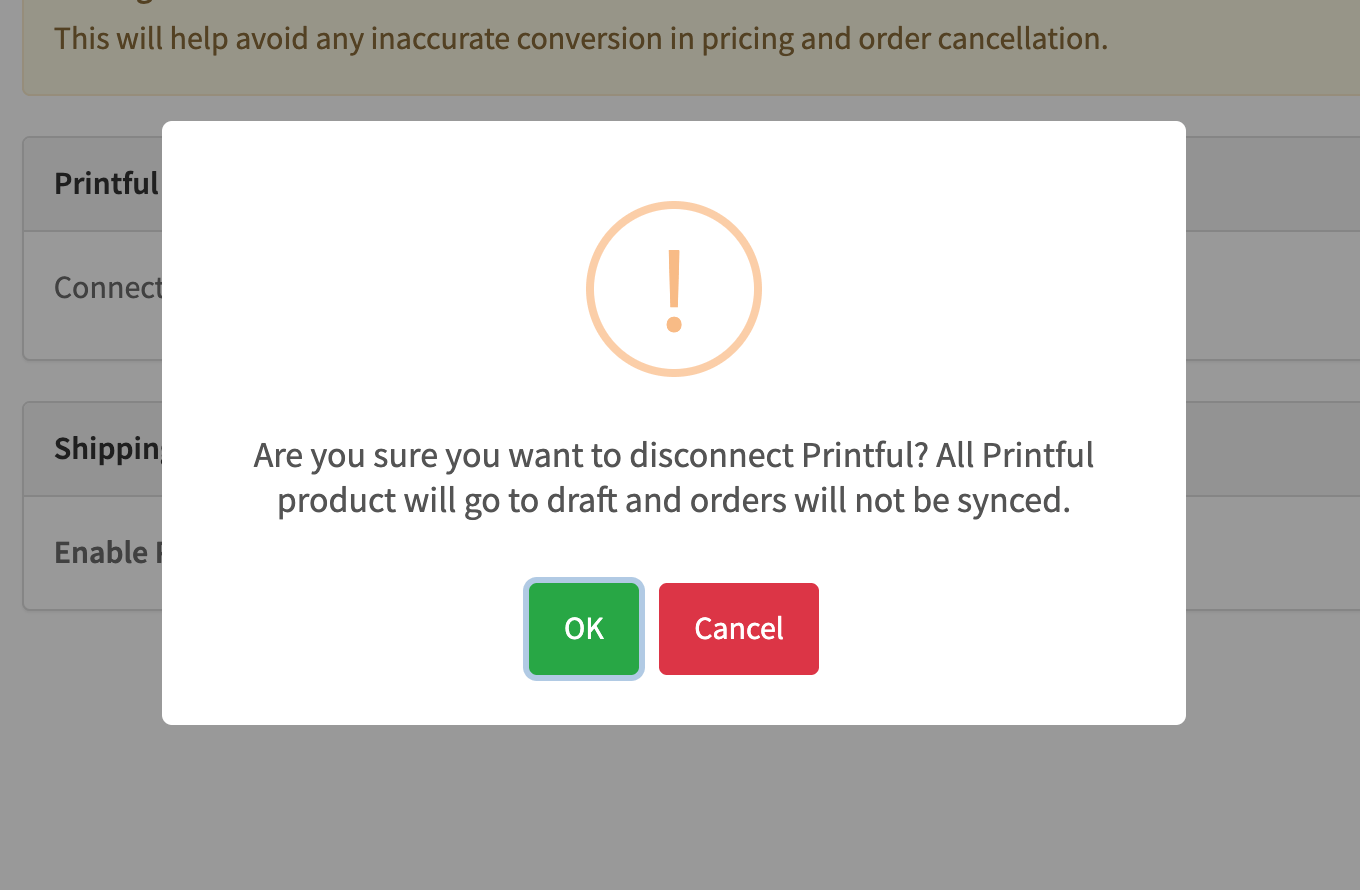
Note: If you disconnect from Printful, your products will go back to being drafted again. If you connect again, then you have to publish the products manually.
Order & Shipping
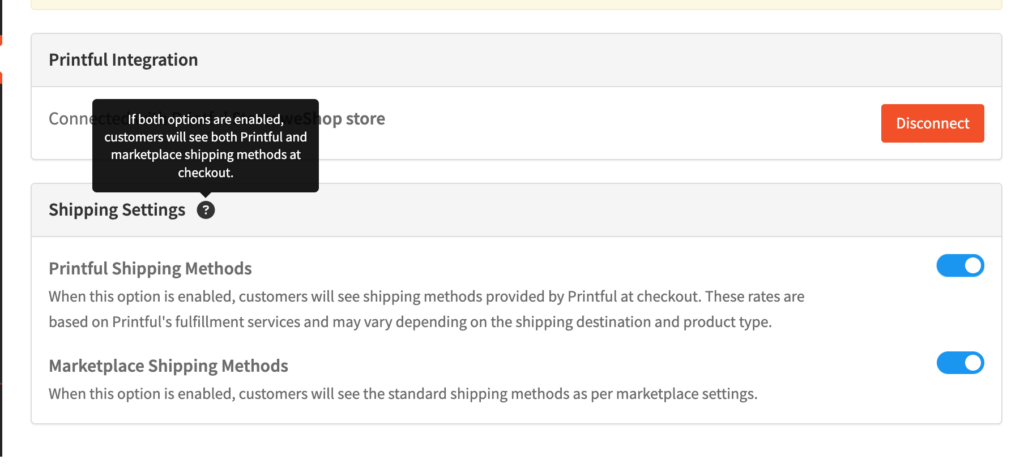
If you want to enable the standard rate shipping of Printful, then the vendor needs to enable the Enable Printful Shipping from the vendor dashboard-
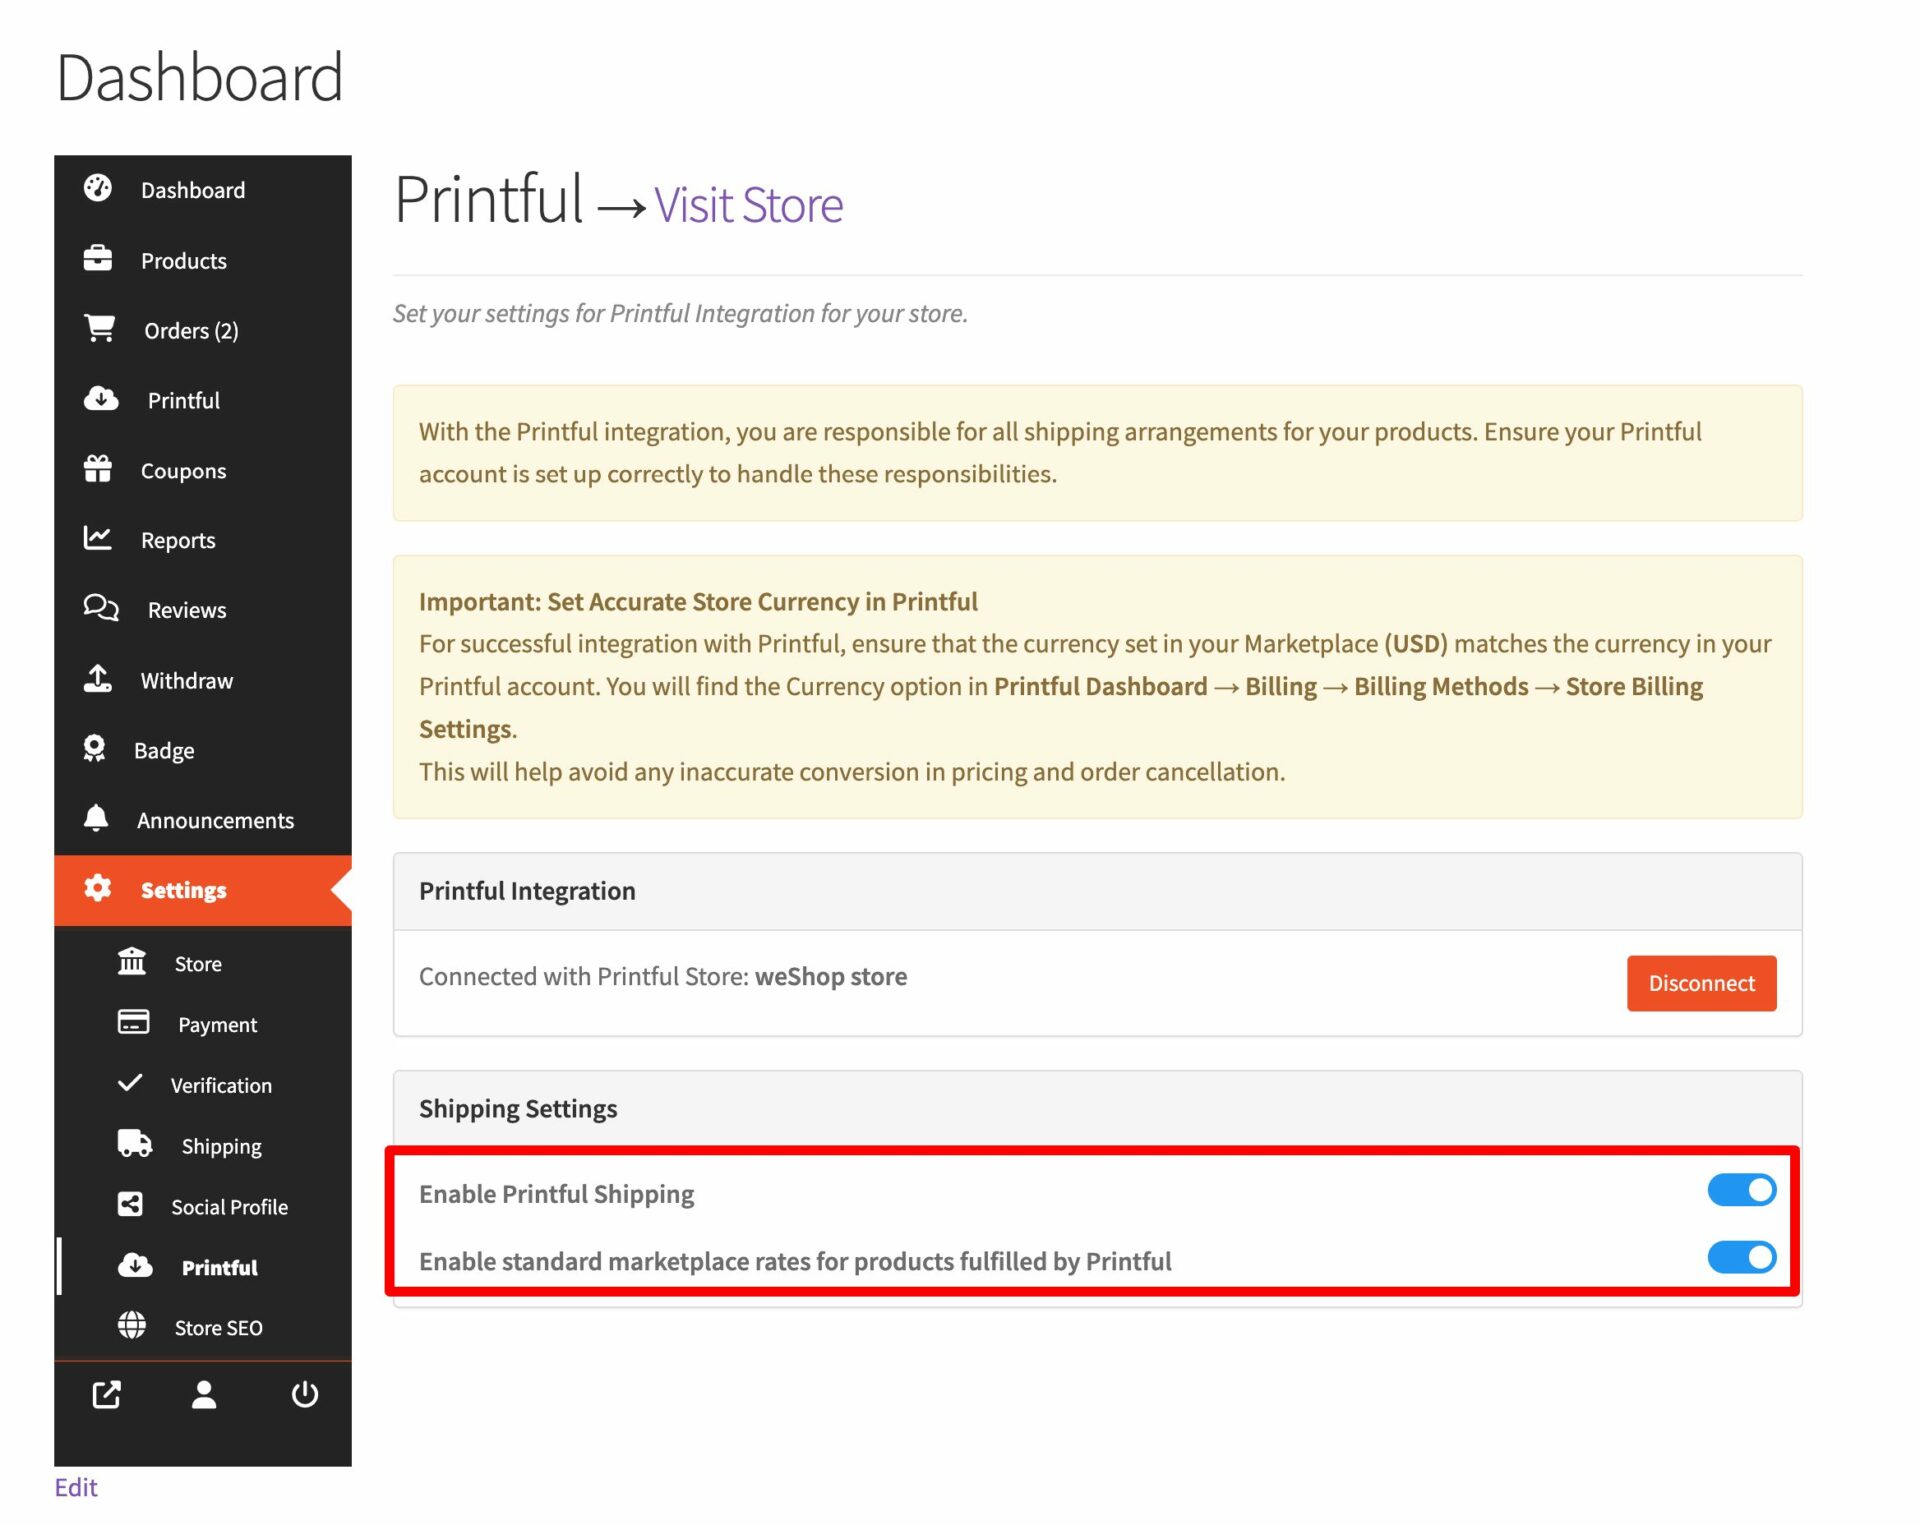
Note: When you enable Printful shipping, by default marketplace shipping will be enabled. However, if you want to use marketplace shipping then disable the Printful Shipping Methods. If both options are enabled then customers will see both Printful and marketplace shipping methods at checkout. At least one of them is needed to be enabled for the customers to checkout.
Then you will see the shipping rates of Printful in the checkout page-
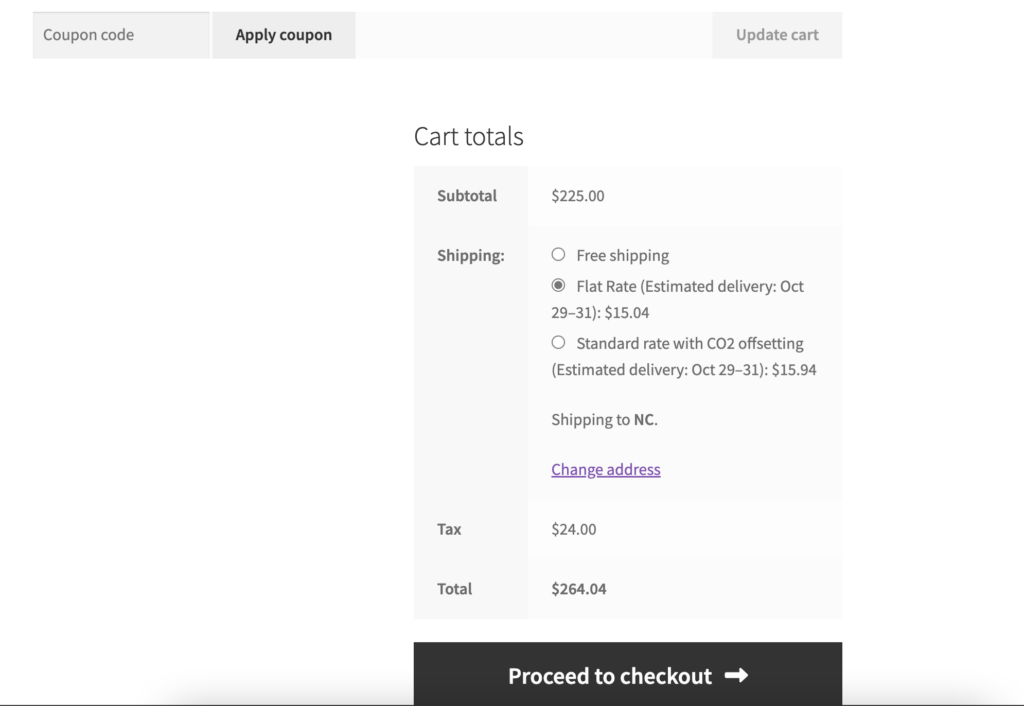
As the Standard marketplace rates for products fulfilled by Printful is enabled, you can see that the shipping option (in this case Free Shipping) set by the vendor in the marketplace is also displaying in the checkout page.
The vendor can’t create a shipment for the Printful products as those products shipping will be handled by Printful-

But, the products that are not associated with Printul, will need to handle shipping separately.
When a customer makes an order of any Printful products, then the order will be in draft mode in the Printful dashboard-
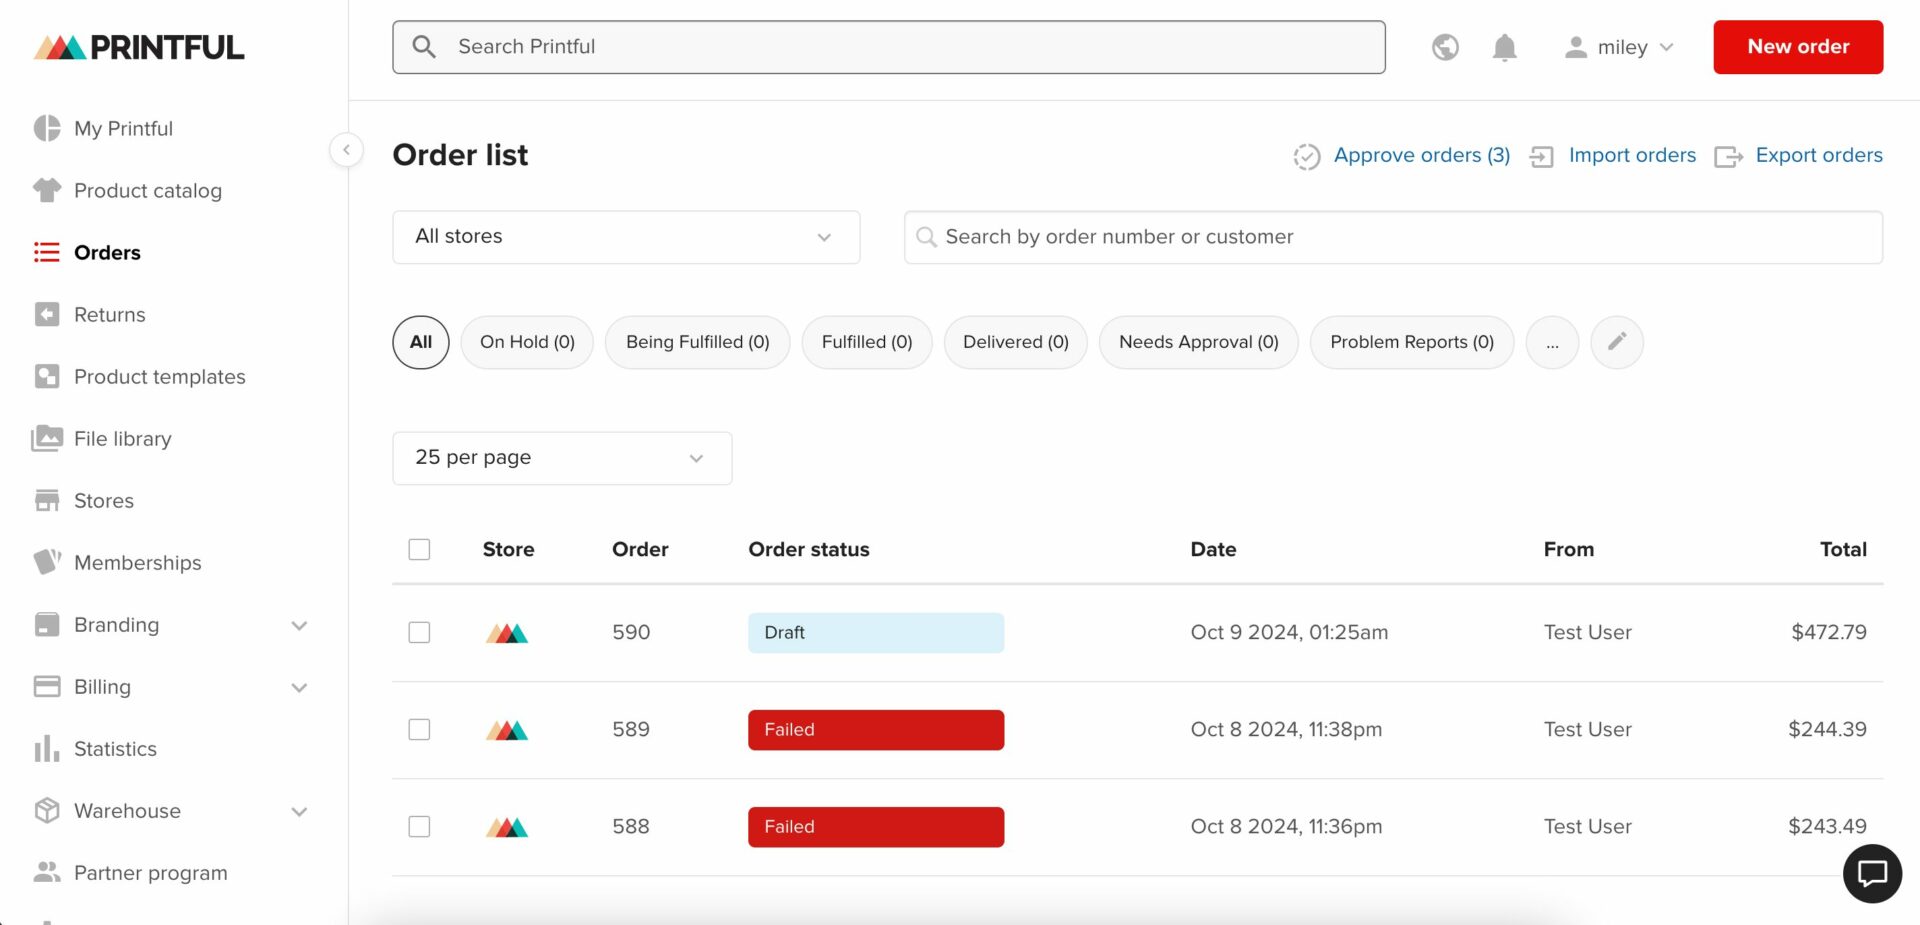
You need to add billing options to Printful to complete the order.
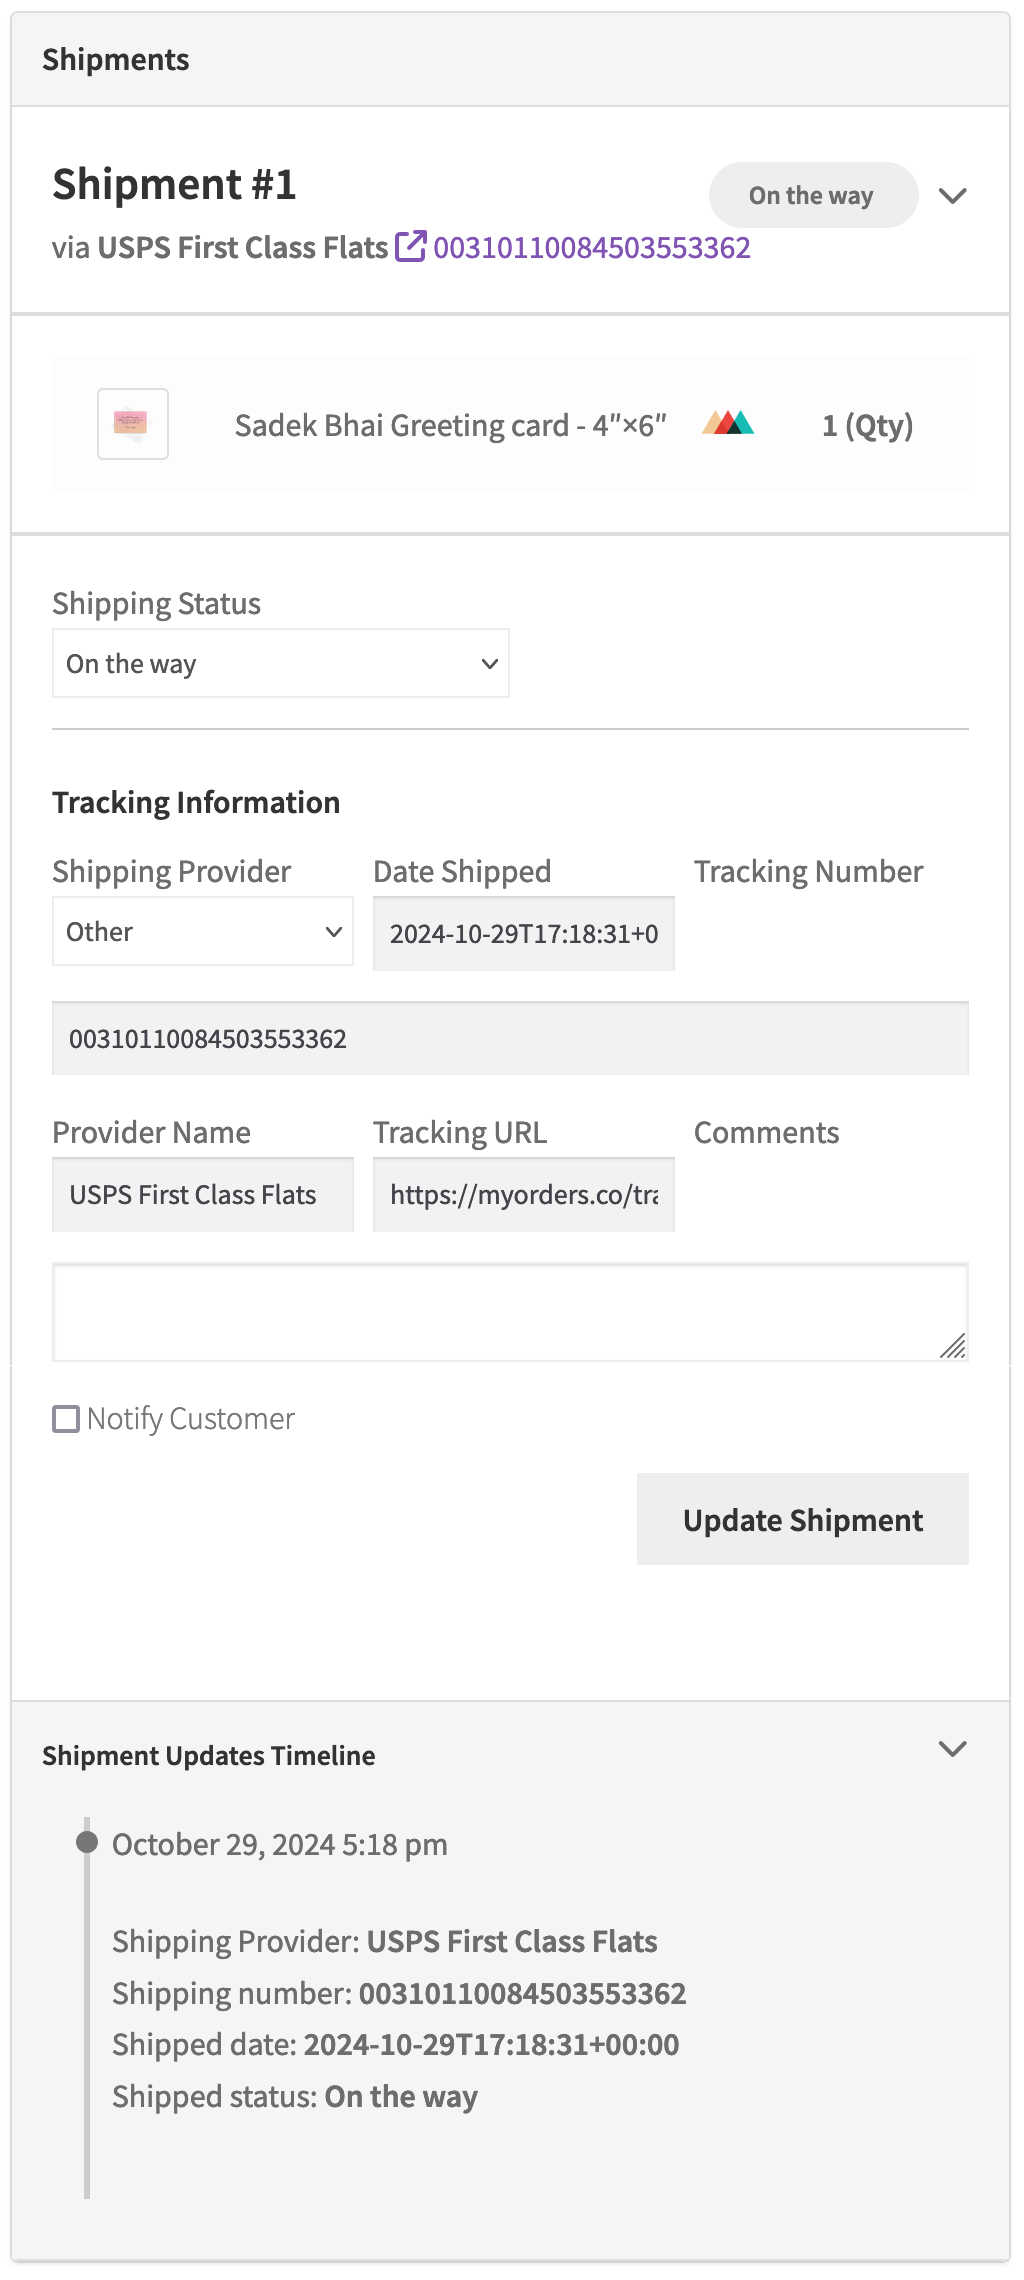
Note: When an order is created for a Printful item and the store is connected to Printful, the order will automatically be created in Printful as well. Based on the actions taken on the Printful side, such as putting the order on hold or canceling it, a note will be added to the order in the store. Once Printful creates the shipment, a corresponding shipment will also be created in the Dokan order, and this shipment will be non-editable for the vendor. For this, the Dokan Shipment tracking feature needs to enabled.
For Subscription, if a vendor still adds a Printful product afte reaching the product upload limit, then the product will uploaded but the status will be in the draft.
If you order a Printful product from one vendor and non-Printful product from another vendor, then the delivery time option will only show for the non-Printful product. The Printful module doesn’t have support for the Delivery Time Module.
Delivery Workflow for Printful
If you place an order with Printful and Dokan, here is how the delivery flow will work-
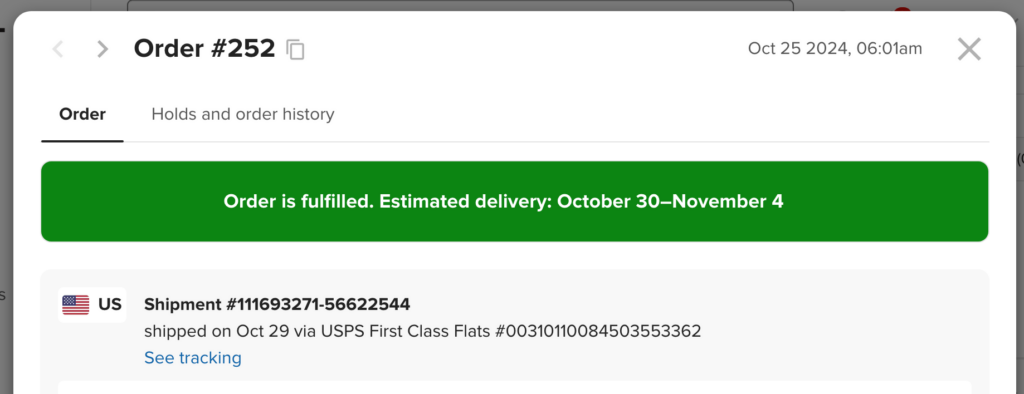
- Printful Dashboard: The order will be marked as fulfilled in the Printful dashboard.
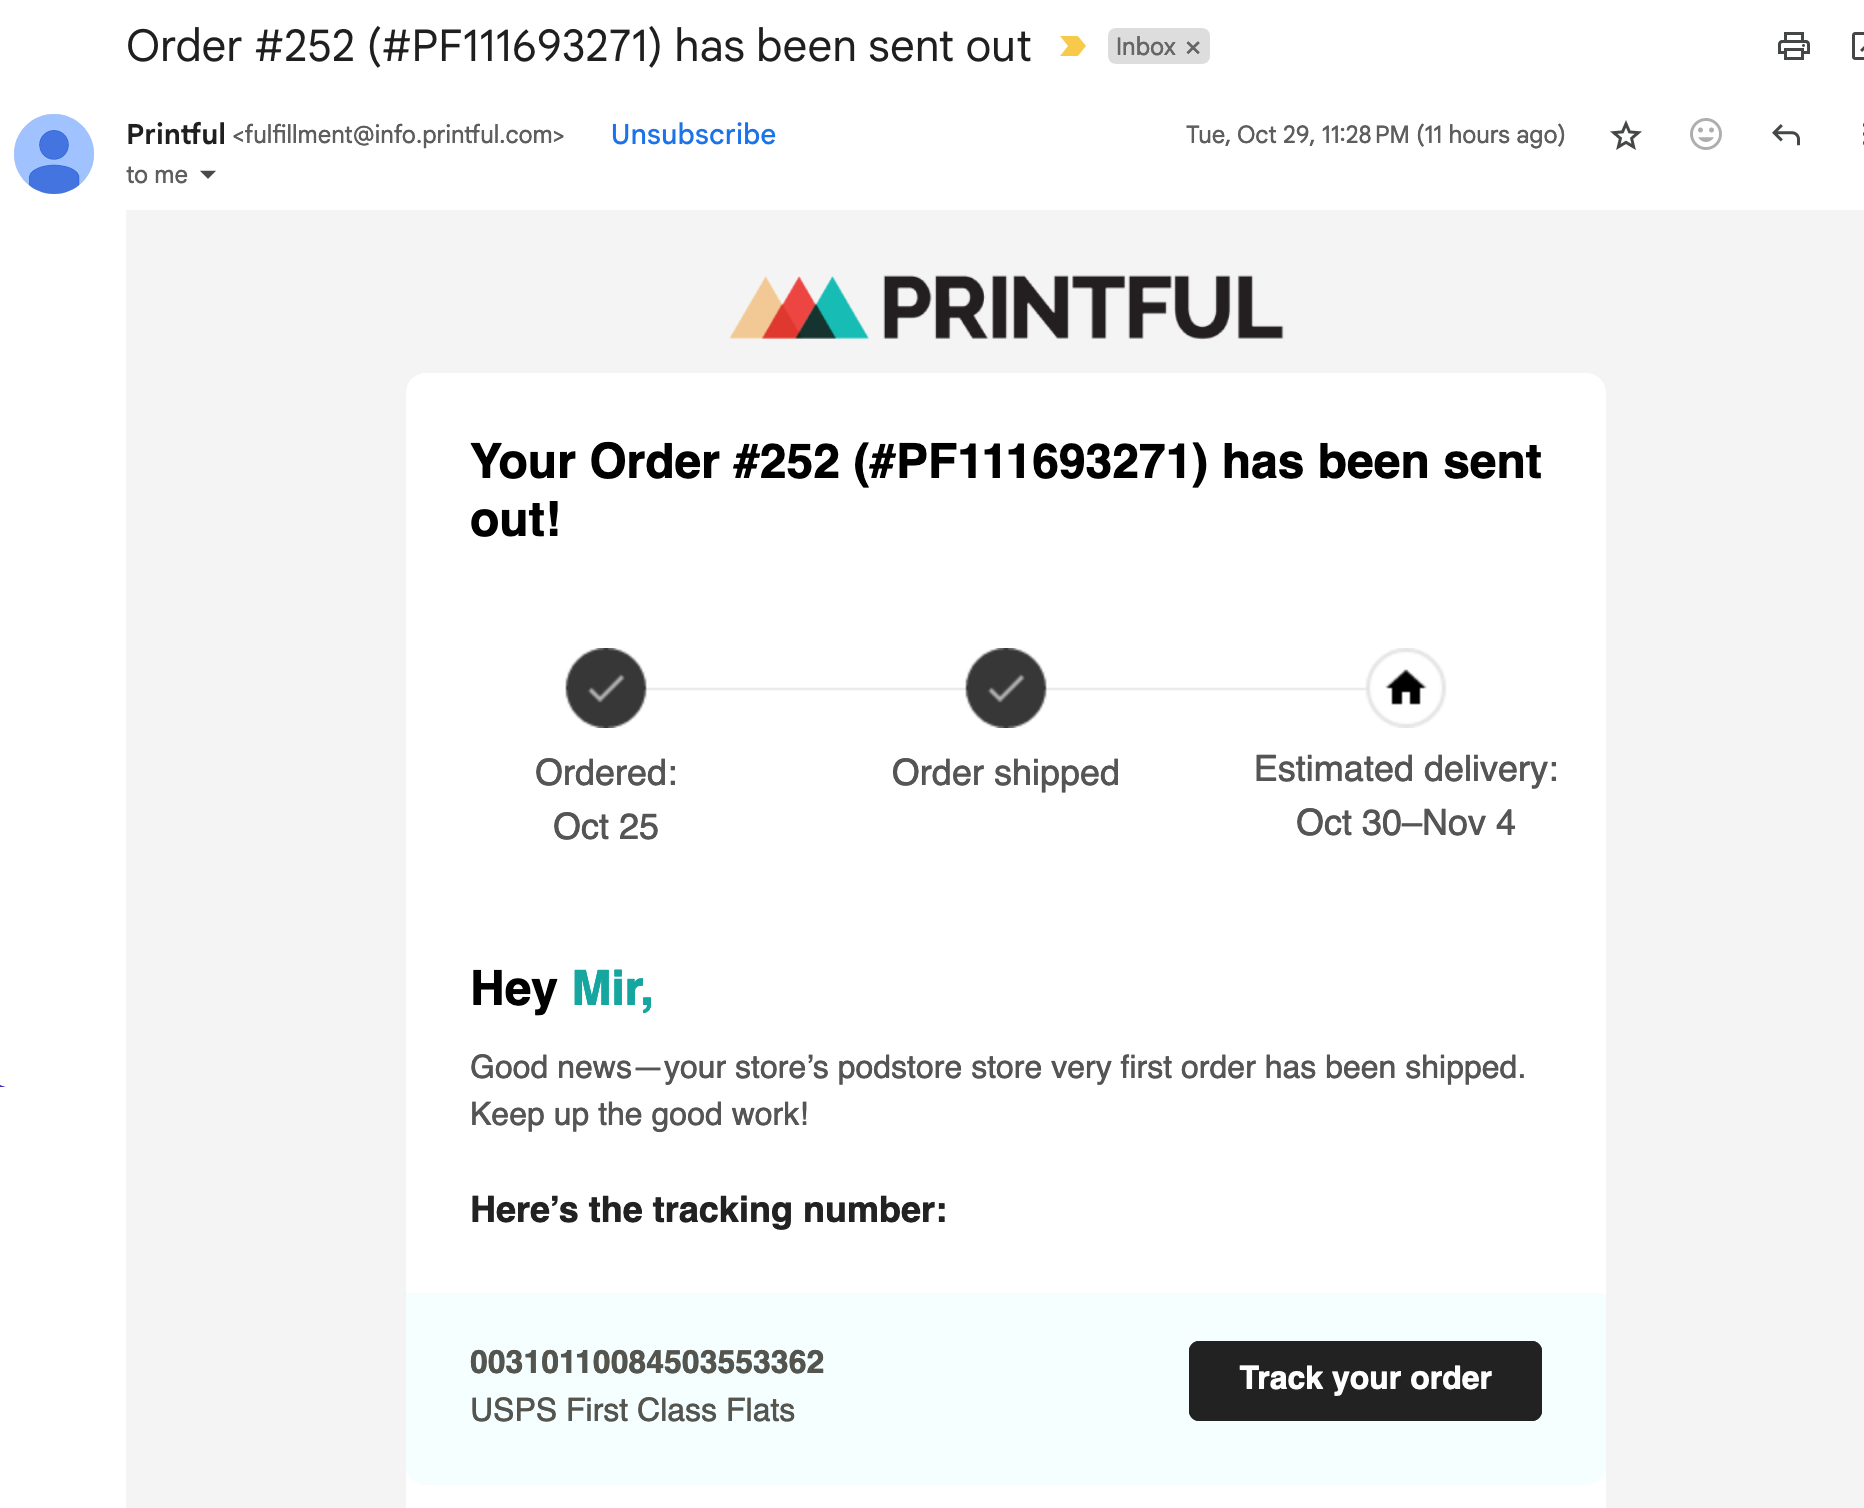
- Store Email Notification: An email notification will be sent to the store email upon shipment creation, indicating that the order has been shipped.
- Vendor Dashboard: The shipment status will be updated in the vendor dashboard, confirming that the order status is synced correctly.
- Admin Dashboard: The shipment status will also be updated in the admin dashboard, ensuring consistency across the vendor and admin views.
- Customer Shipment Tracking: A shipment tracking link will be generated for the customer to track the progress of their order.
This is how you can configure the Printful integration with the Dokan multivendor marketplace.

