Dokan Multivendor provides you with features to design and build your marketplace stores the way you like. The Dokan Single Product Multivendor is one of the newest modules to be introduced to the plugin.
This feature will make it convenient for vendors to sell other vendors’ products. They can add a product from another vendor’s store to their own store with a single click and customize as they like. At the same time, customers get to view all the vendors selling the product and compare prices from the product page. This will let shoppers buy a product with the best price.
This documentation will show how to configure and use Dokan’s Single Product Multivendor Module.
Prerequisites
Activating Single Product Multivendor Module
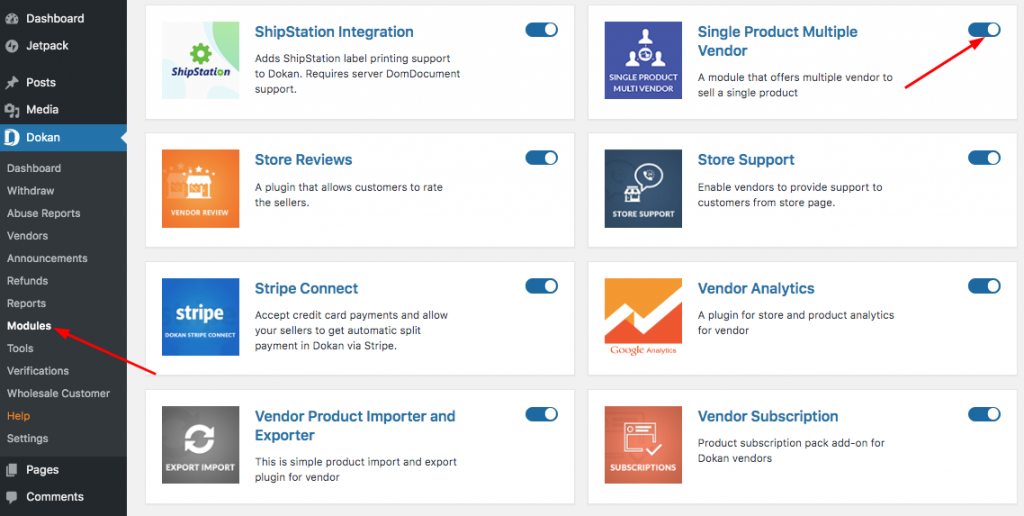
Navigate to WordPress Admin Dashboard → Dokan → Modules
Click on the toggle button beside Single Product Multiple Vendor. This will activate the module.
Settings
1. Navigate to WordPress Admin Dashboard → Dokan → Settings → Single Product MultiVendor.
Click on the checkbox beside Enable Single Product Multiple Vendor.
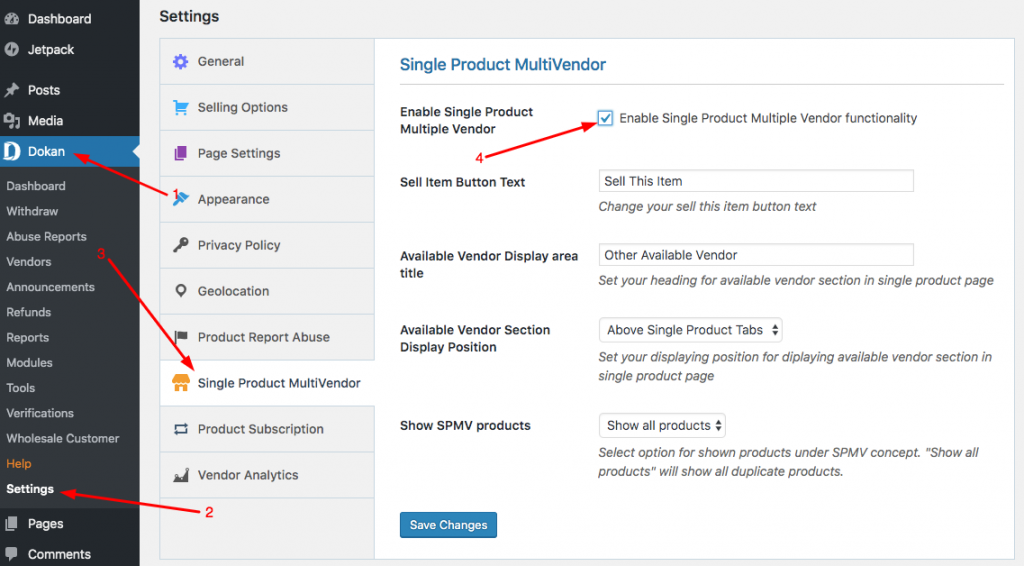
2. You can also change the sell item button text and available vendor display area title.
To change the Sell Item Button Text, type over the given field which will have the default text “Sell This Item”.
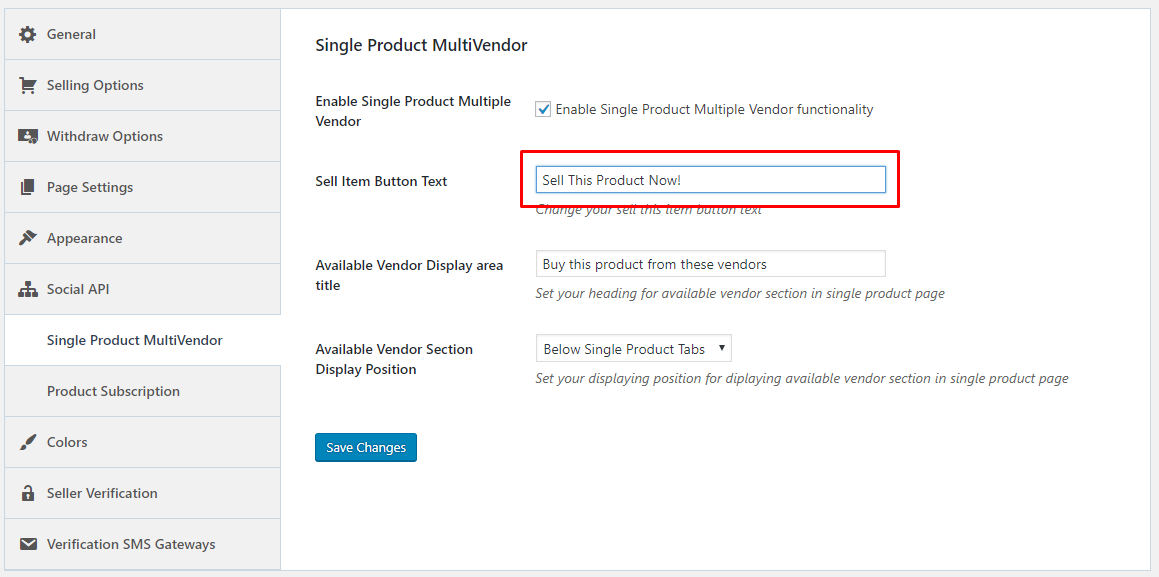
This is how vendors will view the button for a product from the store.
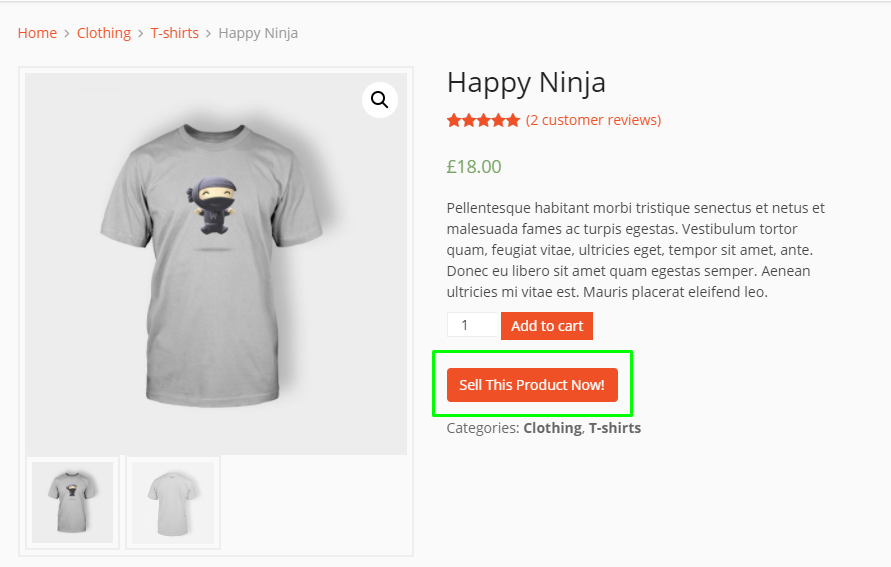
3. You can also change the text for Available Vendor Display Area Title as you desire. To do this, simply write your desired text over the given field which will have the default text ”Other Available Vendors”.
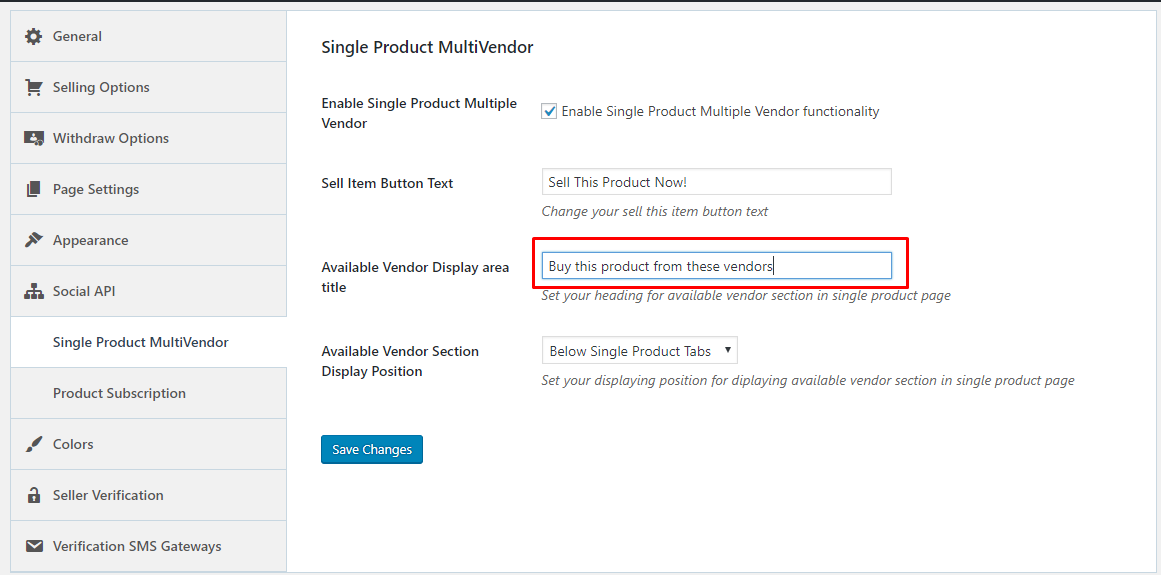
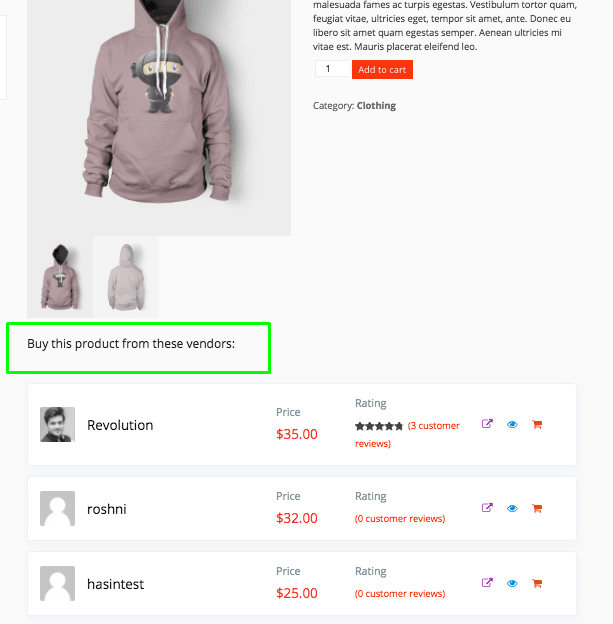
This is how the button will appear on the store. Vendors will get to see the list of all other vendors selling the same product:
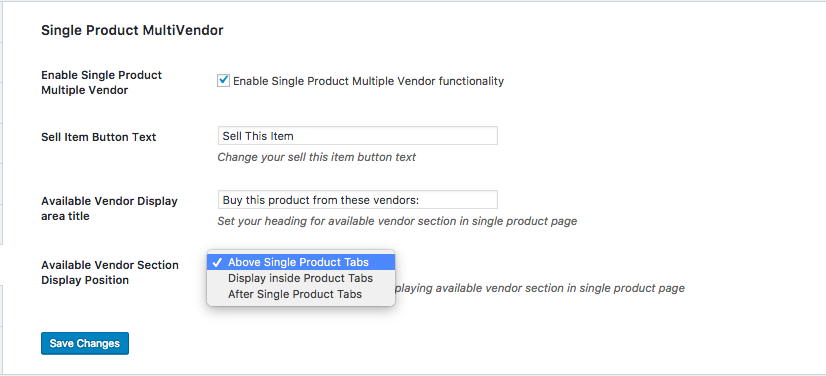
4. You can also choose where you want to display the available vendors list.
To do this, select one from the drop-down given for Available Vendor Section Display Position:
Frontend View for Above Single Product Tabs:
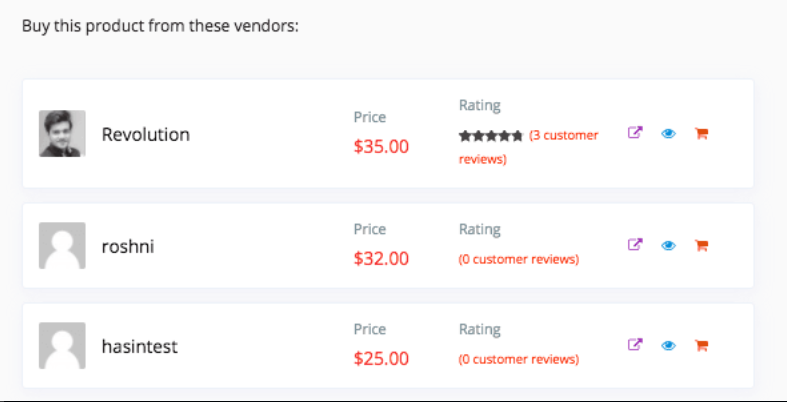
Frontend View for Display Inside Product Tabs:

Frontend View for After Single Product Tabs:
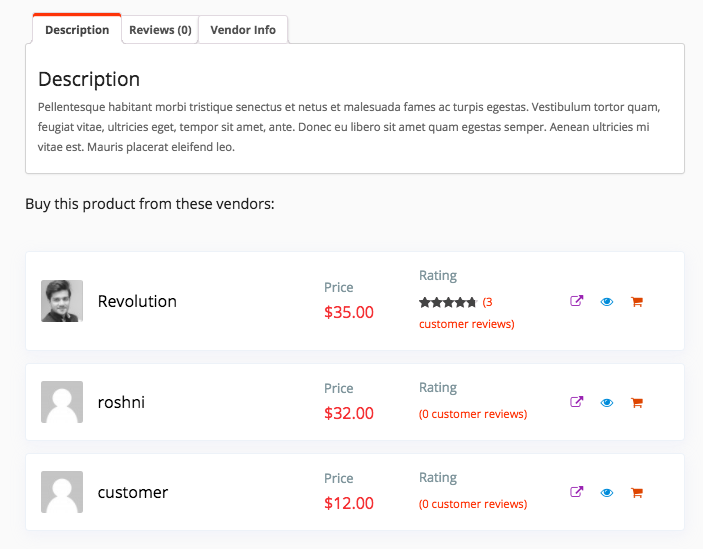
After configuring everything, click on Save Changes.
Store-end View
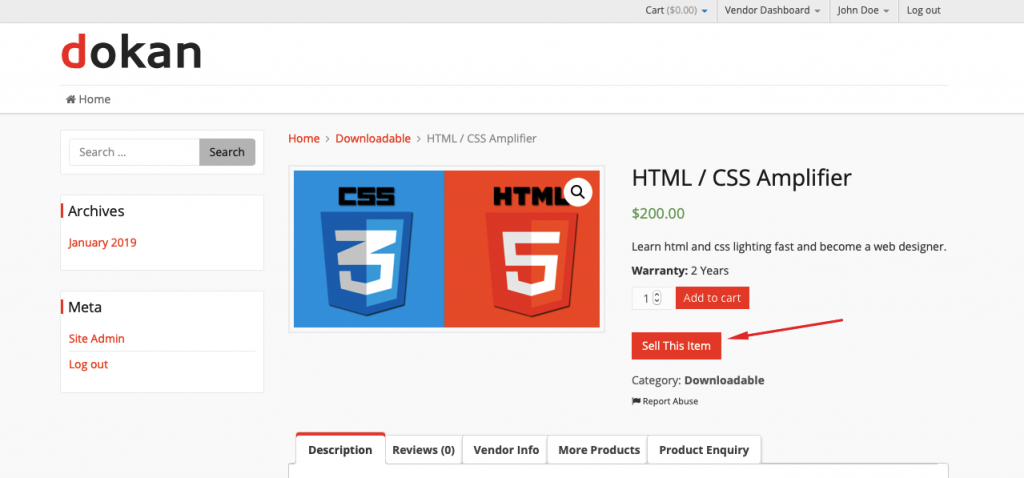
When you visit a product from another vendor, you will see a new button “Sell This Item“.
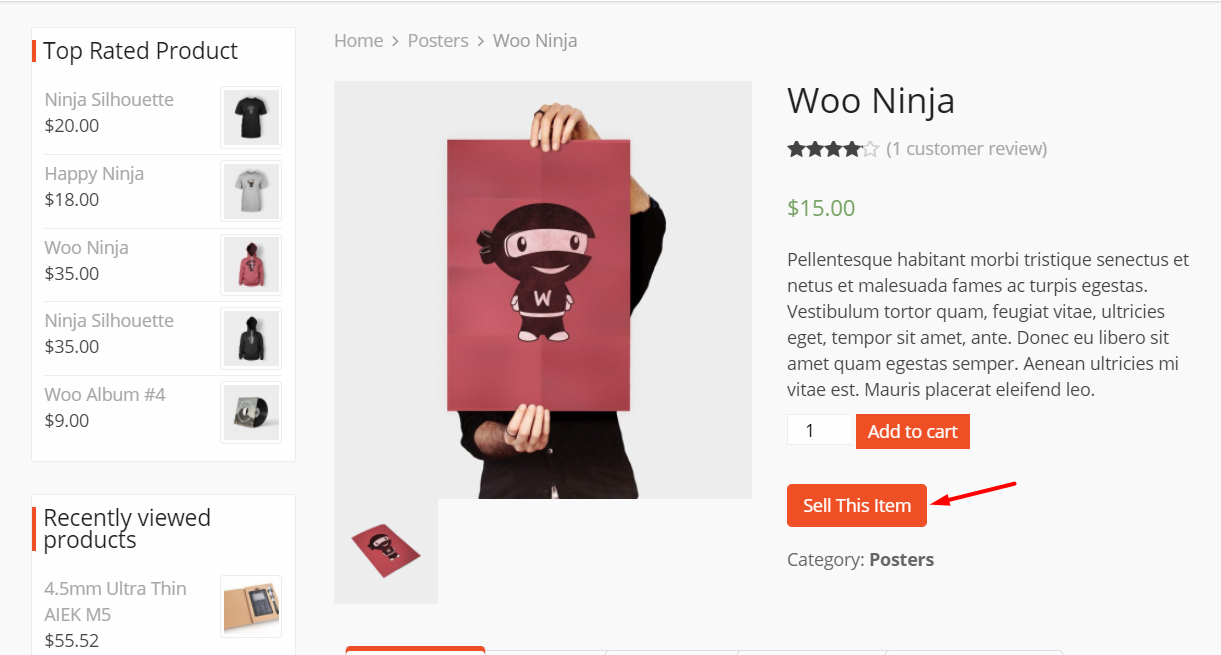
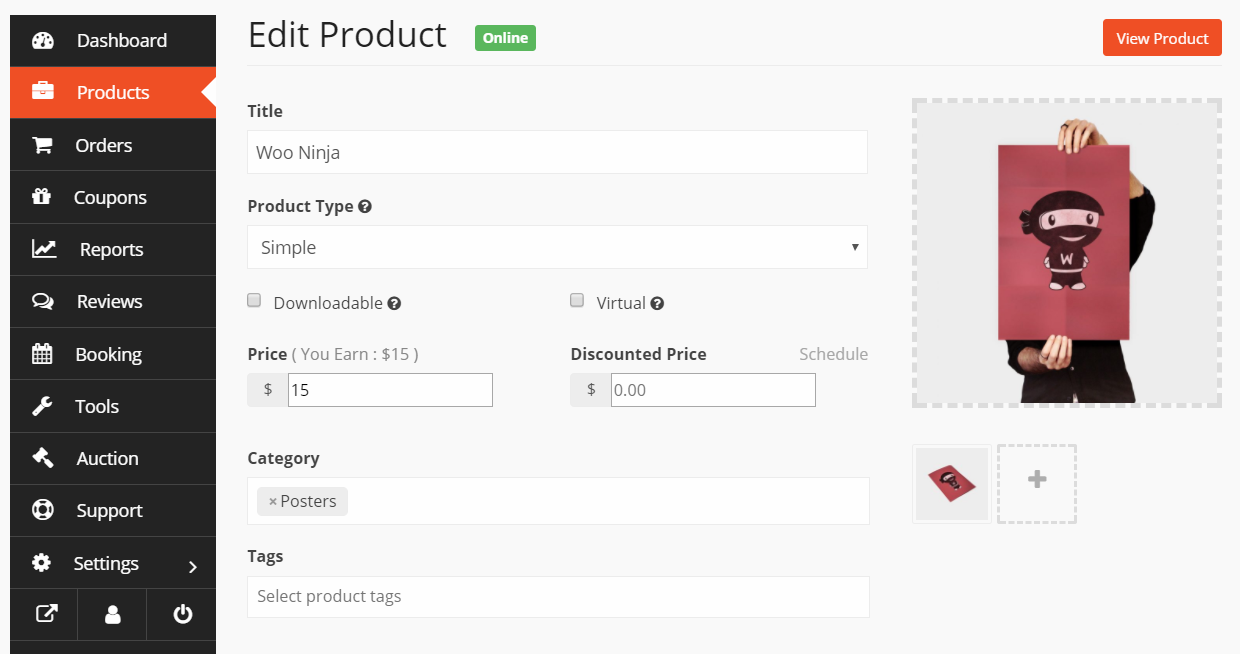
When you click on this button, a new product will be created for your store and you can edit its details.
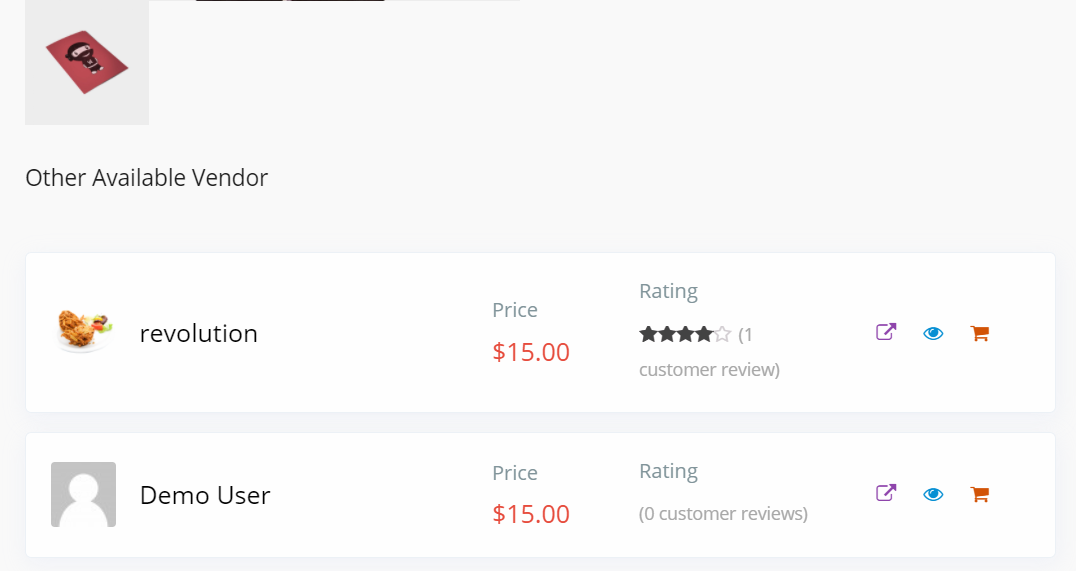
If there are multiple vendors for the same product, the customer will view all of them listed on the product page. This will help them to compare the price and buy a suitable one for them.
Dokan Version 2.9.8 Update
With the release of this version, you can assign a single product to multiple vendors very easily from your dashboard.
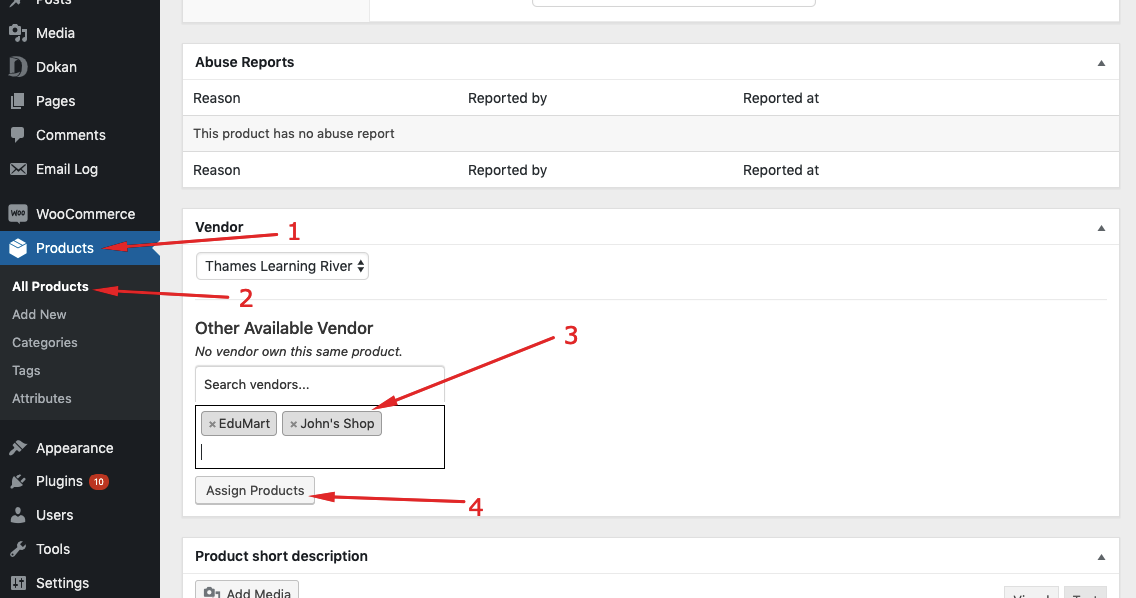
To assign a certain product go to the WP Admin Dashboard > Products > All Products > Select a Product > Edit.
Now, go to the “Other Available Vendor” area and search for the vendors that you want to assign the product. Finally, hit the “Assign Products” button.
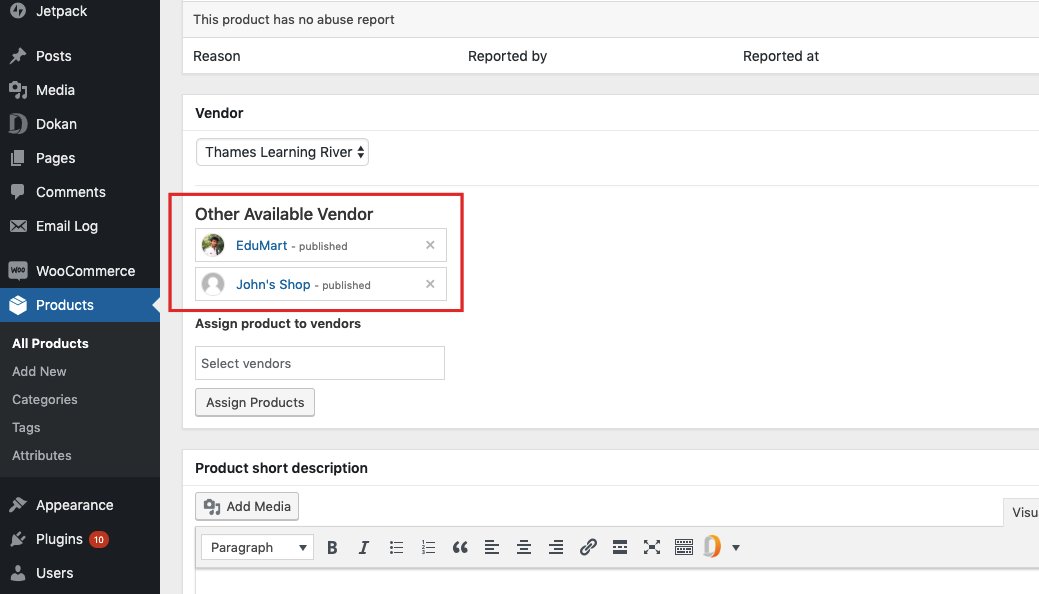
Now, you will see that the product is published to the assigned vendors.
Dokan Version 2.9.11 Update
With the release of this version, you can allow your vendors to sell other vendors’ product according to a set condition. Here is how you can do it:
Navigate to the WP Admin Dashboard > Dokan > Settings > Single Product Multivendor > Show SPMV (Single Product Multiple vendor products.
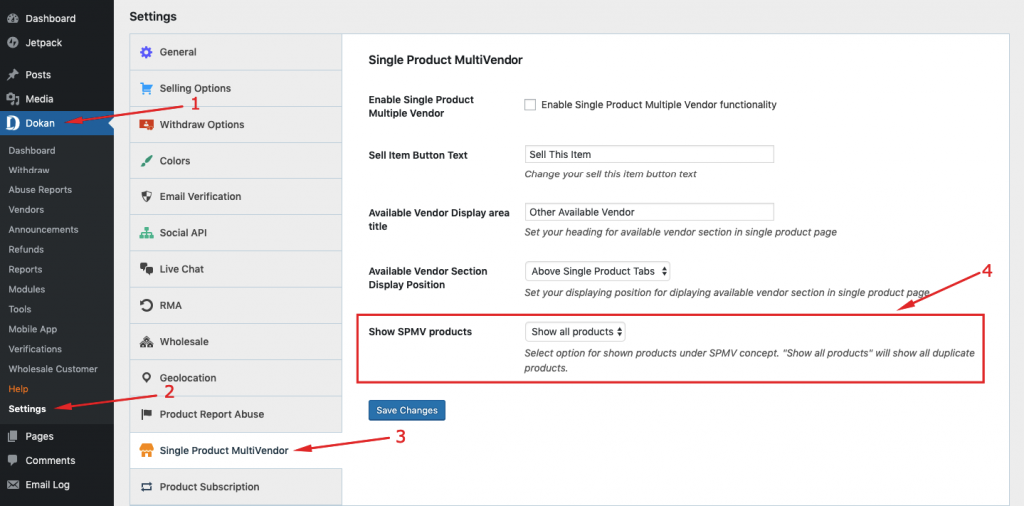
Now, you can set an option from the “Show SPMV products” dropdown. You will get these four options:
- Show all products: Selecting this option will show all duplicate products.
- Min price: If you set the option to ‘Min price’ then if there is the same product with different prices of different vendors, then the product with the minimum price will be shown on the page. But after clicking on the product, you will be able to view all the other products.
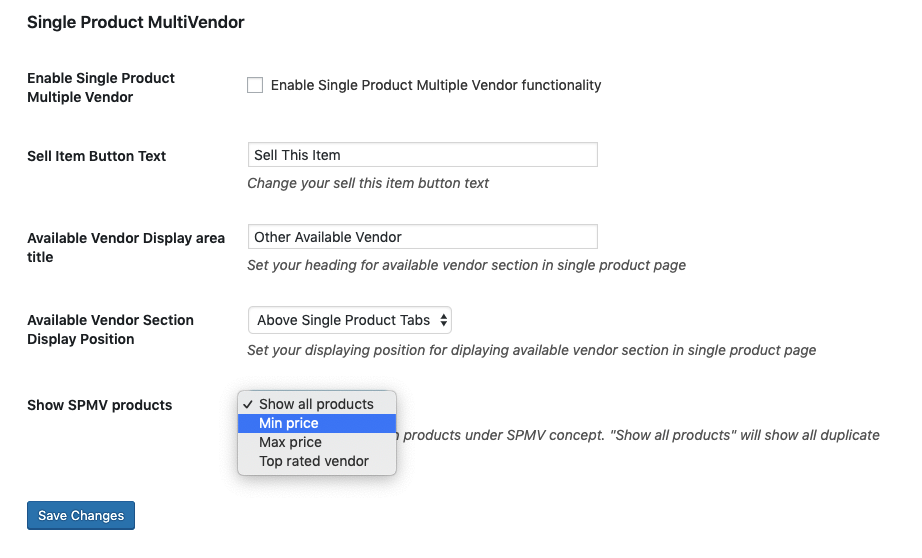
- Max price: If you set the option to ‘Max price’ then if there is the same product with different prices of different vendors, then the product with the maximum price will be shown in the page. But after clicking on the product, you will be able to view all the other products.
- Top-rated vendor: If you set the option to ‘Top rated vendor’ then the vendor who has the top rating will be shown on top of the page.
Here is how a vendor will be able to view the “Sell this item” option:
That’s all about assigning a single product to multiple vendors.
Product Search & Clone
You can easily search for products and clone them to your store. While you are at it, you can change the details of the products according to your liking.
Vendors will find the option when they add a new product from the front end. Go to Products–> Add New Product.
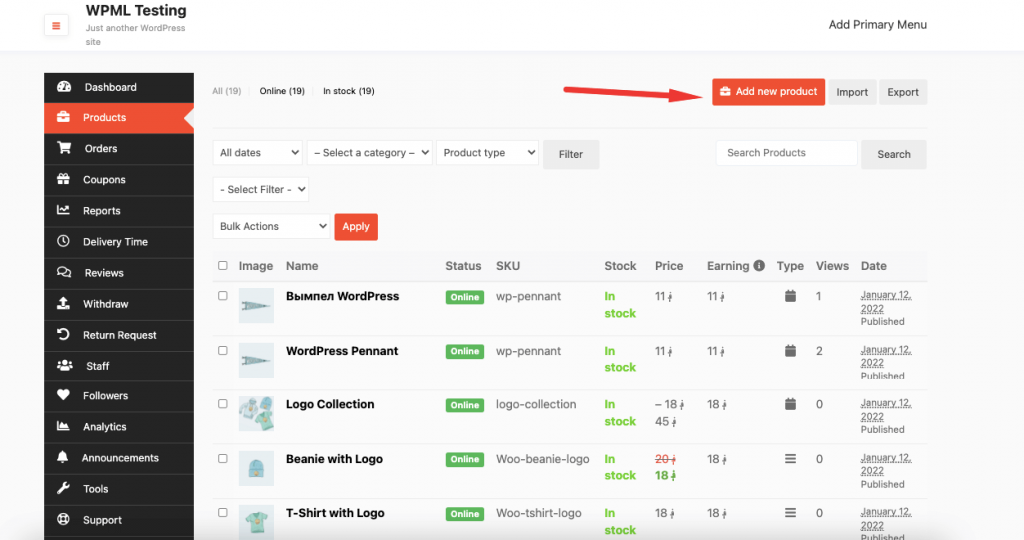
On the top, they will find the search bar,
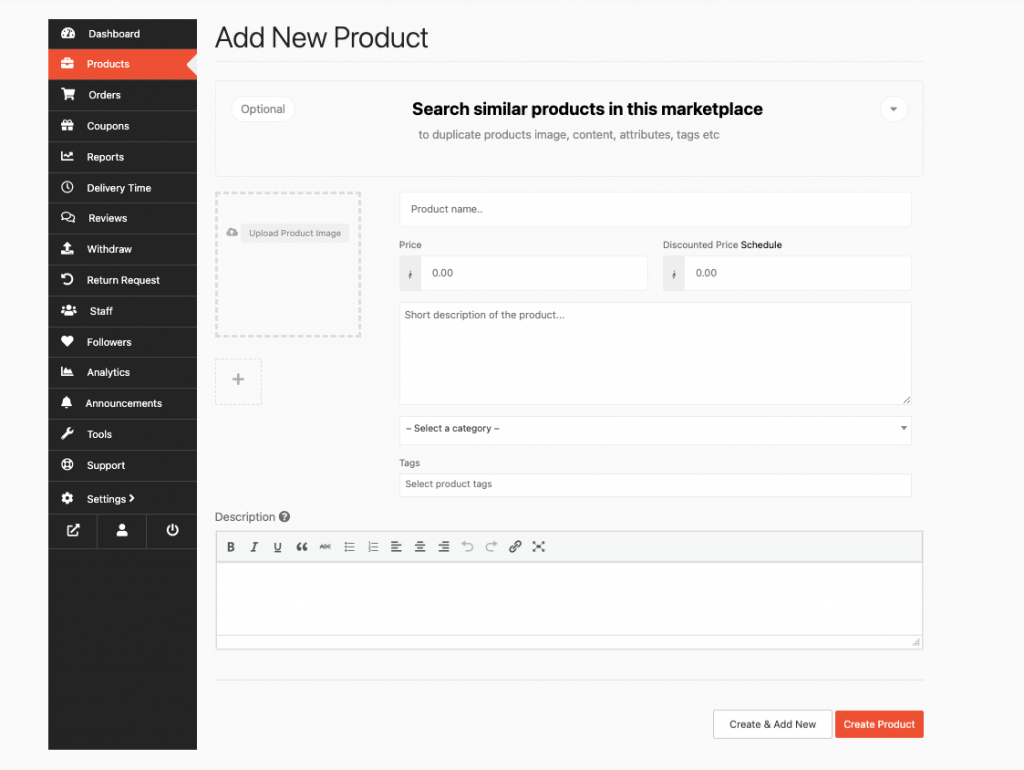
It will appear in the pop-up as well,
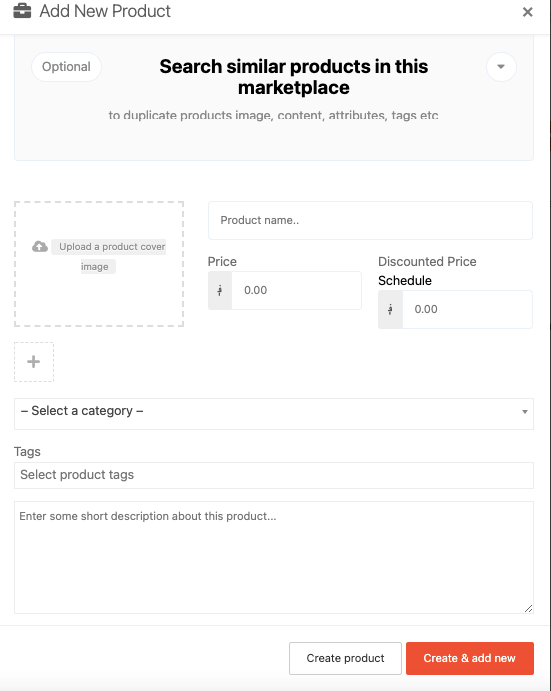
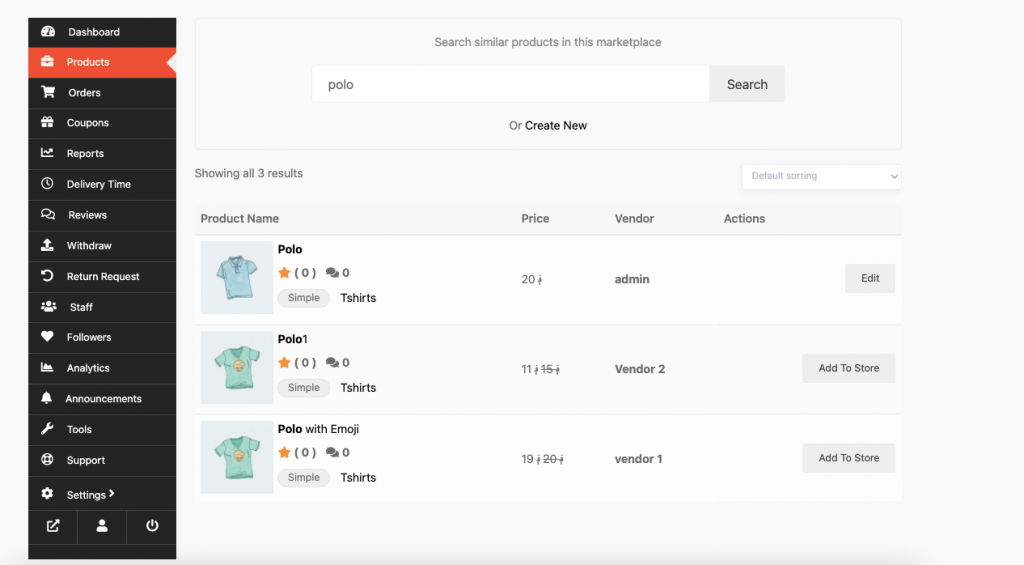
You can type the name of the product in the search bar and you will find all the similar products in the marketplace,
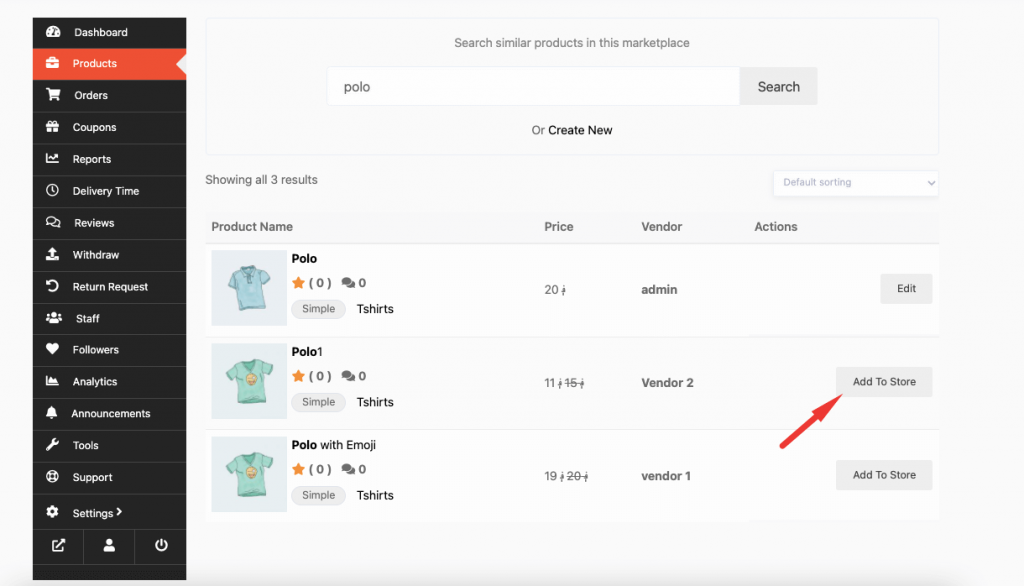
To add a product to your store, click on the Add To Store button on the side of the product,
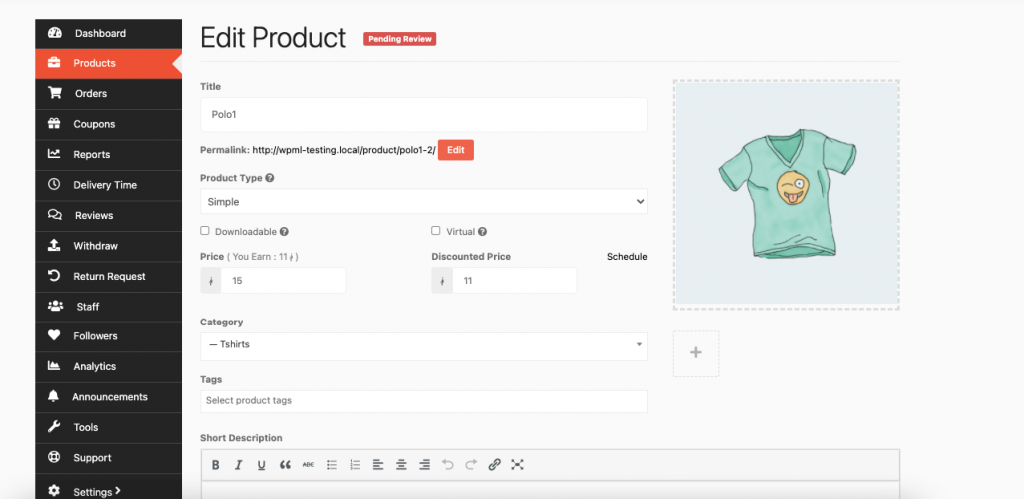
You can edit the details of the product in the Product Edit section,
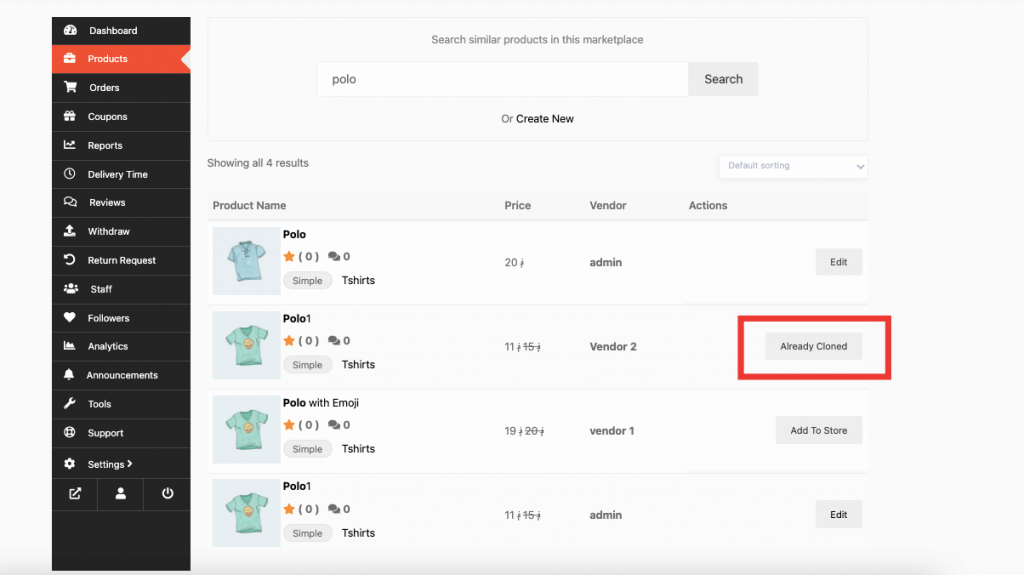
After you have added the product, if you look for that product again you will see that product is ” Already Cloned”.
This is how vendors can search and clone products in their stores.
Note:
- If you are having trouble, re-save the permalink settings.
- It also has support for booking and auctions product. That means when you are searching for booking or auction products you can find those products in the result page as well.
- When you duplicate a product, it will create a new product, not the mirror of the duplicated product. You will still need to publish the product.
To find booking products navigate to Vendor Dashbaord–> Booking–> Add New
To find auction products navigate to Vendor Dashbaord–> Auction–> Add New
- If the search term for the product is present in the product title, SKU, Short description, description, permalink, it will show that product in the result page.
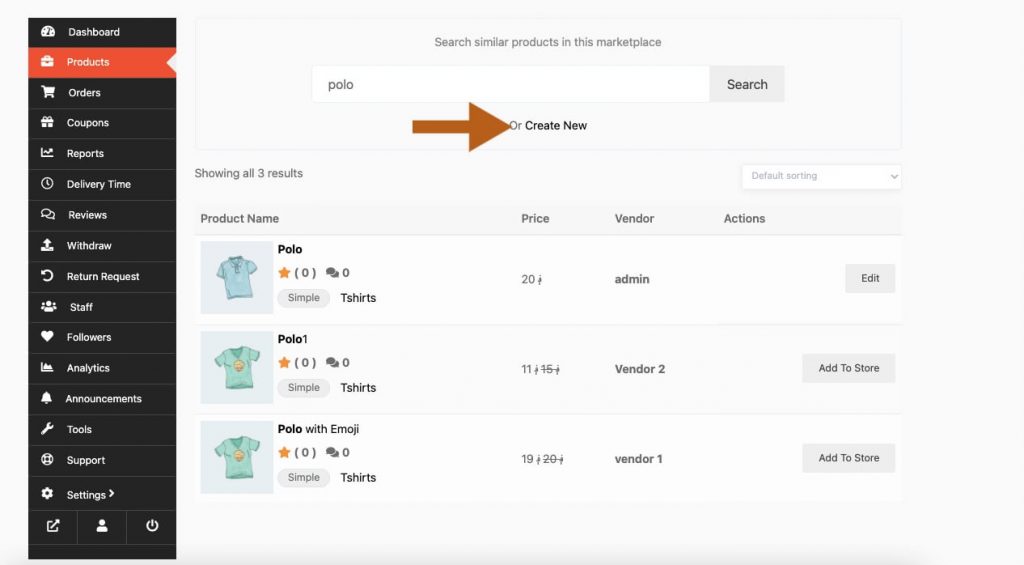
- You can go to Add New Product page from the result page. Just click on the Create New product option like the below screenshot.
- You can filter the products using the sorting filter and if there are too many results, then you will see the pagination at the bottom.
Here’s a quick walkthrough of the module: