LinkedIn is a popular verification medium nowadays. And with Dokan you can easily add a LinkedIn verification step for your customers and sellers.
How to get Client ID and Client Secret from Linkedin
Getting Client ID and Client Secret in the same concept as others. You just have to create an app and get those details from your created apps.
Go through the ‘Create An App’ link to go the Google API page or click here.
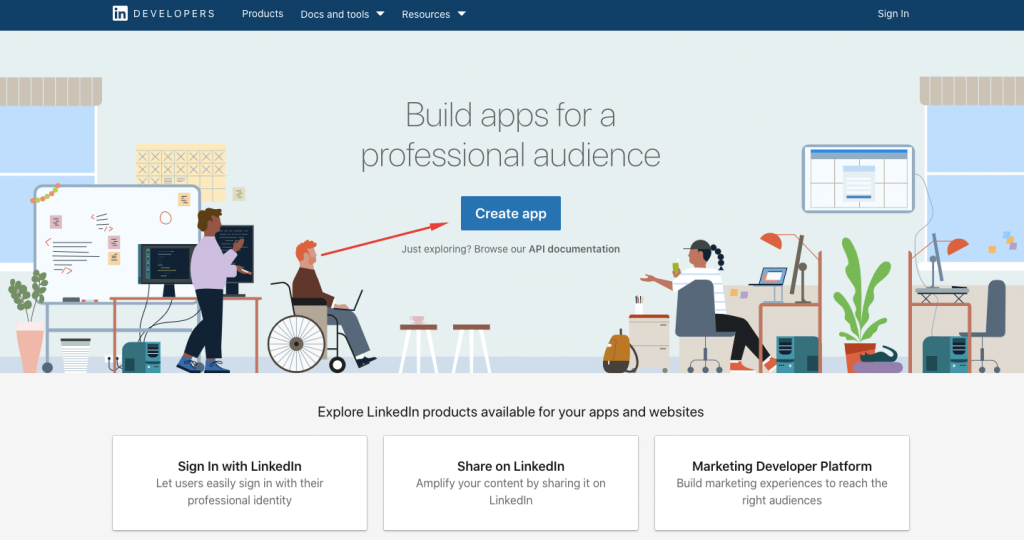
Click on the Create Application on the very first page of the Linkedin app.
On the next page, insert your app details and submit to go further.

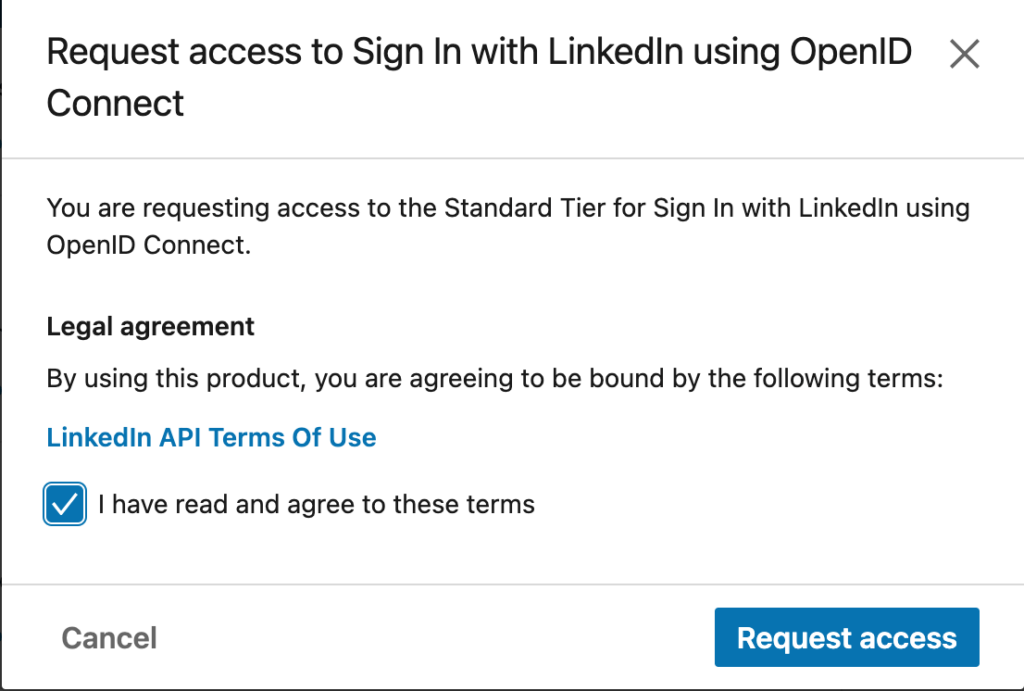
Next, you need to give access to “Sign In with LinkedIn using OpenID Connect” option. Click on the Request Access button-

You will get a pop-up. Don’t forget to check on the “I have read and agree to the terms”-
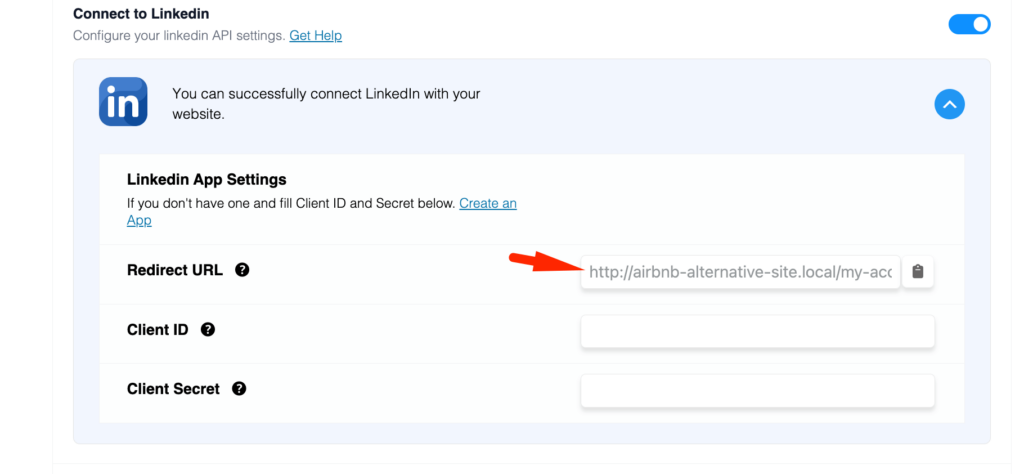
After successfully submitting this page, you’ll redirect a new page where you have to give your redirect URL that has been generated already. Copy the redirect URL as shown in the screenshot below.
This is the most tricky part here. Follow carefully the steps.
→ Go to the Auth section after creating your app.
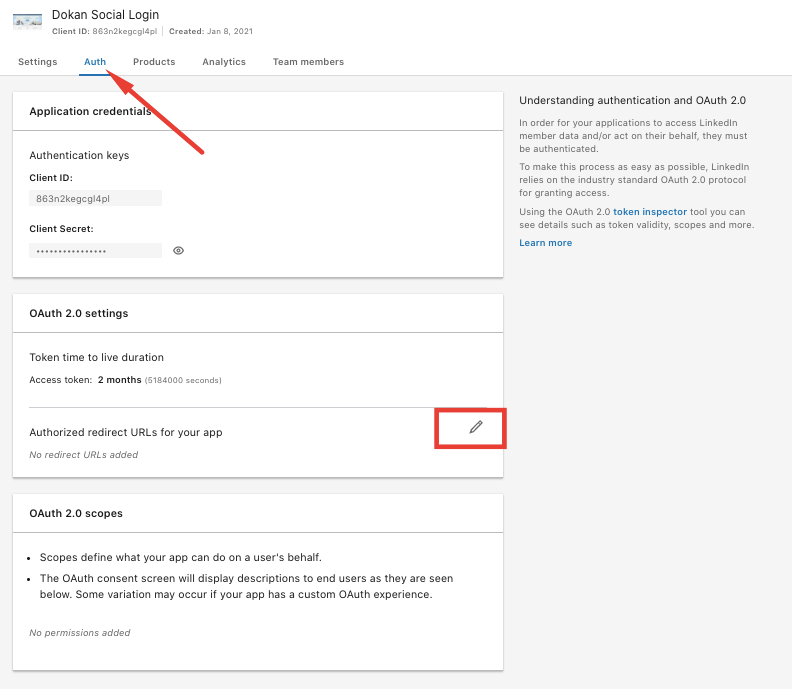
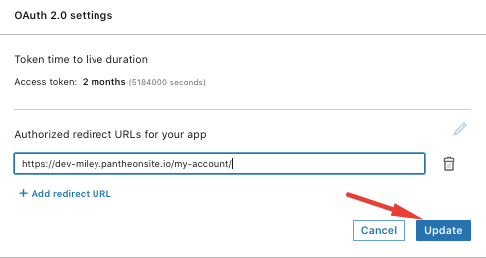
→ Insert the redirect URL that you have copied(shown in the last screenshot above) on OAuth 2.0 and OAuth 1.0a
→ Click on the update button last.
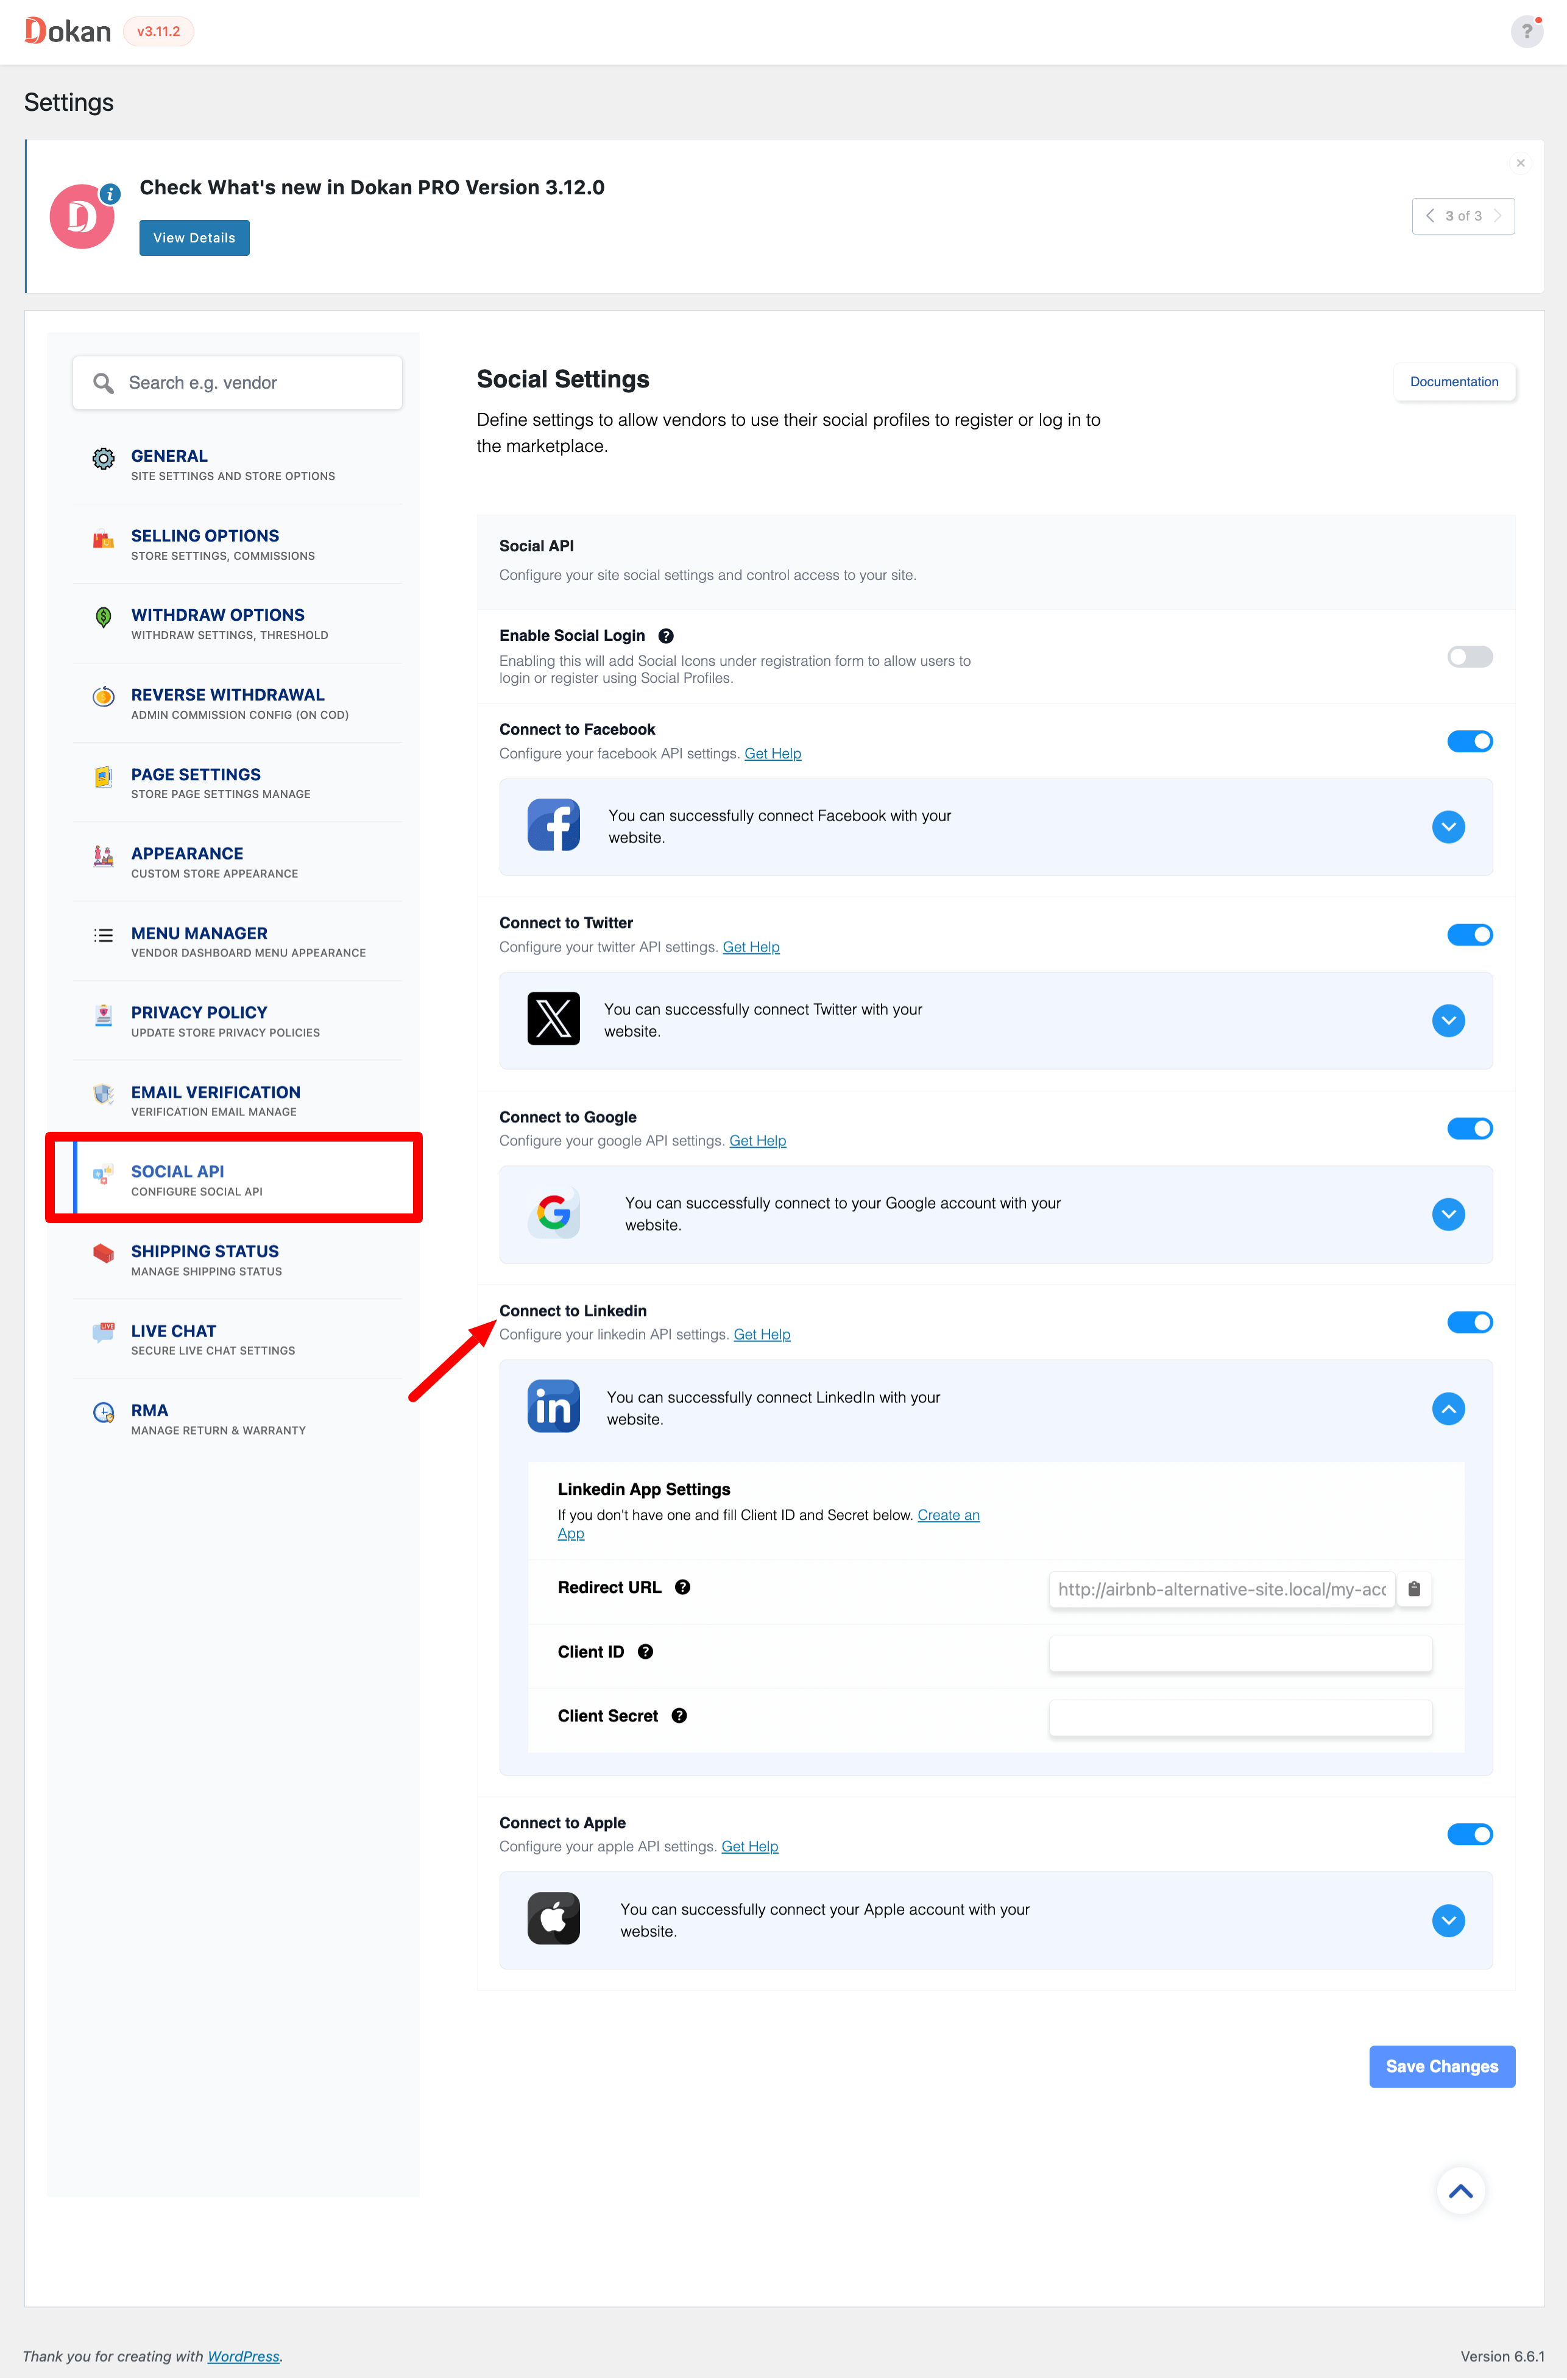
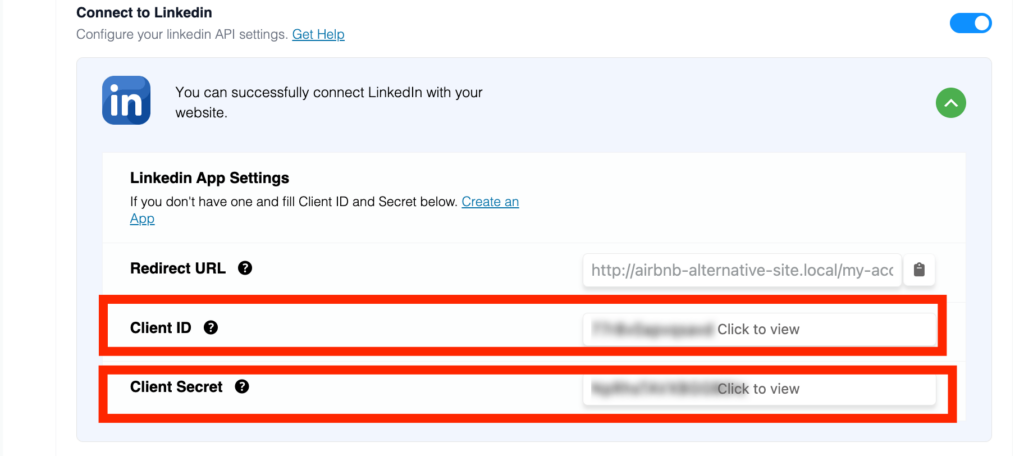
→ Copy Client ID & Client Secret and paste into the setting page(follow the screenshot).
Almost done. Check now what how it works on your site.
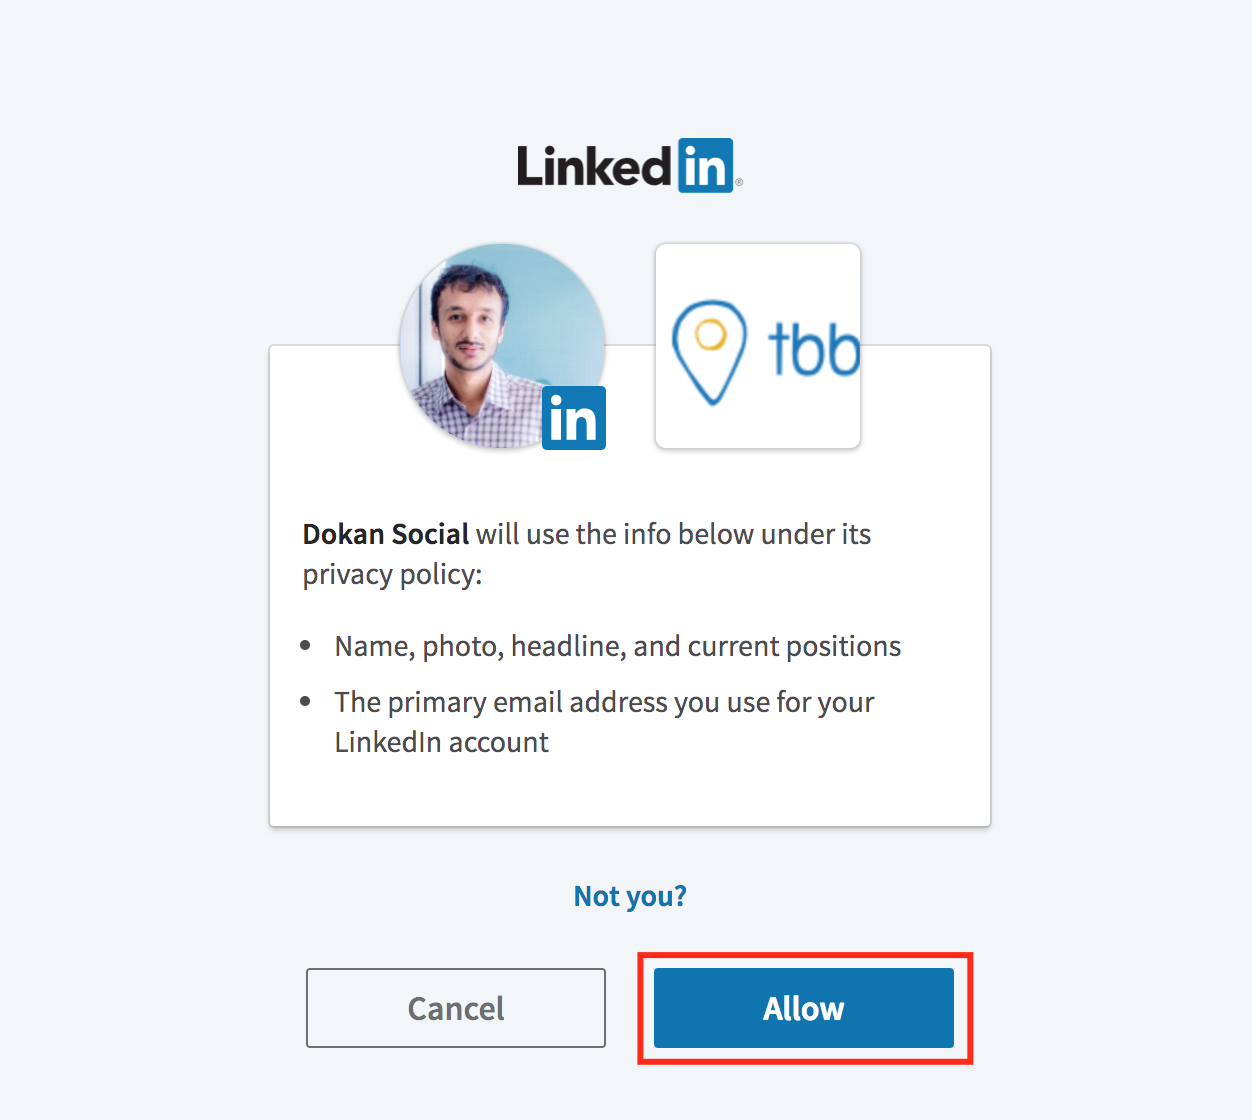
Click on the Linkedin icon, you’ll be redirected to the to app permission page. Allow it and you are done here.