The new Dokan Delivery Time module will help the customers choose the time and date they want their product delivered. However, the admins and vendors can control these timings via settings. We are going to show you how to set up and use the Delivery Time module and you will then understand the whole thing.
How to Setup & Use the Dokan Delivery Time Module
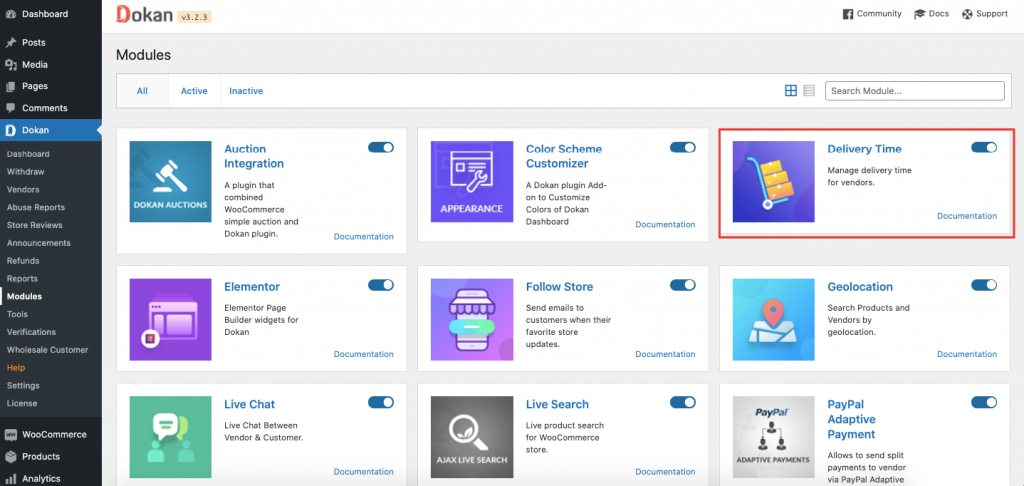
First of all you need to do is enable the Delivery Time module from Dokan–> Modules.
Then you need to configure the settings. Navigate to Dokan–> Settings–> Delivery Time. There you will find all the settings to configure Delivery Time.
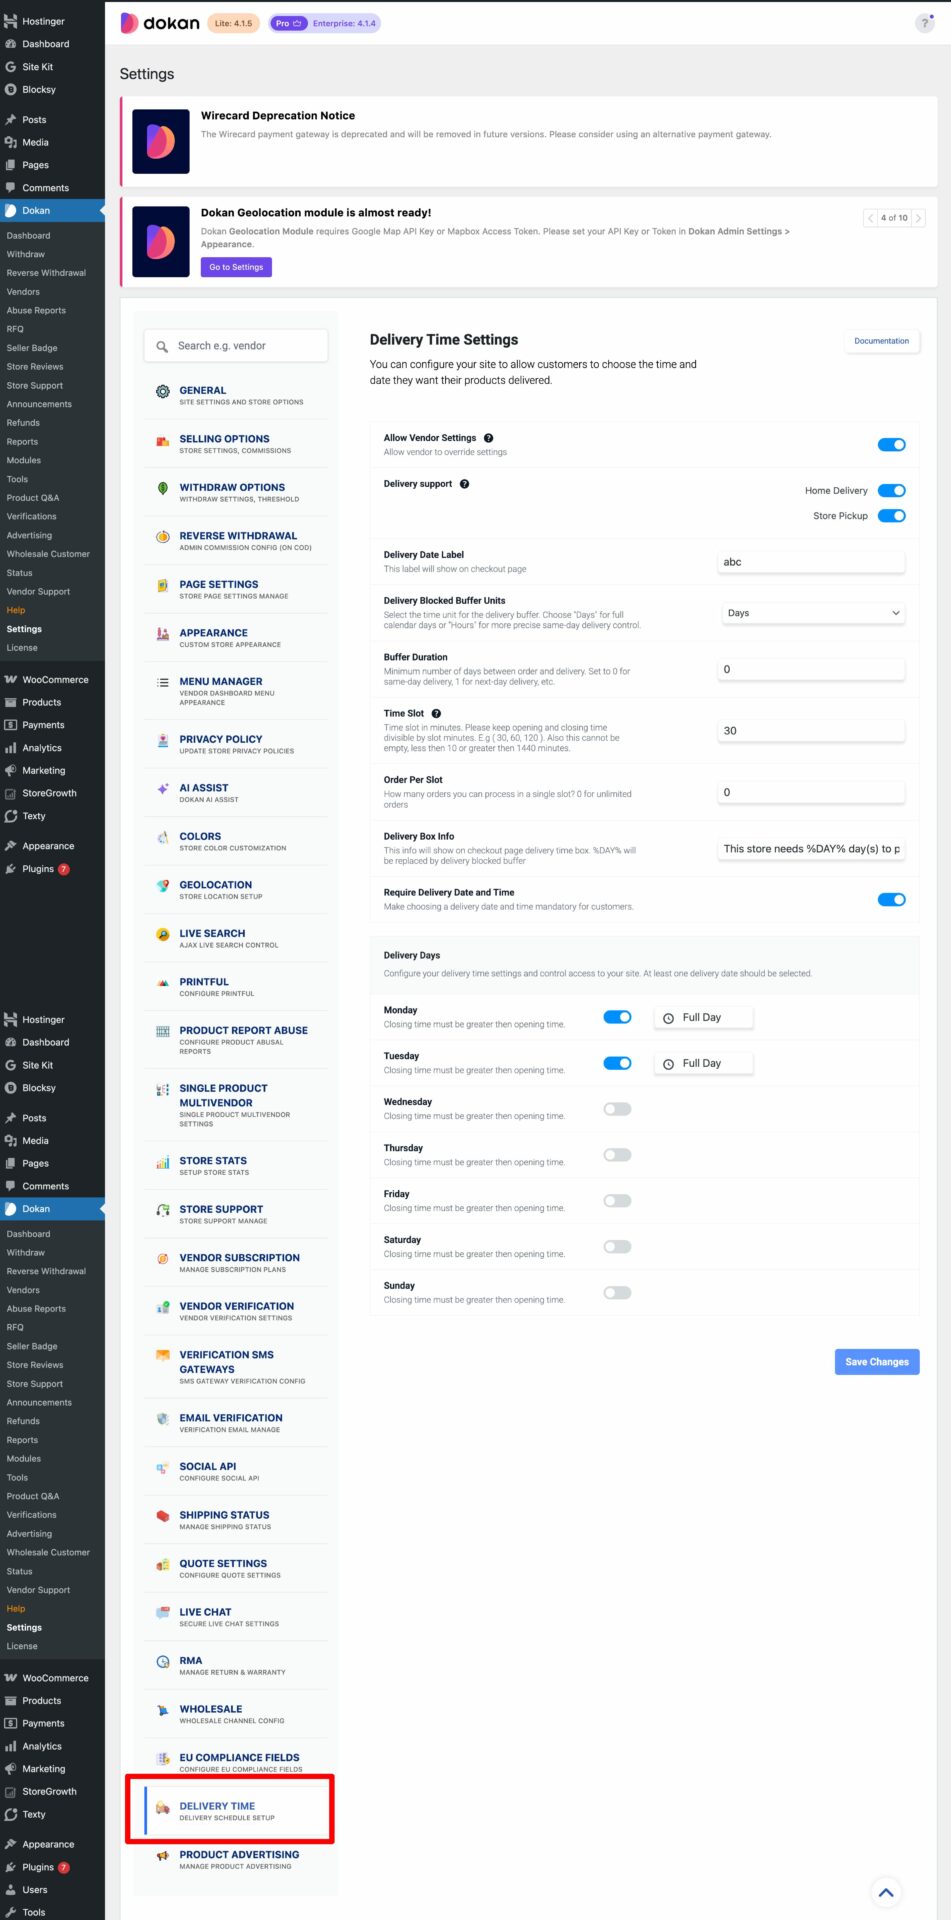
- Allow vendor settings: If you check this box then the vendor will have the power to override the admin settings. Otherwise the settings provided by the admin will be global.
- Delivery Support: Admin can enable delivery support from the backend. But the vendor can override the settings from the vendor dashboard.
- Delivery date label: This label will show on checkout page for the customer.
- Delivery Blocked Buffer Units: Select the time unit for the delivery buffer. Choose “Days” for full calendar days or “Hours” for more precise same-day delivery control.
- Buffer Duration: Minimum number of days/hours between order and delivery. Set to 0 for same-day delivery, 1 for next-day delivery, etc./If the time exceeds today’s store hours, delivery starts from the next business day.
Note: Enable the Allow Vendor option and configure Delivery Days to access the Buffer Duration option.
- Delivery box info: This info will show on checkout page delivery time box. %DAY% will be replaced by Delivery blocked buffer.
- Require Delivery Date and Time: Make choosing a delivery date and time mandatory for customers.
- Time slot: The length of each slot in minutes. Keep opening and closing time divisible by slot minutes. We strongly recommend you select the time slots that are divisible by opening and closing times like (30,60, 90, 120 minutes, etc).
- Order per slot: The number of orders you can take in each slot time. If you select 3 and the slot time is 30 that means you can take maximum of 3 orders in a 30-minute time frame.
- Delivery days: Choose the days and time the vendor can deliver.
Lastly, hit the Save Changes button to finish configuring the settings.
Vendor Setup
Now, if the admin allows the vendor to alter the settings then they can configure their own settings. If the vendor navigate to Vendor Dashboard–> Settings,
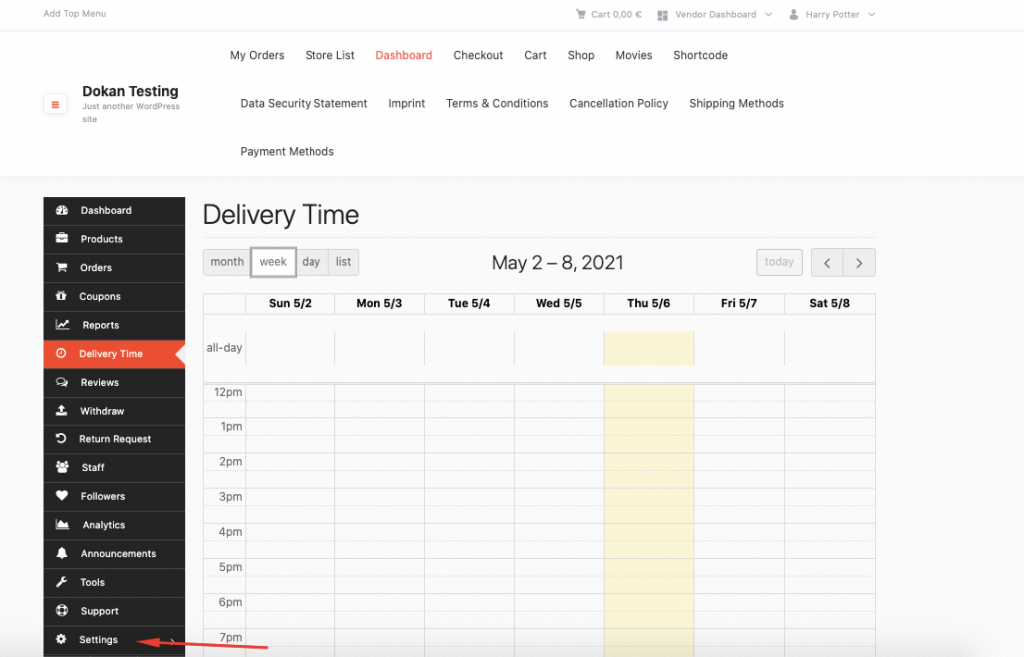
There he/she will find the Delivery Time settings. The Vendor settings are exactly like the Admin settings.
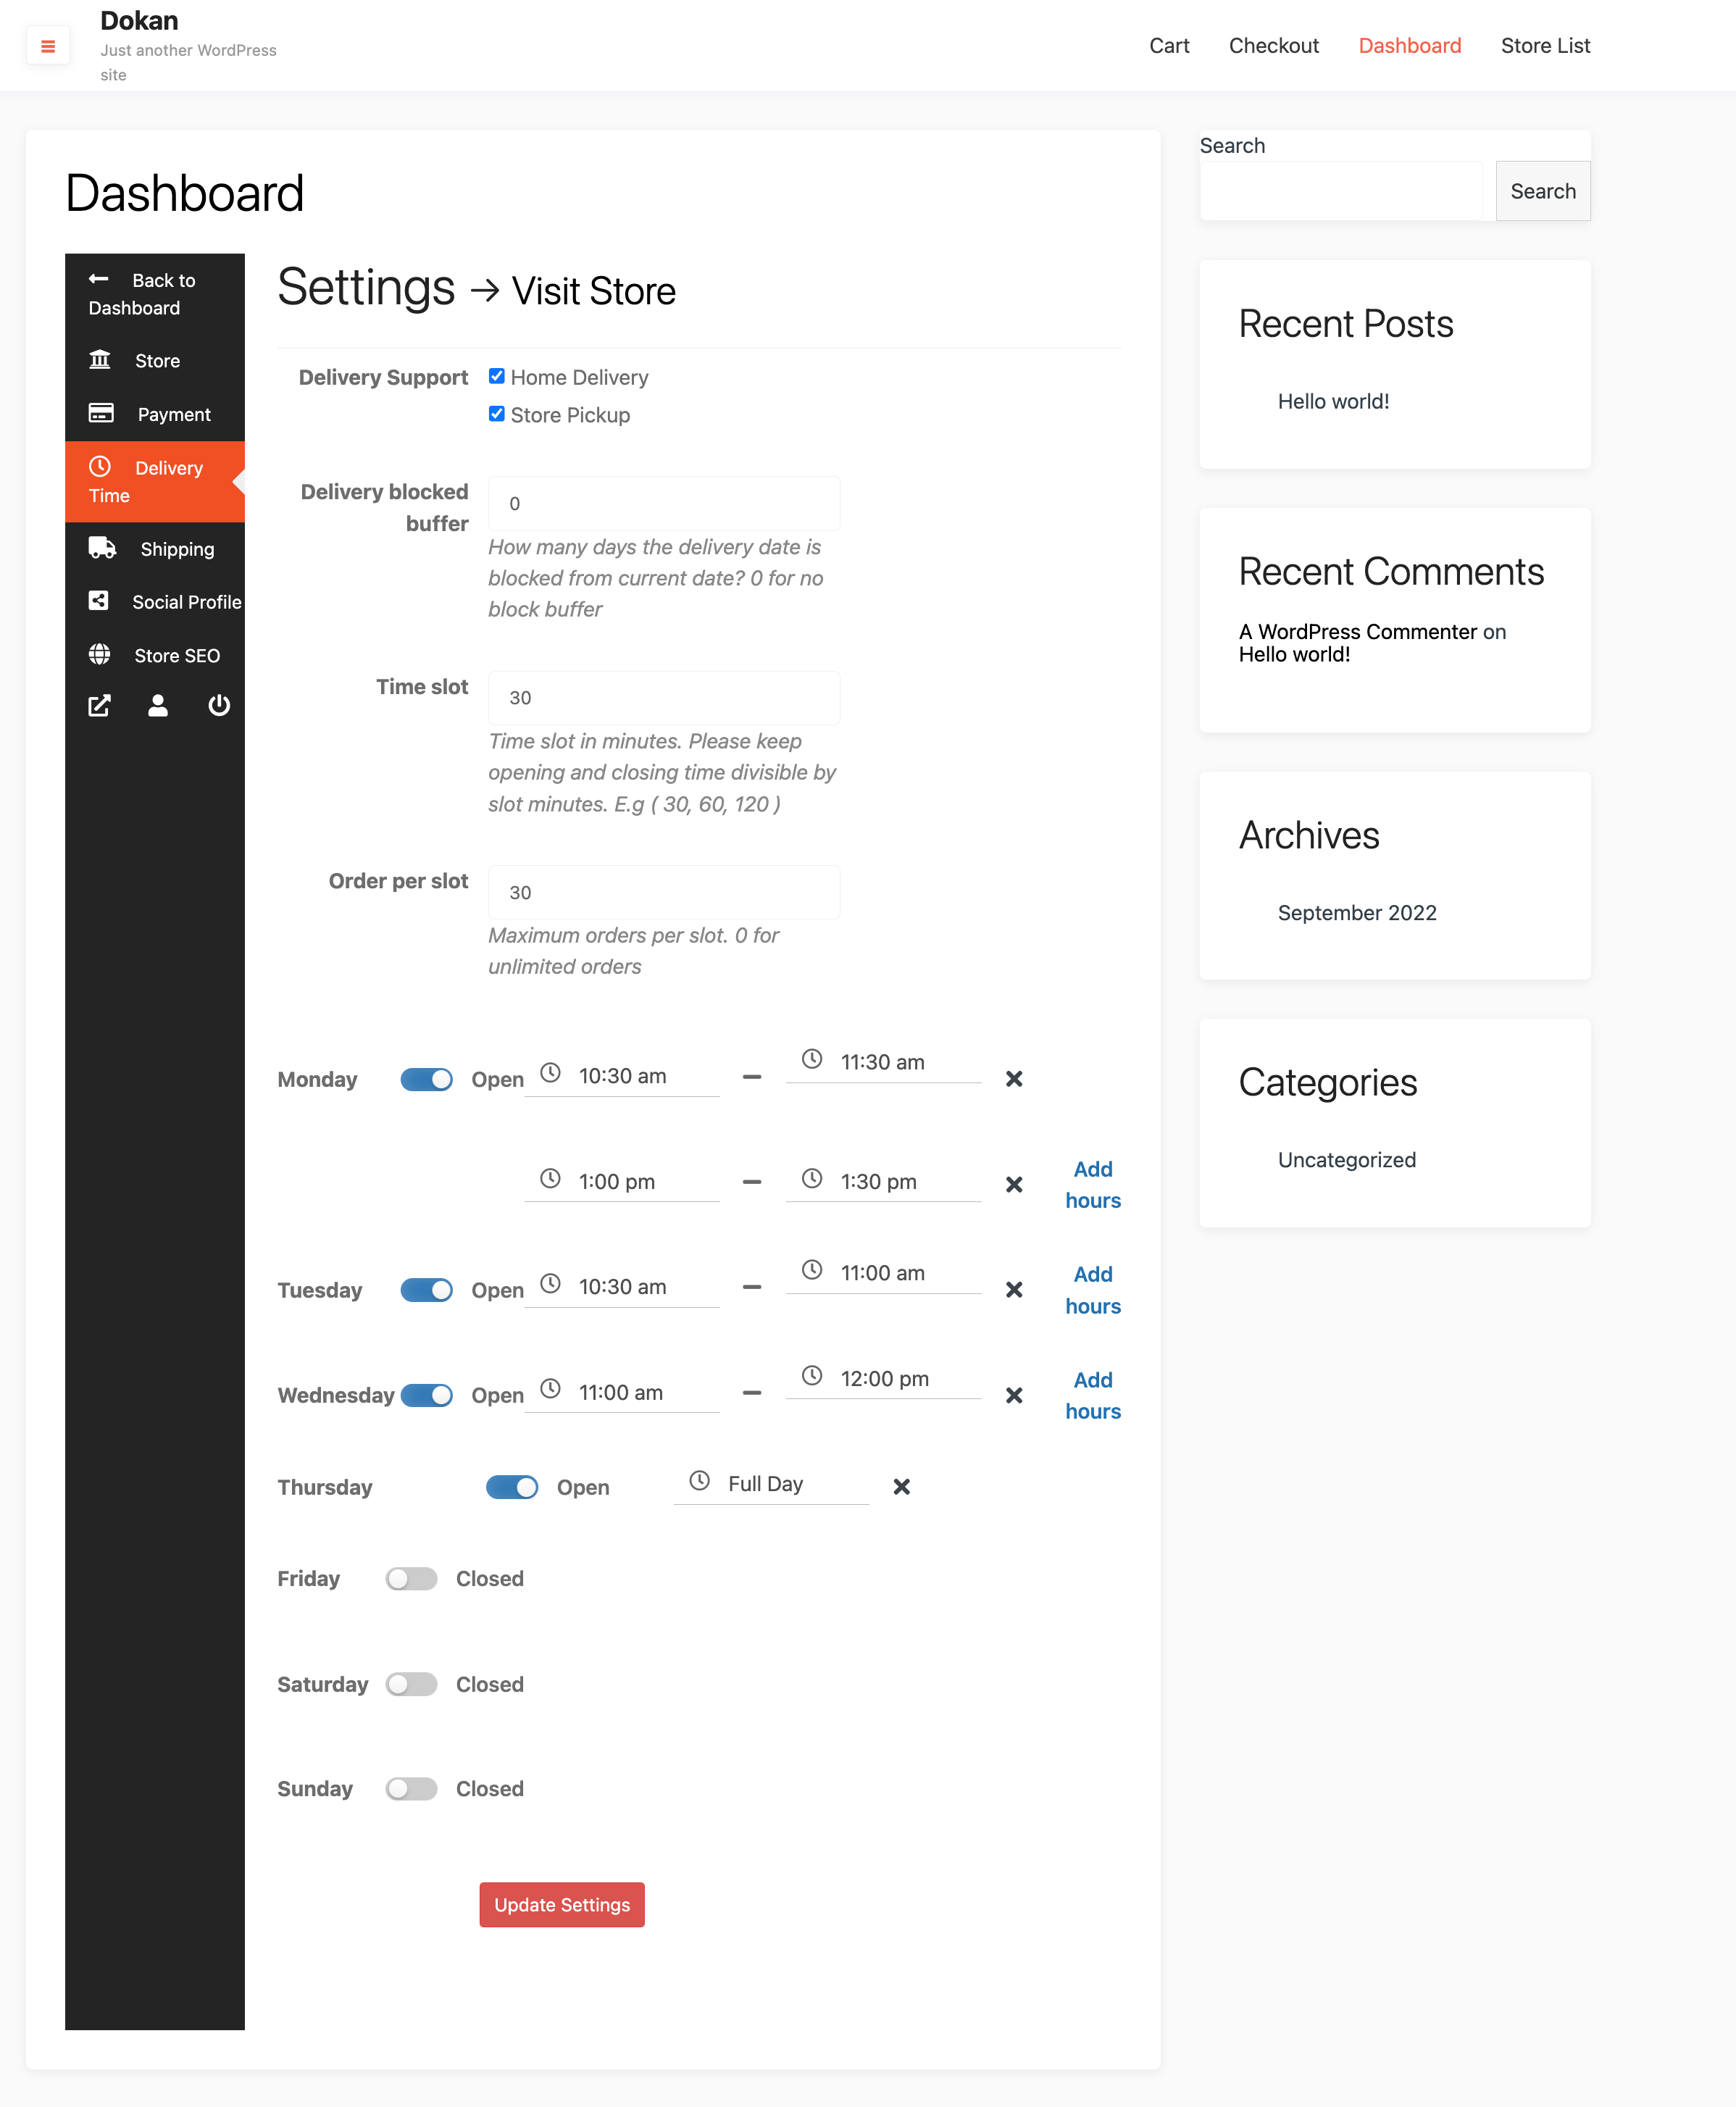
Vendors can select individual Opening times, Closing times, Time slots, and Order per slot for each delivery day. They need to click the Add Hours button to create multiple time slots.
Lastly, click Update Settings to finish.
How the Customer Will Use Delivery Time?
It is very easy for the customer. After purchasing a product and proceeding to checkout, on the right hand side of the checkout page they will see the option to select delivery time.
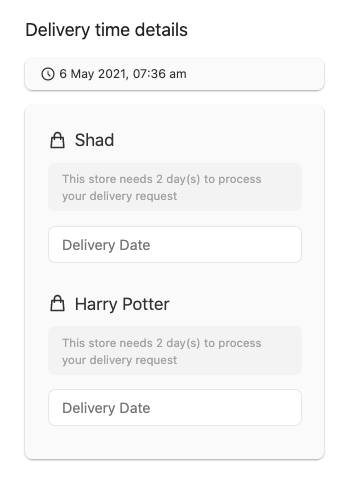
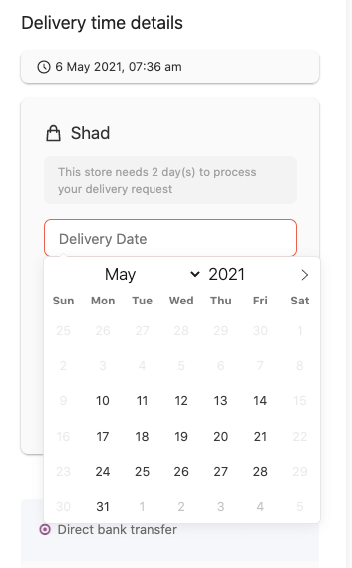
Now, first the customer needs to select the delivery date. Now, only the available dates will appear plus it will take into account the Delivery blocked buffer time. From the available dates, the customer needs to choose one.
Note: Delivery Time module has Vendor Vacation support. So, if the vendor is on vacation then the vacation dates won’t show up either in the delivery date select option.
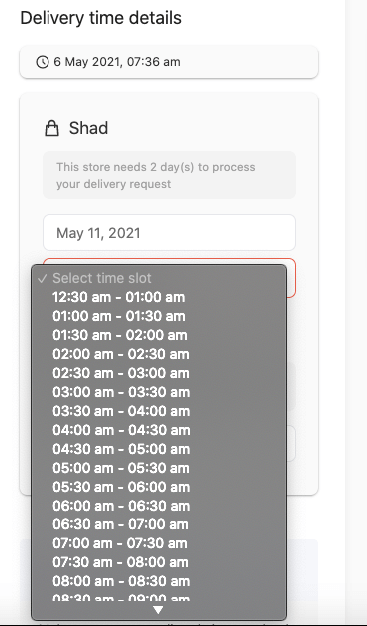
Then, the customer needs to select the time slot as well,
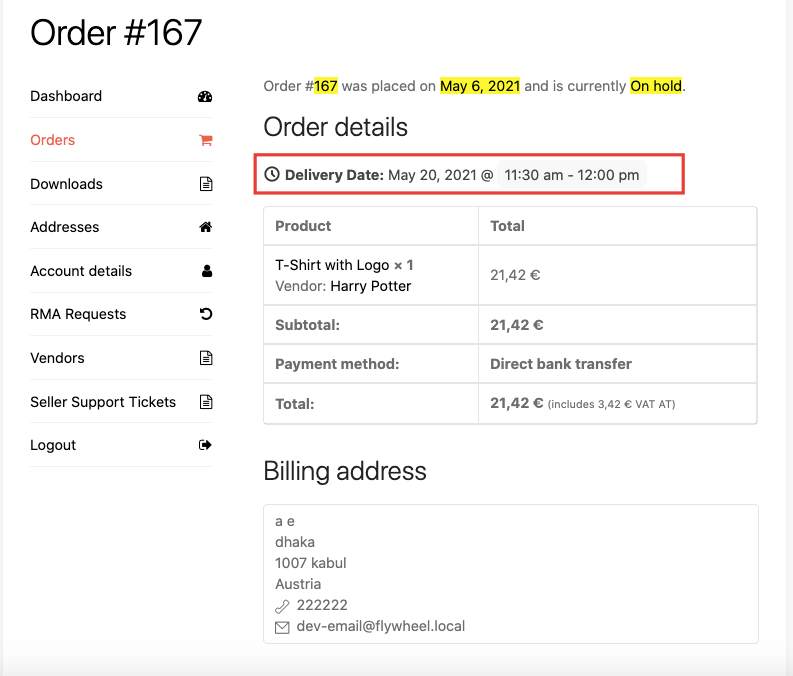
After confirming the order, they can visit My Account–> Orders and see the details of their delivery time.
Delivery Time Details-Vendors
There is option in the Vendor Dashboard, which will enable the vendors to see the dates and number of deliveries on that particular date. Just select the Delivery Time option and they can see all the details.
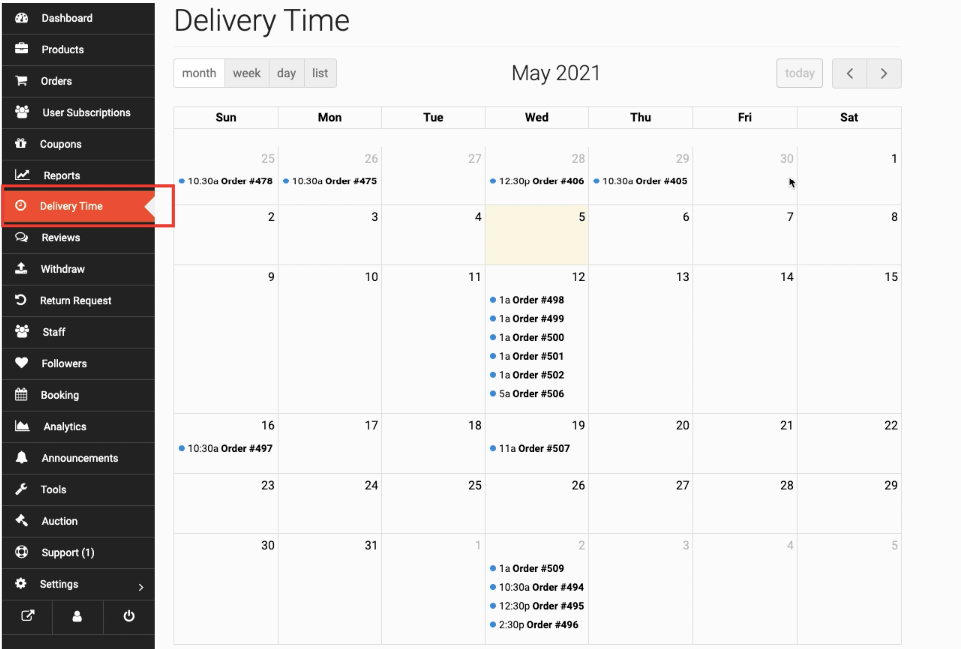
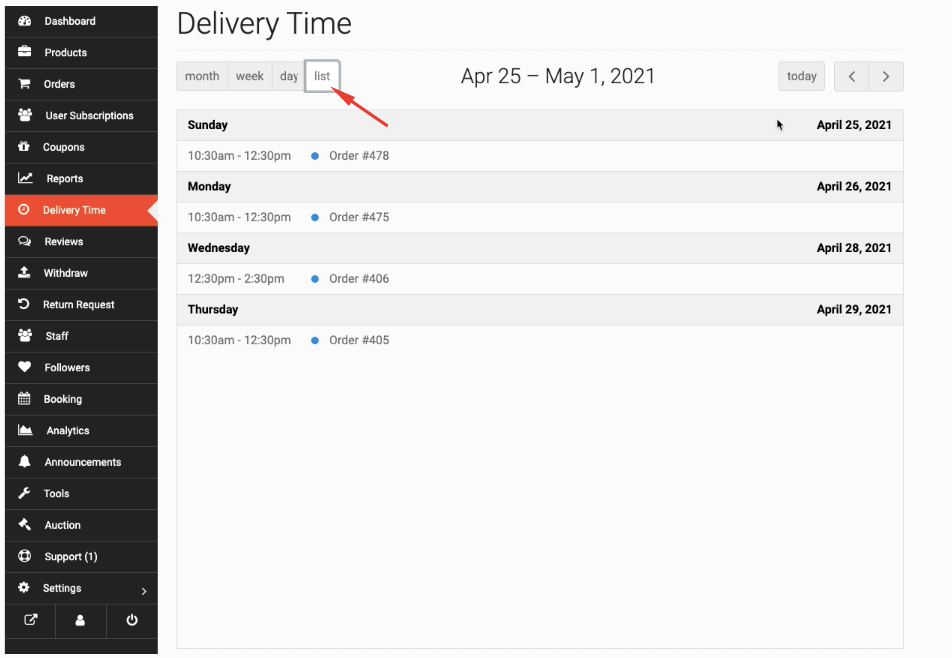
They can also filter the orders by month, week, day. They can see the list view as well,
And when they click on an order they can see the order details as well.
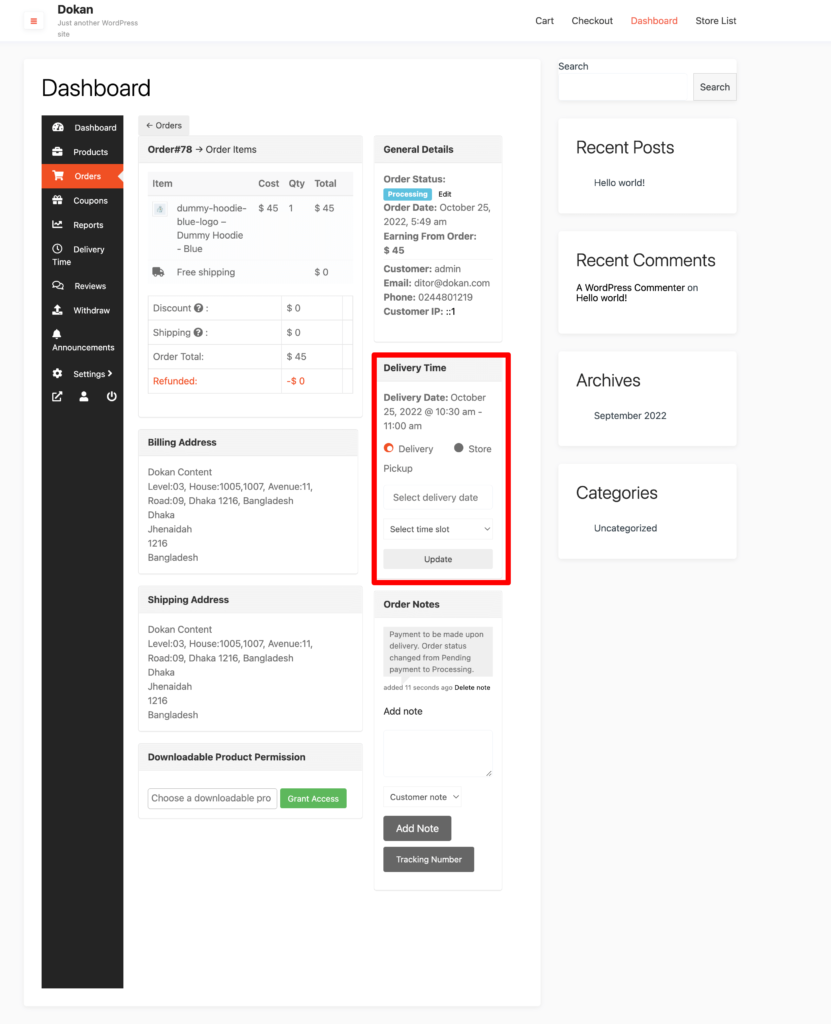
Vendors can update the Delivery Date and time slot if they want. Also, they can change the delivery support as well. If the customer chooses Store pickup, the vendor can change it to Delivery.
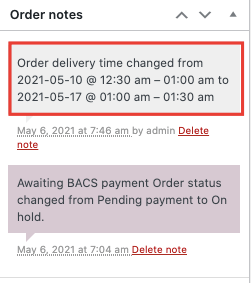
After updating, it will be added to the Order note.
Delivery Time Details-Admin
Admin can also view and update the delivery time details as well. Navigate to WooCommerce–> Orders. And click on an order to see details.
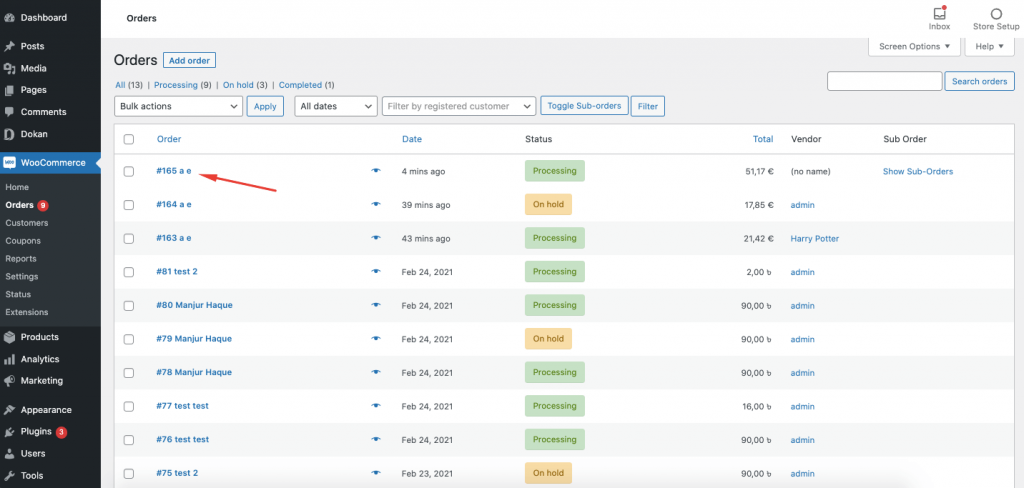
In the order details, they will find a meta box with the delivery time and date. They can change the Delivery Support as well.
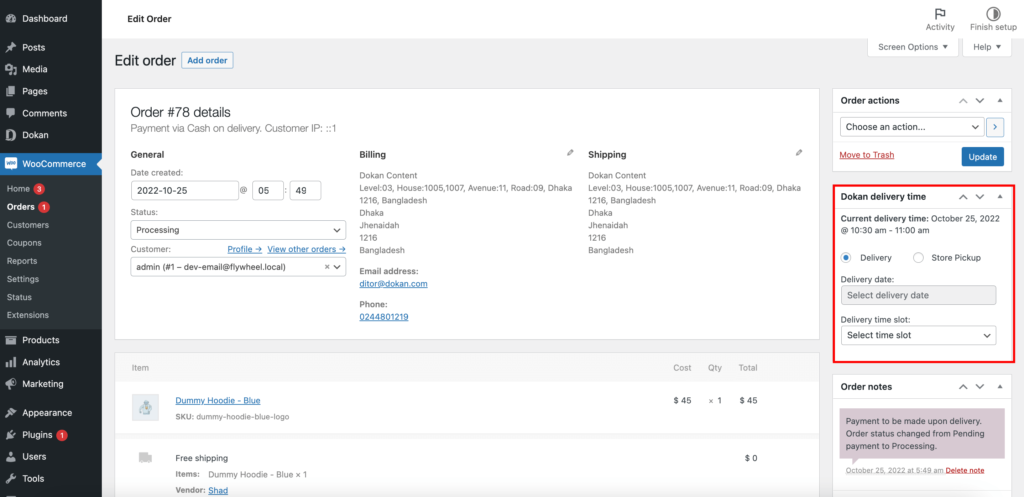
They can also update the Delivery Date and time slot. After updating, it will be added to the Order note.
That is how users can easily setup and use Dokan Delivery Time module and take their marketplace to another level.
Note: This module will not support Downloadable or virtual products.
Store Pickup Location
Instead of home delivery, customers can now pickup their order from the store using the Store Location feature. So, if the customer wants they can pickup their order from the nearby location.
Vendor Settings
To enable the store pickup feature, the vendors need to enable the Store Pickup option or the Home Delivery option or the vendor can enable both.
Setup Store Location
In order for the customers to pickup the order, vendors need to set up their store location. Visit vendor dashboard–> Settings. There the vendors can set up their store location.
And, if the vendors want they can add multiple locations if they have different branches in the country or worldwide. They need to enable the “Store has multiple locations” option.
Click on Add New Location button,
Give the location a name (that will appear at checkout), address. Then click on the Save Location button.
You will see that the second location has been added. The first location is the default location of your store.
Address Verification
Vendors can verify their default address using the Vendor verification feature. Just go to the Verification option from the vendor dashboard. There click on the Start Verification button.
Add your address and click on the Submit button.
Admin needs to approve the address from Dokan–> Verifications.
After approval, vendors will be able to see that their address is verified,
Then vendors will not be able to edit or delete the default store location,
Note: If the vendor wants to change the default address again, then the admin has to approve the address again and the verification status will be deleted.
Checkout Process
Suppose a customer has bought products from two different vendors. On the checkout page, he/she will get two options (if the vendors choose both home delivery and store pick-up options). When they choose the store pickup option,
Now, the customers need to choose pickup date, time slot and pickup location.
When they choose the location, the address will be shown below the location.
After placing the order, two sub-orders will be created.
One for Store Pickup,
And one for home delivery.
Vendor Visualization
We have added some enhancements to the Delivery calendar. Now vendors can see both Home Delivery and Store Pickup orders in the calendar.
Vendors can filter between Home delivery and Store Pickup,
Vendors will see the filtered results,
And if the vendors click on the orders, they will see the details of the order.

This is how the store pickup feature works.