Dokan Elementor module allows the admins customize the global appearance of vendor store pages. However, this feature’s settings are only accessible by the admin.
Prerequisites
To make this feature available, you need these 4 plugins (3 of them require licenses):
Note: The Elementor Pro plugin is not included in the Dokan Plugin. You need to purchase it separately.
Installation
First off, you need to install and activate both the free and paid version of the Dokan plugin.
After that, navigate to your WP Admin Dashboard > Dokan > Modules. Find Elementor and turn on the toggle button to activate this module.
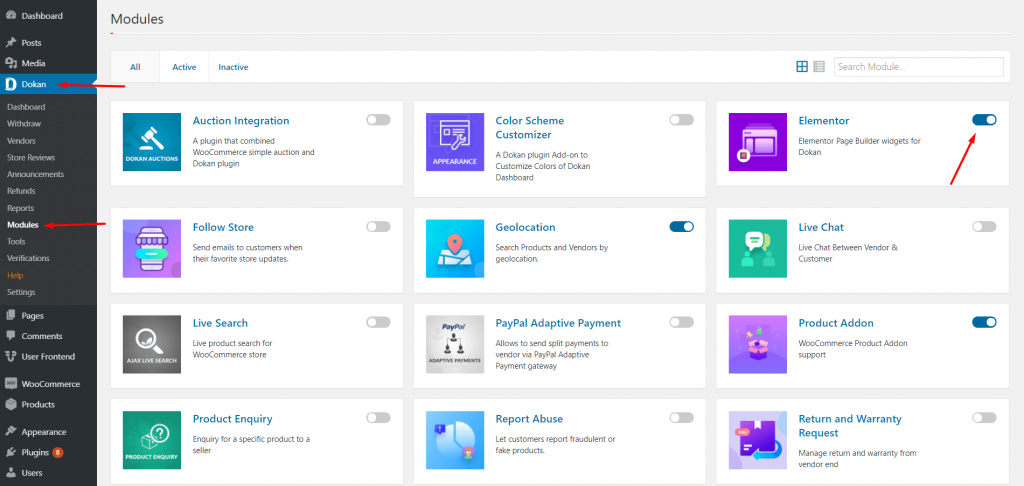
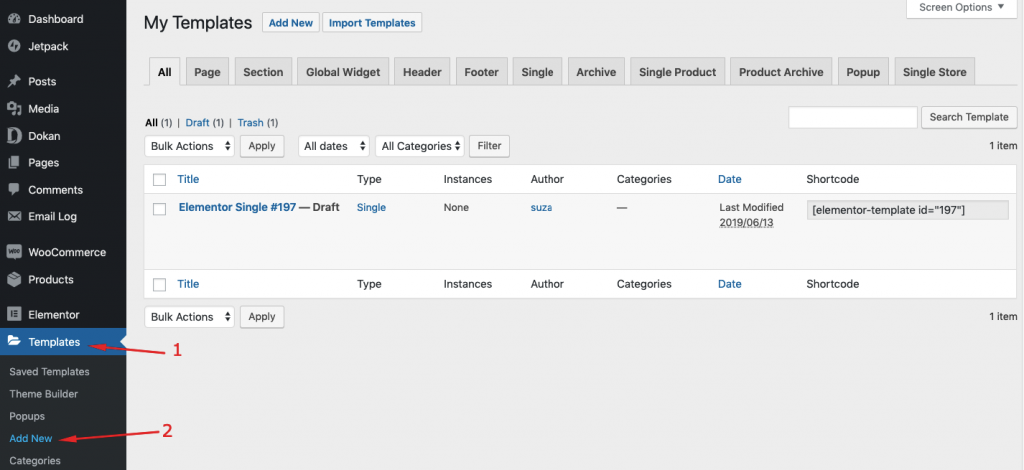
Now, navigate to WP Admin Dashboard > Templates > Add New.
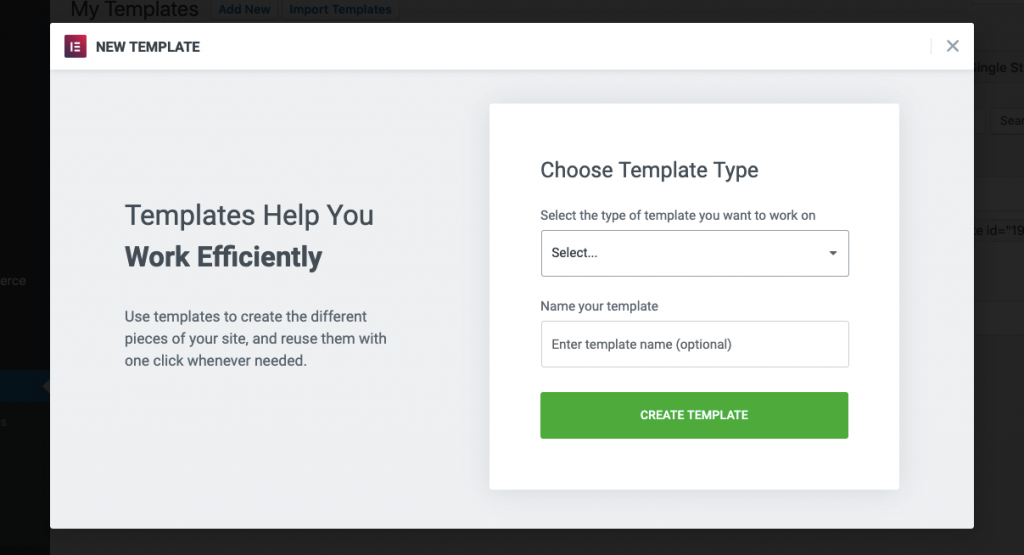
After that, a pop up will appear on the screen:
Now, choose the following template and give a name to the template as well:
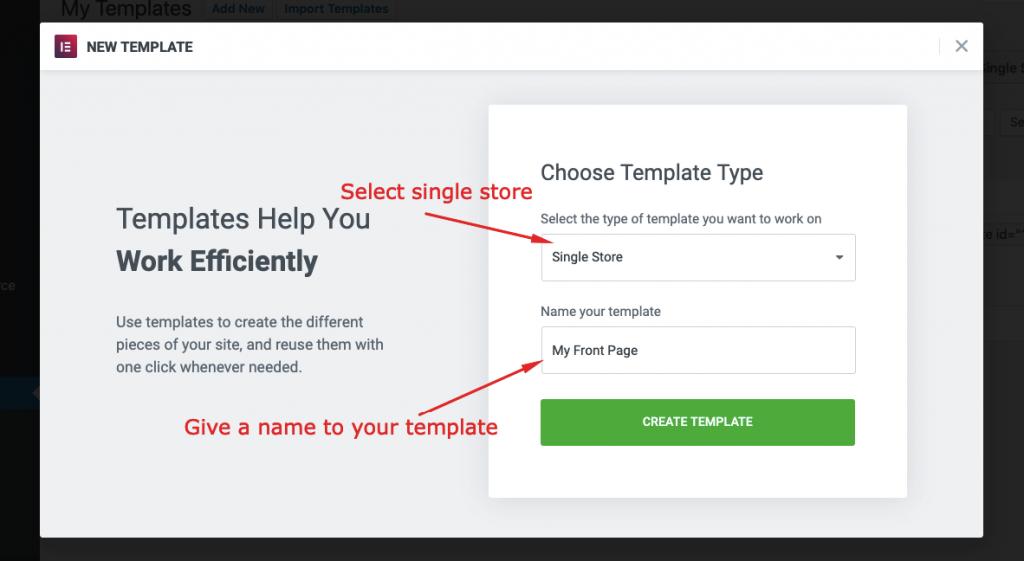
Finally, hit the “Create Template” button to get it done.
Now, you will be able to see the three default blocks for the vendor store page. To set a template hover your mouse over a template and hit the insert button and it will be all set.
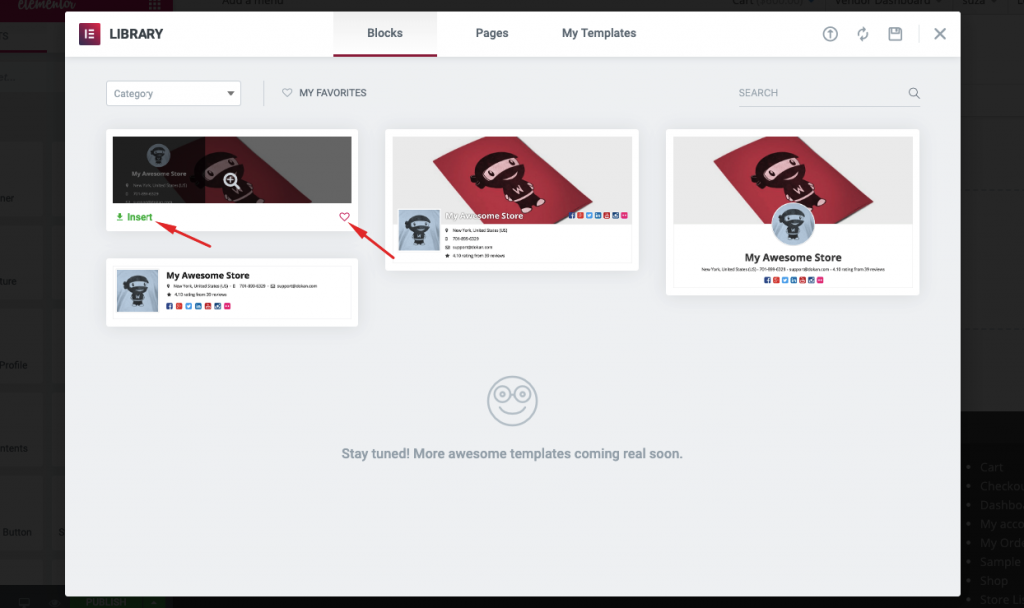
Please note that if you use the Dokan Elementor store theme, the default theme will not work properly.
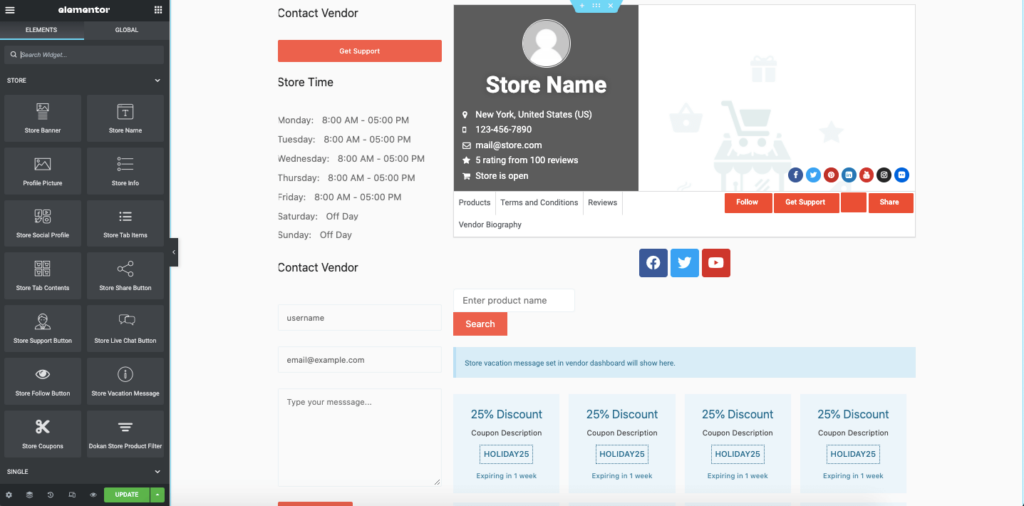
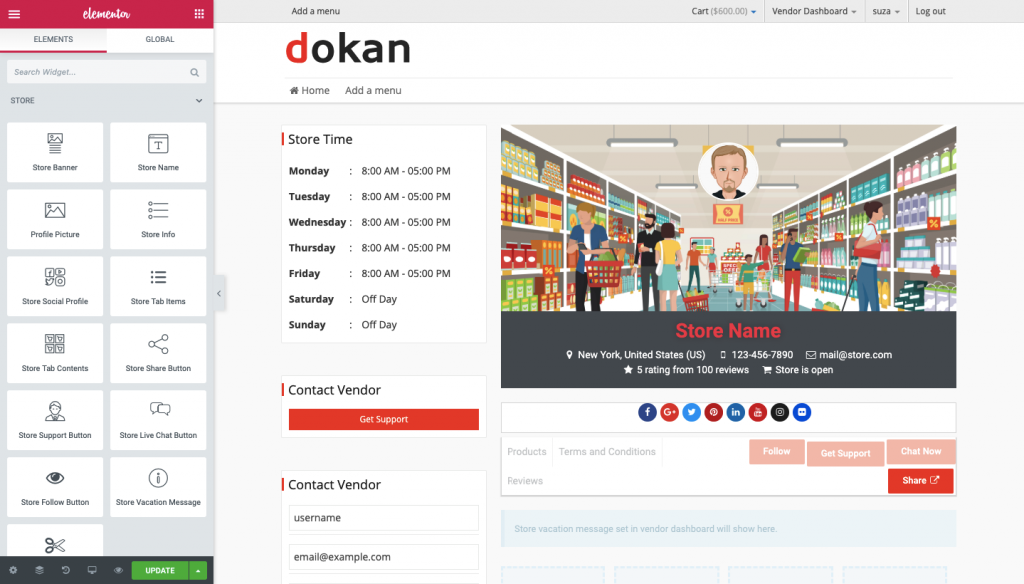
In this section, you will get the following elements:
- Store Banner: You can drag and drop these elements to any preferred area to let your vendors set their store’s banner.
- Store Name: This block is used to change the individual vendor’s store name.
- Profile Picture: This element is used to change the profile picture of the store owner.
- Store Info: Use this element to let your vendor show their store’s information.
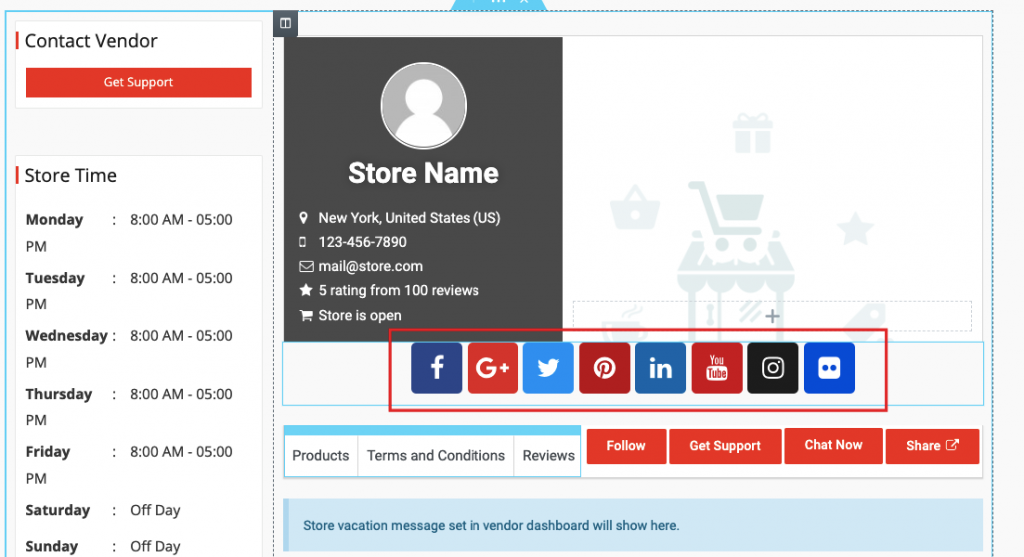
- Social Profile: This element includes social sharing buttons like Facebook, Twitter, Linkedin, Google+, Pinterest, YouTube, Instagram, Flickr.
- Store Tab Items: It contains the products, terms, and conditions and reviews options. You can also show or hide these items if you want.
- Tab Contents: This element will show the store products as a tab.
- Store Share Button: Use this button to add a share button for your vendors.
- Support Button: Use this element to add a support button on the store page.
- Store Live Chat Button: Allow your vendors to set a live chat button on the store page.
- Follow Button: Use this element to add a follow button for the store page.
- Store Vacation Message: This element will help the vendor show texts while they are on vacation.
- Store Coupons: Using this option the vendor will be able to show the store coupons to their customers.
- Dokan Product Store Filter: Using this widget customers can filter products right from the vendor’s store.
How to Customize the Store Elements & Publish Them?
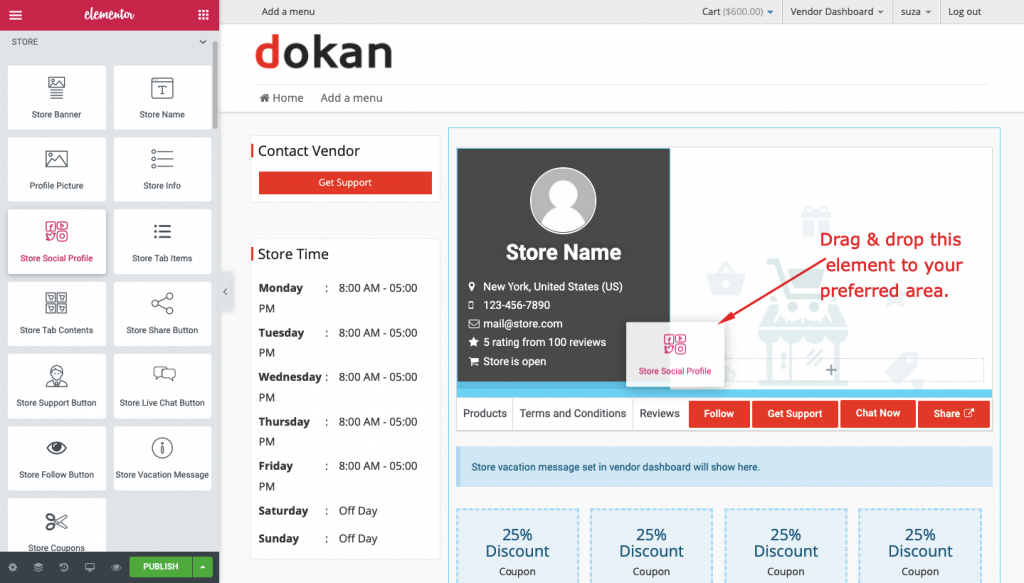
Just drag a store widget or element and drop it to anywhere you want with the Elementor editor. Here in this example, we have dragged the “Store Social Profile”.
After having the elements dropped, it will come into effect like this:
Fortunately, you will also be able to customize these elements like any other regular Elementor elements.
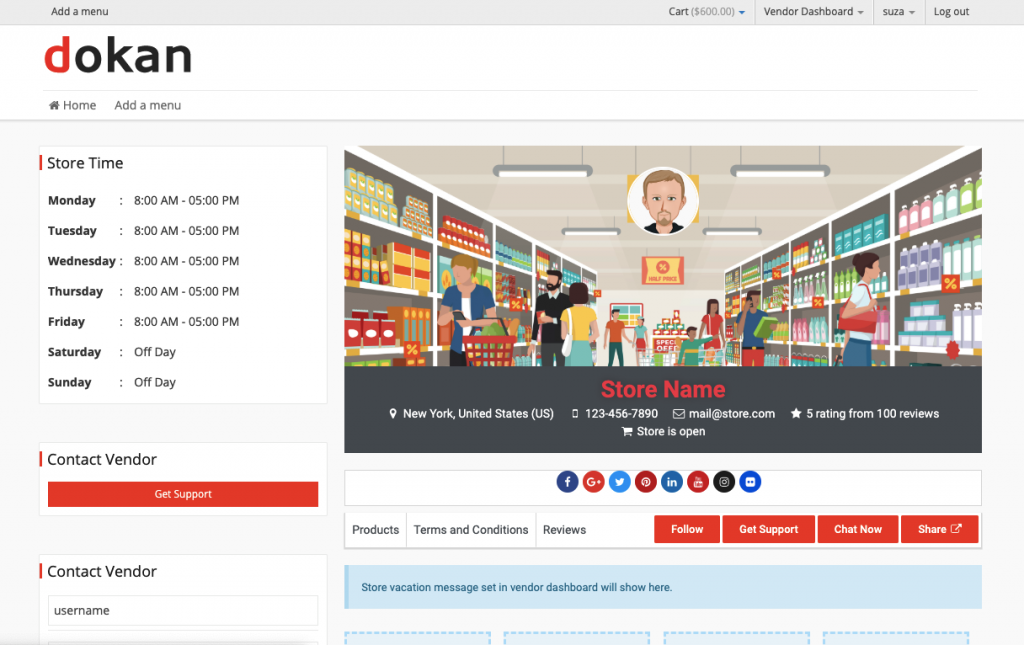
Here is a Dokan Elementor template after customization:
As you can see, we have customized the default dokan elementor template and changed their position and other properties.
You can also set a profile placeholder image and a banner placeholder image for your vendors so that your vendors can upload their individual images with ease.
However, if you change the color of an area of the elements with custom css, your vendors won’t be able to change them.
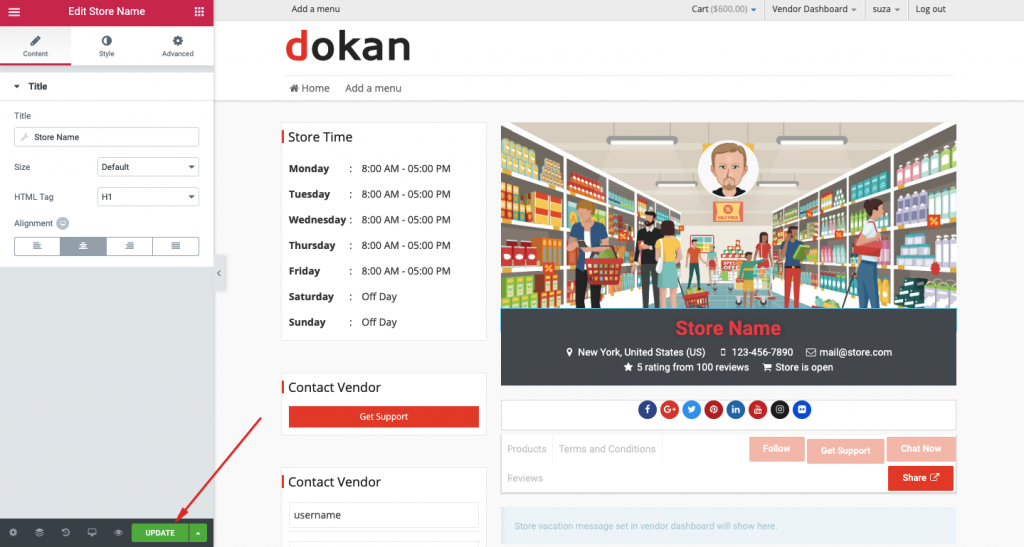
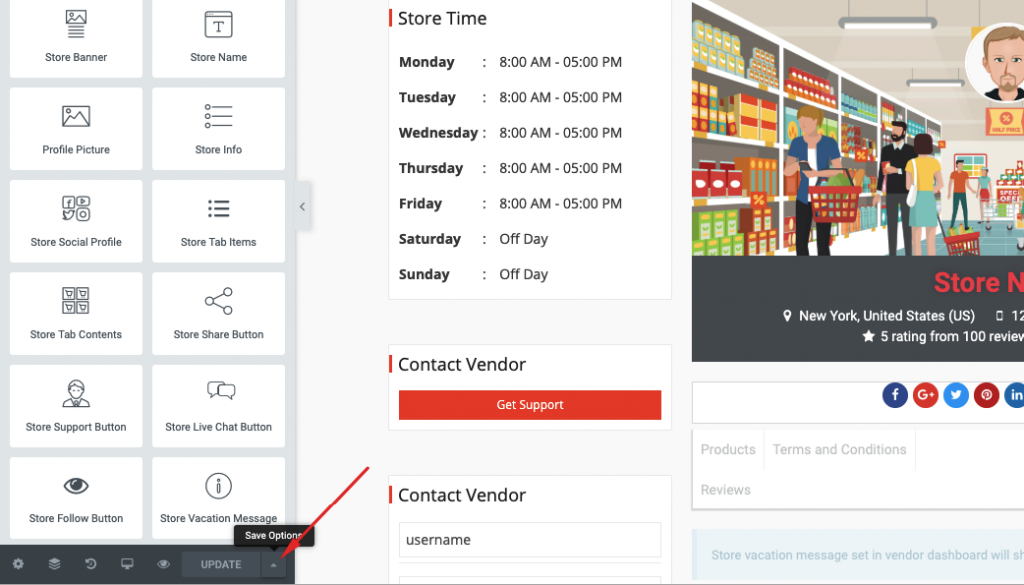
When done editing, hit the ‘UPDATE‘ button:
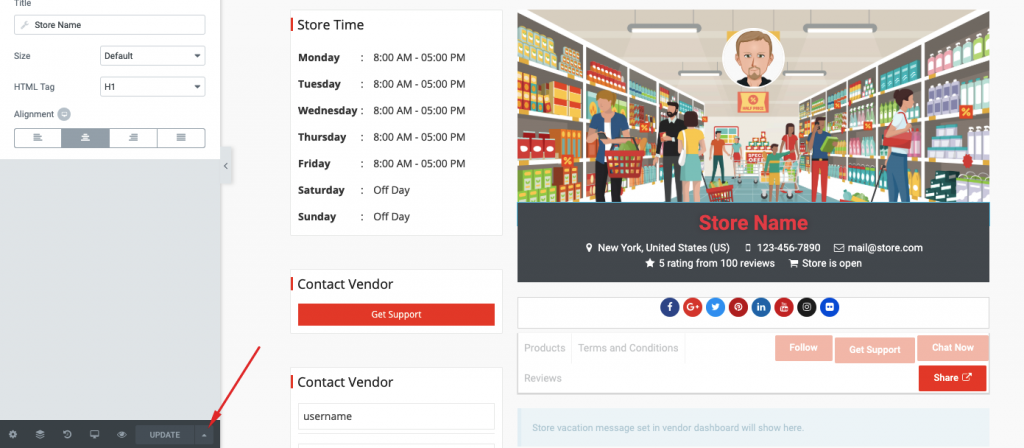
Next up, click on the arrow beside the ‘UPDATE’ button:
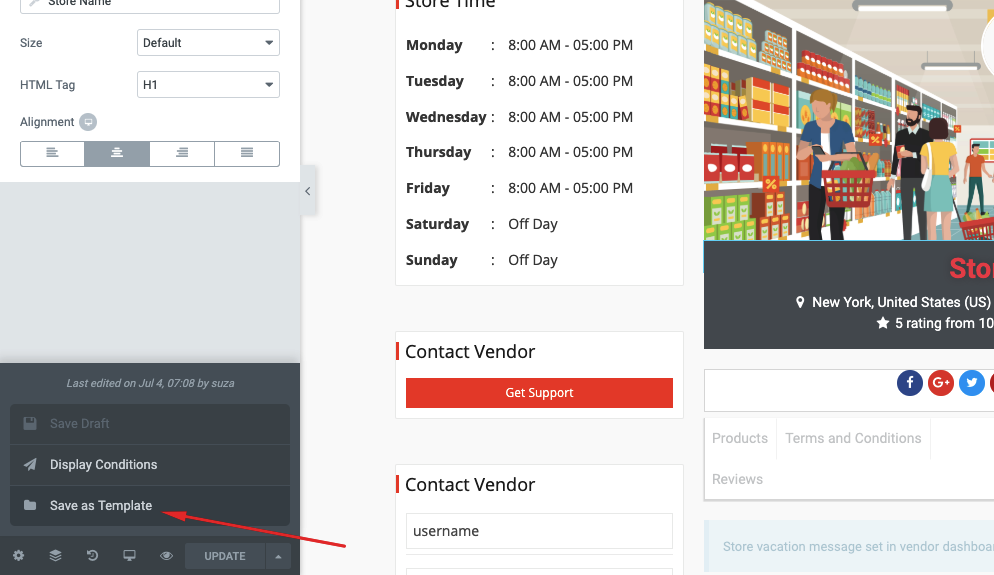
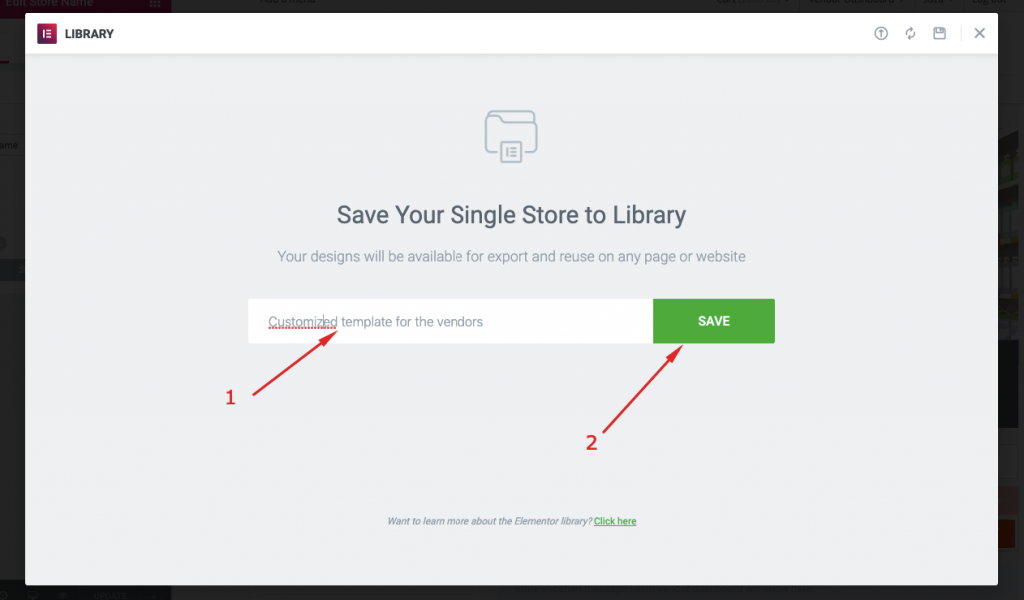
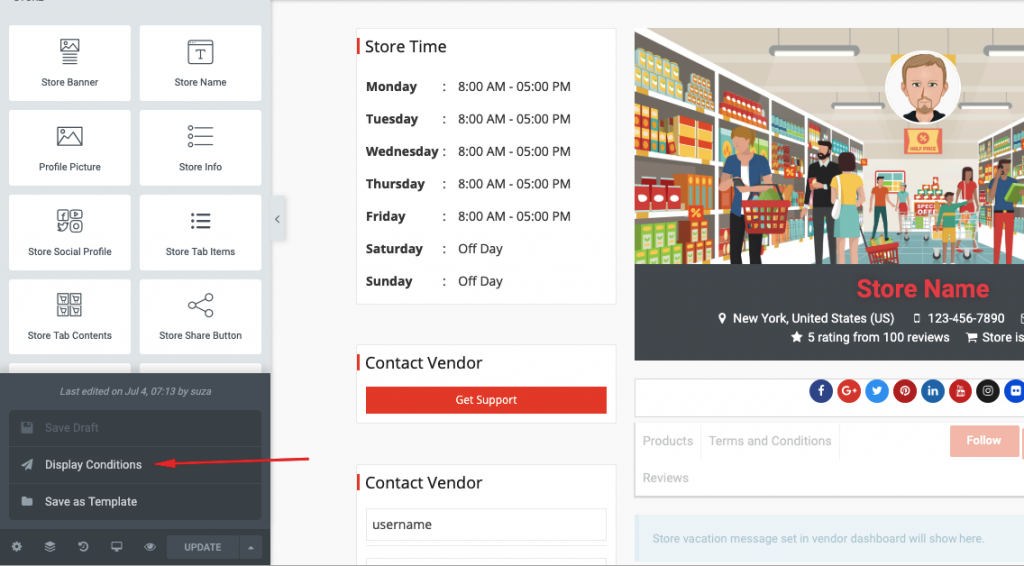
Now, you will have to hit the “Save as Template” option.
After that, you will get a pop up in which you will have to give a name and save the template:
Click on the arrow again:
Select the “Display Condition” option:
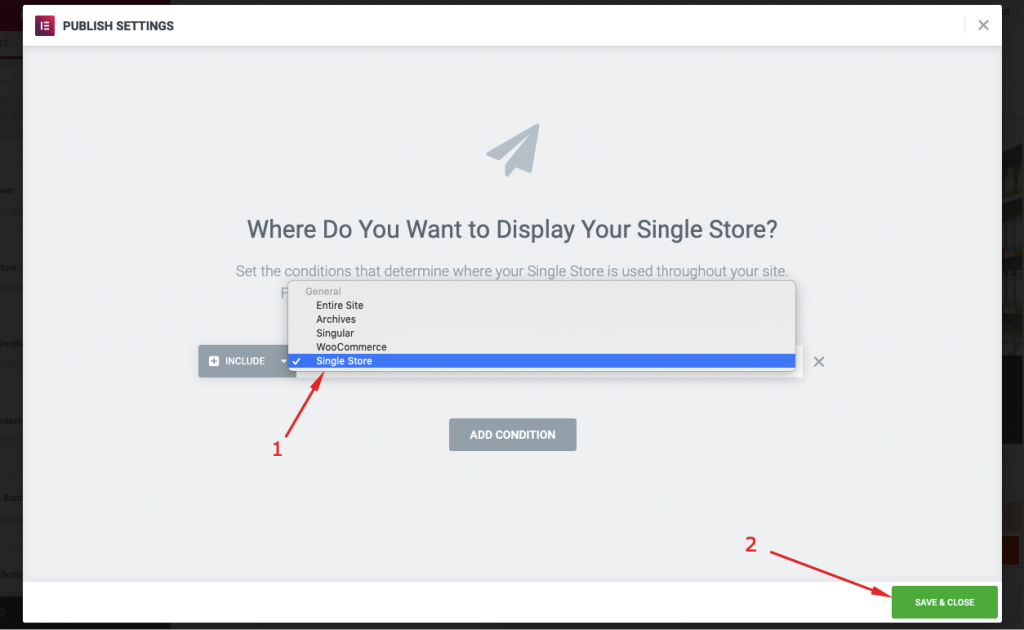
Next, you should see another pop up. Here select the “Single Store” option from the dropdown and hit the “Save & Close” button to finish the setup.
Now, all of your vendors will get to view your customized elementor template from their individual store:
That’s how you can use the Dokan Elementor module to customize the vendor store page.