Dokan plugin has a built-in widget for contacting vendors from their product page. But it sends an email directly to the seller, exposing the mail address of the customer. The marketplace owners did not like it. So, we introduced this new support system for the vendors.
The Dokan Store Support module is for existing clients who have purchased one or more items from a vendor. This module puts a Get Support button on vendor’s store for customers to generate support tickets for the product/service they purchased.
When a customer creates a support ticket from the vendor’s store page, the vendor gets notified via mail that there is a customer waiting for support. Similarly, the customer gets notified via a mail when the seller has replied to his support topic.
Installation
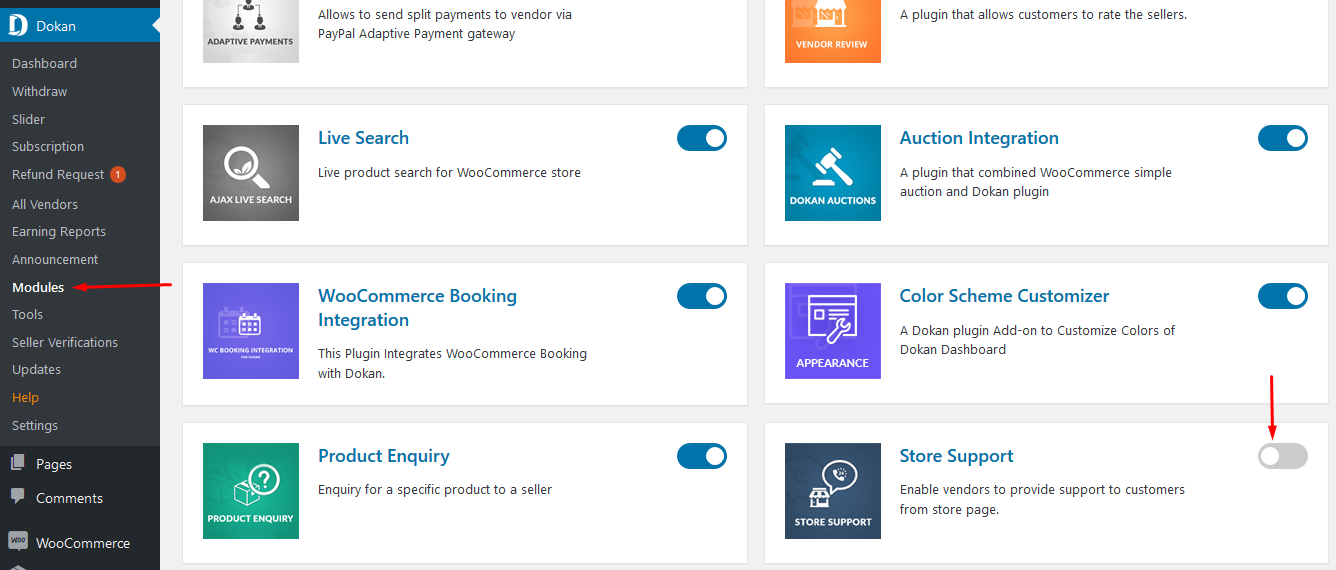
Navigate to your WP dashboard→Dokan→Modules. Find Store Support and turn on the toggle button on the top right to activate this module.
Configuration
The marketplace admin only has to install and activate the plugin. The configuration is for vendors themselves. The vendors need to enable this feature from their vendor store settings page.
Instruction For Vendors
To allow a vendor’s customers to send product-related queries and issues, the vendor needs to enable the support button display on his store page.
- To do this, navigate to Vendor Dashboard → Settings → Store.
At the very bottom of the page, you will get two new fields:
- Enable Support: You need to check the box for using store support feature.
- Support Button Text: You can modify the store support button text from here.
After configuring, click on the Update Settings button.

2. When the admin enables Store Support module, a Support menu will also appear in the vendor’s dashboard.
To view this, go to Vendor Dashboard→Support.
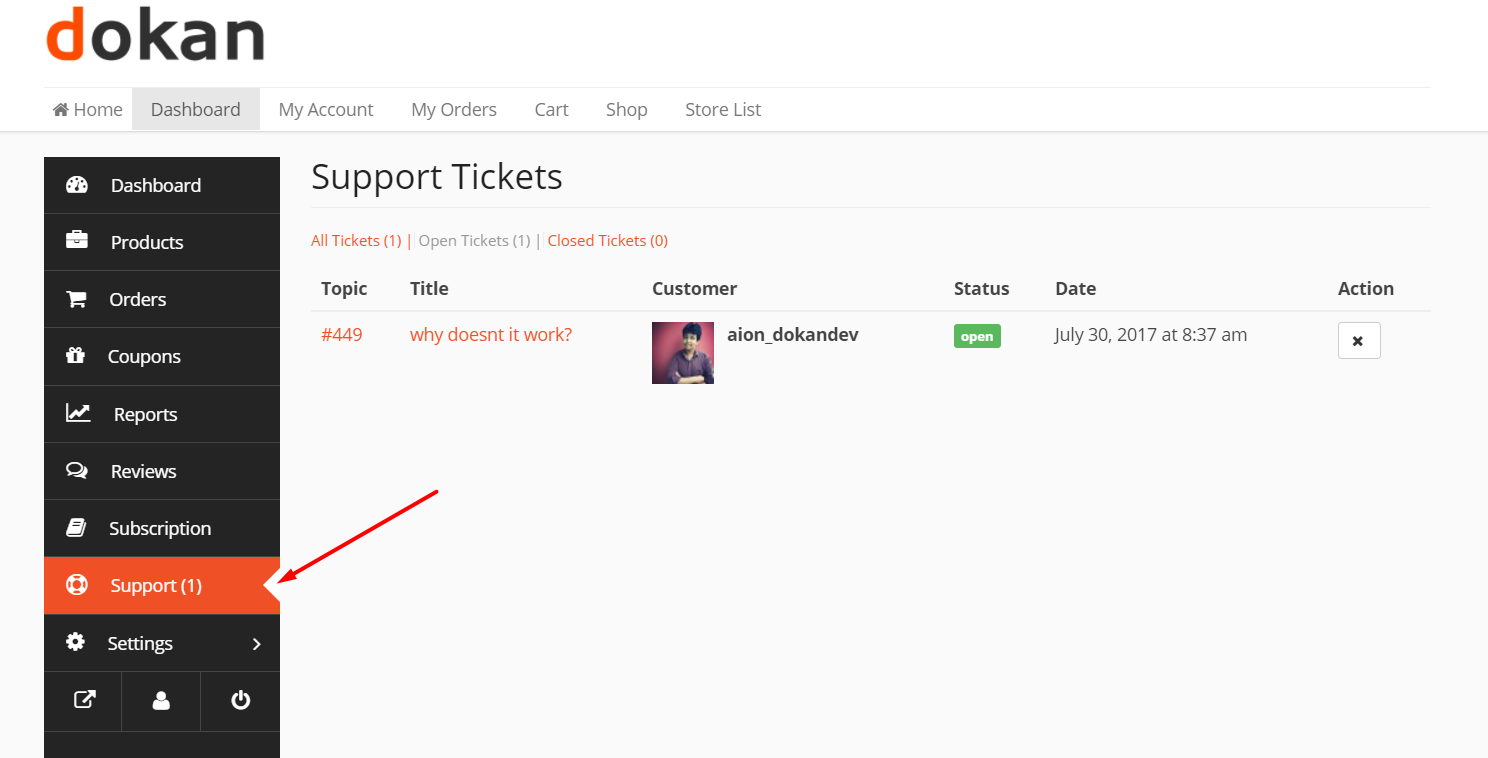
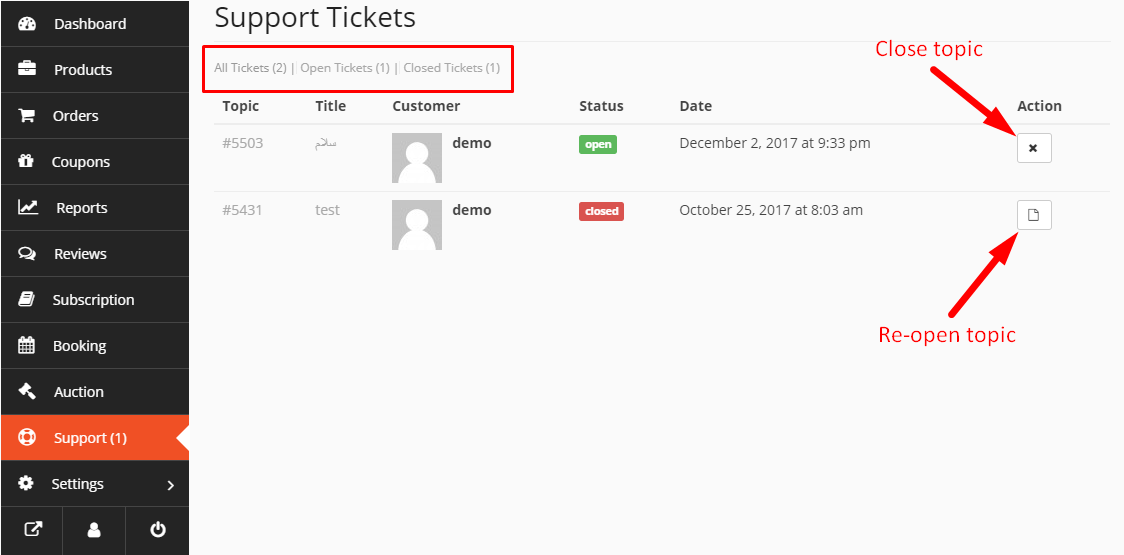
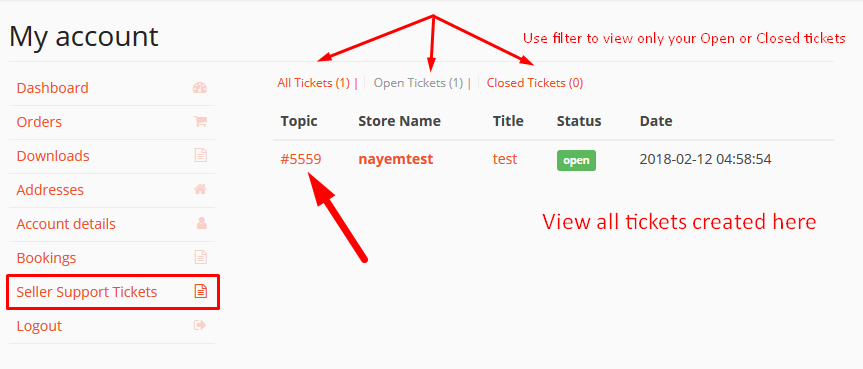
3. After clicking on the Support menu, vendors will get to:
- View all their tickets under All Tickets.
- Filter them by Open Tickets and Closed Tickets.
- View Status and Title of each ticket, Customer’s name, Date when the ticket was created and also the Topic/order number.
- Close or Re-open a ticket directly from the Actions column with or without responding to the ticket. This action can be done from all 3 tabs – All Tickets, Open Tickets, and Close Tickets.
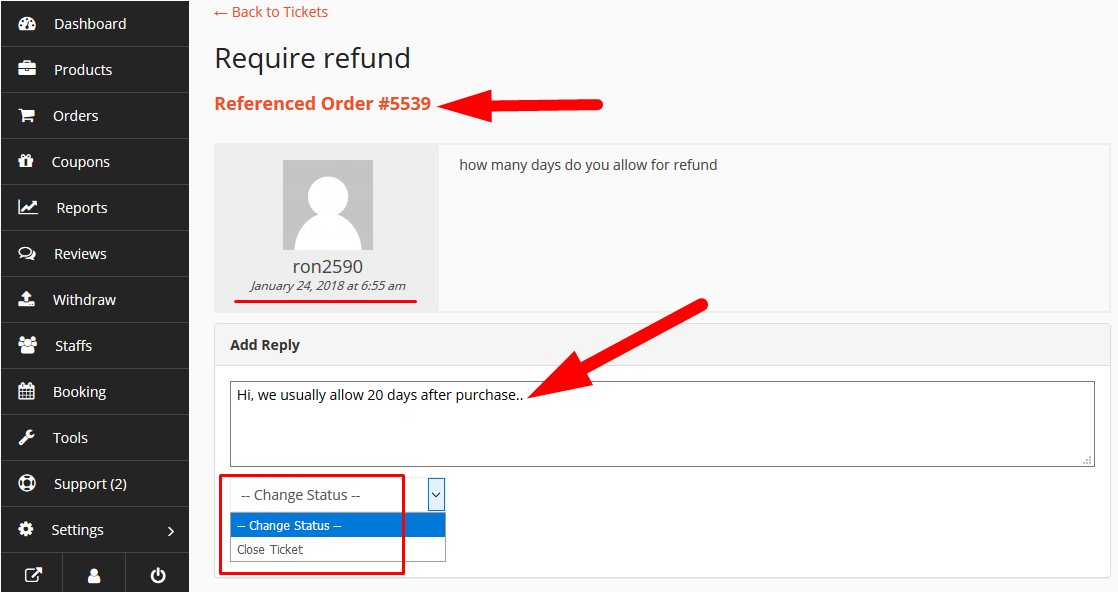
4. To respond to a customer’s ticket, just click on the Topic or Title. This will open up a new page.
From here you [the vendor] can write your reply to your client in the given box.
You can also change the status of the ticket using the drop-down.
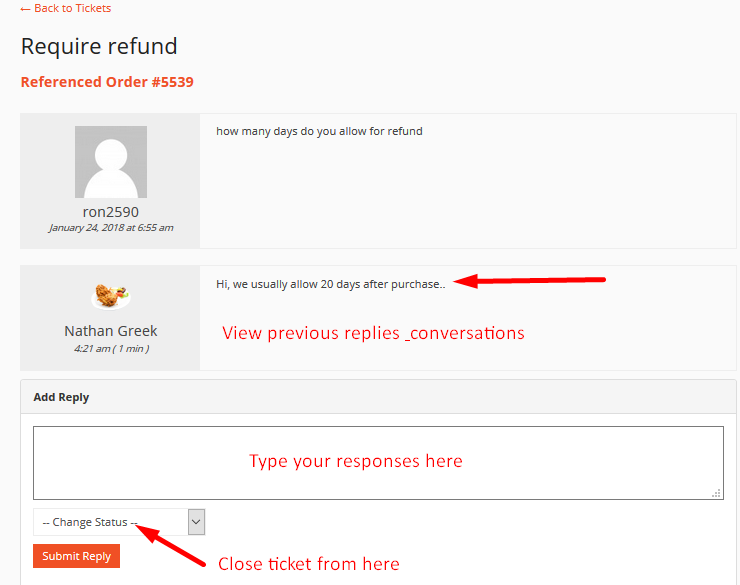
5. Vendors can add as many replies as they want. And customers can also reply to vendor’s responses.
After adding a reply, vendors can view the entire conversation, add more replies, or choose to close the ticket if they want.
Usage: Customer
Open a New Support Topic
To open a new support topic, customers have to navigate to their vendor store page.
First, customers need to log in to their account.
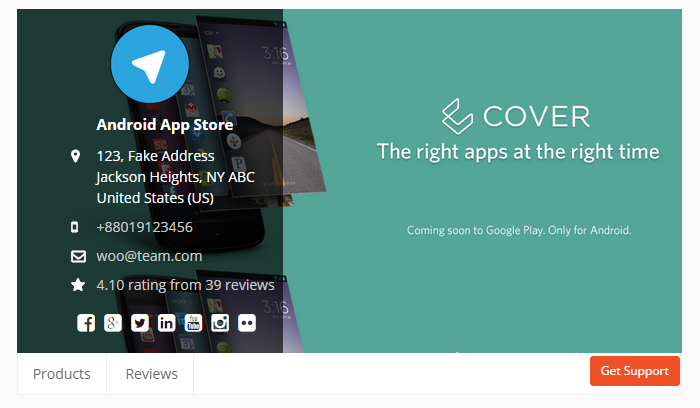
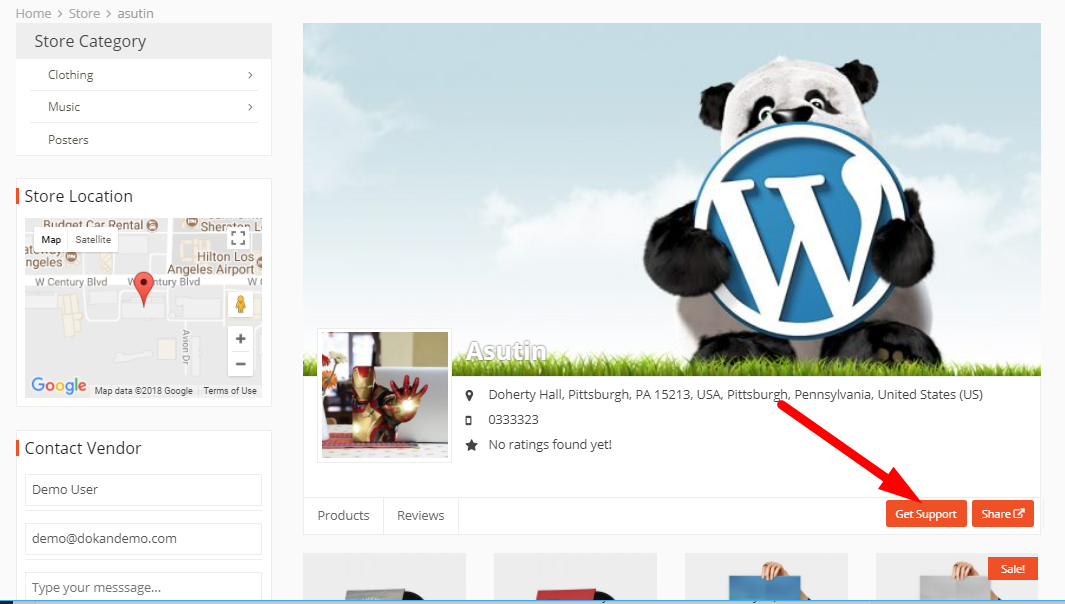
Now, visit your vendor’s store page from whom you have purchased. You will notice a Get Support button on the right side, below the name, description and banner image of the vendor.
Shown below:
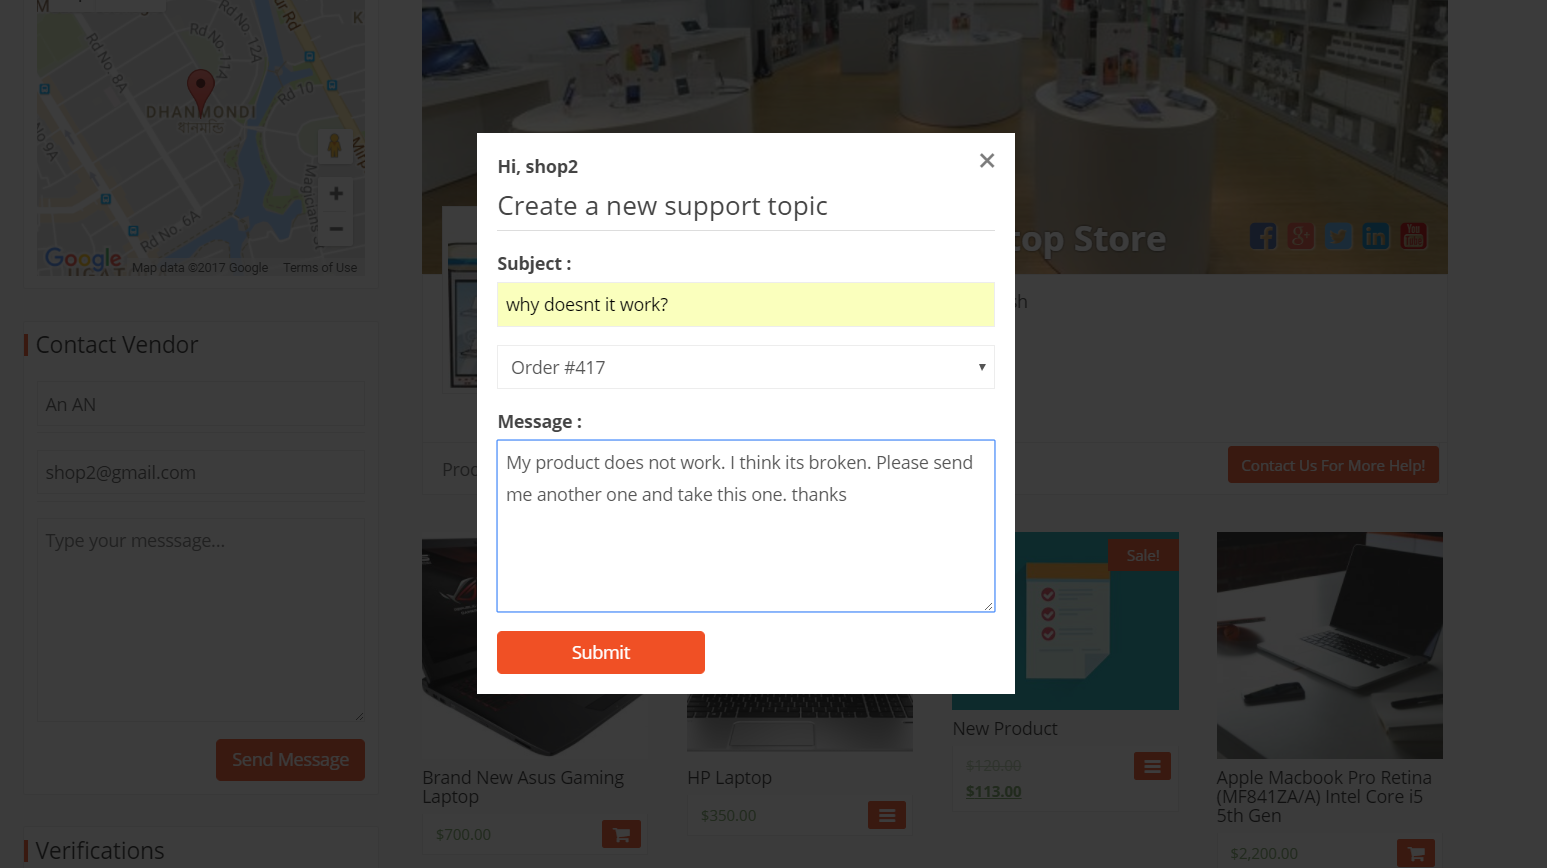
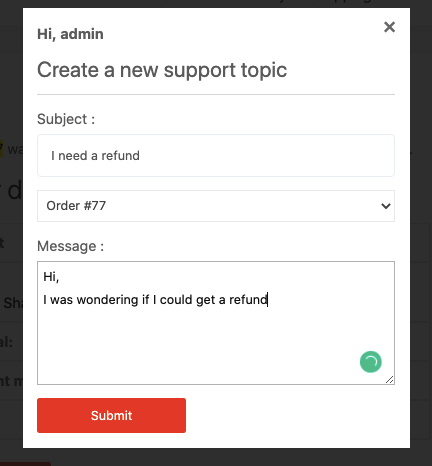
After clicking Get Support, a pop up form will appear where you will be able to insert your issue or query.
This pop up form will ask you to enter a subject, select order number using the drop-down, and type your message.
View Your Existing Tickets
After installing this module, the customers and the sellers, both will be able to see a new menu option on their my-account page. This button is to view the existing support tickets.
Dokan Store Support Widget
When the marketplace admin activates Dokan Store Support module to power up Dokan, it enables a widget on each vendor’s store page.
This widget includes a support form which has important fields like name, email and message. This can be used to contact a vendor on the go from their store.
Notifications
If a customer creates a new support topic, then the seller will receive a notification email stating that he has to reply to a support topic containing the link to reply.
Similarly, when a seller replies to a topic, the customer will also get a notification email stating that he has got a reply and will contain a link to view that topic.
Store Support From Product Page
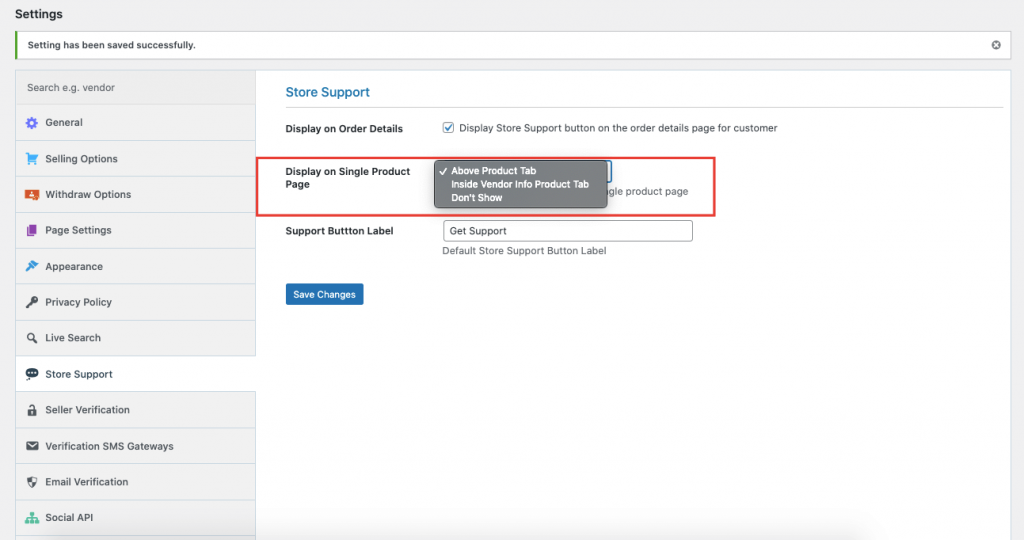
Customers can now get store support from the Product Page also. First you need to decide where you want to show the Store Support button. To do that, go to Dokan–> Settings–> Store Support. There in the Display on Single Product Page option, you need to select if you want to show the button,
- Above product tab
- Inside vendor info product tab
- Or don’t show at all.
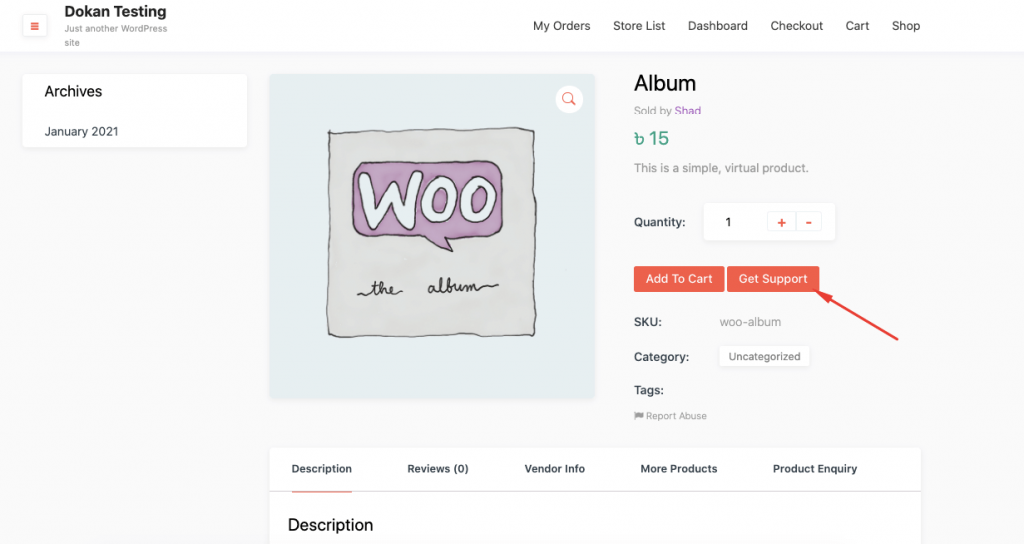
Now, if you go to the product page
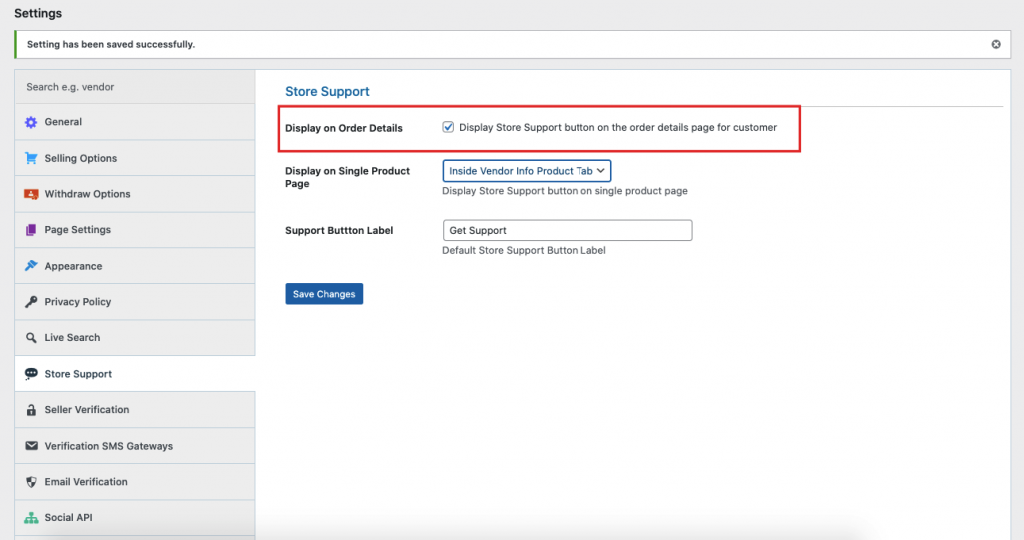
Store Support on Order Details Page
You can now easily get store support from your order details page. To display the Store Support button on the order details page, navigate to Dokan–> Settings–> Store Support. There enable the Display on Order Details option.
Go to your Account page ( my account ) and select any order. Now, select View option. There you will find the Store Support button.
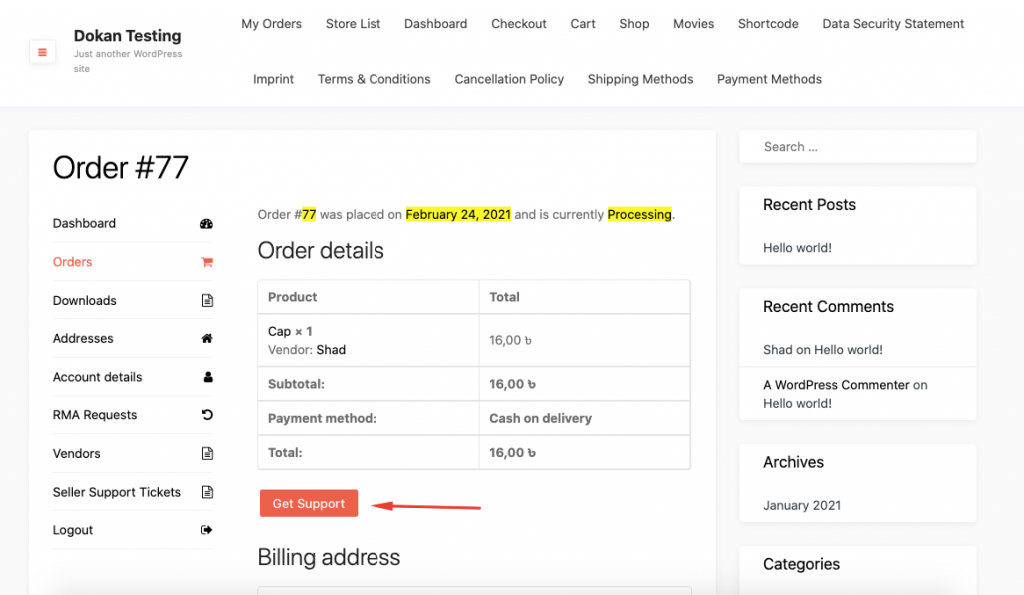
If you click the button, you will see that the order number is already added, the customer just has to add the subject and description.
Email Notification
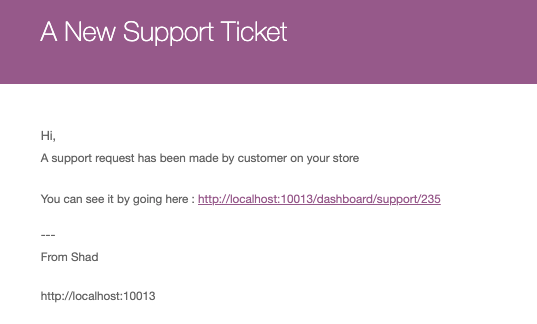
now, every time a user submits a support ticket or inquiry, the vendors will get an email on their inbox with the subject line ” A New Support Ticket”. We have redesigned the templates as well for these emails.
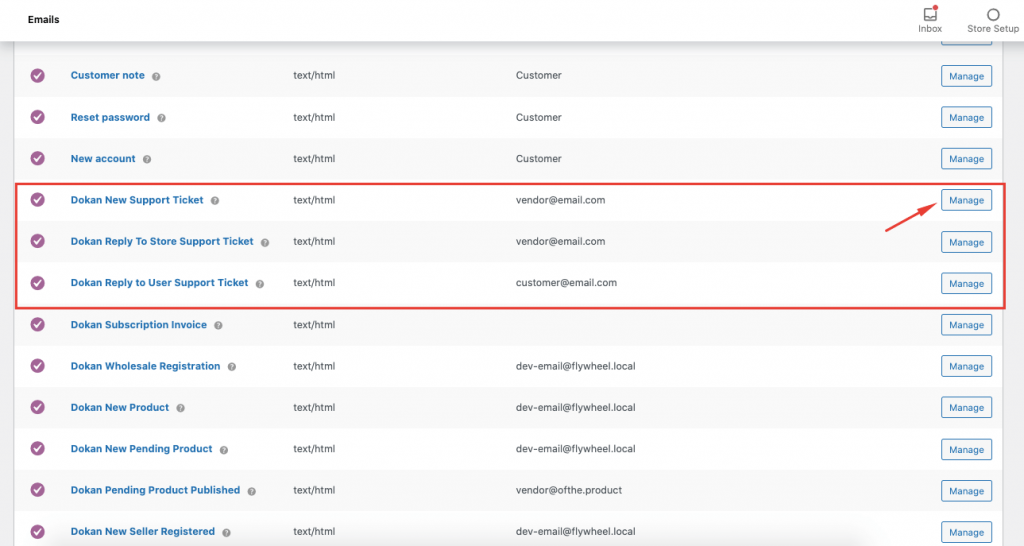
To enable the email notifications, navigate to WooCommerce–> Settings–> Emails.
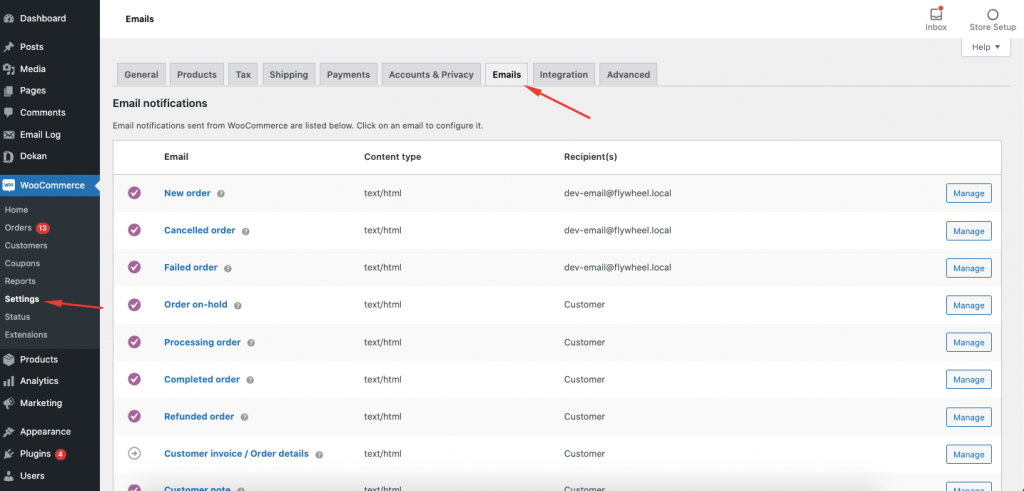
next, find the support emails. We have three types of support emails,
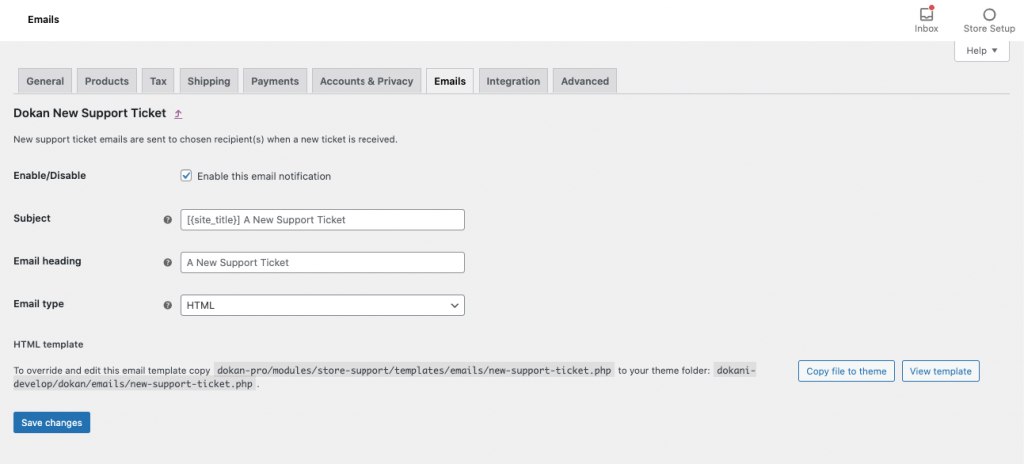
- Dokan New Support Ticket, a support ticket will be created when a customer submits a ticket. The related vendor will get that email.
- Dokan Reply To Store Support Ticket, the customer will receive an email when the vendor replies to their support ticket
- Dokan Reply to User Support Ticket, New support ticket emails are sent to the chosen recipient(s) when a reply to a user ticket is received.
Now, you can set the subject line and email heading while you can also choose the email type (HTML, Plain Text, Multipart). Save changes to finish.
Here is a preview of the template of the email that the customers will receive,
If you have any feature requests or having difficulty understanding this doc, please let us know in our support forum.
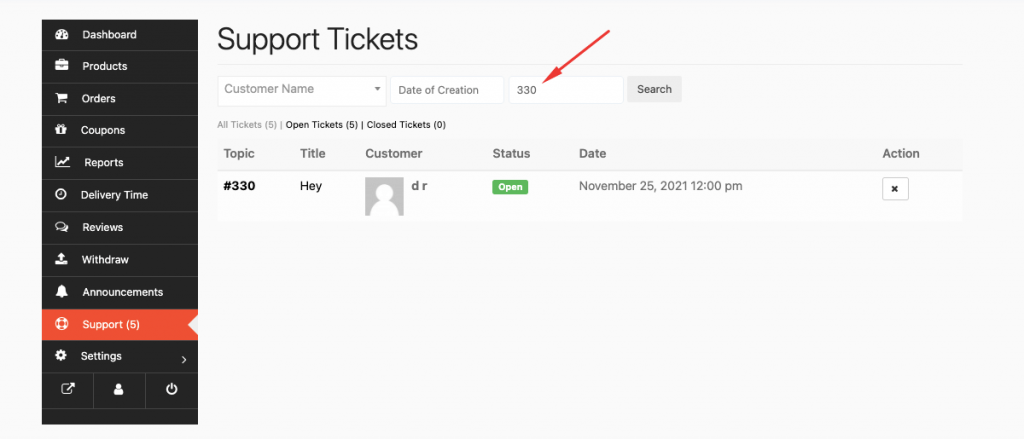
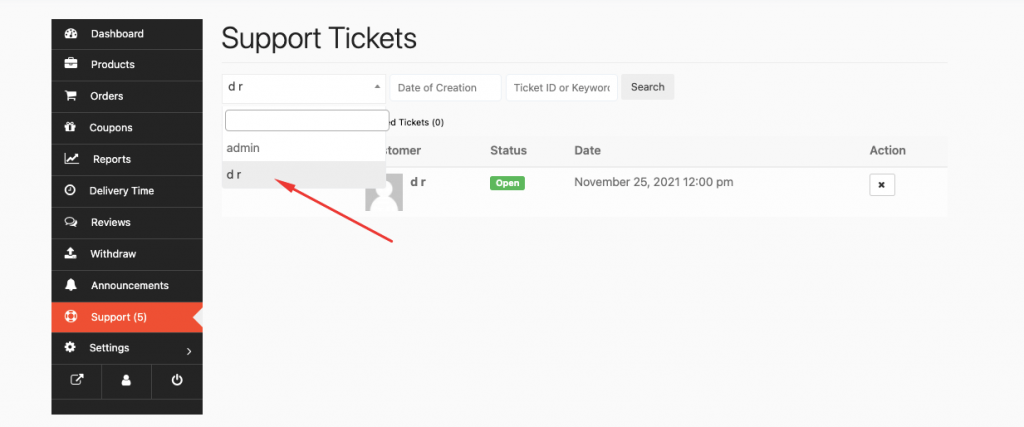
Filtering Support Tickets
Store owners can easily filter the support tickets. They can filter the support tickets by,
- Customer name
- Date of creation
- Support ticket id
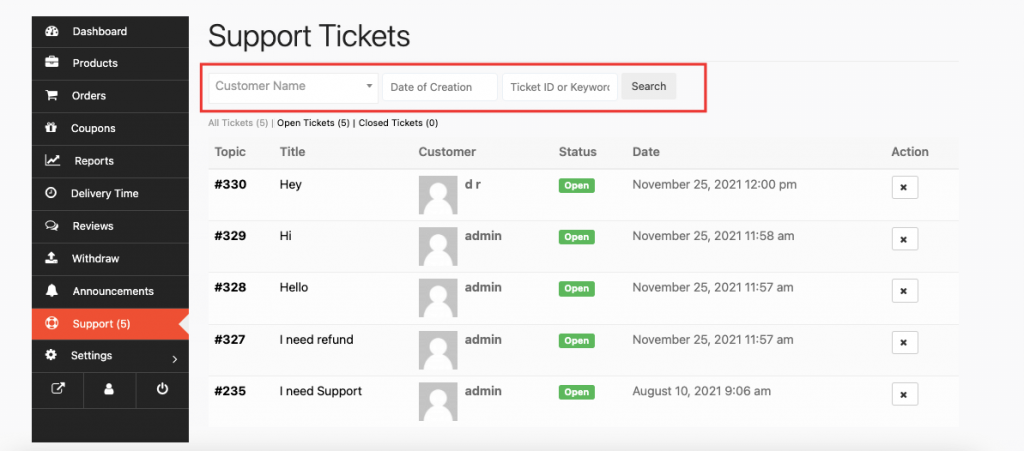
To filter by customer name, type the customer name on the customer name text box and hit the search button.
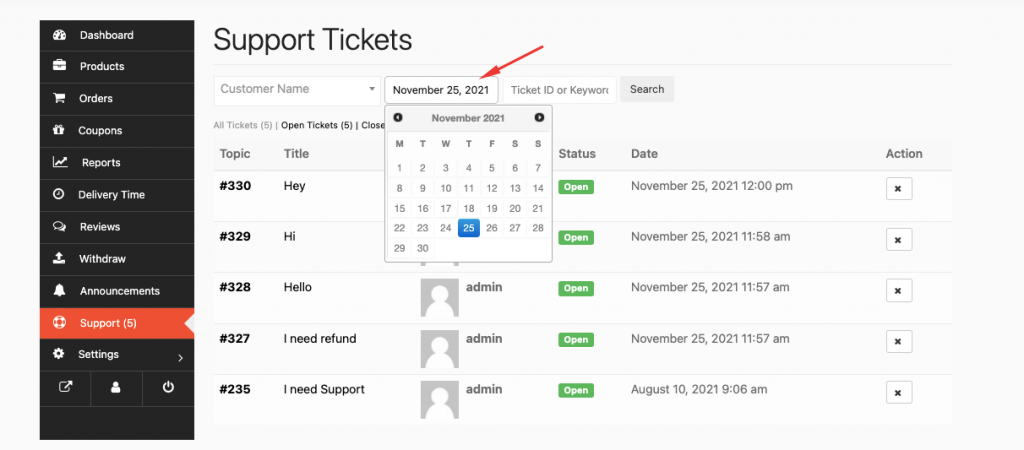
To filter by date of creation, select the date from the Date of Creation text box and hit the search button.
And lastly, type the ticket id number or keyword in the text box and hit the search button.