Using the new Dokan Table Rate Shipping module, vendors can create complex rules for shipping products globally. Vendors can define multiple rates based on the product’s destination, have multiple rates per zone, and add rules based on product weight, the number of items, shipping class, and price.
So, we are going to guide you through how to set up this Table Rate Shipping module along with some examples.
Pre-requisites
- WooCommerce
- Dokan Lite
- Dokan Pro (Latest Version)
Enable Table Rate Shipping Module – Admin
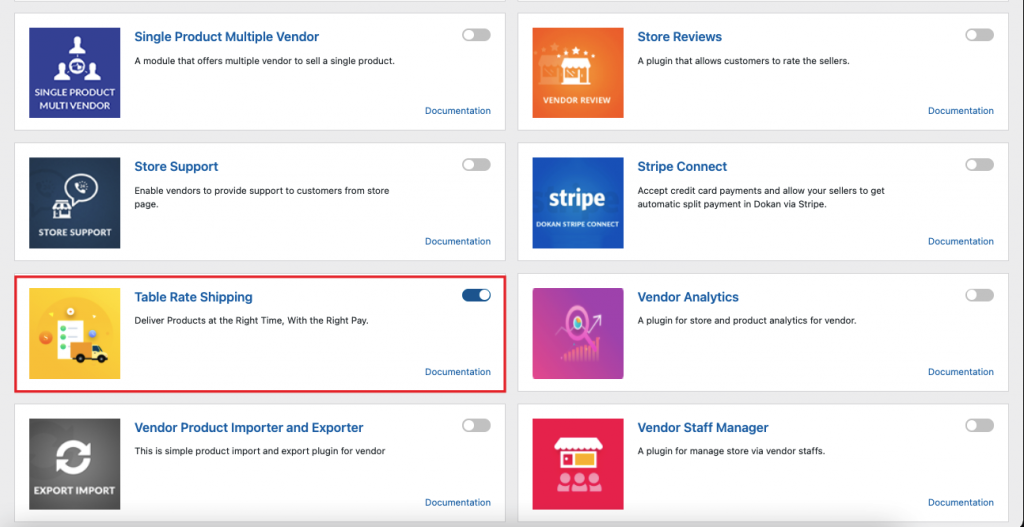
First of all, you need to enable the module from the backend. Navigate to WP-Admin–> Dokan–> Modules. There enable the Table Rate Shipping module.
Create Shipping Class and Shipping Zones – Admin
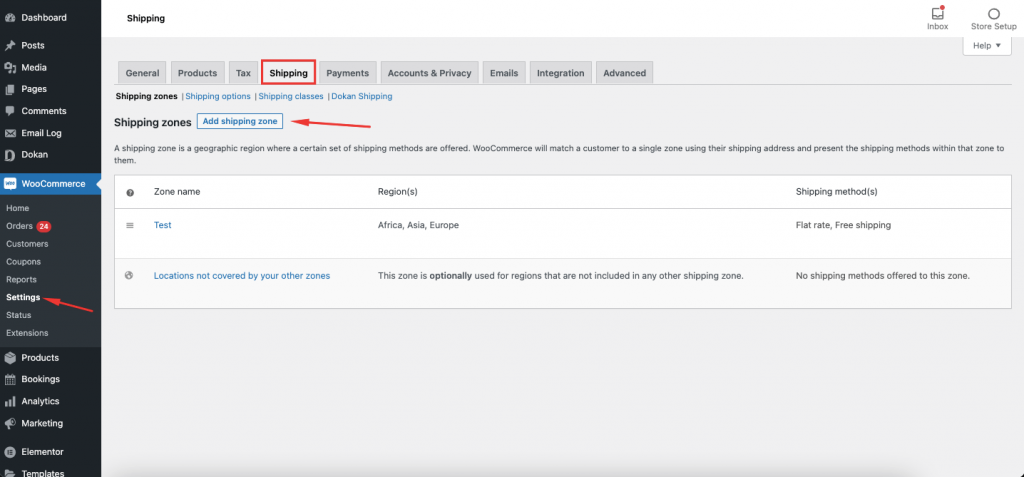
Now, if you have set up shipping zones and shipping classes beforehand, then you can skip this step. Else, you can set up shipping zones and shipping classes from WooCommerce–> Settings –> Shipping.
Add Shipping Method – Admin
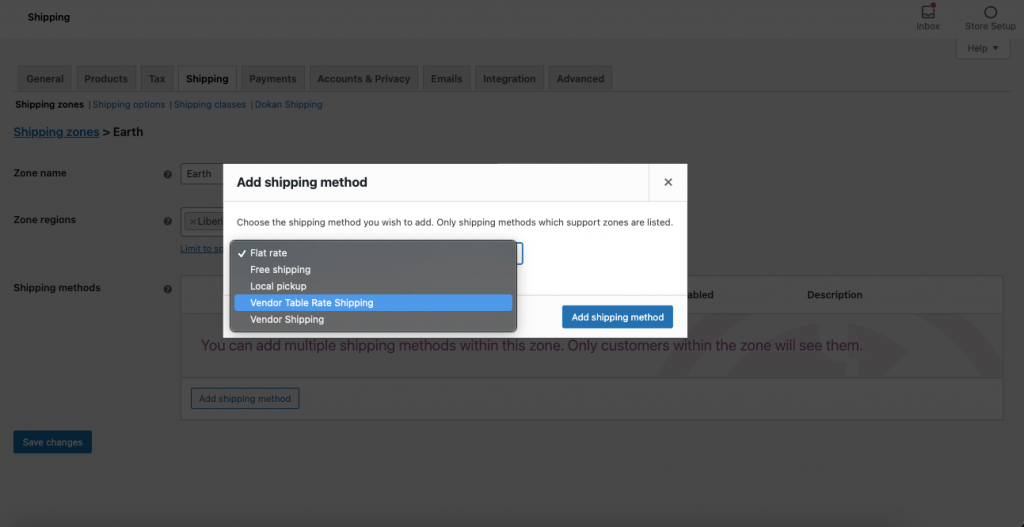
After enabling the Table Rate Shipping feature, you will find a new shipping method in the shipping method list ” Vendor Table Rate Shipping“. Select this method to your selected zone. You can choose other methods as well.
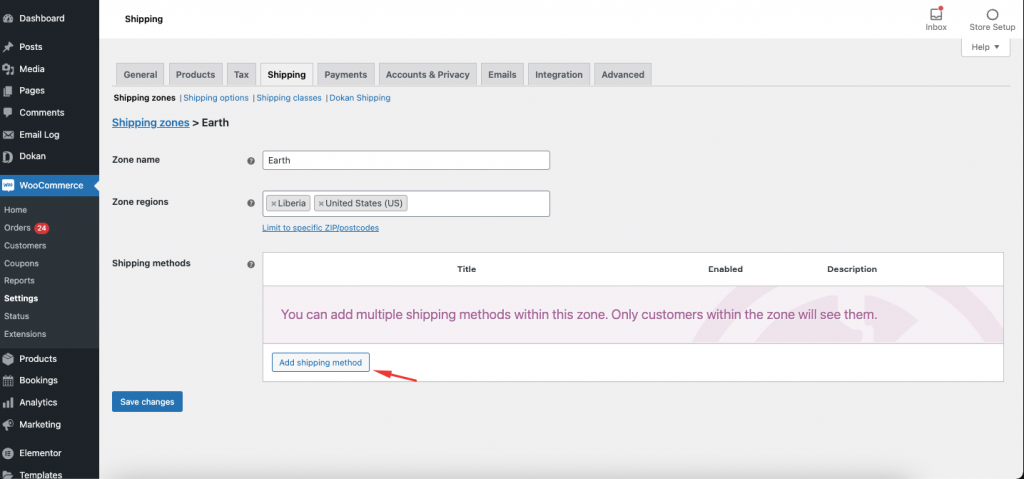
Select your shipping zone and there click on the Add Shipping Method option.
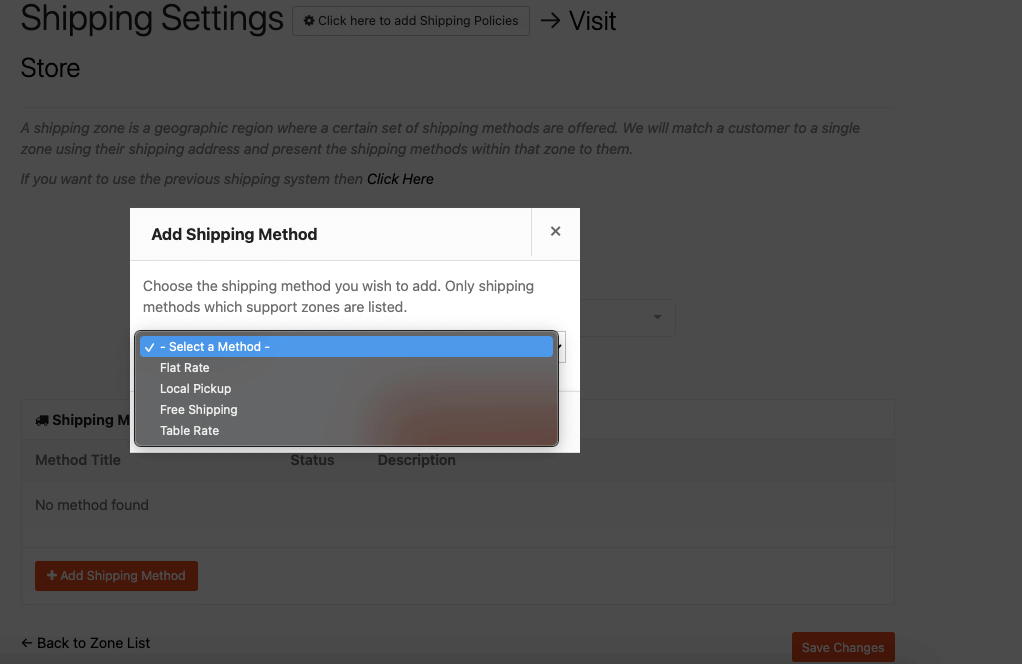
Now, select the Table Rate Shipping method from the dropdown box.
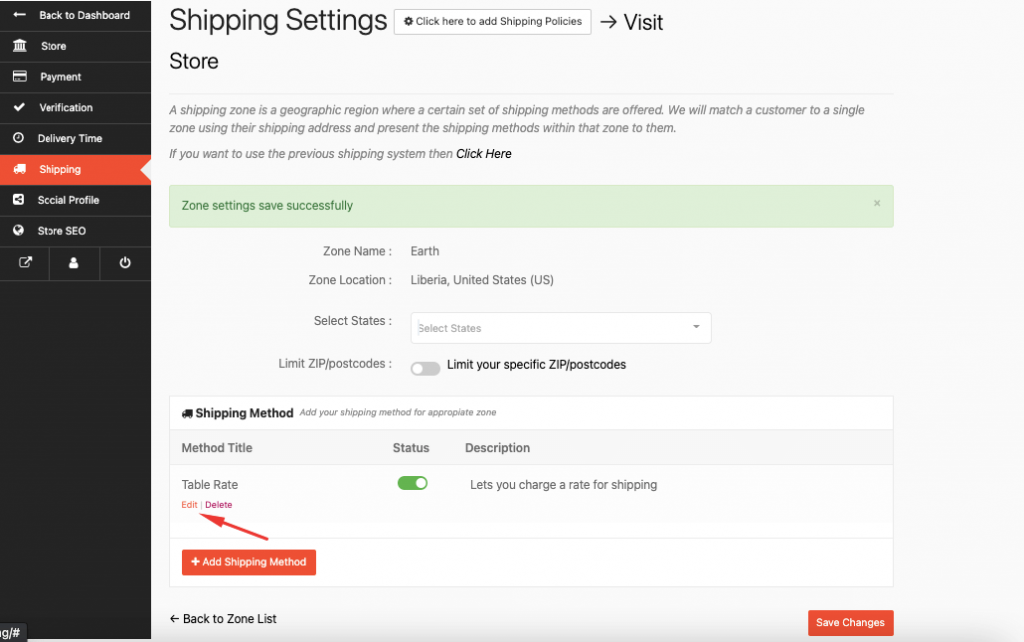
This method will be added to your selected shipping zone. Hit the Save Changes button to finish.
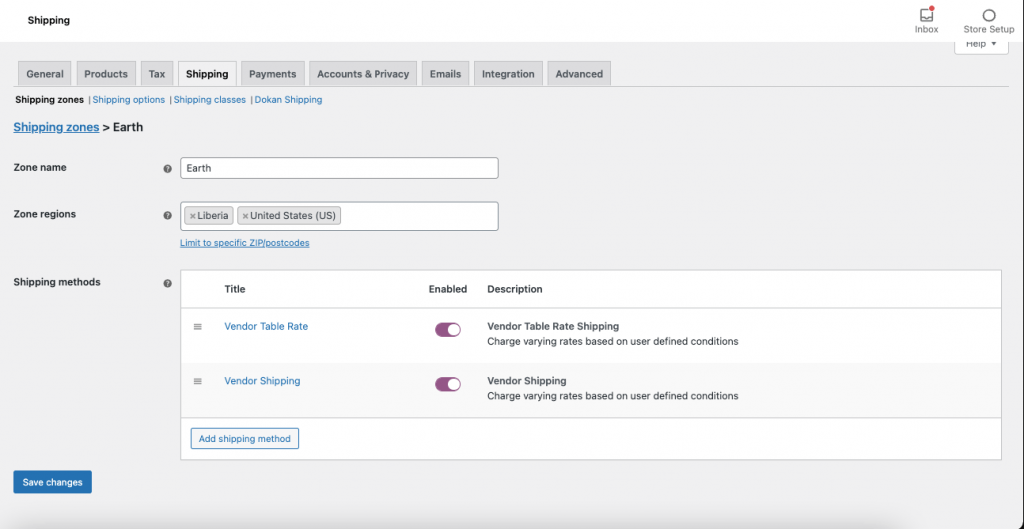
Your part is done. Now, vendors need to configure the settings from the vendor dashboard.
Configuring Table Rate Shipping – Vendor
Now, vendors need to configure the shipping rules from their vendor dashboard. They need to click on the Settings option from the vendor dashboard.
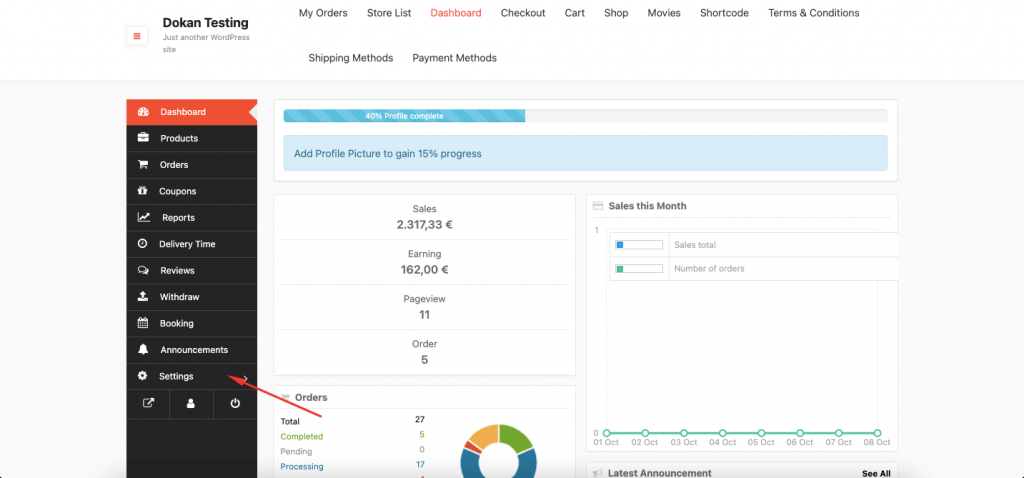
Now, they need to click on the Shipping option.

There they will find the Shipping Zone created by the admin. They need to click on the Edit option.
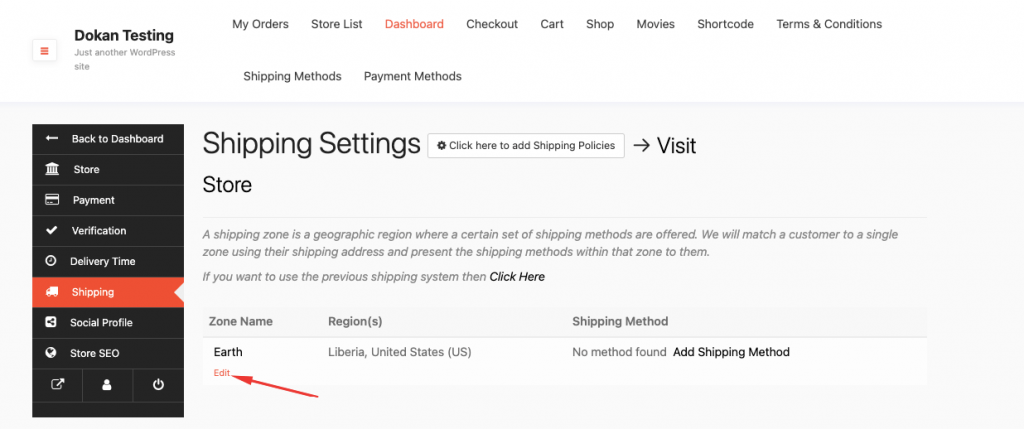
There they need to add the shipping method. So, vendors need to click on the Add Shipping Method button.
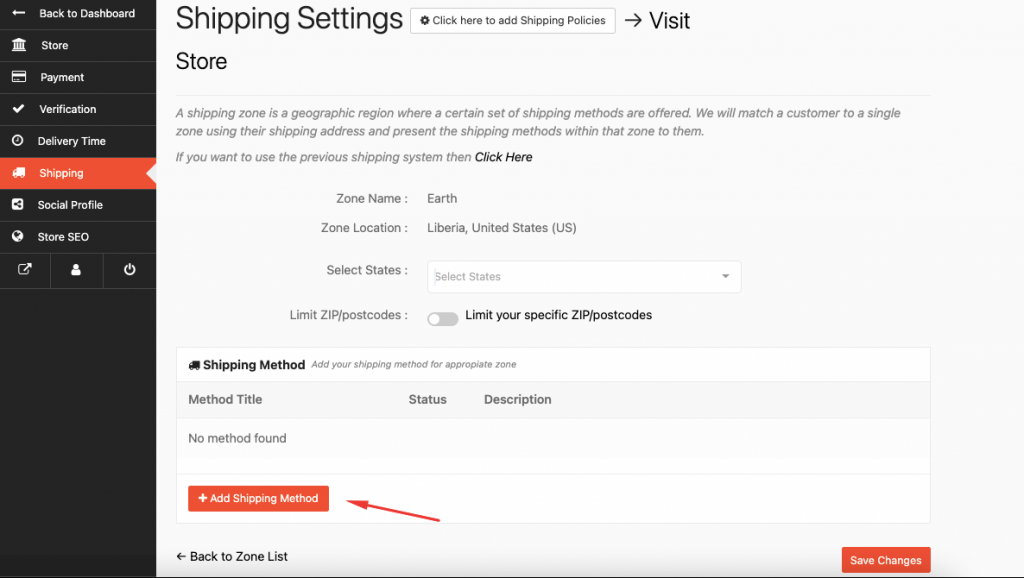
They will find the methods that the admin has selected from the backend. From there they can select the Table Rate Shipping method.
After the Zone settings are saved successfully, vendors need to edit the shipping method to set their respective rules.
On the next page, they will find different fields for setting up their shipping rules.
- Method Title — Name of shipping method displayed to customers. For example, 1st Class and 2nd Class, if there are two methods for a zone.
- Tax Status — Define whether or not tax is applicable for the shipping amount.
- Tax included in shipping costs — Define whether the shipping costs defines in the table are inclusive or exclusive of taxes.
- Handling Fee — Additional fee. Can be a fixed amount (2.50) or leave blank for no handling fee. You can set a fixed price for packaging or labor costs.
- Maximum Shipping Cost — Can assign a maximum cost to a method. For example, if you set the price at $2000, even the shipping cost is $2500, but it will still show $2000.
- Per order – calculates shipping for the entire cart. If there are varying shipping classes in the customer’s cart, the class with the highest priority will be used.
- Calculated rates per item – calculates the rate by checking each item in the customer’s basket against the table of rates.
- Calculated rates per line – looks at each line in the basket and checks that against the table. Multiple of the same item are on the same line, so the customer will only be charged once for multiples of the same item.
- Calculated rates per shipping class – each shipping class in your basket is totaled and offered at a final rate.
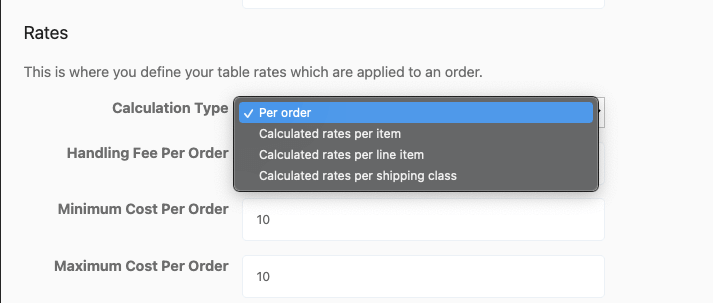
- Handling fees per Order/Item/Line Item/Class: Add a flat additional fee to the cost of each calculated item or whole order, per class, per line item.
- Minimum cost per Order/Item/Line Item/Class : Set the minimum cost per calculated item each calculated item or whole order, per class, per line item.
- Maximum cost per item Order/Item/Line Item/Class: Set the maximum cost per calculated item each calculated item or whole order, per class, per line item.
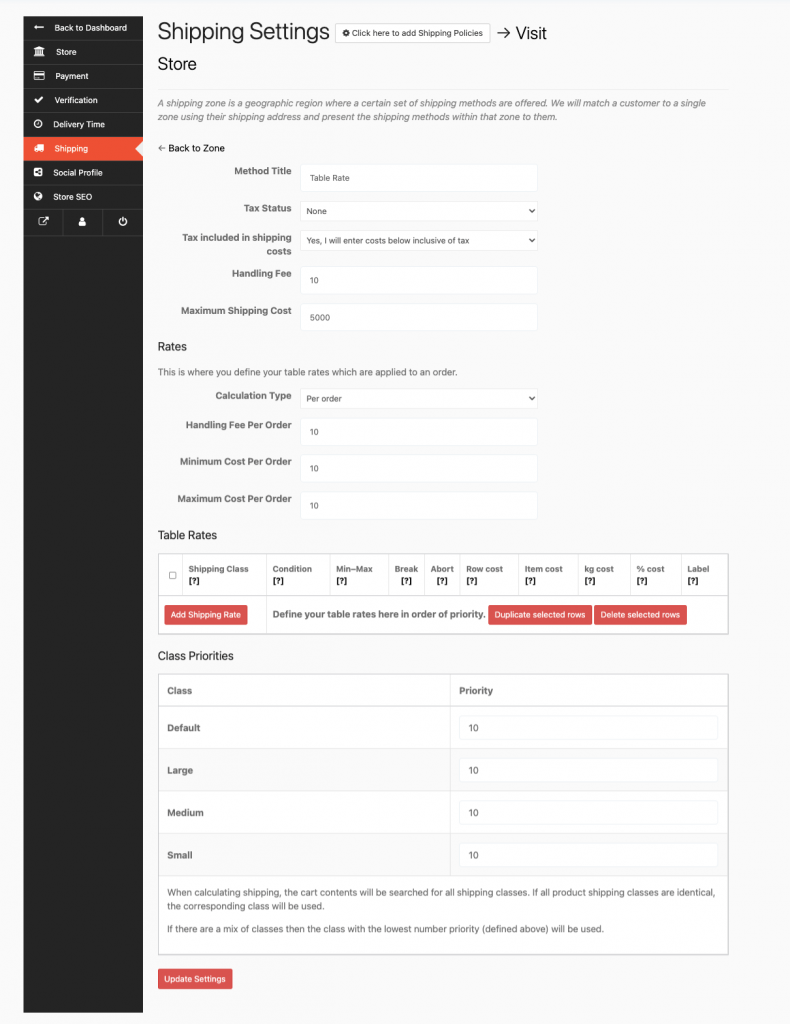
Table Rates
Shipping Class
Choose the shipping class to which this rate will apply. Or if the vendors want they can also choose to apply the rate to items in any shipping class or in no shipping class.
Condition
This column tells the system what product information it should use to calculate rates. Your options are:
- None – you don’t wish to use product information to calculate the total
- Price – the price of the items
- Weight – the weight of the items
- Item Count – the number of an individual item
- Item Count (same class) – the number of items in the shipping class
Min/Max
The minimum and maximum amounts for your chosen condition. These will be:
- Price – the minimum and maximum price
- Weight – the minimum and maximum weight. You can use the weight unit to determine in WooCommerce > Settings > Products
- Item Count – the minimum and maximum number of an individual item. For example, you may wish to have one price for 1-50 items and another for 50+ items
- Item Count (same class) – the minimum and maximum number of items in a specific class
Break
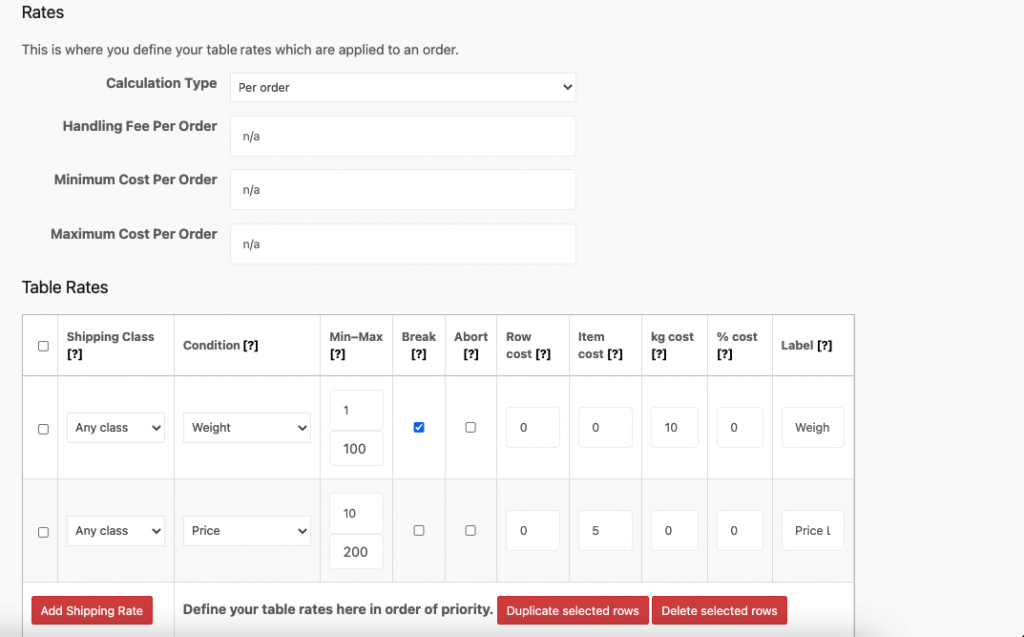
When you check this option, you’re telling the plugin: If you reach this row of the table, stop the calculation from going any further. Meaning, you’re telling the process to break.
This is used for:
- Per order – to tell the plugin to offer a specific rate and no others
- Calculated – It means to stop any further rates being matched, with priority given to the top of the list. This is particularly important when merging shipping (see below).
Abort
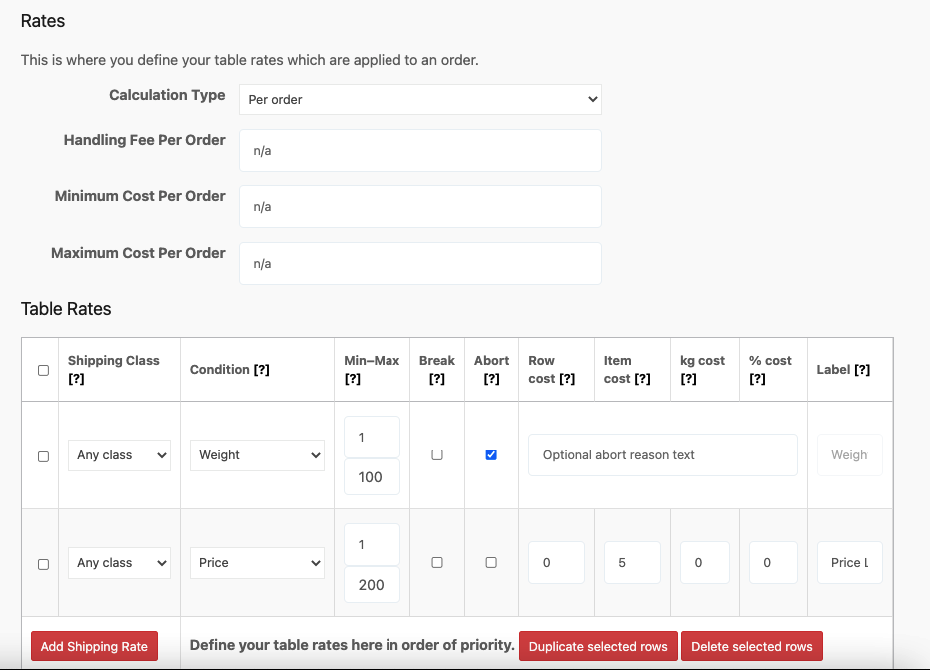
Enable this option to disable all rates or the shipping options you are editing. Do it matches any item/class.
Shipping Prices
This is where you set the cost for your shipping. You can add the following figures:
- Row Cost – the base cost for shipping this item. This could include the cost of your packaging.
- Item Cost – the cost for each individual item. This is in addition to the cost.
- Cost per kg – the cost per kg for the items.
- % Cost – the percentage of the items’ total that should used to calculate shipping.
Label
If you are creating a per-order table of rates, you can add a label for each individual rate.

Class Priorities
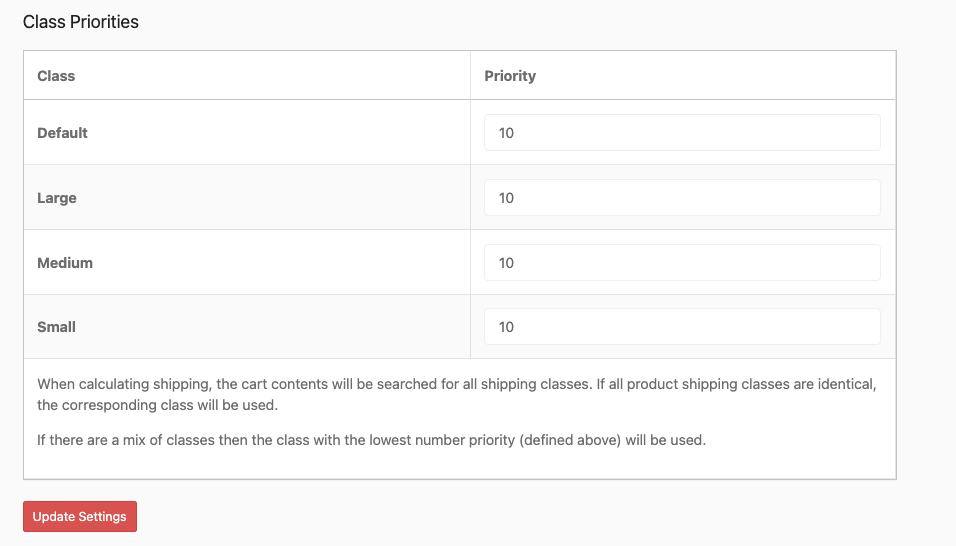
If you have created shipping classes under WooCommerce > Settings > Shipping > Shipping Classes and if you have chosen “Per order” as Calculation Type, you will see a section called “Class Priorities”.
If there are items in different shipping classes in the cart, it will calculate the whole things based on those items in the shipping class with the highest priority (or the lowest number). In the example below, the Hoodies shipping class is more important than the default class.
Lastly, vendors need to update the settings to finish.
Here are some examples of how these rules work for Table Rate Shipping.
Per Order Based
We are going to show you how the calculation type Per Order works.
We have selected Per Order from the Calculation Type option. We have kept the other fields like handling fees, maximum/minimum cost empty. But you can add any amount you want, it will be automatically added.
We have chosen the “Any Class” type from the table rates and condition is “Weight”, with minimum weight 1 kg and maximum weight 100kg. We are charging $10 per kg. And the label name is “New Label”.
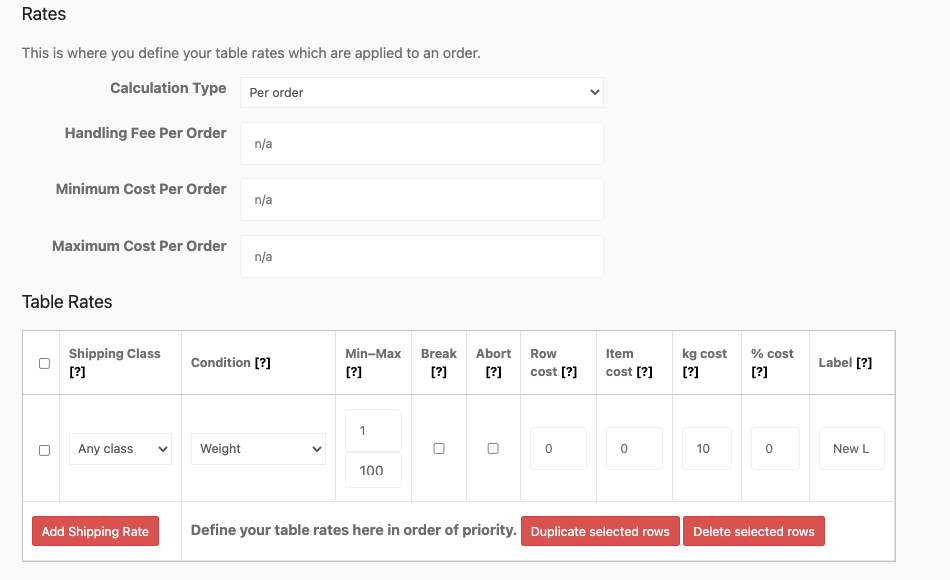
That means, if the order is in between 1kg-100kg, we will charge $10 per kg. So, if the customer orders for example 3kg, the shipping cost will be ( 3*10 ) $30.
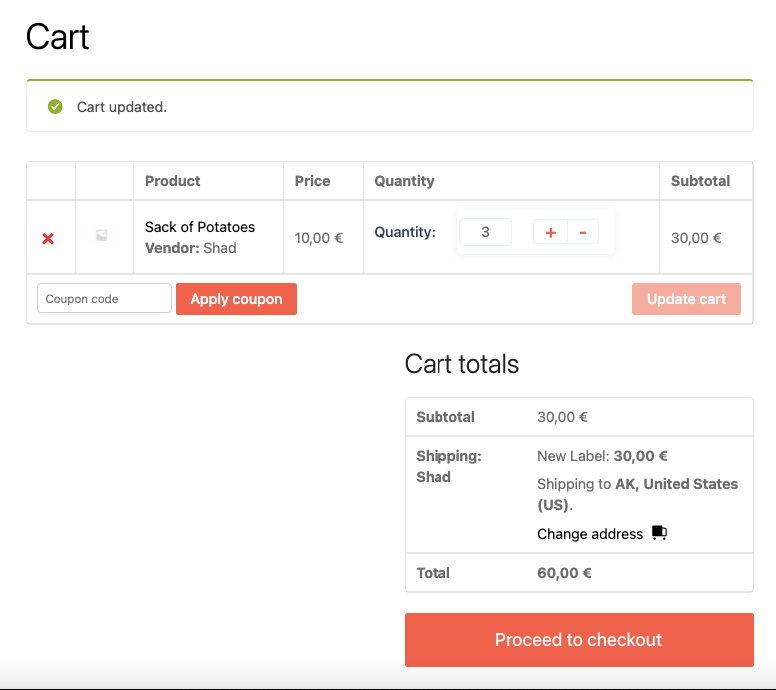
If the order exceeds the maximum amount mark, then it will show ” No shipping methods found”.
Calculated Rates Per Item
We will use the same conditions as before. This option counts the shipping based on the price, weight, etc. But the Label option doesn’t work for this calculation type.
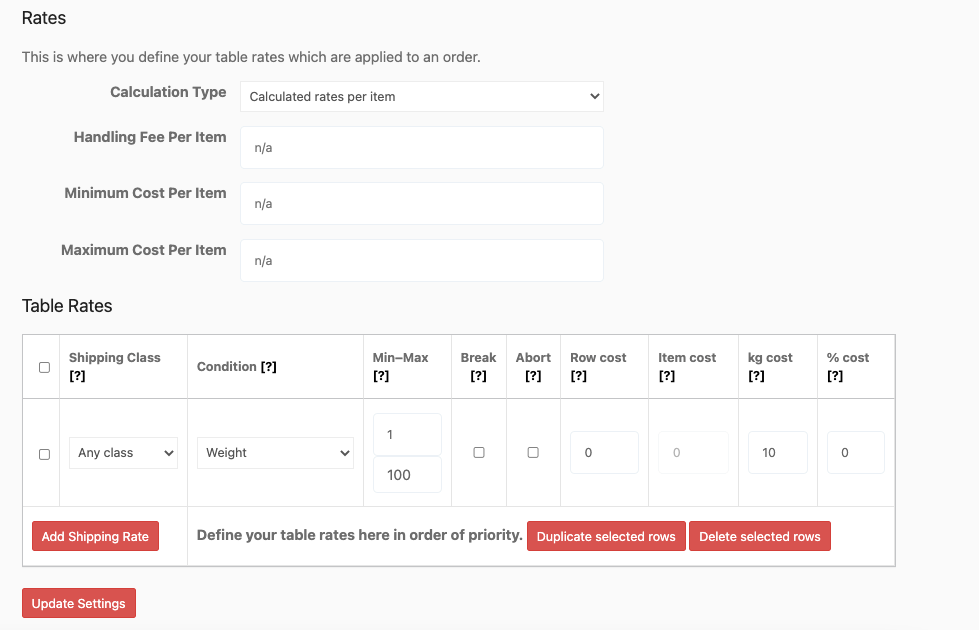
The weight of our product is 1kg. So, we have set the condition based on the weight, minimum weight 1kg whereas maximum weight 100kg. So, the conditions match our product’s initial weight (1kg). So, the shipping cost will be $20.
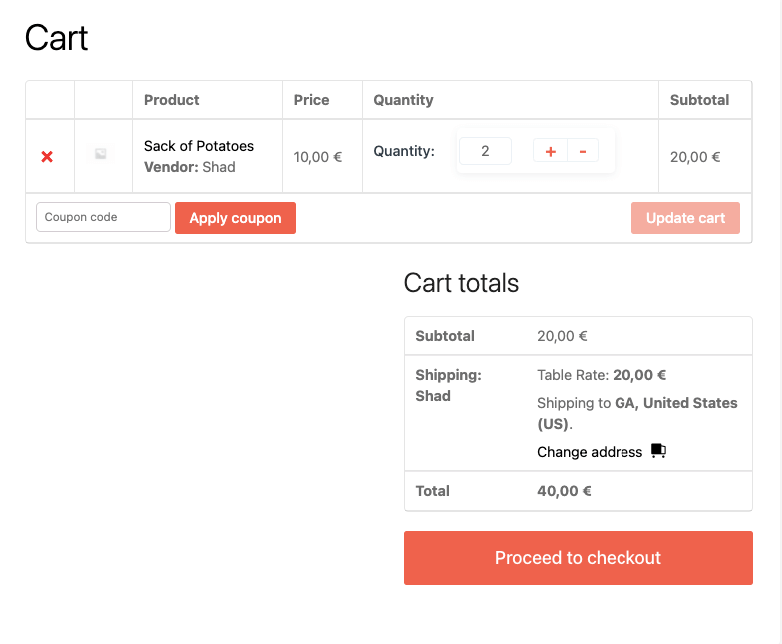
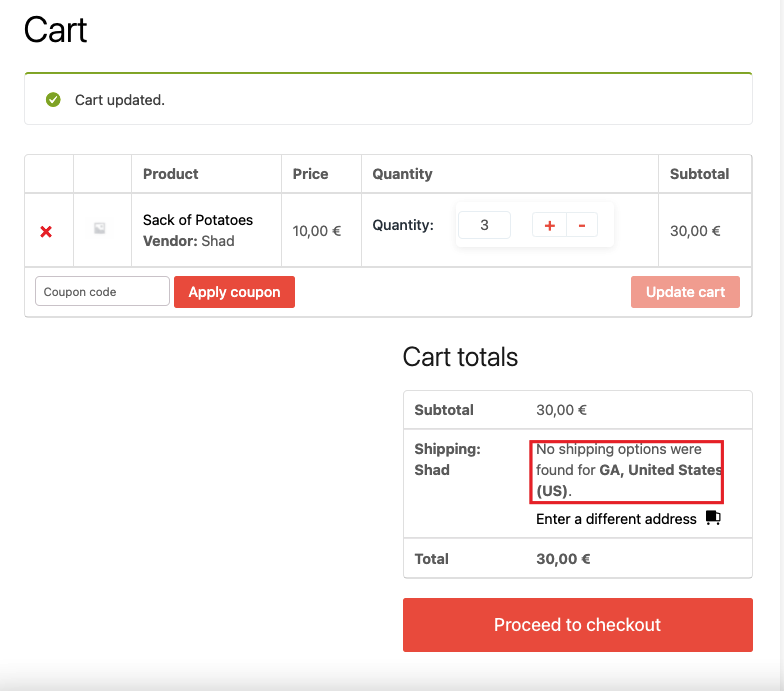
Let’s try another way, shall we? This time we will set the minimum weight to 20kg and the maximum weight to 100kg. As our product’s initial weight is 1kg, it will show that there are no shipping options.
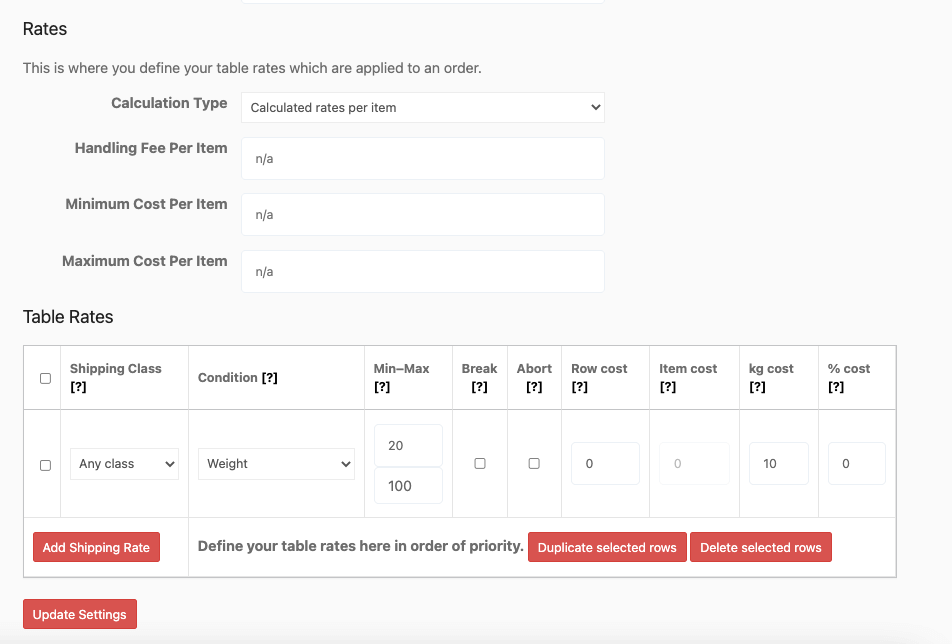
And as it doesn’t match the conditions it will not show the shipping methods.
Calculated Rates Per Line
This shipping calculation type calculates the shipping cost based on the ordered item quantity. So, with the same conditions,
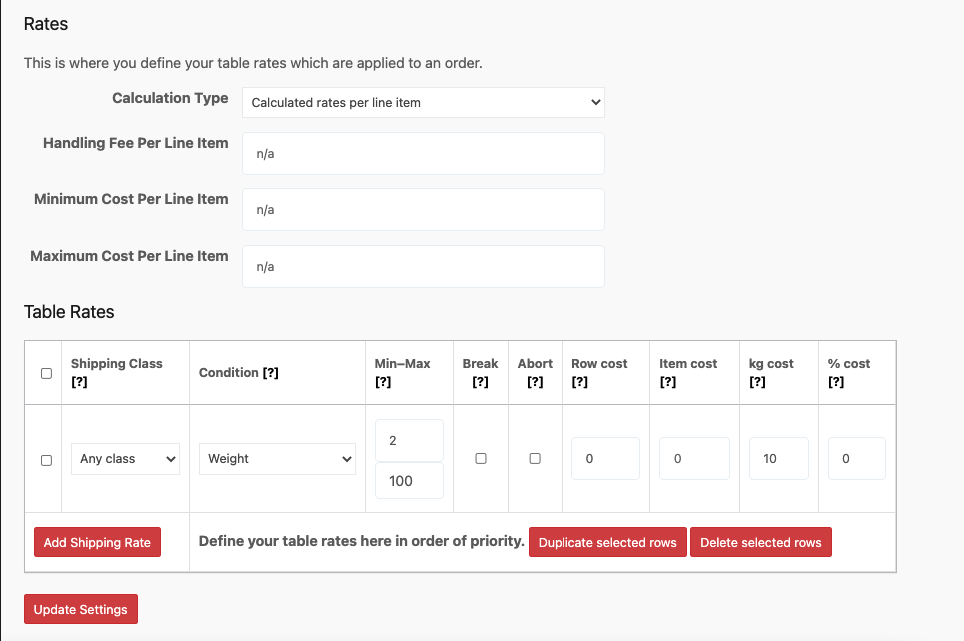
And as the order is for 4 products, the shipping cost will be ( 4*10 ) $40 ( as per kg we have set at $10 ).
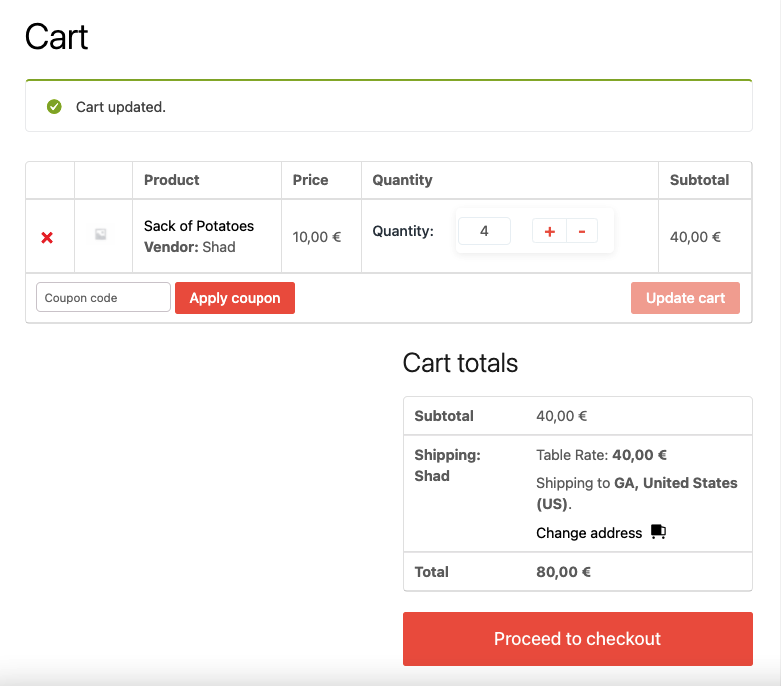
As our product’s weight is 1kg, so the total order for 4 counts as 4kg. It falls under the condition of a minimum of 2kg and a maximum of 100kg. However, if we set the minimum weight at 20kg, then the customer has to order 20 products ( 20*1 =20kg ) in order to enable any shipping option.
Calculated Rates Per Shipping Class
It is as the name suggests. This calculation type calculates the shipping amount based on the shipping class. If the customer orders a product that fall under any shipping class, then the shipping cost will be calculated based on that class conditions.
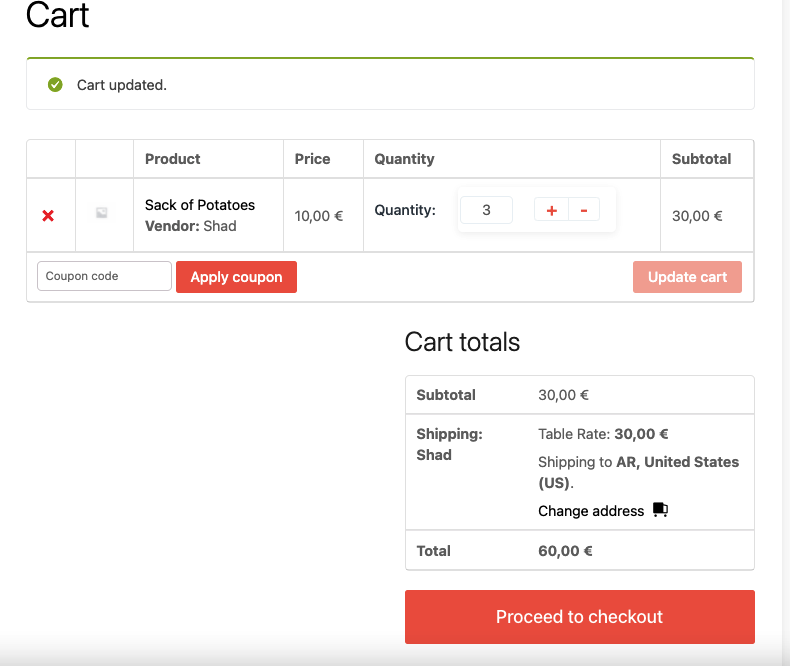
For example, we have chosen a class “Large”. So, if a customer orders a product of the Large Shipping class, then for every kg, we will charge $10. We have set the minimum weight to 1kg and the maximum weight to 100kg.
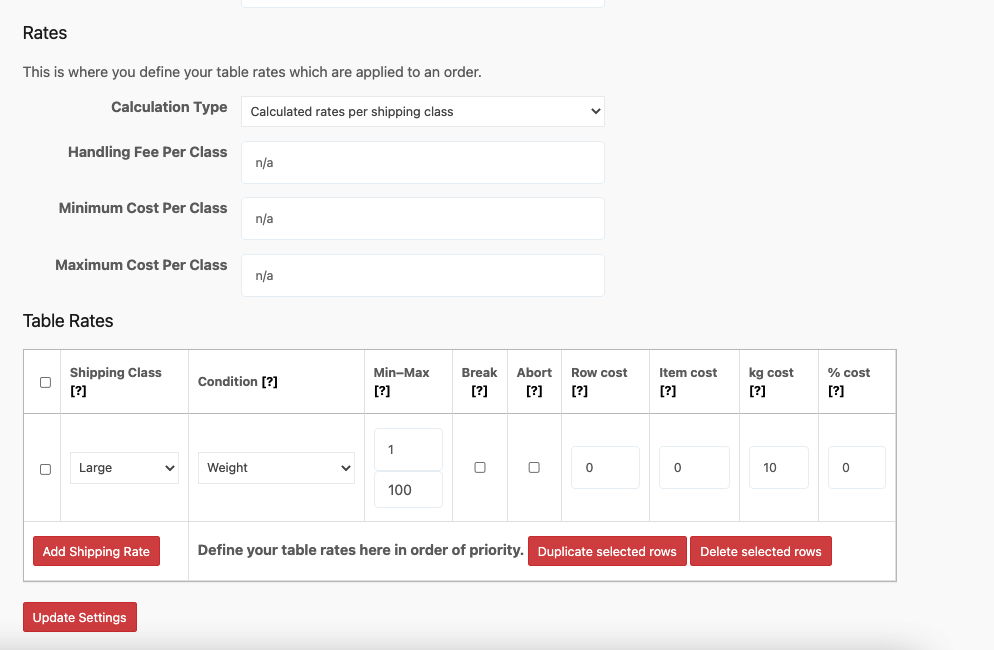
So, according to the checkout page, the subtotal will be $30 for 3 pieces.
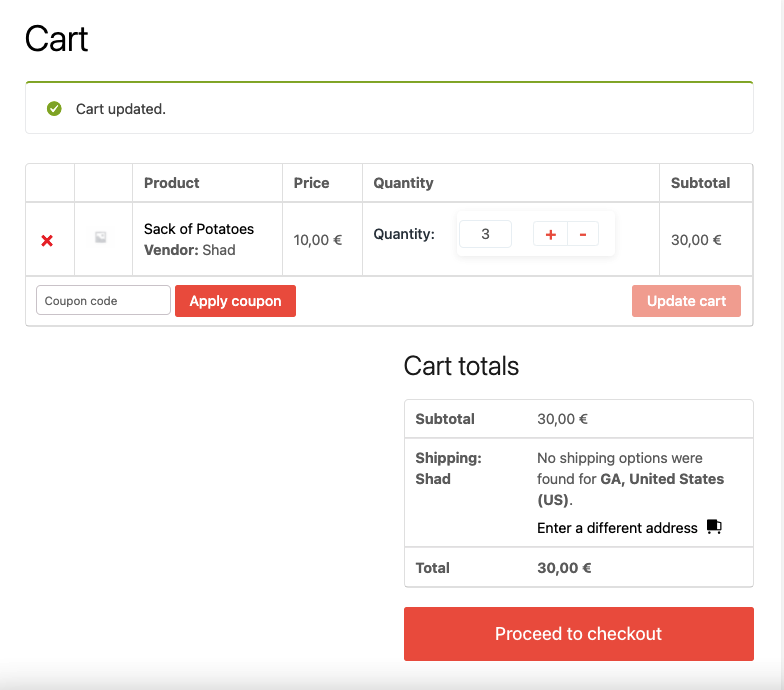
But, if the order doesn’t match the weight conditions or other conditions you set, then it will show no shipping options.
Multiple Conditon Based Conditions
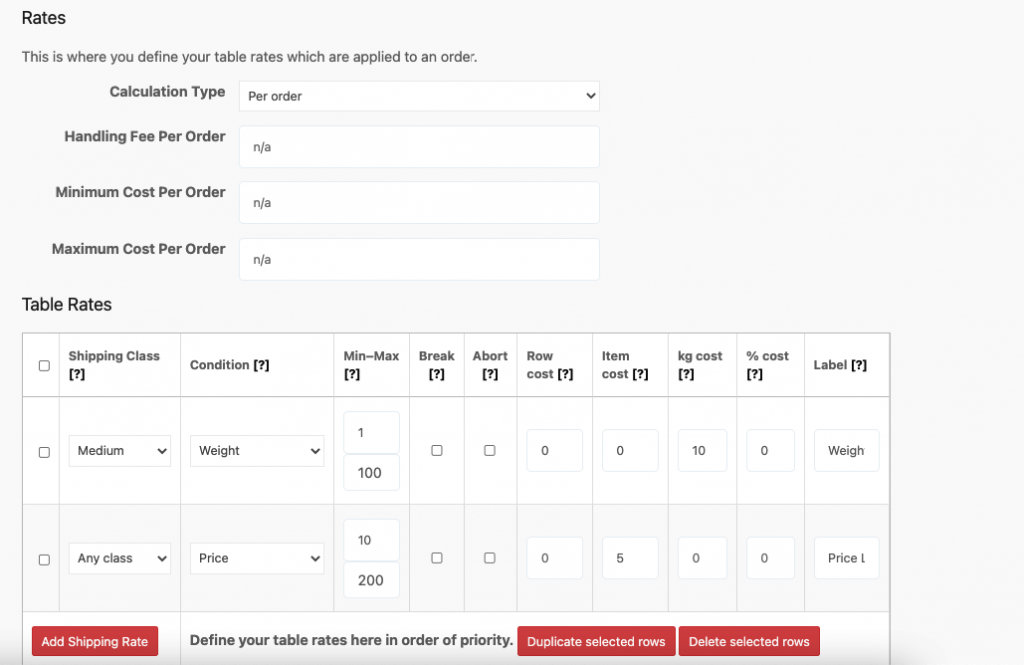
If you select multiple conditions, then the cart page will show multiple shipping options. For example, we have chosen the Per Order calculation type.
First condition:
Shipping class: Medium
Condition: Weight
Min: 1kg Max:100kg
Per Kg Cost: $10
Label: Weight Label
Second Condition:
Shipping class: Any Class
Condition: Weight
Min: 20kg Max:100kg
Per Item Cost: $5
Label: Price Label
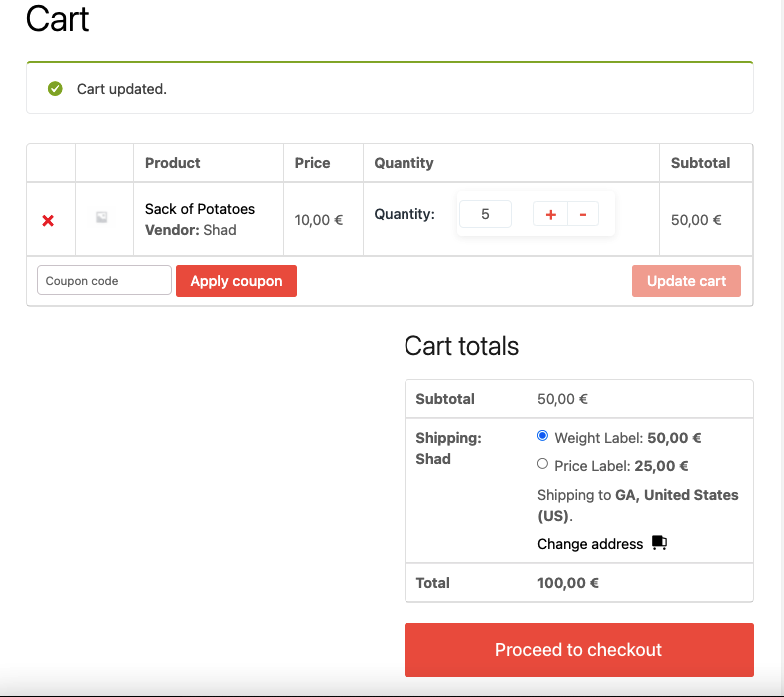
If both of the conditions are met, the checkout page will look like this with both the shipping conditions showing ( Weight Label and Price Label ). Customers can choose anyone.
How the Break option Works
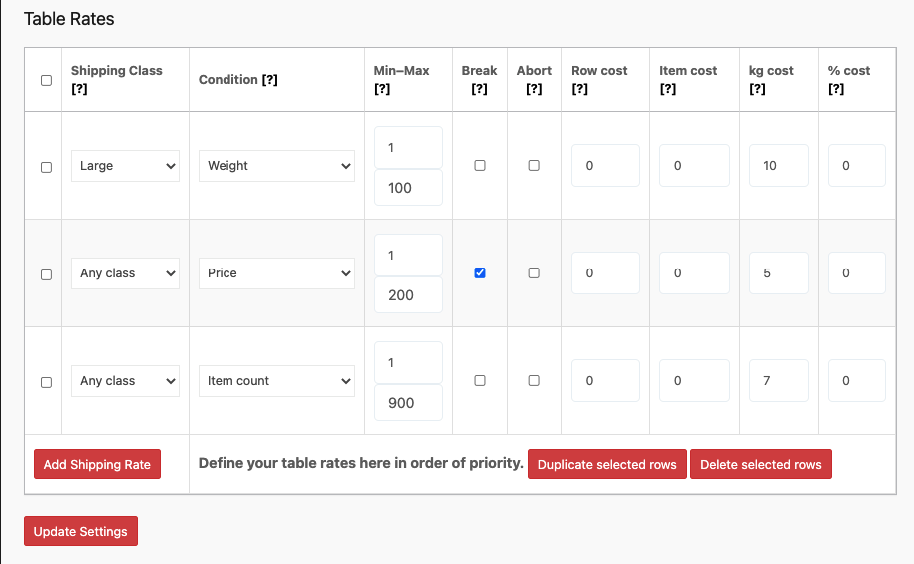
Imagine you are selling bag of potatoes and it is in the large shipping class. You have set 3 different conditions for shipping.
First, if the weight is between 1-100kg, you will charge $10 per kg for shipping.
Second, if the price is between $1-$200, you will charge $5 per kg for shipping.
Third, if the product quantity is between 1-900, you will charge $7 per kg for shipping.
Now, the break checkbox tells the system to stop calculating when the second condition is met.
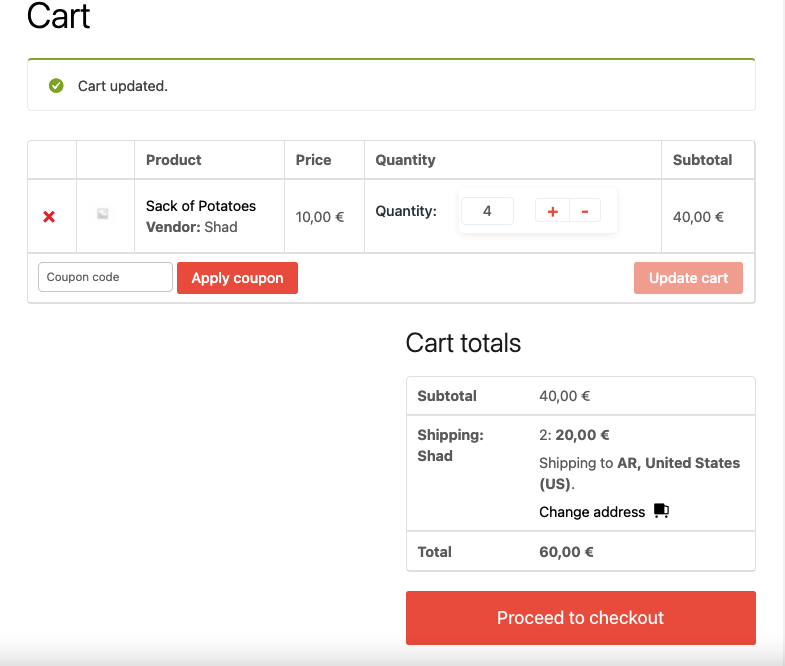
Now for Per Order, the shipping cost will be $20 for 4 bags of potatoes as it will only break the calculation if the second condition is met and calculate the shipping cost based on the second condition.
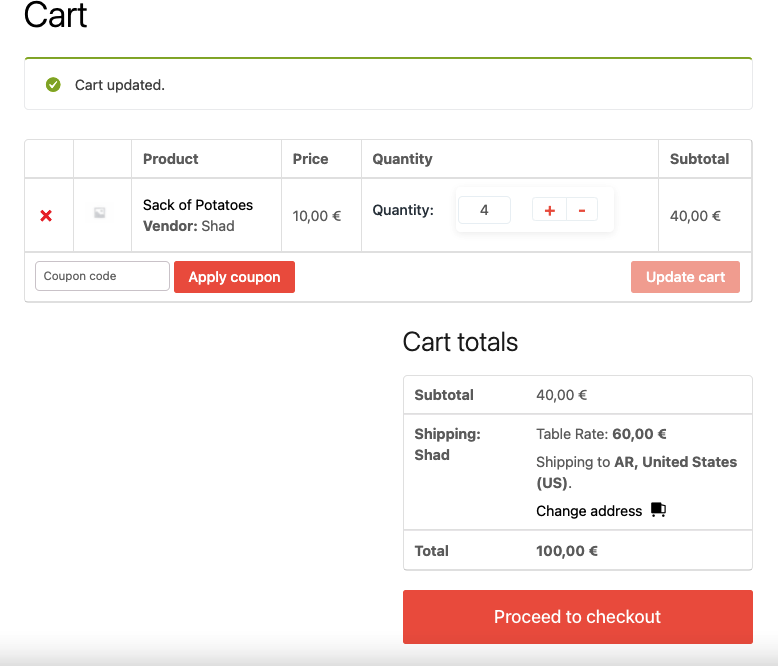
For Calculate Per Item and Per Line Item,the system calculates down through the table until it finds the break condition and stops.
So, in this case, the shipping cost for 4 bags of potatoes will be ( (4kg * 10) + (4 bags of potatoes * 5 ) ) = $60.
So, this is how you can configure the table rate shipping module for Dokan.