The Vendor Support is a new and powerful module for Dokan Pro users. It lets vendors and admins communicate directly with each other. This is something that wasn’t available before, and now it’s easier than ever to stay connected.
Admins can now chat with any vendor, and vendors can reach out to admins whenever needed. Whether it’s for support, updates, or just a quick question, this feature makes communication smooth and simple.
The module is available for every premium tier of the Dokan Pro plugin. Once enabled, it opens up a new channel for faster resolutions and better collaboration.
In short, the Vendor Support module helps you build stronger connections with your vendors. It’s the perfect tool for anyone looking to improve support and communication within their marketplace.
How to Configure the Vendor Support Module?
To enable the Vendor Support module, follow these simple steps:
- Go to the Dokan Dashboard: Log in to your WordPress admin dashboard and navigate to Dokan in the left-hand menu.
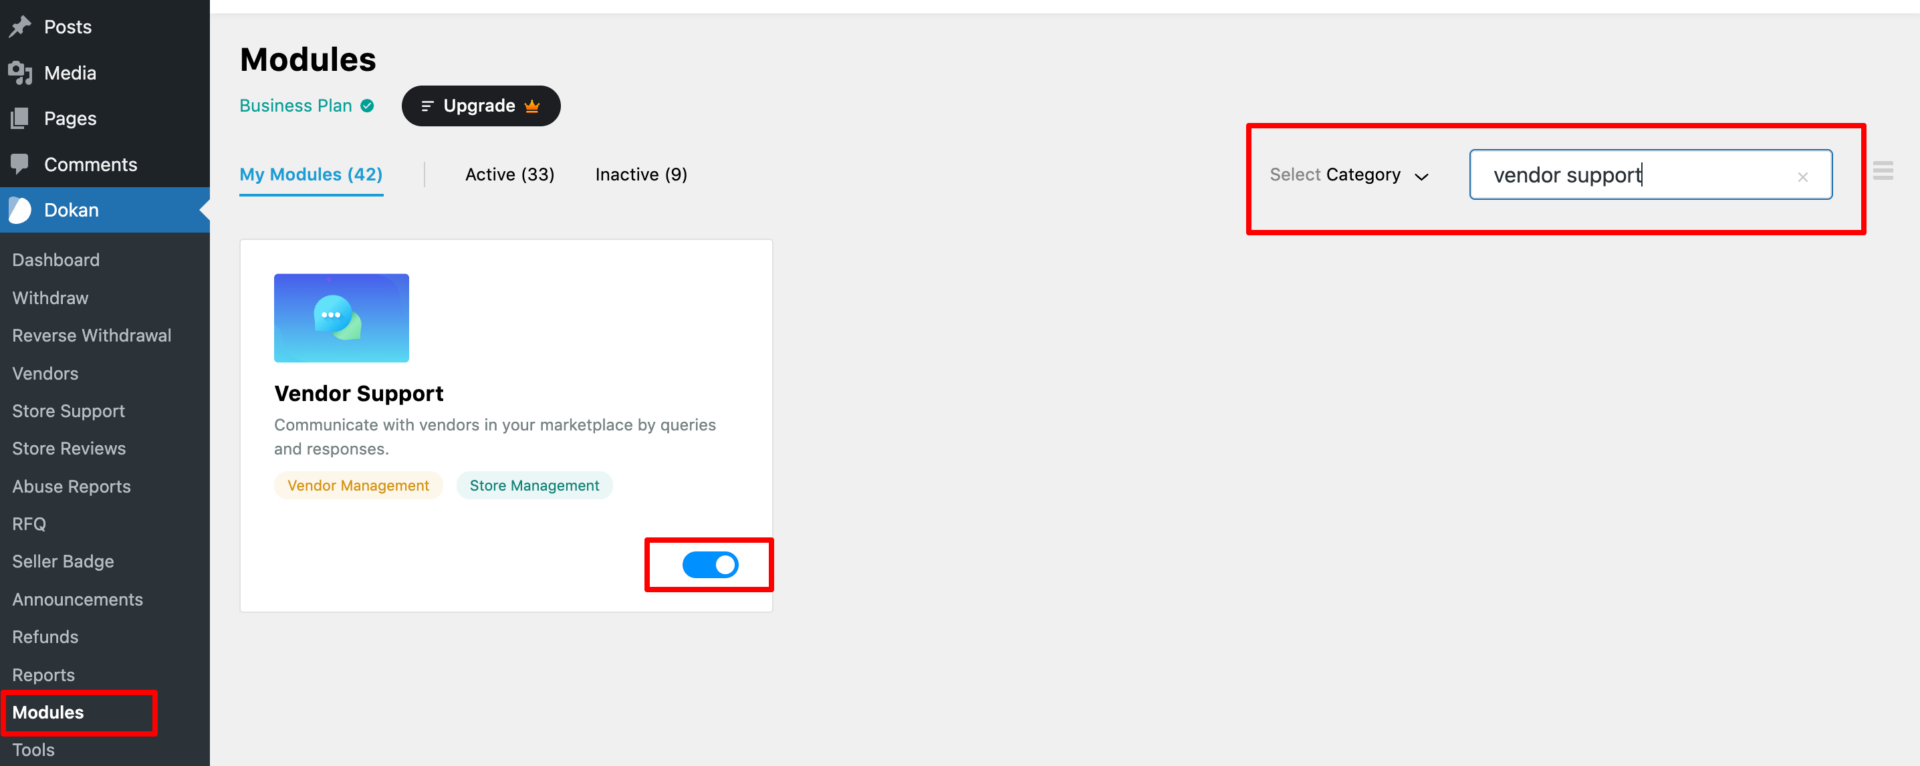
- Click on Modules: Under the left menu bar, click on the Modules option. This will show you all available modules for Dokan.
- Locate Vendor Support: You can either search for “Vendor Support” using the search bar or scroll through the list of modules to find it.
- Enable the Module: Once you find the Vendor Support module, simply toggle the radio button to turn it on.
That’s it! The module is now enabled and ready to let your vendors and admins communicate with each other.
- Important Note: Admins cannot initiate messages with vendors. Only vendors can start a conversation by sending a message to the admin. Admins can respond to any vendor messages and continue the conversation, but they cannot start a new one.
How to Send a Message to the Admin?
Vendors can easily send a message to the admin from the vendor dashboard.
Here’s how:
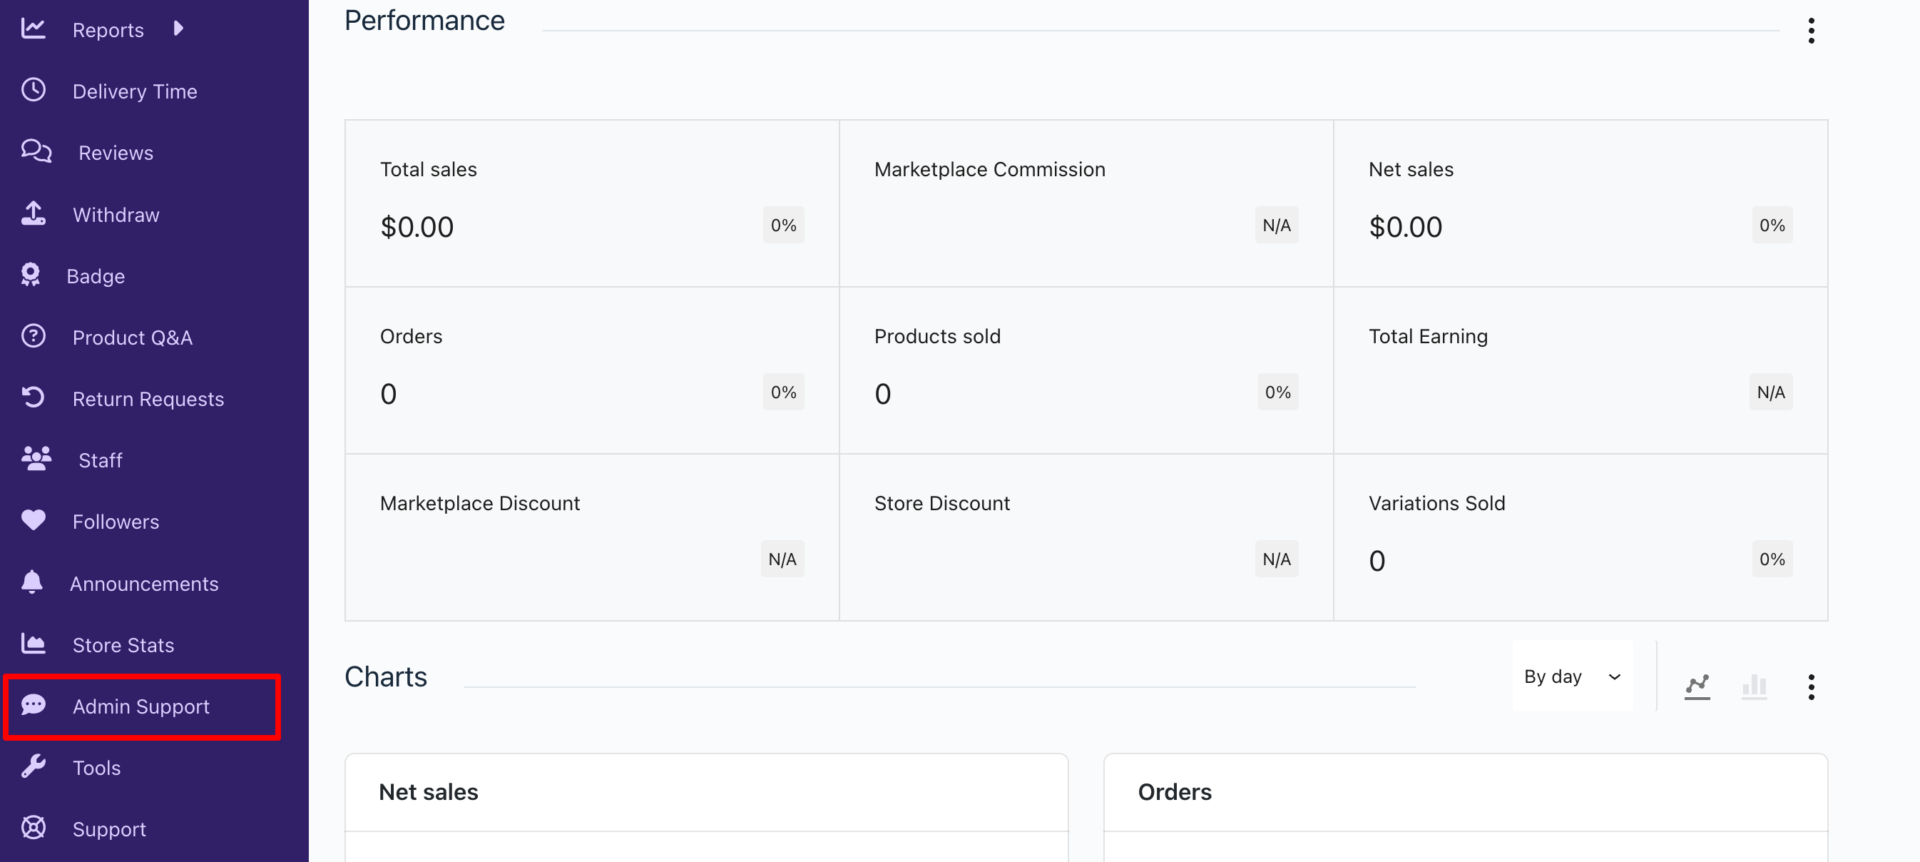
- Click on Admin Support: From the vendor dashboard, locate and click on the Admin Support button on the left-hand menu.
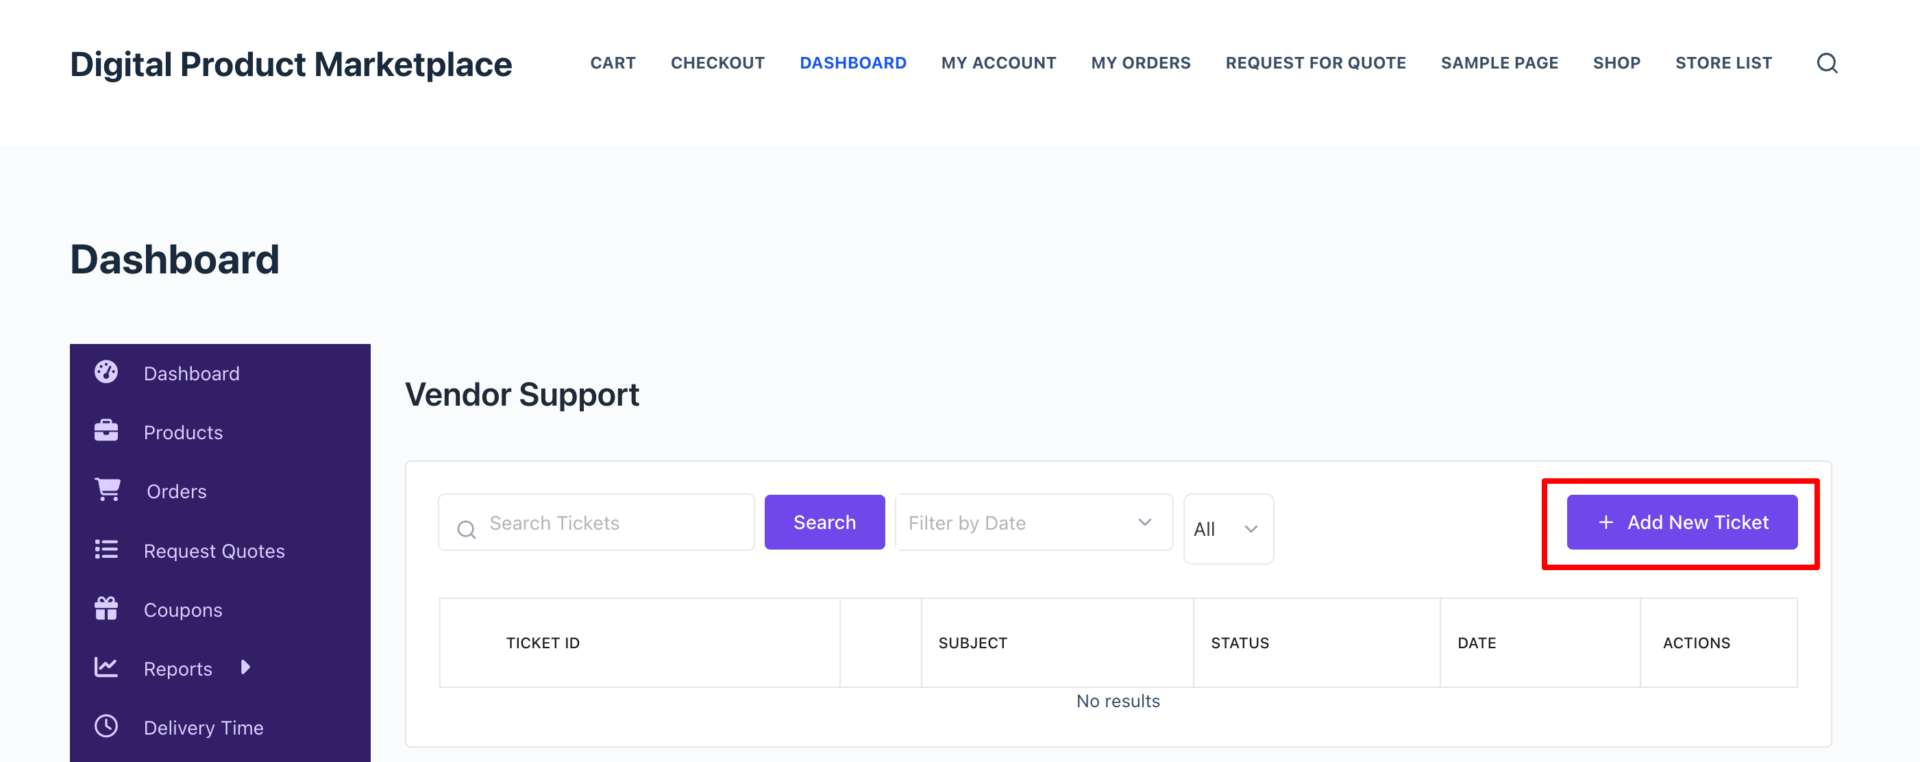
- Add New Ticket: Once on the Admin Support page, click the + Add New Ticket button to start a new conversation.
- Write Your Message: A pop-up window will appear where you can enter the Subject and the Message. Use this space to clearly explain your query or issue.
- Text Styling & Image Upload: The message editor comes with text styling options. You can format your text to make it more readable. You can also upload images directly within the message to provide more context to the admin, making it easier for them to understand your issue.
- Submit the Message: Once you’re done, click the Submit button to send your message to the admin.

That’s it!
This is how a vendor can send a message to an admin.
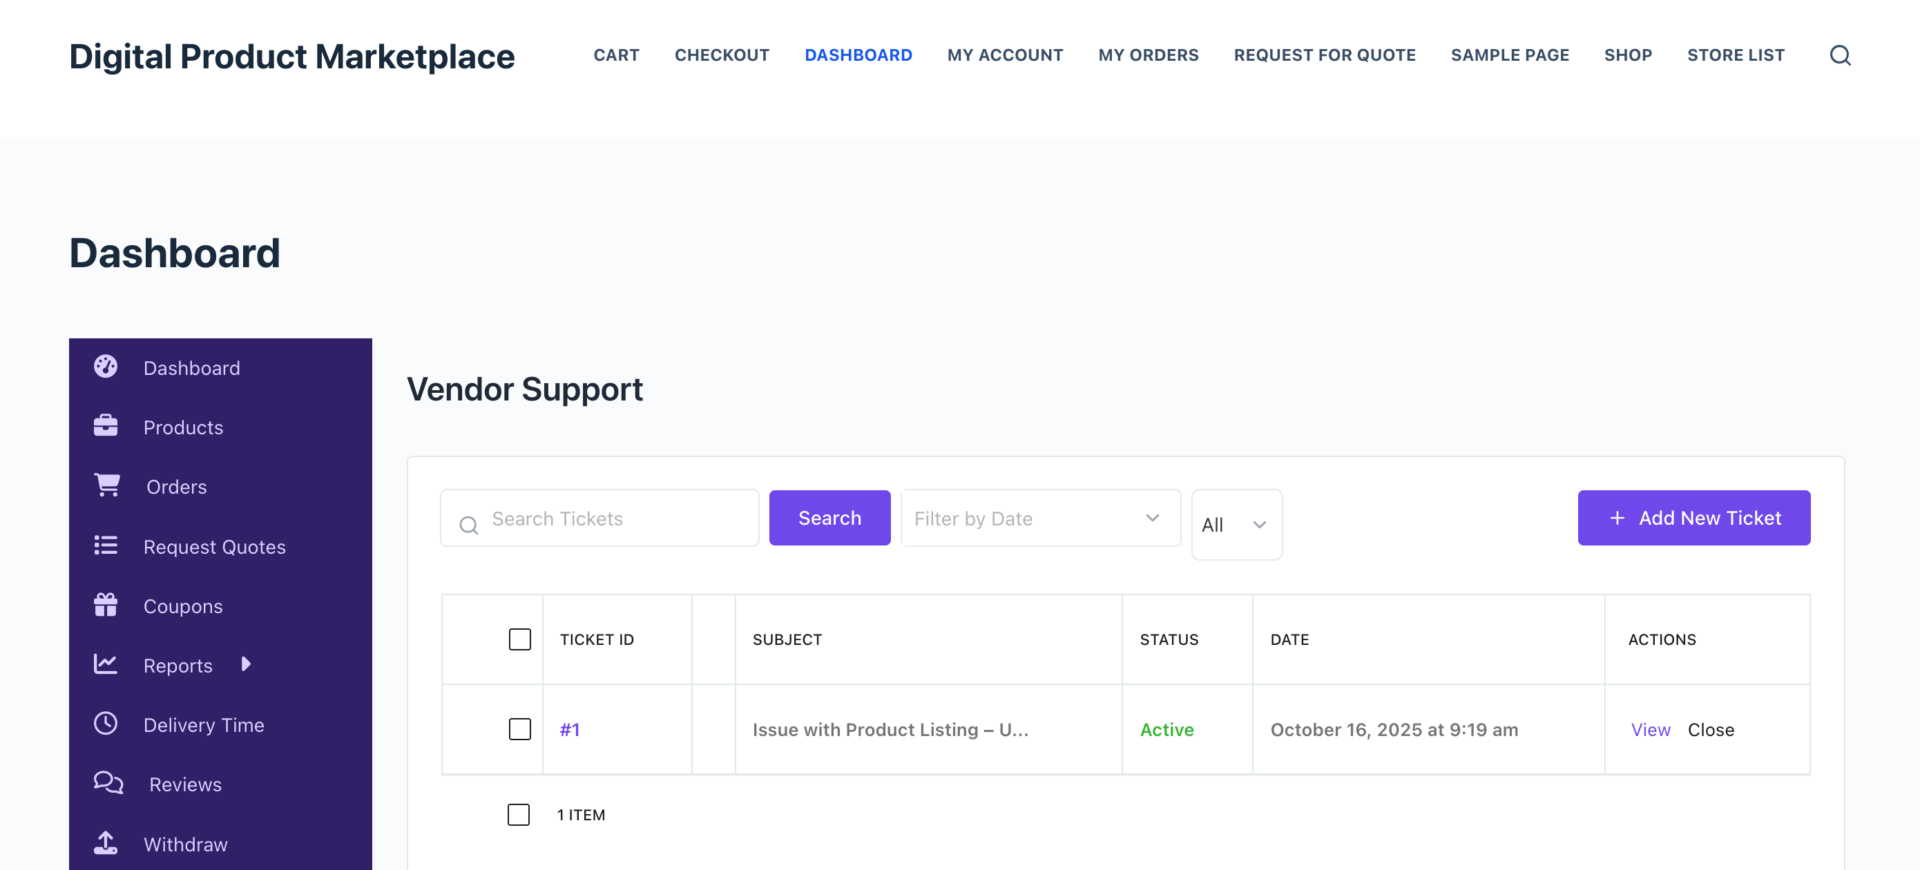
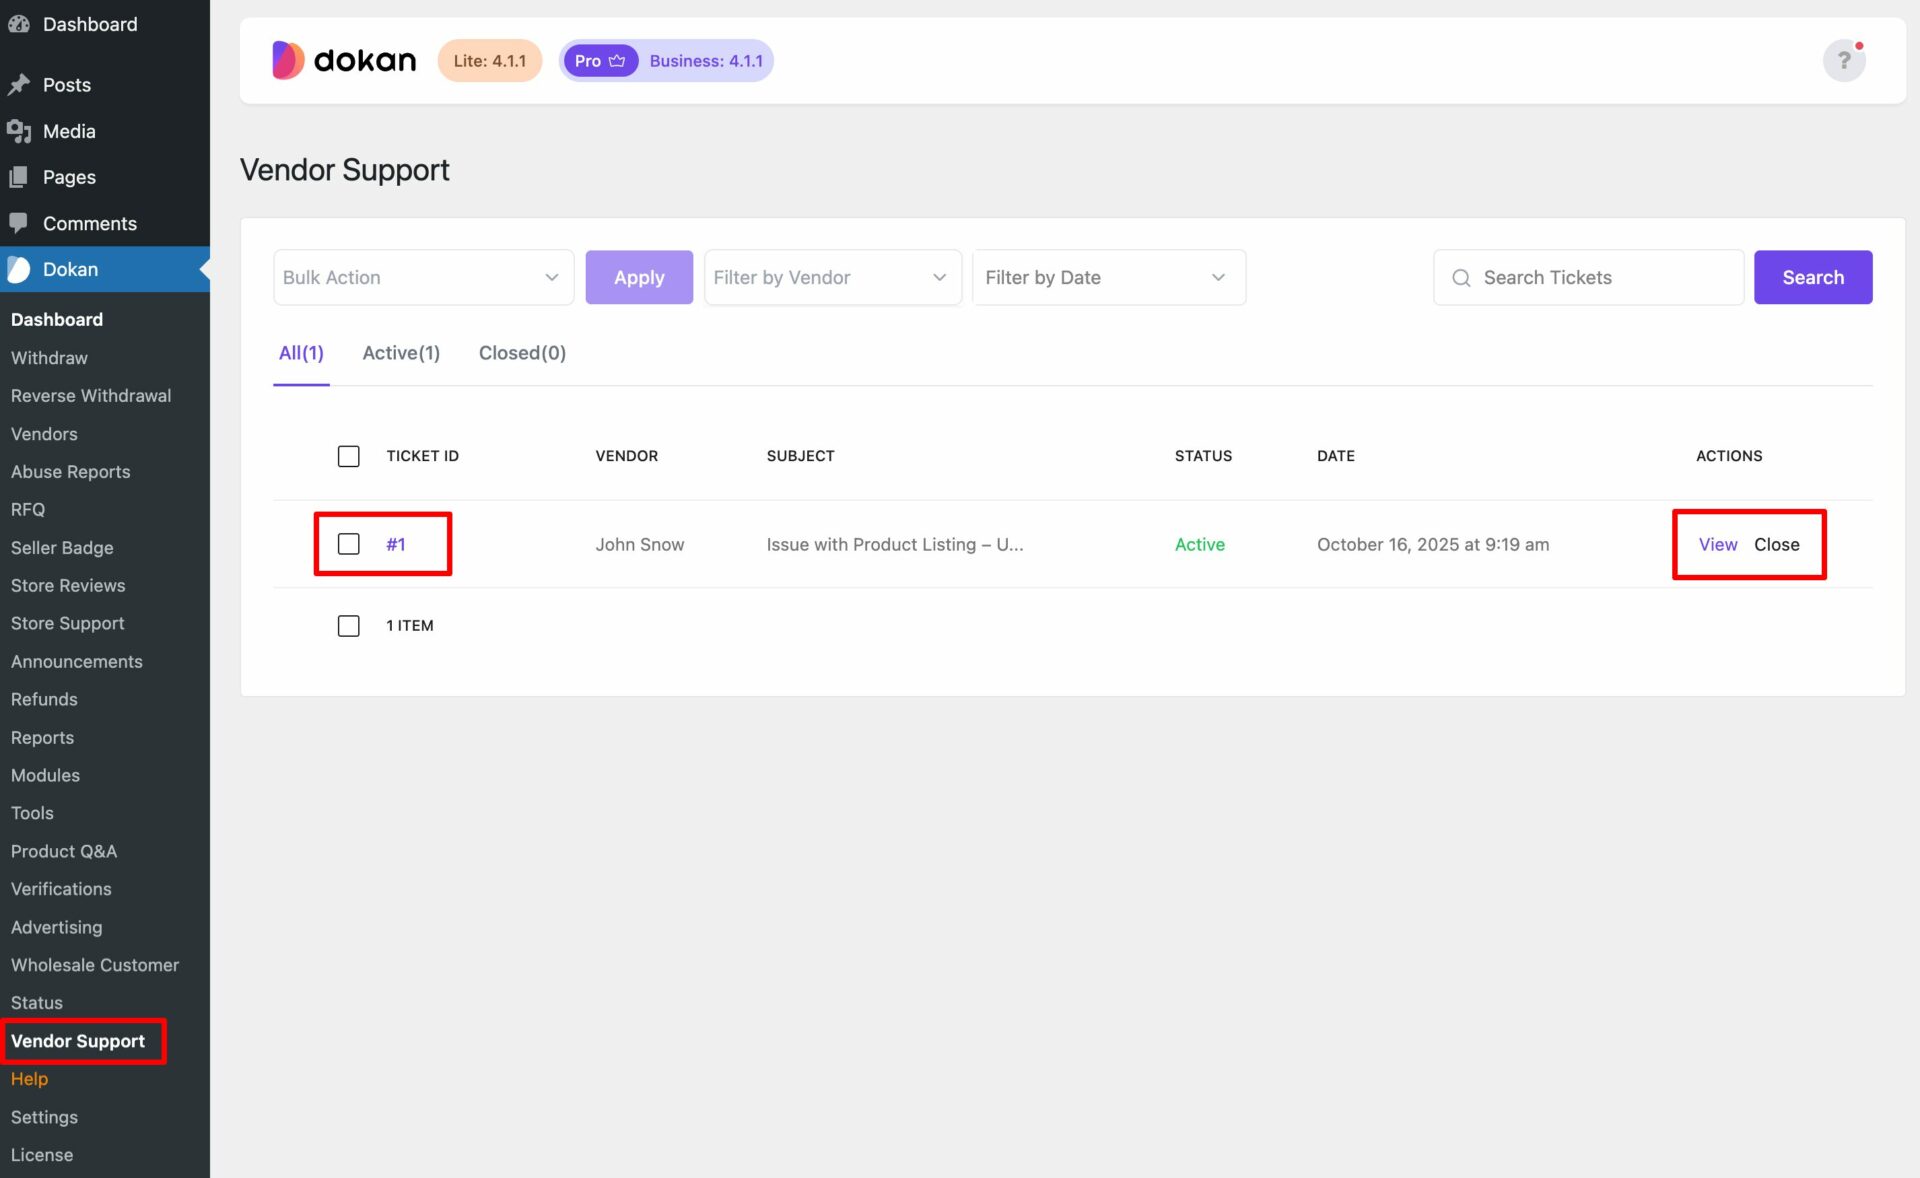
Once a vendor submits a message, they’ll see the Vendor Support dashboard. The interface is simple and user-friendly, with the following key elements:
- Ticket ID: Each message or support request will be assigned a unique Ticket ID for easy tracking. This helps vendors and admins quickly identify and manage support queries.
- Subject: The Subject field displays the title or issue that the vendor raised in their message. In this case, the subject is related to the issue with the product listing.
- Status: The Status section shows the current status of the ticket, such as “Active” or “Closed.” It keeps the vendor informed about the progress of their support request.
- Date: This shows the date and time when the ticket was created, so vendors can keep track of when they sent their query.
- Actions: In this column, vendors will find options to either View the ticket or Close it. If the admin has responded, the vendor can view the conversation here. Once the issue is resolved, the vendor can close the ticket.
- Search & Filter: At the top of the dashboard, there are search and filter options. Vendors can search for specific tickets using keywords and filter tickets by date. This makes it easy to find past conversations or prioritize certain issues.
How to Address the Ticket as an Admin?
As an admin, navigate to Dokan -> Vendor Support, and there you’ll find all the tickets.
Now, click on the Ticket ID or Actions to reply to address the ticket.
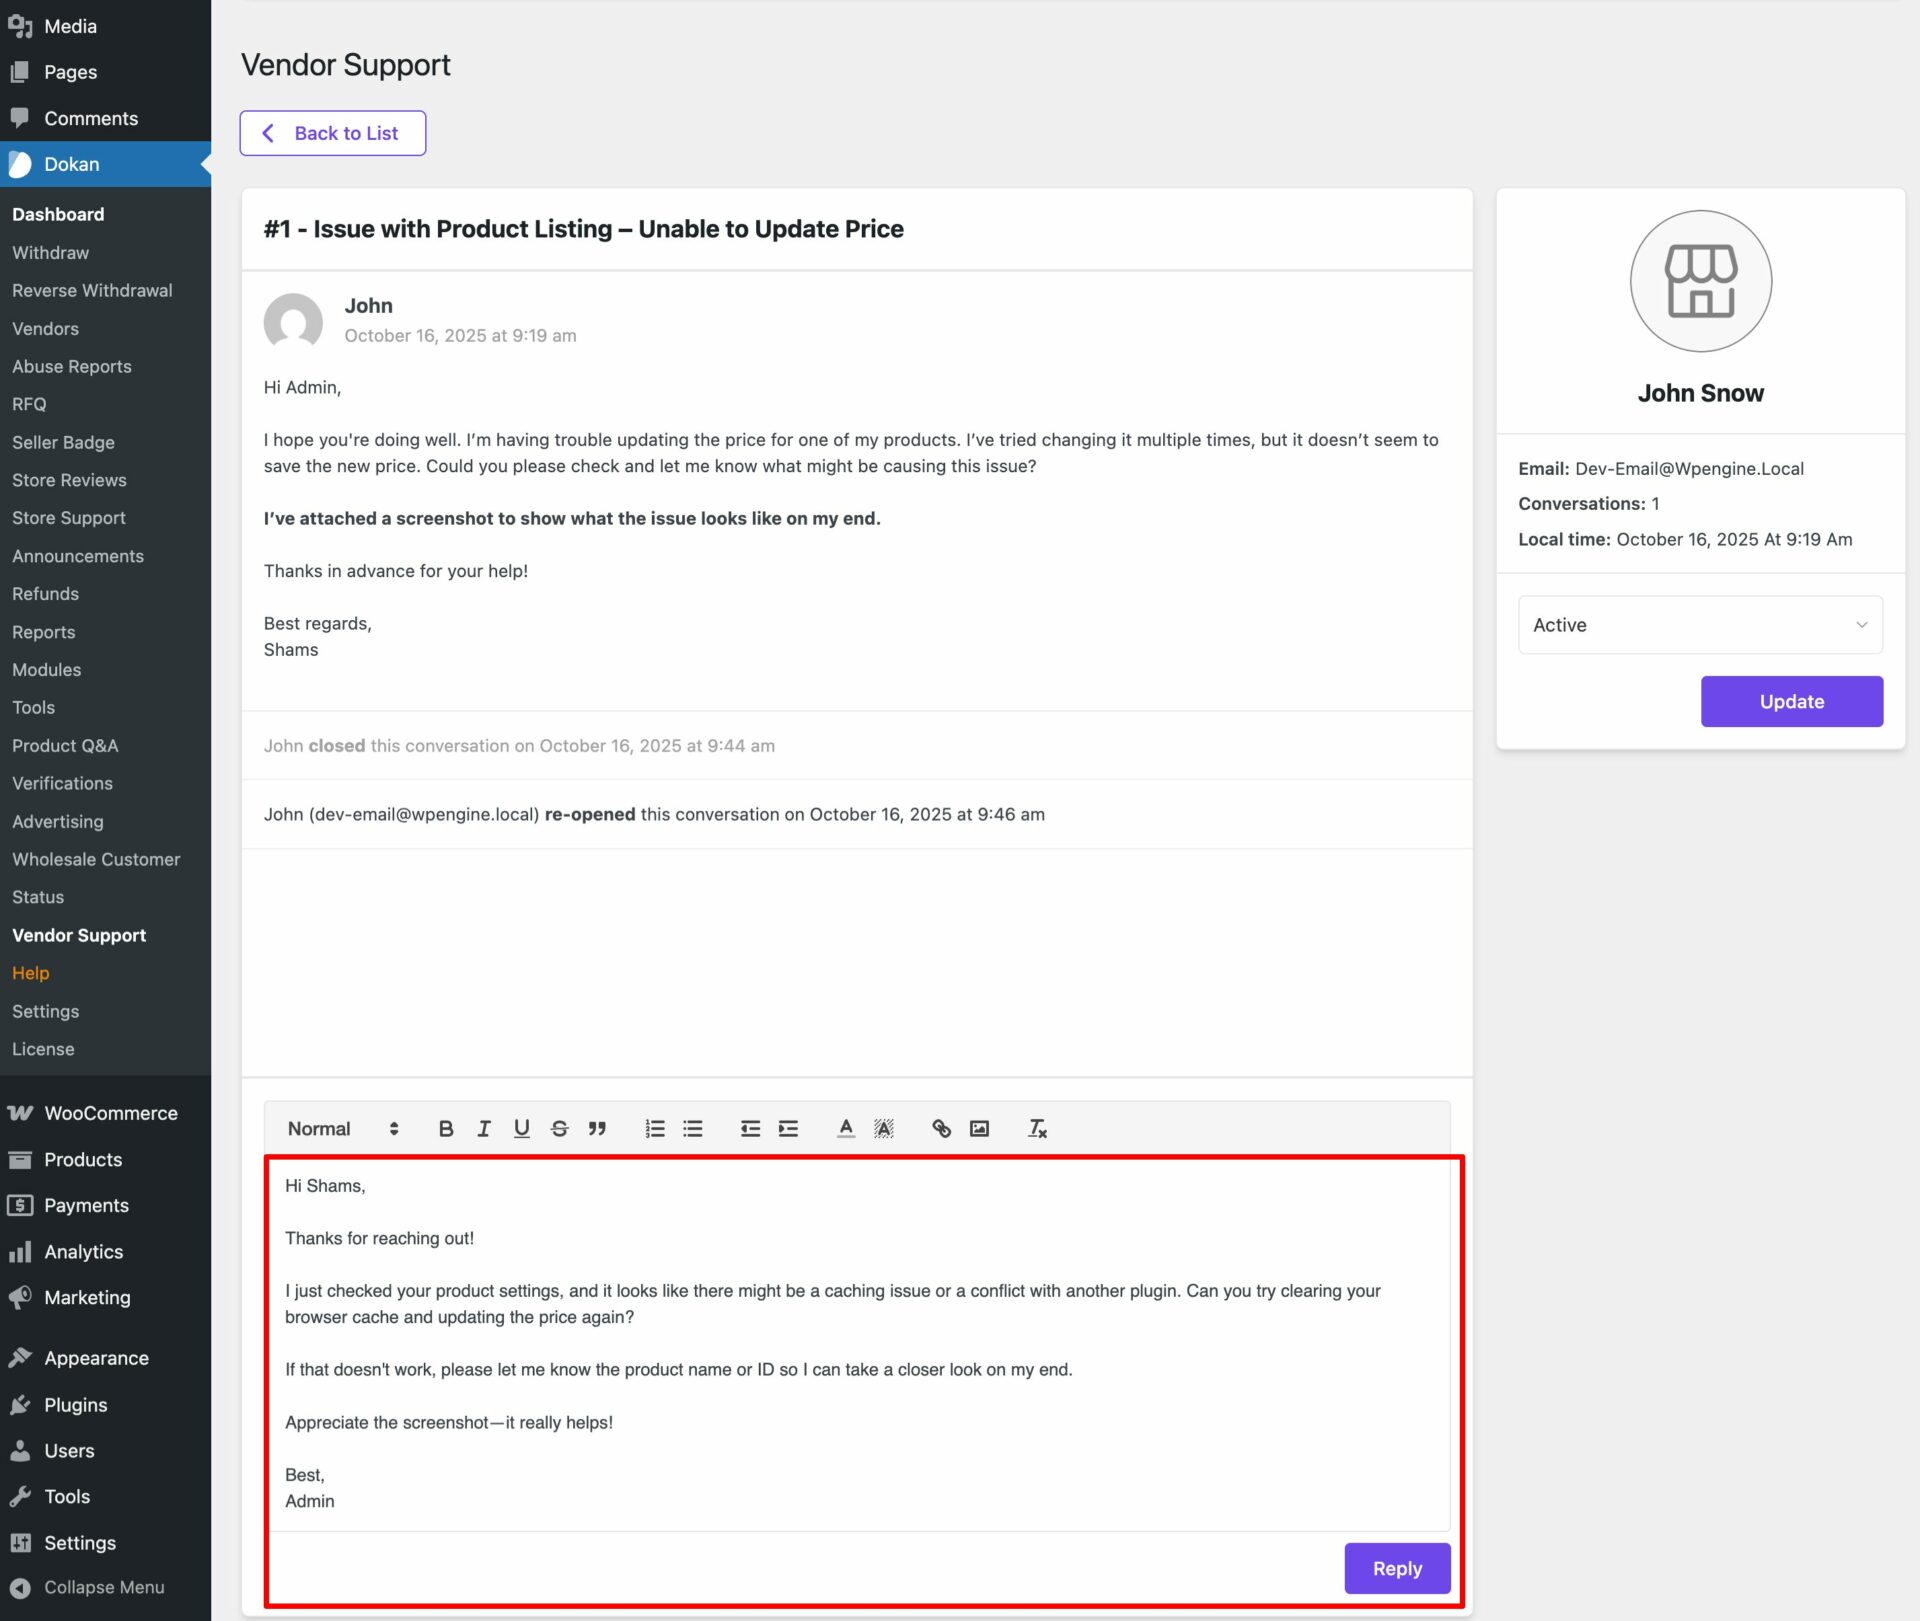
After clicking on the Ticket ID or View option, you will get the interface to reply to the message.
Write the message and hit the Reply button to send the reply.
After replying to the query, if you think that the question is properly addressed, you can close the ticket by updating the status. Choose ‘Close‘ from the drop-down and hit the ‘Update’ button.
Thus, you can close any conversation from the editor as an admin.
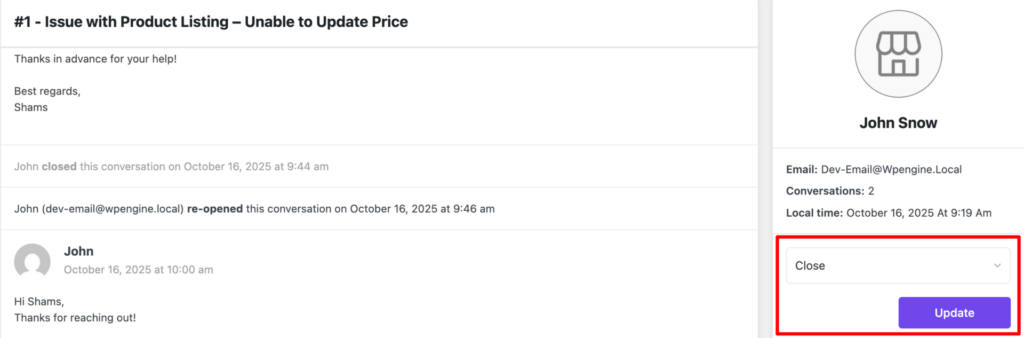
Following the same way, vendors can also be able to close any conversation.
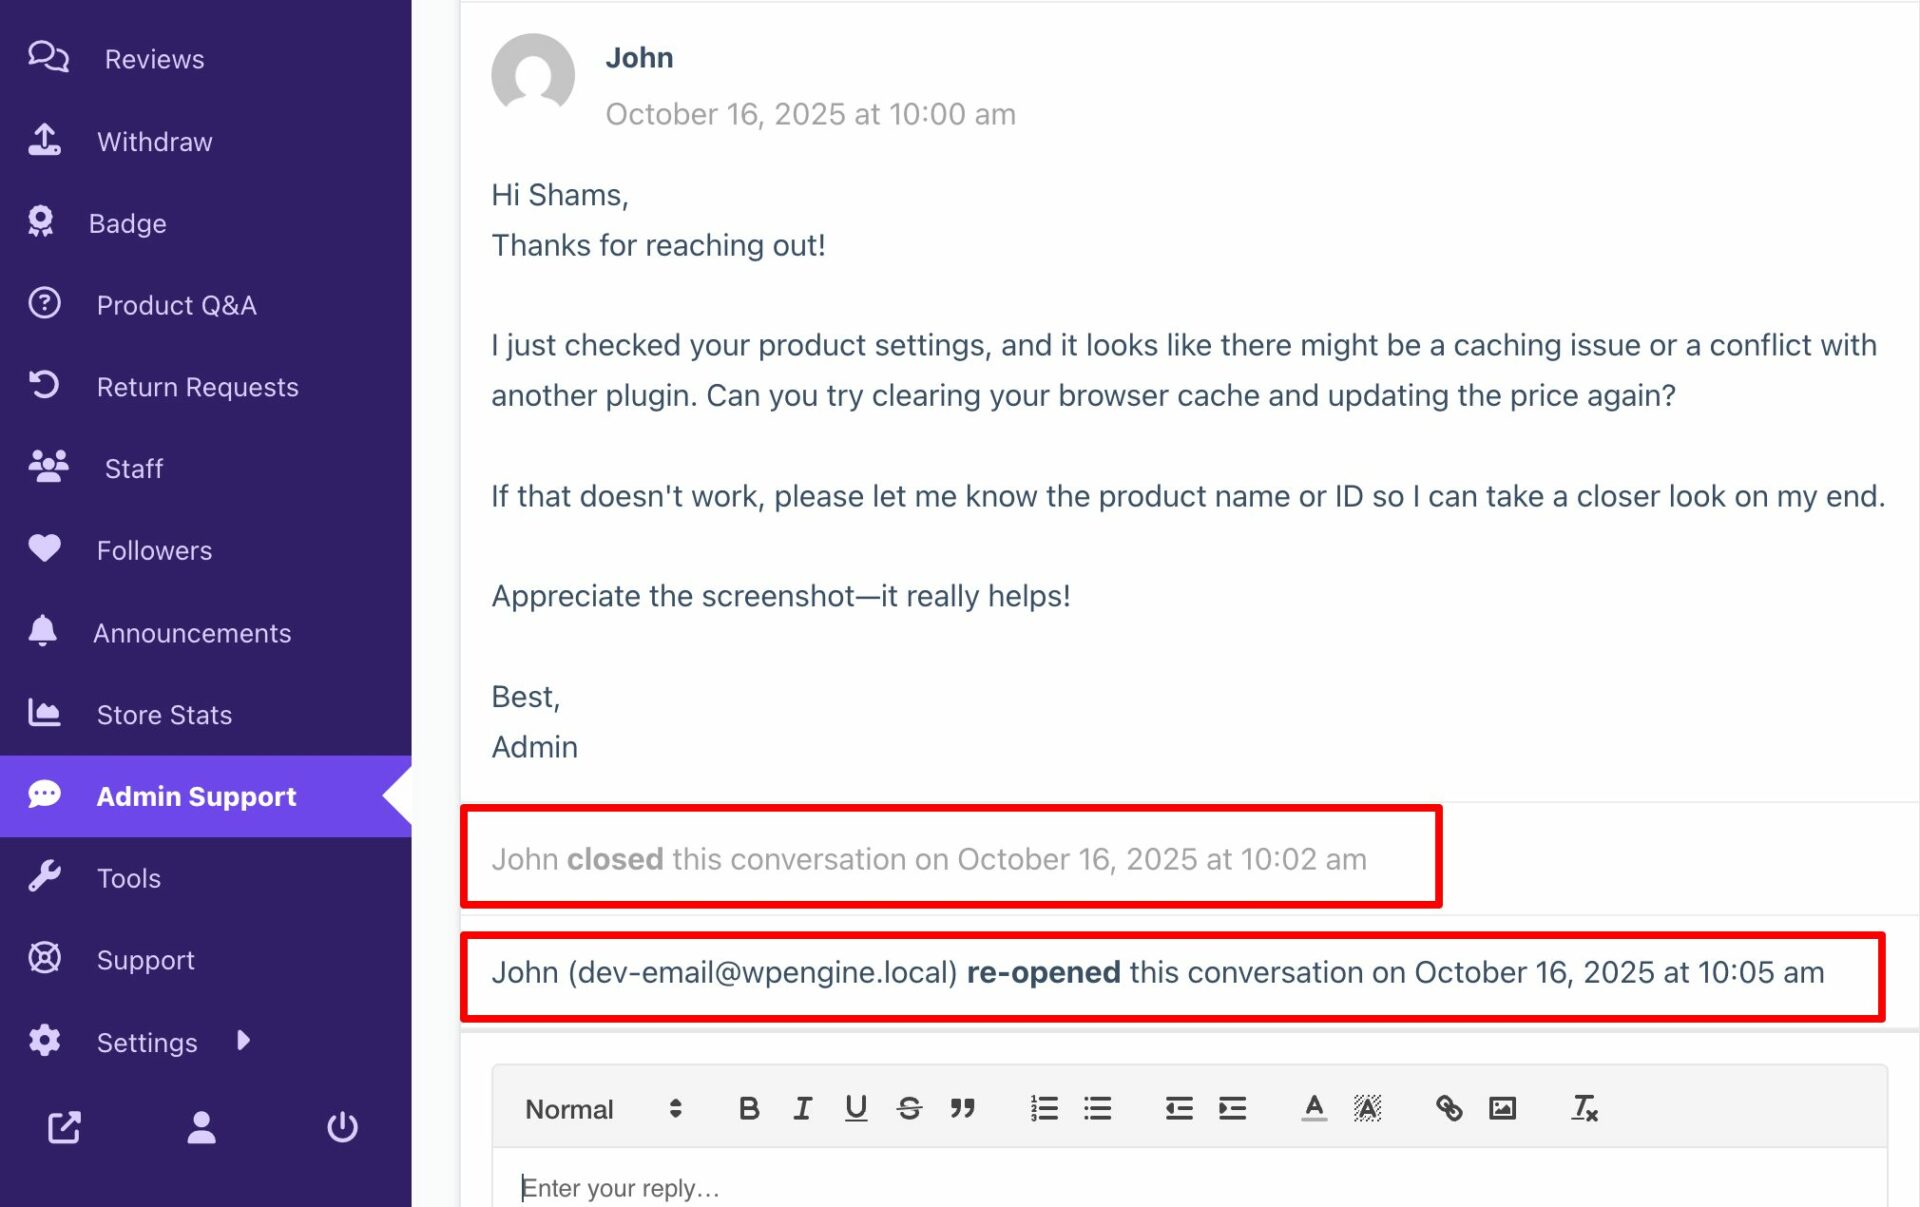
Once a conversation is closed, either the admin or the vendor can re-open it at any time.
If either party sends a new message within the same conversation, the ticket will automatically be marked as Active again. This ensures that both the admin and the vendor can continue their discussion without losing track of the ongoing issue.
The status will show as Active on both the admin’s and vendor’s interface. This helps both parties know that the conversation is still ongoing.
Also, both parties will be able to check who re-opens or closes any conversation in real-time from the editor.
WooCommerce Configuration (Optional)
If the admin wants to receive vendor messages in their email inbox, along with the notifications in the dashboard, this can be set up easily from the WooCommerce settings.
Additionally, if the admin wants to send replies from the admin dashboard and have those replies sent to the vendor’s email inbox (along with the vendor dashboard), that can also be enabled.
Here’s how to set it up:
- Go to your Admin Dashboard.
- Navigate to WooCommerce and click on Settings.
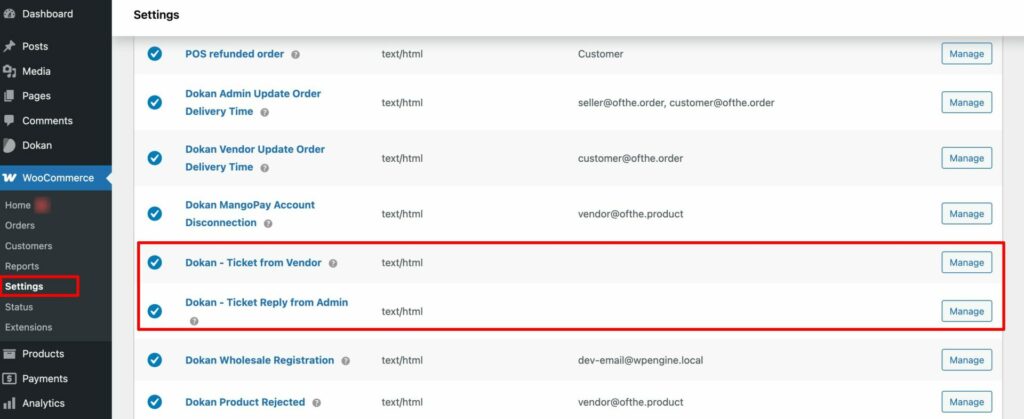
- Select the Emails tab.
- Find the ‘Dokan – Ticket from Vendor’ and ‘Dokan – Ticket Reply from Admin‘ options.
By default, both the Vendor Message Notifications and Email Replies options are enabled.
If you don’t want to receive vendor messages in your email inbox, you can easily disable this option.
- To do that, click on the ‘Dokan – Ticket from Vendor‘ or ‘Manage’ next to it.
- You will be redirected to a new interface where you’ll find the option to enable or disable the email notifications.
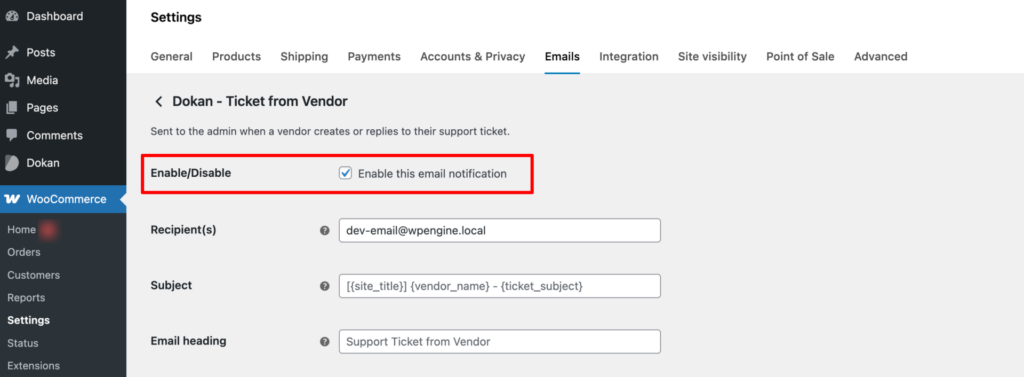
From here, you can turn off email notifications if you no longer want to receive messages in your email inbox, while still keeping them in the dashboard.
Following the same way, you can also enable or disable the ‘Dokan – Ticket Reply from Admin’ option.
That’s all!
This is how you can use our new and powerful Vendor Support module.

