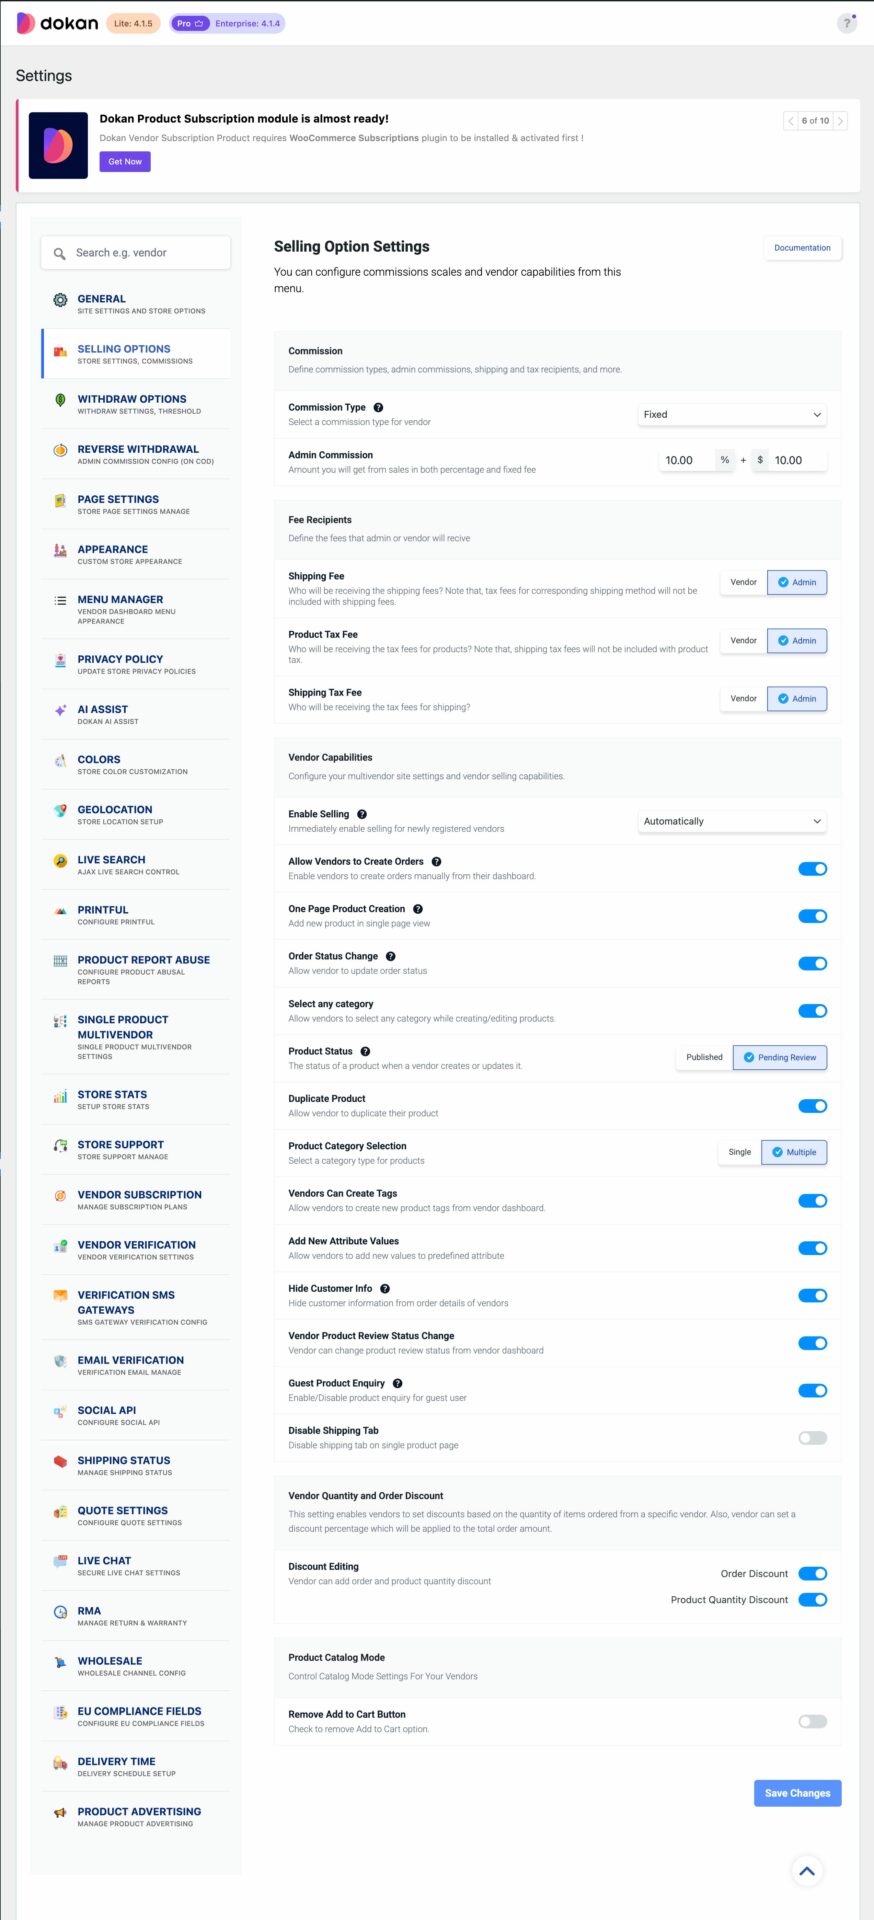
Selling Options for Dokan is the most important part of Dokan Settings where you can tweak multiple settings for your vendors and their stores.
The Selling Options setting is located inside WP Admin → Dokan → Settings → Selling Options.

Commission
- Commission Type: Choose the type of commission you want to use: Flat , Percentage, Combine ( for Dokan Pro users )
- Admin Commission: From this numeric field, select the commission of the admin. If you have selected Percentage as Commission Type and if you insert 10 as admin commission, then admin will get 10% and the vendor will get 90%.
In the case of Combine Commission, you need to put flat and percentage both. - Shipping Fee Recipient: Use this option to set the recipient (Admin or Vendor) who will be receiving the shipping fee.
- Tax Fee Recipient: Use this option to set the recipient (Admin or Vendor) who will be receiving the Tax fee.
- Product Tax Fee Recipient: Decide who will be receiving the tax fees for products? Note that, shipping tax fees will not be included with product tax.
- Shipping Tax Fee Recipient: Decide who will be receiving the tax fees for shipping.
- Process Refund via API: Automatically process refund from payment gateways when admin approves refund request. This settings doesn’t interfere with any of Dokan’s payment integrations.
Vendor Capability
- Enable Selling: You can enable selling for vendors in 3 ways-
- Automatically: Vendor will be able to sell after they register.
- Manually: Admin needs to approve vendors in order to sell
- Verified Only: Only verified vendors can sell

- One Page Product Creation: If disabled, instead of a single add product page it will open a pop-up window or the vendor will redirect to the product page when adding a new product.
- New Vendor Product Upload: To allow newly registered vendors to add products to their stores, enable this checkbox.
- Disable Product Popup: Enable this checkbox to disable ”Add New Product” in the pop-up view from the vendor’s dashboard.
- Order Status Change: Checking this box will enable the sellers to change the order status and let them control their own orders.
If you do not check this box, then you – the admin have to control all the orders and change the status for each product accordingly. - Select any category: Allow vendors to select any category while creating/editing products.
- Guest Product Enquiry: Enable this checkbox to turn on product inquiries for guest users.
- New Vendor Enable Auction: Enable this checkbox to enable auction status for newly registered vendors.
- Category Selection: Setting this field’s value to Multiple will enable the sellers to select multiple categories for their products. If you set the value to Single, then the sellers will be able to select only one category for one product.
- Product Status: This defines the status of newly created products. If you want to review each and every product before appearing on your site, then you can set it to Pending Review. If you do not want to review the products manually and want the sellers to publish the products directly, then you can set the status to Published.
- Duplicate Product: To allow vendors to duplicate products of other vendors, enable this checkbox.
- Discount Editing: Allow vendors to add product and/or order discount by enabling these checkboxes.
- Hide Customer Info: Enable this checkbox to hide customer information from the order details of vendors.
- Log ShipStation API Request: If a Dokan Marketplace owners want to keep a log of ShipStation API request he/she needs to enable Log ShipStation API Request from
- Disable Shipping Tab: Enable this option if you want to show shipping tab in the single product page.