Managing product submissions in a marketplace can get complicated. Many of our clients wanted more control over how vendors add and manage products, but the default setup often felt limited.
That’s why we introduced the Dokan Product Form Manager module. It gives you full control over your product forms, so you can decide what vendors see, what they fill in, and how products are submitted.
You can customize fields, adjust layouts, and collect the exact information your marketplace needs. Everything stays simple, organized, and aligned with your workflow.
We will show you how to configure the Product Form Manager module.
But first, see how many custom blocks and fields you can edit in each plan-
Plan Custom Blocks Custom Fields per Block Professional Up to 3 Up to 5 Business Up to 8 Up to 10 Enterprise Unlimited Unlimited
Enable the Product Form Manager Module
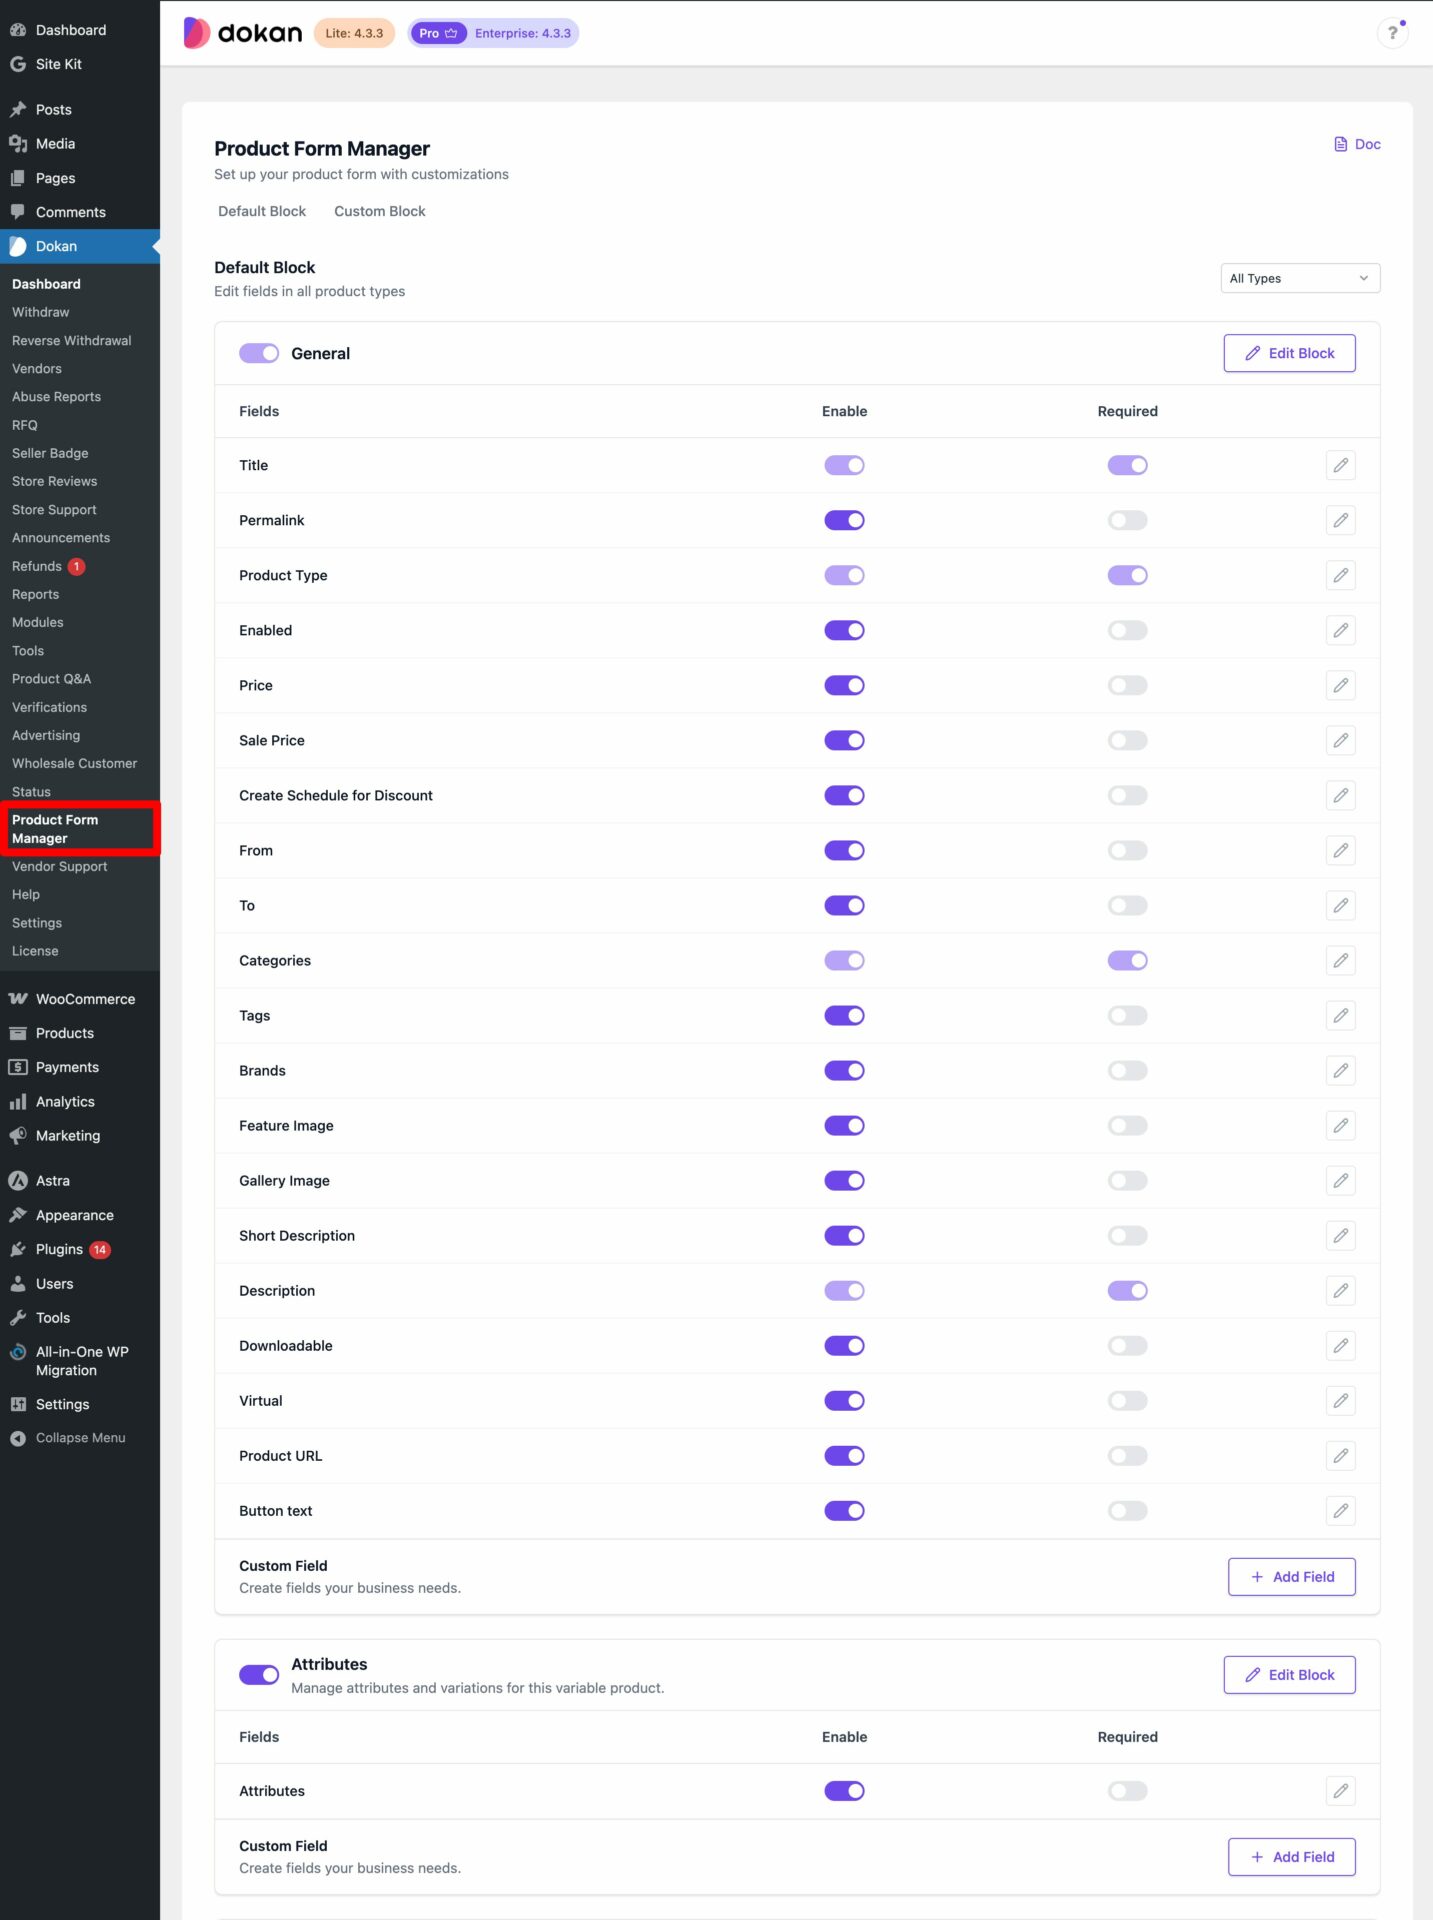
First, you need to enable the product form manager module from WP-Admin–> Dokan–> Modules.

Configuring Product Form Manager
Now, you need to configure the product form manager. You will see the Product Form Manager option in the menu.
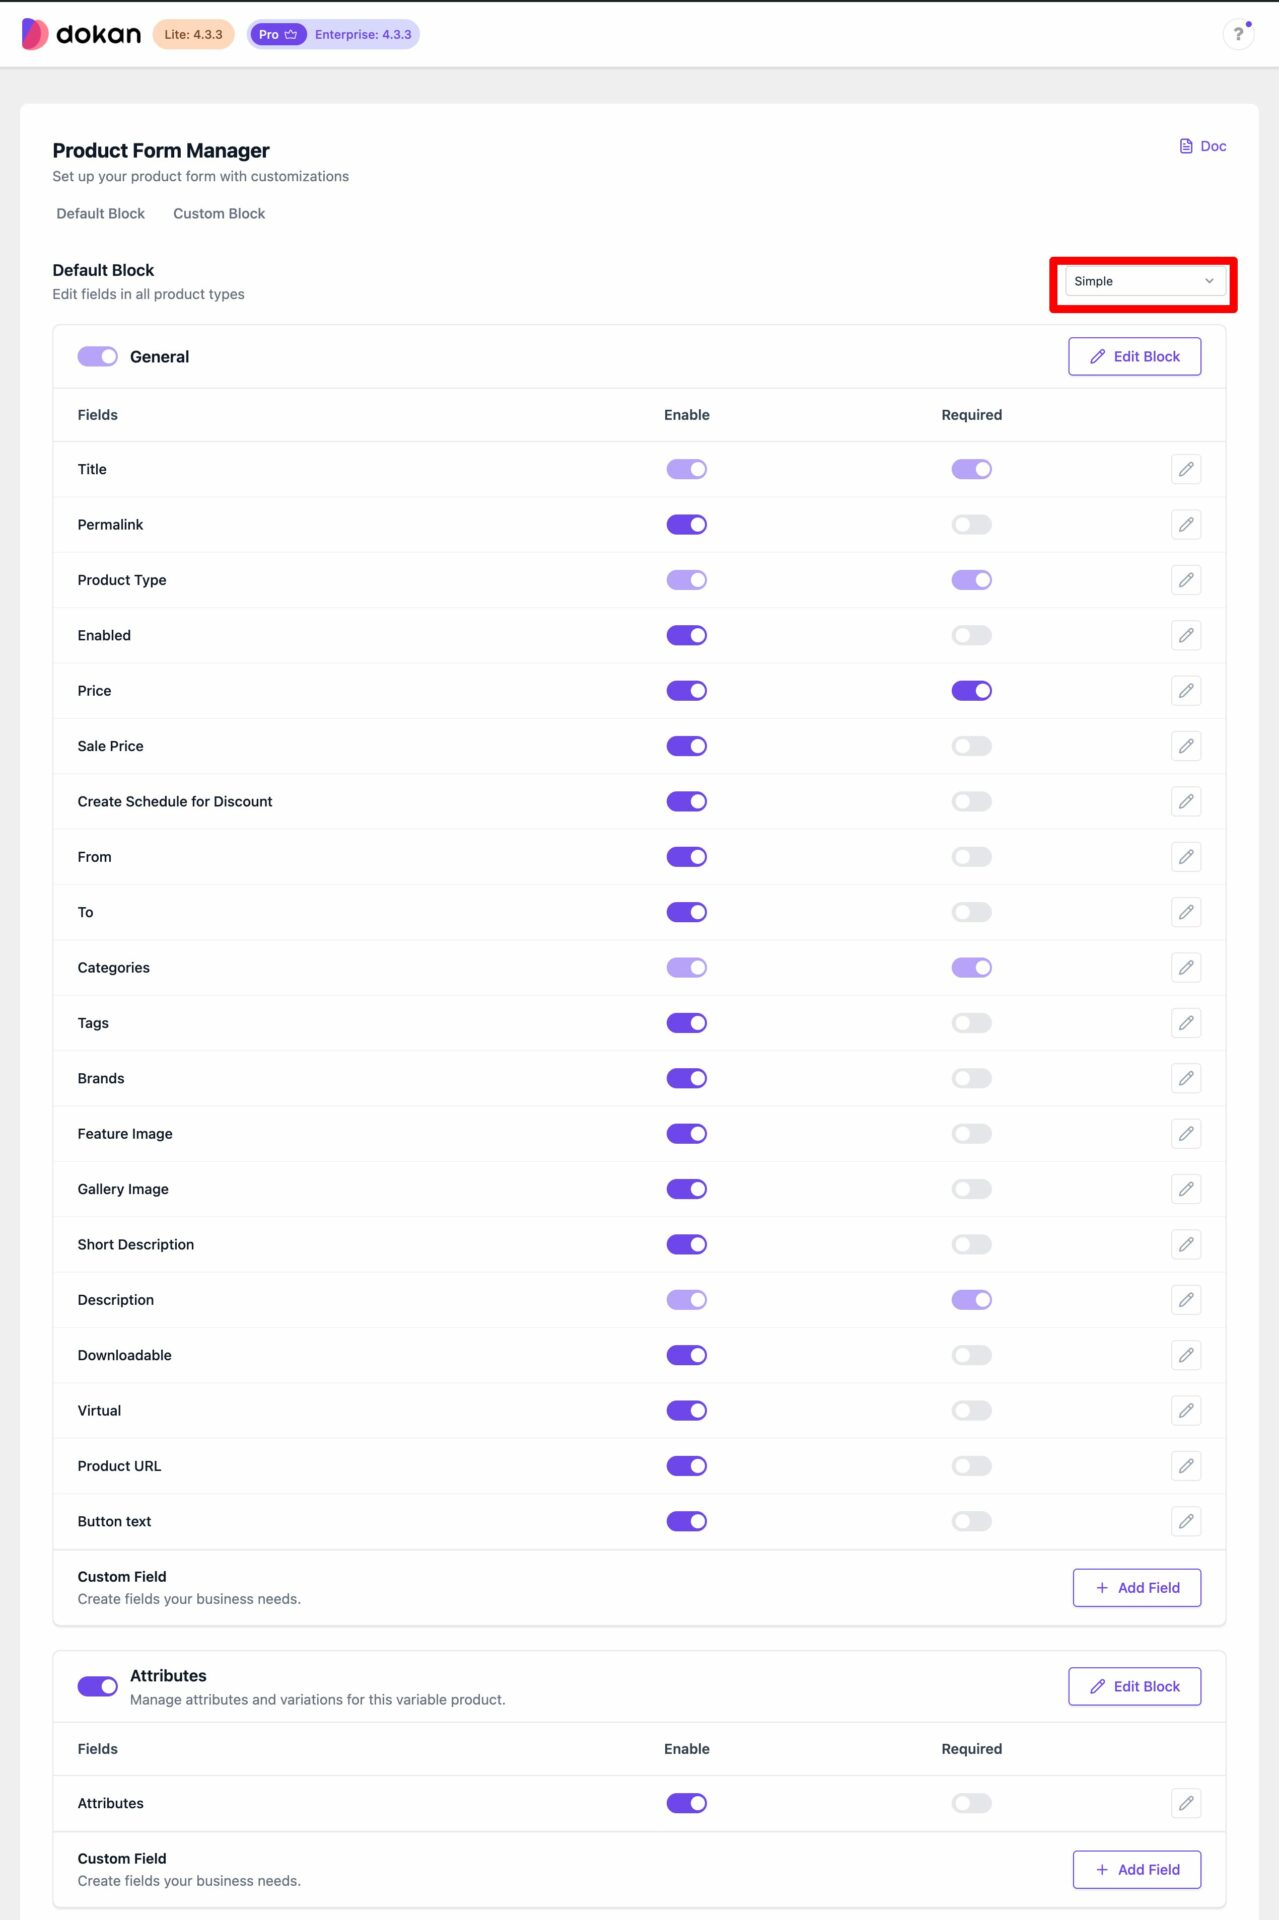
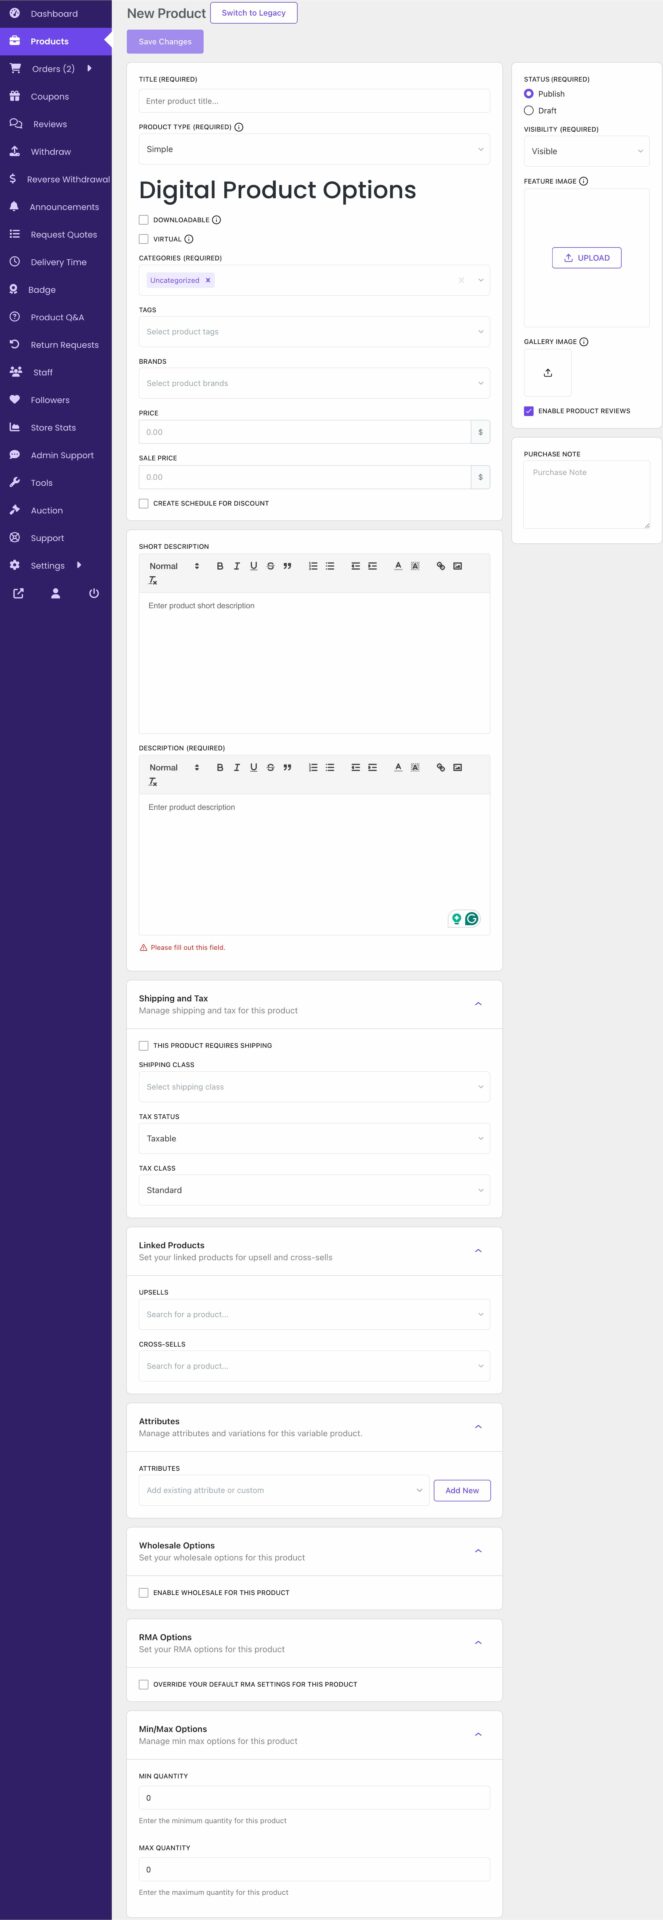
You can edit all types of forms for products like Simple Products-
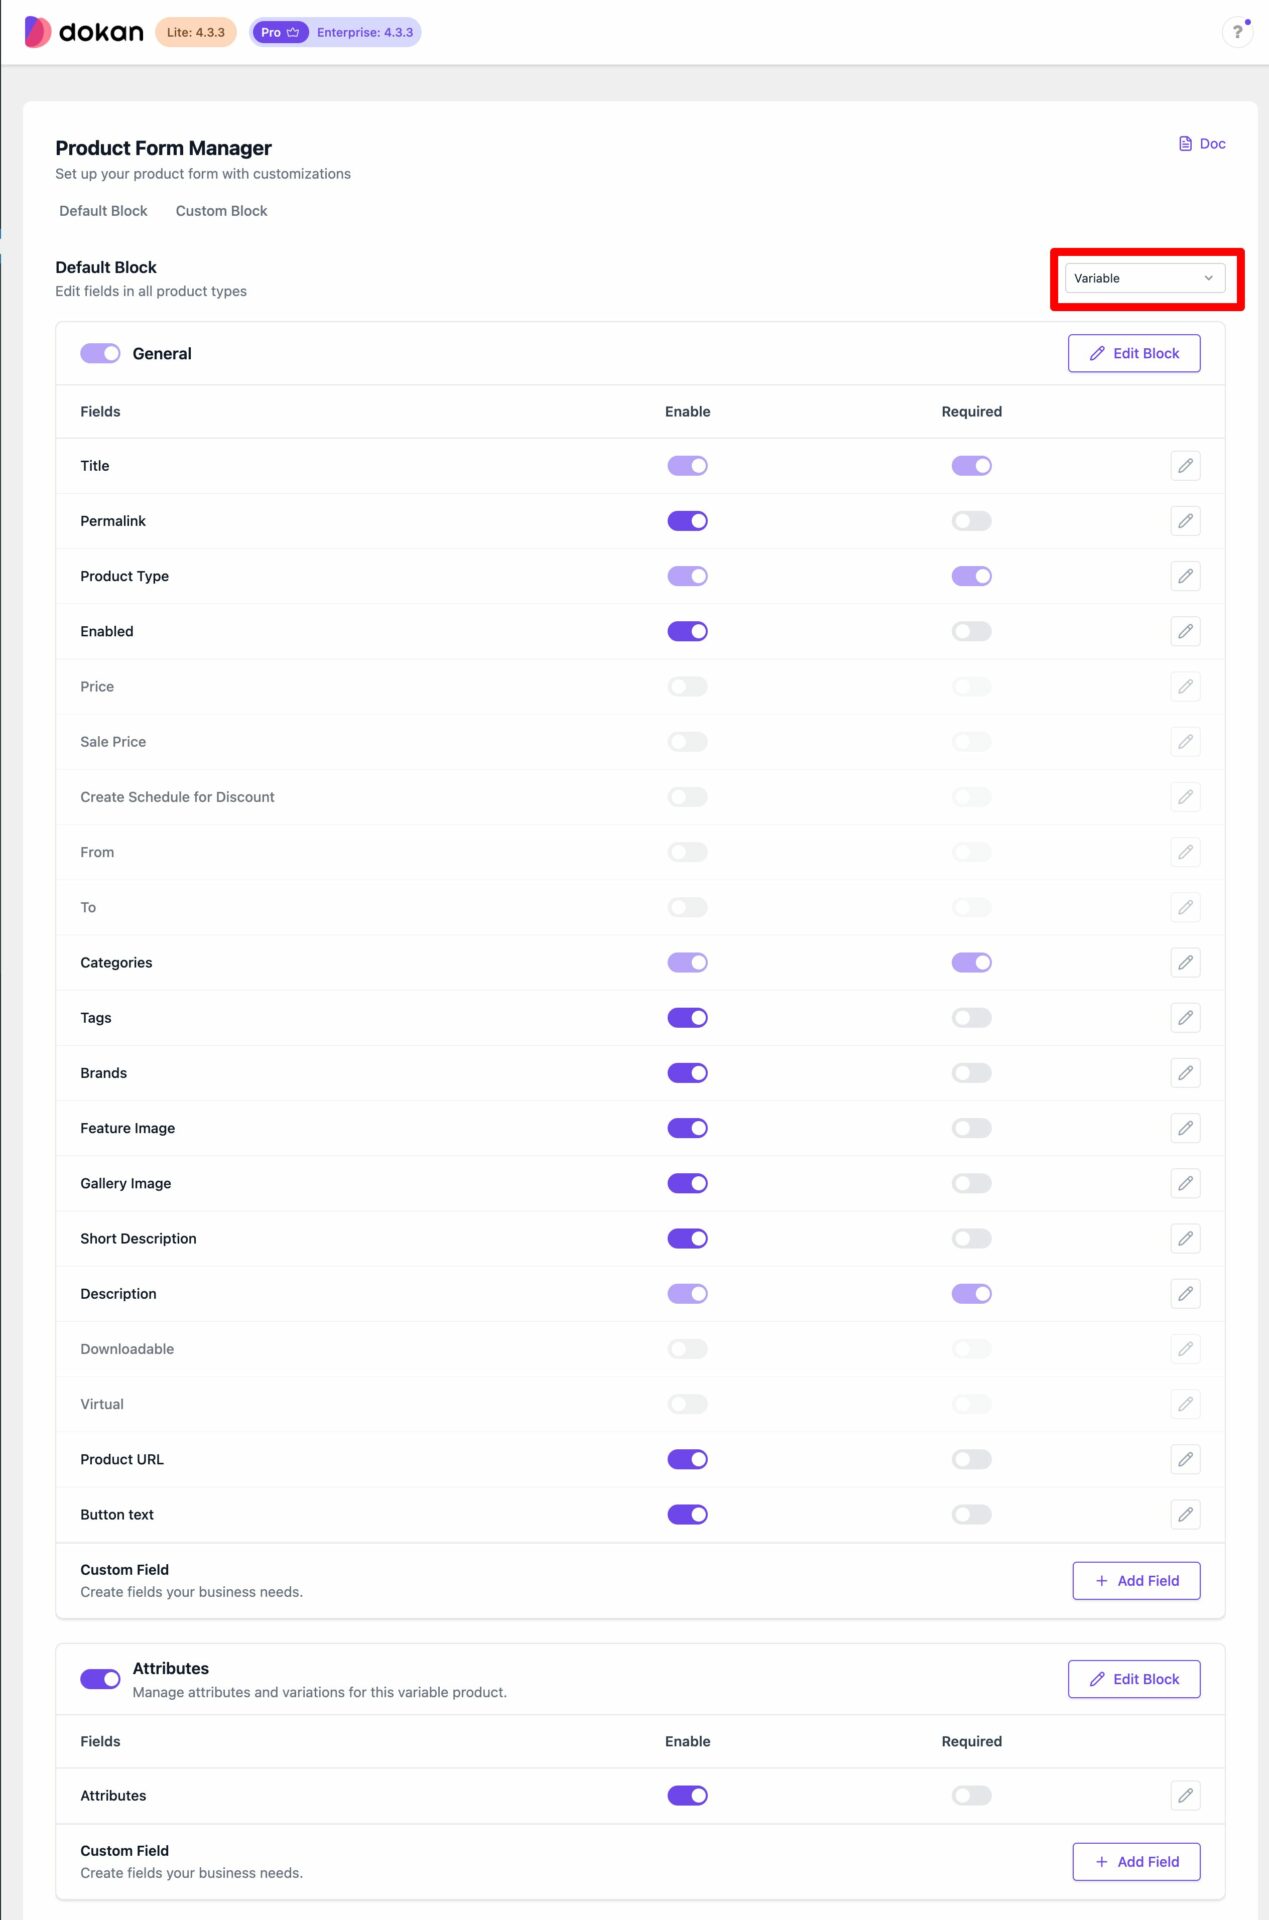
Variable product form-
Or affiliate product form-
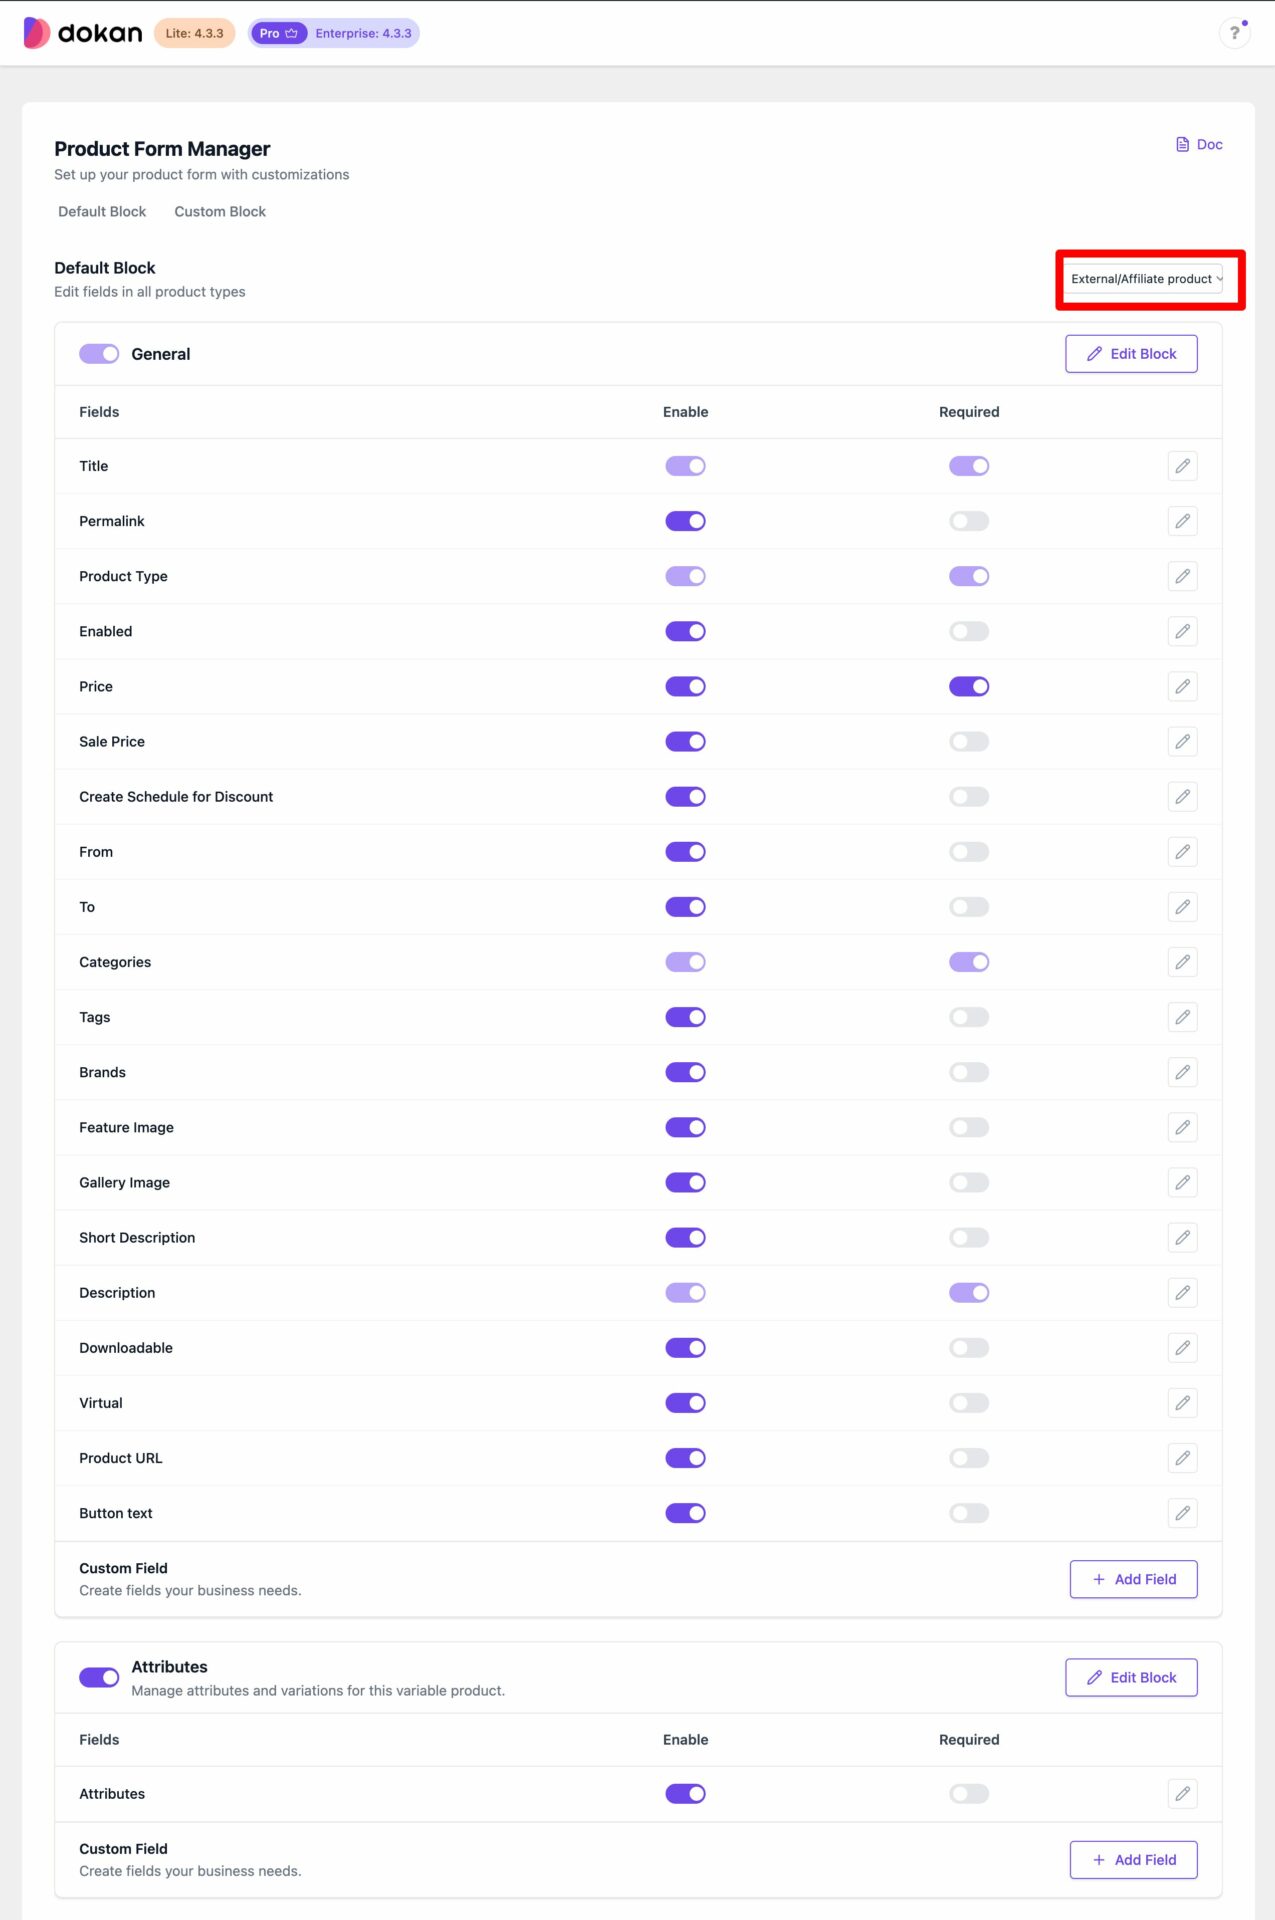
Add, Edit, & Disable Existing Fields
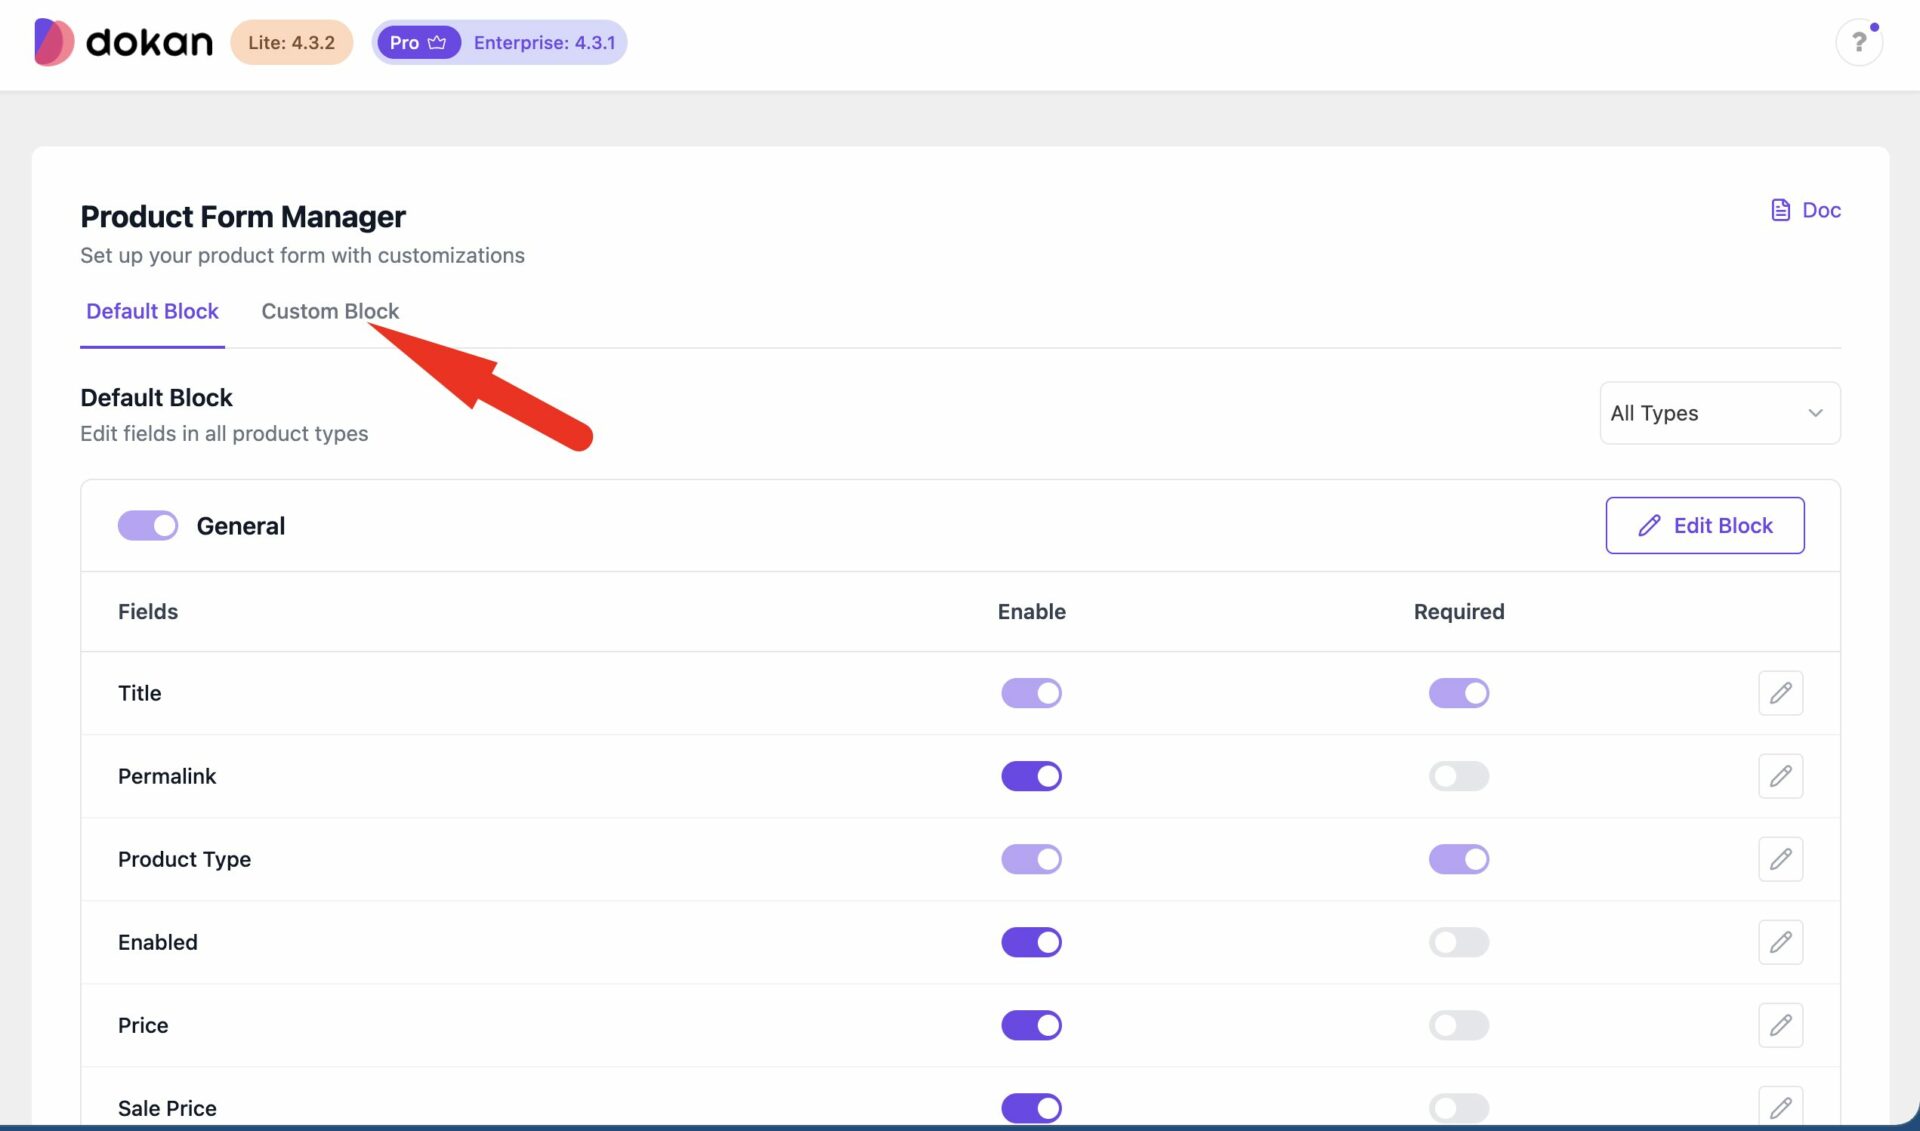
You can easily add a new field , or edit and update the existing fields.
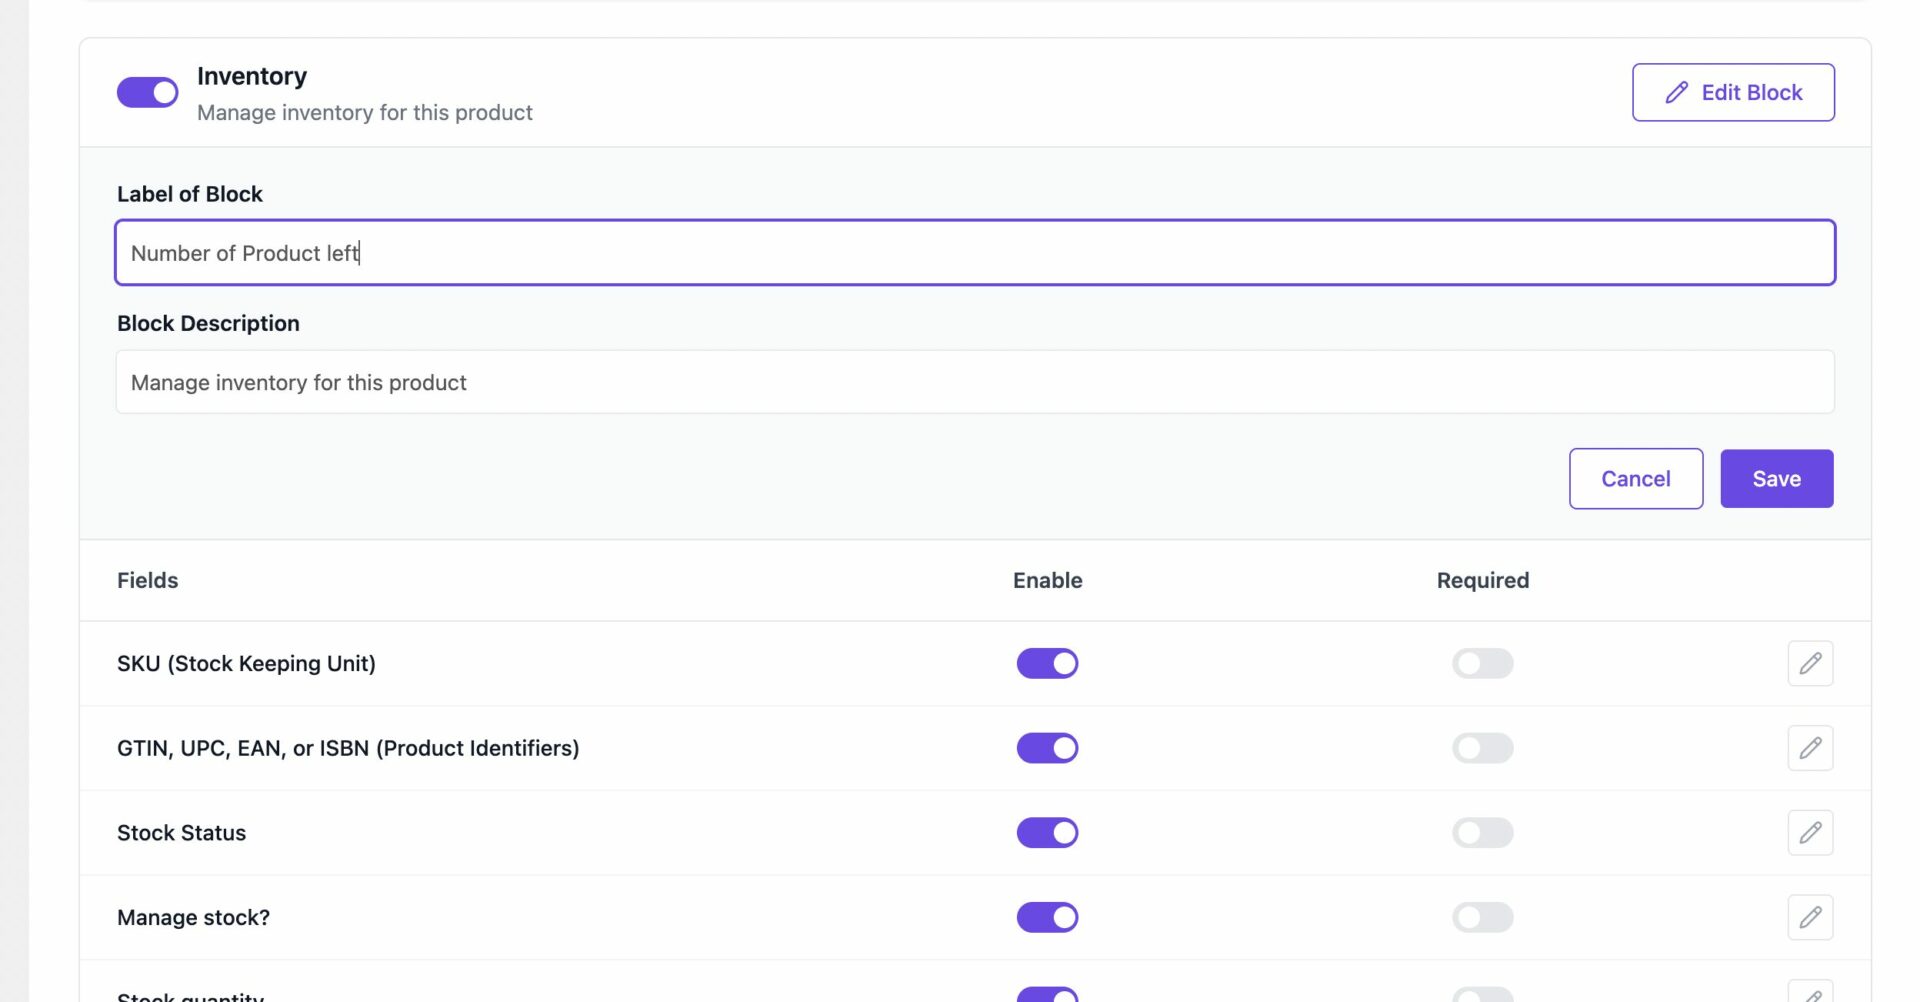
For exmaple, we are going to change the “Inventory” field name to “Number of Products Left”. Just click on the Edit Block button and change the field to your desired name-
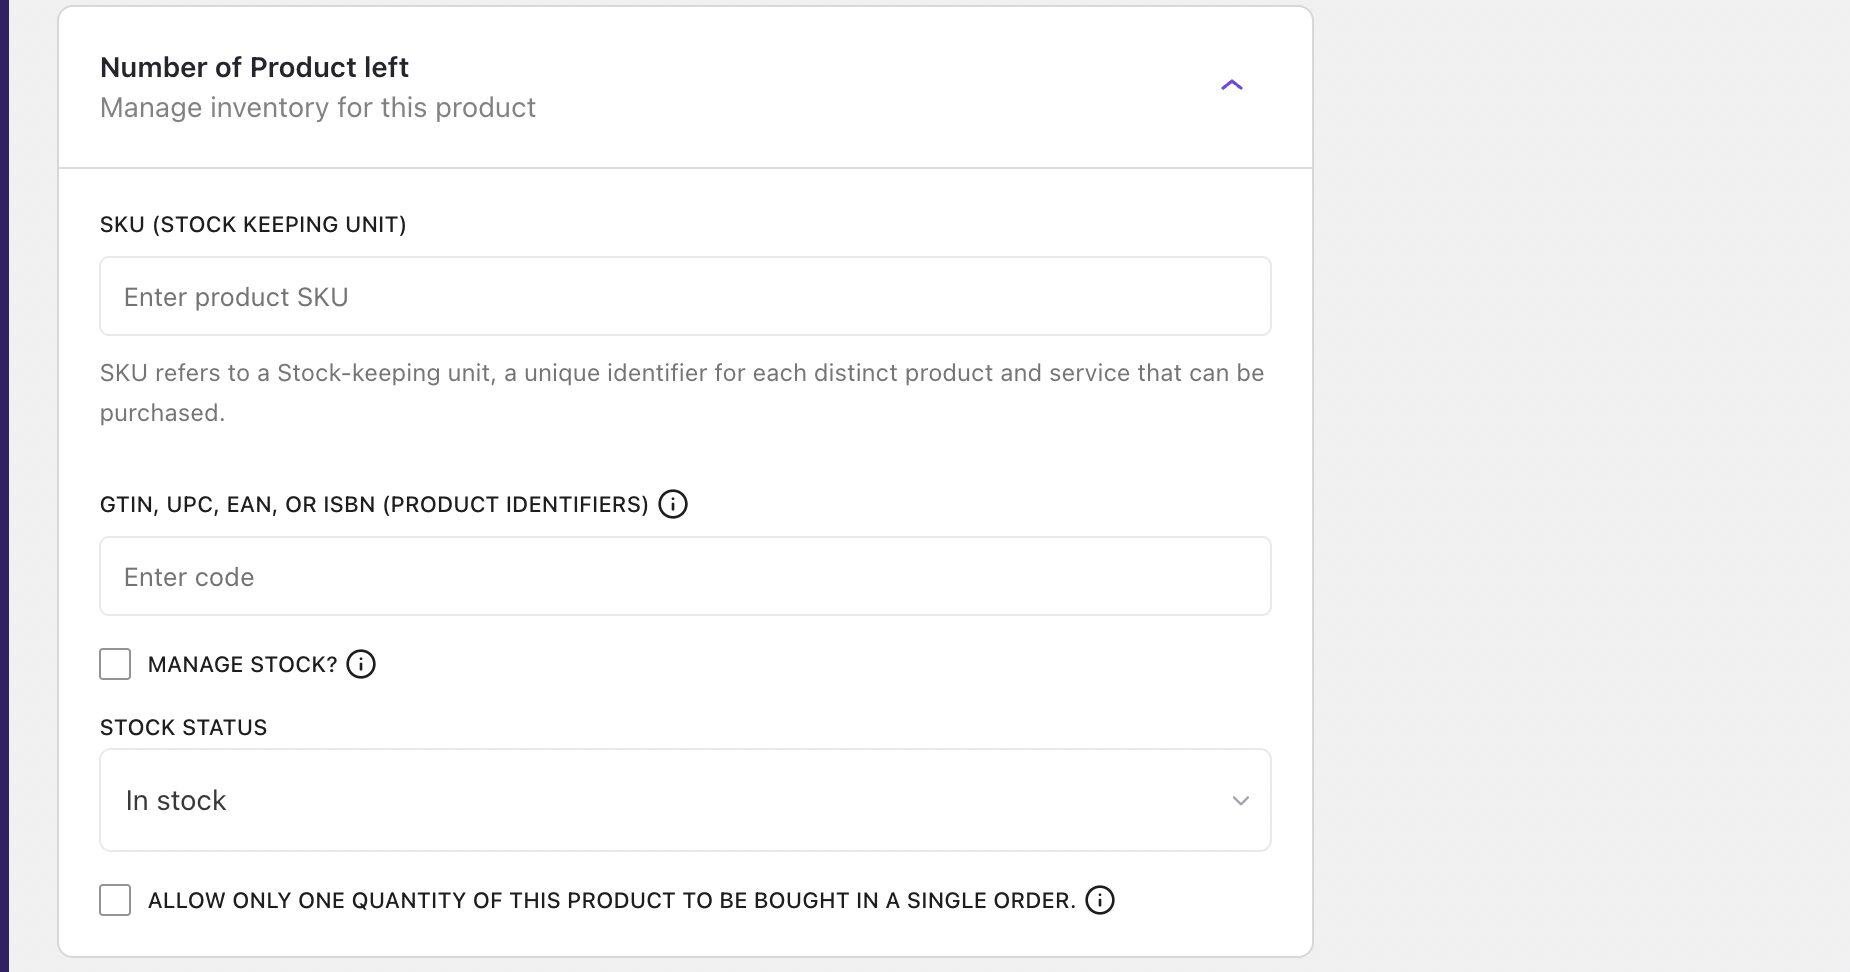
In the frontend vendor dashboard, you can see that the field name is changed-
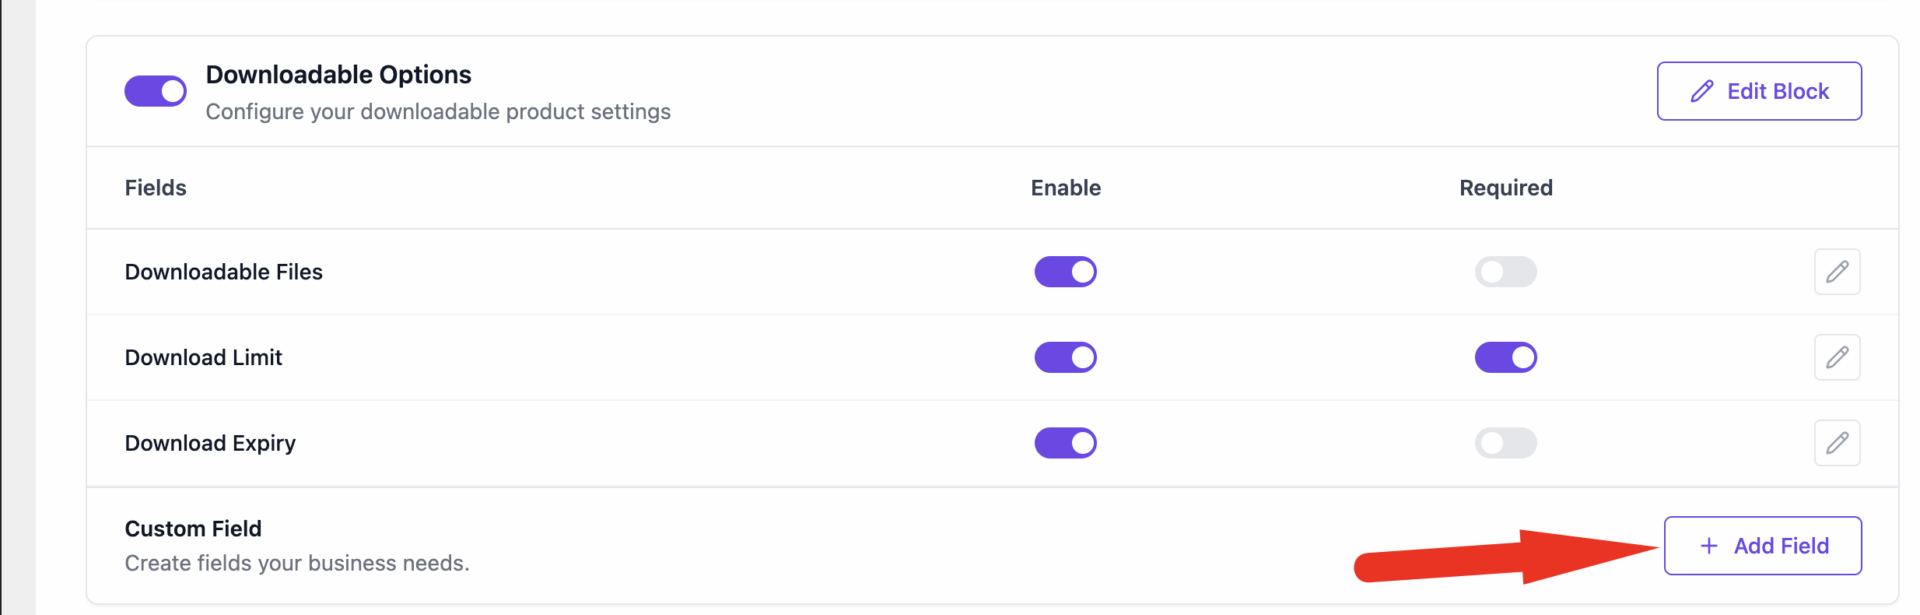
Also, you can add an extra field to any of the existing fields.
Click on the Add Field button on any of the existing field option-
Now, give the field a name and choose what do you want to show in the form of text, radio button, number, rich text, checkbox etc from the dropdown and save it.
You can see that the extra field has been added-
Also, it will be added in the vendor dashboard product form as well-
Also, you can disable any existing field as well-
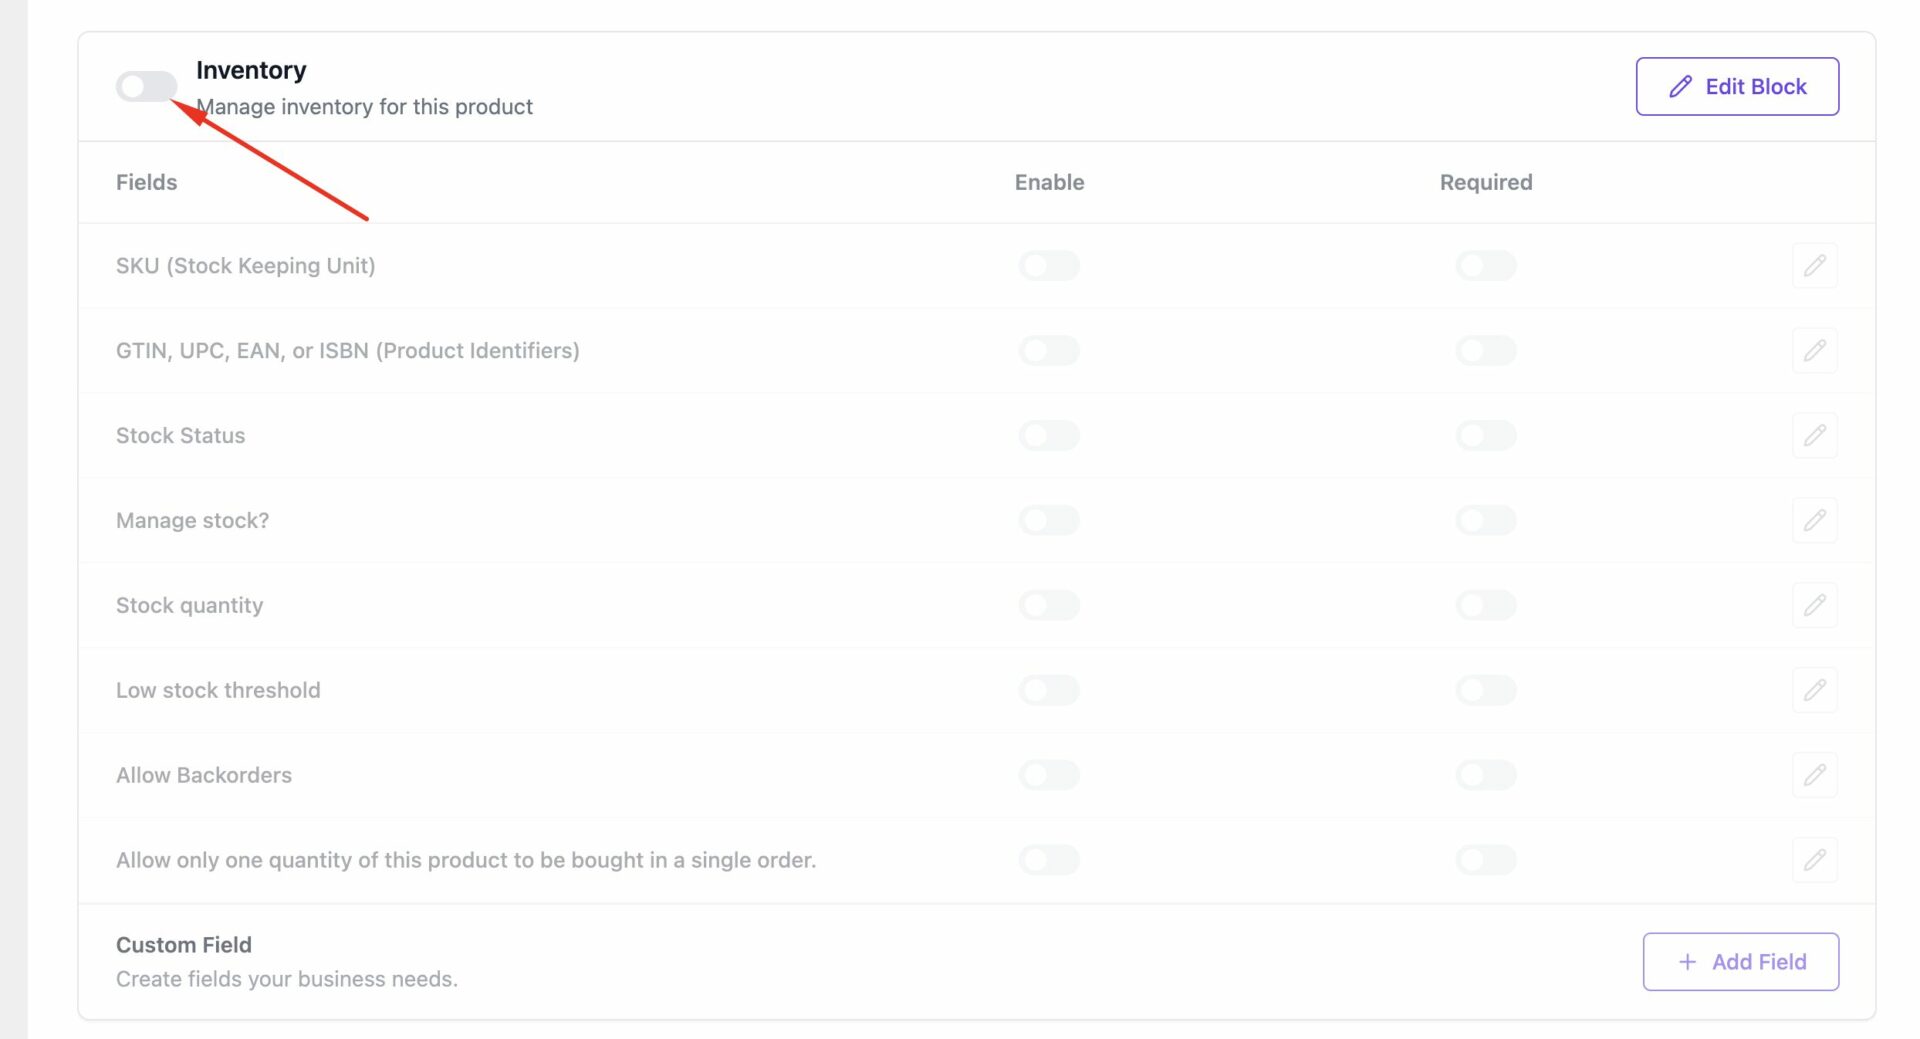
The inventory field will disappear from the vendor dashboard product form-
Custom Block
You can add a custom block to make the product form more flexible.
To add a new block click on the Custom Block button-
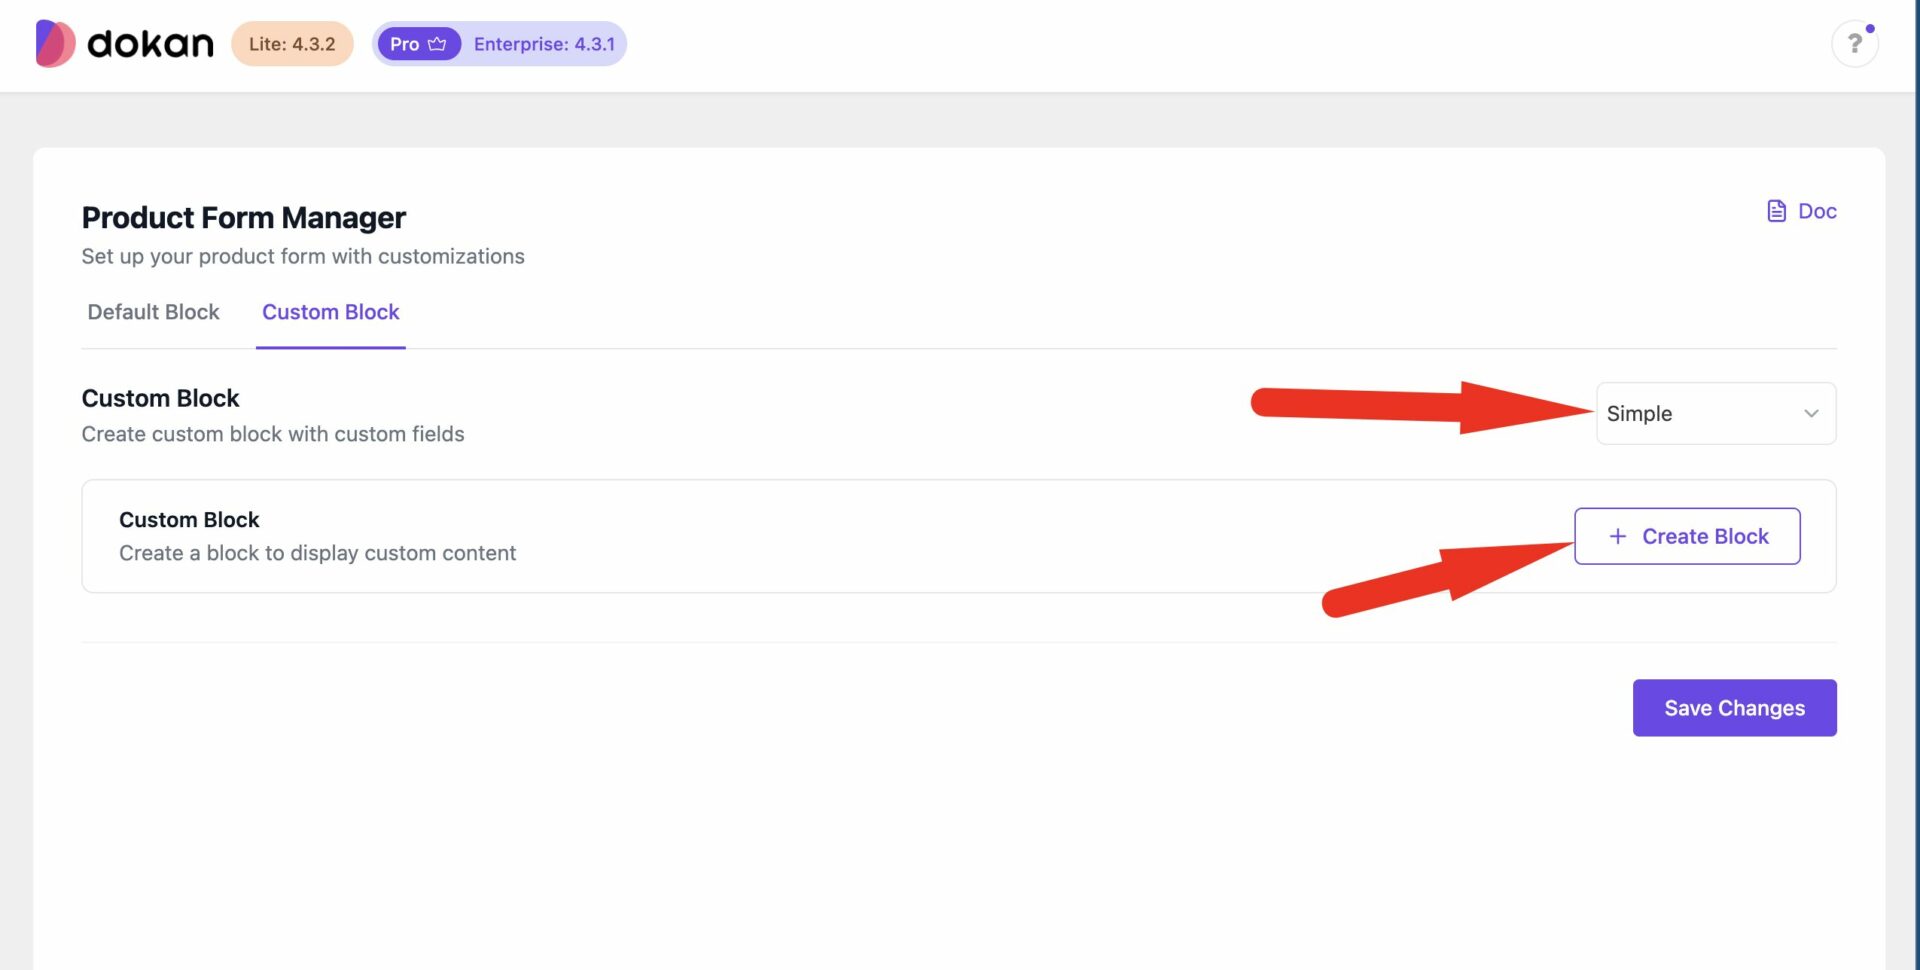
Then click on the Create Block button after choosing the product type-
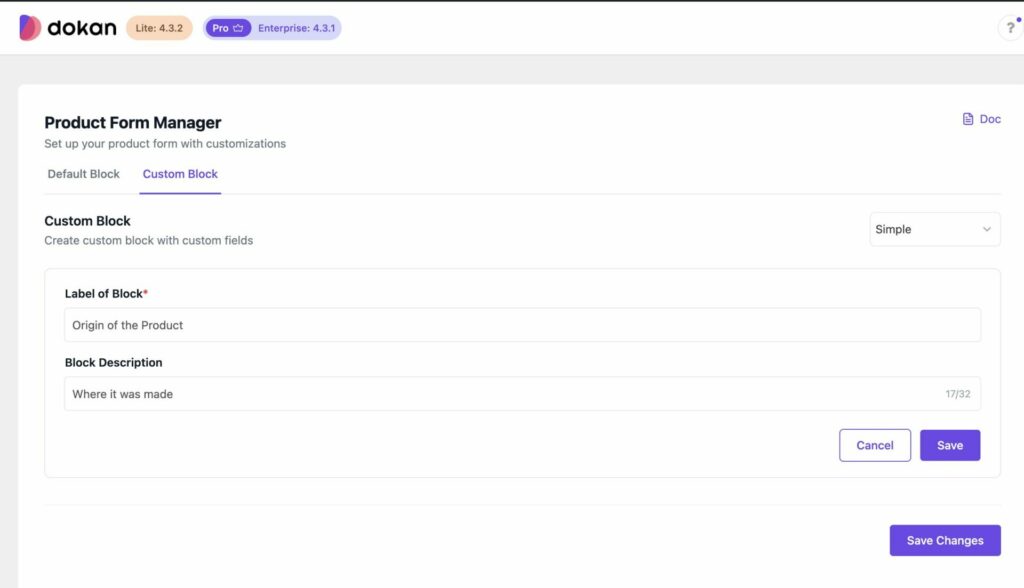
Add the Label of the Block and the block description and save changes-
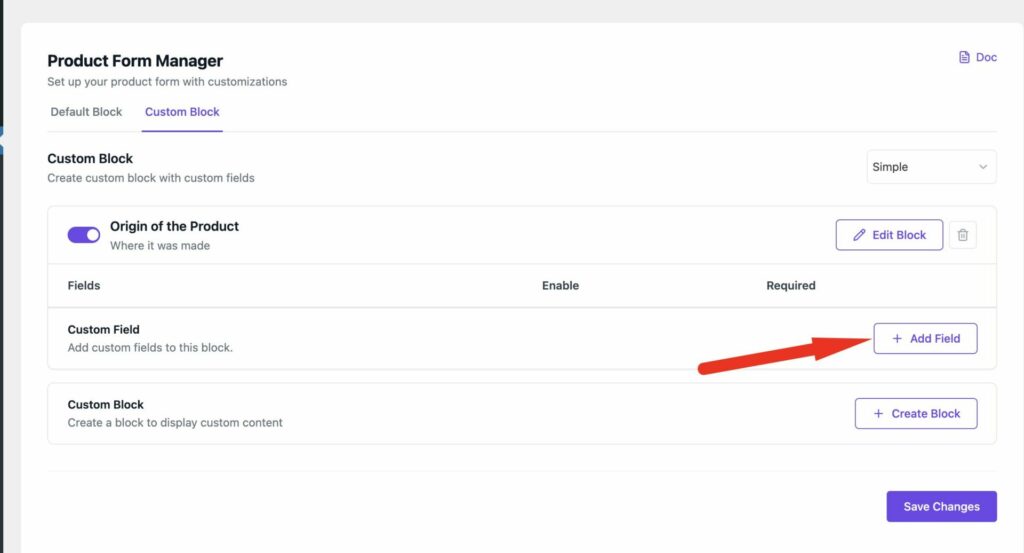
Then, for the custom block, you need to add the blocks. Click on the Add Field button-
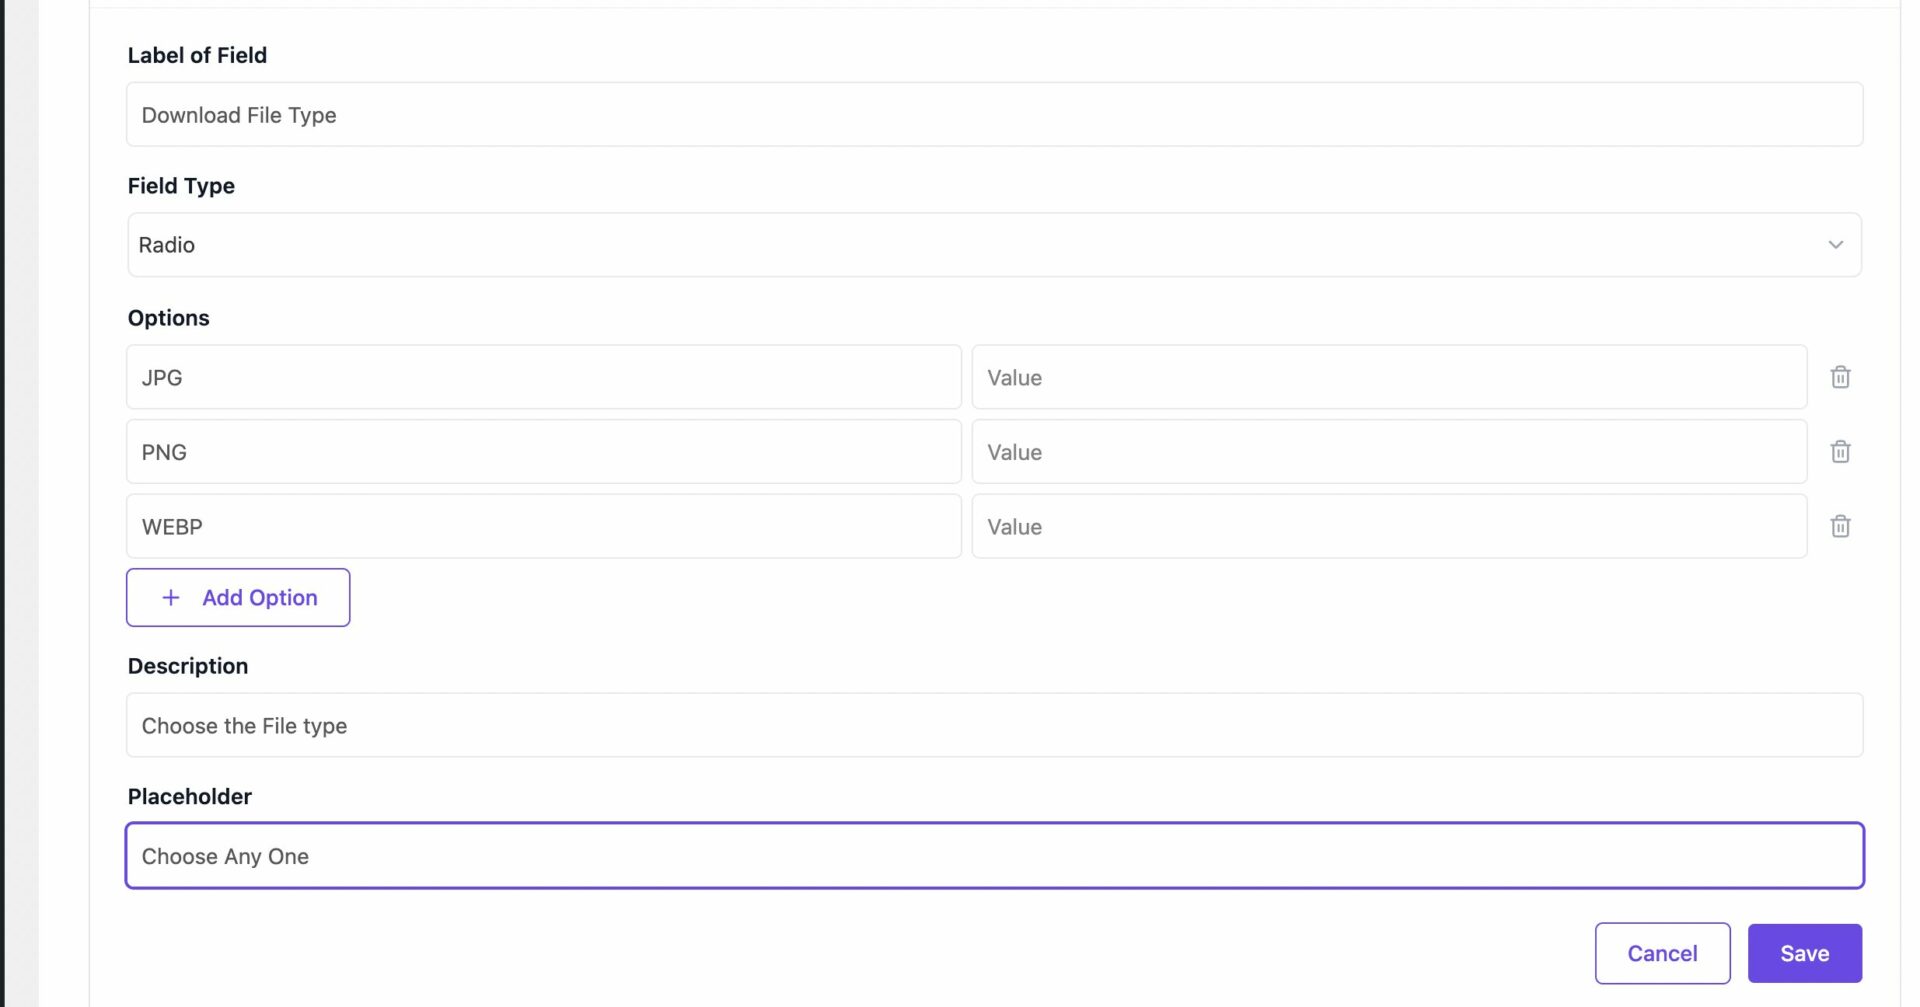
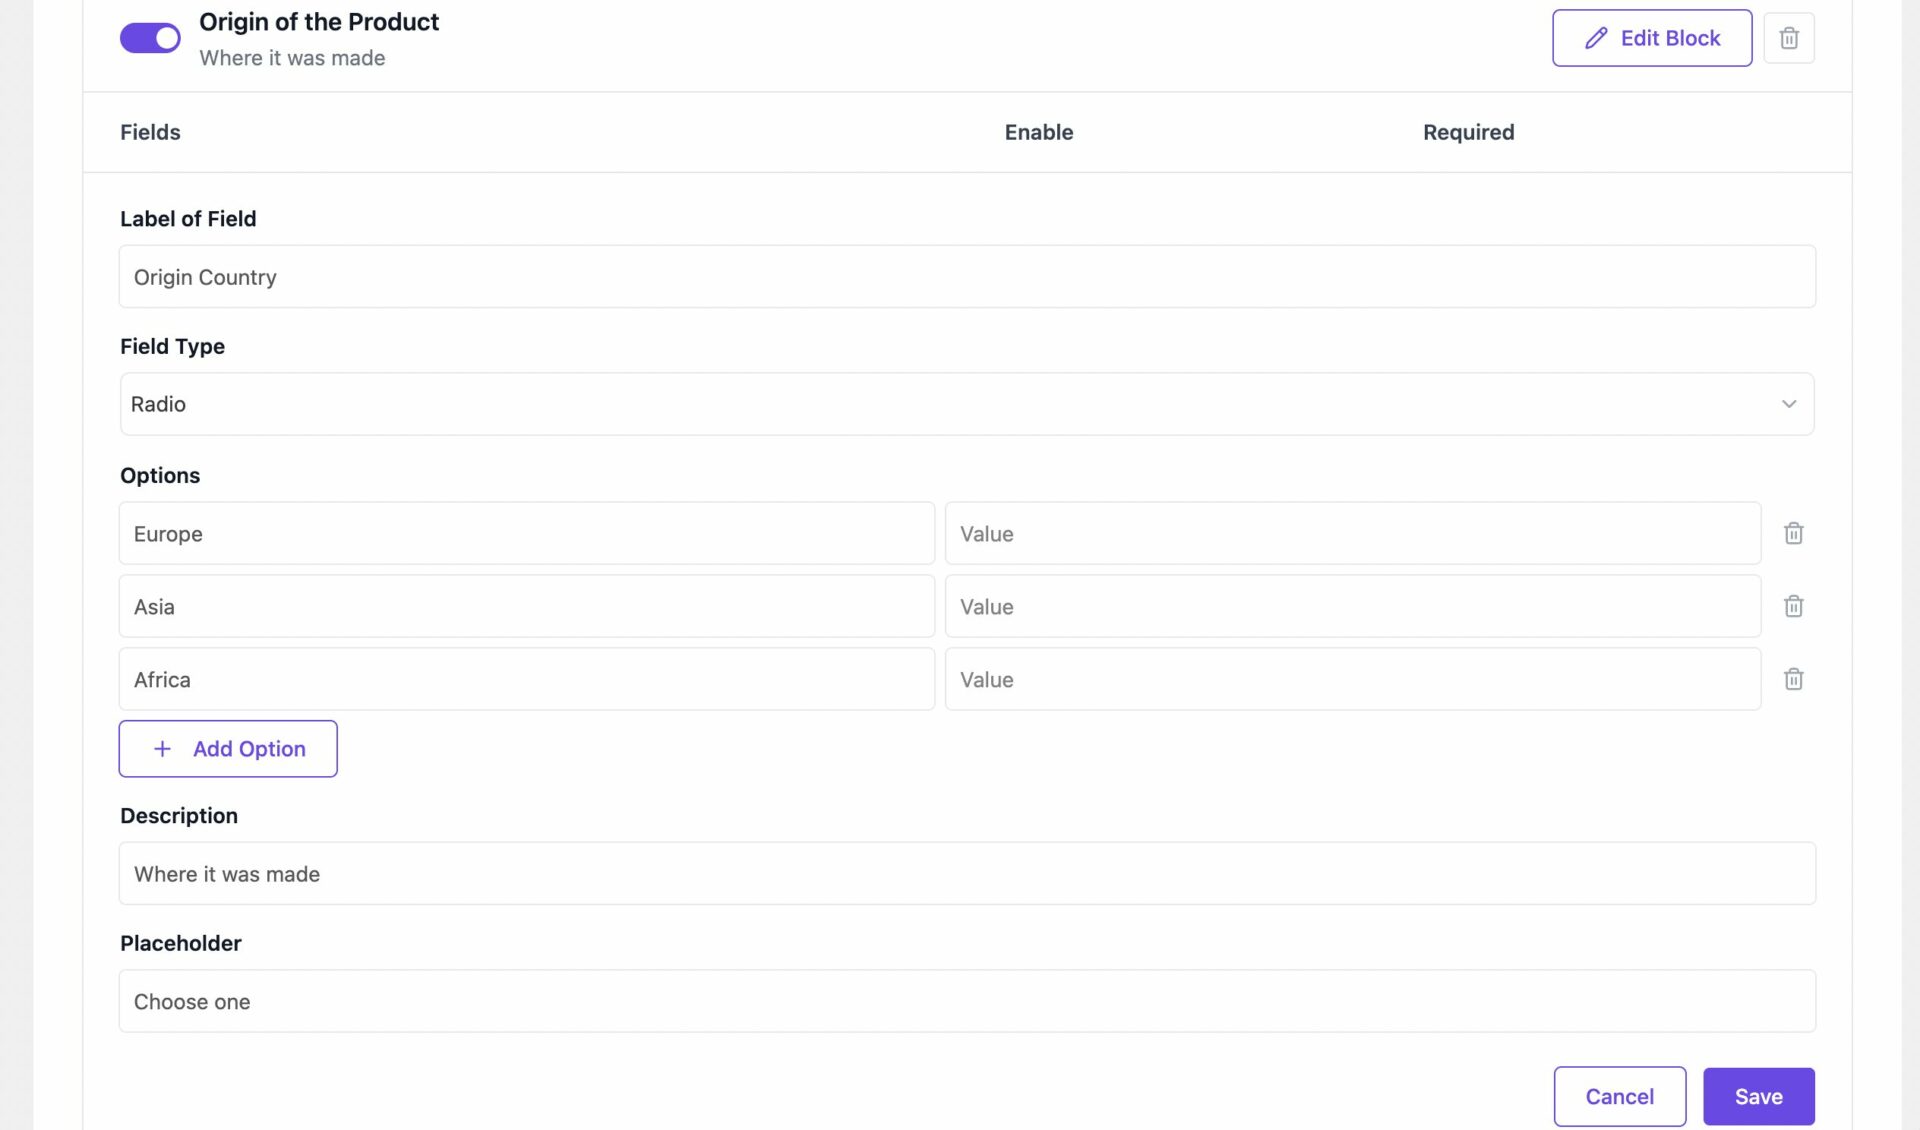
Now choose the field label, field type, description, placeholder and save the changes-
You can set multiple fields in the custom block.
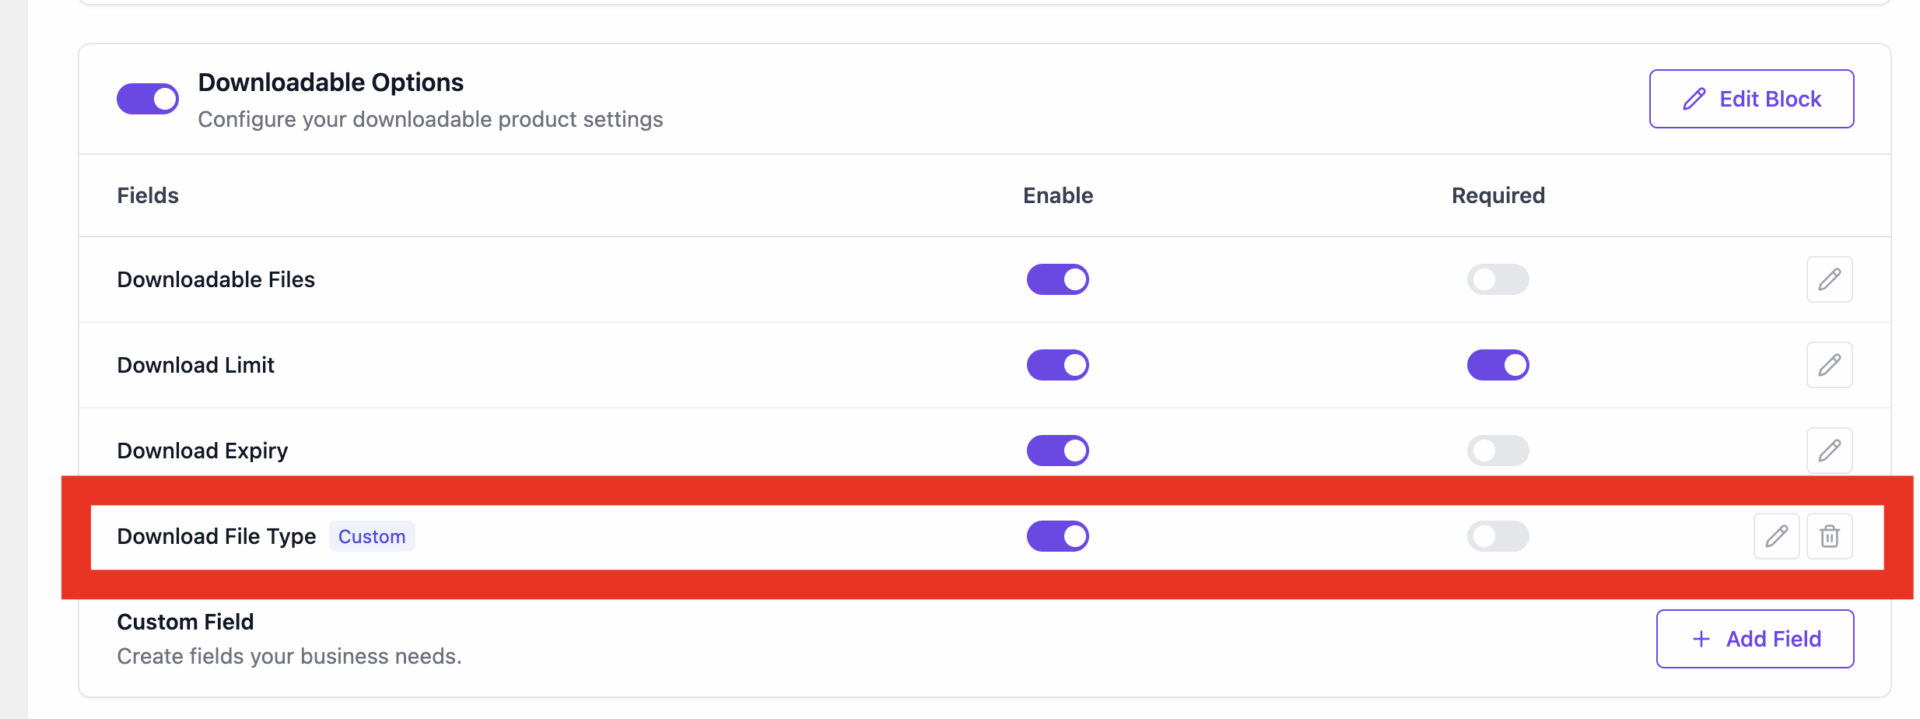
You will see that the custom block is now set.
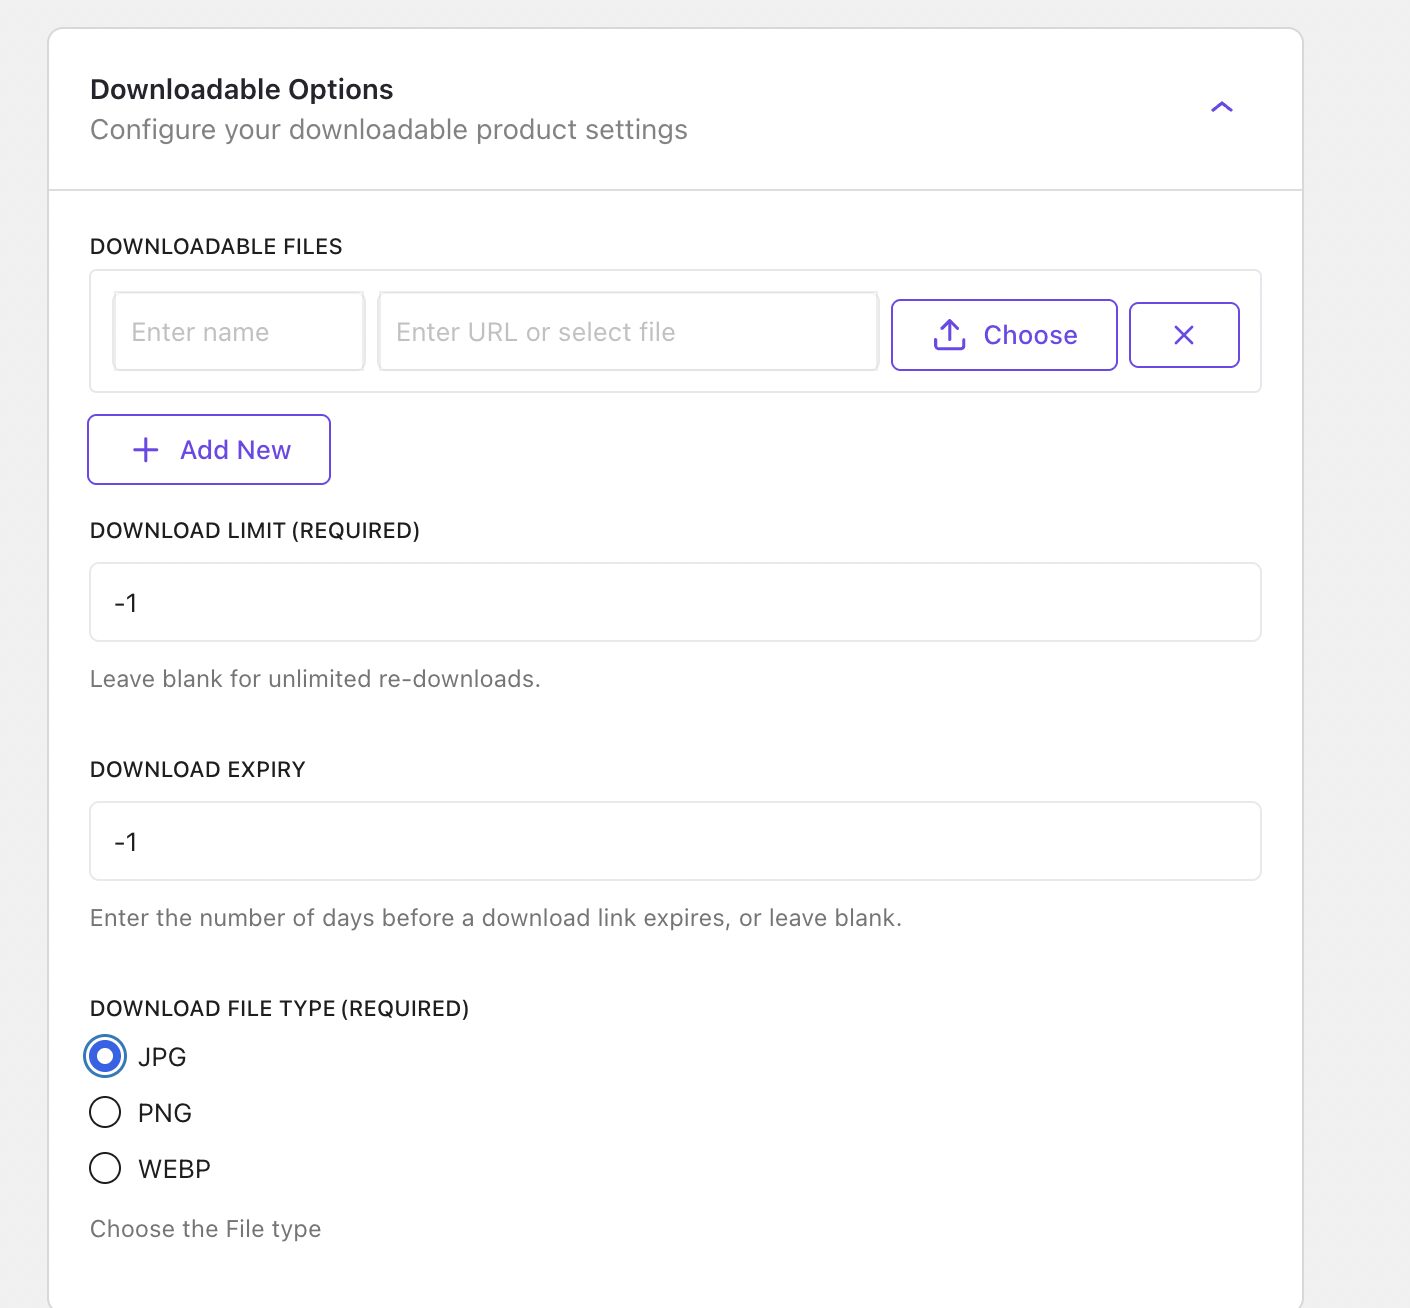
The vendors will be able to see the custom block in the product form in the dashboard-
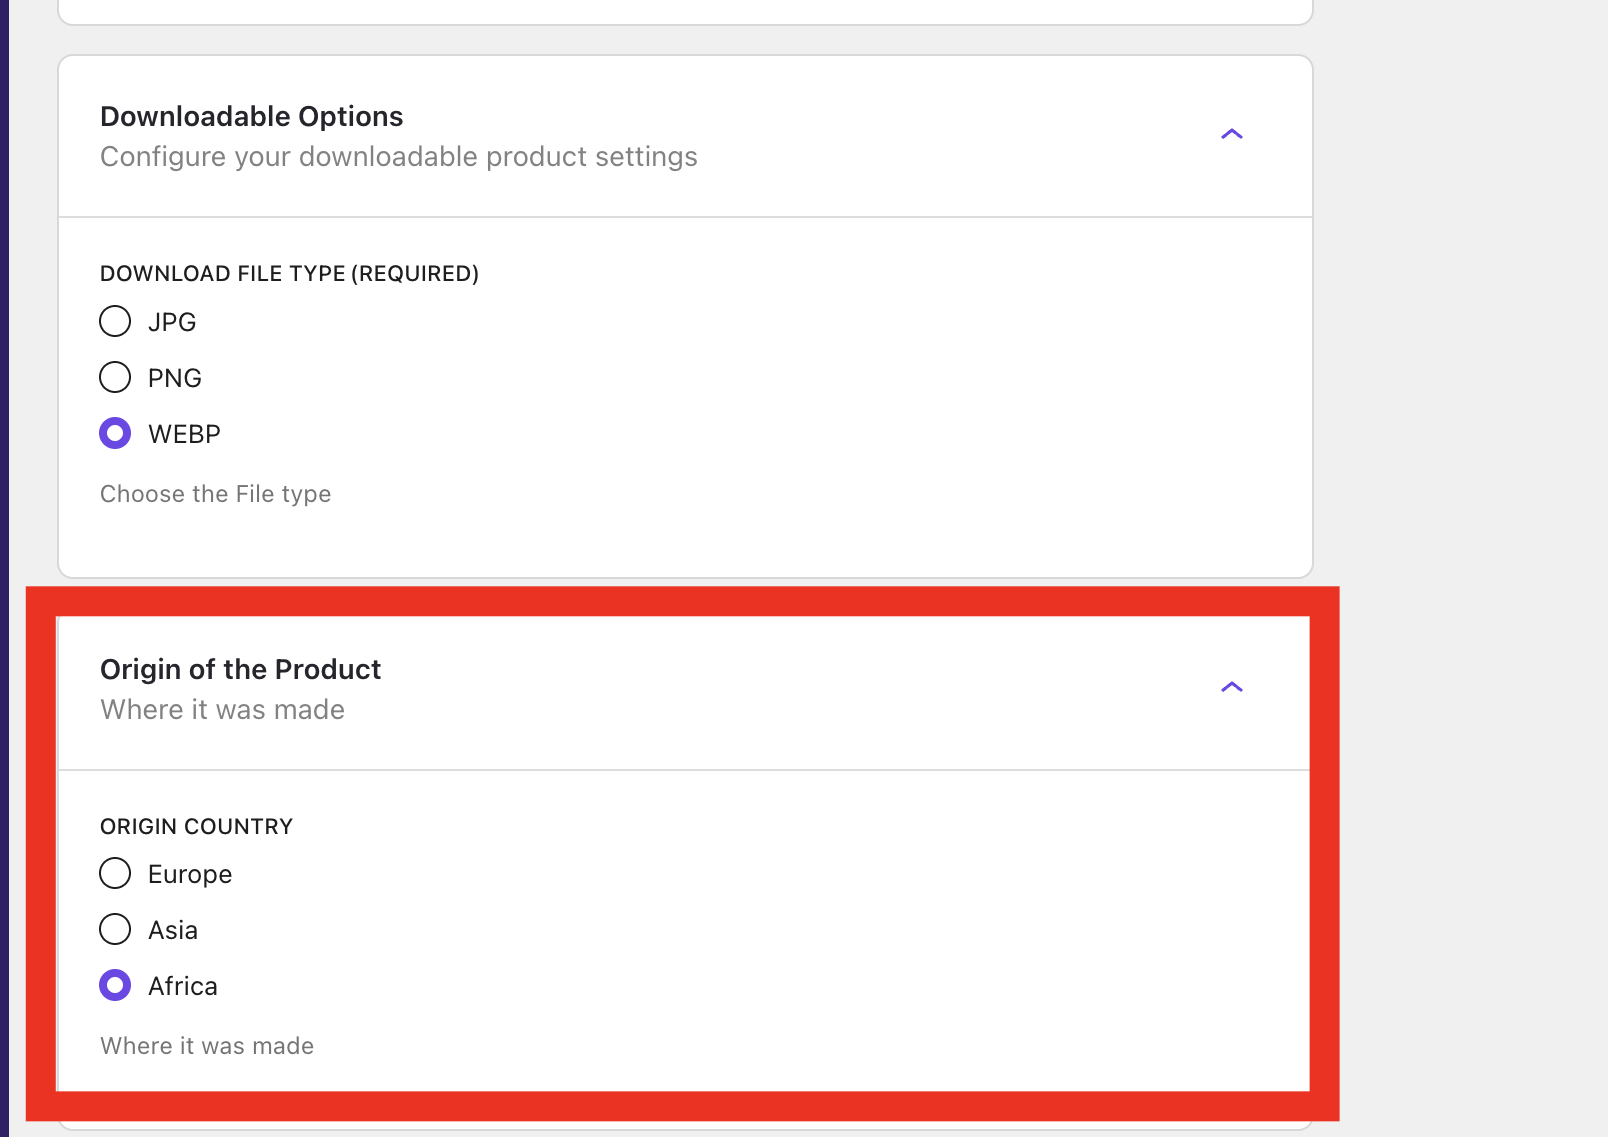
The customers will be able to see the field in the single product page-

This is how you can easily configure and use the Dokan Product Form Manager module.
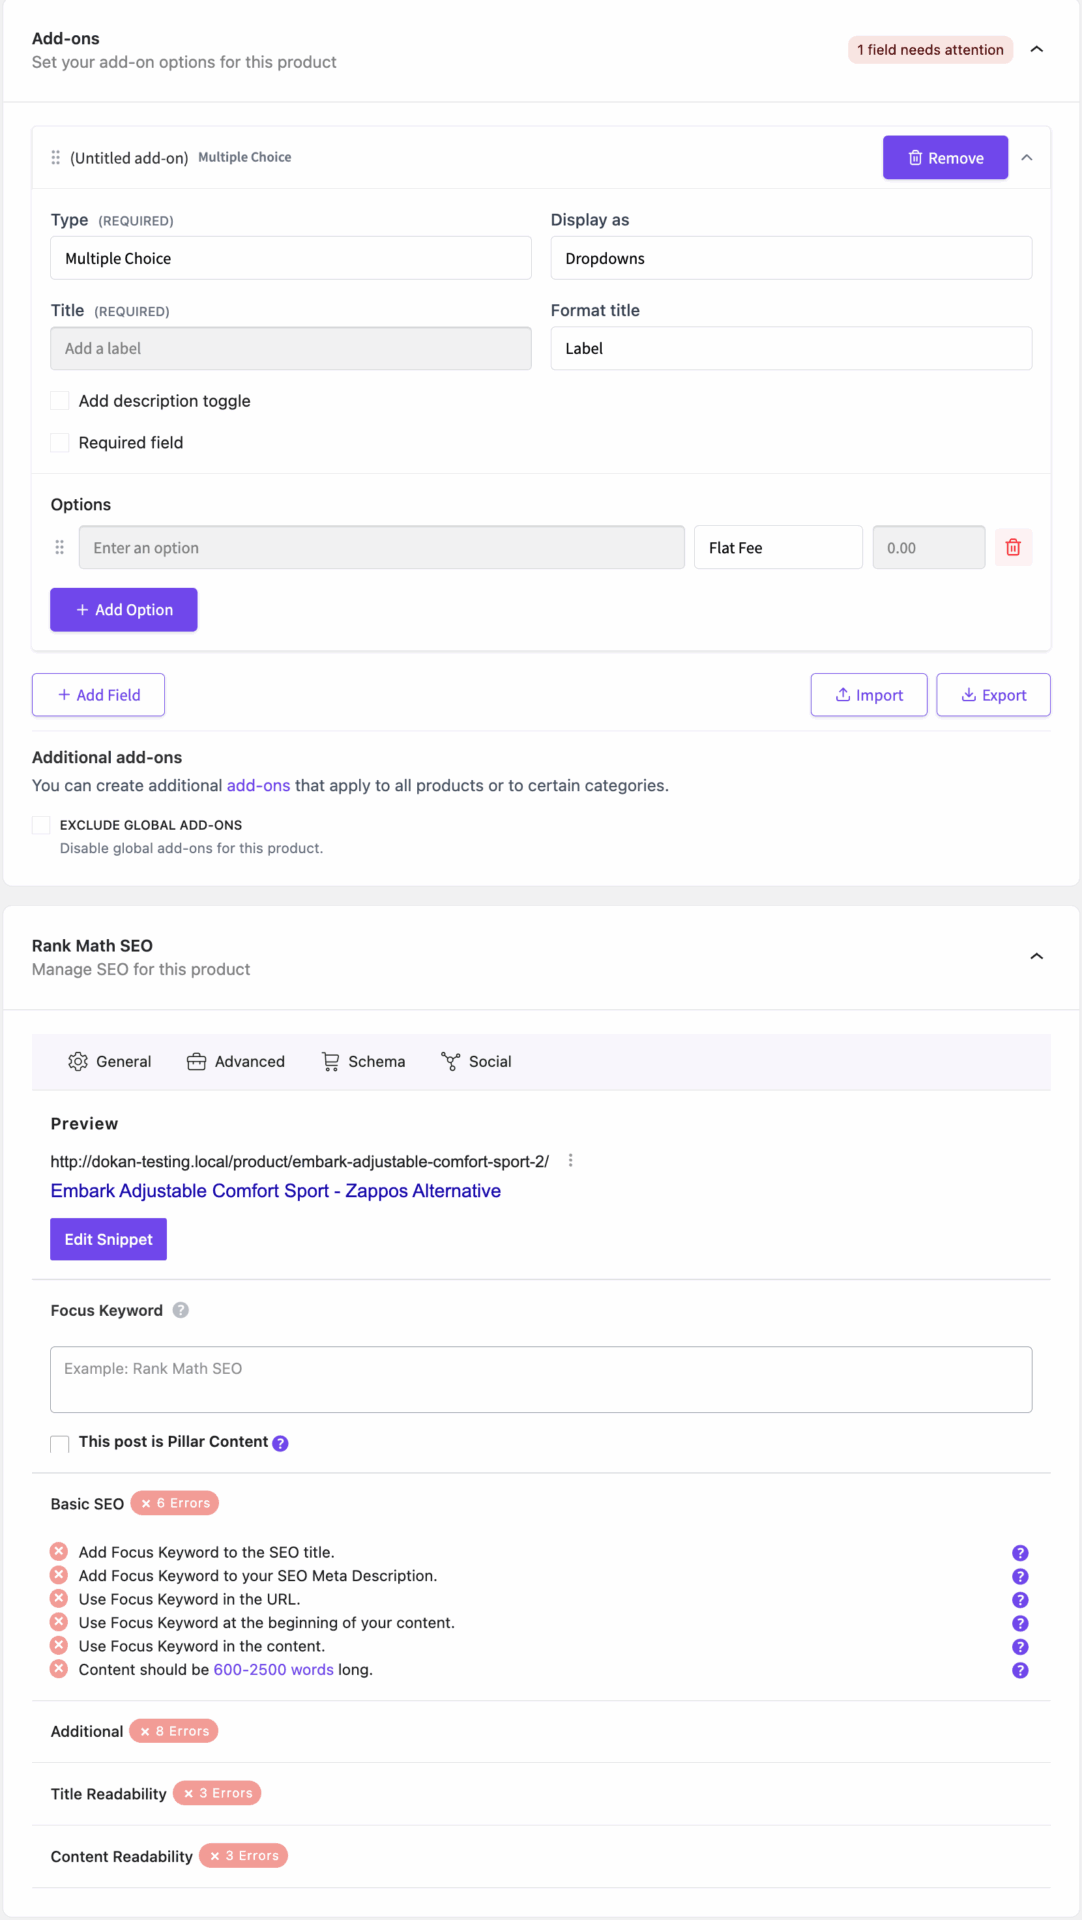
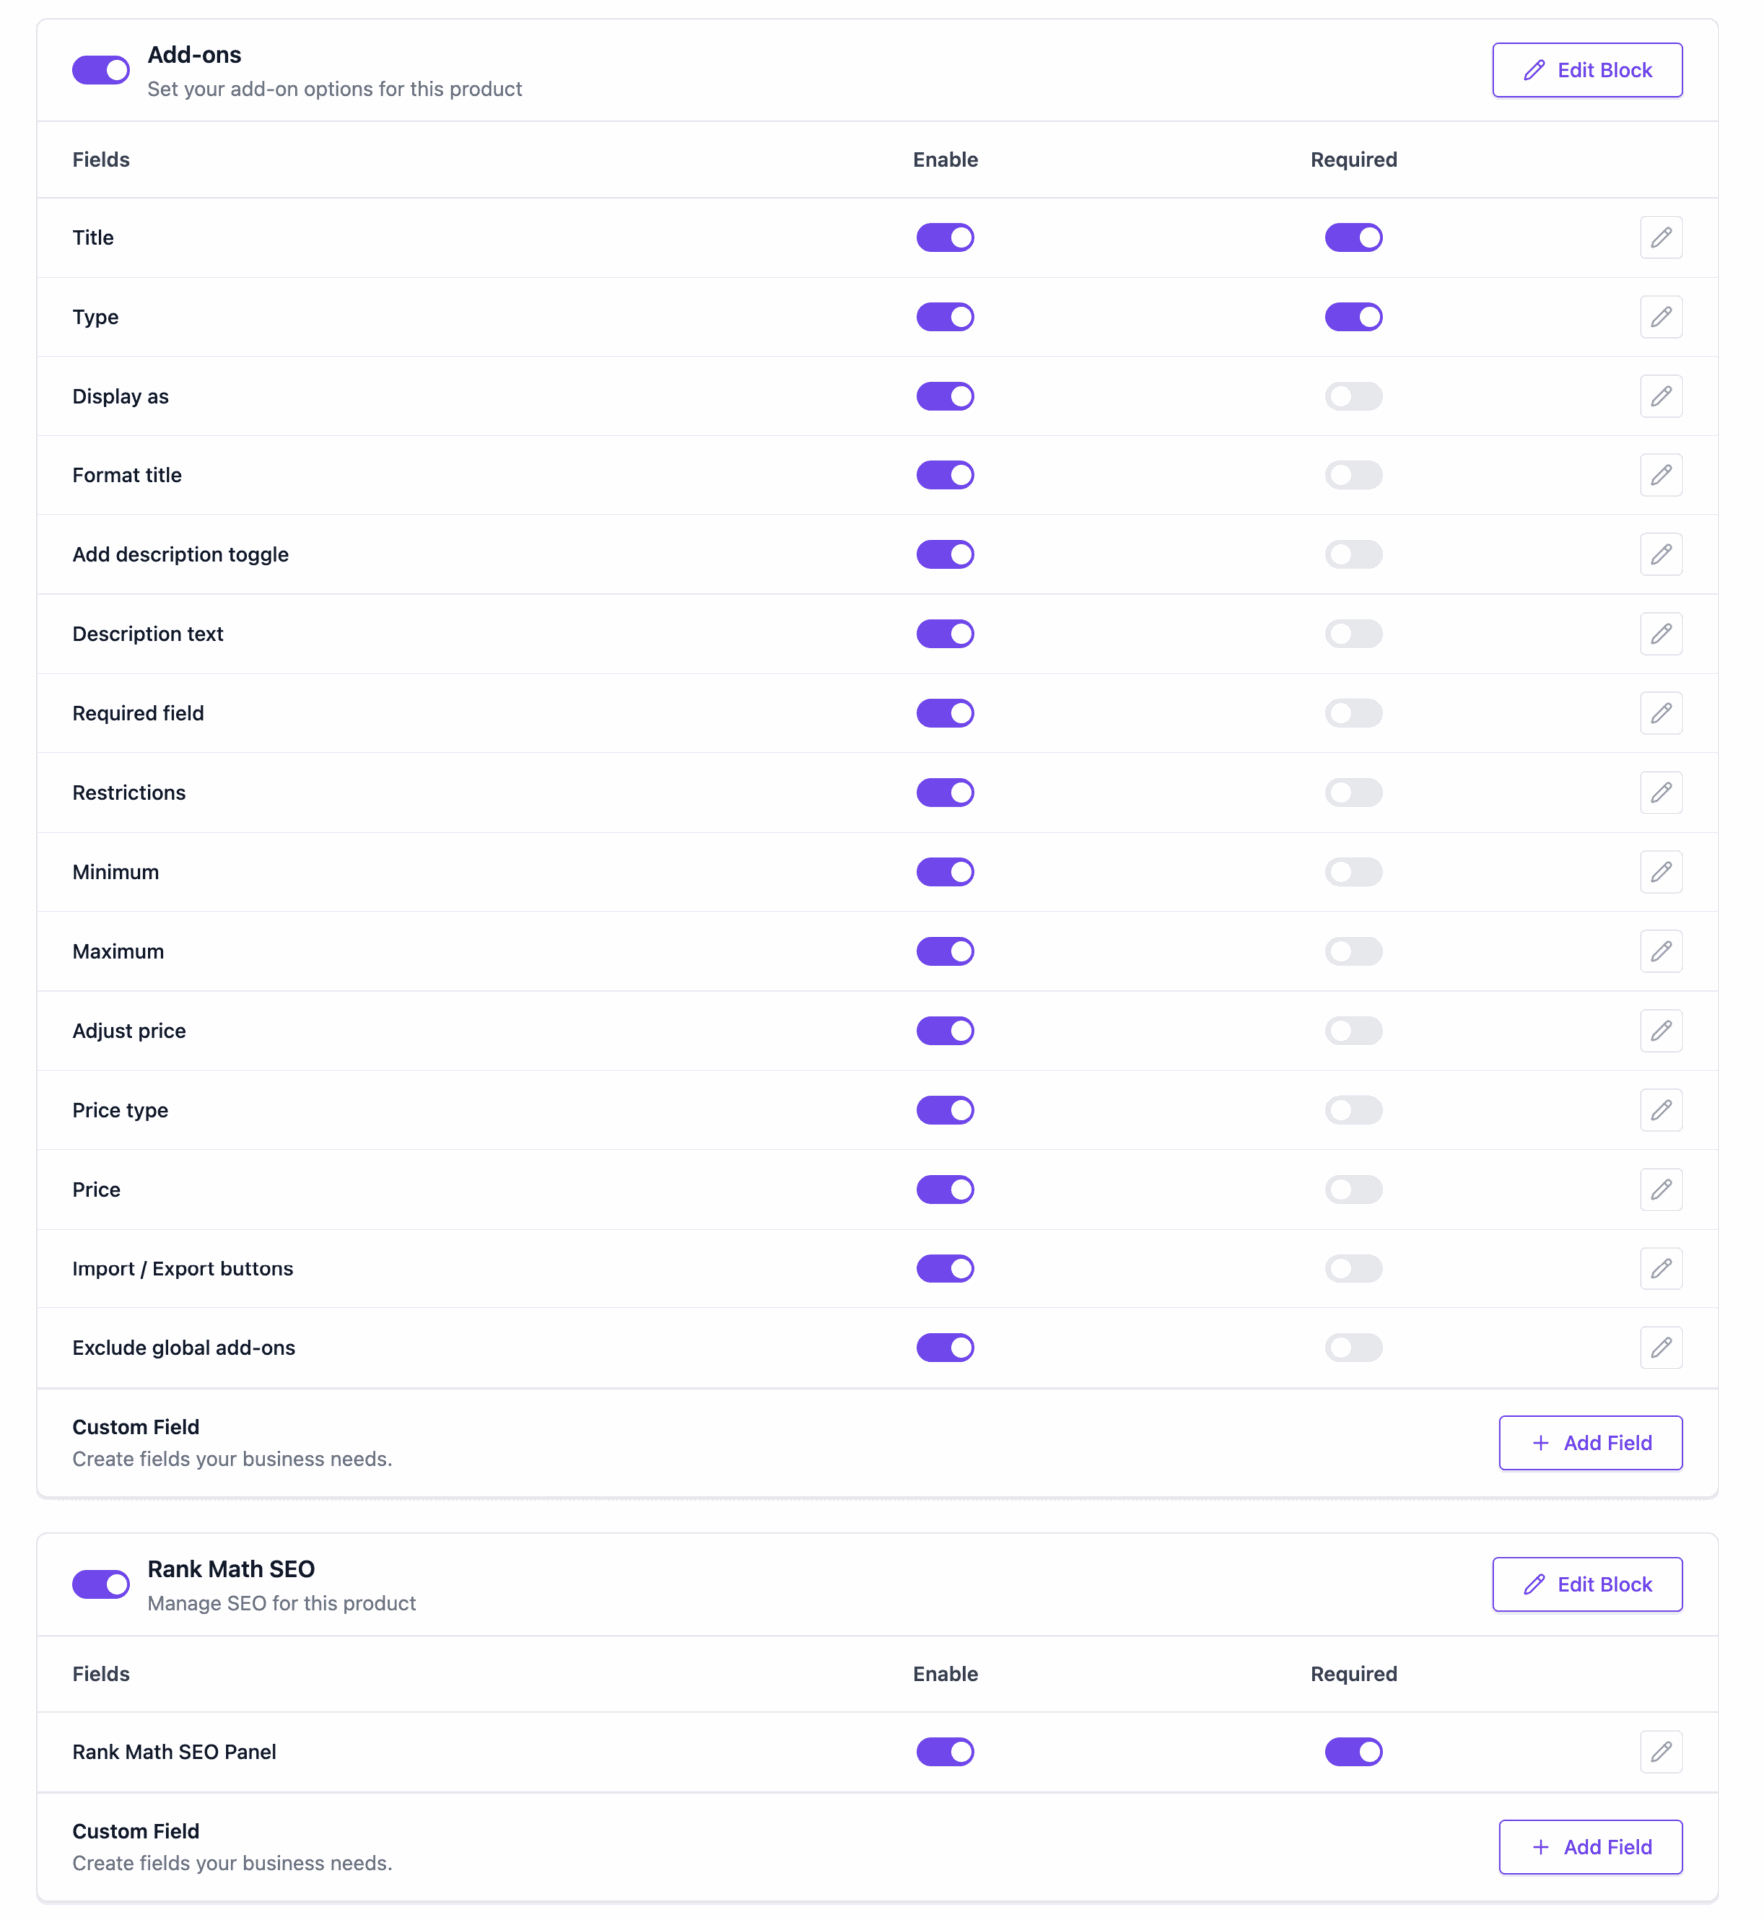
Rank Math SEO and Product Add-on Module Support
The product form manager module supports the Rank Math SEO and Product Add-on as well.
You can enable the fields from the backend-
Vendors can update the fields from the vendor dashboard as well-