
Set up an automated workflow with Dokan and n8n integration that posts every new vendor to Slack and lets you approve or reject them with a single tap, without ever logging into WordPress.
Workflow file: Dokan — Vendor Approval (Slack) - PUBLISH.json
| Who it’s for | Marketplace owners and admins. No coding required. |
| Time to set up | About 15 minutes |
| You’ll connect | Dokan (WordPress), n8n, and Slack |
Overview
Every 15 minutes, n8n checks your Dokan store for vendors waiting to be approved. When it finds one, it posts a card to your Slack channel with the vendor’s name, store, email, phone, and address, along with three buttons:
- Approve sets the vendor live on your store.
- Reject sets the vendor aside. They are kept and can be recovered later.
- View profile opens the vendor’s store page.
You tap a button in Slack, and Dokan handles the rest, including sending the welcome or rejection email automatically.
Every 15 min  →  n8n asks Dokan "any vendors waiting?"
              →  posts each new vendor to Slack

[ Approve ] tap  →  vendor set ACTIVE    →  Slack confirms
[ Reject  ] tap  →  vendor set INACTIVE  →  Slack confirms
Good to know: Dokan needs no special setup, and n8n does all the checking on a timer. The buttons are simple links, so you do not need any custom Slack app configuration either.
Before You Begin
Gather these five values first. You will paste them into the workflow during setup, so keep them somewhere safe as you go.
| What you need | Where to find it |
|---|---|
| Dokan site address | Your store URL, for example https://yourstore.com |
| n8n public address | Your n8n URL, for example https://yourname.app.n8n.cloud. On n8n Cloud, this is the address in your browser when logged in. |
| Slack channel ID | See “Find your Slack channel ID” below. |
| WordPress Application Password | See “Create a WordPress Application Password” below. |
| A secret token | A long random string you make up, 30 or more mixed letters and numbers. This stops strangers from approving vendors. Example: kf83Jd0aPqR7tZ2xLm9Wn4Vb6Yc1Hs5Eg |
Find your Slack channel ID
- In Slack, click the channel name at the top, for example
#vendor-approvals. - In the popup that opens, scroll to the bottom.
- Copy the Channel ID. It looks like
C0XXXXXXX.
Create a WordPress Application Password
This lets n8n read your vendors and change their status. It is separate from your normal login password.
- Log in to WordPress and go to Users → Profile on your admin account.
- Scroll to Application Passwords.
- Type a name such as
n8n, then click Add New Application Password. - Copy the password that appears. It looks like
abcd EFGH ijkl MNOP.
Important: WordPress shows this password only once. Save it now, because you cannot view it again later.
Step 1: Import the Workflow
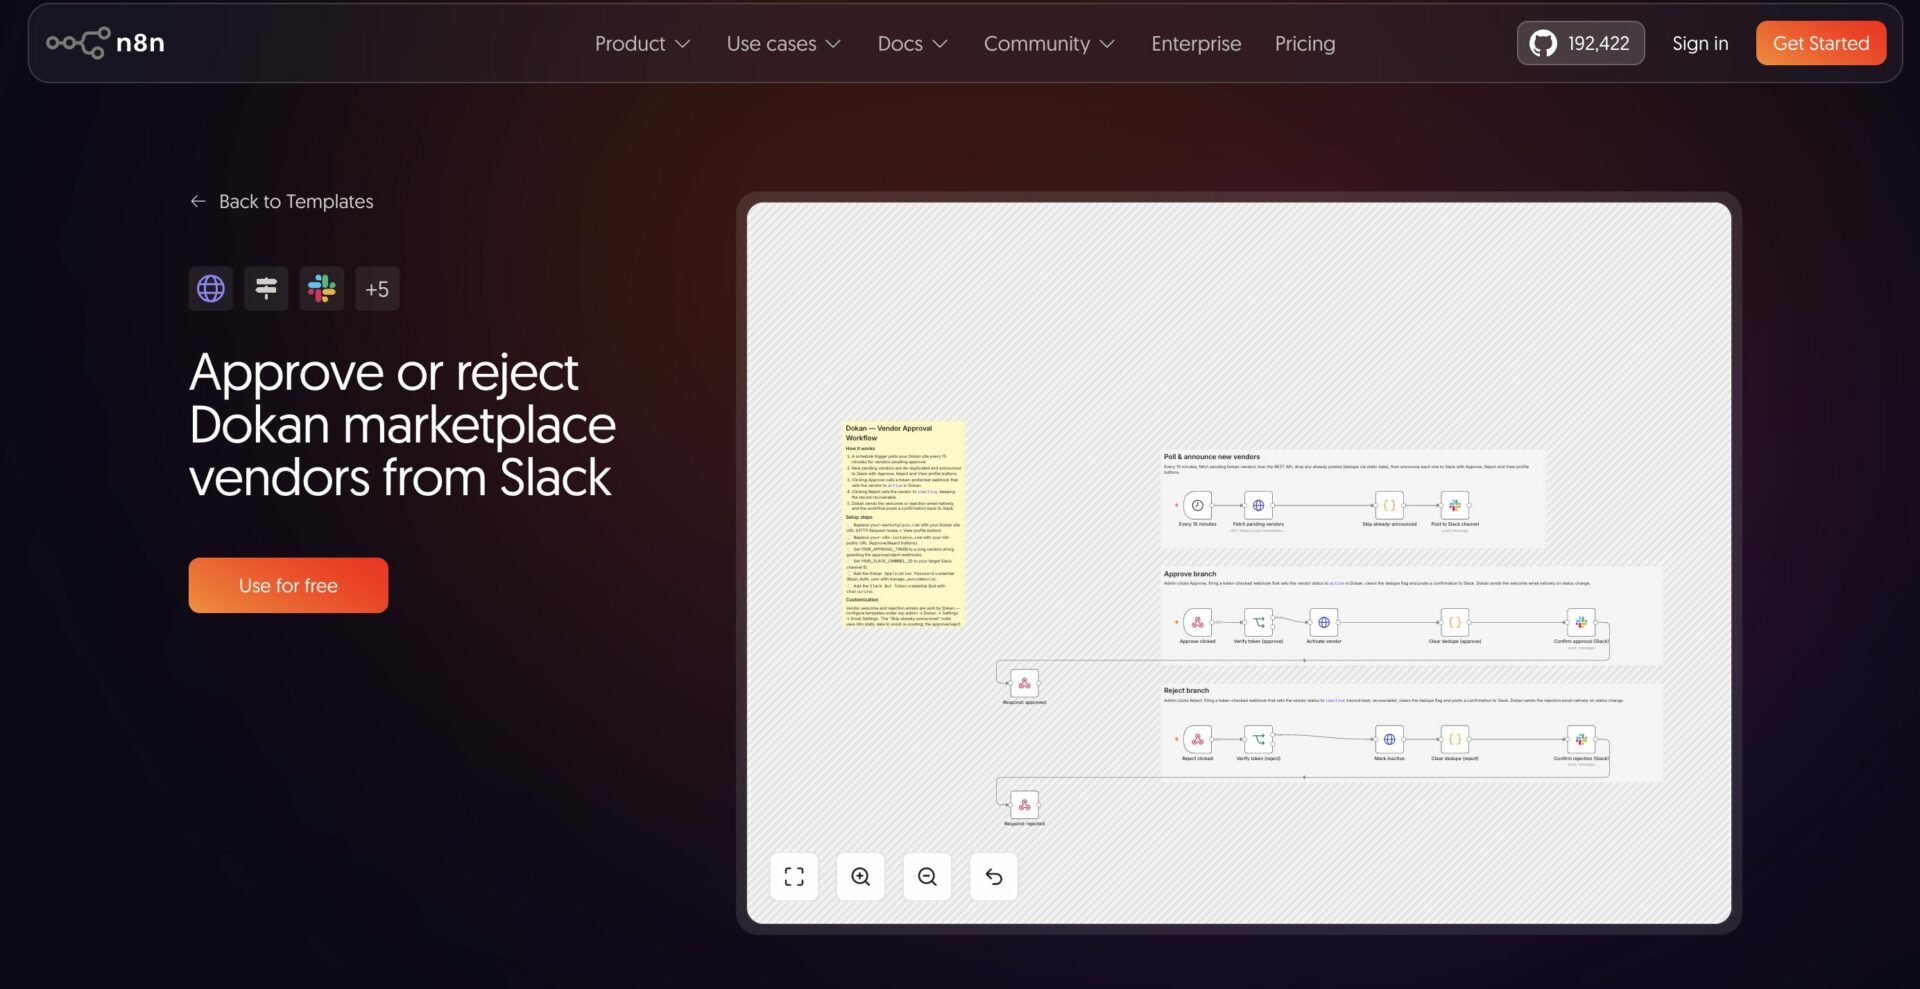
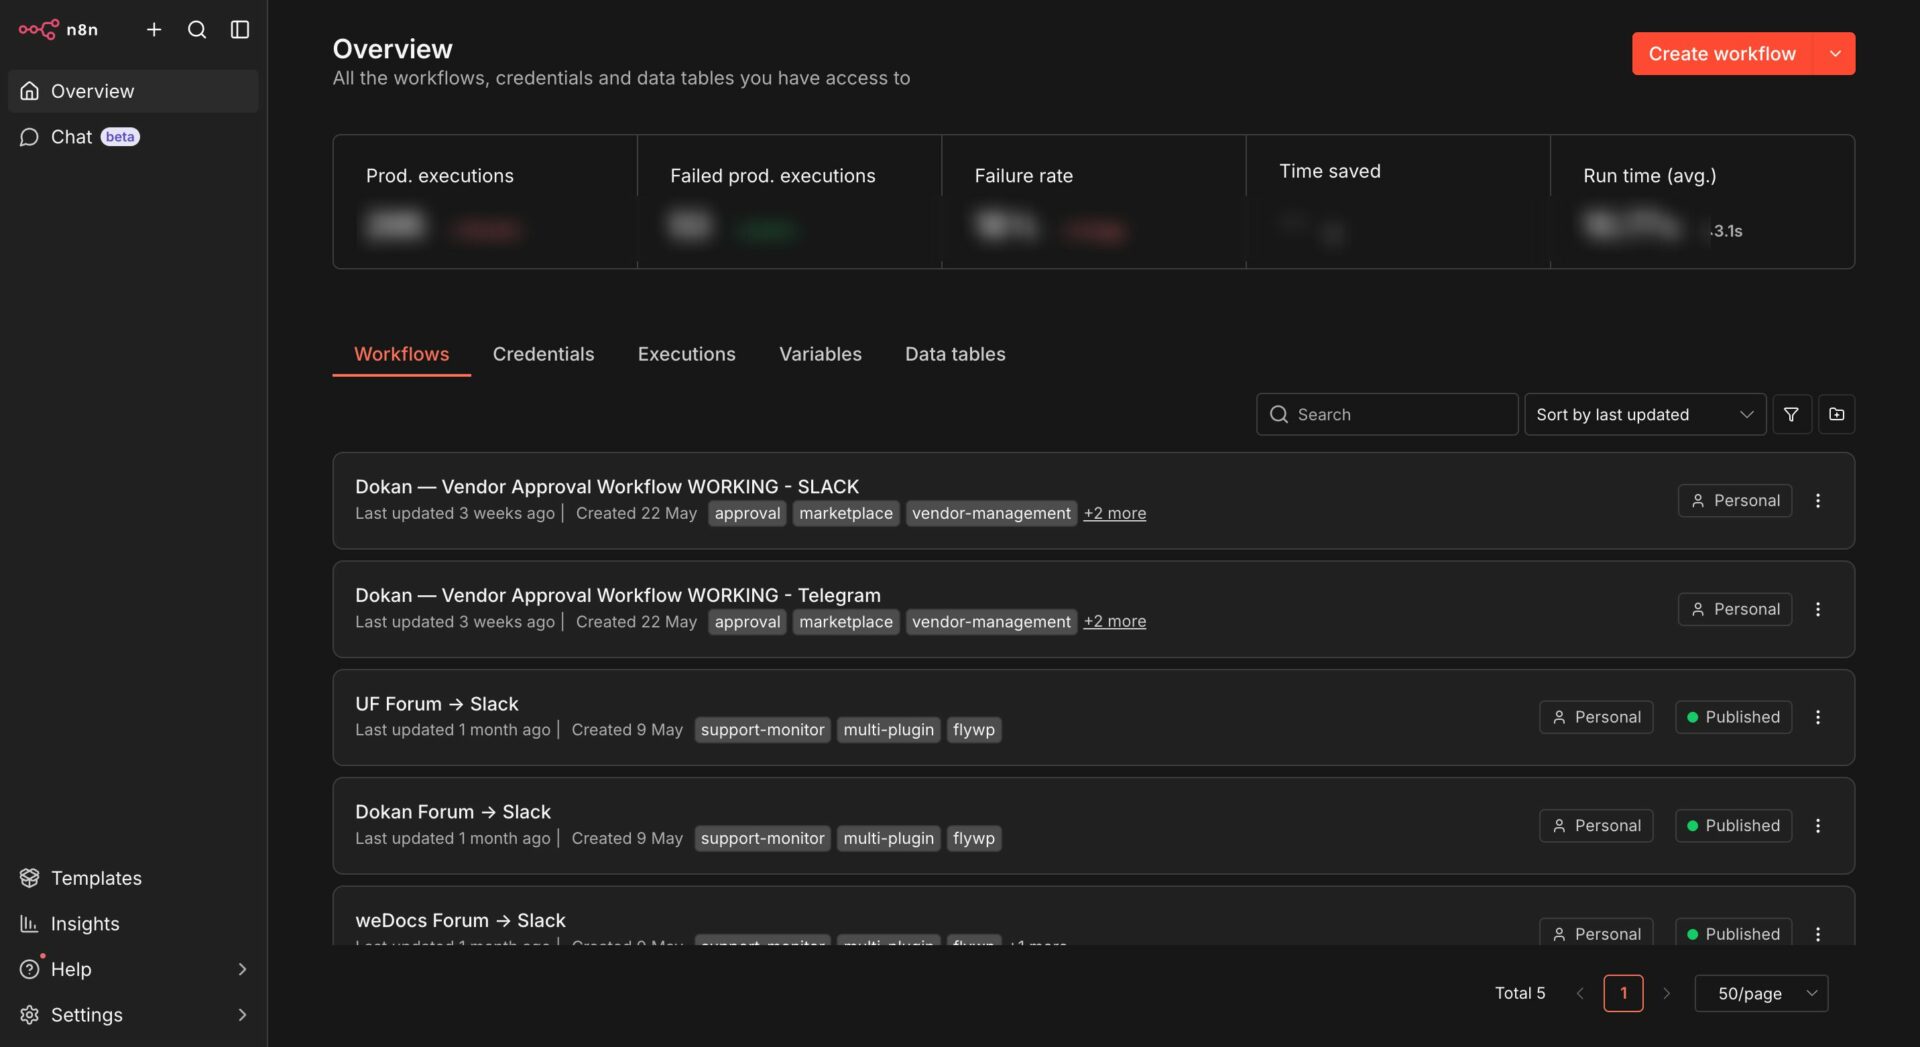
- Log in to n8n.
- In the top-right corner, click Add workflow or the + button.
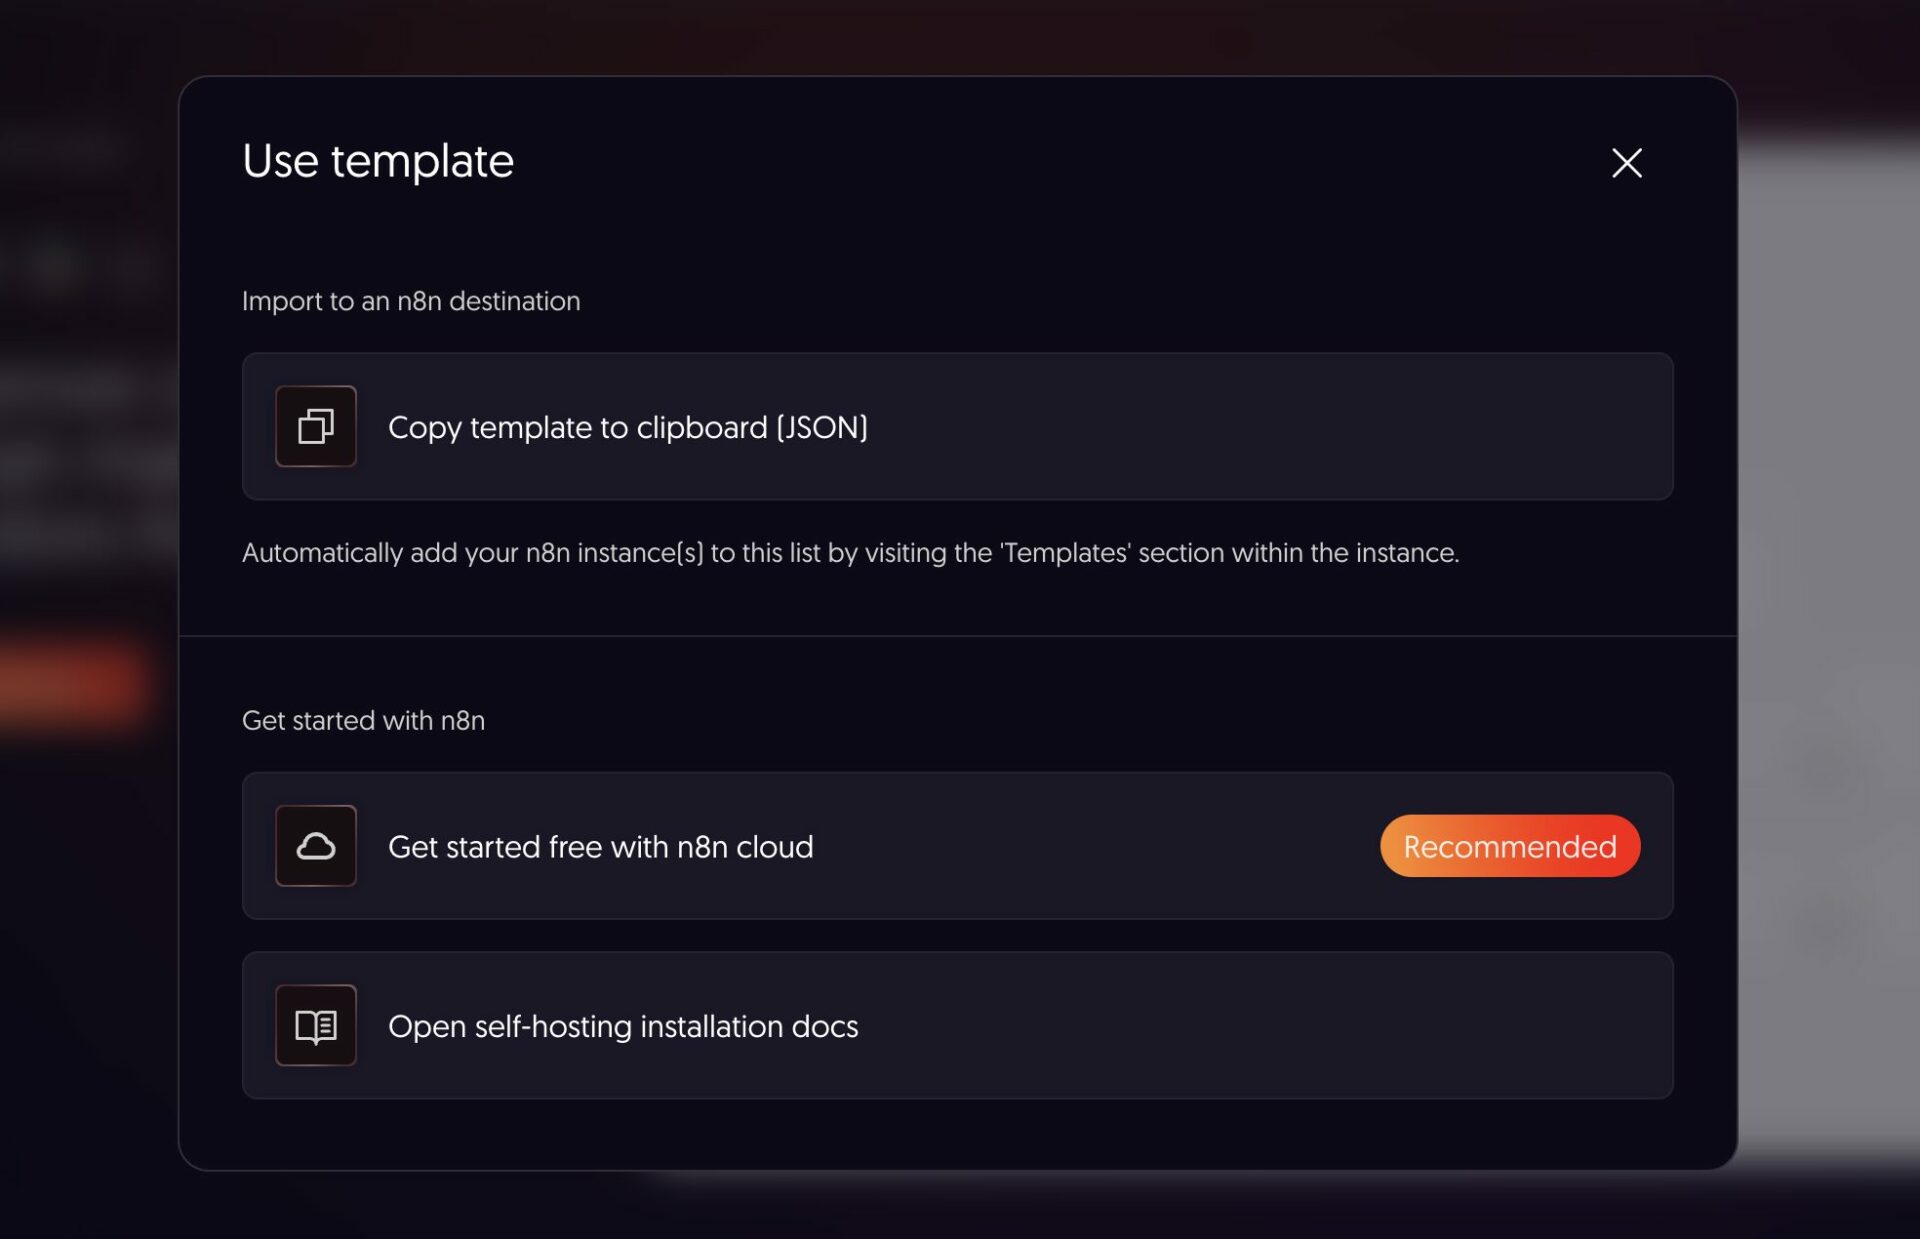
- On the blank workflow, click the three dots (⋯) in the top-right corner, then choose Import from File.
- Select the file
Dokan — Vendor Approval (Slack) - PUBLISH.json.
You will find the workflow here.
The workflow loads as a set of connected boxes with yellow sticky notes that explain each part. You only need to edit a few fields. The rest already works.
Step 2: Replace the Placeholders
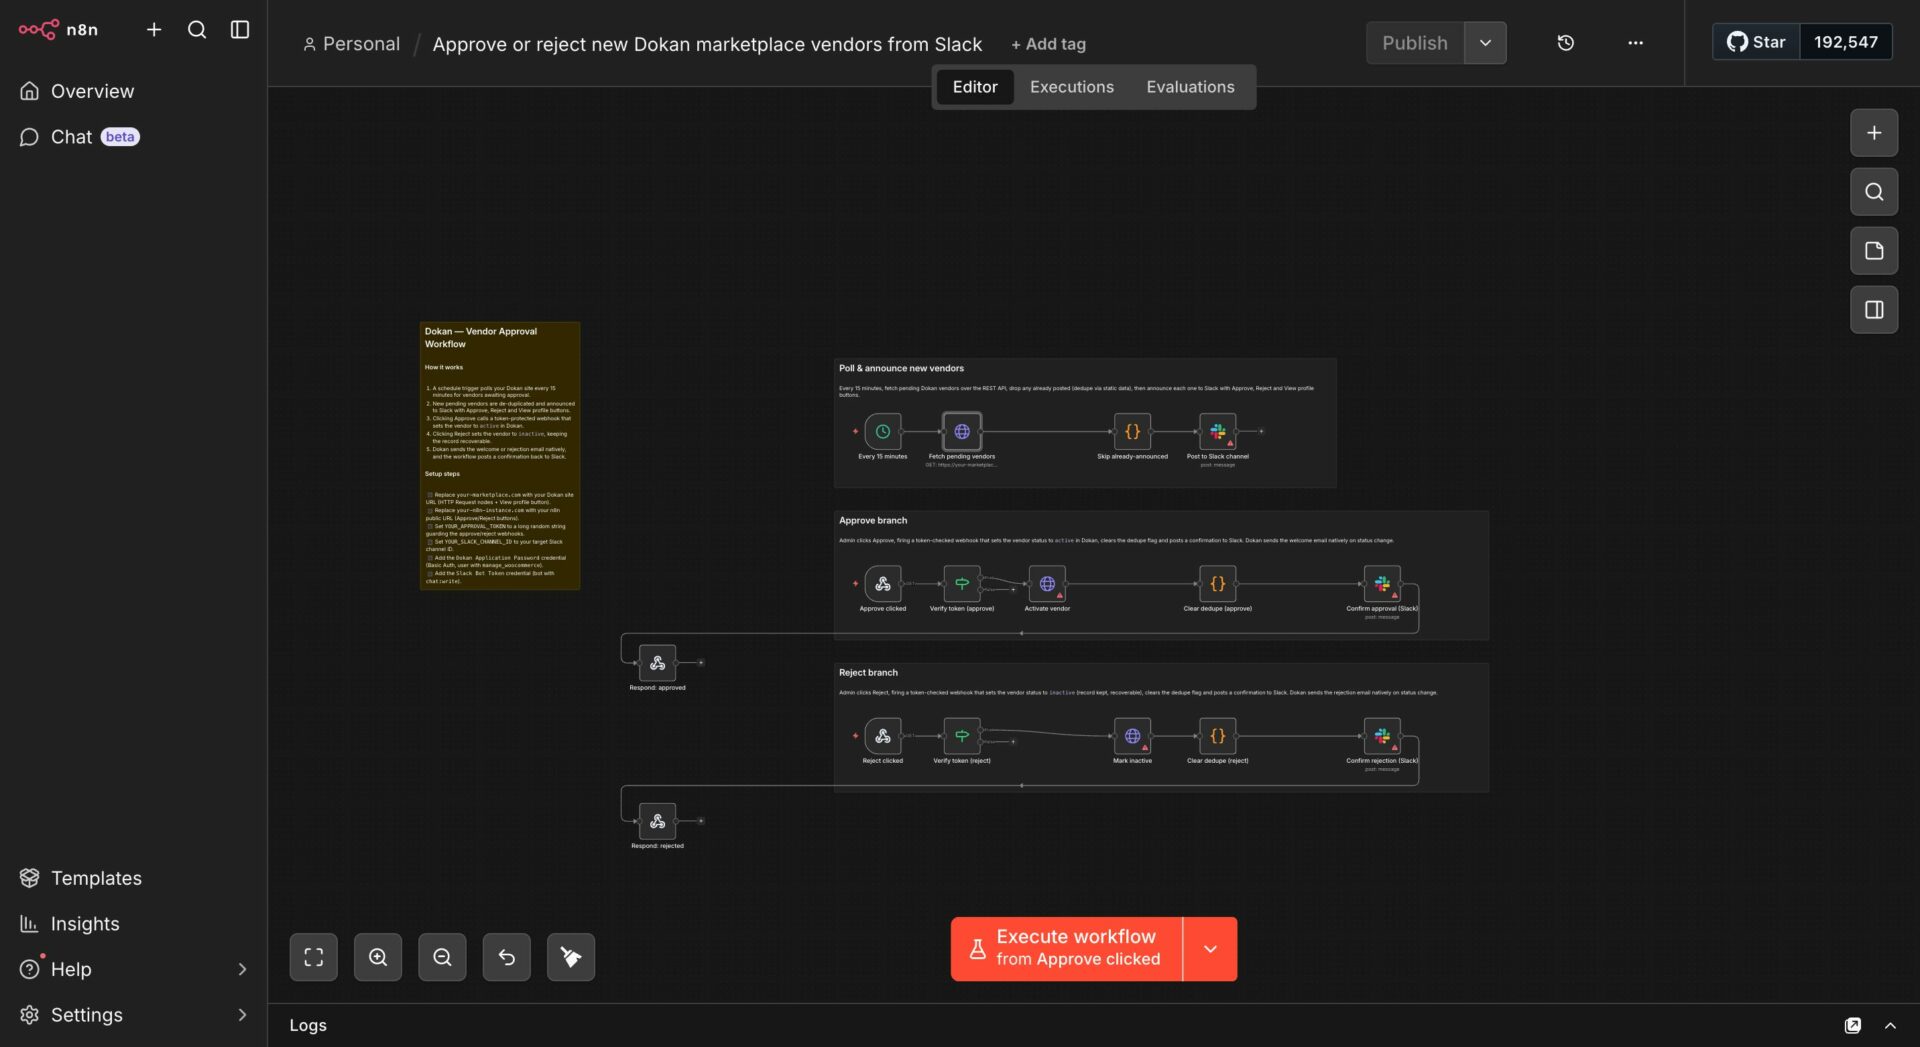
The imported workflow contains sample values. Find each one and type your real value over it.
| Placeholder | Replace with | Where it appears |
|---|---|---|
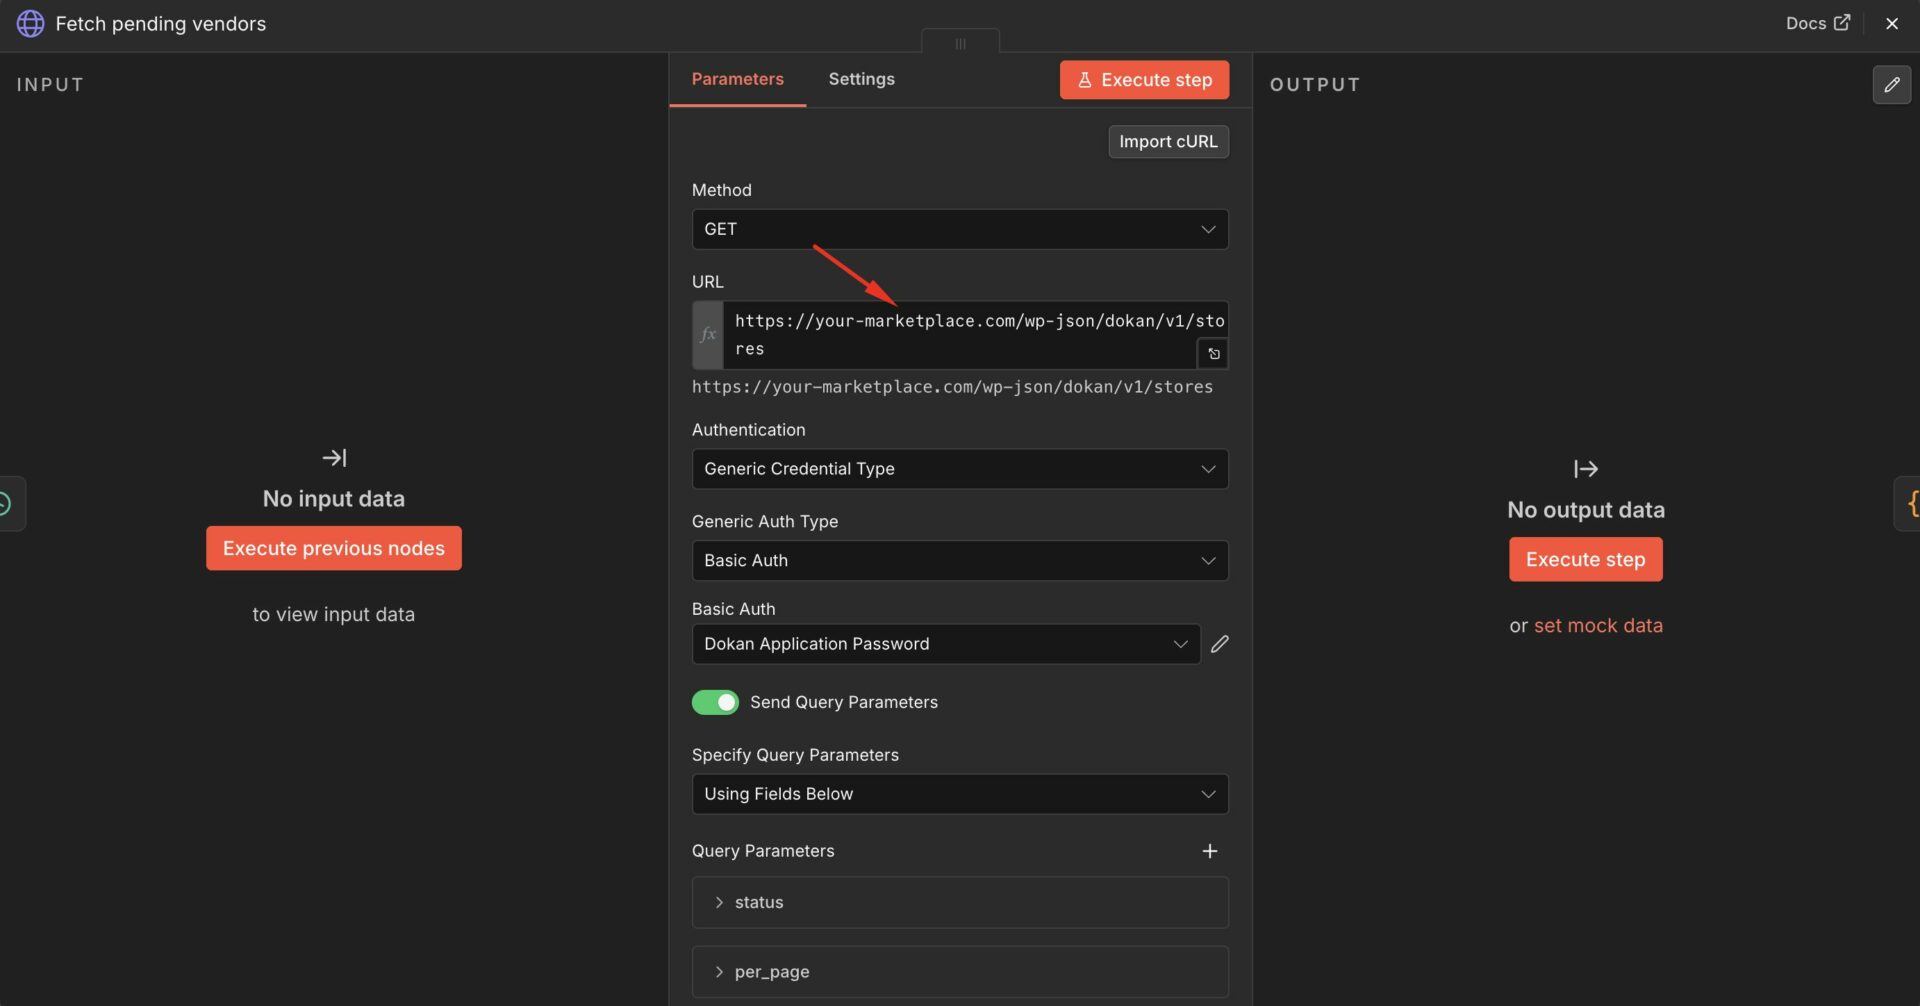
your-marketplace.com | Your Dokan site address | “Fetch pending vendors”, “Activate vendor”, “Mark inactive”, and the View profile button |
your-n8n-instance.com | Your n8n address | The Approve and Reject buttons inside the Slack message |
YOUR_APPROVAL_TOKEN | Your secret token | The Approve and Reject buttons, and both “Verify token” boxes |
YOUR_SLACK_CHANNEL_ID | Your Slack channel ID (C0XXXXXXX) | The three Slack boxes |
To edit a value: double-click a box to open it, find the placeholder text, type your value over it, then close the box. Repeat for each placeholder.
Here is the “Fetch pending vendors” workflow-
Important: The secret token must be exactly the same in every location. If it does not match, clicking Approve will fail with a “bad token” error.
Step 3: Connect Your Accounts
n8n needs permission to talk to your store and to Slack.
Connect your Dokan store
- Double-click the Fetch pending vendors box.
- Next to Credential, click Create New, then choose Basic Auth.
- Set User to your WordPress admin username.
- Set Password to the Application Password you created earlier.
- Save.
- Open the Activate vendor box and the Mark inactive box. For each, select the same credential from the dropdown. You do not need to type it again.
Connect Slack
- Double-click the Post to Slack channel box.
- Next to Credential, click Create New, sign in to Slack, then click Allow.
- Open the Confirm approval box and the Confirm rejection box. For each, select the same Slack credential.
- Make sure your Slack bot is in the channel. In Slack, type
/invitein your channel and add the bot if needed.
Step 4: Turn On the Workflow
In the top-right corner of the workflow, switch the Active toggle to ON.
The 15-minute checker starts, and the Approve and Reject buttons go live. Setup is complete.
Step 5: Test the Workflow
Run one full test before relying on it.
- Open a private or incognito browser window and register a test vendor on your store. Leave them pending.
- Wait up to 15 minutes, or click Execute Workflow in n8n to check right away.
- Confirm a vendor card appears in your Slack channel with Approve, Reject, and View profile.
- Click Approve. A small success page opens in your browser.
- In WordPress, go to Dokan → Vendors and confirm the test vendor is now active.
- Confirm Slack shows a confirmation message.
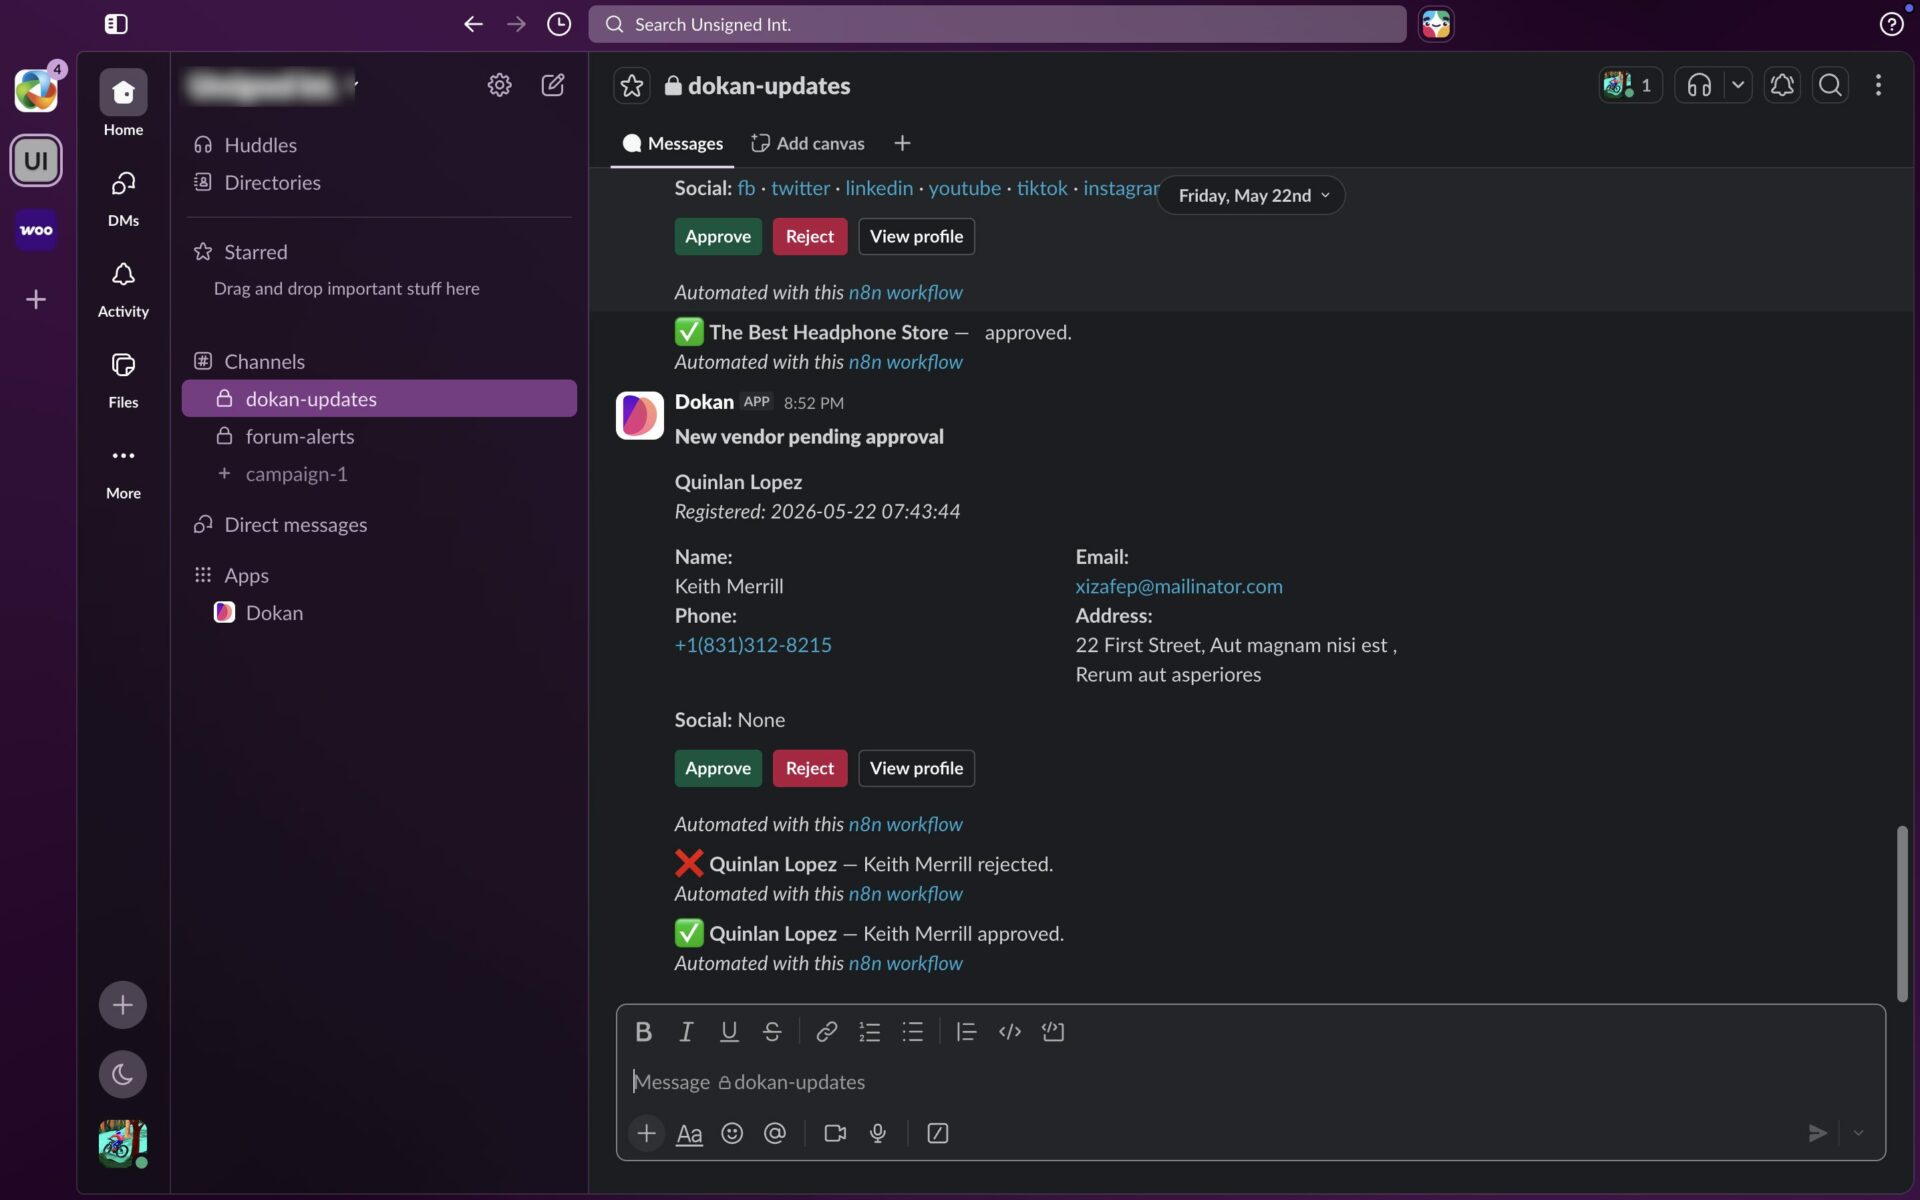
If all six happened, your setup is working correctly.
Troubleshooting
| Problem | Likely cause | Fix |
|---|---|---|
| No card ever appears in Slack | The workflow is not active, or the vendor was already posted | Confirm Step 4 is ON. For testing, use a brand-new vendor, since the workflow skips vendors it has already posted. |
| A button click shows an error | The secret token does not match | Recheck Step 2. The token must be identical in the buttons and in both “Verify token” boxes. |
| Button error, vendor not changed | Wrong WordPress login | Recheck the Basic Auth username and Application Password in Step 3. Create a new Application Password if unsure. |
| Slack error “not_in_channel” | The bot is not in the channel | In Slack, run /invite to add the bot to the channel. |
| Posts go to the wrong place | Channel ID typo | Confirm you used the C0XXXXXXX ID, not the channel name. |
To see what happened: in n8n, open the workflow and click Executions on the left. Green means it worked, red means it failed. Click a red entry to see which box failed and why.
Reference: What Each Box Does
| Box | Job |
|---|---|
Every 15 minutes | Timer that starts each check. |
Fetch pending vendors | GET {site}/wp-json/dokan/v1/stores retrieves vendors awaiting approval. |
Skip already-announced | Drops vendors that were already posted. |
Post to Slack channel | Posts the vendor card and buttons. |
Approve clicked | Webhook dokan-vendor-approve-slack. |
Verify token (approve) | Checks the secret token. |
Activate vendor | POST .../stores/{id}/status with {"status":"active"}. |
Confirm approval (Slack) / Respond: approved | Confirms in Slack and shows the success page. |
Reject clicked | Webhook dokan-vendor-reject-slack. |
Verify token (reject) | Checks the secret token. |
Mark inactive | POST .../stores/{id}/status with {"status":"inactive"}. |
Confirm rejection (Slack) / Respond: rejected | Confirms in Slack and shows the page. |