
This guide covers everything you need to set up the Dokan Customer App, from activating your license to configuring notifications and submitting your build request.
Work through the three sections in order. License activation comes first, configuration second, and the build request form last.
License Activation
You need to activate your license from the admin dashboard in order to activate the App Bridge plugin.
Upload the plugin to your WordPress dashboard and activate it.
Then, go to App Bridge → Customer App. There, you need to add your license key by clicking on the Activate License button-
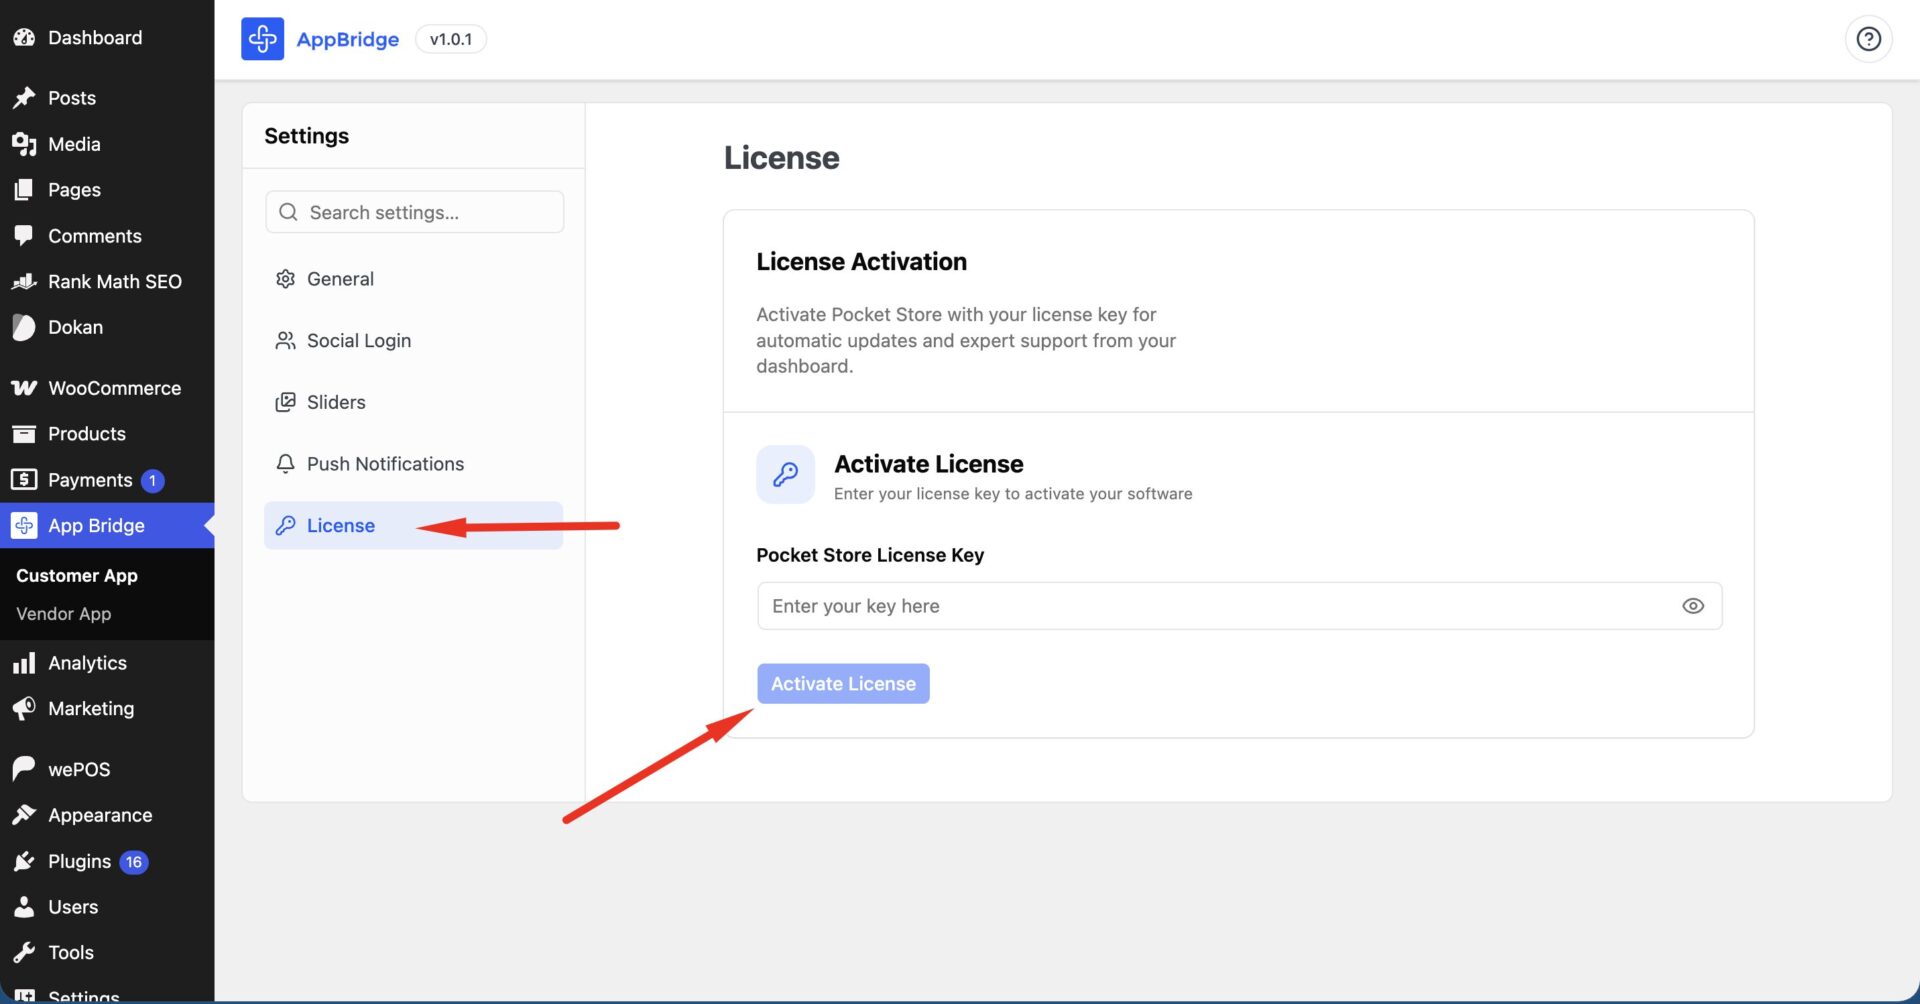
Then add your license and click on the Activate License button-
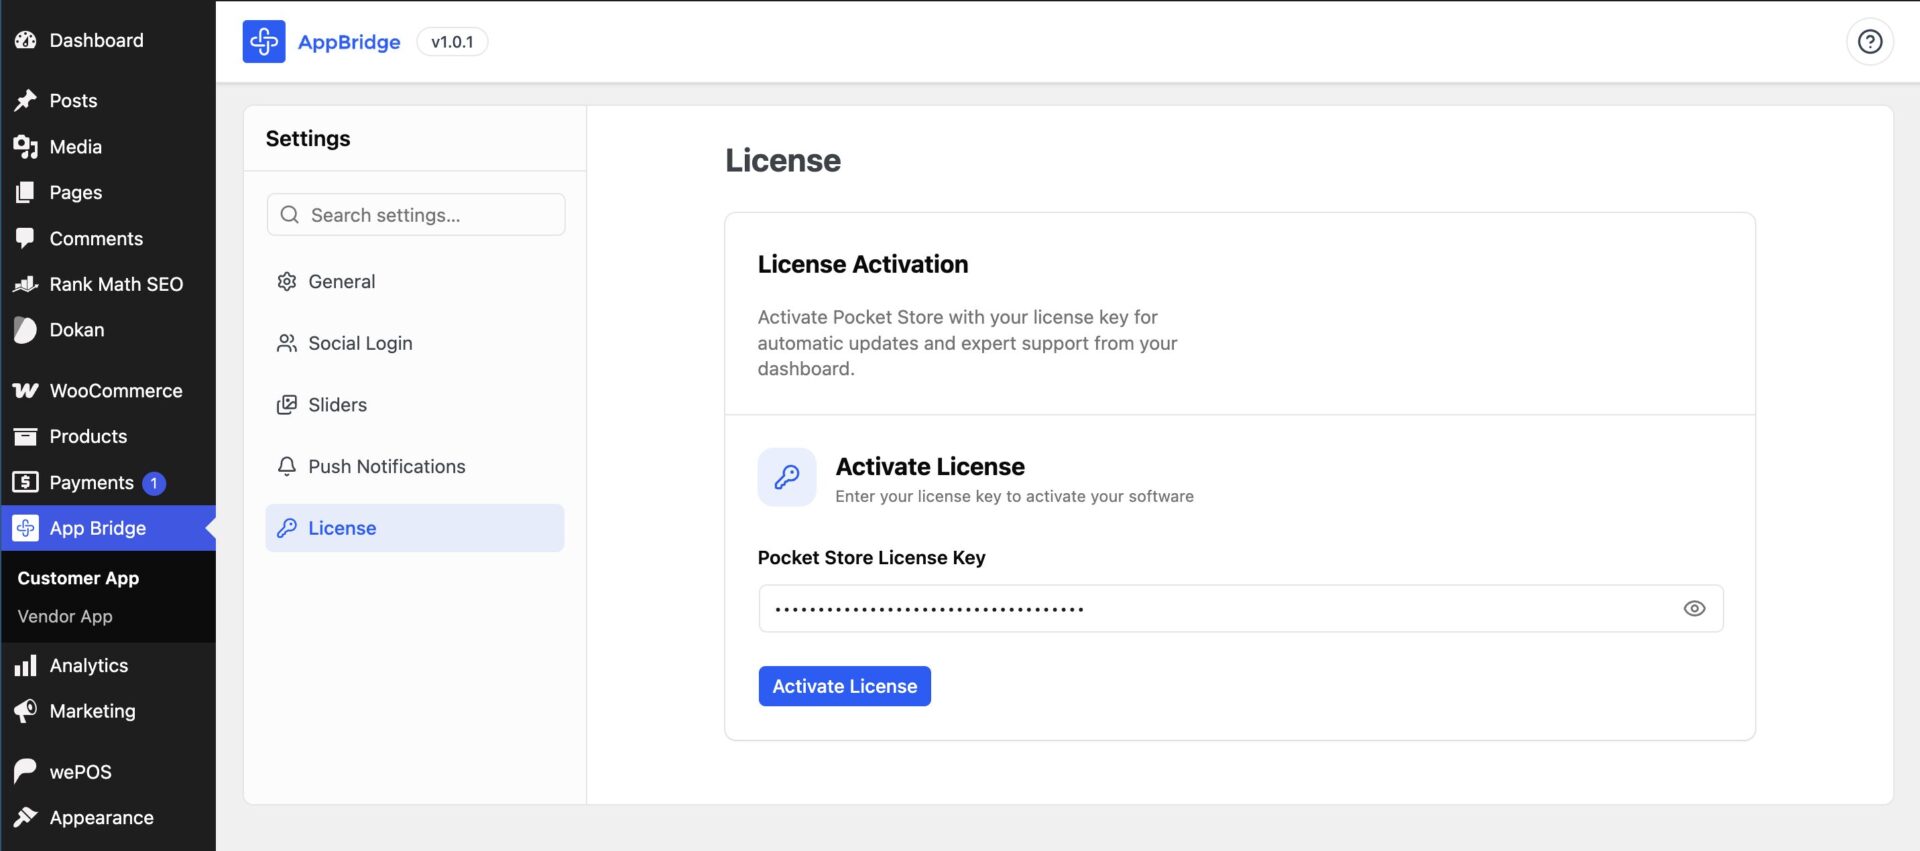
Your license key is activated-
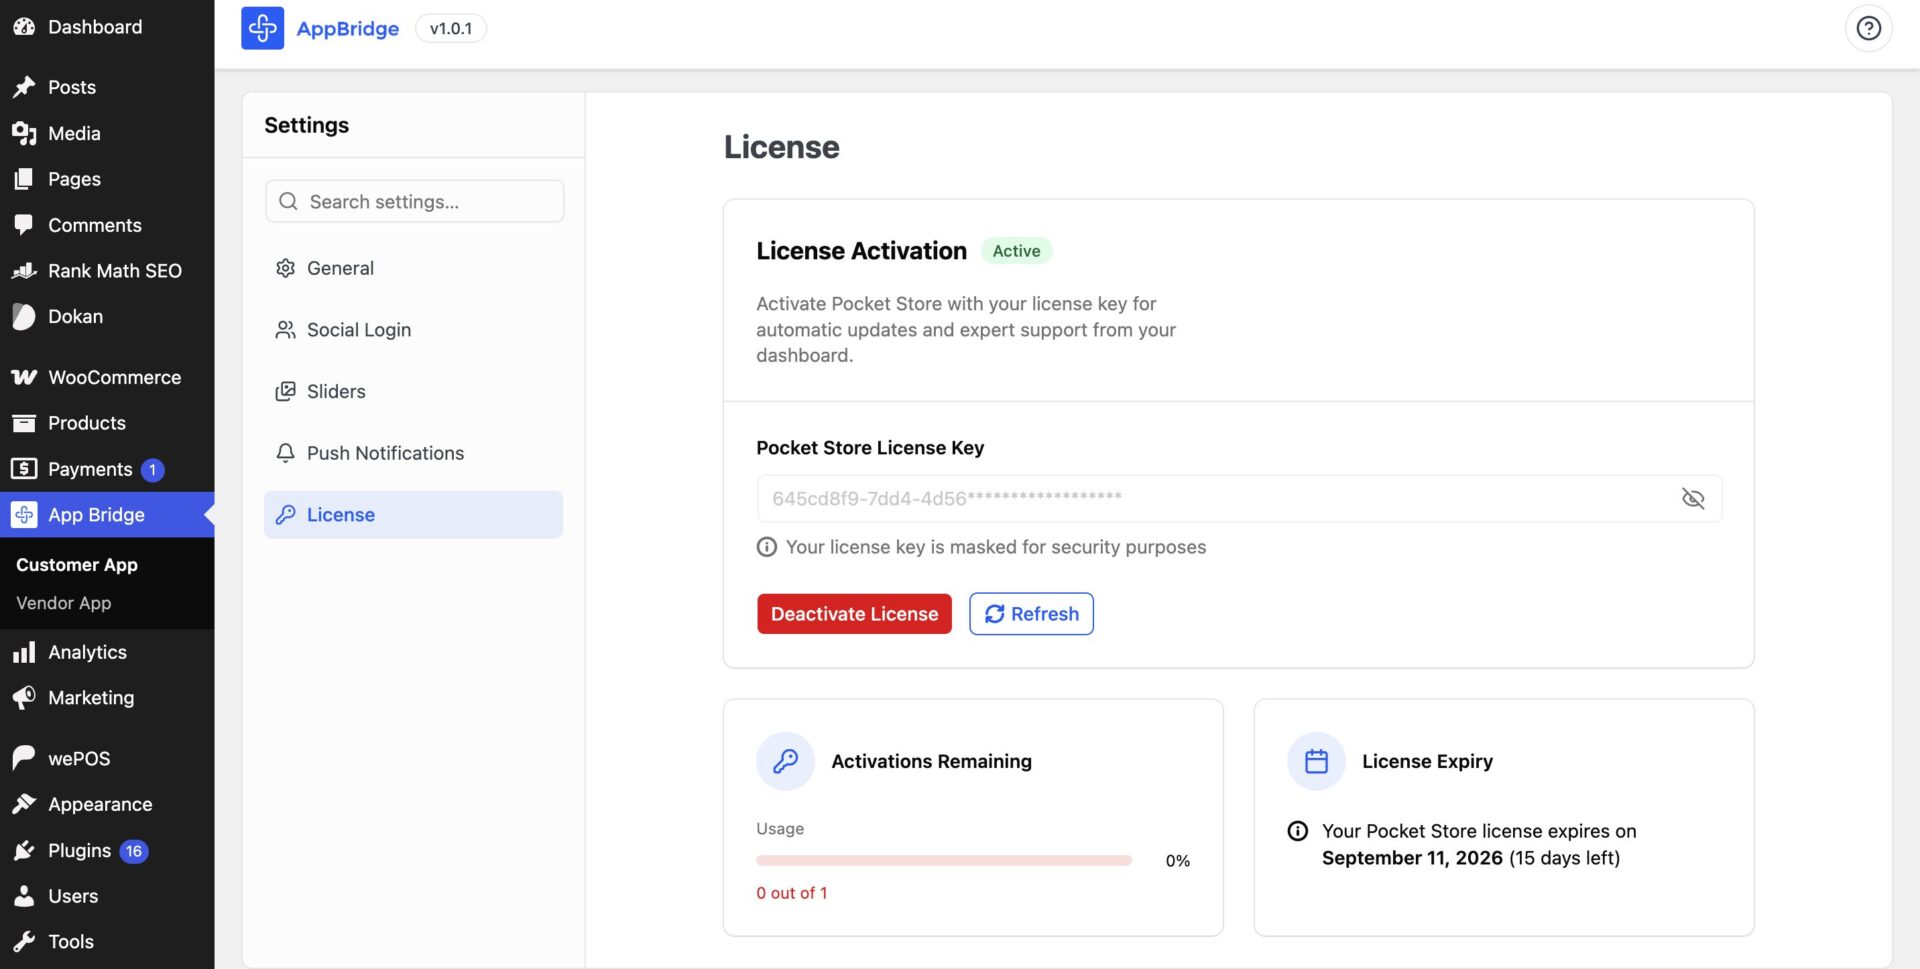
You are ready to use the Customer App.
Configuration
You need to configure the App Bridge plugin to use the customer app.
General
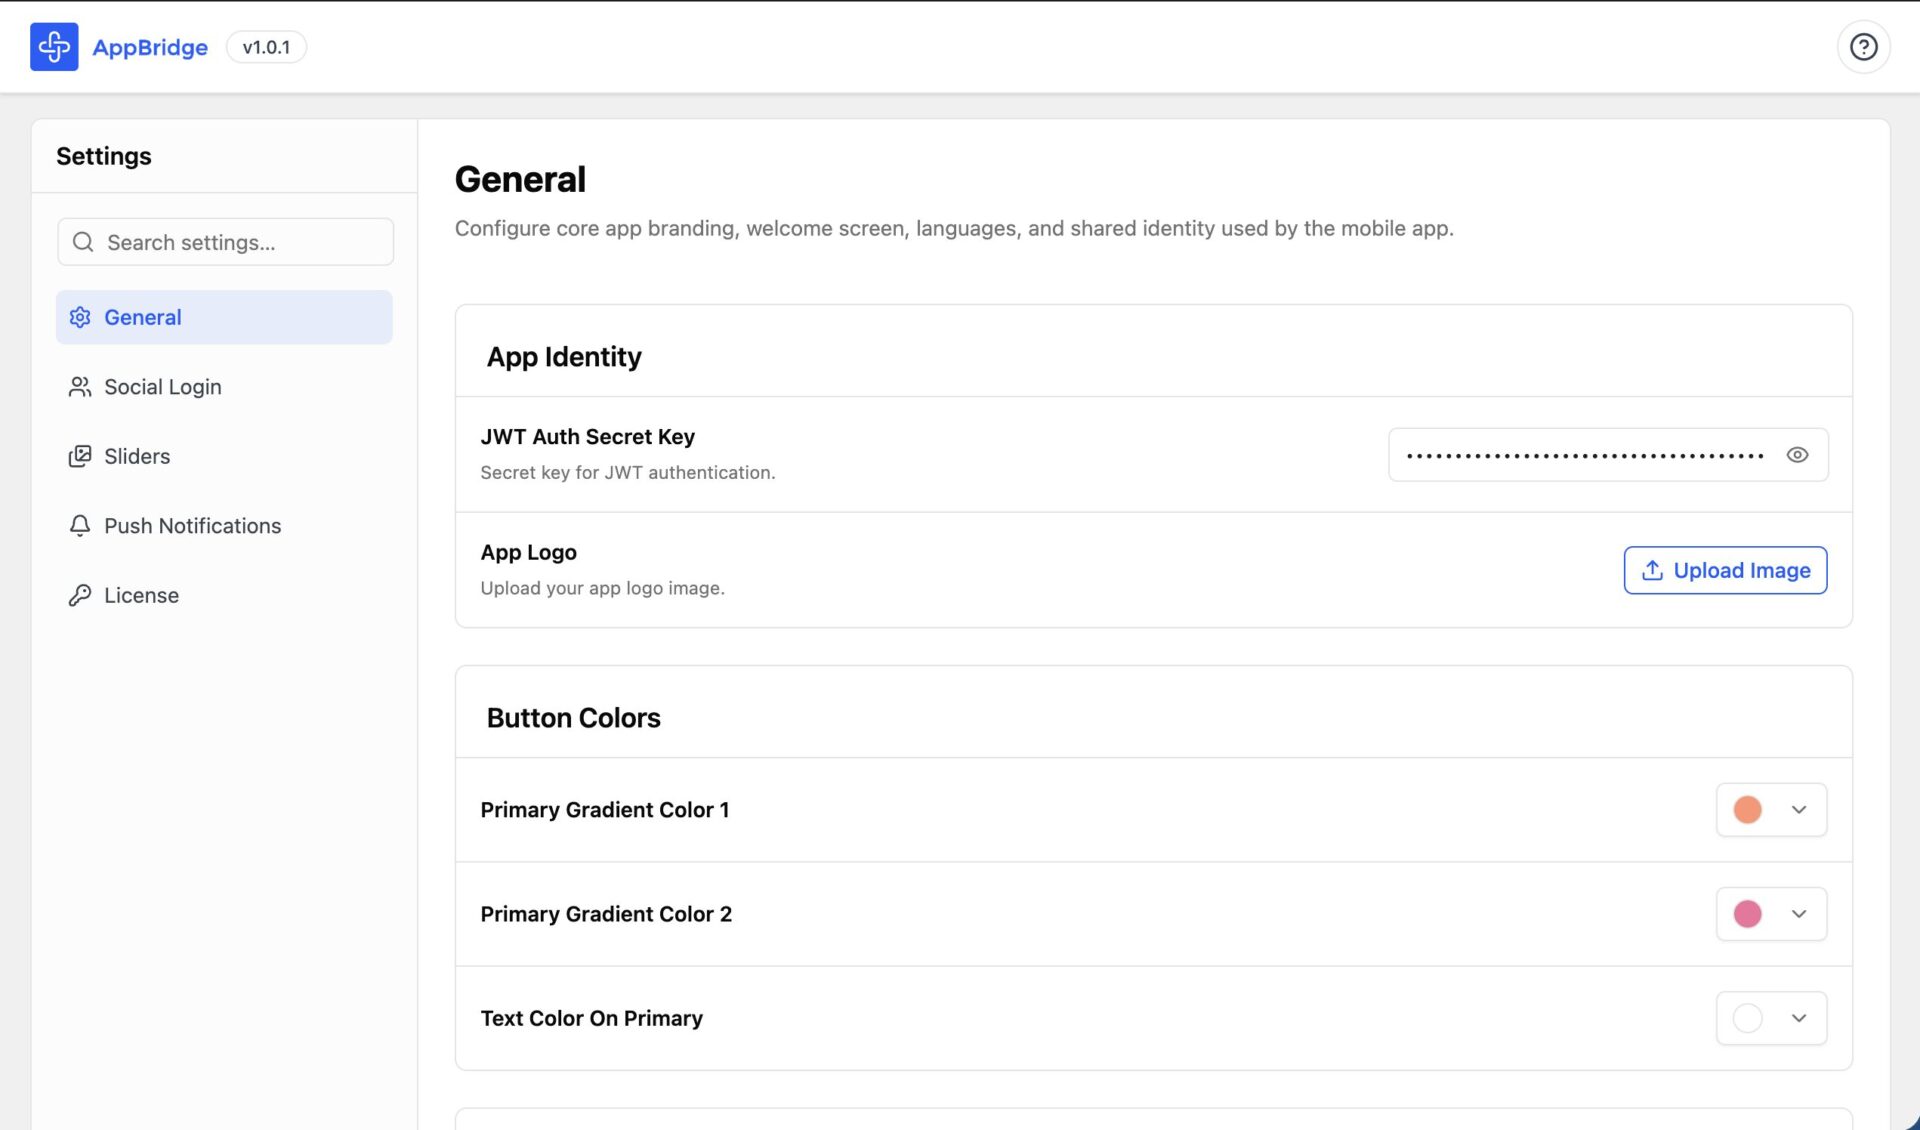
In the general section, you will find the JWT Auth Secret Key for App Identity-
Push Notifications
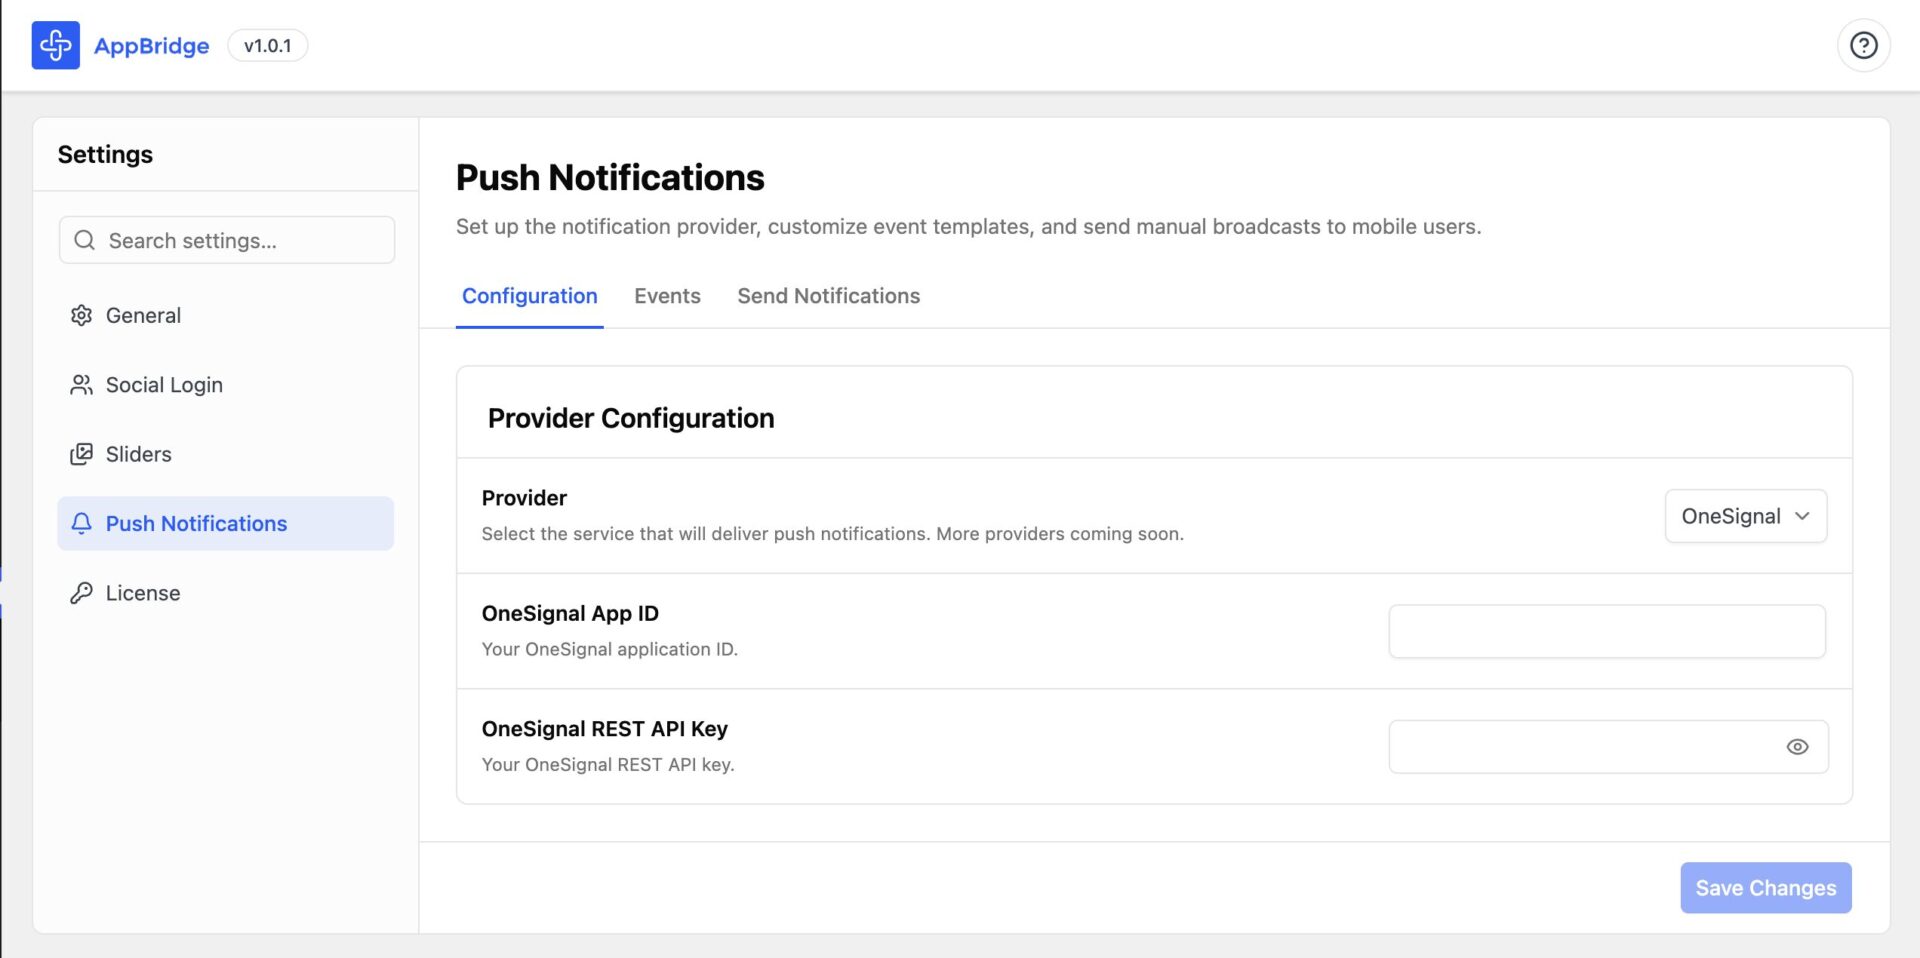
To send notifications to your users, you need to configure the sender provider. Currently, we have OneSignal as the notification provider-
Events
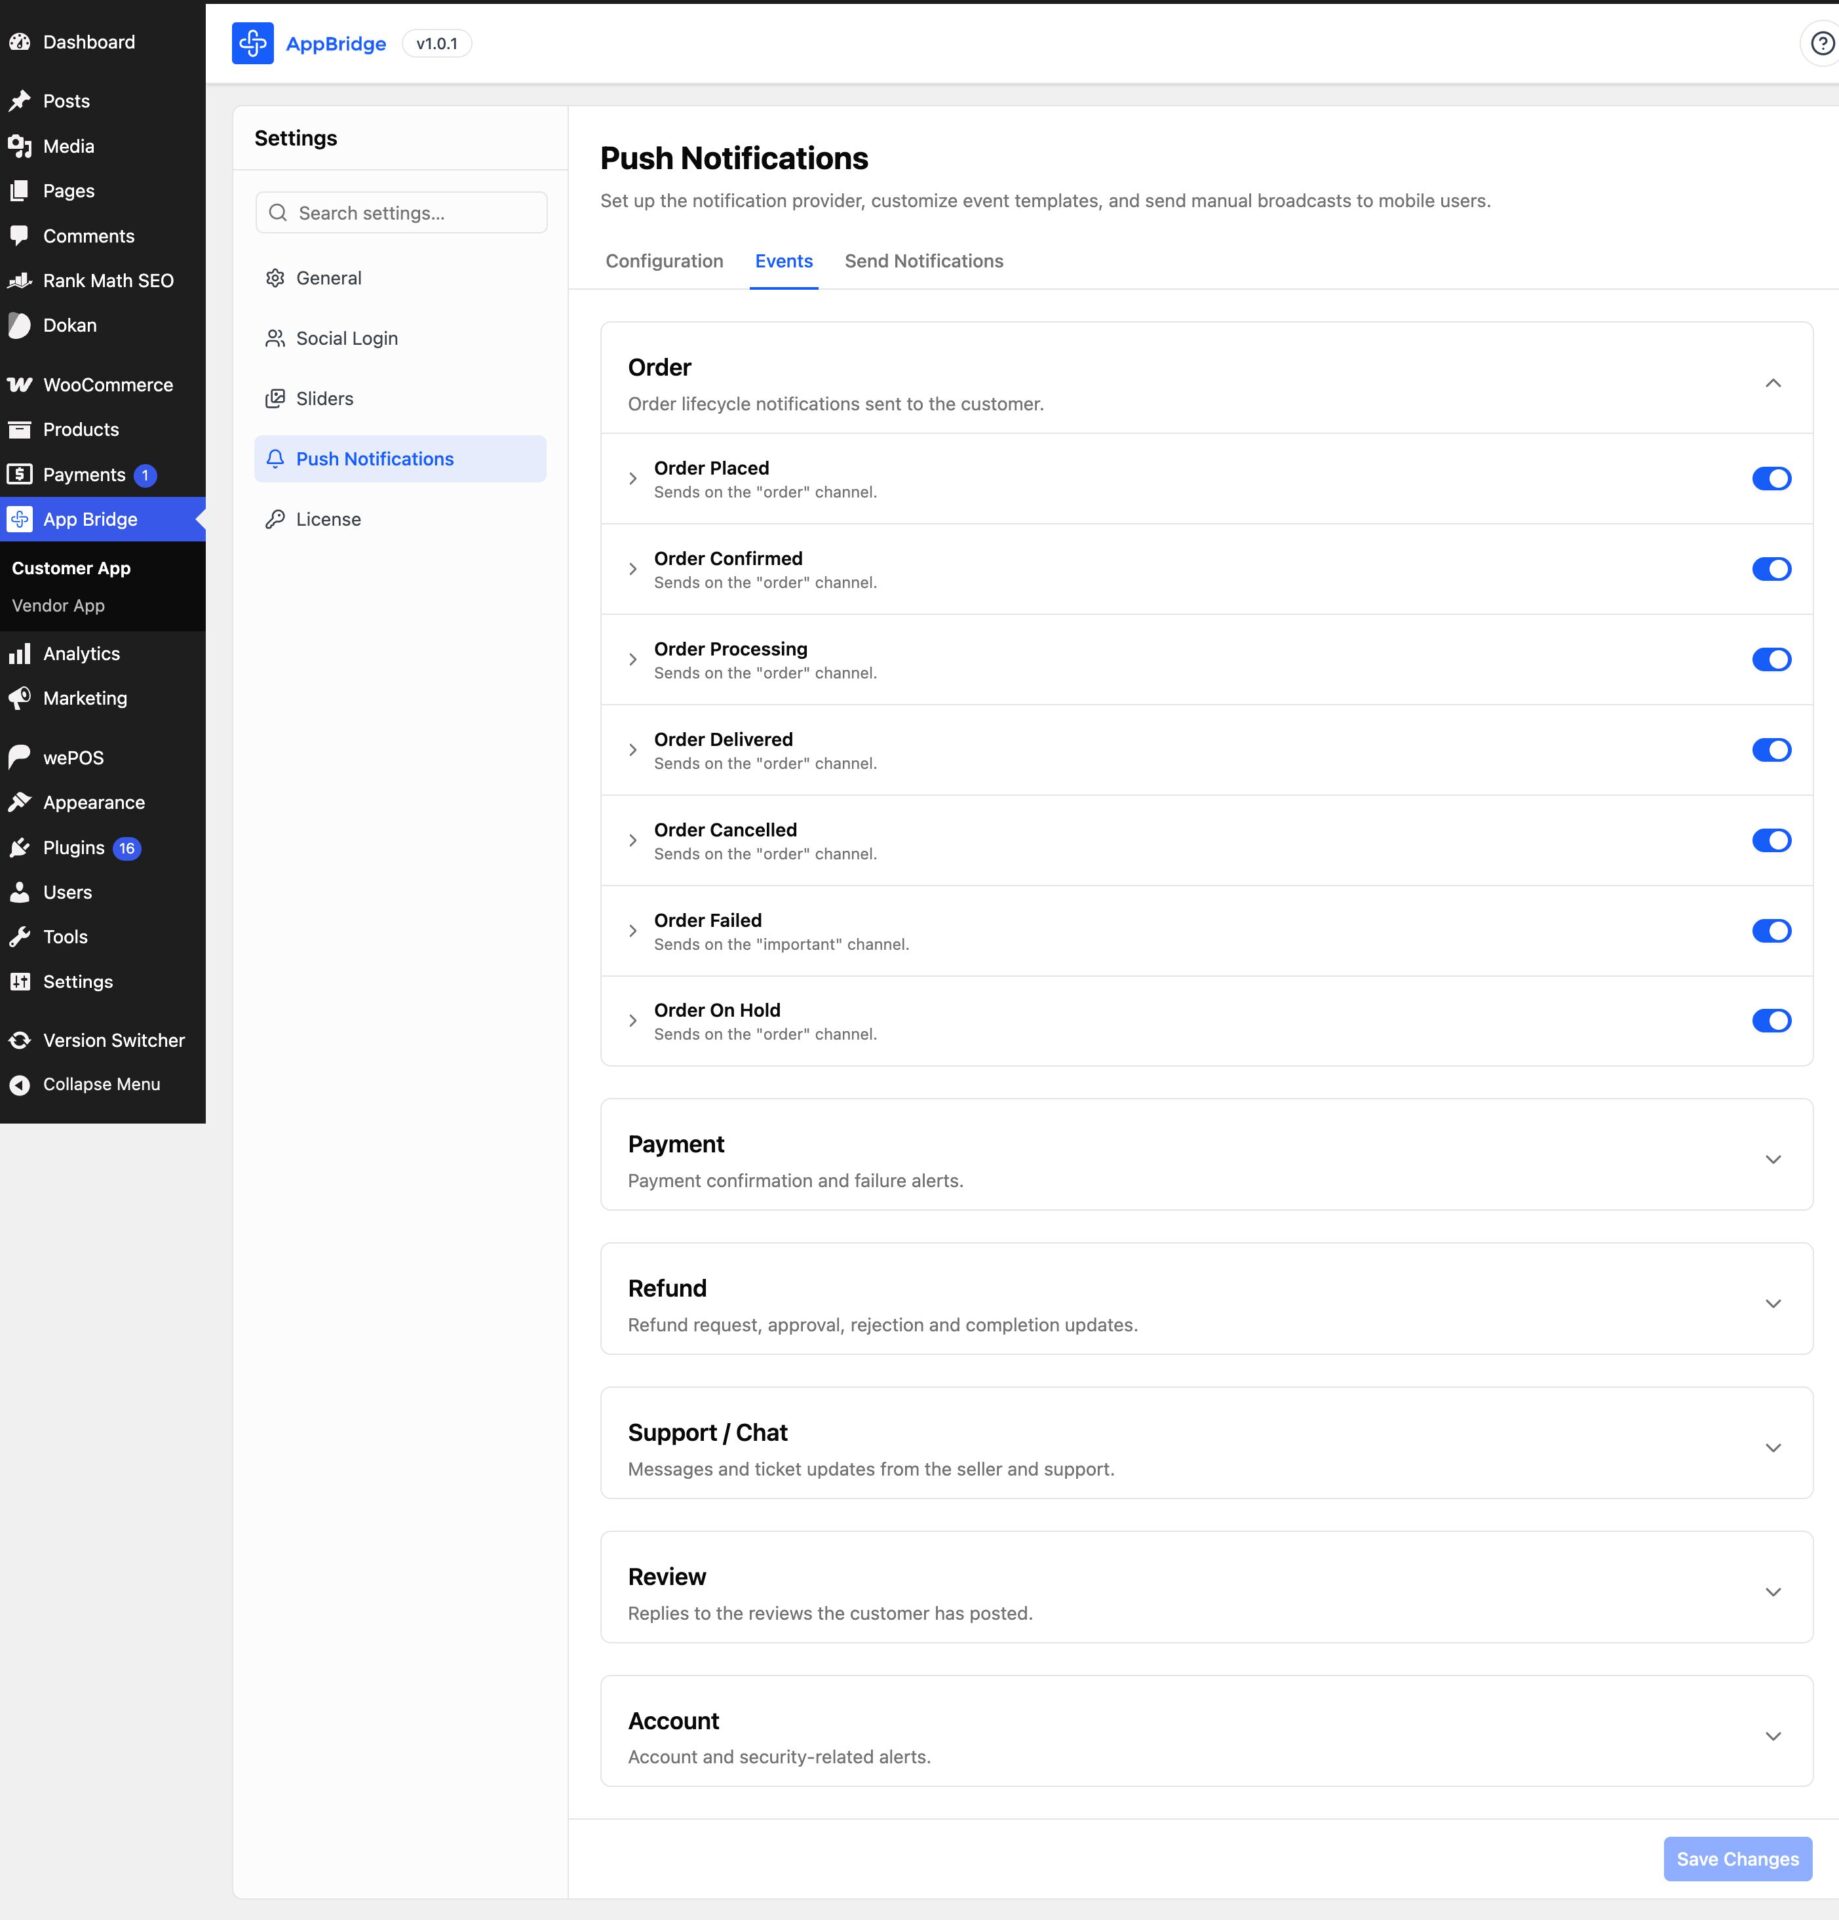
You can send different types of notifications to your users. Like-
Order Notifications
Controls notifications related to customer orders.
Events include:
- Order Placed
- Order Confirmed
- Order Shipped
- Order Out for Delivery
- Order Delivered
- Order Cancelled
- Order Status Changed
These alerts help customers track their purchases from checkout to delivery.
Payment Notifications
Handles payment and refund updates.
Events include:
- Payment Successful
- Payment Failed
- Refund Requested
- Refund Approved
- Refund Completed
Useful for keeping customers informed about their money.
Product Notifications
Related to products customers are following or have saved.
Events include:
- Back in Stock
- Price Drop
- Wishlist Item Available
- Low Stock on a Saved Item
These notifications bring customers back when something they wanted becomes available.
Promotional Notifications
Marketing and offer alerts.
Events include:
- New Coupon Available
- Sale Started
- Abandoned Cart Reminder
- New Store Added
Important for driving repeat purchases and re-engagement.
Review Notifications
Alerts related to customer reviews.
Events include:
- Review Reminder
- Review Published
- Vendor Replied to Review
Helps customers share feedback and see when a vendor responds.
Support / Chat Notifications
Customer communication alerts.
Events include:
- New Message
- Ticket Opened
- Ticket Updated
Ensures customers do not miss replies from vendors or support.
Account Notifications
Customer account and security-related updates.
Events include:
- Account Registered
- Password Changed
Useful for account monitoring and security awareness.
Additional UI Elements
Left Sidebar
Contains:
- General Settings
- Push Notifications
- License
The Push Notifications section is currently active.
Top Navigation Tabs
Three tabs are visible:
- Configuration
- Events (currently selected)
- Send Notifications
This suggests admins can:
- configure notification providers
- manage event triggers
- manually send broadcast notifications
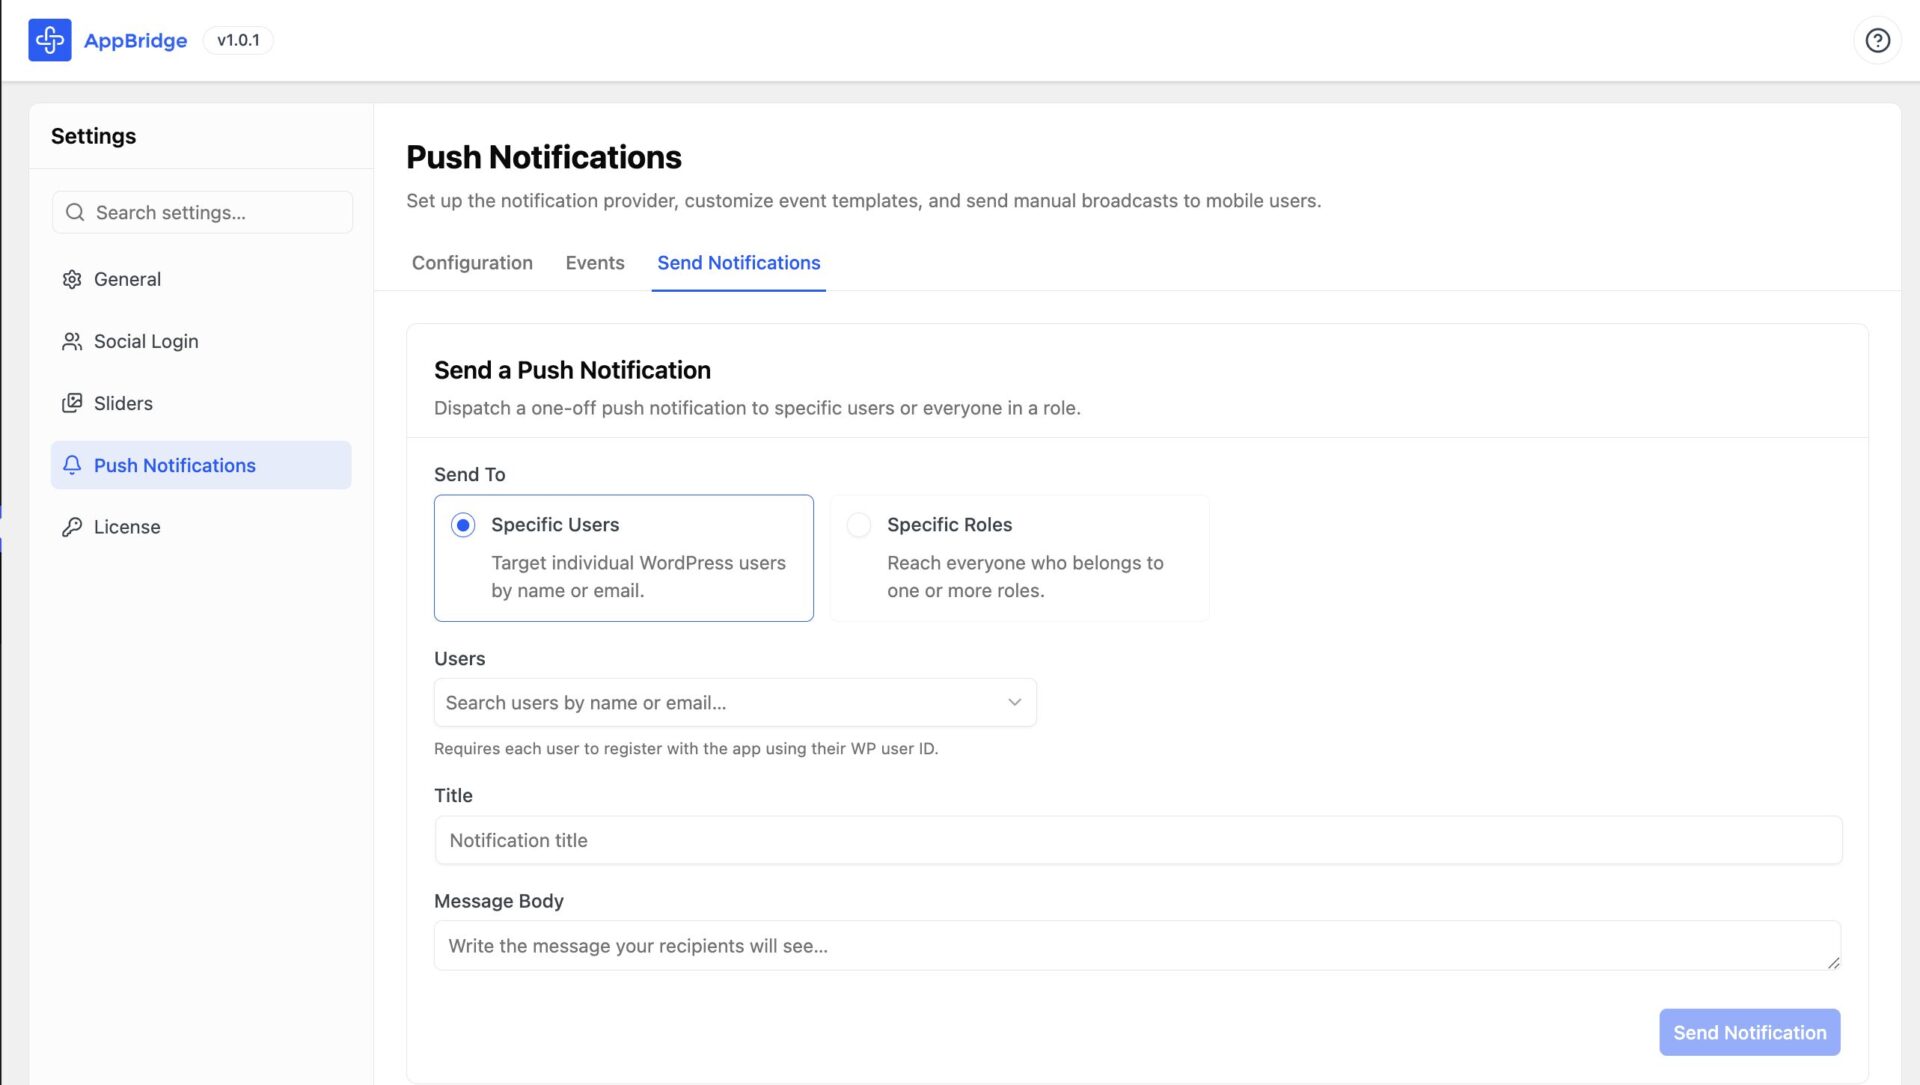
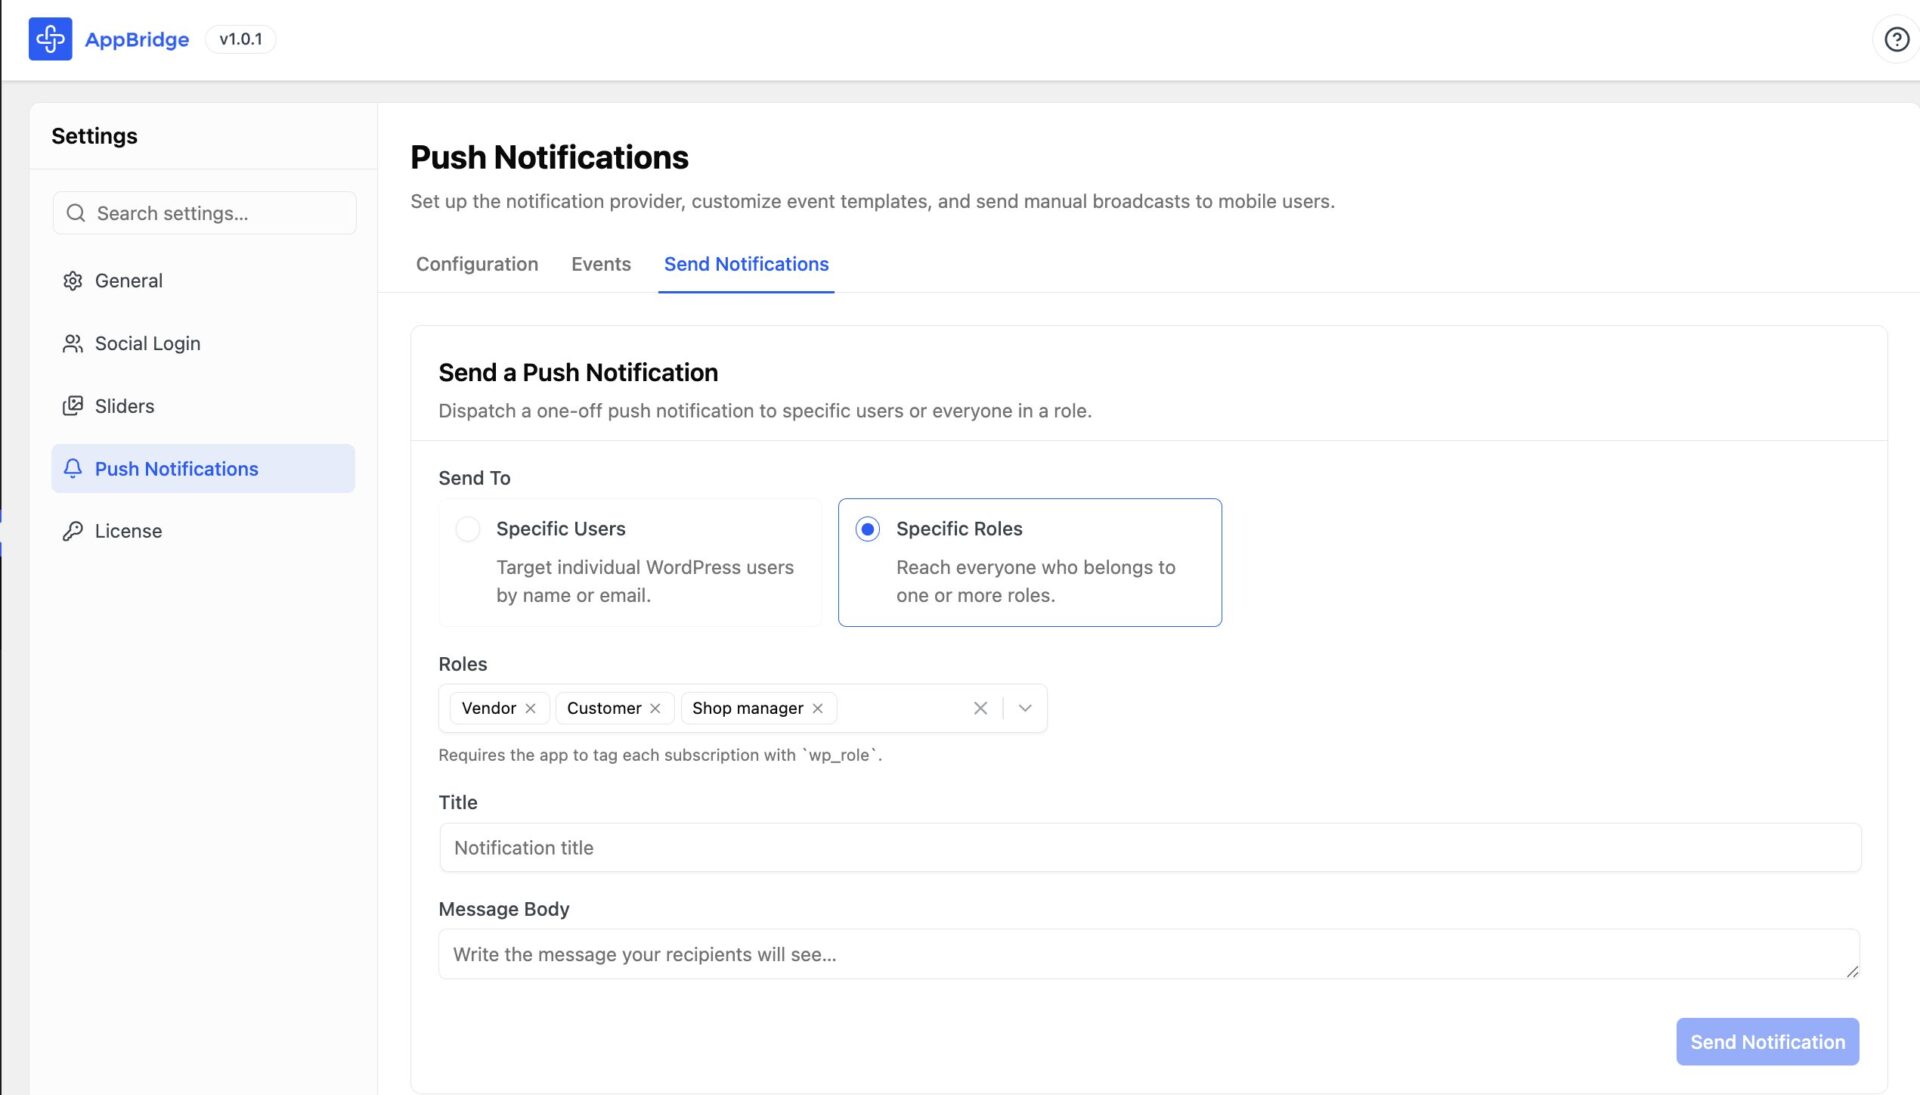
Send Notifications
You can either send notifications to Specific Users–
Or you can send notifications to “Specific Roles”-
This is how you can configure the App Bridge plugin.
Build Request Form Guide
This section walks through every item you need and every field in the Customer App Build Request Form, so you can submit a complete, correct form on the first attempt.
Before You Fill the Form
Collect every item below before opening the form. A missing item mid-submission means delays or starting over.
| Item | What it is | Where to get it |
|---|---|---|
| App icon | 1024×1024 PNG, no transparency | Design tool of your choice |
| Privacy policy URL | A live, publicly accessible page on your store | Your WordPress Pages |
| Apple Developer access | Organizational account, required for iOS submission | developer.apple.com |
| Google Developer access | Google Play Console account, required for Android submission | play.google.com/console |
| Firebase project | Required for Android push notifications | console.firebase.google.com |
| WordPress admin credentials | Admin username and password for your WooCommerce site | Your WP Admin |
Where to Find the Form
- Log in to your Dokan account.
- Go to Mobile Apps → Customer App in the dashboard sidebar.
- The Build Request Form appears on that page. Scroll down to begin.
Form Walkthrough
Work through each section in order. Filling every field correctly streamlines the build.
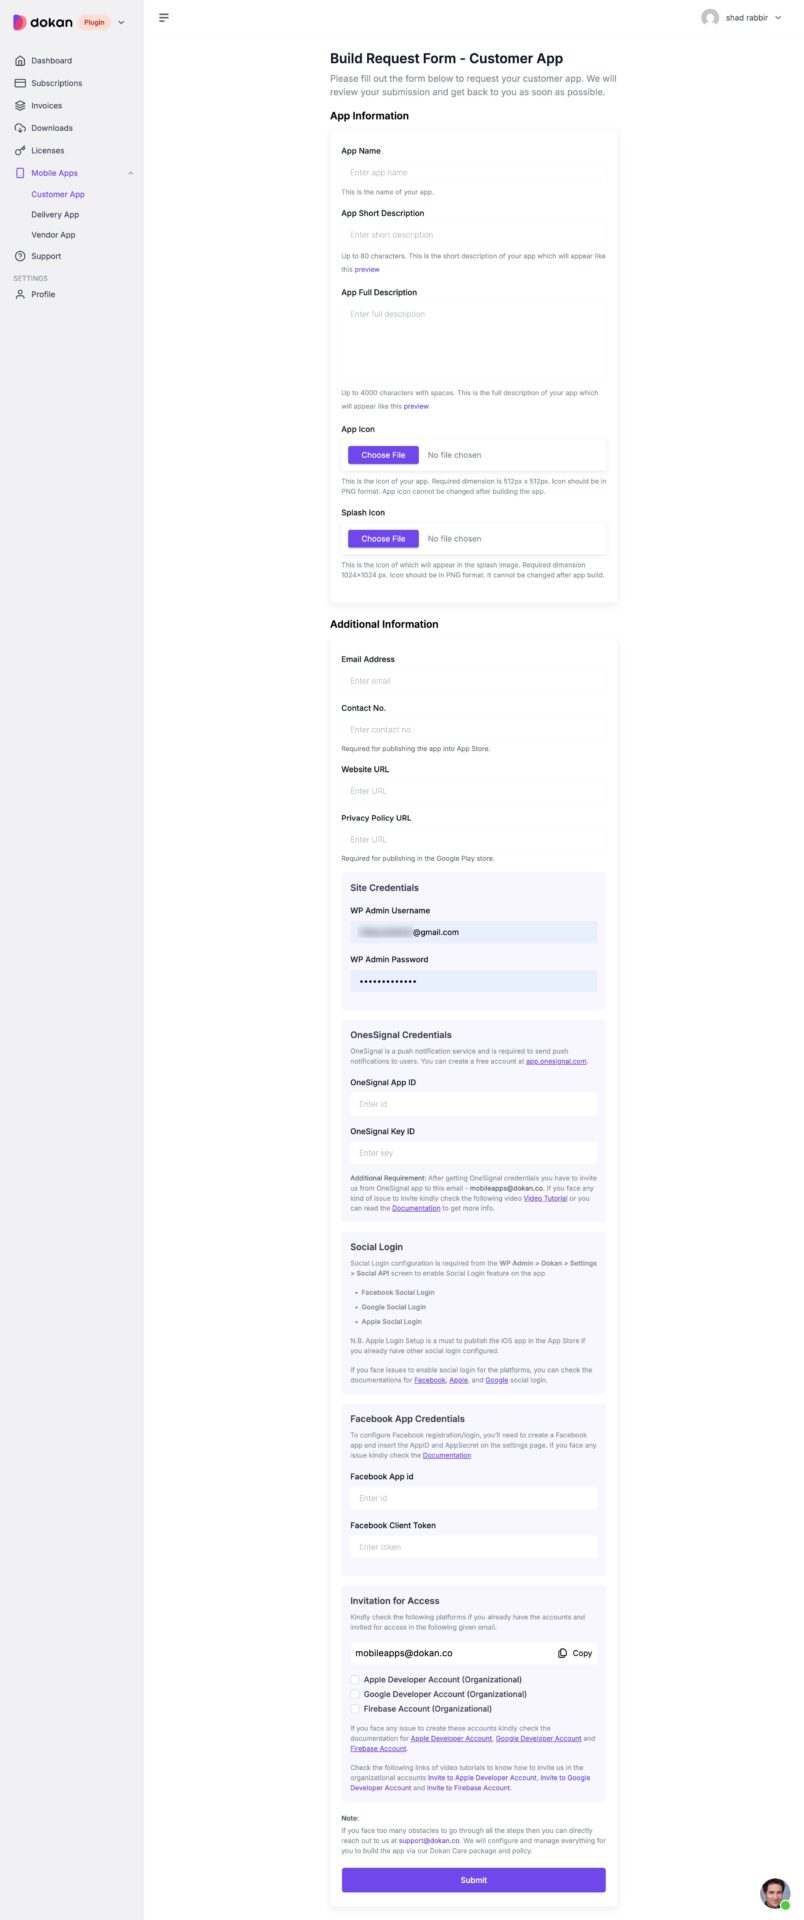
Step 1: App Information
These fields define what appears in the app stores and on your customers’ devices. Fill them carefully, since app store listings are difficult to change after approval.
- App Name. Keep it short, avoid special characters, and match your store brand.
- App Short Description. Up to 80 characters. This appears in app store search results. Use the preview link to see how it looks.
- App Full Description. Up to 4,000 characters with spaces. This is your full App Store and Google Play listing. Use the preview link to check the layout.
- App Icon. Upload the 1024×1024 PNG you prepared. It must be PNG format, and the icon cannot be changed after the app is built.
Step 2: Additional Information
The build team uses these details throughout the process, and the app stores may contact you directly during review.
- Marketplace Name. The name of your marketplace.
- Email Address. Use an address you monitor daily. This is the primary contact for the build team.
- Contact No. Required for publishing the app to the App Store.
- Your Website URL. Your WooCommerce store URL.
- Privacy Policy URL. Must be a live, publicly accessible page. Required for publishing to both Google Play and the App Store.
Step 3: Site Credentials
Provide admin-level WordPress access so the team can connect your store to the app and configure the necessary settings.
- WP Admin Username.
- WP Admin Password.
Step 4: Invitation for Access
You need to invite the Dokan team to your developer accounts before the build can begin. Send all invitations to this email:
[EMAIL ADDRESS] (use the Copy button in the form to grab it).
Then check the box for each platform you have set up and invited:
- Apple Developer Account (Organizational). Invite the team as an Admin under Users and Access in the Apple Developer portal.
- Google Developer Account (Organizational). Add the team as Release Manager or Admin under Setup → Users and Permissions in the Play Console.
- Firebase Account (Organizational). Add the team as Owner under Project Settings → Users and Permissions in the Firebase Console.
If you have trouble creating these accounts, the form links to setup documentation for each platform, plus video tutorials showing how to invite the team to each organizational account.
A Note on Doing It for You
If you run into too many obstacles with these steps, you can reach out directly at [EMAIL ADDRESS]. The team will configure and manage the whole build for you through the Dokan Care package and policy.
After You Submit
- The Dokan team reviews your submission.
- If anything is missing, they contact you by email.
- Once all inputs are confirmed, the team logs in to your WordPress site and installs the app connector.
- Build and testing begin against your live store.
- The team submits your apps to the Apple App Store and Google Play.
- Apple and Google complete their review.
- You receive a go-live notification with your App Store and Play Store links.